10 min read
Overview
Welcome to the last lesson of our DeFi course dedicated to guiding you through the intricate process of building a Decentralized Exchange (DEX) platform. This lesson we'll guide you through the crucial steps of deploying your DEX frontend to a production environment.
To help you stay up-to-date on the latest liquidity changes in your DEX, we will also show you how to create a Telegram bot using QuickAlerts. QuickAlerts is a Quicknode product that allows you to create custom expressions and receive real-time notifications for a variety of activities on the blockchain.
By completing this lesson, you'll have achieved a milestone of having a fully functional dApp, primed and ready to be used by your users.
Deploying the Frontend to Production
By deploying our frontend and making it public on the web, users will be able to interact with our DEX worldwide.
Vercel is a cloud platform specializing in facilitating modern web application deployment and hosting. It is particularly well-suited for projects built using popular frontend frameworks like React, Vue.js, and Angular, as well as static site generators like Next.js. Vercel simplifies taking your web application code and making it accessible online, providing a seamless and efficient deployment experience. You can deploy from a Git repository, which means whenever you push changes to your repository, Vercel can automatically trigger new deployments, making updates to your live site effortless.
With that being said, we will use GitHub and Vercel to deploy the DEX frontend to the web.
Firstly, we upload the code to GitHub.
1. Log in to your GitHub account
2. Create a new repository by selecting a repository name. If you don't want anyone to see this repository, select Private instead of Public.
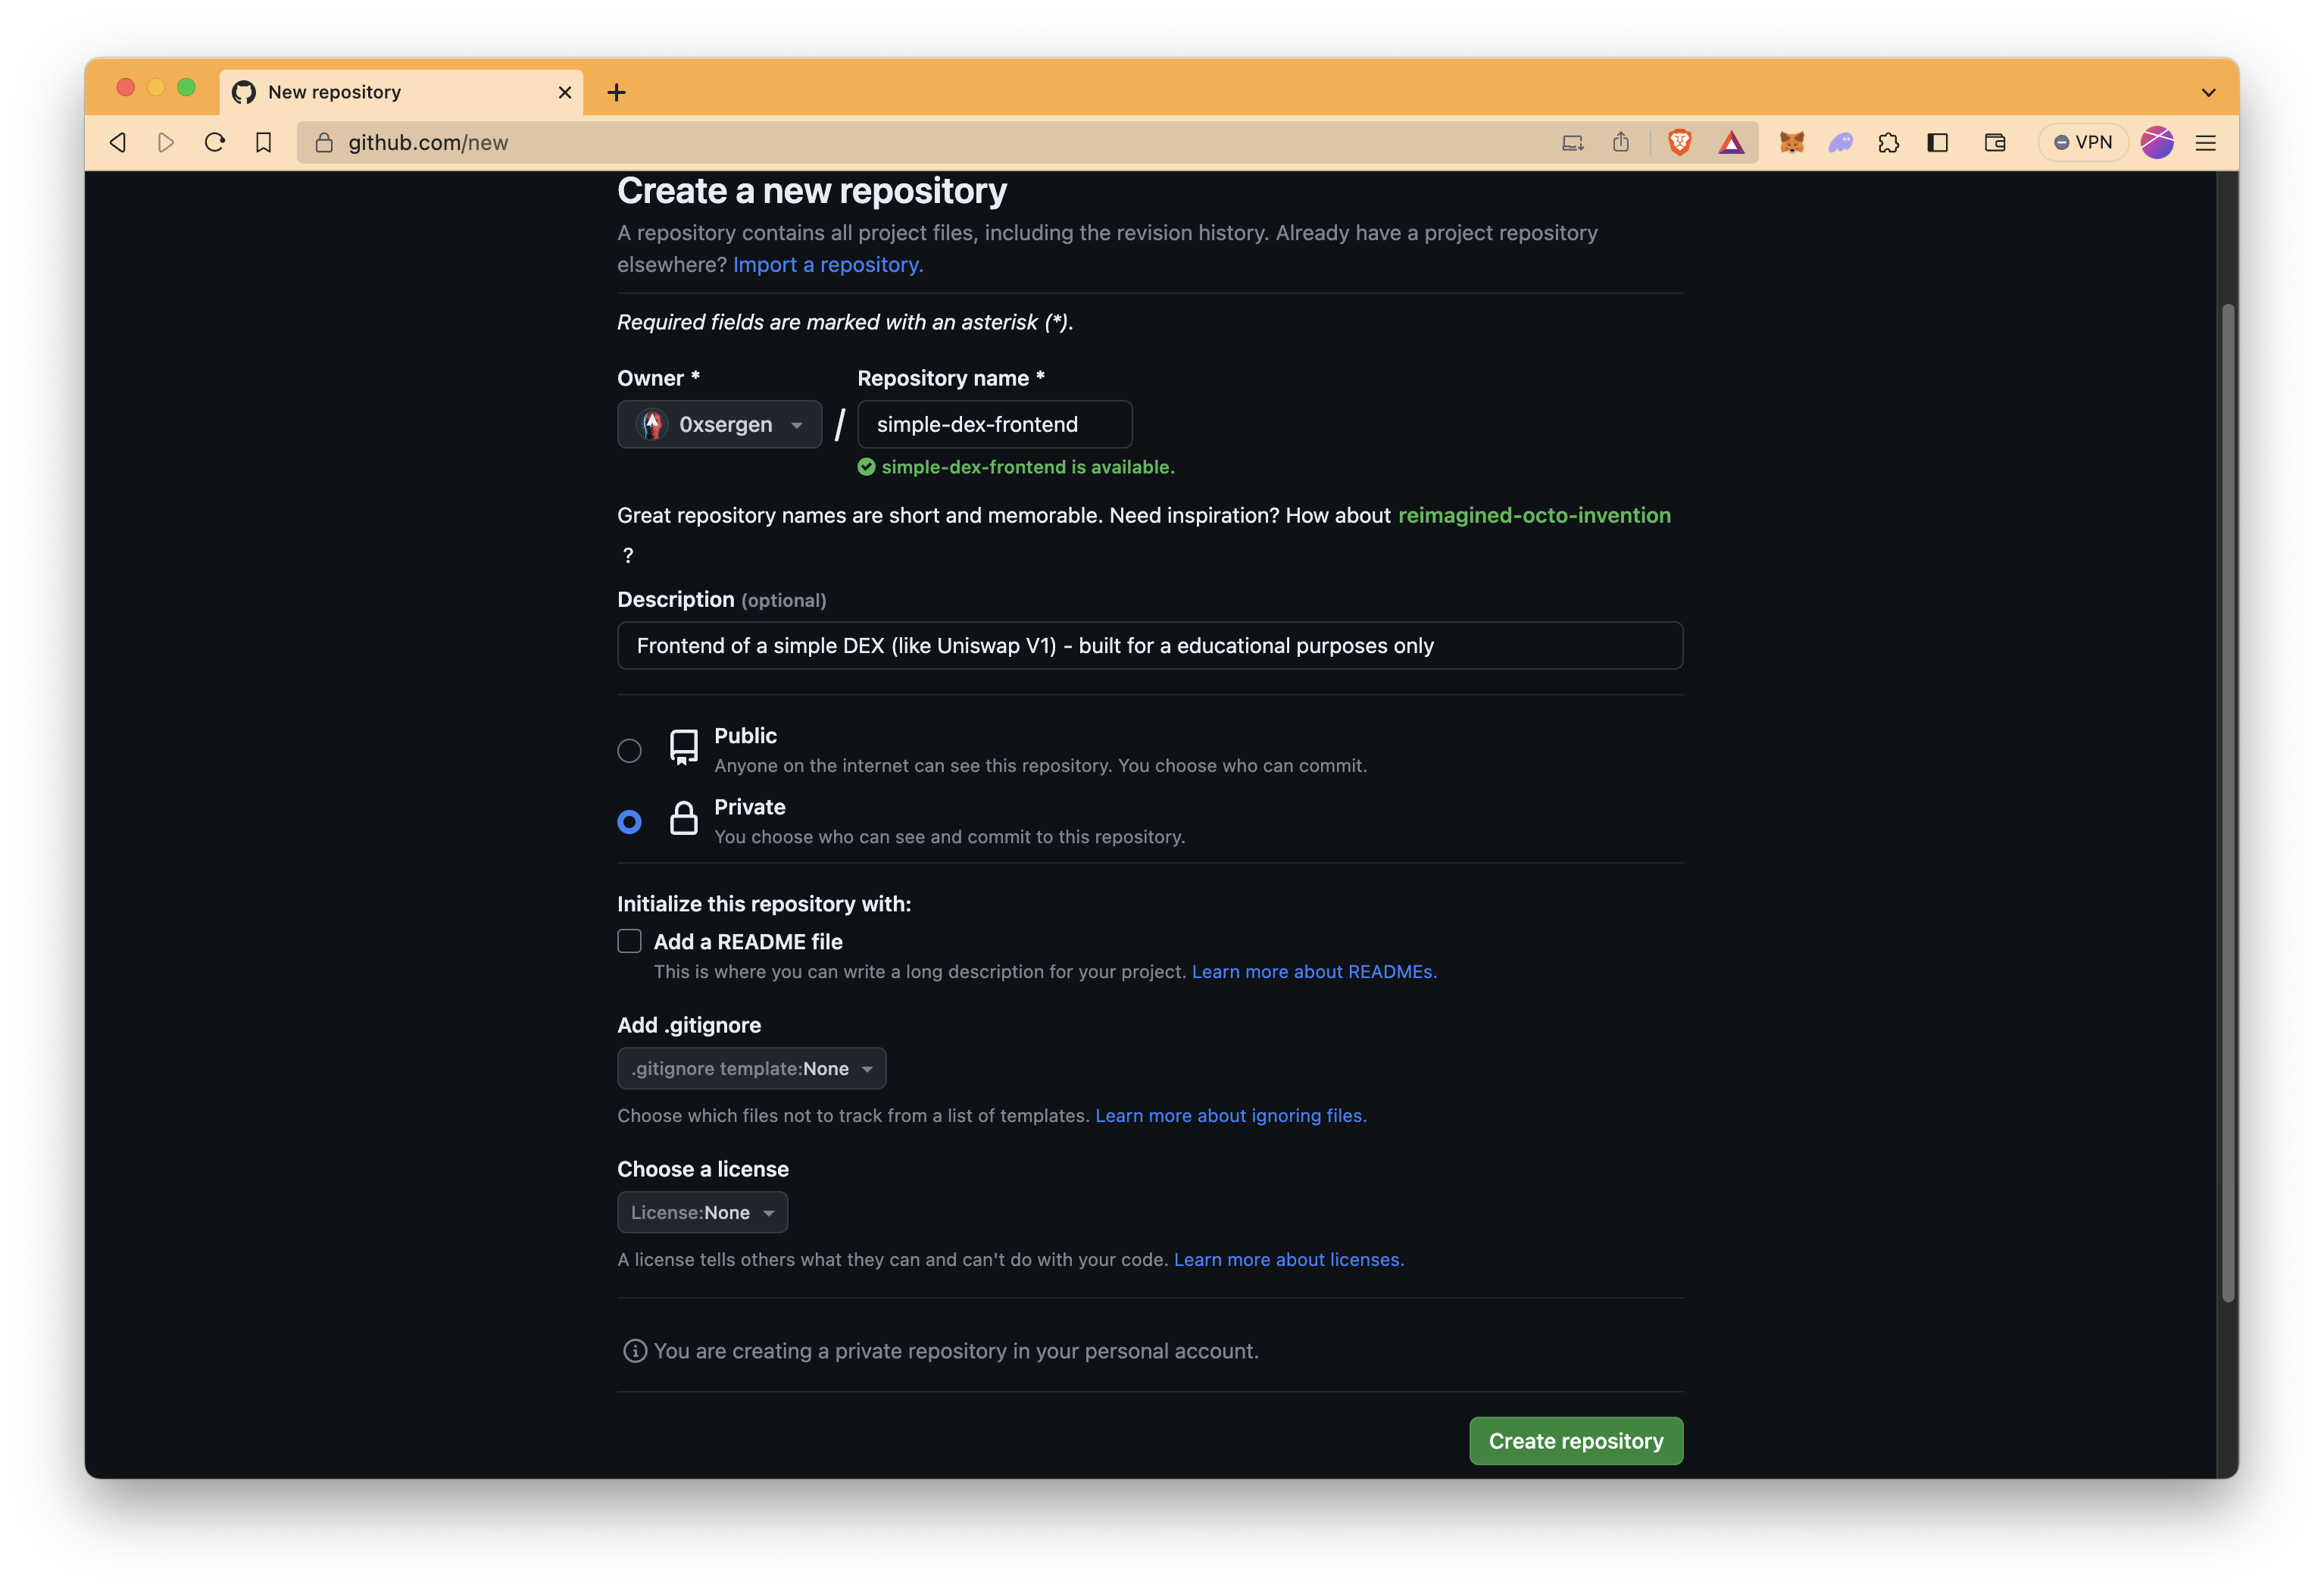
3. Click Create Repository, and then once its created, copy the repository URL (such as https://github.com/YOUR_NAME/REPOSITORY_NAME.git).
4. Within your terminal window, navigate into your frontend's main directory (e.g. defi-dex-frontend) and run these commands below
Do not forget to change URL_OF_THE_REPOSITORY with your repository's URL.
Before proceeding with any commits or pushes, take a moment to double-check your .gitignore file. This file is critical for excluding specific files and directories from Git tracking and typically located at the root directory of your Git repository. Accidentally, including sensitive information, large files, or build outputs could lead to a cluttered repository and security risks.
Double check your .gitignore file so that it matches the format below:
.env

# Logs
logs
*.log
npm-debug.log*
yarn-debug.log*
yarn-error.log*
pnpm-debug.log*
lerna-debug.log*

node_modules
dist
dist-ssr
*.local

# Editor directories and files
.vscode/*
!.vscode/extensions.json
.idea
.DS_Store
*.suo
*.ntvs*
*.njsproj
*.sln
*.sw?
git init
git add .
git commit -m "first commit"
git branch -M main
git remote add origin URL_OF_THE_REPOSITORY
git push -u origin main
Let's explain these commands in detail. They are the fundamental steps for initializing and pushing code to a remote Git repository.
git initinitializes a new Git repository in your project folder.git add .stages all the changes in the repository.git commit -m "first commit"creates a commit with a descriptive message.git branch -M mainrenames the default branch to "main."git remote add origin URL_OF_THE_REPOSITORYassociates the remote repository's URL with the local repository.git push -u origin mainpushes the committed changes to the remote repository's "main" branch, establishing a connection and making your code available on the remote repository.
You should be prompted to enter your Github username and password. Fill in the credentials and hit Enter.
IMPORTANT NOTE: If you run into an error such as remote: Support for password authentication was removed on August 13, 2021., navigate to your developer settings on Github (Settings --> Developer Settings --> Personal access tokens) and create an access token. You can then re-run the git push -u origin main command and re-enter your credentials but instead of your password, use the access token you created.
4. Log in to Vercel with your GitHub account.
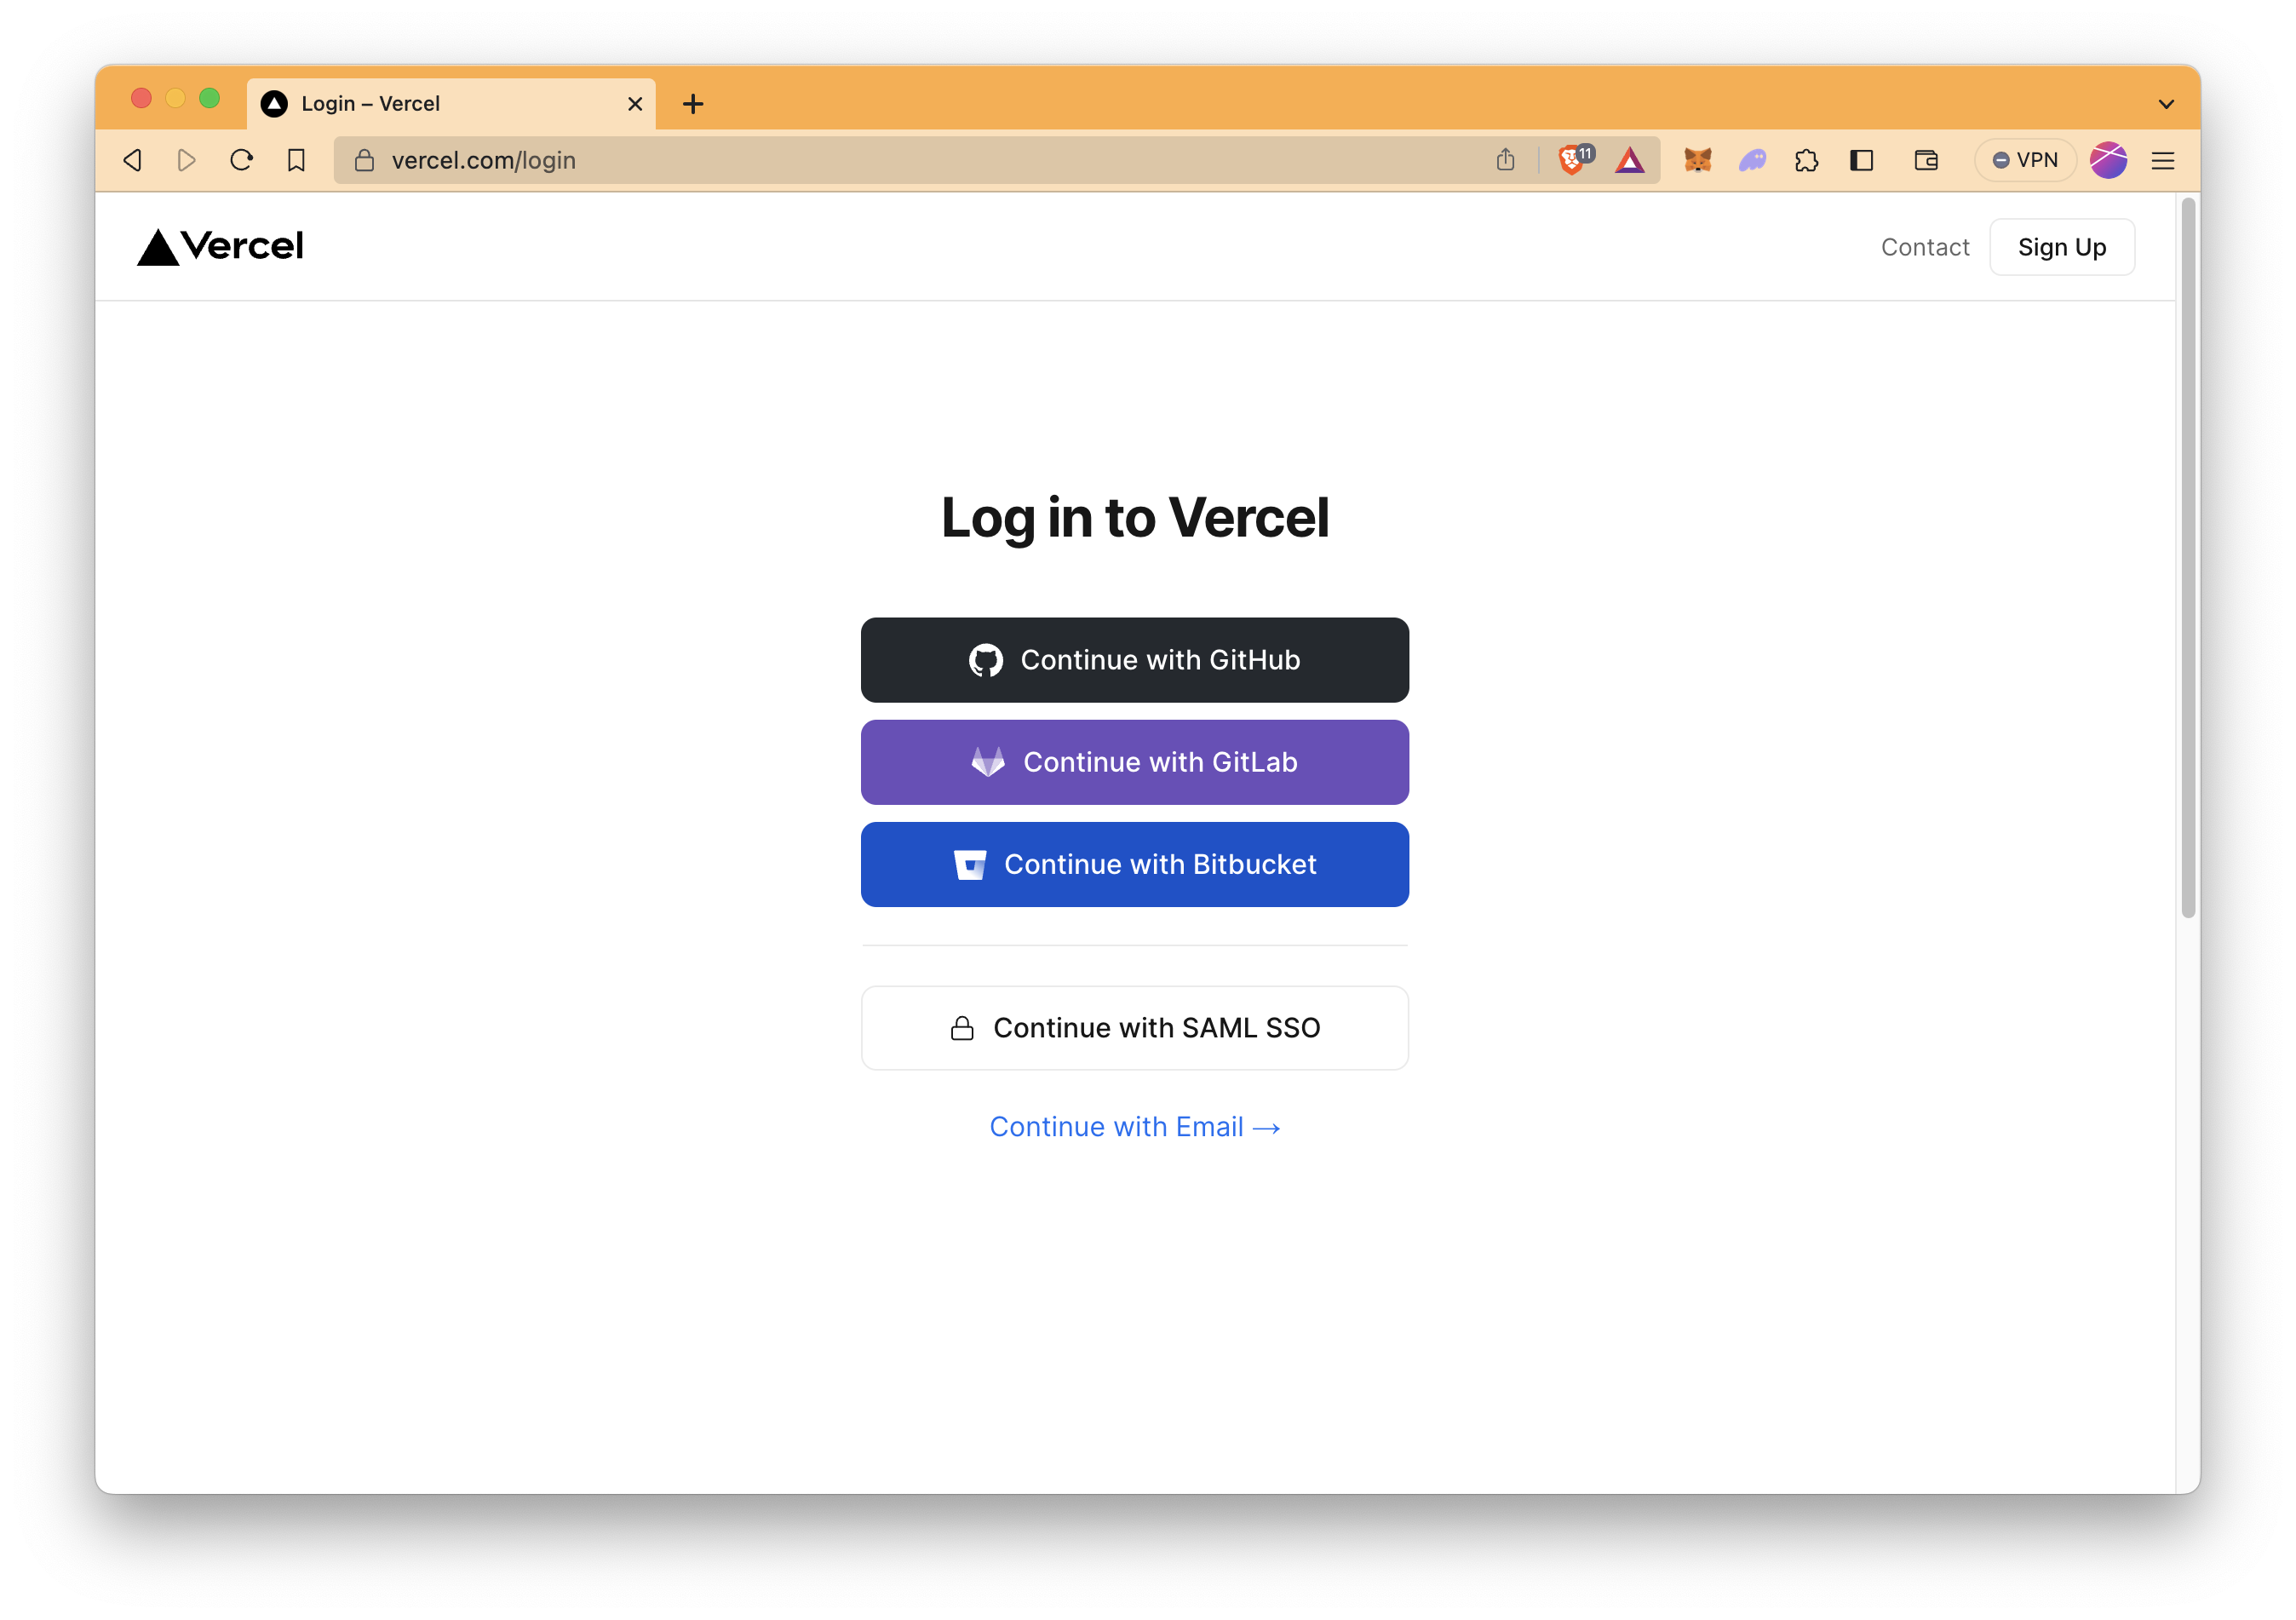
5. On your dashboard, Click Add New and then select Project.
6. Click Import next to the relevant Git repository.
7. Configure project deployment settings. Set your environment variables defined in the .env file during the development under the Environment Variables category. See the image below for details.
Make sure that Framework Preset is selected as Vite.
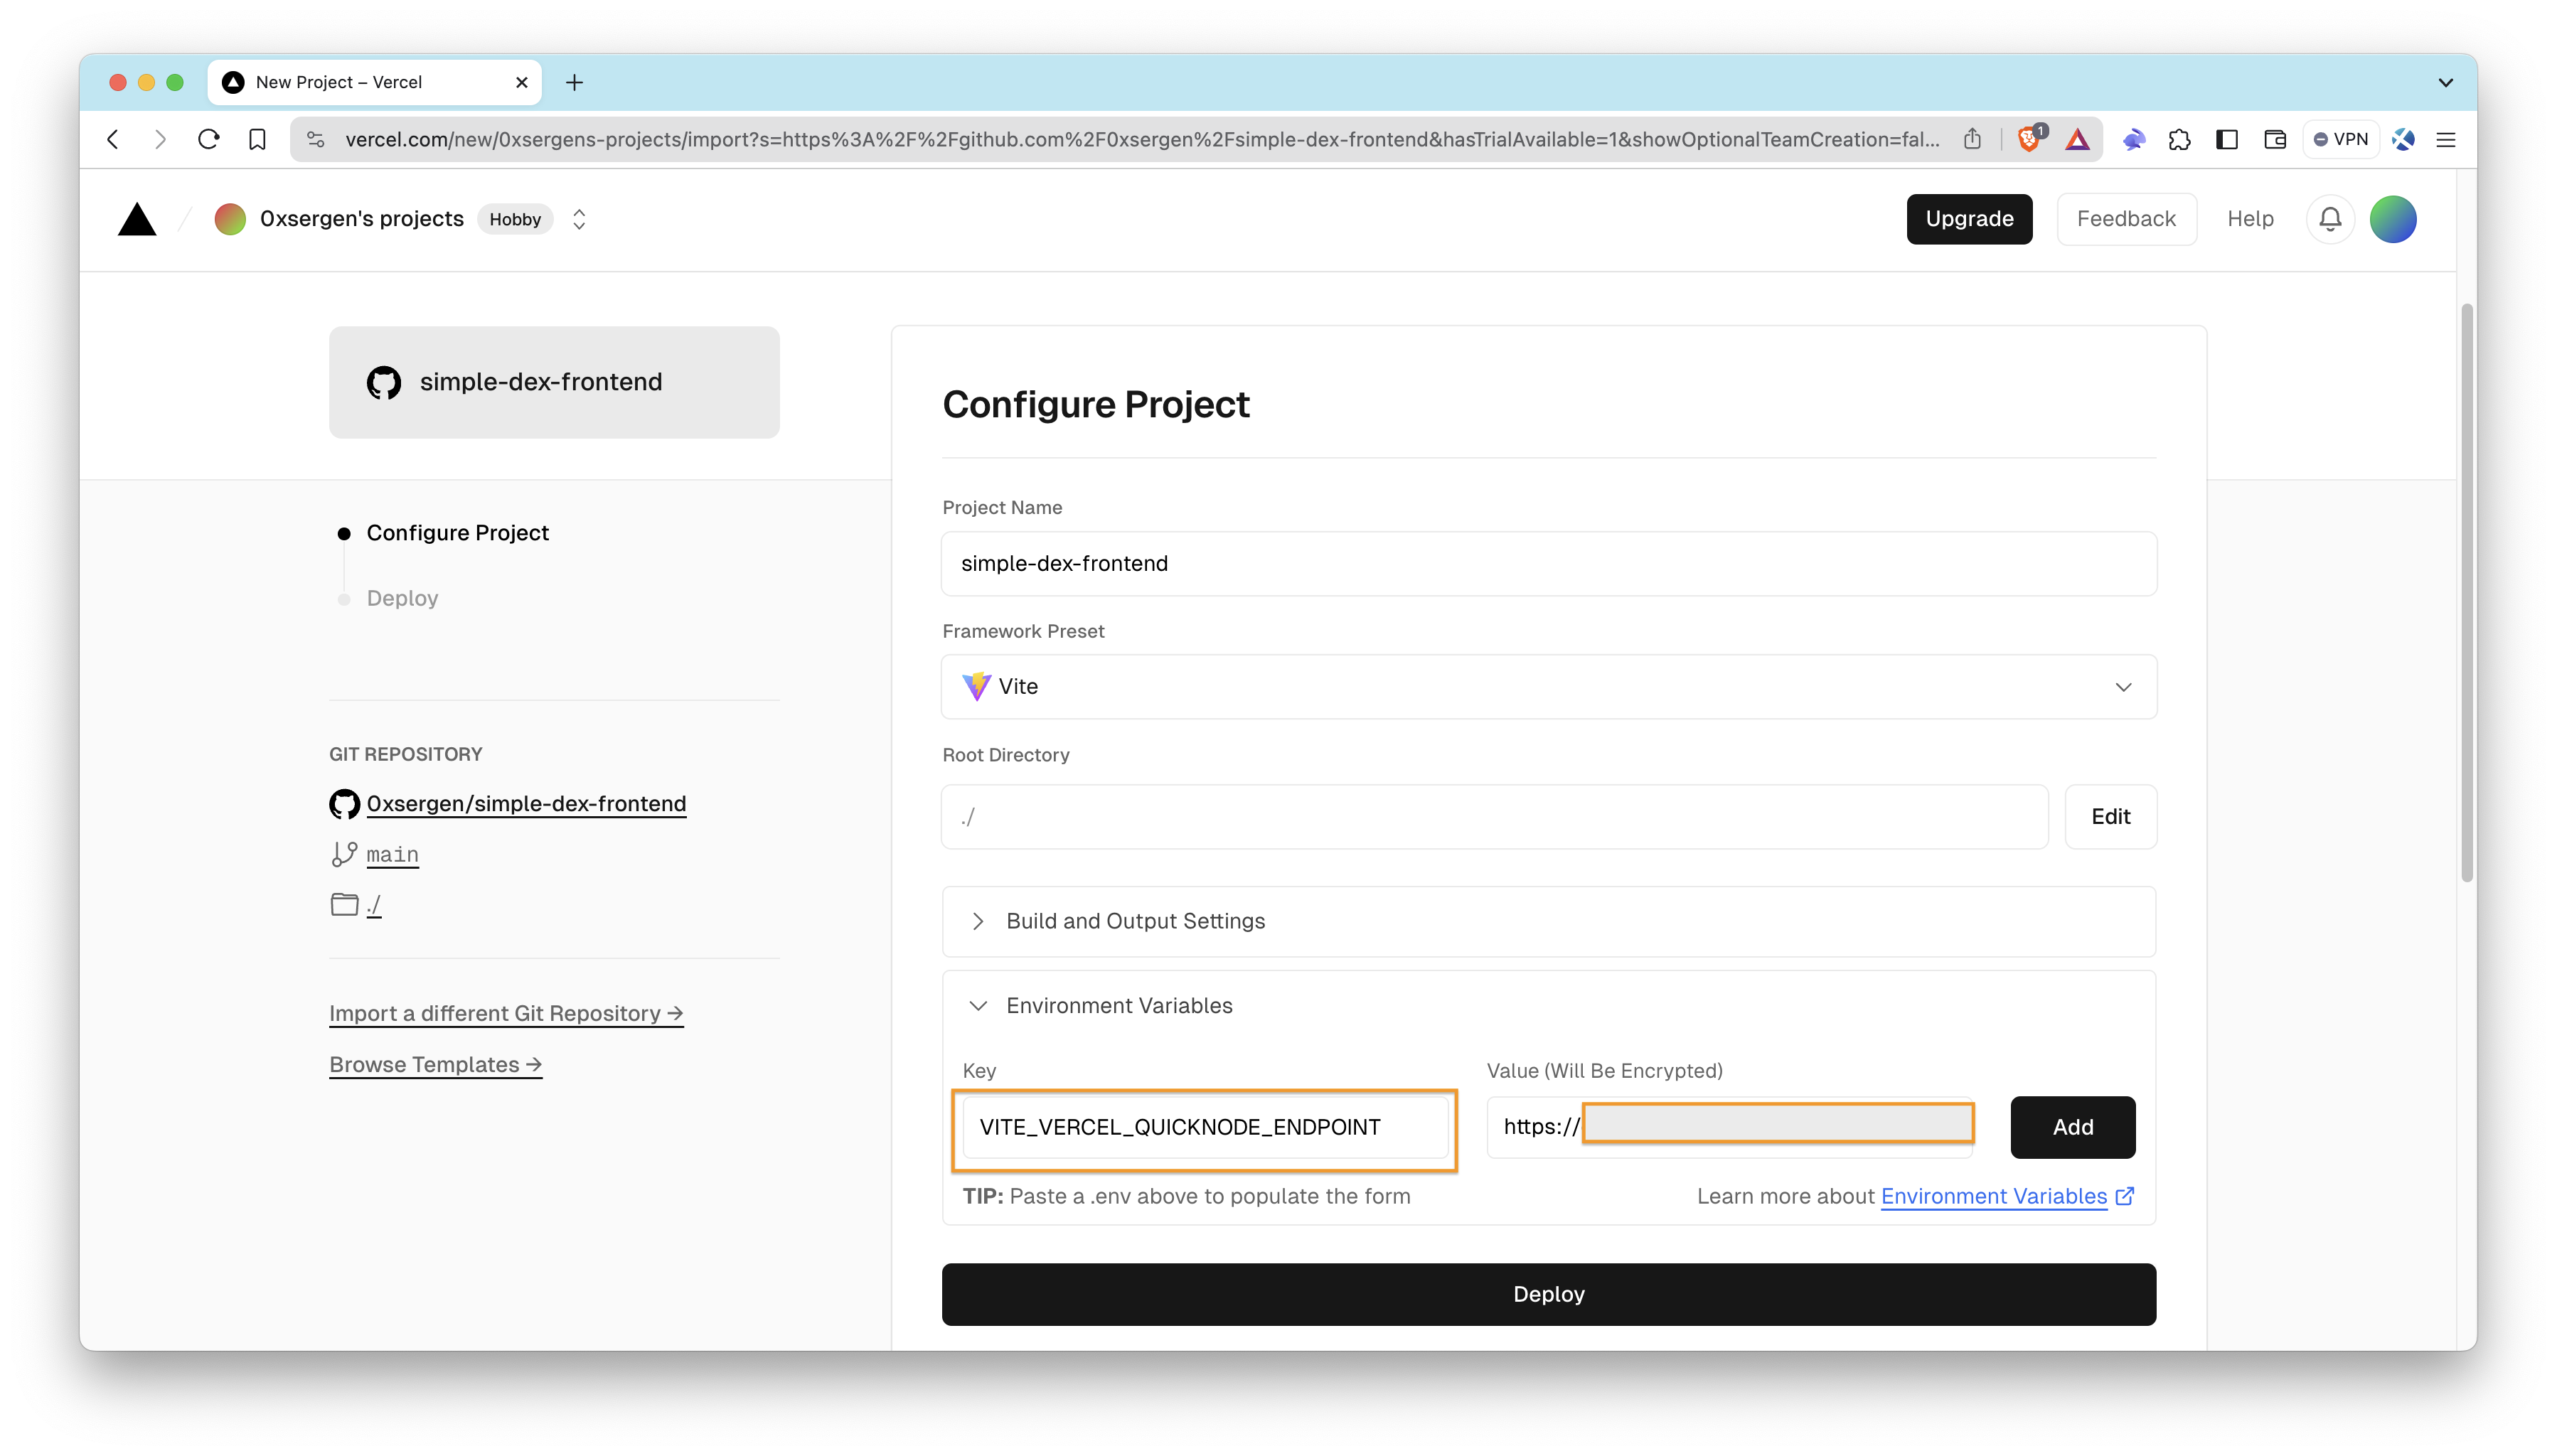
8. Click Deploy. It will take a few minutes for Vercel to deploy the application publicly. Once published, it'll display a domain link for your dApp.
9. Click the domain link to navigate to your dApp.
Congratulations on deploying the dApp to the web! 🎉
Testing the DEX using the Frontend
With both smart contracts and frontend deployed to the public, it's time to demonstrate the functionality of the DEX platform.
1. Connect Wallet
- Open the deployed frontend in your web browser.
- Locate the "Connect Wallet" button on the interface.
- Click on the button to initiate the wallet connection process.
- Follow the wallet's prompts to connect your wallet to the dApp.
You may temporarily change the wallet's network other than Sepolia to check if the warning message is displayed correctly.
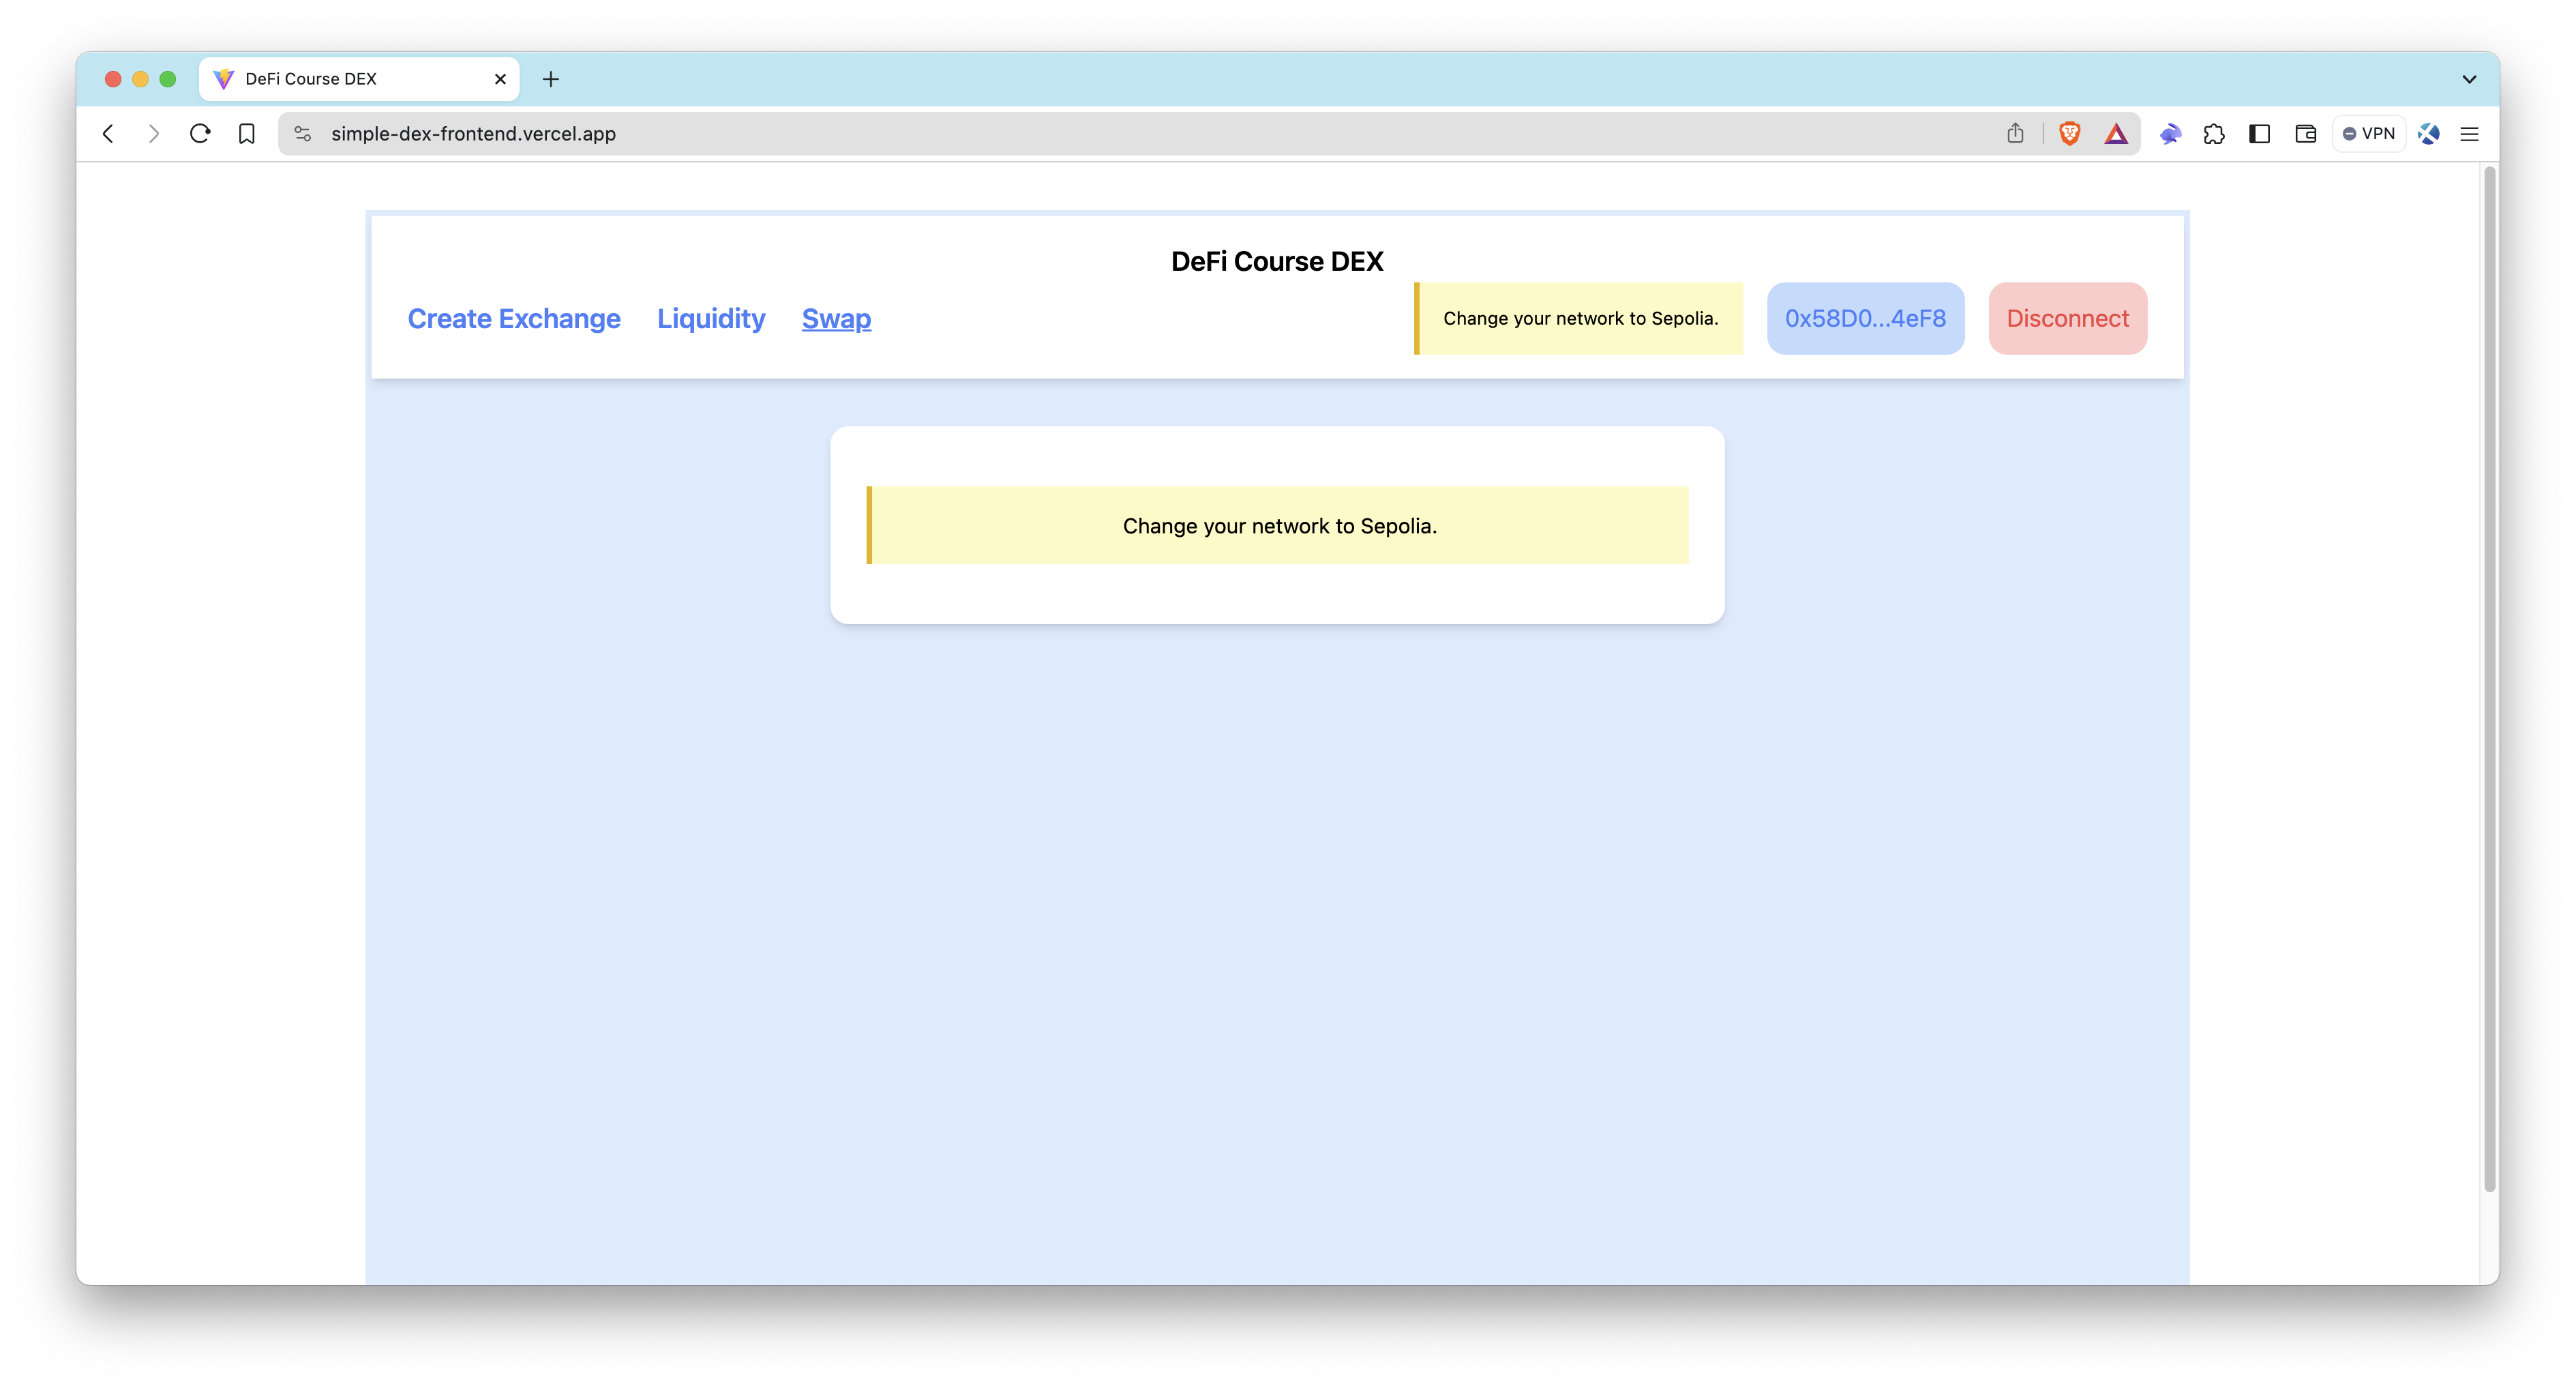
2. Check Account Balance
Once connected, your wallet address and testnet ETH balance should be displayed accurately on the interface.
Ensure that you have a sufficient balance of testnet ETH for transactions. If you don't have enough balance, feel free to use Quicknode's faucet.
3. Swap Tokens
The swap section is already displayed on the interface at the beginning.
- Select the direction of the swap (ETH->Token or Token->ETH).
- Enter the desired amount to swap.
- Click on the "Swap" button.
- Confirm the transaction in your connected wallet. Wait for the transaction to be processed and confirmed on the testnet.
- Check if your balances are updated after the swap transaction.
You may enter an amount higher than your balance to check if the Swap button displays an Insufficient balance message.
4. Provide Liquidity
- Locate the "Liquidity" section.
- Click on the "Add Liquidity".
- Enter the amounts of ETH and the token you wish to add.
- Click on the "Add Liquidity" button to send the transaction.
- Confirm the transaction in your wallet. Wait for the transaction to complete.
- Check if your balances are updated after the liquidity transaction.
5. Remove Liquidity
- Go back to the Liquidity page.
- Enter the amount of LP token you wish to remove.
- Click on the "Remove" button to send the transaction.
- Confirm the transaction in your wallet. Wait for the transaction to complete.
- Check if your balances are updated after the liquidity transaction.
Liquidity Tracking with QuickAlerts
In this part, we will show you how to create a Telegram bot that will send a notification to the Telegram channel whenever a user adds or removes liquidity with QuickAlerts.
This part is optional and is not required to complete the course. However, we highly encourage you to follow through with this part.
To do this, you will need to:
- Create a Telegram bot
- Set up a QuickAlerts webhook
- Write some code to send notifications to the Telegram bot
Creating a Telegram Bot
In this part, we will create a bot and an announcement channel.
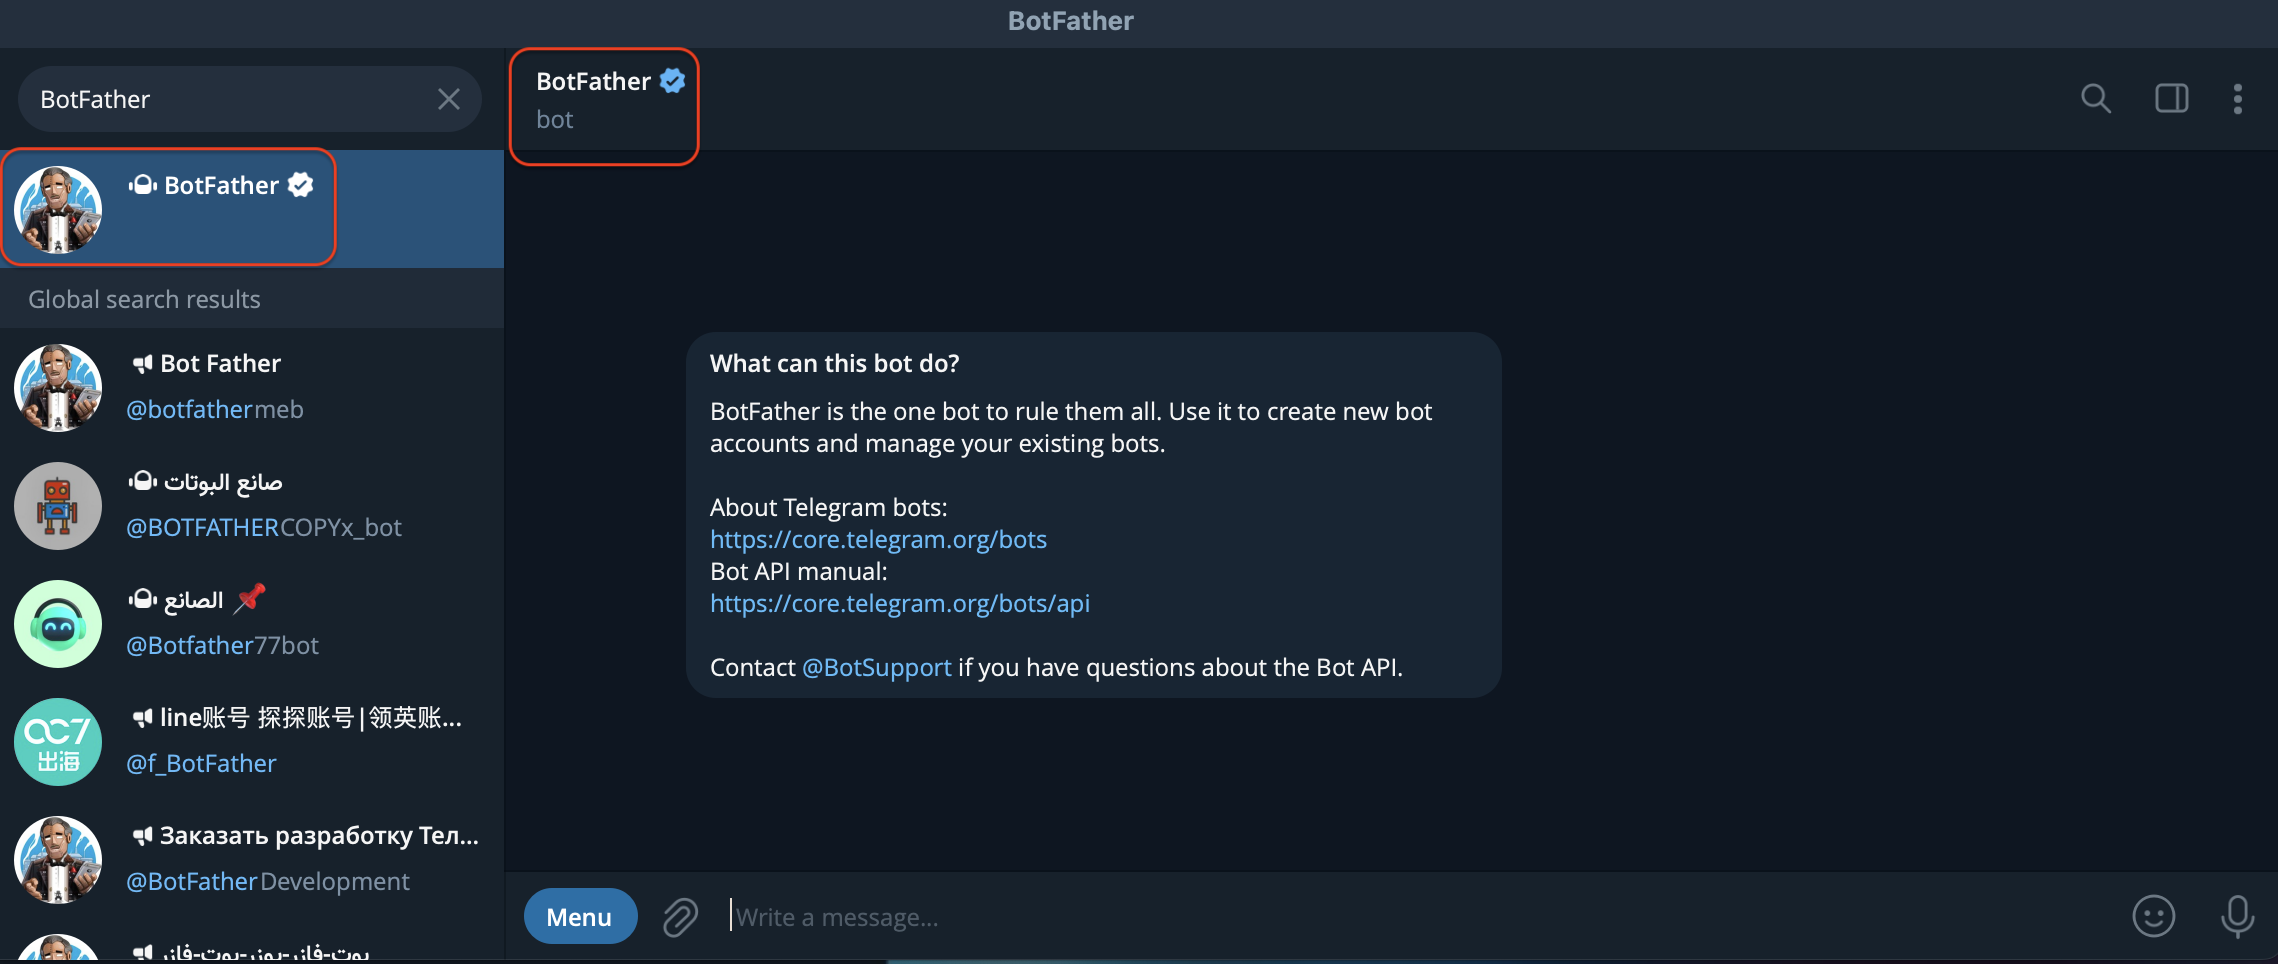
- Search for
BotFatheror go to https://t.me/BotFather on Telegram. Be sure that it is verified.
- Click
Start. - Write
/newbot. - Choose a name for the bot (i.e.,
QN DeFi Bot). - Choose a username for the bot. It should be ended with
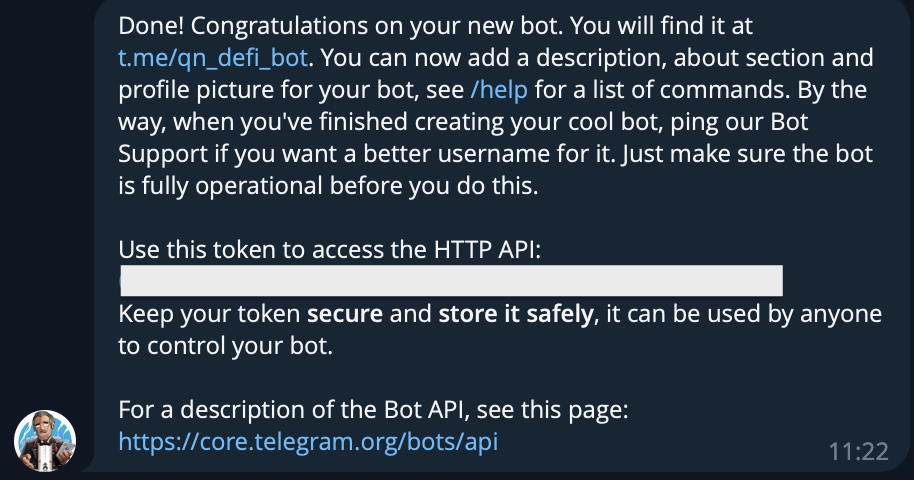
bot(i.e.,qn_defi_bot). - It gives the link of your TG bot (e.g., https://t.me/qn_defi_bot) and a token to access the HTTP API. Save it securely, it can be used by anyone to control your bot.
-
Click (≡), and click
New Channel. -
Select a Channel Name (i.e.,
QN DeFi Bot)- (optional) Select the privacy setting. If you select Public channel, set a link and save. You can skip this part.
- Click
Skipfor adding members.
-
Then, we need to find out the id of the channel.
- Click the name of the channel, click settings (⋮),
Manage Channel,Administrator,Add Administratorrespectively.
- Click the name of the channel, click settings (⋮),
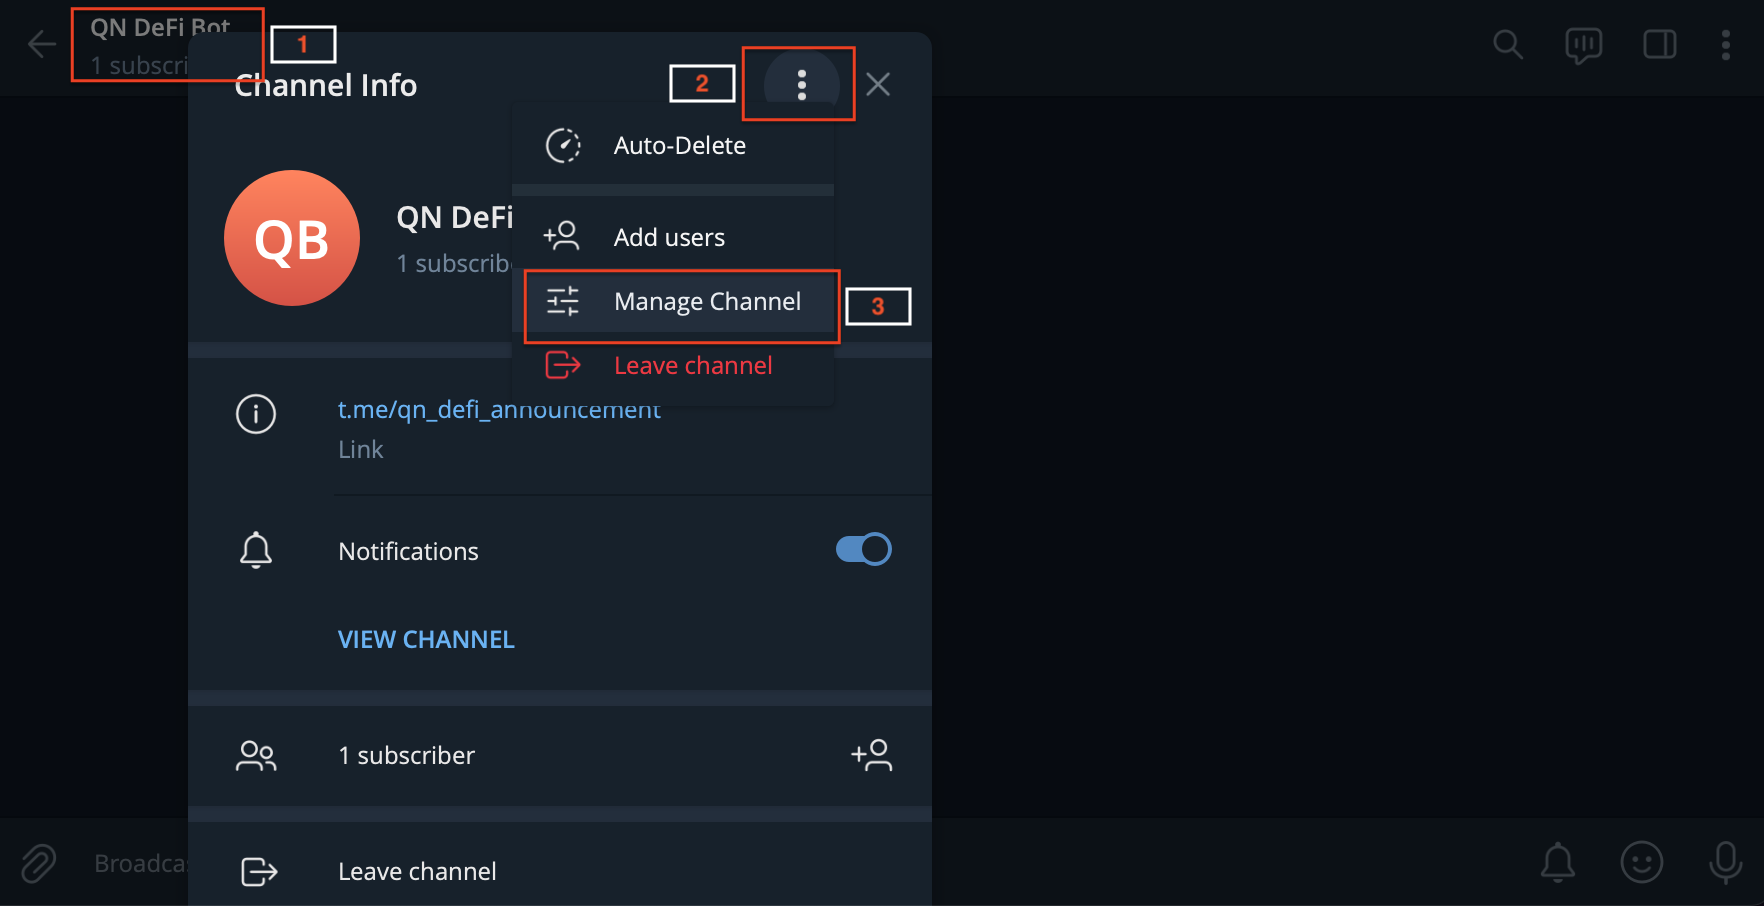
- Search for
myidbotand save the settings. - After adding the bot, write
/getgroupidin the chat. The bot sends the group id. Save it to use in the following steps. - (optional) You can remove the
myidbotfrom administrator. - Follow the same steps as you did to add a bot to the channel, click
Add Administrator, search for your bot username (i.e.,qn_defi_bot), select it, and save.
Setting Up the Backend
Now, it's time to set up the backend.
Open your terminal in any directory you want and run following commands to create a new project.
mkdir telegram-bot
cd telegram-bot
npm init --yes
npm install dotenv express node-telegram-bot-api nodemon
echo > index.js
echo > .env
This code will install the following packages:
- dotenv: This package is used to load environment variables from a file.
- express: This package is a web framework used to create HTTP servers.
- node-telegram-bot-api: This package is a JavaScript API for interacting with Telegram bots.
- nodemon: This package is a tool that automatically restarts your Node.js application when it detects changes to the code.
Then, open your favorite code editor and modify the index.js file corresponding the code below.
// Import the necessary modules
const dotenv = require("dotenv");
const express = require("express");
const TelegramBot = require("node-telegram-bot-api");

// Load environment variables from a file
dotenv.config();

// Get the environment variables
const { TOKEN, PORT, CHAT_ID } = process.env;

// Create a new Telegram bot
const bot = new TelegramBot(TOKEN);

// Function to shorten the displayed address (e.g. 0xabcd...abcd)
function shortAddress(_address) {
  // Return the first 6 and last 4 characters of the address
  return _address.substring(0, 6) + "..." + _address.slice(-4);
}

// Create an Express server
const app = express();
app.use(express.json());

// Route to receive updates from QuickAlerts
app.post("/webhook", async (req, res) => {
  // Get the webhook data
  const webhook = req.body;

  // Get the address of the sender
  const from = webhook.matchedReceipts[0].from;

  // Get the event data
  const eventData = webhook.matchedReceipts[0].logs;

  // Initialize a message variable
  let message;

  // Define the signature of events you're looking for
  // We will explain how to get these values in "Setting Up QuickAlerts"
  const removeLiqTopic =
    "0x96cd817c6329656790ef8fba7675405193677d39619571282f5e21f3a98cd059";

  const addLiqTopic =
    "0xac1d76749e5447b7b16f5ab61447e1bd502f3bb4807af3b28e620d1700a6ee45";

  // Loop through the event data and check if the topics include the target topic
  eventData.forEach((event) => {
    // If the topic is found, set the message
    if (event.topics.includes(removeLiqTopic)) {
      message = `${shortAddress(from)} removed liquidity. \n
      https://sepolia.etherscan.io/tx/${event.transactionHash}`;
    } else if (event.topics.includes(addLiqTopic)) {
      message = `${shortAddress(from)} added liquidity. \n
      https://sepolia.etherscan.io/tx/${event.transactionHash}`;
    }
  });

  // Send a status code of 200
  res.sendStatus(200);

  // Send the message if it is not empty
  if (message !== undefined) {
    bot.sendMessage(CHAT_ID, message);
  }
});

// Start the Express server
app.listen(PORT, () => {
  console.log(`Express server is listening`);
});
Then, modify the .env file like the one below.
TOKEN=<TELEGRAM_BOT_TOKEN>
PORT=5001
CHAT_ID=<TELEGRAM_CHAT_ID>
- Replace
<TELEGRAM_BOT_TOKEN>with the bot token you get from BotFather in the Creating a Telegram Bot section. - Replace
<TELEGRAM_CHAT_ID>with the channel ID you got from myidbot in the Creating a Telegram Bot section.
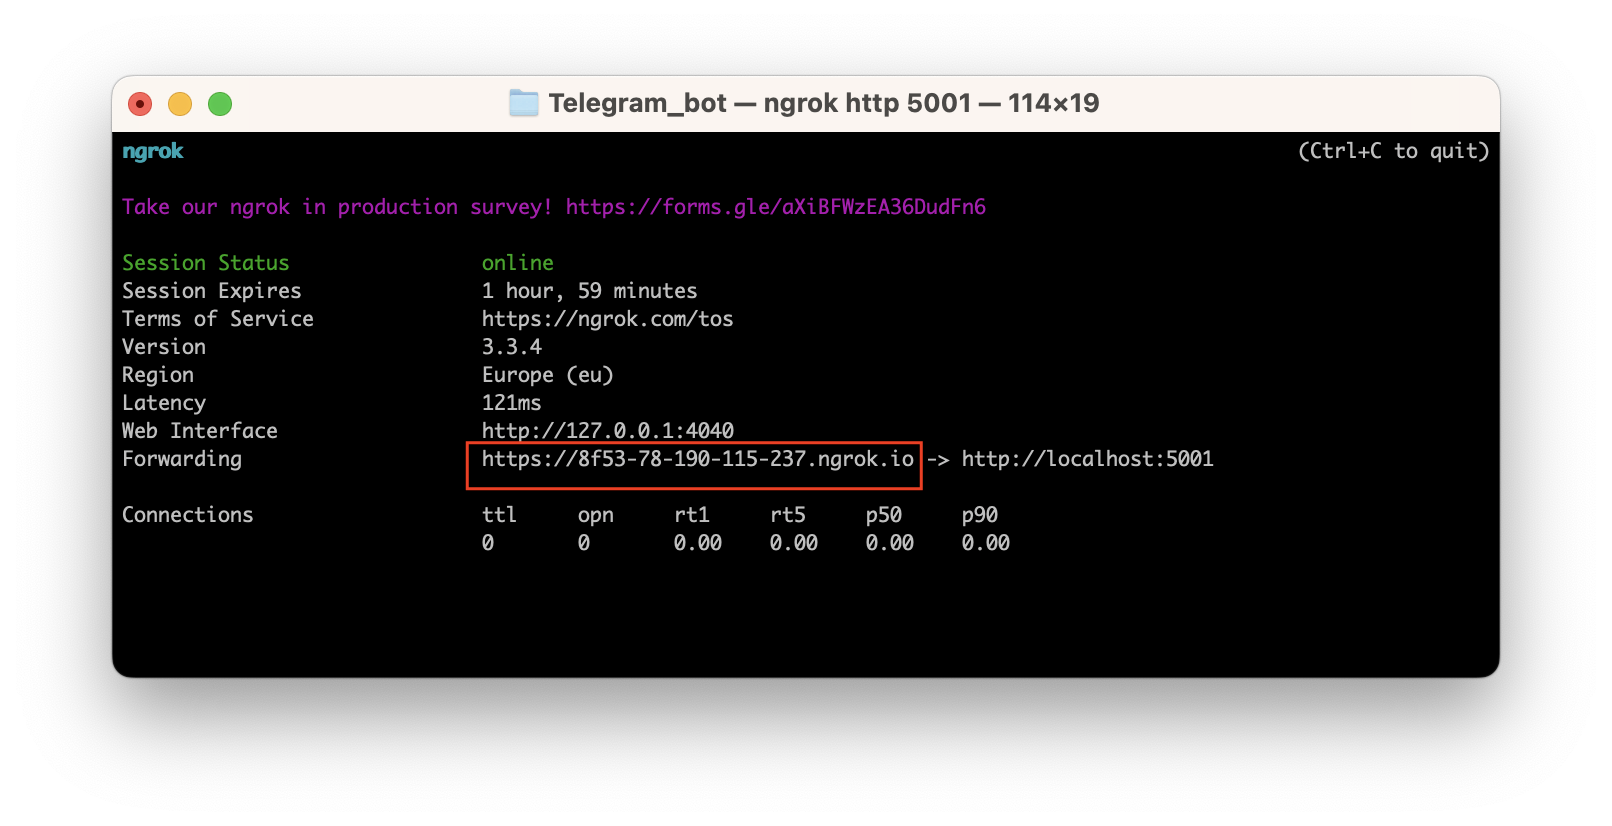
Then, open a new Terminal window and run ngrok on a port. Make sure that the value of PORT in the .env file is exactly the same as the port number used with the ngrok command.
ngrok http 5001
If you don't have ngrok installed, check this page and install it globally on your system.
Copy the URL which you get after running the above command.
Setting Up QuickAlerts
In this part, we will set up QuickAlerts with defining expression to get notified.
- Navigate to Quicknode and login. Once logged in, click the QuickAlerts tab on the left sidebar. Then, click Create QuickAlert.
- Name your QuickAlert (i.e.,
QN DeFi), and selectEthereumandSepoliaas chain and network. - Select
Monitor Smart Contracts Eventsas a template.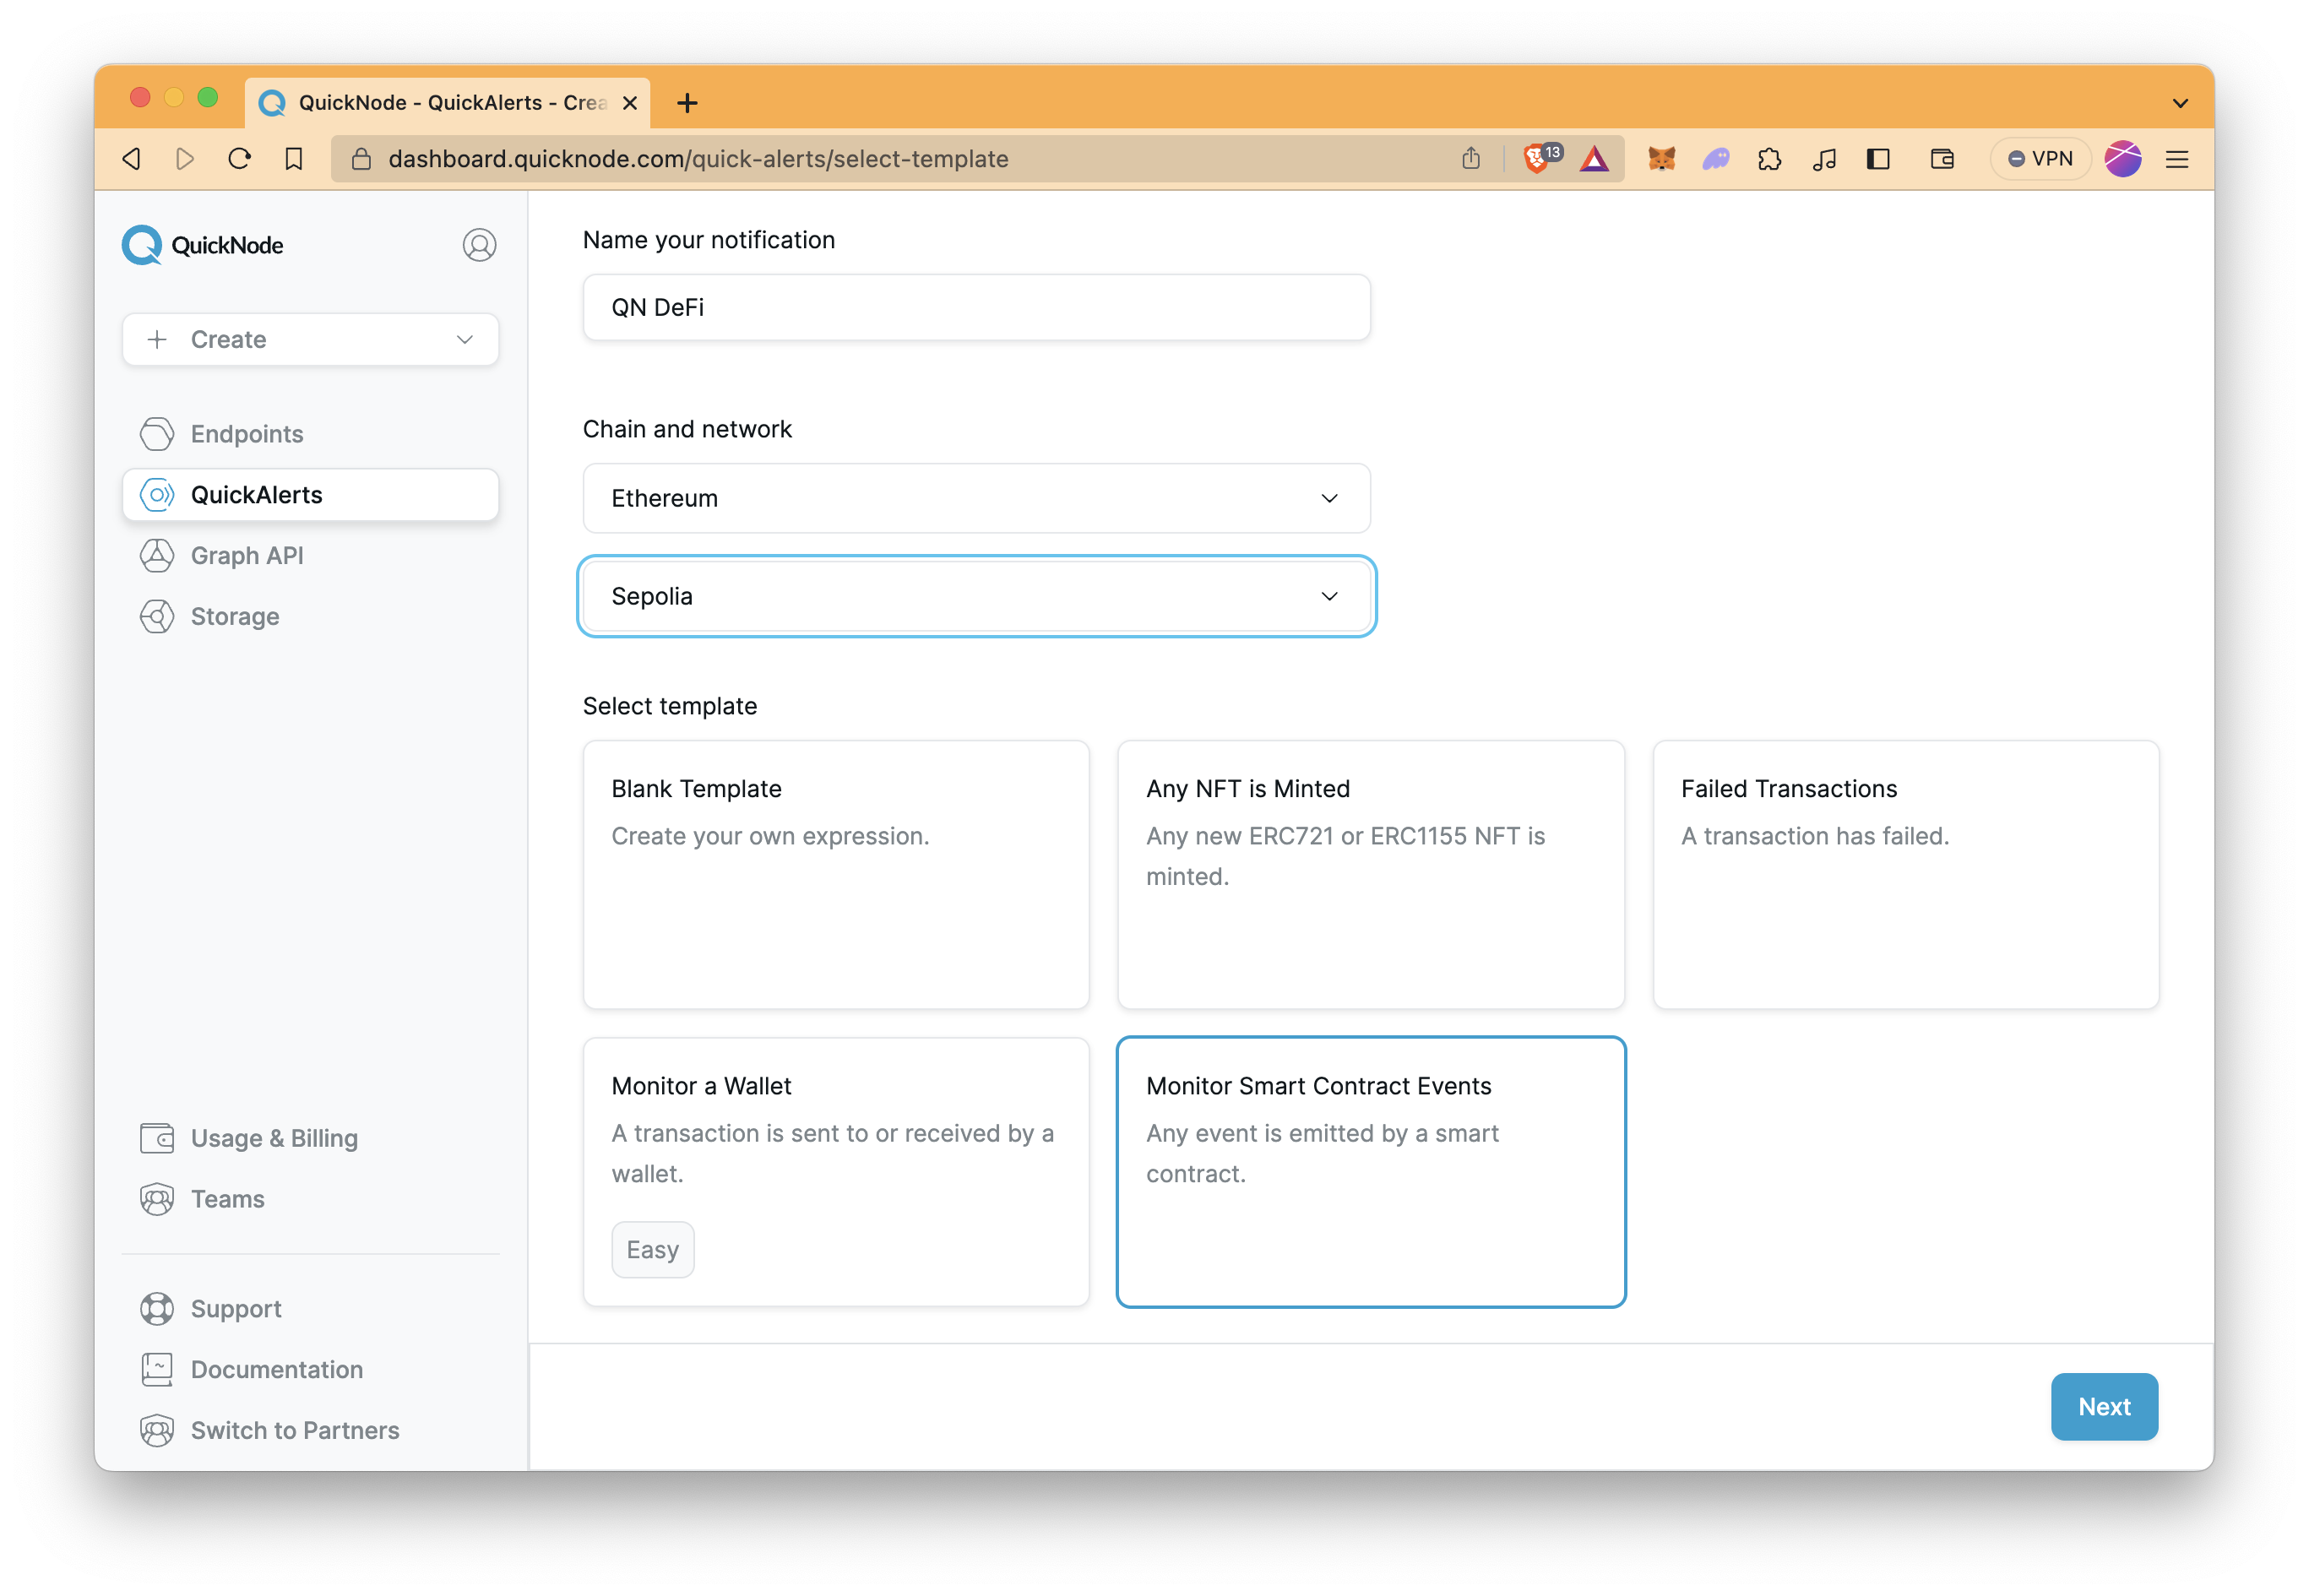
Now, we need to define the expression to detect transactions that we want to get notified. In this course, we will track adding and removing liquidity transactions.
Each event has a unique signature and we will use these signatures to detect transactions.
Let's get signatures of LiquidityRemoved and LiquidityAdded events that are defined in the Exchange smart contract.
-
If you already added and removed liquidity for testing purpose before, check these transactions on Etherscan.
-
Go to the Logs section on the transaction page.

-
Find the log related to either
LiquidityRemovedorLiquidityAdded. The Topics[0] value is the signature of the event.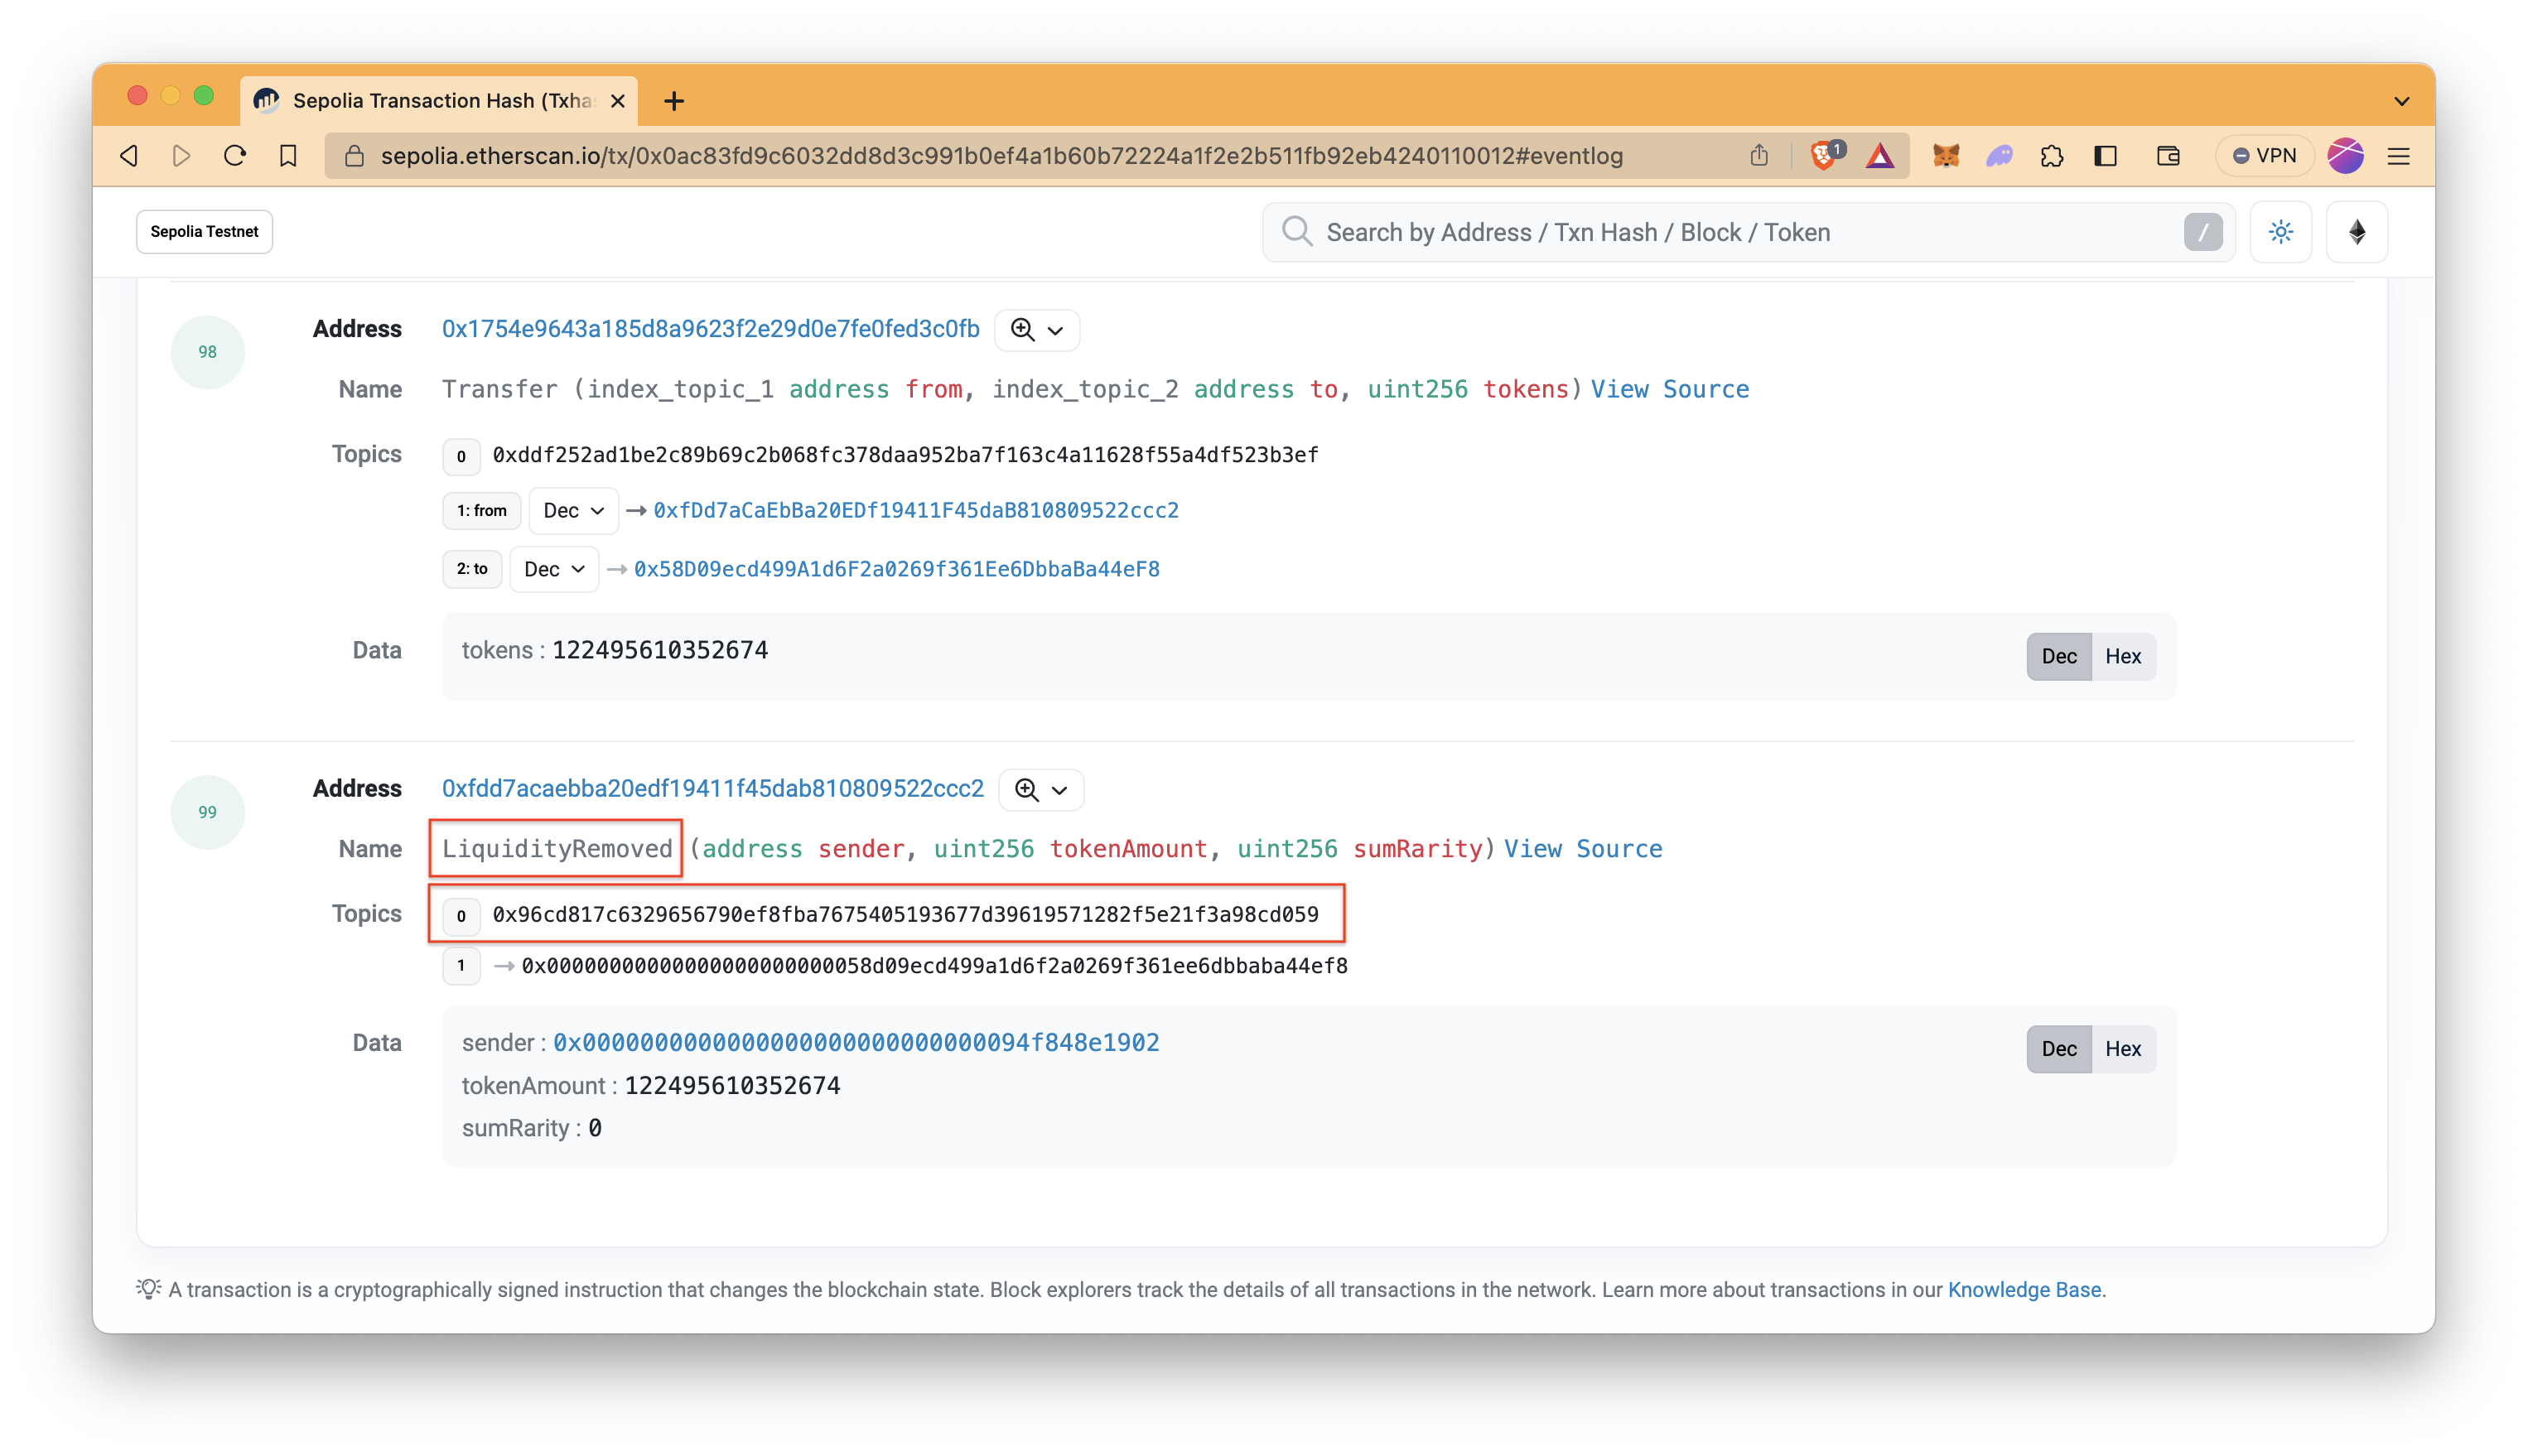
-
Repeat the process to get signature of both events.
-
Copy your Exchange smart contract's address as well.
You interact with your Exchange smart contract to add/remove liquidity. So, you can get the address on the transaction page.
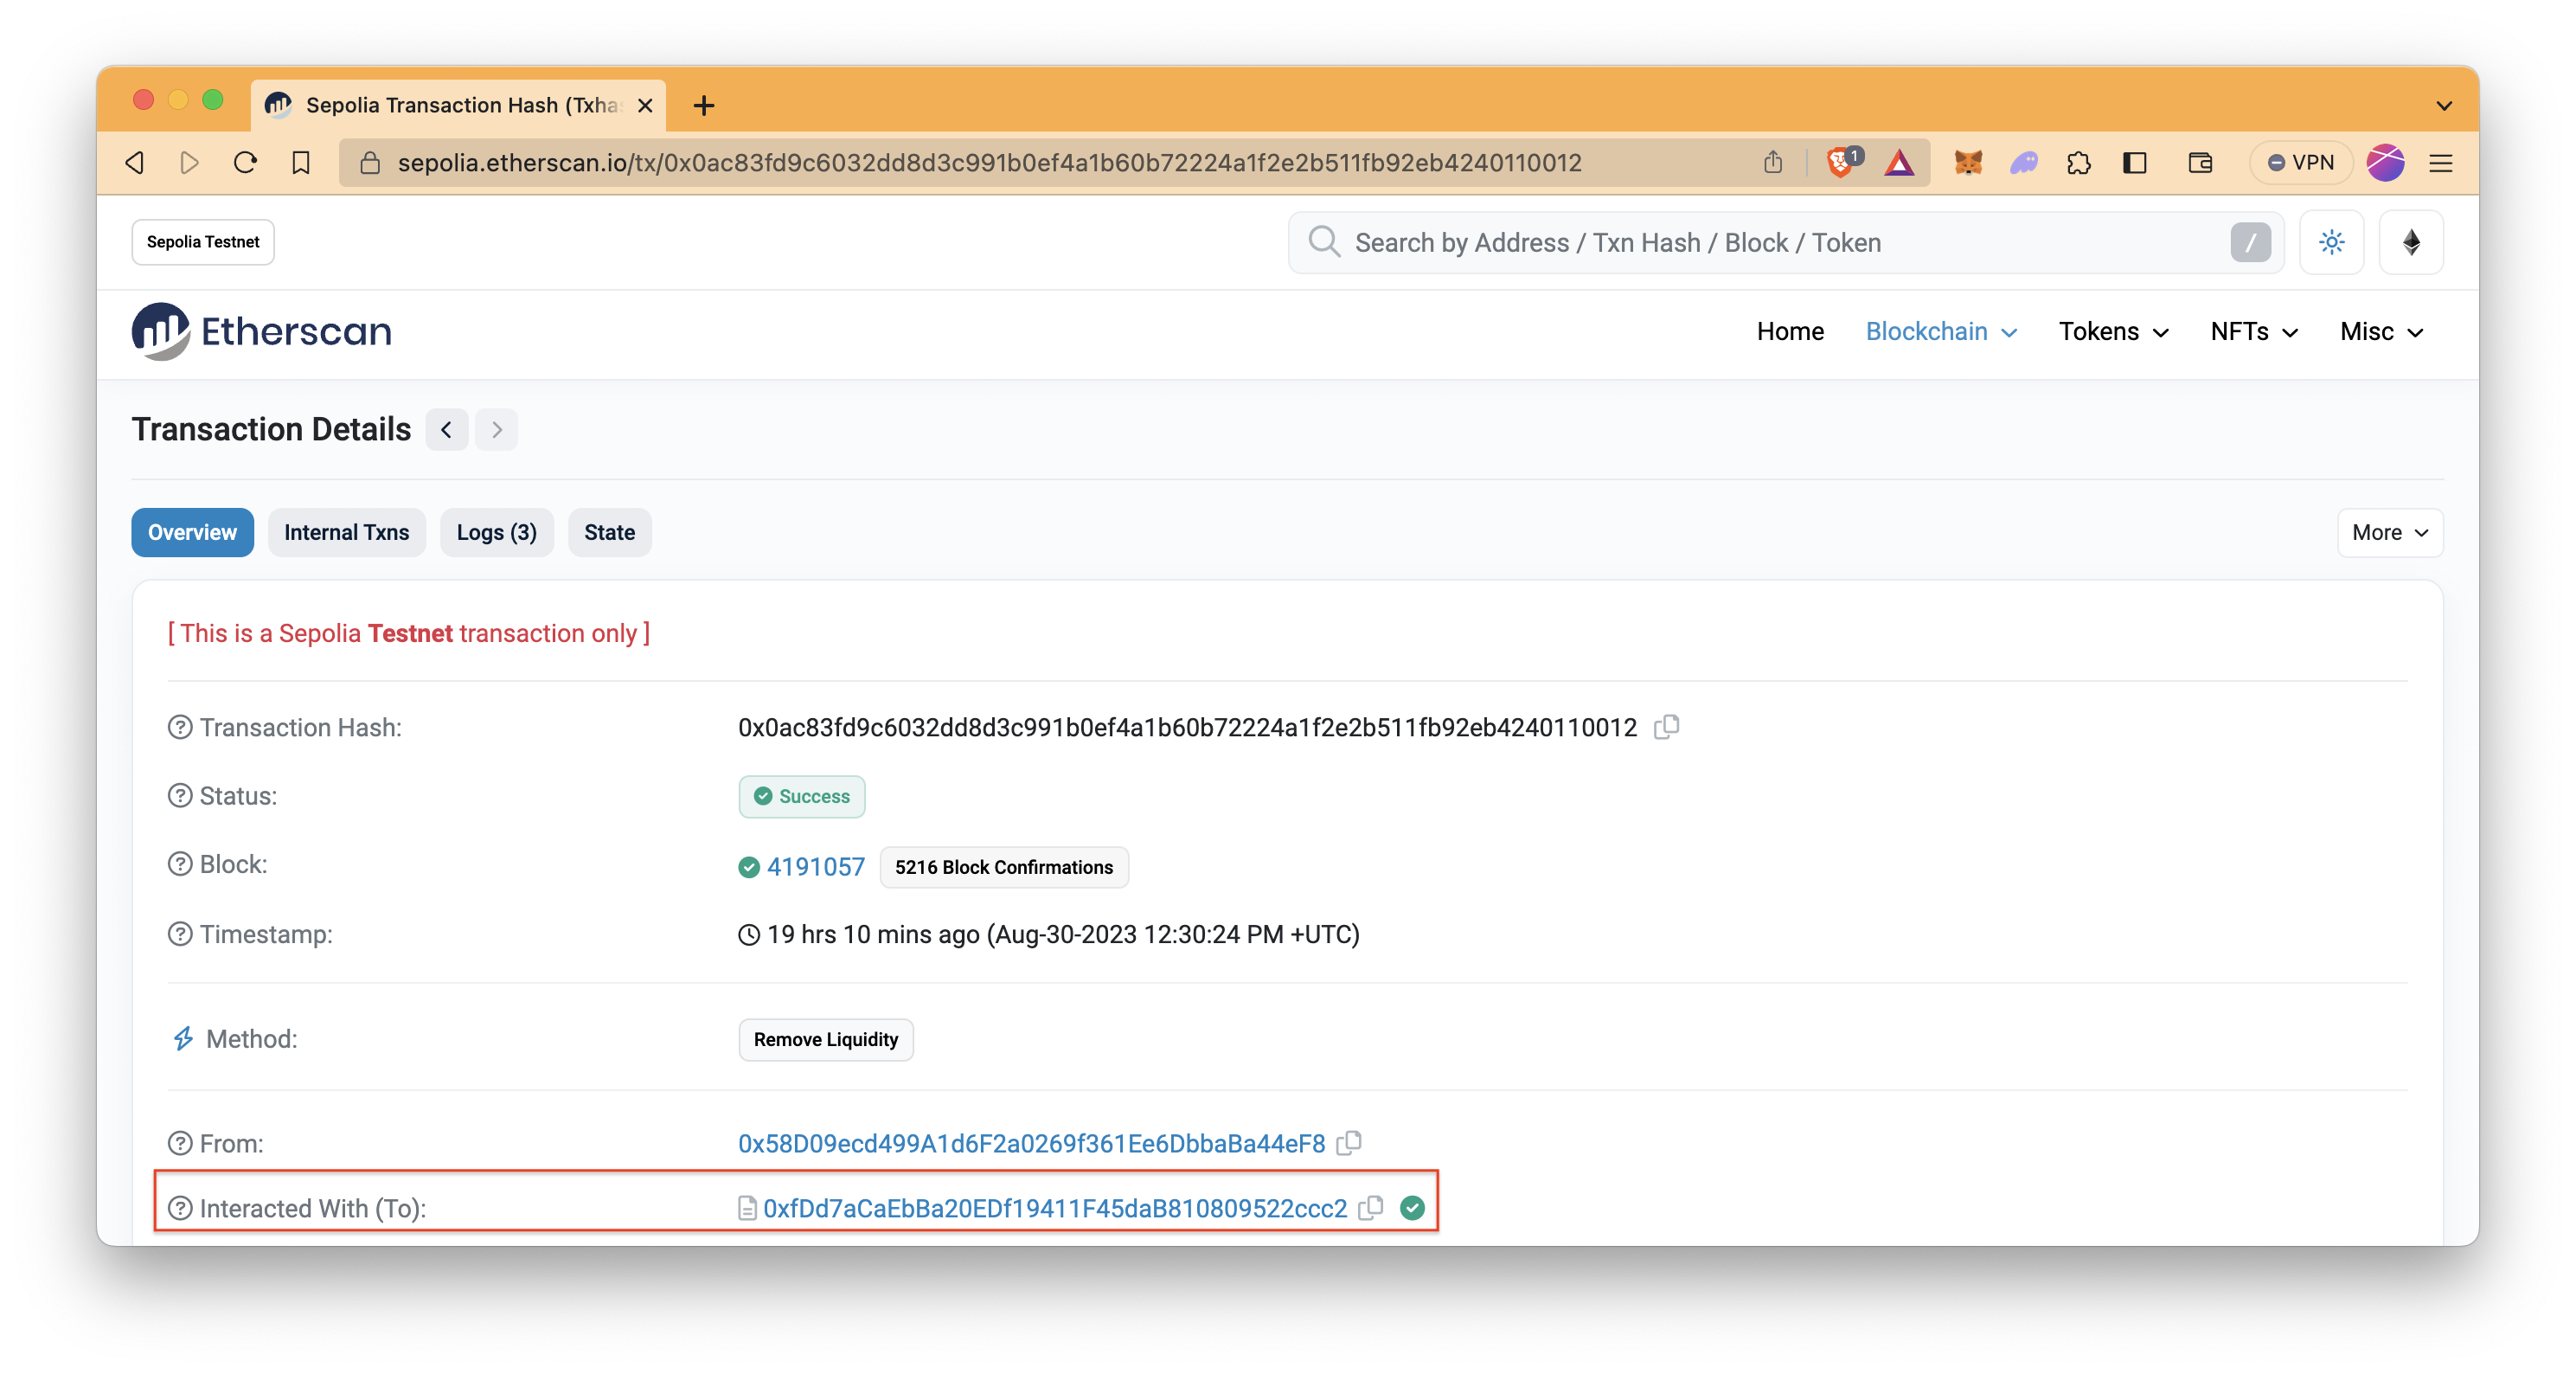
After getting event signatures and Exchange smart contract address, we are ready to define the expression.
The expression below tracks the adding and removing liquidity transactions, along with the Exchange smart contract address.
(tx_logs_address == 'EXCHANGE_SMART_CONTRACT_ADDRESS') && (tx_logs_topic0 == 'LIQUIDITY_REMOVED_SIGNATURE' || tx_logs_topic0 == 'LIQUIDITY_ADDED_SIGNATURE')
Replace EXCHANGE_SMART_CONTRACT_ADDRESS, LIQUIDITY_REMOVED_SIGNATURE, and LIQUIDITY_ADDED_SIGNATURE with the corresponding values that you get.
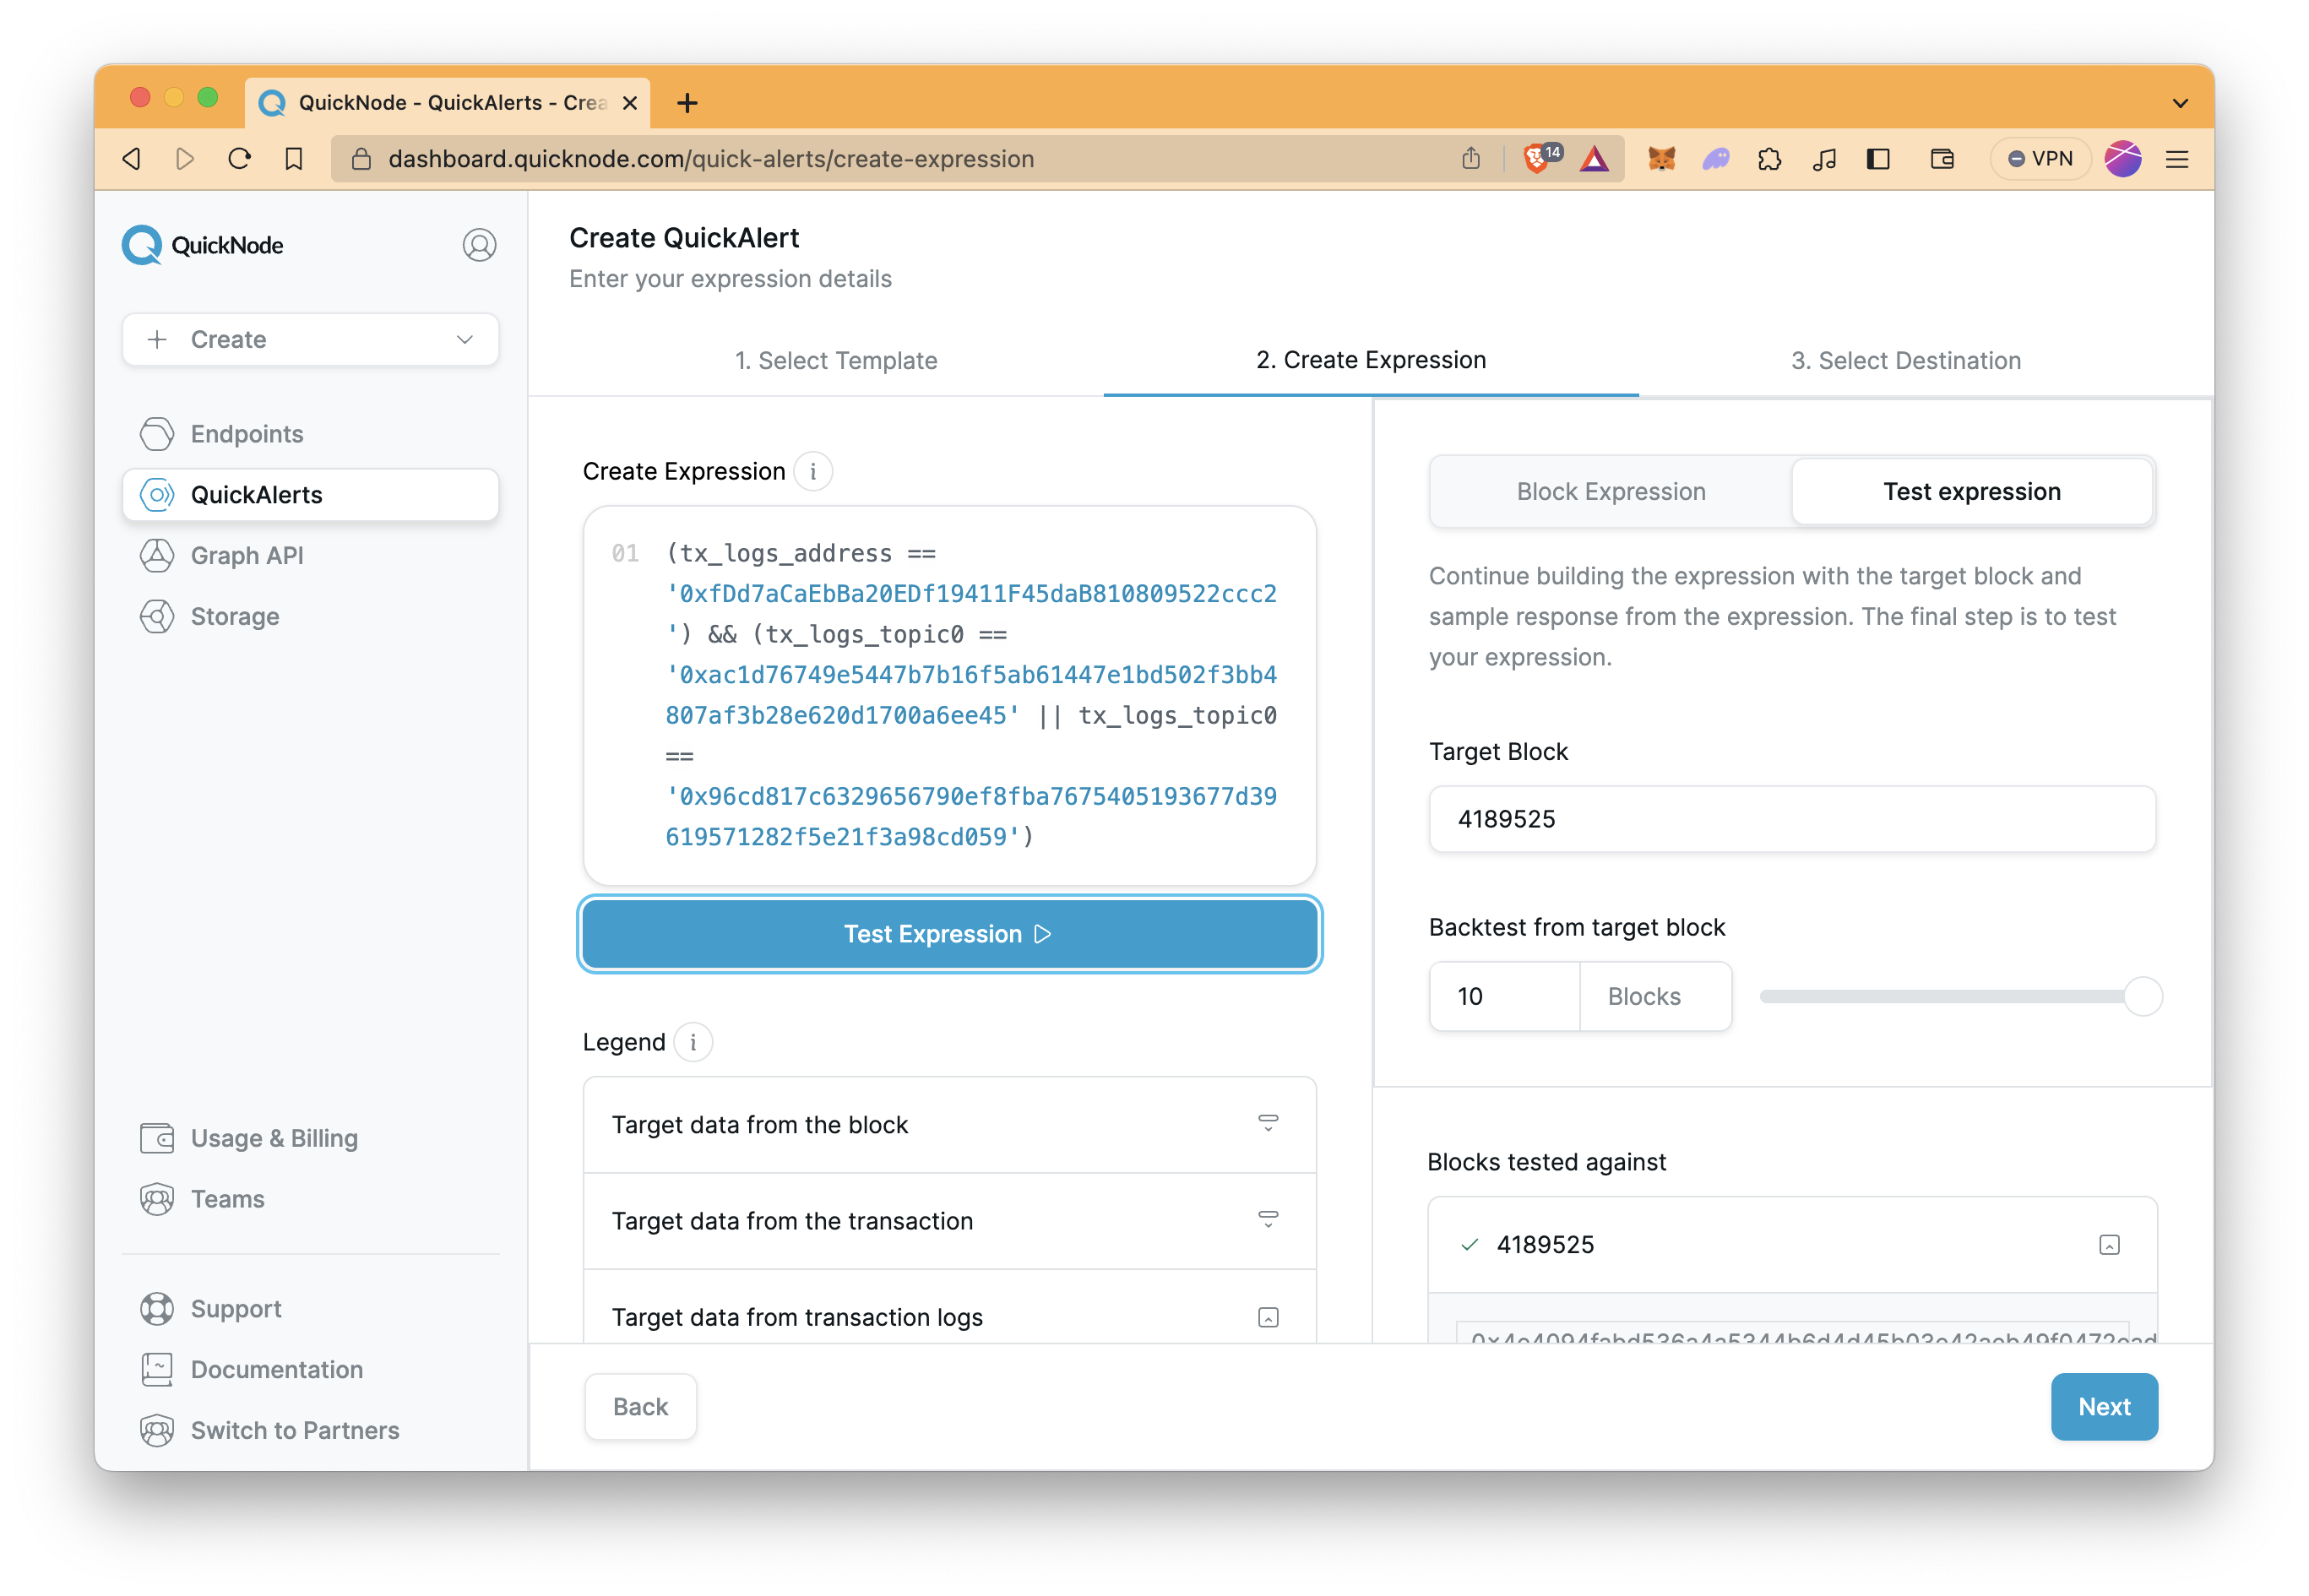
- Test the expression on some historical block data through the Quicknode UI.
- Click Create Destination and select
Webhook. - Select
Webhook name(i.e.,QN DeFi Webhook) - Copy ngrok URL that you get before and paste it into URL and request type and add
/webhookto the end. (i.e.,https://aed5-78-190-115-237.ngrok.io/webhook - Select Matched Transactions and Receipts and click Create Webhook and Deploy Notification, respectively.
Now, everything is ready to test!
Open your terminal in the telegram-bot directory that you create the project for the backend.
npm run dev
Then, add or remove liquidity via the frontend. If everything goes well, you will see a new message in your announcement channel.
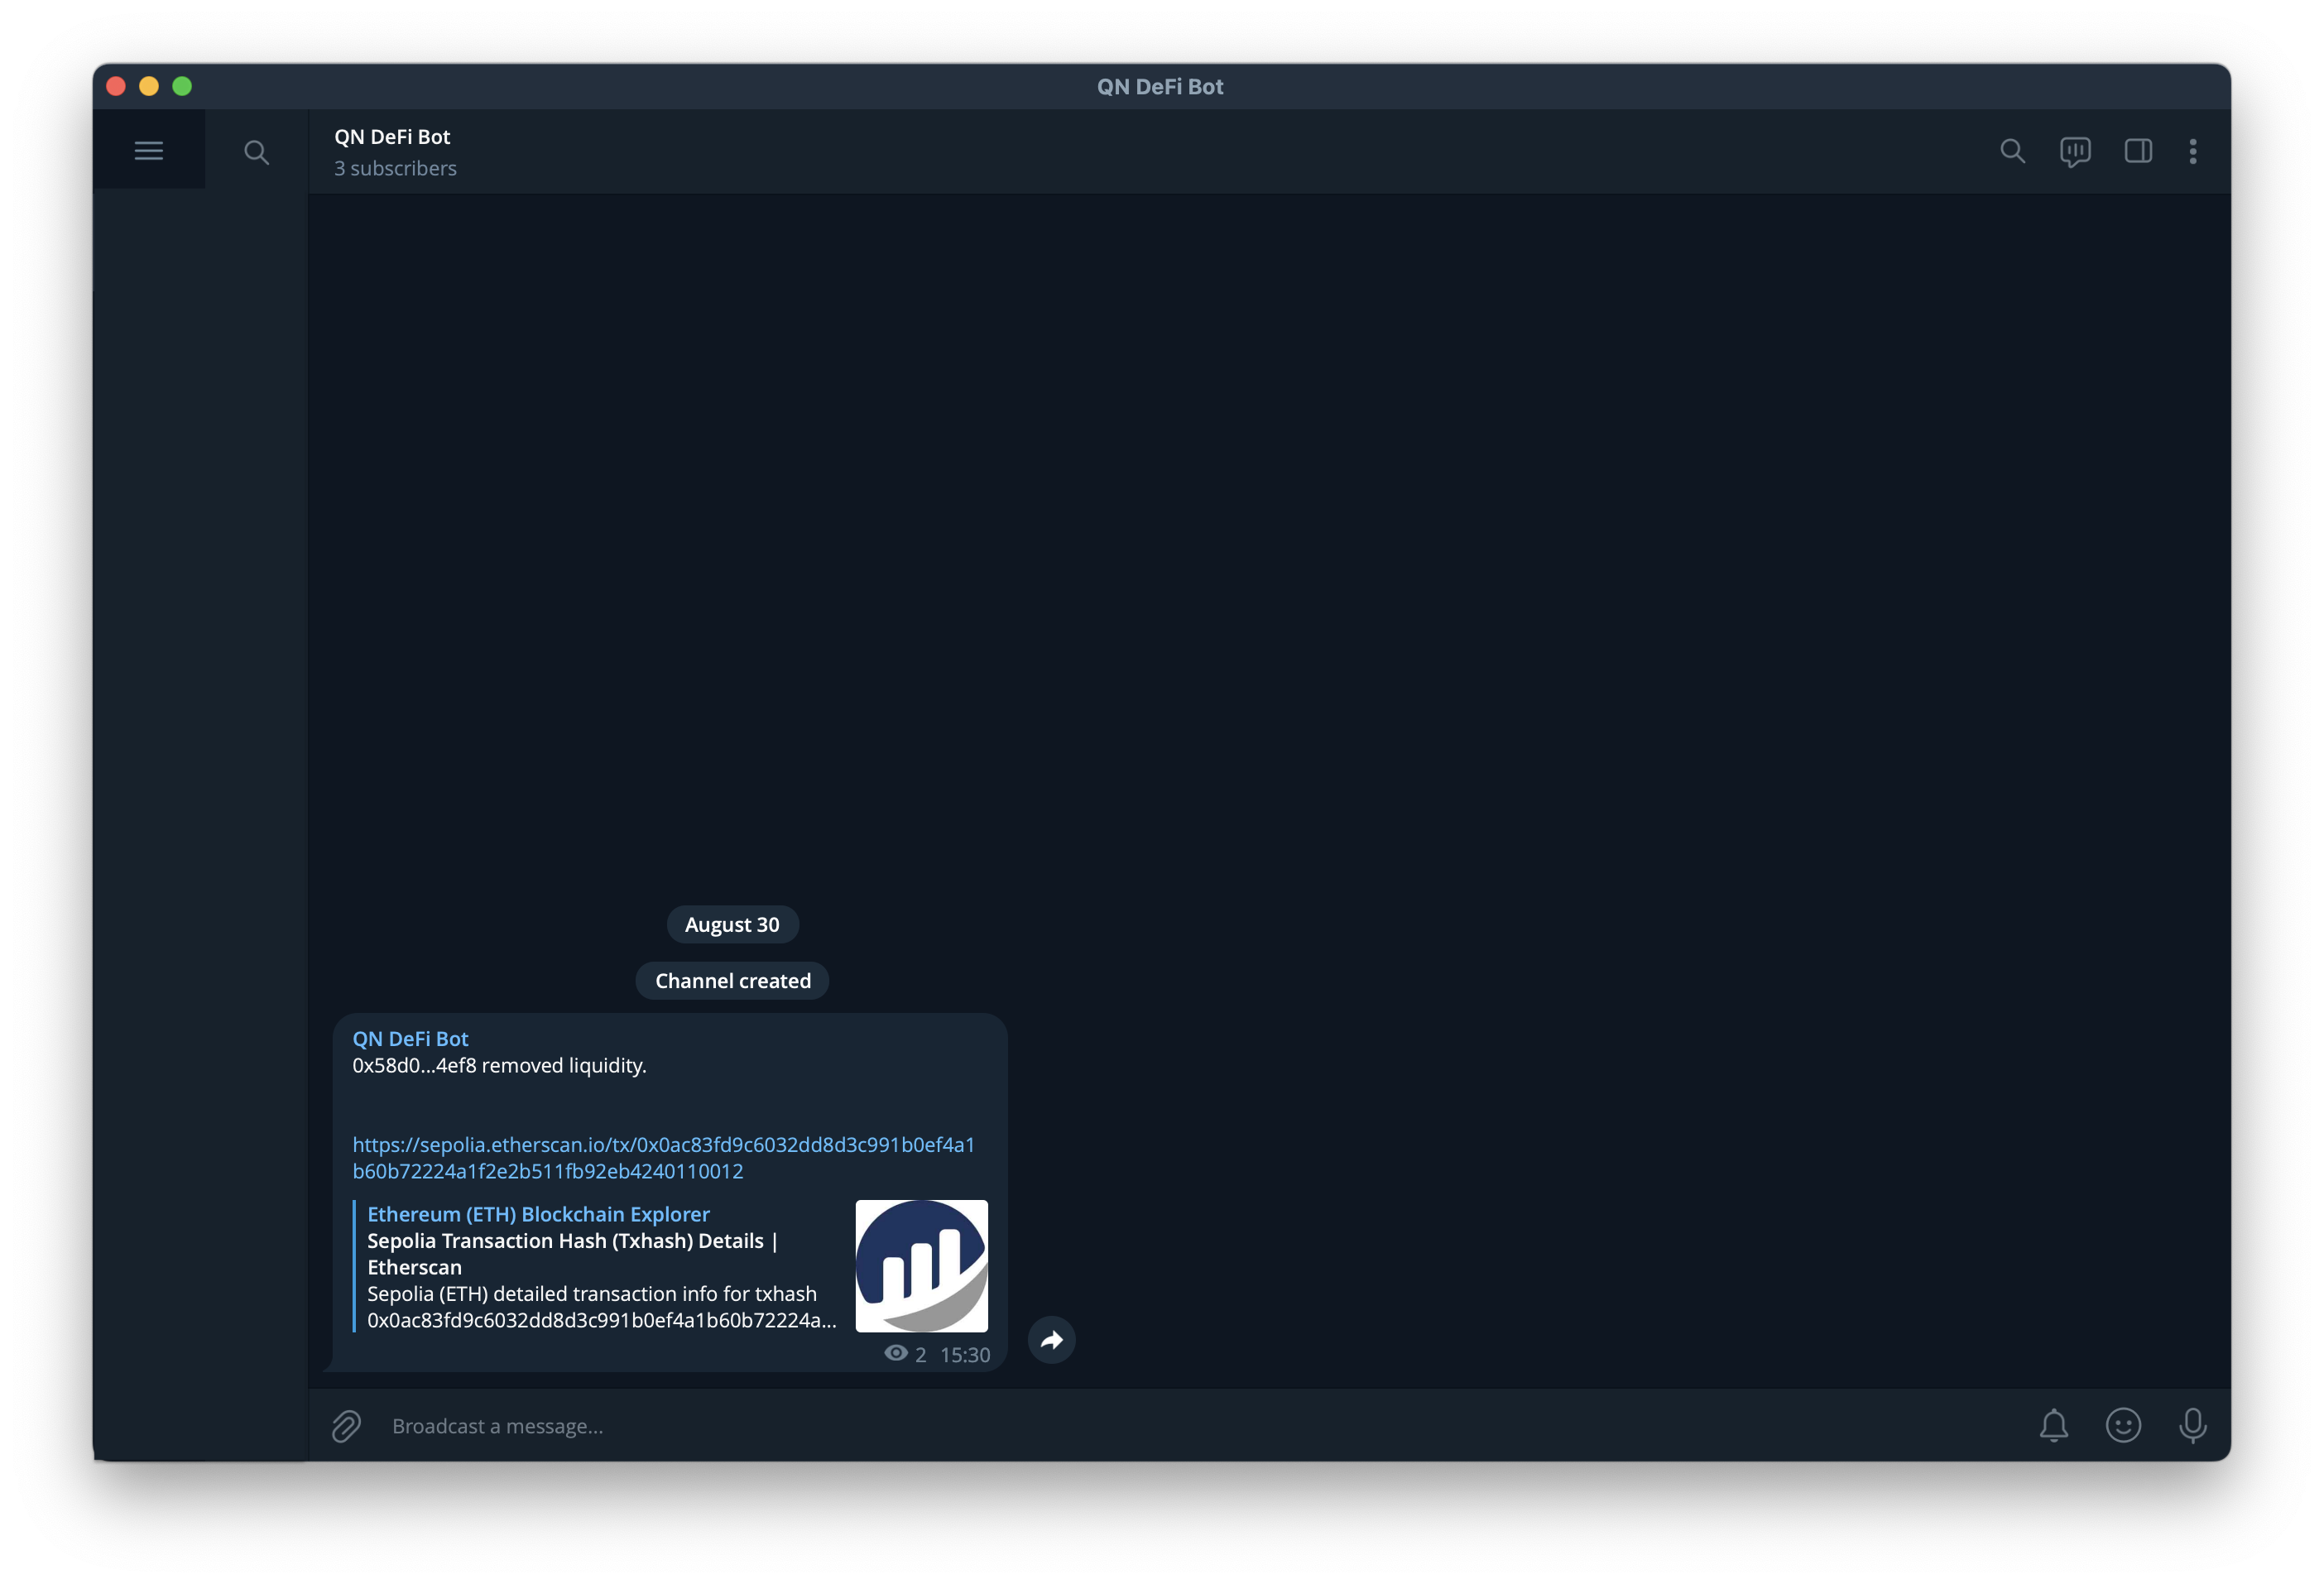
Congratulations! You have successfully set up a Telegram bot to receive notifications from QuickAlerts.
Quiz
Let's finish with a quiz to reinforce what you've learned. This quiz will cover the topics discussed during the lesson.
Conclusion
As we conclude this exhilarating journey through the intricacies of building a DEX platform, we stand at the threshold of our final lesson. Throughout this course, you've gained invaluable insights into blockchain development, smart contract deployment, frontend integration, and more. Congratulations on reaching this milestone, and get ready to transition from learning to implementation in this remarkable final lesson of our course.