15 min read
Overview
Welcome to lesson 4 of Quicknode's DeFi DEX course! This lesson, we're diving into testing and deploying the DEX contracts we have built over the past two lessons. Testing is crucial to ensure the proper functioning of your smart contracts. Before we get started with our actual testing and deployment to the Ethereum Sepolia testnet, let us take a few minutes to discuss the current best practices and standards for developing and maintaining smart contract code today. Afterward, we will discuss some more technical testing methods and then get into creating tests for our DEX smart contracts using Foundry.
Best Practices for Smart Contract Development
- Start Simple: Simpler is often better. Ensure your smart contracts do only what they need to do, and no more.
- Modular Design: Write modular code to improve readability, reusability, and maintainability. For example, logic used more than once can be seperated into utility functions to reusability.
- Code Comments: Solidity supports comments. Use them to describe the purpose and functionality of functions, especially public ones.
- Reentrancy Guard: Prevent recursive calls from external contracts using mechanisms like the Checks-Effects-Interactions pattern and using tools like reentrancyGuard.
- Regular Audits: Have your code audited by third-party experts? especially before any mainnet release.
- Use Established Libraries: Leverage well-vetted libraries like OpenZeppelin, which provide implementations for standard functionalities (e.g., ERC20, ERC721).
- Gas Optimization: Always be mindful of gas costs. Avoid unnecessary storage operations, use appropriate data types, and prune unnecessary code.
- Error Handling: Make use of require, assert, and revert to handle unexpected situations.
- Access Control: Ensure only authorized entities can access certain functions using tools like Ownable or Role-based access control.
- Timelocks: For critical governance decisions or contract upgrades, implement a delay before any changes take effect, giving users time to react.
- Pause Mechanism: Implement a mechanism to pause contract functionalities in case of detected vulnerabilities.
Smart Contract Testing Environments
Local Blockchain Environment
This is one way to test your smart contracts without having to worry about deploying them onto a public blockchain. It involves creating a copy (or "fork") of a blockchain locally so developers can deploy and experiment with their contracts locally without risking real funds on mainnet or needing to deploy and test on a testnet blockchain. In local blockchain development, you can use both automated and manual testing methods.
Testnet Blockchain Environment
Testnets are separate blockchain environments that operate just like mainnet but are meant for a testing environment. Some benefits of using a testnet as compared to locally include, more realistic interactions since you are conducting activity on a public blockchain. This may come at the downside of having to maintain testnet tokens to test with or longer testing cycles (since testnet blockchains generally slower than your local one).
Smart Contract Testing
When testing smart contracts using Foundry or any other testing framework, it is essential to ensure consistent behavior and security of your smart contracts. As you know, deploying a smart contract on the blockchain is immutable. Therefore, you'll need to be confident your smart contract is free from vulnerabilities, or you won't be able to change the code (unless you re-deploy or have an upgradeable contract). Additionally, since our smart contracts will be public and decentralized (as it has no admin privileges), we need to be confident the functionality works as expected, or it can lead to bad actors taking advantage of the smart contracts.
Types of Automated Testing
Automated testing refers to using tools that will automatically check and evaluate the functionalities of your smart contract. These automated tests are built using scripts written in languages like Solidity, JavaScript, and Python. The result of using a script to test enables us to run tests as often as we'd like, save time, minimize human error (compared to manual testing), and carry out tasks faster than we would manually.
Unit Testing
Another form of automated testing refers to Unit testing. This testing refers to the practice of testing individual sections of your code to ensure they work correctly. For example, in a smart contract, you might test the functions that handle exchanging tokens to ensure they work as expected. This will help catch errors early in the development process.
Positive and Negative Tests
- Positive Tests: Things that the code should handle. Double-checking the start/end state changes from each test. For example, making sure that liquidity can be added to the exchange pool and that liquidity tokens are minted correctly.
- Negative Tests: Things that the code should not handle. For example, creating an exchange for a token that already has an associated exchange should fail.
Other Testing Methods
- Fuzz Testing: Fuzz testing involves throwing a lot of random data at your software to see how it reacts. It's a way to uncover unexpected errors or vulnerabilities in your code.
- Invariant Testing: Invariant testing checks for things in your code that should always be true. For example, in a smart contract, you might have an invariant that the total amount of tokens should never decrease. Invariant testing ensures that your code always adheres to these rules.
- Differential Testing: Differential testing compares the outcomes of two different systems or versions of code that are supposed to do the same thing (we won't use this, but it's good to know).
Manual Testing
After completing automated tests, manual testing should be next in the development cycle. This type of testing determines if the smart contract functions per the technical specifications of the "product" (in our case, the DEX). This type of testing is extremely valuable when you are testing the smart contracts through your frontend to make sure the DEX and frontend work as expected.
Audits & Bug Bounties
To further increase the chance of finding an issue in your smart contracts, you can get an independent audit by a reputable private third party or start a bug bounty campaign. Audits usually include automated testing and a full analysis of your codebase. Audits are most useful for finding security issues and poor development standards.
Alternatively, you can start a bug bounty campaign and allow users from the community to submit feedback and win a reward if any vulnerabilities or other weak security standards are found.
Compiling the DEX Contracts
Now that we have a basic understanding of smart contract testing standards and the different test types, let us move on to compiling and testing our DEX smart contracts. In your main directory (e.g., defi_dex) within your terminal window, run the following forge command in your terminal to compile the smart contracts.
forge build
You should see an output like this:
[⠆] Compiling...
[⠒] Compiling 23 files with 0.8.15
[⠰] Solc 0.8.15 finished in 2.80s
Compiler run successful
Compiling our contracts converts them to bytecode, which is what the EVM can understand.
Given that your compilation was successful, let's now move on to testing.
Building Tests for the Factory Contract
In your test folder, create another file called Factory.t.sol and input the following code:
// SPDX-License-Identifier: MIT
pragma solidity 0.8.20;

import "forge-std/Test.sol";
import "../src/Factory.sol";
import "../src/Exchange.sol";
import "../src/ERC20.sol";

contract FactoryTest is Test {
    Factory public factory;
    MyToken public token;

    address tokenOwner = makeAddr("owner");

    function setUp() public {
        token = new MyToken(tokenOwner);
        factory = new Factory();
    }

    function testCreateNewExchange() public {
        address tokenExchangeAddress = factory.createNewExchange(address(token));
        assertEq(factory.getExchange(address(token)), tokenExchangeAddress, "Exchange address does not match");
        assertTrue(tokenExchangeAddress != address(0), "Exchange address should not be 0x0");
    }

    function testFailCreateExchangeForExistingToken() public {
        factory.createNewExchange(address(token));
        factory.createNewExchange(address(token));
    }
}
Remember to save the file! Let's now recap the code.
The code above uses a test suite from Foundry to evaluate the functionality of the Factory contract. This test suite, named FactoryTest, inherits from Foundry's Test contract and has two primary functions. The createFactoryandToken function initializes new instances of the Factory and Token contracts and then creates an Exchange for the deployed token. The createExchange function performs several assertions to check if the properties of the created Exchange and Token are correct, such as name, symbol, total supply, and reserves.
Building Tests for the Exchange Contract
The Exchange contract has a lot of logic, so we won't be building out tests for every function but for the main ones that users use to add and remove liquidity, get quote prices for swaps and swap tokens.
In your test folder, create another file called Exchange.t.sol and input the following code:
// SPDX-License-Identifier: MIT
pragma solidity ^0.8.0;

import "../src/Exchange.sol";
import "../src/ERC20.sol";
import "forge-std/Test.sol";


contract ExchangeTest is Test {
    Exchange exchange;
    MyToken token;
    address tokenAddress;

    address owner = makeAddr("alice");

    function setUp() public {
        vm.prank(owner);
        token = new MyToken(owner);
        tokenAddress = address(token);
        exchange = new Exchange(tokenAddress);
    }

    function testAddLiquidity() public {
        vm.prank(owner);
        vm.deal(owner, 10 ether);

        token.mint(owner, 10000 * 10 ** 18);

        vm.prank(owner);
        token.approve(address(exchange), 10000 * 10 ** 18);

        vm.prank(owner);
        uint256 tokensToAdd = 5000 * 10 ** 18;
        uint256 ethToAdd = 10 ether;
        uint256 liquidity = exchange.addLiquidity{value: ethToAdd}(tokensToAdd);
        console.log(liquidity);
        assertGt(liquidity, 0, "Liquidity tokens not minted");

        uint256 contractTokenBalance = token.balanceOf(address(exchange));
        assertEq(contractTokenBalance, tokensToAdd, "Exchange token balance incorrect");

        assertEq(address(exchange).balance, ethToAdd, "Exchange ETH balance incorrect");
    }

    function testRemoveLiquidity() public {
        vm.prank(owner);
        vm.deal(owner, 10 ether);
        token.mint(owner, 10000 * 10 ** 18);
        vm.prank(owner);
        token.approve(address(exchange), 10000 * 10 ** 18);
        vm.prank(owner);
        uint256 tokensToAdd = 5000 * 10 ** 18;
        uint256 ethToAdd = 10 ether;
        uint256 liquidity = exchange.addLiquidity{value: ethToAdd}(tokensToAdd);

        uint256 totalLiquidityTokens = liquidity;

        vm.prank(owner);
        (uint ethAmount, uint tokenAmount) = exchange.removeLiquidity(totalLiquidityTokens);
        console.log(ethAmount, tokenAmount);

        assertTrue(ethAmount > 0 && tokenAmount > 0, "ETH and Tokens should be returned");
        assertEq(ethAmount, ethToAdd, "Incorrect ETH amount returned");
        assertEq(tokenAmount, tokensToAdd, "Incorrect Token amount returned");
    }


    function testSwapEthForTokens() public {
        vm.prank(owner);
        vm.deal(owner, 10 ether);
        token.mint(owner, 10000 ether);
        vm.prank(owner);
        token.approve(address(exchange), 10000 ether);
        vm.prank(owner);
        exchange.addLiquidity{value: 10 ether}(10000 ether);

        uint ethToSwap = 1 ether;
        uint minTokens = 1;
        address recipient = makeAddr("bob");
        vm.deal(recipient, ethToSwap);
        vm.prank(recipient);
        uint tokensReceived = exchange.swapEthForTokens{value: ethToSwap}(minTokens, recipient);

        assertTrue(tokensReceived >= minTokens, "Received less tokens than expected");
    }

    function testTokenForEthSwap() public {
        vm.prank(owner);
        vm.deal(owner, 10 ether);
        token.mint(owner, 10000 ether);
        vm.prank(owner);
        token.approve(address(exchange), 10000 ether);
        vm.prank(owner);
        exchange.addLiquidity{value: 10 ether}(10000 ether);

        address bob = makeAddr("bob");
        vm.prank(owner);
        token.mint(bob, 1000 ether);
        vm.prank(bob);
        token.approve(address(exchange), 1000 ether);

        uint tokensToSwap = 500 ether;
        uint minEth = 1;
        vm.prank(bob);
        uint ethReceived = exchange.tokenForEthSwap(tokensToSwap, minEth);

        assertTrue(ethReceived >= minEth, "Received less ETH than expected");
    }
}
Remember to save the file! Let's now recap the code.
The code above the other smart contract, Factory to create an exchange and a demo ERC20 token called Example ERC20. The test contract sets up the initial conditions by creating these contracts and funding two pseudo-users, Alice and Bob, with 10 Ether each. Various functions are provided to test the behavior of the exchange, such as testSetUp() for verifying the initial state of the exchange and token, testGetAmount() for confirming amount calculations, testAddLiquidity() for testing the liquidity provision feature, and testTokenForEthSwap() and testEthForTokenSwap() for simulating token to Ether and Ether to token swaps. We use assertions in the contract to confirm that all the operations result in the expected state changes.
Running Tests & Analyzing Results
With our tests created, let's now test them out. Run the following forge terminal command:
forge test
You will see an output similiar to the following:
Ran 2 tests for test/Factory.t.sol:FactoryTest
[PASS] testCreateNewExchange() (gas: 1369157)
[PASS] testFailCreateExchangeForExistingToken() (gas: 1366113)
Suite result: ok. 2 passed; 0 failed; 0 skipped; finished in 4.44ms (847.17µs CPU time)

Ran 4 tests for test/Exchange.t.sol:ExchangeTest
[PASS] testAddLiquidity() (gas: 184334)
[PASS] testRemoveLiquidity() (gas: 163064)
[PASS] testSwapEthForTokens() (gas: 178185)
[PASS] testTokenForEthSwap() (gas: 233829)
Suite result: ok. 4 passed; 0 failed; 0 skipped; finished in 4.54ms (1.76ms CPU time)

Ran 2 tests for test/Counter.t.sol:CounterTest
[PASS] testFuzz_SetNumber(uint256) (runs: 256, μ: 30765, ~: 31310)
[PASS] test_Increment() (gas: 31325)
Suite result: ok. 2 passed; 0 failed; 0 skipped; finished in 14.29ms (10.37ms CPU time)

Ran 3 test suites in 181.84ms (23.28ms CPU time): 8 tests passed, 0 failed, 0 skipped (8 total tests)
Notice that after the process has been completed, you will see two new folders named out and cache. The out directory contains the artifacts of your smart contract, including the ABI, while Forge utilizes the cache folder to only recompile the necessary components.
Although we have finished testing our DEX contracts, we still need to deploy them onto a blockchain. In the coming sections, we'll build out a frontend and show you how to deploy your smart contracts onto a testnet blockchain before deploying to production (mainnet).
Deploying to Sepolia Testnet
With our automated tests verified, we will now go through the process of deploying the set of contracts to a testnet such as Sepolia testnet. Before diving into the deployment process, we must fund our wallet and configure our deployment settings in Foundry. Deploying smart contracts with Foundry takes a single command (i.e., forge). Still, you will need to include an RPC URL, a funded wallet (i.e., private key), and constructor arguments (if applicable).
Create a Quicknode Sepolia Endpoint
In order to communicate with the Ethereum Sepolia network, we'll need access to a Ethereum node. You're welcome to use public nodes or deploy and manage your own infrastructure; however, if you'd like 8x faster response times, you can leave the heavy lifting to Quicknode.
Navigate to your Quicknode endpoints page, then click Create Endpoint and select the Ethereum Sepolia testnet.
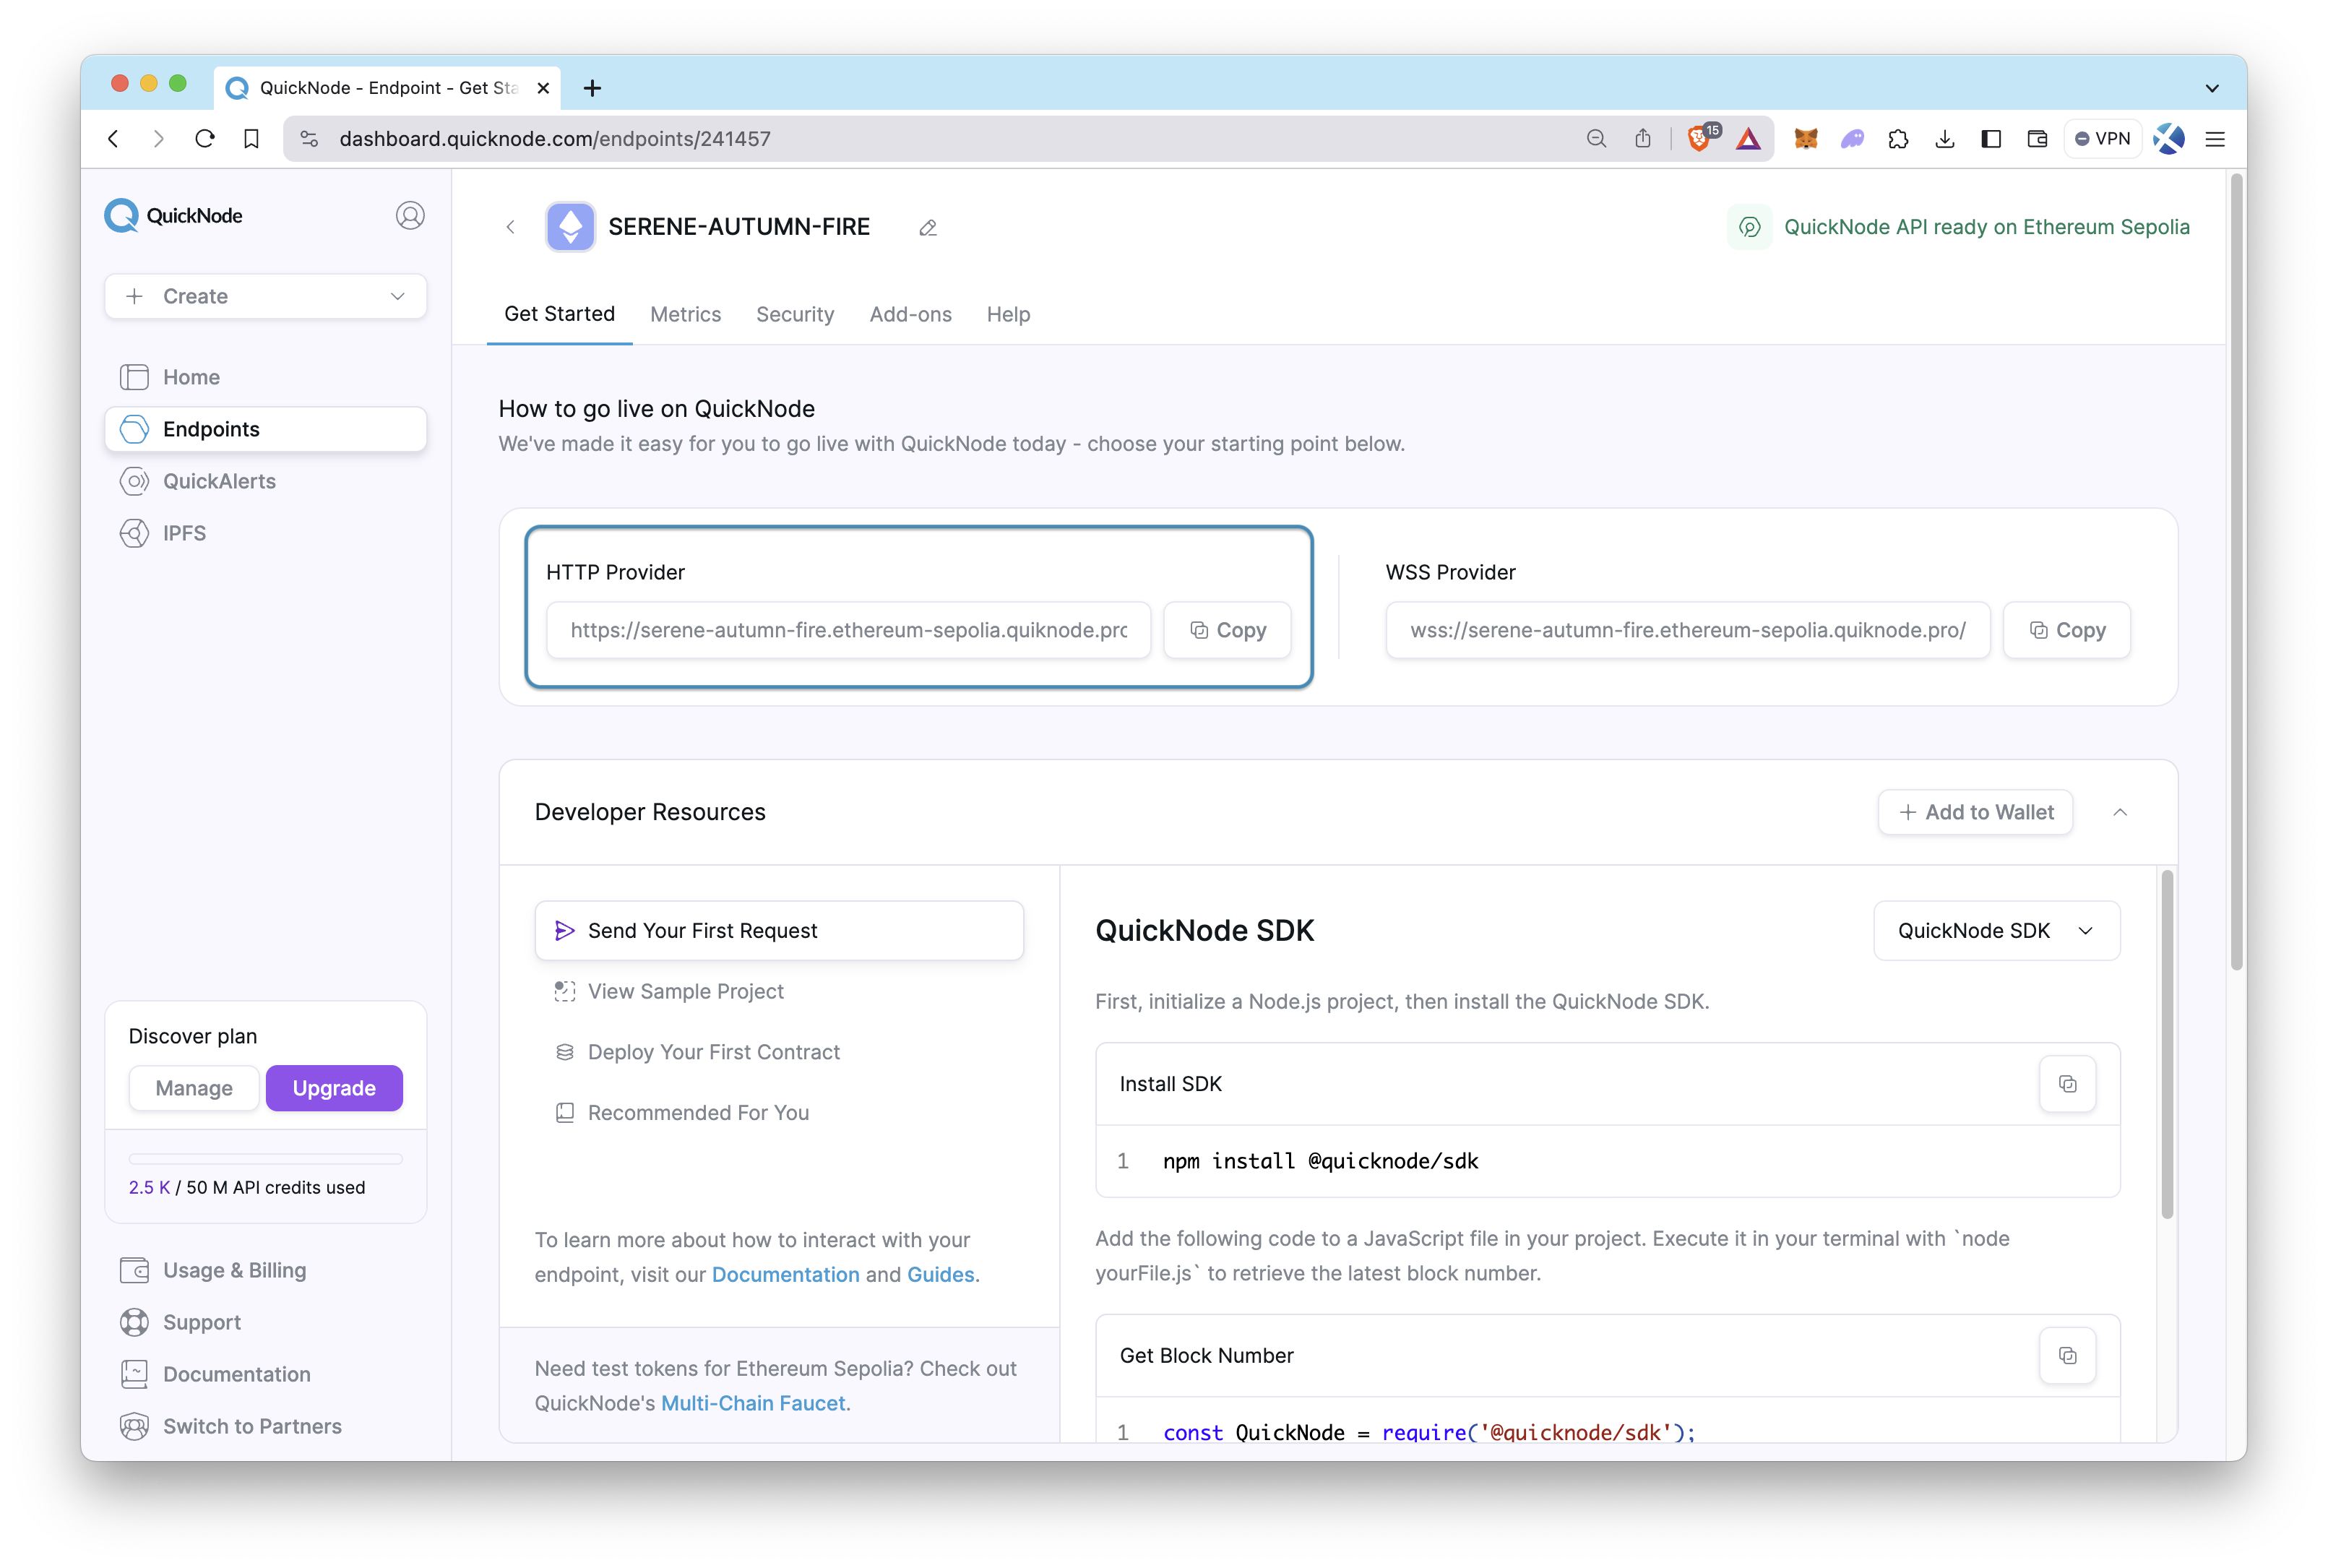
Quicknode provides both a HTTP and WSS URL we can use to communicate with the Sepolia testnet. Keep the HTTP Provider URL handy as we'll need it in the following section.
Fund Your Testnet Wallet
To deploy and interact with smart contracts on a testnet, you'll need some testnet tokens to pay for gas fees. Luckily, you can use the Quicknode Multi-Chain Faucet to get free testnet tokens.
Connect or paste your wallet address and select the Ethereum Sepolia testnet. You can also tweet for a bonus!
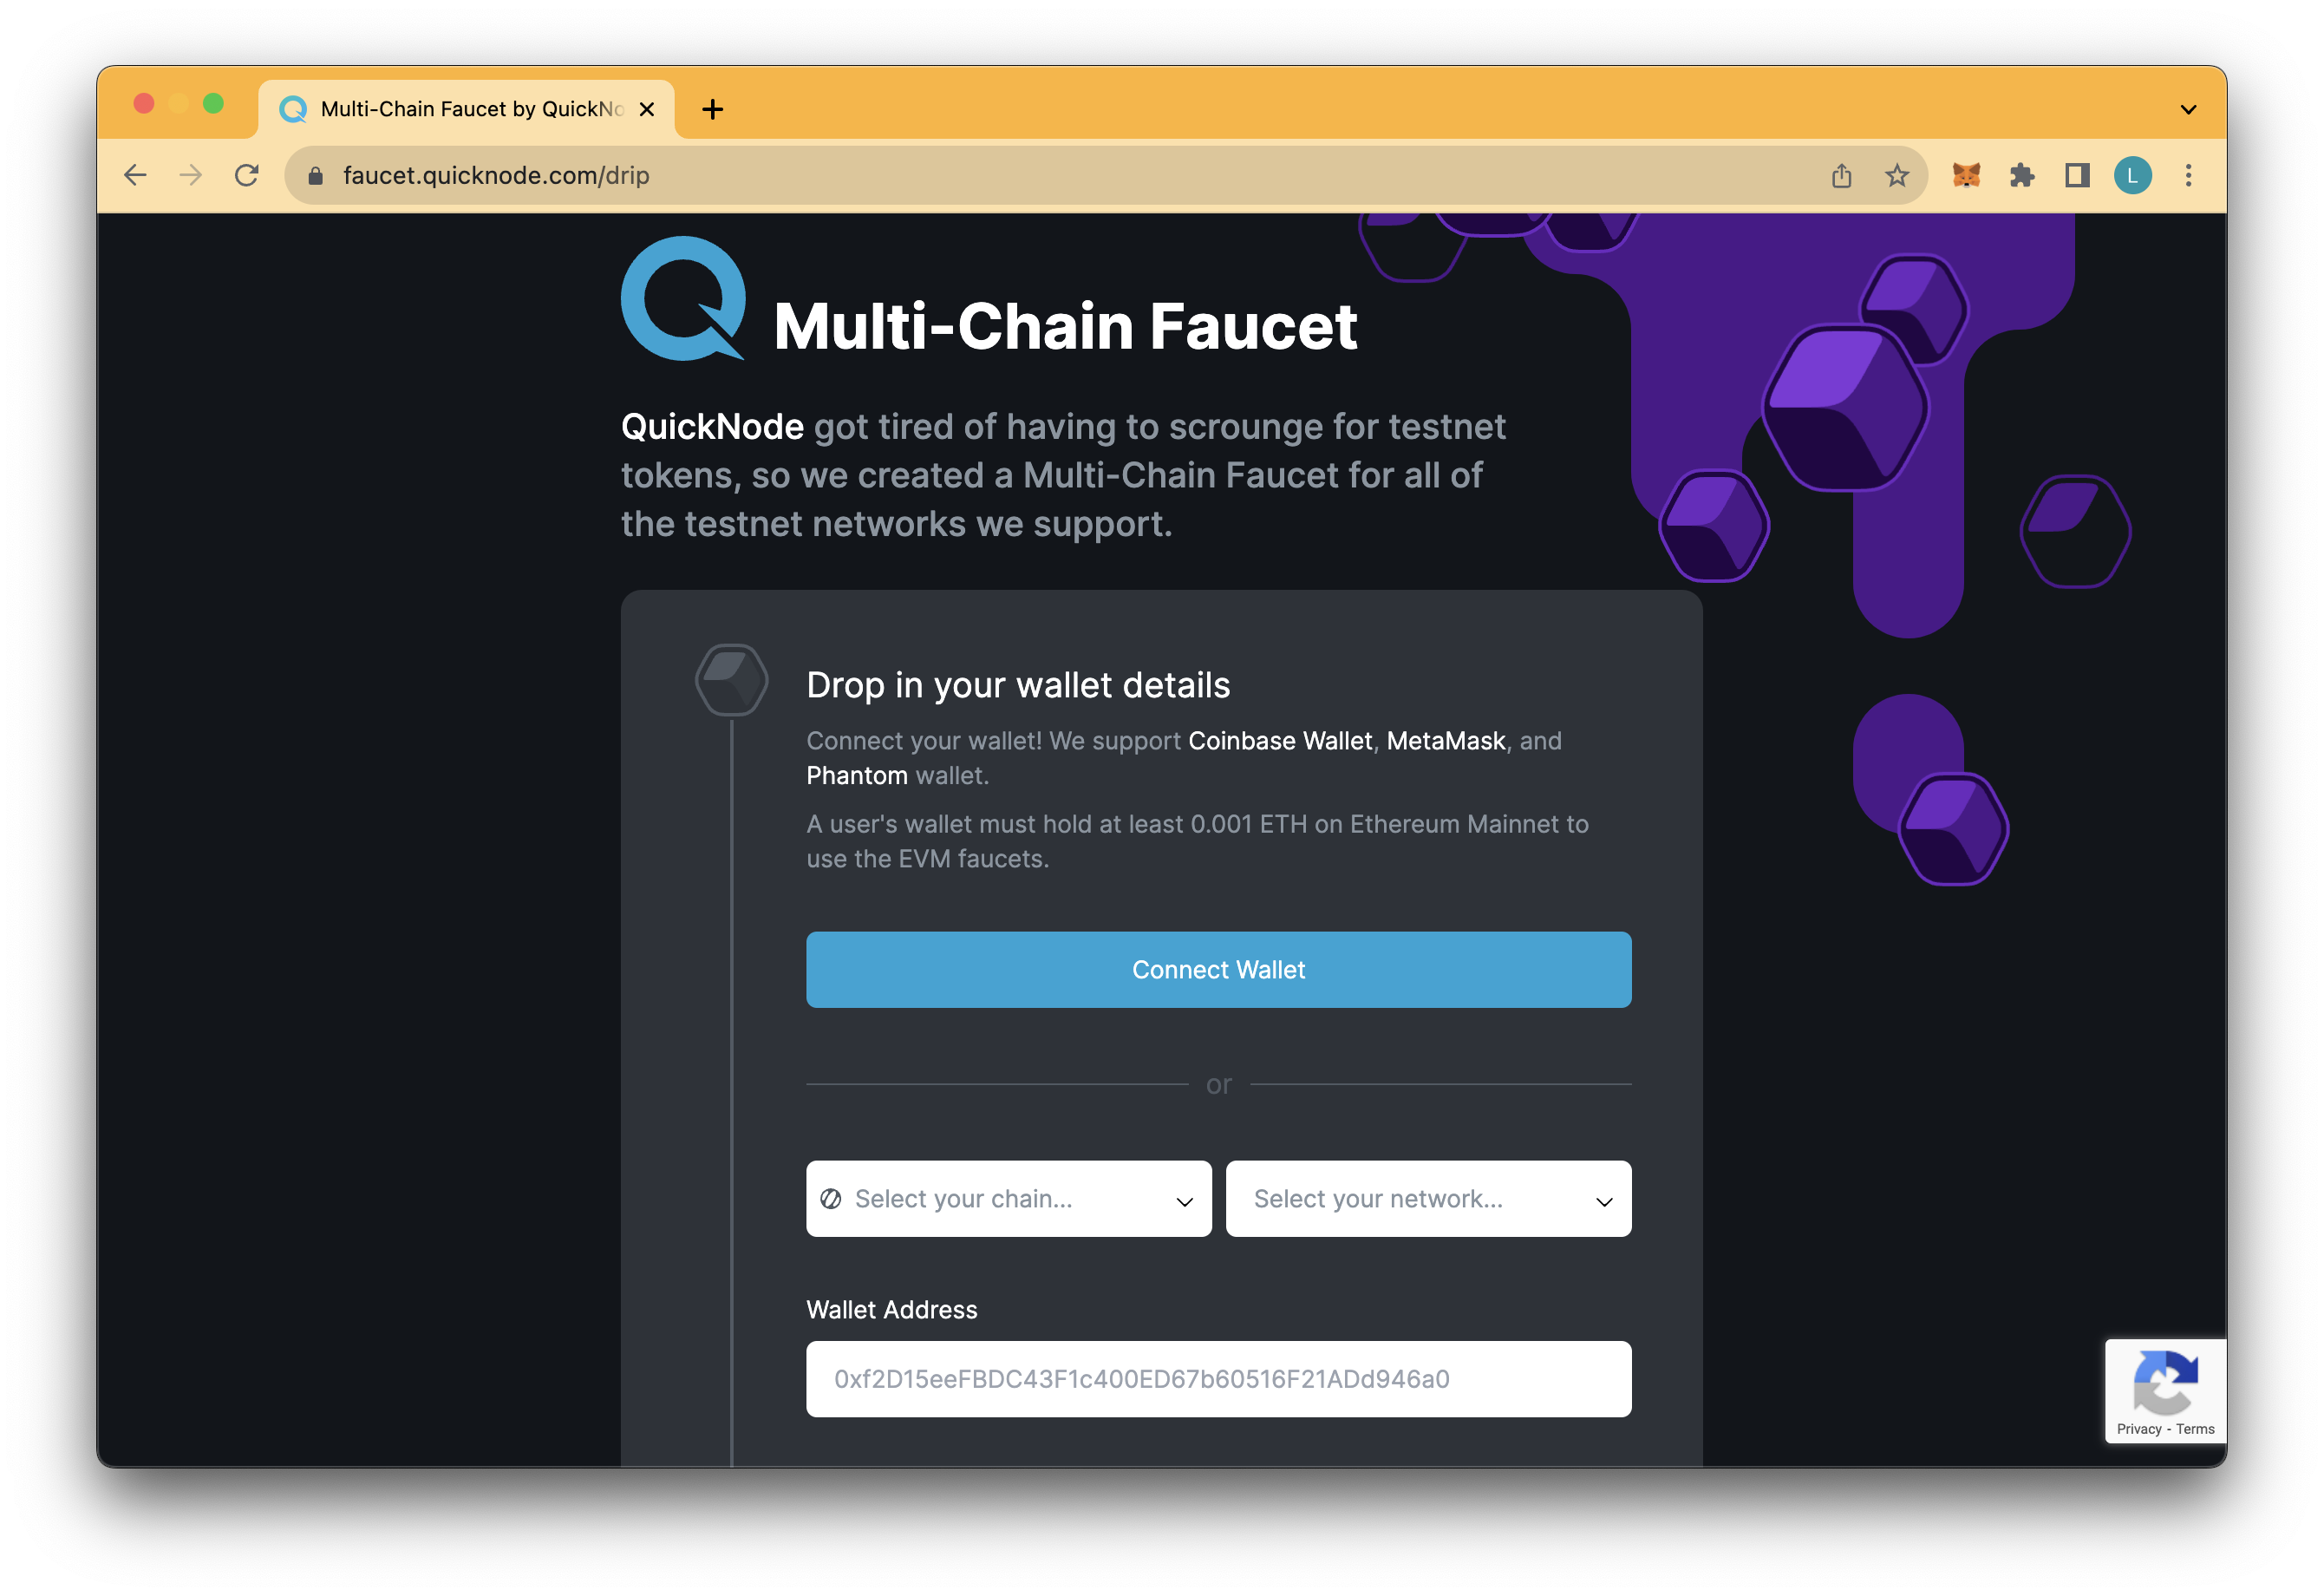
Note: you will need at least 0.001 ETH on Ethereum Mainnet to use the EVM faucets.
Deploying the DEX Contracts
To deploy your Factory contract onto the Sepolia testnet, run the following forge create command in your terminal within the defi_dex directory.
You'll need to replace the QUICKNODE_HTTP_URL with your actual Quicknode endpoint. Also, replace the YOUR_PRIVATE_KEY placeholder with your actual private key.
forge create --rpc-url QUICKNODE_HTTP_URL \
--private-key YOUR_PRIVATE_KEY \
src/Factory.sol:Factory
It may take a few minutes, but once the contract is deployed, you should see the print statement in the terminal displaying the deployer address, deployed smart contract address, and transaction hash.
Similar to the following output:
No files changed, compilation skipped
Deployer: 0x452162Cc0b1ed46680A6dAe7657490b2f1G7531
Deployed to: 0x30cbGe1d3655d087405D8909741353vdd53A4a437
Transaction hash: 0x7682a3cd7c3b2459dgc94546b5ee334818012df84461f7e0bad99f7a602vc
Congrats! You just deployed your Factory contract to a public testnet! Check the block explorer to confirm your Factory contract exists. Once you confirmed it does, move onto the next section for verifying the smart contract!
Verifying Source Code
In this section, we'll walk you through how you can verify your Factory smart contract using Foundry. Later on, you can use these same practices to verify the other contracts (e.g. Exchange & ERC20)
Foundry makes it easy to verify your smart contracts. All you have to run is the forge-verify-contract along with the contract address, contract path (in our directory), and your Etherscan API key. If you still need to get one, create one now.
Then, in your main directory within defi_dex, run the following command to verify the Factory contract:
forge verify-contract \
--etherscan-api-key <your_etherscan_api_key> \
<the_contract_address> \
--chain-id 11155111 \
src/Factory.sol:Factory
If deploying on another network than Sepolia, you can update the chain ID in the command above.
You should see an output similiar to:
Start verifying contract `0xA8dFE14Fd3e1BcA4CFB654c8Aede16Fa7A28e27d` deployed on sepolia
...
...
Thats it! Your Factory contract should now be verified. Navigate back to the block explorer and check the Code tab (it should have a checkmark if its verified) to see if your contract code is now public.
Deploy ERC-20 Token
In order to test our DEX smart contract, we'll need a test token. For this, we'll deploy the MyToken contract we created earlier. Complete the command below by filling in the proper values then run the command in your terminal to deploy the ERC-20 token contract:
forge create src/ERC20.sol:MyToken \
  --rpc-url QUICKNODE_HTTP_URL \
  --private-key YOUR_PRIVATE_KEY \
  --constructor-args YOUR_WALLET_ADDRESS
You'll see an output like:
Deployer: 0xe0f2b924422909626D539b0FBd96239B31767400
Deployed to: 0x821F5C6Fe6b1764Cc2c116BFD481A8df2171bCC0
Transaction hash: 0x531100f7f83fd76eb2f904604ec8ab25a14cbda991038026ffd758c0fdf15f78
Wrap Up & What's Next
Congratulations on completing lesson 4, where we delved into best practices for smart contract development testing methodologies and finally deployed our DEX contracts onto the Sepolia testnet using Foundry. Pat yourself on the back. You have laid down a robust foundation, ensuring that the backend of your DEX is secure and functional.
Next lesson, get ready to make your DEX user-friendly as we switch gears to frontend development. We'll be setting up a React application that will interact with your smart contracts, creating a complete DEX experience. You'll learn how to connect a wallet, interact with the blockchain, and test the whole setup to ensure seamless user interactions. Stay tuned!