12 min read
Introduction
In the last lesson, we learned about connecting with a Solana cluster using the Solana CLI. In this lesson, we will dive into Solana-Web3.js to read account and transaction data and send transactions to the Solana blockchain.
Solana-Web3.js
Solana-Web3.js is the Solana JavaScript API. It is a collection of libraries that allow you to interact with the Solana blockchain from your JavaScript or TypeScript application. It is a wrapper around the Solana JSON RPC API and provides a convenient interface for interacting with the Solana blockchain.
Set Up a Demo Project
Let's start by opening a code editor of your choice. In your terminal, let's create a new directory and initialize a new project (I will be using yarn in this course, but feel free to use npm if you prefer):
mkdir solana-basics && mkdir solana-basics/week-2 && cd solana-basics/week-2
yarn init -y
echo > app.ts
Note we will be using TypeScript in this course--if you do not already have it installed, we recommend a global installation. In a terminal window, enter:
npm install -g typescript
Let's also create a tsconfig.json for our project. In your terminal, run:
tsc --init
This will create a tsconfig.json file in your project directory. We will use the default values for now.
Finally, we will need to install Solana-Web3.js. In your terminal, run:
yarn add @solana/web3.js@1
After installation, open app.ts to start writing some code!
Establish a Connection
Establishing a connection to a Solana cluster in JavaScript requires the use of the Connection class. The Connection class is a wrapper around the Solana JSON RPC API, providing a convenient interface for interacting with Solana. Inside app.ts, add the following code:
import { Connection } from "@solana/web3.js";

const quickNodeEndpoint = 'https://example.solana-devnet.quiknode.pro/123/' // 👈 REPLACE THIS WITH YOUR ENDPOINT
const connection = new Connection(quickNodeEndpoint);
Make sure to replace the endpoint with your own (the same one we used in the CLI that we got from our Quicknode Dashboard).
We are importing the Connection class from the @solana/web3.js library and creating a new instance of the class, passing in our endpoint. That's it! We now have a connection to the Solana devnet cluster. If you enter on the following line, connection., you should see a drop-down list of methods available on the connection:
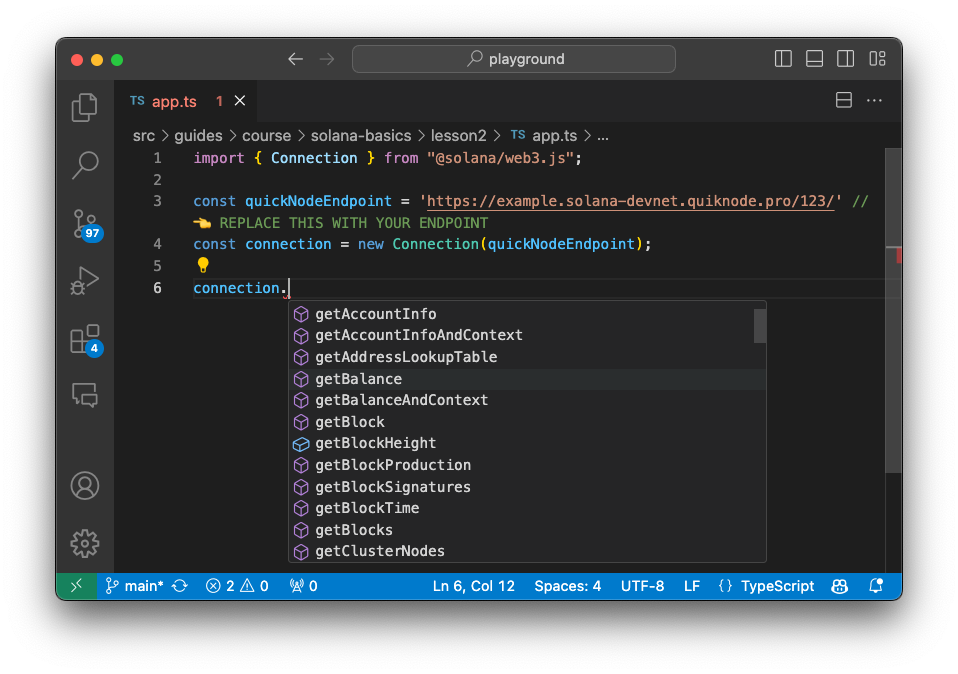
You can also see these methods in node_modules/@solana/web3.js/lib/index.d.ts by CTRL/CMD + Click on the Connection class in your code editor.
For a detailed list of all available methods and their parameters, you can check out the Quicknode Solana Docs.
Let's add a simple script to check that our connection is working. Add the following code to app.ts:
connection.getVersion().then(version => {
    console.log('Connection to cluster established:', quickNodeEndpoint);
    console.log('Version:', version);
}).catch(error => console.error(error));
Run your code by entering:
ts-node app
You should see something like this in your terminal:
Connection to cluster established: https://example.solana-devnet.quiknode.pro/123/
Version: { 'feature-set': 4033350765, 'solana-core': '1.16.18' }
Nice job! You have successfully established a connection to the Solana devnet cluster using Solana-Web3.js. You can go ahead and delete your getVersion code (but keep your connection declaration). We will not need it for the rest of the lesson.
Get Account Info and Balance
Suppose you want to know what data or metadata is stored in a Solana account. You can use the getAccountInfo method to fetch the account data. Before we do that, let's discuss how Solana accounts are identified. Typically, the API utilizes the PublicKey class to identify accounts. The PublicKey class is a wrapper around a 32-byte array that represents a public key on Solana (ed25519 public key as buffer or base-58 encoded string). You can create a new PublicKey by using a string representation of the public key (address). Let's do this just below our connection declaration on line 5 (make sure to import the PublicKey class on line 1):
import { Connection, PublicKey } from "@solana/web3.js";

const quickNodeEndpoint = 'https://example.solana-devnet.quiknode.pro/123/' // 👈 REPLACE THIS WITH YOUR ENDPOINT
const connection = new Connection(quickNodeEndpoint);
const myAddress = 'YOUR_WALLET_ADDRESS'; // 👈 REPLACE THIS WITH YOUR ADDRESS
const myPublicKey = new PublicKey(myAddress);

console.log(`Address: `, myPublicKey.toBase58());
Replace YOUR_WALLET_ADDRESS with your wallet address. Remember, you can get your wallet address by running solana address in your terminal. Note that we use the toBase58 method to convert the PublicKey to a string representation of the public key (Base58 is an encoding scheme used by Solana that uses 58 characters: numbers and letters, excluding 0, O, I, and l to avoid confusion). There are alternative methods to render the PublicKey as a buffer, byte array, etc. Typically, toBase58 or toString is used for logging or displaying the address. You can see the options by entering myPublicKey. in your code editor:
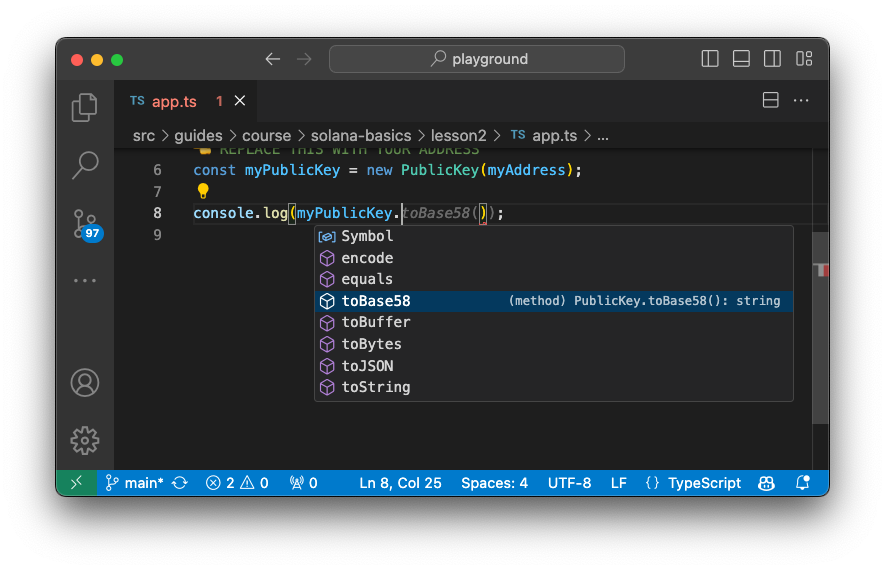
Run your code, and you should see your address logged to the terminal:
ts-node app
Address:  YOUR_WALLET_ADDRESS
We can now get information about that PublicKey. After your log, add the following code:
connection.getAccountInfo(myPublicKey).then((info) => {
    console.log(`Account Info: \n`, info);
});
We are calling the getAccountInfo RPC method and passing in our PublicKey. This method returns an AccountInfo object, which contains the account metadata we learned about in the last lesson. Run your code by entering ts-node app in your terminal, and you should see something like this:
 {
  data: <Buffer >,
  executable: false,
  lamports: 5733961560,
  owner: PublicKey [PublicKey(11111111111111111111111111111111)] {
    _bn: <BN: 0>
  },
  rentEpoch: 0,
  space: 0
}
You can see that the account:
- has no additional data stored in it
- is not an executable account, meaning it is not a Program
- has a balance of 5.73396156 SOL (note: 1 SOL = 1,000,000,000 lamports)
- is owned by the System Program
- has no rent due
- has no space allocated
This is normal for a typical wallet, but you can use this command to query any account on the Solana blockchain (which may yield some different attributes). If inclined, query your wallet address in the Solana Explorer and compare the results!
Though our query did get the SOL balance of our account, there is an alternative method, getBalance, to get the balance of an account. Let's add the following code to app.ts:
//👇add LAMPORTS_PER_SOL to your imports
import { Connection, PublicKey, LAMPORTS_PER_SOL } from "@solana/web3.js";

connection.getBalance(myPublicKey).then((balance) => {
    console.log(`Balance: ${balance / LAMPORTS_PER_SOL} SOL`);
});
We are calling the getBalance RPC method and passing it in our PublicKey. This method returns the balance of the account in lamports. We are dividing the balance by LAMPORTS_PER_SOL (a constant defined in the Solana-Web3.js library) to get the balance in SOL. Run your code by entering ts-node app in your terminal, and you should see the balance of your account in SOL.
Send a Transaction
Let's create a function that will allow us to mimic what we did with the CLI: send 0.1 SOL to another account. First, let's update our import statement--we will need a few more components from the Solana-Web3.js library:
import {
    Connection,
    PublicKey,
    LAMPORTS_PER_SOL,
    Transaction,
    SystemProgram,
    TransactionInstruction,
    Keypair,
    sendAndConfirmTransaction
} from "@solana/web3.js";
And then add the following code to app.ts (you can delete the getAccountInfo and getBalance code if you want):
async function sendTransaction() {
    // Define Keys


    // Create Instruction


    // Create and Prepare Transaction


    // Send and Confirm Transaction

}
sendTransaction().then(() => process.exit());
We are just defining a new function that will send a transaction. We will fill in the details in a moment. We are also calling the function and then exiting the process.
Define Keys
Let's start by defining the keys we will need for our transaction. Unlike our previous examples, we will need more than a PublicKey for this task. This is because we need to sign the transaction with our private key. Solana-Web3.js has a Keypair class that allows us to generate a new random keypair (which we will use for our receiver) and to derive one from a private key (which we will use for our sender). Let's add the following code to app.ts:
    // Define Keys
    const receiver = Keypair.generate();
    console.log(`Receiver Address: ${receiver.publicKey.toBase58()}`);
    // 👇 Replace the secret with your own
    const secret = [0, 0, 0, 0];
    const sender = Keypair.fromSecretKey(new Uint8Array(secret));
Make sure to replace the secret array with your own private key that we generated with the solana-keygen command in the CLI.
- First, we create a new random keypair for our receiver. We will only need their public key--we log that to the console so we can verify the transaction later.
- Next, we create a new Keypair for our sender. We are using the
fromSecretKeymethod and passing in a Uint8Array of our private key.
Now, let's use these keys to create our instruction.
Create Instruction
We will be using the SystemProgram class to create our instruction. The SystemProgram class is a wrapper around the System Program, a built-in program on Solana that allows you to create new accounts, transfer SOL, and more. We will be using the transfer method to create our instruction. Let's add the following code to app.ts:
    // Create Instruction
    const ix: TransactionInstruction = SystemProgram.transfer({
        fromPubkey: sender.publicKey,
        toPubkey: receiver.publicKey,
        lamports: LAMPORTS_PER_SOL / 10
    })
We are defining a new constant, ix, a TransactionInstruction (remember, Instructions are the building blocks for transactions that tell the runtime what to do). We are using the transfer method of the SystemProgram class to create our instruction. This method takes an object with the following properties:
fromPubkey: The public key of the sendertoPubkey: The public key of the receiverlamports: The number of lamports to transfer (we are using theLAMPORTS_PER_SOLconstant and dividing by 10 to send 0.1 SOL)
Under the hood, the transfer method is building an instruction that contains the three elements required of any instruction:
programId: The program ID (in this case, the System Program ID)data: The encoded instruction data as a Buffer (in this case, the discriminator pointing to the Transfer instruction and the transfer amount). You can see the source code of the method on the Solana-Web3.js GitHub.keys: An array of AccountMetas that specify the accounts to interact with and their permissions, e.g.:
        keys: [
            { pubkey: myPublicKey, isSigner: true, isWritable: true },
            { pubkey: receiver.publicKey, isSigner: false, isWritable: true },
        ],
Create and Prepare Transaction
For this example, the instruction we just created is all we will need, but we still need to package it in a Transaction that can be sent to the Solana cluster. To do this, we can use the .add() method on the Transaction class. Let's add the following code to app.ts:
    // Create and Prepare Transaction
    const transaction = new Transaction().add(ix);
    const { blockhash } = await connection.getLatestBlockhash();
    transaction.feePayer = sender.publicKey;
    transaction.recentBlockhash = blockhash;
    transaction.sign(sender);
Let's break this down (pay attention, you will do this a lot in Solana development):
- First, we create a new Transaction and add our instruction,
ix, to it using the.add()method. - Next, we fetch the latest blockhash from the cluster using the
getLatestBlockhashmethod. We are using theawaitkeyword because this method returns a Promise. This is an essential step because the Solana runtime invalidates stale transactions to increase performance. - Next, we set the
feePayerproperty of our transaction to the public key of our sender. This is the account that will pay the transaction fee. - Next, we set the
recentBlockhashproperty of our transaction to the blockhash we fetched from the cluster. - Finally, we sign the transaction with our sender's private key.
Send and Confirm Transaction
Now, you should have a Transaction that is ready to be sent to the Solana cluster. We can do this by using the sendAndConfirmTransaction method (there are a few other methods on the Connection class for sending transactions, but this one is pretty handy and confirms the transaction's success). Let's add the following code to app.ts:
    // Send and Confirm Transaction
    const signature = await sendAndConfirmTransaction(connection, transaction, [sender]);
    console.log(`Tx: https://explorer.solana.com/tx/${signature}?cluster=devnet`);
We are calling the sendAndConfirmTransaction method and passing in the following parameters:
connection: The connection to the Solana clustertransaction: The transaction we just created[sender]: Note that we are usingsenderand notsender.publicKey. This is because thesendAndConfirmTransactionmethod expects an array of Signers (an interface that includes thepublicKeyandsecretKeyproperties). We are passing in an array with a single Signer (our sender). More complex transactions may require multiple signers. The method returns a transaction signature that we can use to verify the transaction on the Solana Explorer. We will log a link to the transaction in the console.
Run the Code
You should now have a complete script that looks something like this:
import {
    Connection,
    PublicKey,
    LAMPORTS_PER_SOL,
    Transaction,
    SystemProgram,
    TransactionInstruction,
    Keypair,
    sendAndConfirmTransaction
} from "@solana/web3.js";

const quickNodeEndpoint = 'https://example.solana-devnet.quiknode.pro/123/' // 👈 REPLACE THIS WITH YOUR ENDPOINT
const connection = new Connection(quickNodeEndpoint);

async function sendTransaction() {
    // Define Keys
    const receiver = Keypair.generate();
    // 👇 Replace the secret with your own
    const secret = [0, 0, 0, 0];
    const sender = Keypair.fromSecretKey(new Uint8Array(secret));
    console.log(`Receiver Address: ${receiver.publicKey.toBase58()}`);

    // Create Instruction
    const ix: TransactionInstruction = SystemProgram.transfer({
        fromPubkey: sender.publicKey,
        toPubkey: receiver.publicKey,
        lamports: LAMPORTS_PER_SOL / 10
    })

    // Create and Prepare Transaction
    const transaction = new Transaction().add(ix);
    const { blockhash } = await connection.getLatestBlockhash();
    transaction.feePayer = sender.publicKey;
    transaction.recentBlockhash = blockhash;
    transaction.sign(sender);

    // Send and Confirm Transaction
    const signature = await sendAndConfirmTransaction(connection, transaction, [sender]);
    console.log(`Tx: https://explorer.solana.com/tx/${signature}?cluster=devnet`);
}
sendTransaction().then(() => process.exit());
Go ahead and run your code. In your terminal, enter:
ts-node app
Do you see a link to your transaction in Solana Explorer? It should look something like this:
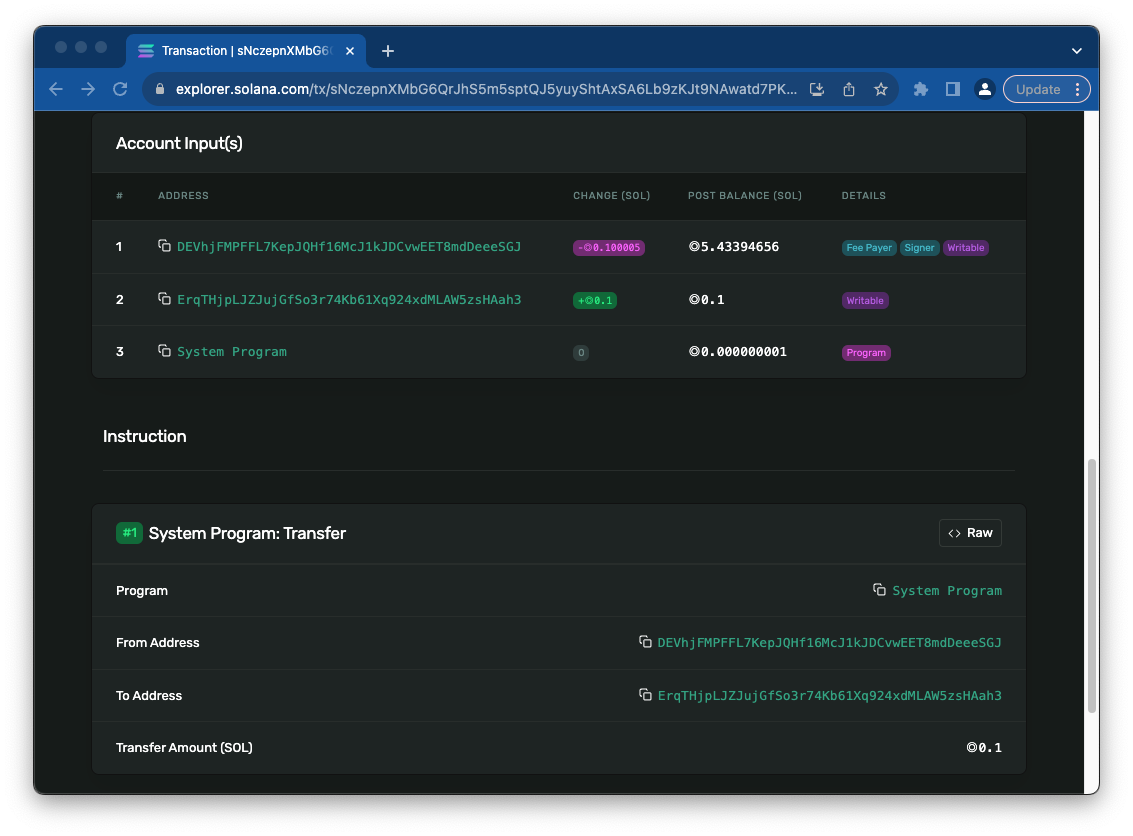
Great job! You have successfully sent a transaction to the Solana devnet cluster using Solana-Web3.js.
Recap
In this lesson, we learned how to use Solana-Web3.js to read and write to the Solana blockchain. We covered the basics of creating a new wallet, connecting to a Solana cluster, querying accounts, and sending transactions. With these tools, we have the basic building blocks for building dapps on Solana. In the next lesson, we will learn how to build a simple web app (often referred to as "dapp", decentralized application) that connects to your wallet.
Knowledge Check
Continued Learning
If you want to keep exploring, try expanding your script a bit by using the getTransaction method to fetch the transaction details and log them to the console. You can do this by adding the following code to app.ts:
    const txInfo = await connection.getTransaction(signature, {maxSupportedTransactionVersion: 1})
    console.log(`Transaction Details: /n`, txInfo);
Feel free to parse the data and see if you can find all the details we saw in the Solana Explorer!