33 min read
Overview
You are finally here! The final lesson. Let's get it! Today, we will be wrapping up the final two elements of our game: the user dashboard and the game board. Today, we will leverage your hard work by putting our useGame hook and transaction buttons to work! Let's get into it.
User Dashboard
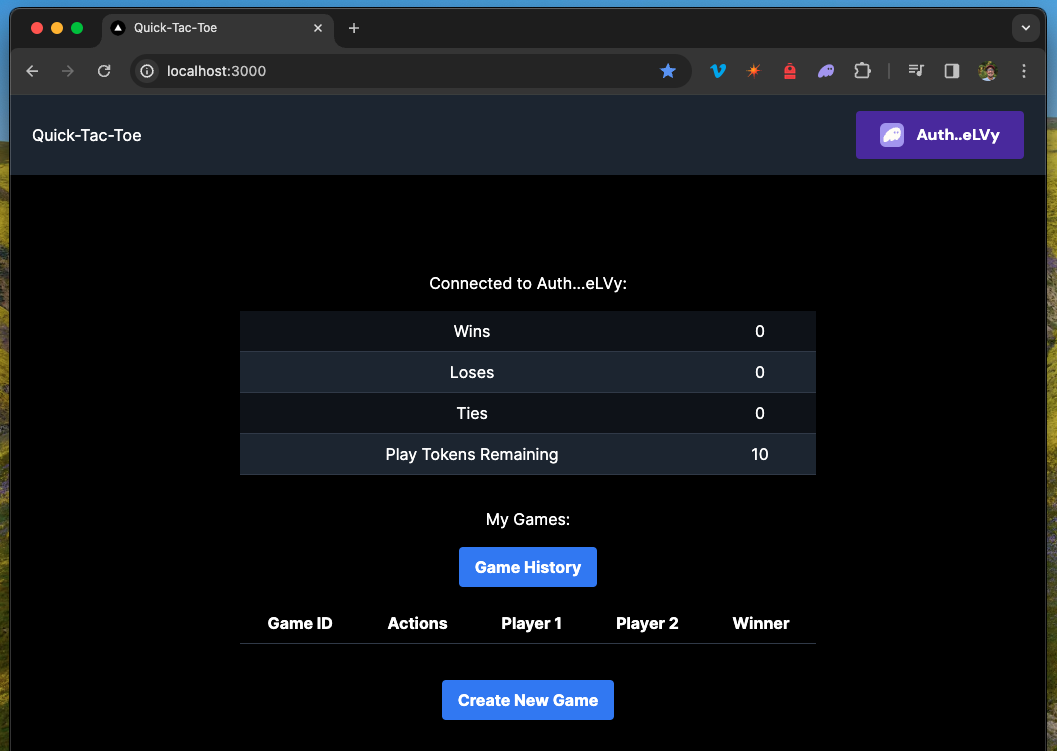
The user dashboard will show the user's record, current games, game history, and play token balance. The dashboard will also allow the user to start or join a game.
If you recall, we implemented a Game component in our main page, page.tsx:
    <SolanaProviders>
      <Navbar />
      <Game />
    </SolanaProviders>
Let's build it.
Inside of your ./components/ directory, create a new file, Game.tsx. Open the file and paste the following code:
import { useWallet } from '@solana/wallet-adapter-react';
import CreatePlayerButton from './SendTransactionButtons/CreatePlayer';
import { useGame } from '@/utils/game/useGame';
import CreateGameButton from './SendTransactionButtons/CreateGame';
import GameList from './GameList';
import PlayerStats from './PlayerStats';
import Balance from './Balance';
import { shortenHash } from '@/utils/utils';


const Game = () => {
    const { connected, publicKey } = useWallet();
    const { activePlayer, refreshActivePlayer } = useGame();

    return (
        <div className="flex flex-col items-center justify-between px-4 md:px-24 py-8 md:py-24 ">
            <div className="md:w-full w-screen text-center">
                {!connected ? "Wallet Not Connected" :
                    !activePlayer ? (
                        <>
                            <Balance />
                            <CreatePlayerButton onSuccess={refreshActivePlayer} />
                        </>
                    ) : (
                        <div>
                            <div className="text-center w-11/12 max-w-xl mx-auto">
                                Connected to {shortenHash(publicKey?.toBase58() || "")}:
                                <PlayerStats player={activePlayer} />
                            </div>
                            <div className="mt-8 text-center w-11/12 max-w-xl mx-auto">
                                My Games:
                                <GameList player={publicKey} />
                                <div className="mt-4">
                                    <CreateGameButton />
                                </div>
                            </div>
                        </div>
                    )
                }
            </div>
        </div>
    );


}
export default Game;
Let's walk through what this component should do:
- If the user's wallet is not connected, display a message saying so.
- If the user is connected, but does not have a player account, display a button to create a player account. Since we pass the
refreshActivePlayerfunction to theCreatePlayerButtoncomponent, the user's player account will be refreshed after the transaction is complete. - If the user is connected to a wallet and has a player account, we will display:
- the user's player stats,
- a list of the user's games, and
- a button to create a new game
We must create two additional components, PlayerStats and GameList. Let's do that now.
Player Stats
The primary purpose of the PlayerStats component is to display the user's record and play token balance. We will also show a button to claim the user's reward if they have won a game.
Inside your ./components/ directory, create a new file, PlayerStats.tsx. Open the file and paste the following code:
import { PlayerInfo } from "@/utils/game/types";
import ClaimRewardButton from "./SendTransactionButtons/ClaimReward";

interface Props {
    player: PlayerInfo;
}

const PlayerStats = ({ player }: Props) => {
    const { record, playerTokenBalance, rewardClaimed } = player;

    return (
        <div className="overflow-x-auto mt-4 text-center ">
            <table className="w-full text-white table-auto">
                <tbody>
                    {record.wins >= 1 && !rewardClaimed && <tr key={'prize'} className={`bg-gray-800 border-b border-gray-700 bg-opacity-50`}>
                        <td className="px-4 py-2" colSpan={2}>
                            <ClaimRewardButton />
                        </td>
                    </tr>}
                    <tr key={'wins'} className={`bg-gray-800 border-b border-gray-700 bg-opacity-50`}>
                        <td className="px-4 py-2">Wins</td>
                        <td className="px-4 py-2">
                            {record.wins.toString()}
                        </td>
                    </tr>

                    <tr key={'loses'} className={`bg-gray-800 border-b border-gray-700`}>
                        <td className="px-4 py-2">Loses</td>
                        <td className="px-4 py-2">{record.losses.toString()}</td>
                    </tr>
                    <tr key={'ties'} className={`bg-gray-800 border-b border-gray-700 bg-opacity-50`}>
                        <td className="px-4 py-2">Ties</td>
                        <td className="px-4 py-2">{record.ties.toString()}</td>
                    </tr>
                    <tr key={'tokens'} className={`bg-gray-800 border-b border-gray-700`}>
                        <td className="px-4 py-2">Play Tokens Remaining</td>
                        <td className="px-4 py-2">{playerTokenBalance}</td>
                    </tr>
                </tbody>
            </table>
        </div>
    );
}

export default PlayerStats;
Here's what this component does:
- If the user has won a game and has not claimed their reward, display a button to claim the reward.
- Display the user's record and play token balance.
Game List
Finally, let's create our GameList component. The list should be dynamic and display the user's active games or game history depending on the user's selection. The list should also display a button to join or participate in a game if the user is eligible. In your components directory, create a new file, GameList.tsx. Open the file and paste the following code:
import { useGame } from "@/utils/game/useGame";
import { shortenHash } from "@/utils/utils";
import Link from 'next/link';
import { PublicKey } from "@solana/web3.js";
import { useState } from "react";
import JoinGameButton from "./SendTransactionButtons/JoinGame";

interface Props {
    player: PublicKey | null
}

const GameList = ({ player }: Props) => {
    const [showAll, setShowAll] = useState(false);
    const { gameClient, games } = useGame();

    return (
        <div className="overflow-x-auto mt-4 text-center">
            <button
                className="bg-blue-500 hover:bg-blue-700 text-white font-bold py-2 px-4 rounded mb-4"
                onClick={() => setShowAll(prev => !prev)}
            >
                {showAll ? "Active Games" : "Game History"}
            </button>

            <table className="min-w-full text-white table-auto">
                <thead>
                    <tr className="border-b border-gray-700">
                        <th className="px-4 py-2">Game ID</th>
                        <th className="px-4 py-2">Actions</th>
                        <th className="px-4 py-2">Player 1</th>
                        <th className="px-4 py-2">Player 2</th>
                        <th className="px-4 py-2">Winner</th>
                    </tr>
                </thead>
                <tbody>
                    {games?.sort((a, b) => {
                        //@ts-ignore this works
                        return a.account.id.toNumber() > b.account.id.toNumber() ? 1 : -1;
                    })
                        .filter(game =>
                            // If showAll is true, show all games the user is participating in
                            // If showAll is false, show only games the user can play or join
                            showAll ? gameClient.isParticipating(game.account, player) :
                                (gameClient.canPlay(game.account, player) || gameClient.canJoin(game.account, player))
                        )
                        .map((game, index) => {
                            const canPlay = gameClient.canPlay(game.account, player);
                            const canJoin = gameClient.canJoin(game.account, player);
                            const canPlayOrJoin = (canPlay || canJoin);;

                            return (
                                <tr key={game.account.id} className={`bg-gray-800 border-b border-gray-700 ${index % 2 === 0 ? 'bg-opacity-50' : ''}`}>
                                    <td className="px-4 py-2">
                                        <Link href={`/games/${game.publicKey.toString()}`} >
                                            {game.account.id.toString()}
                                        </Link>
                                    </td>
                                    <td className="px-4 py-2">
                                        {canPlay && (
                                            <Link
                                                href={`/games/${game.publicKey.toString()}`}
                                                className="bg-blue-500 hover:bg-blue-700 text-white font-bold py-2 px-4 rounded"
                                            >
                                                Play
                                            </Link>
                                        )}
                                        {canJoin && (
                                            <JoinGameButton
                                                gameInfo={game.account}
                                                gamePda={game.publicKey}
                                            />
                                        )}
                                    </td>
                                    <td className="px-4 py-2">{shortenHash(game.account.playerX.toString())}</td>
                                    <td className="px-4 py-2">{gameClient.lookingForOpponent(game.account) ? 'waiting' : shortenHash(game.account.playerO.toString())}</td>
                                    <td className="px-4 py-2">{game.account.winner ?
                                        shortenHash(game.account.winner.toString()) :
                                        ('tie' in game.account.state) ? "Tie"
                                            : "N/A"}</td>
                                </tr>
                            )
                        })}
                </tbody>
            </table>
            {games && games.length === 0 && (
                <div className="text-gray-500 mt-4">No games found.</div>
            )}
        </div>
    );
}

export default GameList;
This one is large, but it's not too complicated. Let's break it down:
- First, we are creating a toggle button that will allow the user to switch between viewing their active games and game history.
- Next, we are creating a table displaying the user's games. We are doing a lot of array manipulation here, but the gist is that we are filtering the games based on whether the user can play or join the game. We are also sorting the games by their id. We have included some logic to display the winner of the game. If the game is a tie, we will display "Tie." If the game is not over, we will display "N/A."
- Finally, we display a message if no applicable games exist.
Excellent work. Now, let's build out our Game Board.
Game Board
Game Board Page
The game board will be a dynamic page that displays the game board and allows the user to play the game. We are going to leverage Next.js's dynamic routing to create a dynamic page for each game based on the Game's PDA.
The general architecture of the page will be as follows:
app/
├── page.tsx (our main user dashboard)
└── games/
    └── [gamePDA]/ (dynamic url segment)
        └── page.tsx (our page that renders game board)
This should yield a game URL that looks something like this: https://your-game-domain-example.com/games/XYZ123GAMEPDAADDRESS.
We will create a new directory, games/ inside of our ./app/ directory. Inside the games/ directory, create a new folder, [gamePDA]. Create page.tsx inside that directory, the page that will render the game board. Open the file (you should be in ./app/games/[gamePda]/page.tsx).
Add the following code:
'use client'

import React from 'react';
import SolanaProviders from '@/components/SolanaProviders';
import Navbar from '@/components/Navbar';
import Board from '@/components/Board';

export default function Page({ params }: { params: { gamePda: string } }) {

    return (
        <SolanaProviders>
            <Navbar />
            <Board gameId={params.gamePda} />
        </SolanaProviders>
    );
}
Here, you can see how we are incorporating our dynamic parameters. "Dynamic Segments are passed as the params prop to layout, page, route, and generateMetadata functions." (source). This means we can destructure the params prop to get the gamePda parameter that we pass into the Board component. We will use that PDA to fetch the game state from the Solana Cluster.
Now, we just need to create our Board component, and we will be done!
Game Board Component
Finally, we just need to build out our Board component. This component will display the game board and allow the user to play the game. The component will need to do a few things:
- Fetch the game state from the Solana Cluster
- Display the game board based on the current game state
- Allow the user to play the game (if they are a participant and it is their turn)
- Display the winner of the game (if there is one)
- Listen for changes to the game state and update the UI accordingly
- Add some various styling/UX effects based on the current player and game state
- Provide a link back to the user dashboard
Let's get started. Create a new file in your ./components/, Board.tsx. Let's paste the entire code, and then we will walk through it together. Add the following code to Board.tsx:
import { Game } from "@/utils/game/types";
import { useGame } from "@/utils/game/useGame";
import { shortenHash } from "@/utils/utils";
import { useConnection, useWallet } from "@solana/wallet-adapter-react";
import { PublicKey } from "@solana/web3.js";
import { useCallback, useEffect, useState } from "react";
import PlayButton from "./SendTransactionButtons/Play";
import Link from "next/link";


interface Props {
    gameId: string
}

const Board = ({ gameId }: Props) => {
    const [gameState, setGameState] = useState<Game>();
    const [loading, setLoading] = useState<boolean>(true);
    const { gameClient } = useGame();
    const { connection } = useConnection();
    const { publicKey: connectedPlayer } = useWallet();

    const refreshGameState = useCallback(() => {
        if (!gameClient) return;
        const gamePda = new PublicKey(gameId);
        setLoading(true);
        gameClient.fetchGame(gamePda)
            .then((game) => {
                setGameState(game);
            })
            .catch((err) => {
                console.error(err);
            })
            .finally(() => {
                setLoading(false);
            });
    }, [gameClient, gameId]);

    useEffect(() => {
        refreshGameState();
    }, [refreshGameState]);

    useEffect(() => {
        const subscription = connection.onAccountChange(new PublicKey(gameId), () => {
            refreshGameState();
        })
        return () => {
            connection.removeAccountChangeListener(subscription);
        }
    }, [refreshGameState, connection, gameId])

    if (loading) return <div className="flex flex-col items-center justify-center h-full mt-10">Loading...</div>;
    if (!gameState) return <div className="flex flex-col items-center justify-center h-full mt-10">Game not found</div>;

    const { id, playerX, playerO, board, state, turn, winner } = gameState;
    const currentPlayer = gameClient.whoseTurn(gameState);
    const canPlay = connectedPlayer && (currentPlayer?.toBase58() === connectedPlayer?.toBase58());
    const isPlayerX = 'active' in state && currentPlayer?.toBase58() === playerX.toBase58();
    const isPlayerO = 'active' in state && currentPlayer?.toBase58() === playerO.toBase58();
    const isOtherPlayerTurn = 'active' in state && currentPlayer?.toBase58() !== connectedPlayer?.toBase58();
    return (
        <main className="flex flex-col items-center justify-center h-full mt-10">
            <div className="text-lg mb-4">
                <p>
                    Game ID: <span className="font-bold">{id.toString()}</span>
                </p>
                <p>
                    X: <span className="font-bold">{shortenHash(playerX.toBase58())}</span>
                    <span className="text-sm text-gray-400"> {isPlayerX ? "(current turn)" : ""}</span>
                </p>
                {gameClient.lookingForOpponent(gameState) ? <p className="pulse mt-4 text-center">
                    Waiting for opponent to join...
                </p> : <p>
                    O: <span className="font-bold">{shortenHash(playerO.toBase58())}</span>
                    <span className="text-sm text-gray-400"> {isPlayerO ? "(Next move)" : ""}</span>
                </p>}
                {'tie' in state && <p className="mt-4">Tie!</p>}
                {winner && <p>🎉 Winner: {shortenHash(winner.toBase58())} 🎉</p>}
                {isOtherPlayerTurn && <p className="pulse mt-4 text-center">
                    Waiting for {isPlayerX ? 'X' : 'O'} to play
                </p>}
                {canPlay && <p className="mt-4 text-center">
                    Your turn. Select a square.
                </p>}

            </div>
            <div className="grid grid-cols-3 gap-4 w-64 h-64">
                {board.map((row, rowIndex) =>
                    row.map((cell, colIndex) => {
                        let content;
                        let isCellClickable = false;

                        if (cell) {
                            content = 'x' in cell ? 'X' : 'O';
                        } else if (!canPlay) {
                            content = <div className="opacity-0">Z</div>; // Invisible placeholder
                        } else {
                            isCellClickable = true;
                            content = (
                                <PlayButton
                                    gameInfo={gameState}
                                    currentPlayer={connectedPlayer}
                                    gamePda={new PublicKey(gameId)}
                                    row={rowIndex}
                                    column={colIndex}
                                    onSuccess={refreshGameState}
                                    currentMove={isPlayerO ? 'O' : 'X'}
                                />
                            );
                        }

                        return (
                            <div
                                key={`${rowIndex}-${colIndex}`}
                                className={`bg-gray-800 rounded-md flex items-center justify-center text-2xl text-white ${isCellClickable ? 'cursor-pointer hover:bg-gray-700' : ''}`}
                            >
                                {content}
                            </div>
                        );
                    })
                )}

            </div>
            <Link className="mt-4" href="/">
                ⬅️ Home
            </Link>
        </main>
    );

}

export default Board;
Let's walk through what this component does:
- We define two hooks using
setStateto manage the component's game and loading states. - We fetch the game client, connection, and connected player from our
useGame,useConnection, anduseWallethooks. - We define a function,
refreshGameState, that will fetch the game state from the Solana Cluster and update the component's state. We useuseCallbackto memoize the function so that it will not be recreated on each render. - We define two
useEffecthooks. The first will callrefreshGameStateon component mount. The second will subscribe to changes to the game state and callrefreshGameStatewhen the game state changes. We are using a Solana Websocket method,onAccountChange, to listen for changes to the game state. To learn more about Solana Websockets, check out our Guide or Solana Docs. Note: we must remove the subscription when the component unmounts. Otherwise, we will have a memory leak. We do this with theremoveAccountChangeListenermethod inside theuseEffectreturn statement. - We check whether the component is loading or the game state is undefined. If so, we display a loading message or a message saying the game was not found (e.g., if the user tries to navigate to an address that isn't a Game PDA).
- We destructure the game state and check to see if the user is the current player if the user can play, and if the user is player X or O. These will help create a UX that is intuitive for the user.
- Finally, we render the game board. We are using a 3x3 grid of divs (mapped from the board found in the on-chain game state) to display the game board. If a position has been played, we render the "X" or "O" in the square. If the position has not been played, we render a
PlayButtoncomponent (if you recall, this uses ourinvisibleparameter, so only the styling should be the same as the other squares). We are also using some conditional styling to make the game board more intuitive for the user. For example, if the user is not the current player, we will make the game board unclickable and display a message saying it is not their turn. If the user is the current player, we will display a message saying it is their turn and allow them to click on a square to play the game. We are also showing a message if the game is a tie or if there is a winner. We are using thecurrentMoveparameter (which ultimately renders the button text) to display the player's move (e.g., "X" or "O") in the empty square if it is their turn.
(drumroll please 🥁)
That's it! You have completed the final lesson in our Intro to Solana Development course. Congratulations! You have built a fully functional Tic-Tac-Toe game on the Solana Blockchain.
Game Time!
If you are running on local host, make sure your validator is running and your program is deployed.
Open your terminal and run the following command:
npm run dev
You should be able to open your browser and navigate to http://localhost:3000/ to see your game in action. You are going to need two wallets with devnet SOL to play the game locally.
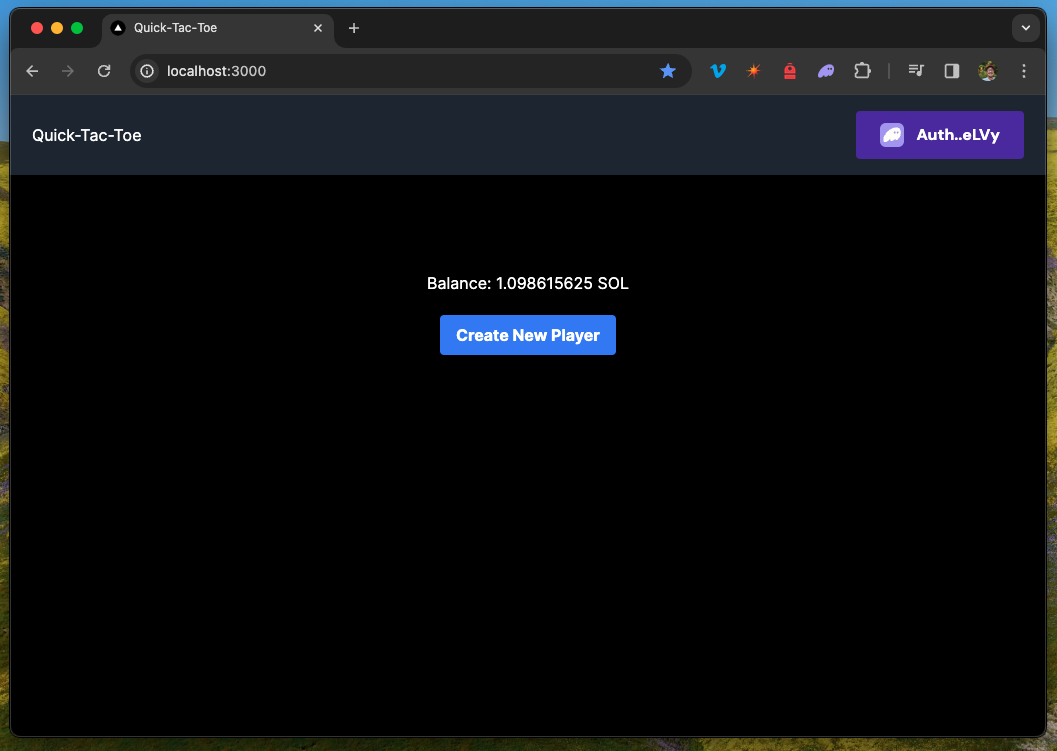
Connect your wallet, and you should be prompted to create a new player:
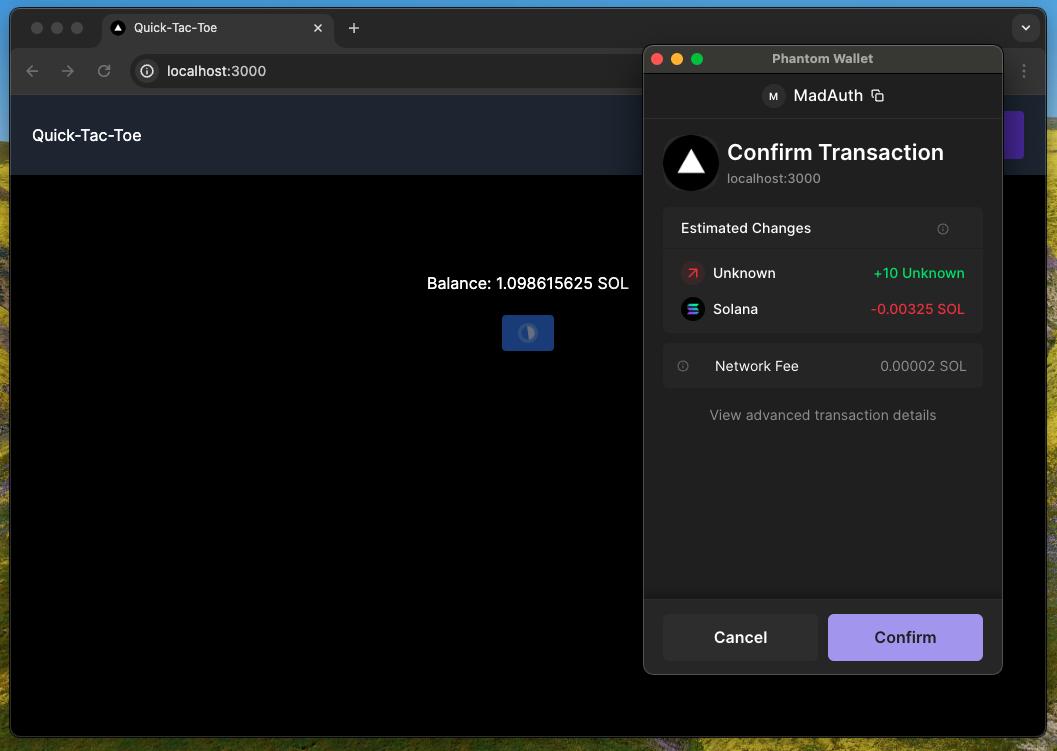
When your wallet is approving the transaction, you can see our estimated token balance change (+10):
Once your account is created, you should see our account dashboard with a 0-0-0 record and ten play tokens:
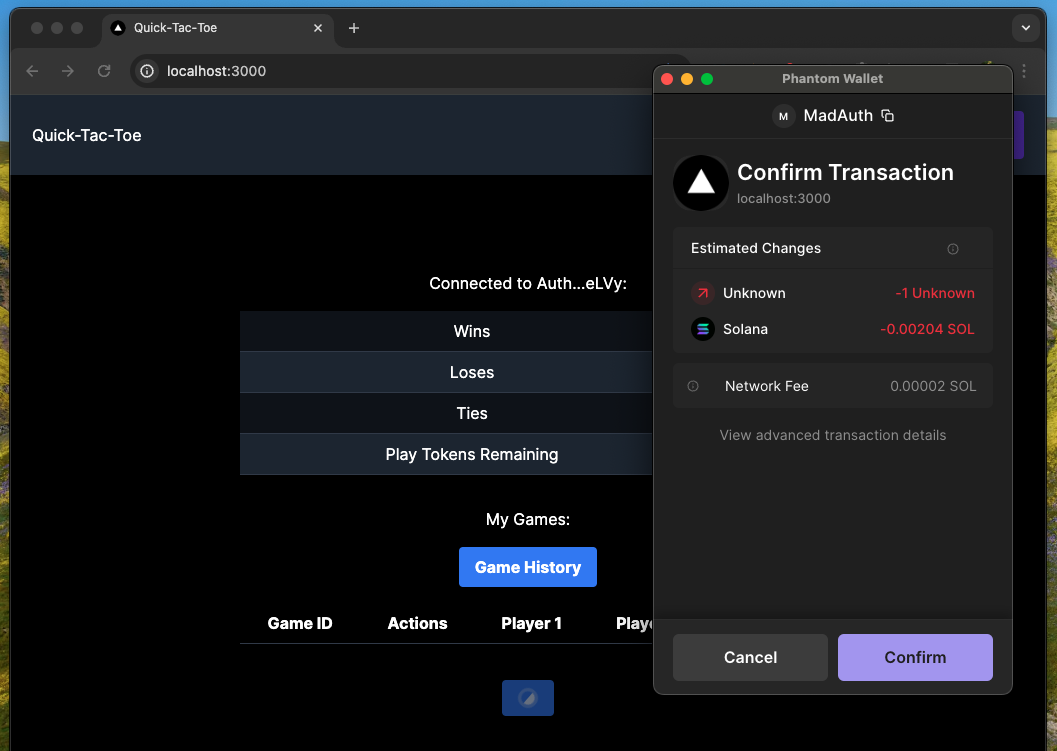
Create a new game (you should notice one of our play tokens being burned):
Open another wallet and create a player account. You should see an open game for you to join:
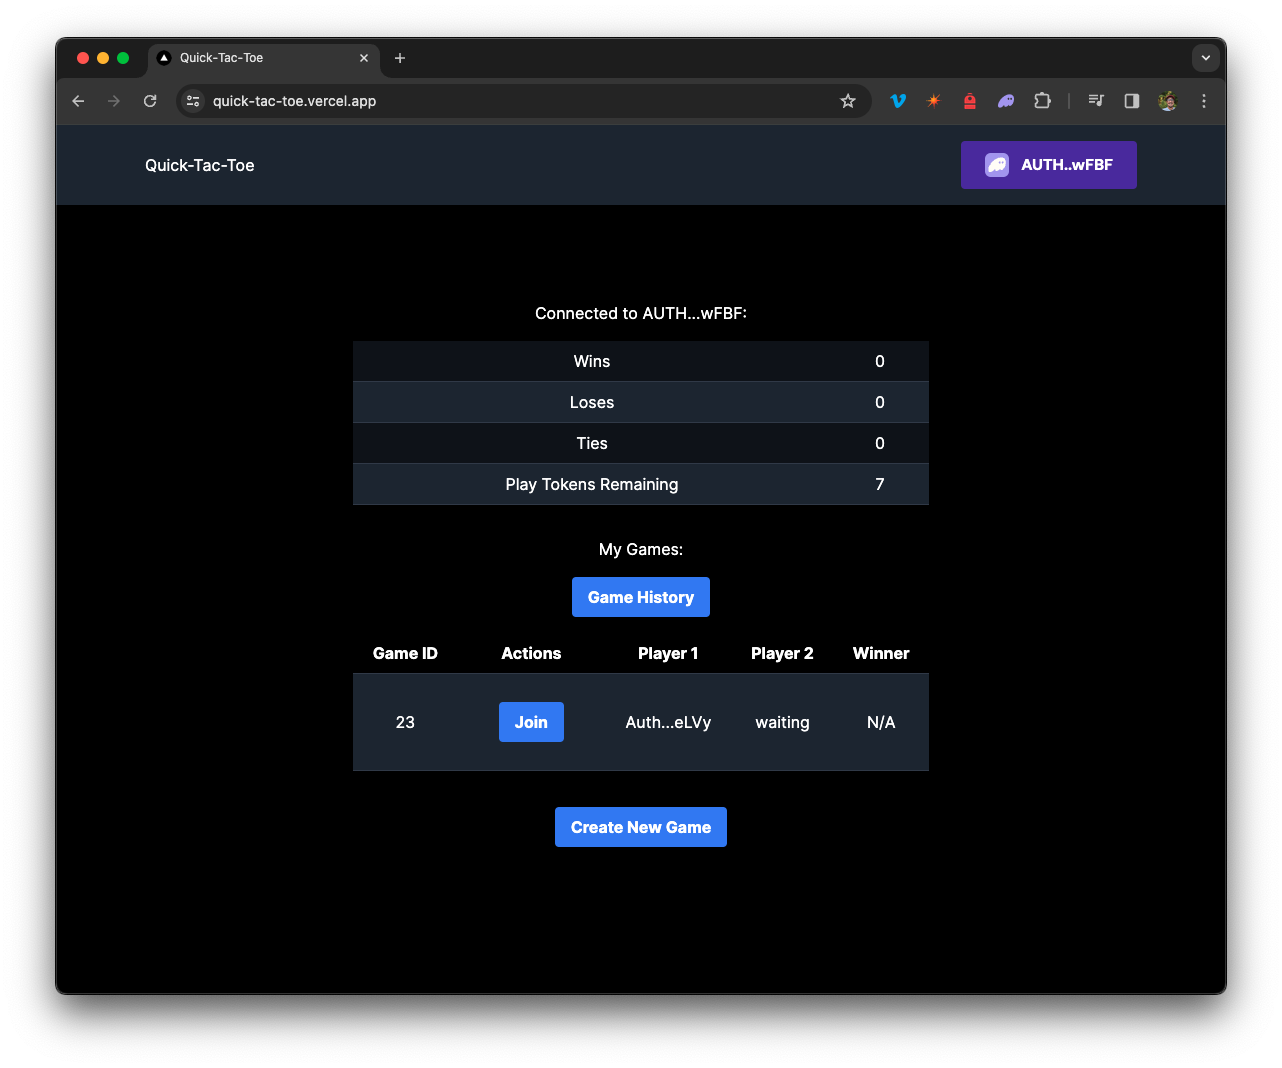
Join the game, and you should see a blank game board:
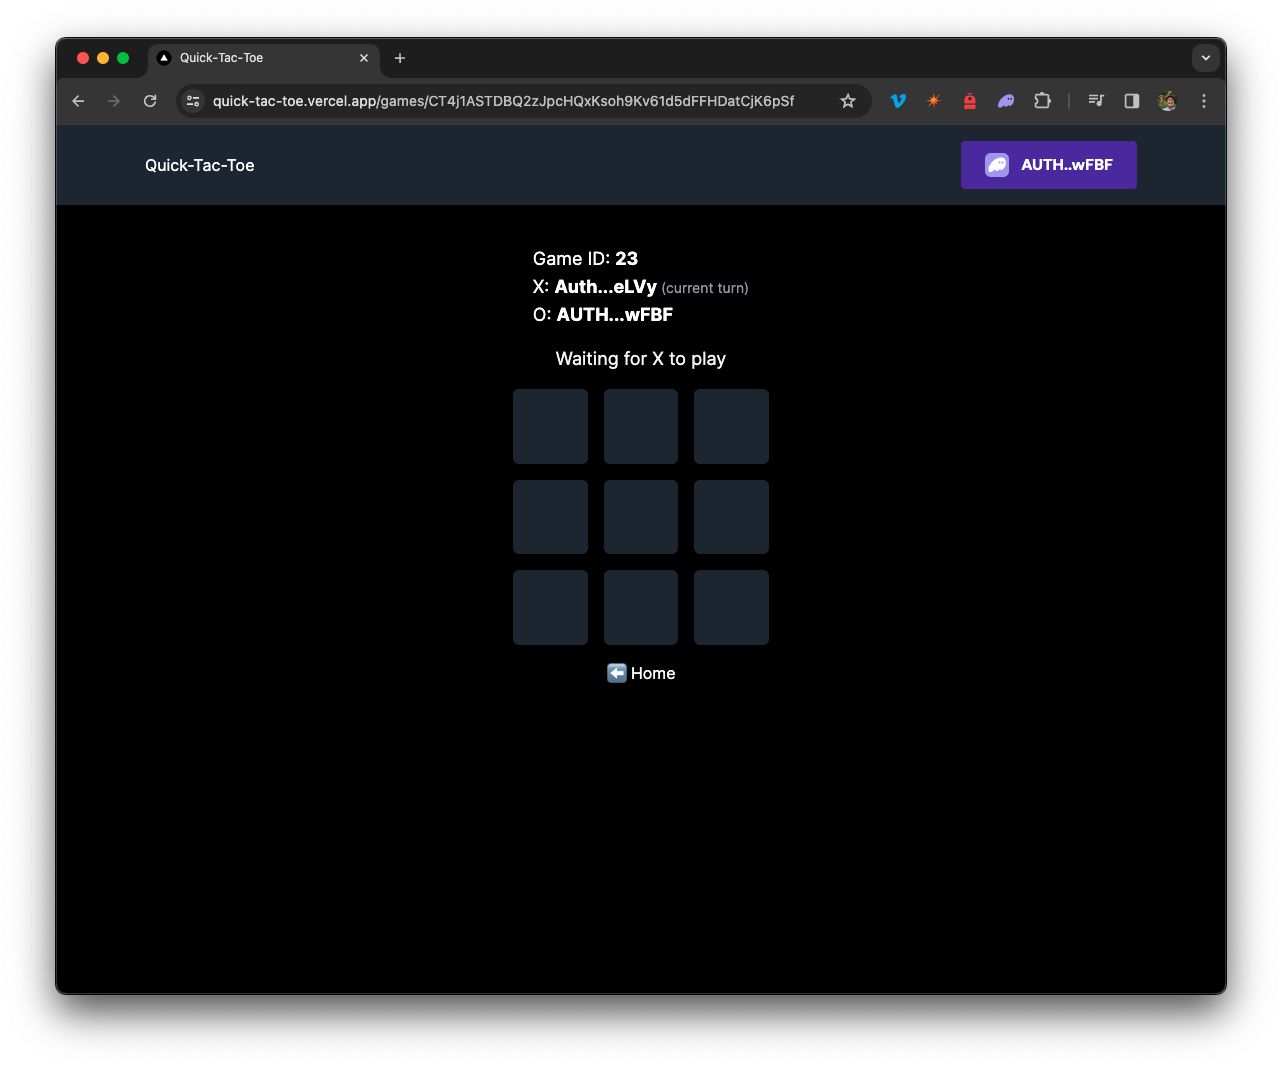
You will have to switch back and forth between wallets (or browser windows) to play the game. You should see the game board update as you play:
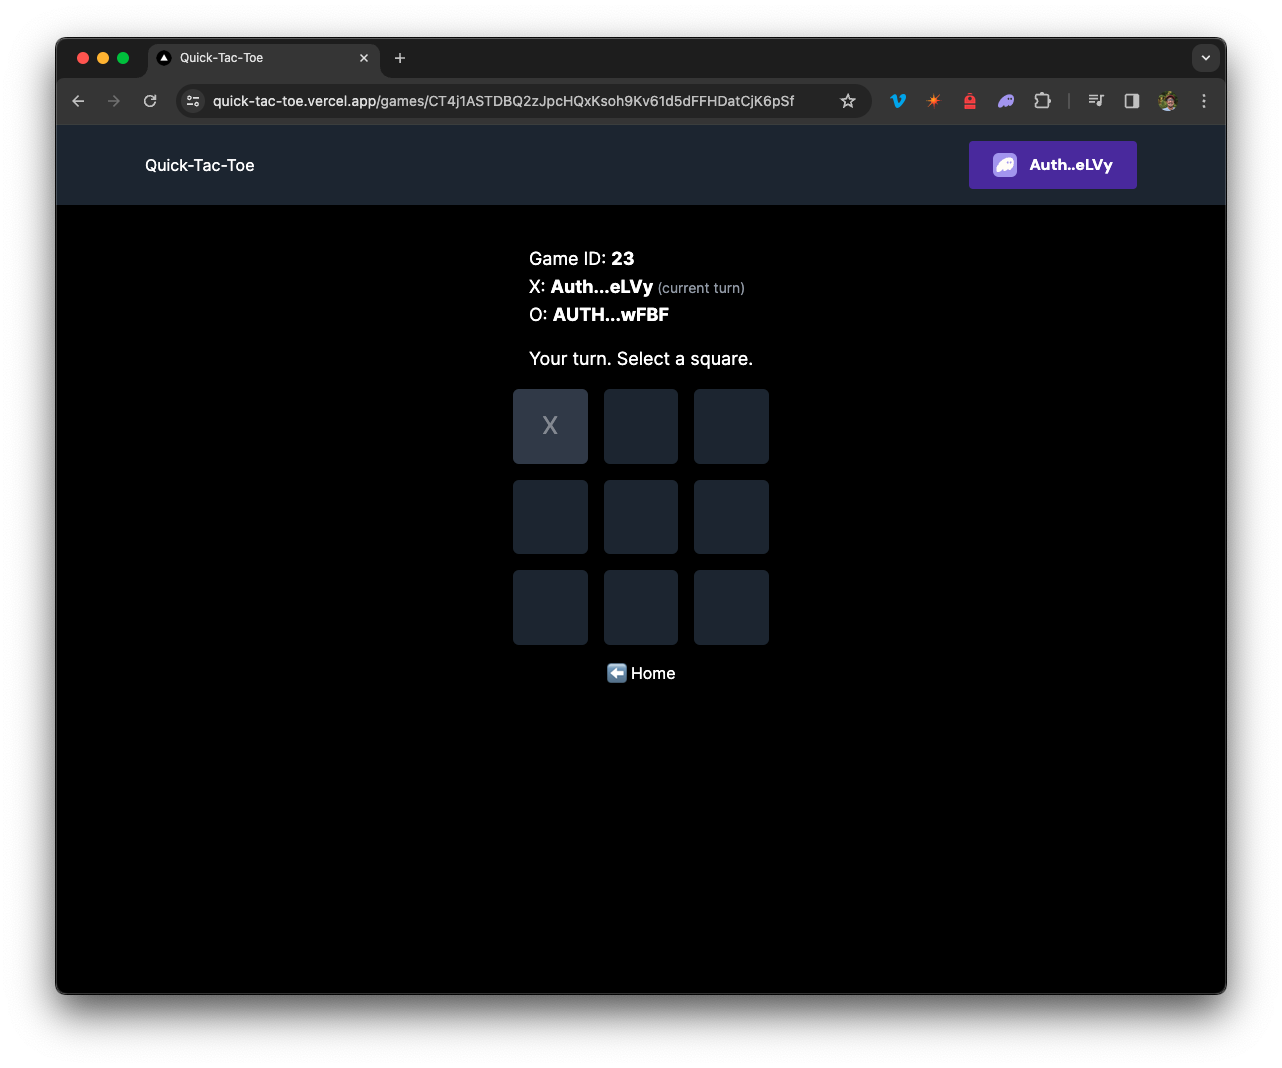
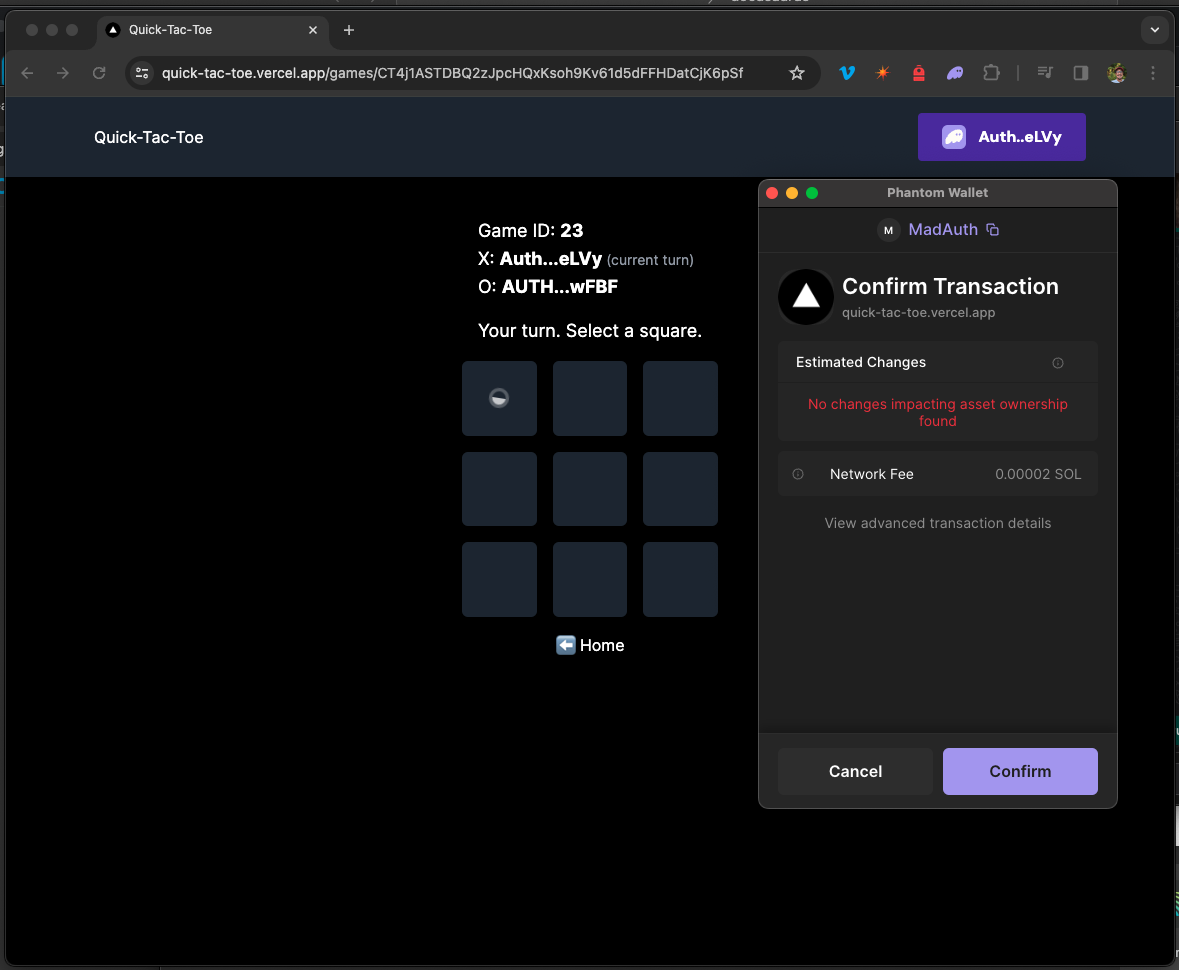
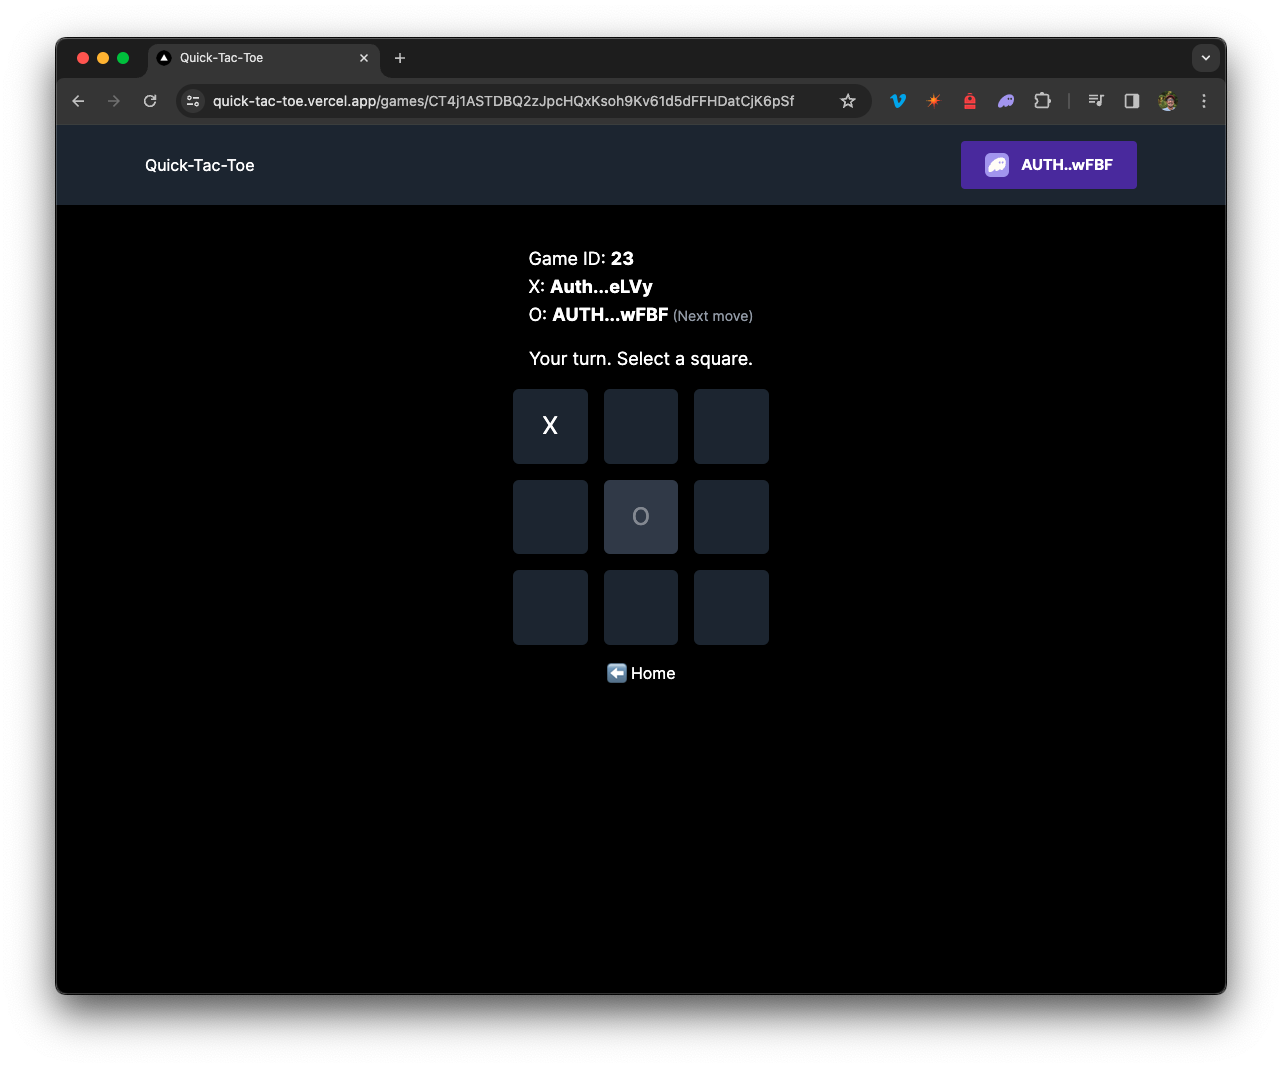
Go ahead and let one of the players win so you can see the winner and reward claim functionality:
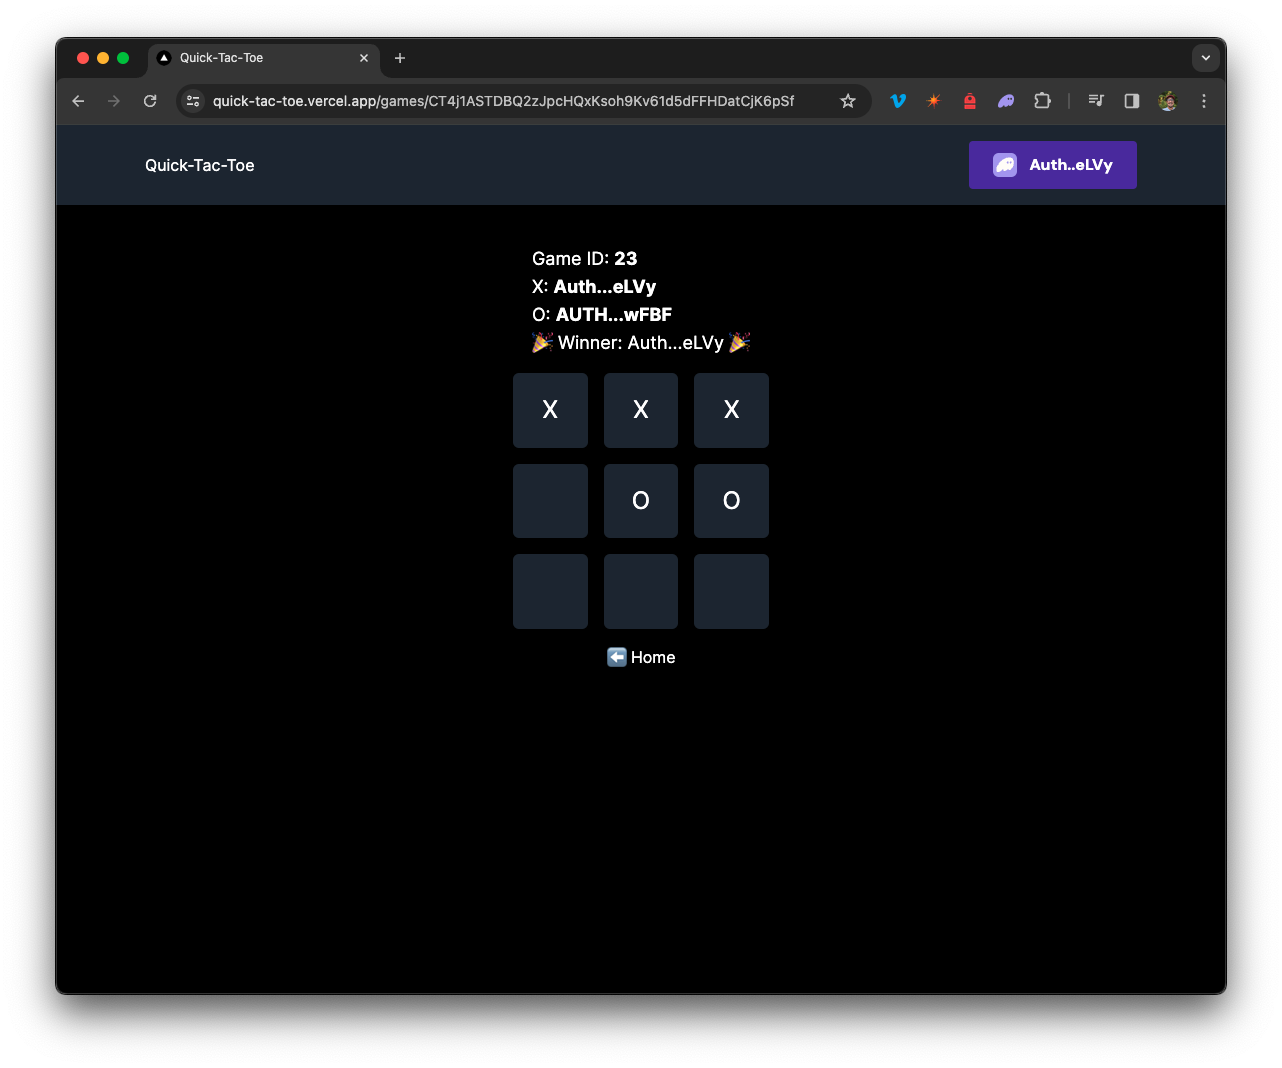
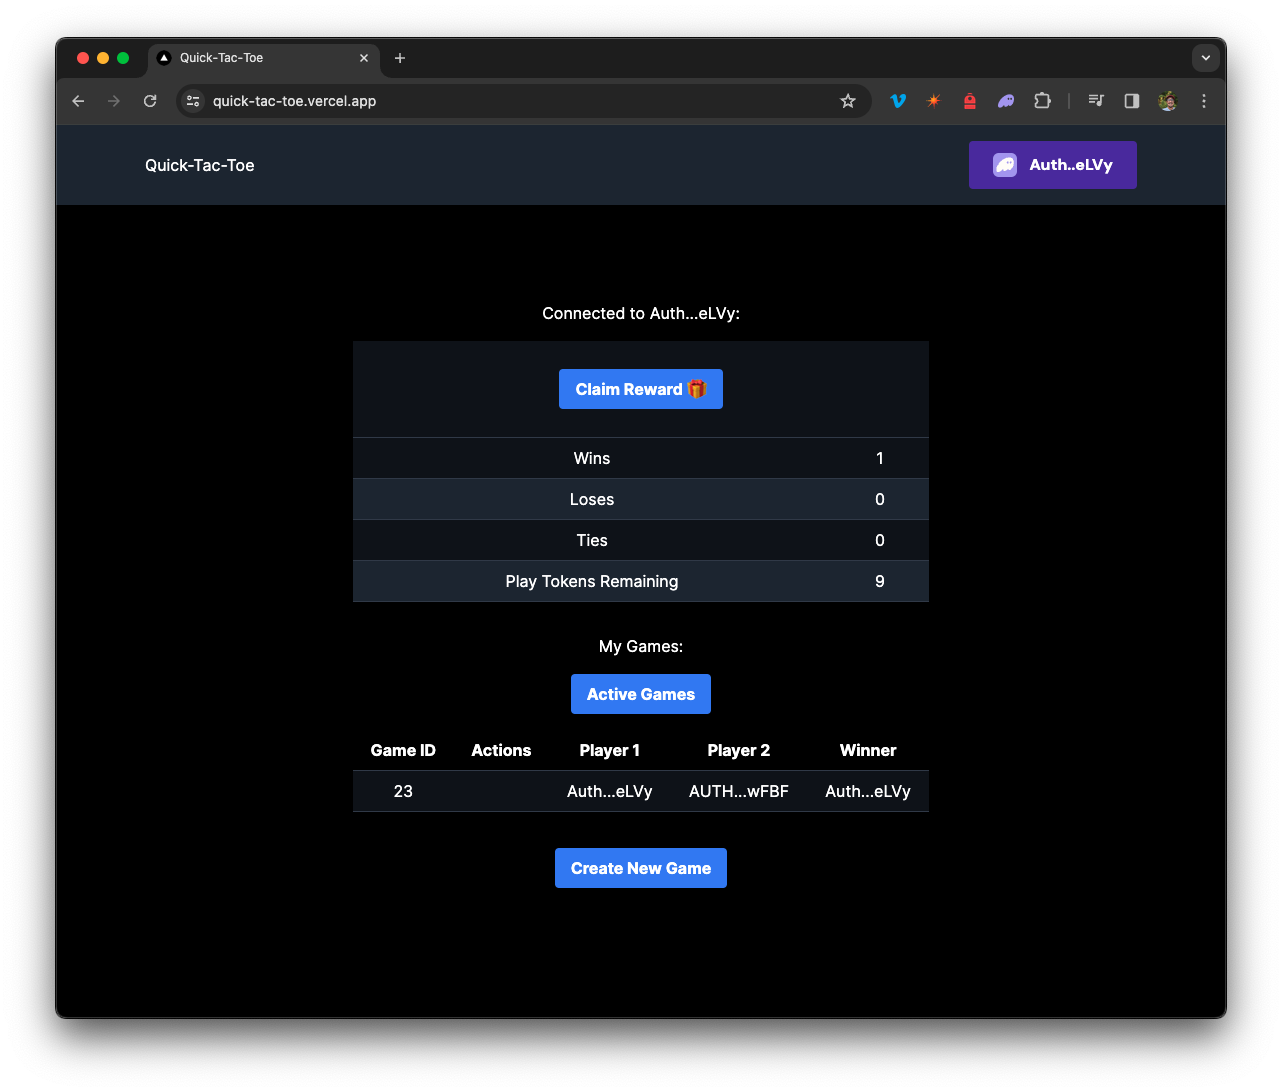
You did it! Play a few games and see if you can find any bugs. If you do, try to fix them. If you get stuck, you can always check out the final code here.
Conclusion
GREAT JOB! You have completed the Intro to Solana Development course. You have learned how to build a fully functional Arcade and Tic-Tac-Toe game on the Solana Blockchain. You now have all the tools to interact with tokens, create programs, and deploy fully functional applications on the Solana Blockchain.