
13 minutos de lectura
Resumen
It can be costly to store massive files on a blockchain mainnet, and this is where decentralized file storing systems like IPFS can come in handy. Sometimes, NFTs use IPFS as well. In this guide, we’ll cover how we can integrate IPFS with Ethereum using Quicknode's IPFS tool.
What You Will need
What You Will do
- Learn about IPFS
- Learn how to use Quicknode's IPFS tool
- (Optional) Learn how to run a local IPFS node
- Store some data on IPFS
- Deploy a smart contract and store the IPFS data within it
| Dependencia | Versión |
|---|---|
| node.js | 16.13.2>= |
| ethers.js | ^5.7.2 |
| browserify | ^17.0.0 |
| uniq | ^1.0.1 |
¿Qué es IPFS?
The web that we use today is mostly centralized; Even the data stored on the cloud is centralized and is controlled by giant cloud providers. Imagine if the servers of Wikipedia were to go down; this can leave us with a significant loss of knowledge. Centralization doesn’t seem to be a good thing, so why do we keep using it? That’s because we want our pages, images, and other content to load fast with very little latency and in high quality. While using a centralized server, content delivery speed can be regulated. Plus, there was no foolproof alternative until IPFS. IPFS (short for InterPlanetary File System) is a file storing and sharing system appropriate for the next generation of the Internet; Web3. IPFS is a versioned file system at its core, which can store files and track versions over time, much like git. IPFS also defines how a file moves over the network, making it a distributed file system. It is very flexible and works with several transport layer protocols like TCP, uTP, UDT, QUIC, TOR, and even Bluetooth.
How does IPFS work?
Whenever someone wants to download a file from the internet, the user has to query the exact address of the file, which is mostly the IP address of a remote server called location-based addressing. But what if the server is down? That person won’t get the file. There can be another user who has already downloaded a copy of that file before, but still, the computer wouldn’t be able to grab that from another user. To fix this problem, IPFS uses content-based addressing instead of location-based addressing. Instead of saying where to find the file, you just say what file is to be found. Every file uploaded with IPFS is associated with a unique hash, so when someone wants to download the file, they can query the network for the file hash, and someone from the IPFS network will provide it to the user. IPFS has built-in security as the hash of the requested file and supplied/downloaded file can always be verified. Another benefit of using hashes is avoiding duplication. When multiple users try to upload the same file, it will only be accepted once, making the network very efficient.
IPFS and Ethereum
Blockchains like Ethereum provide us with timestamping data, which makes tampering with that data almost impossible, but to store a file on Ethereum can be very expensive given the amount of processing the Ethereum blockchain has to do, whereas the content-based addresses that IPFS returns are 46 bytes in size which is a tiny amount considering the size of files. So it is cheaper to publish a file on IPFS and store their content-based address on the Ethereum blockchain. In the following example, we’ll publish an image to IPFS, store its hash in a smart contract, and retrieve/view that image using ethers.js and Quicknode.
IPFS and Quicknode
With Quicknode's IPFS tool, developers don't have to worry about running and managing their own IPFS node. Instead, they can pin and serve their decentralized data via the Quicknode Dashboard or via API calls (check out the Docs here). Quicknode supports both IPFS pinning and gateways so developers can pin data and serve it through a public or private gateway.
To checkout another resource for Quicknode and IPFS, check out this guide: Create & Host a Blog with IPFS
In the next section, we'll learn how to use Quicknode to store data on IPFS.
Publishing a file on IPFS
Although we reccomend using Quicknode's IPFS tool to pin and serve data, we'll demonstrate both methods below (e.g. 1. Using Quicknode's managed IPFS service; 2. Running a local IPFS node).
- Quicknode IPFS
- Nodo IPFS local
Para utilizar IPFS en Quicknode, se requiere un plan «Build» o superior. Consulta el desglose de las funciones por plan en nuestra página de tarifas.
Accede al panel de control de Quicknode y haz clic en la pestaña «IPFS» de la barra lateral izquierda.
Then, click on the Files tab and either click the New button and select Upload a file or simply drag the file you want to pin. We'll be using the image below as an example.

Once pinned, you'll see the file name, along with other data such as the files CID, whether its pinned, and the date it was pinned.
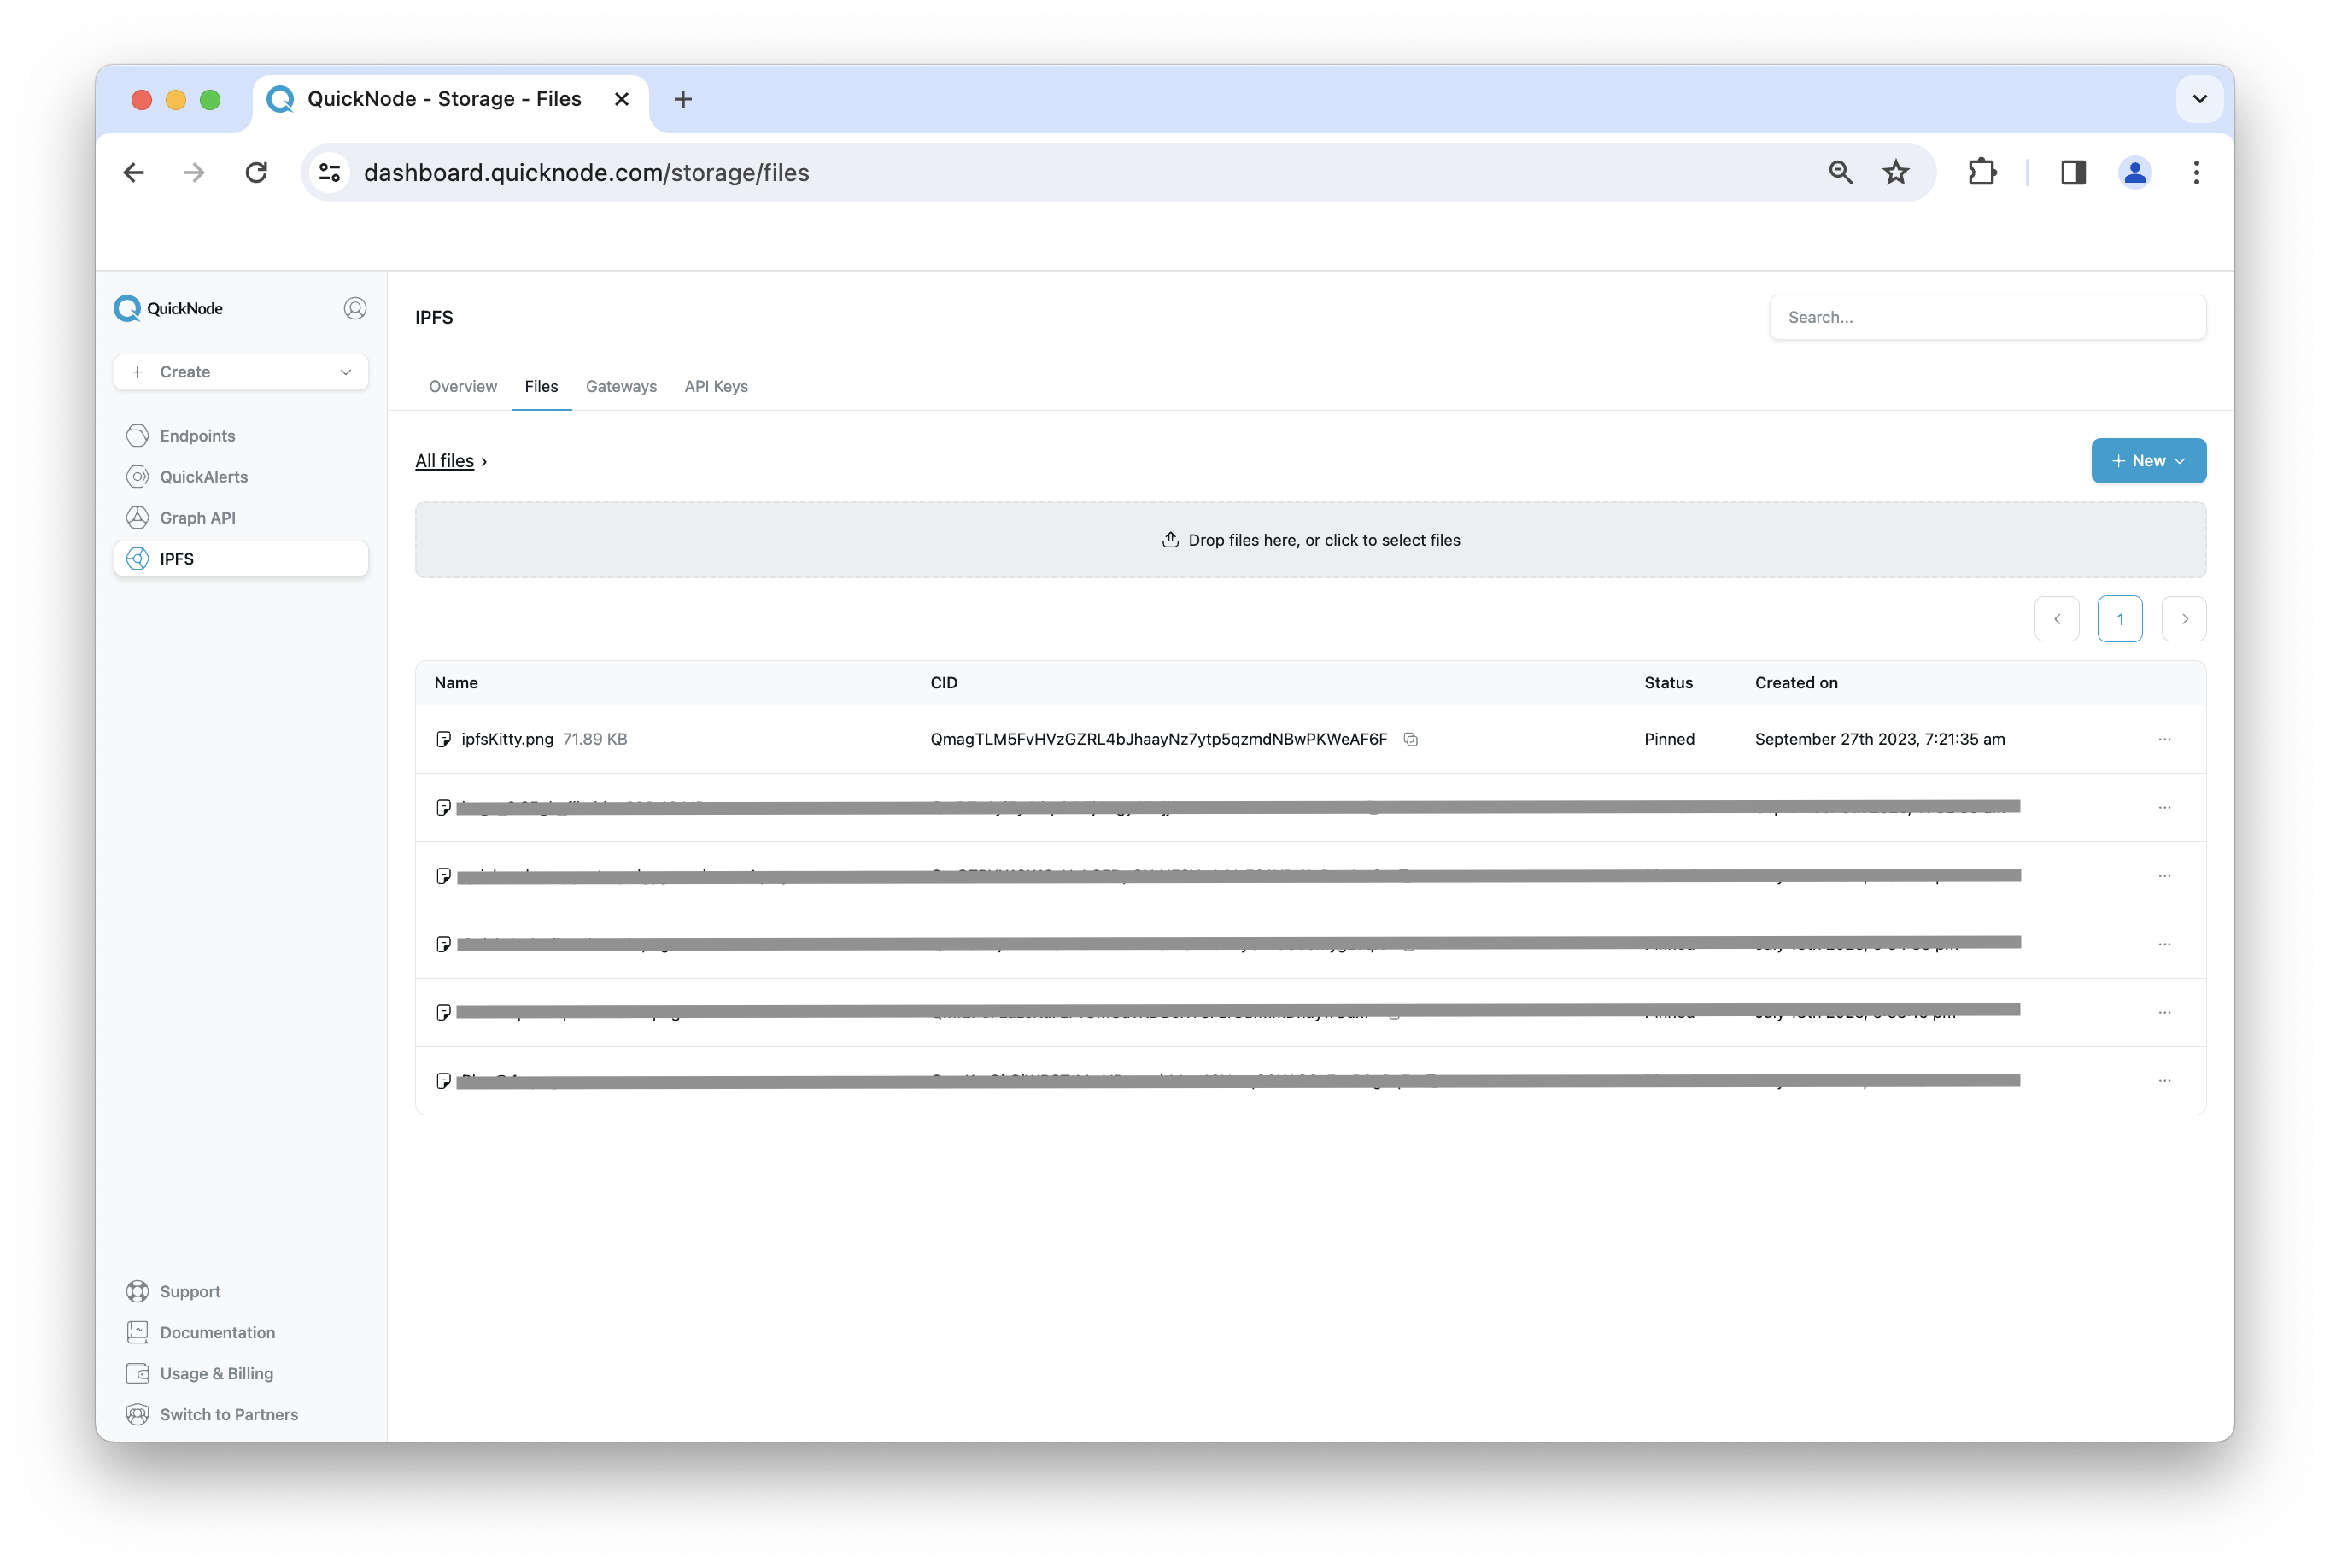
¡Ha sido muy fácil! Además, no tenemos que preocuparnos por poner en marcha y gestionar nuestro propio nodo IPFS. Puedes hacer clic en los tres puntos situados junto al archivo y seleccionar «Copiar URL de IPFS» para obtener la URL donde está alojado tu archivo. Además, puedes volver a descargar o ver los detalles de tus archivos desde este menú de los tres puntos. Tómate un momento para probarlo.
Now that we have our file pinned on IPFS via Quicknode, we can move onto the next section.
Our first step here would be to install IPFS and publish our file to IPFS. You can download and install IPFS CLI based on your Operating system by following the installation guide in IPFS docs, creating a project directory, and changing the directory.
Abre tu terminal/cmd e inicializa el repositorio IPFS.
$ ipfs init
Ahora, abre otra ventana de terminal/cmd e inicia el demonio de IPFS. Este actuará como tu nodo IPFS local.
$ ipfs daemon
Puedes utilizar tu propia imagen o metadatos, o bien la imagen de ejemplo que aparece a continuación.
Example image.jpg
Move your desired image into the project directory (image.jpg here) and go back to the previous terminal/cmd window, and publish the image to IPFS using the following command:
$ ipfs add image.jpg
Una vez completada la subida, verás un resultado similar a este:

Save the generated hash, as we’ll need it to retrieve the image in the later steps.
Configura tu punto de acceso de Quicknode
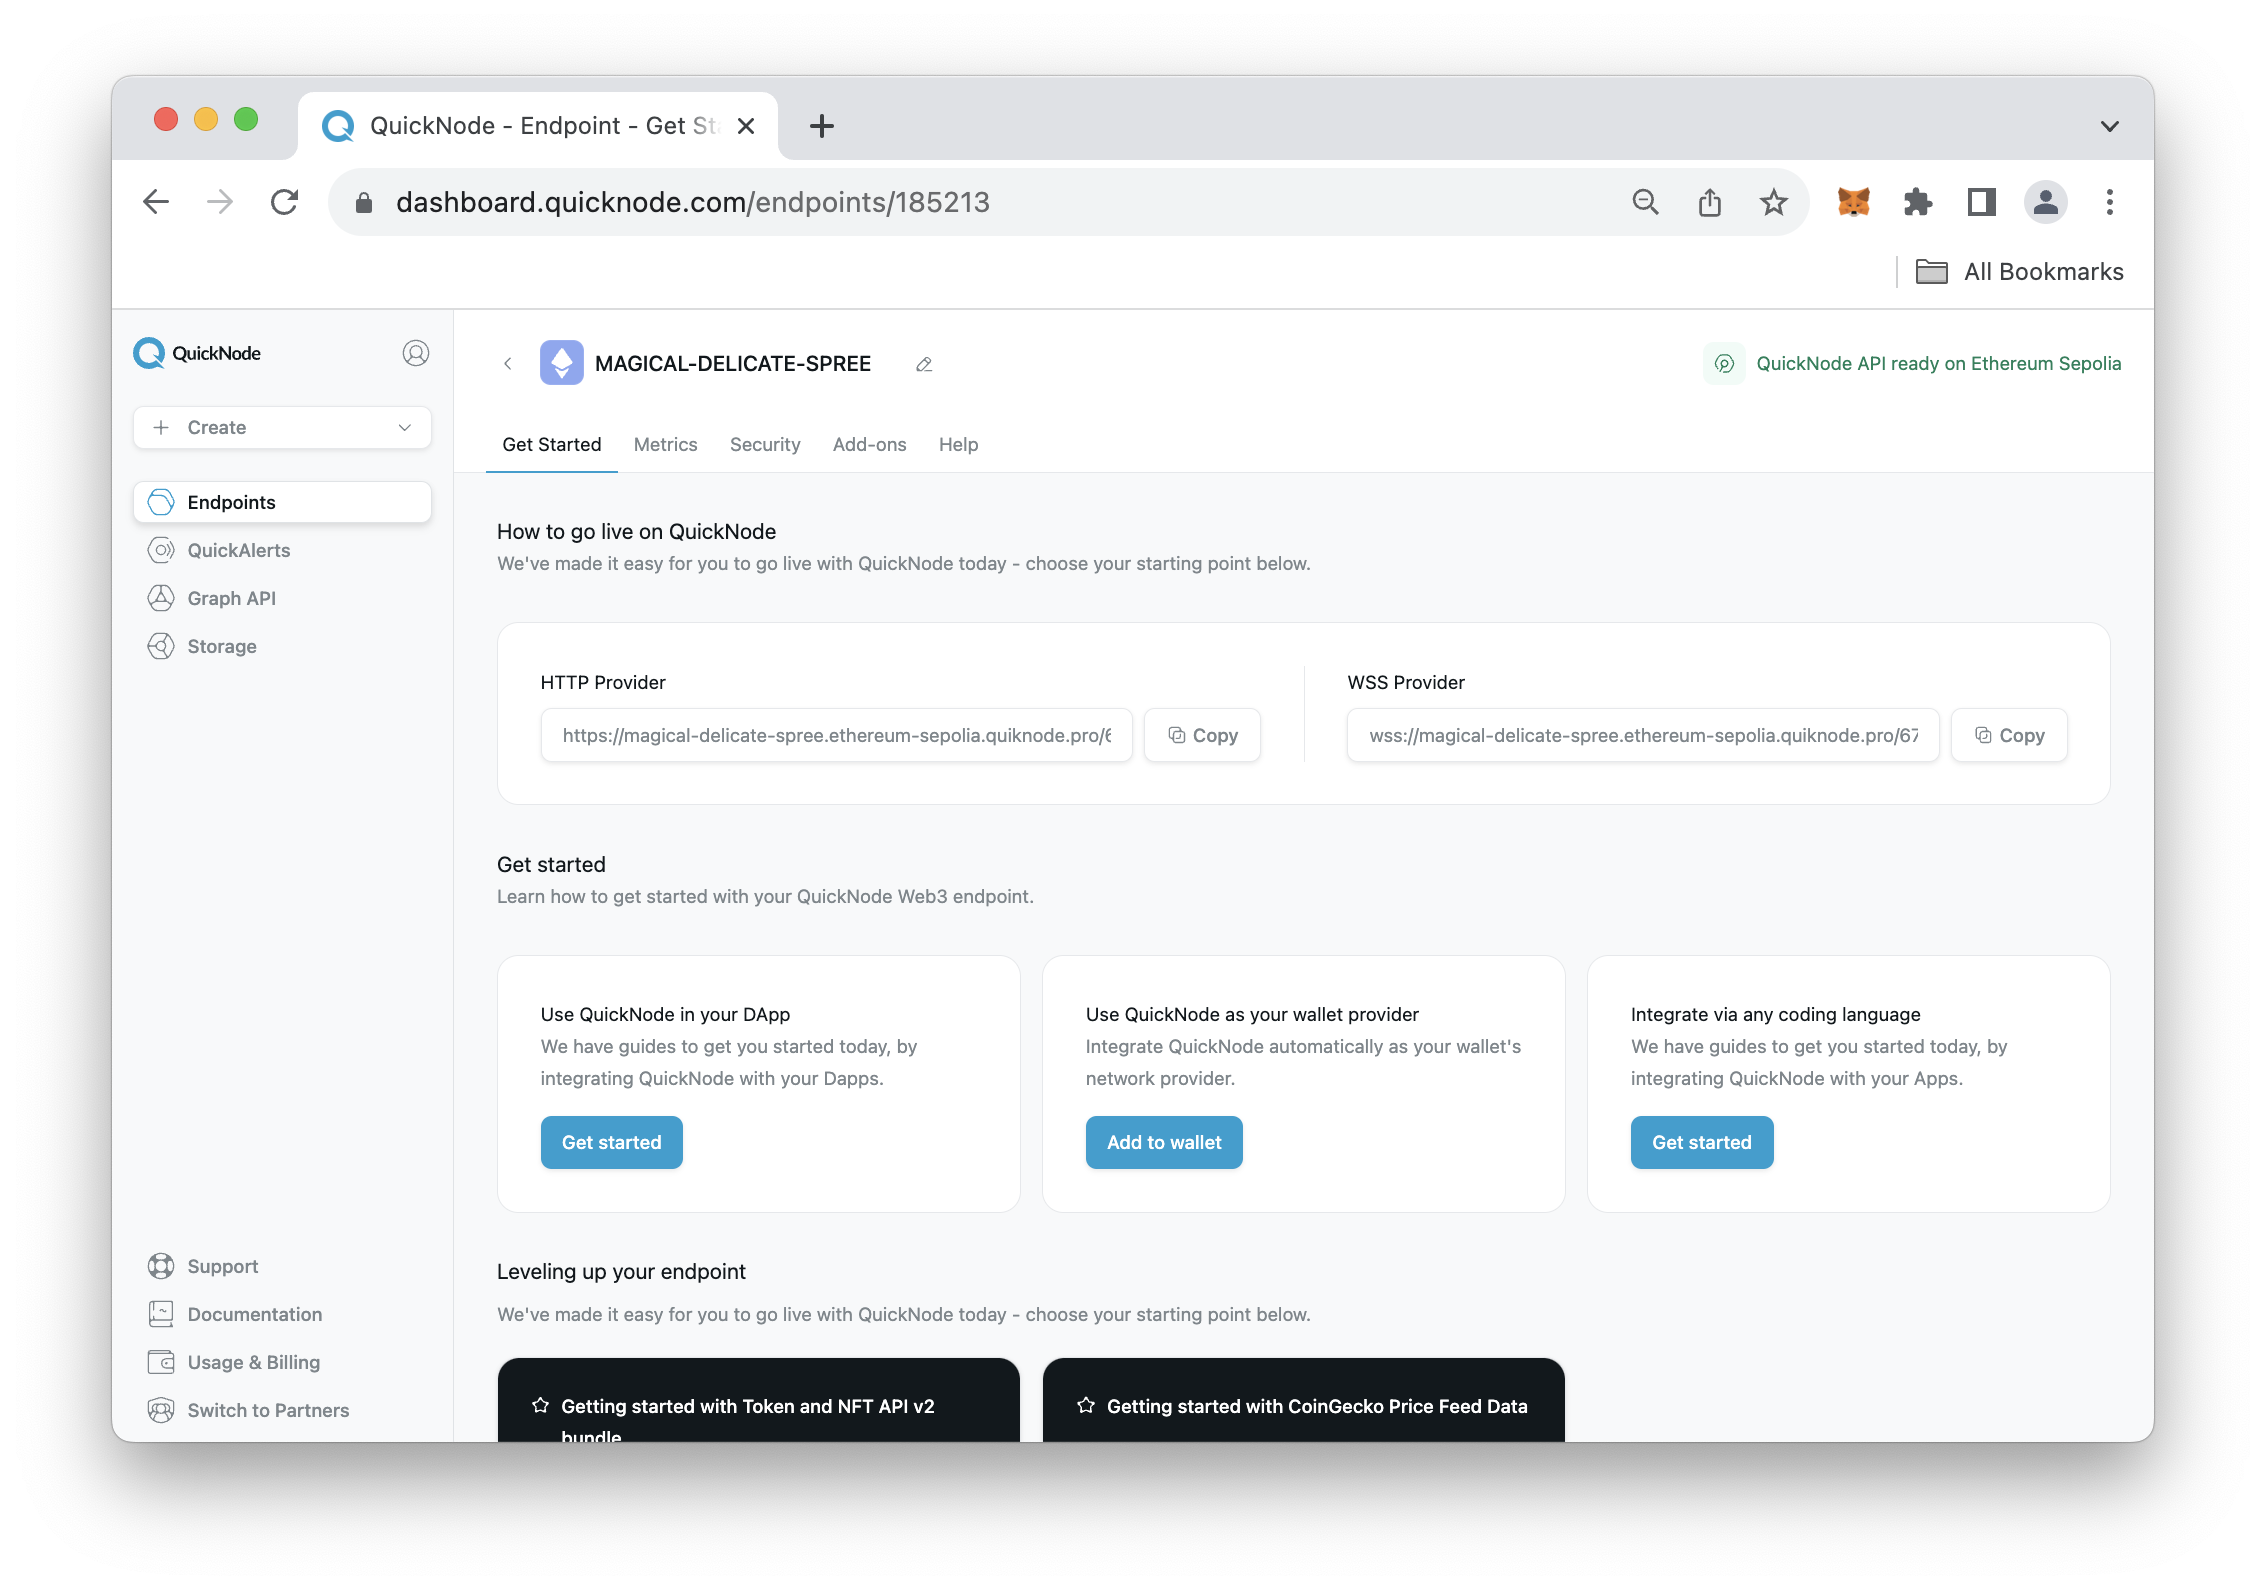
To query the Ethereum blockchain, we will need access to an Ethereum node for that we could use pretty much any Ethereum client, such as Geth or OpenEthereum (fka Parity). Since that is a bit too involved to fetch a single hash from a contract, we'll just grab a free endpoint from Quicknode to make this easy. We’ll need a Ethereum Sepolia endpoint to get data from the chain as we’ve deployed our contract on the Sepolia testnet. After you've created your free Ethereum Sepolia endpoint, keep your HTTP Provider URL handy as you'll need it later on.
Add Custom Network on MetaMask
Now, you may be wondering why we want to set a custom network in MetaMask. Although we could use the default Sepolia testnet found in the networks list. We'll use a custom one so we're not rate-limited and can enjoy up to 8x faster times.
Open your MetaMask wallet and click the elippses in the top-right. Click Settings --> Networks --> Add Network. Once the new page opens, click the Add a network manually button in the bottom of the MetaMask extension page.
You'll be asked to input the following fields:
- Network name: Sepolia Quicknode
- New RPC URL:
YOUR QUICKNODE HTTP PROVIDER URL - Chain ID: 11155111
- Currency symbol: ETH
- Block explorer URL (Optional): https://sepolia.etherscan.io/
After, click Save. If you navigate back to your MetaMask extension, and click the Networks tab, you should now see your Quicknode Sepolia network available. Make sure it is selected.
In the next section, we'll fund our MetaMask wallet using Quicknode's Multi-Chain Faucet.
Grifo multicadena de Quicknode
Up until this point, we have stored our file on IPFS, created a Quicknode endpoint and added our custom network in MetaMask. Next, we'll need to get some test ETH in order to pay for the deployment and interaction of our smart contract.
Navigate to the Quicknode Multi-Chain Faucet and connect your wallet or paste in your wallet address. You'll need to select the Ethereum chain and Sepolia network and then request funds.
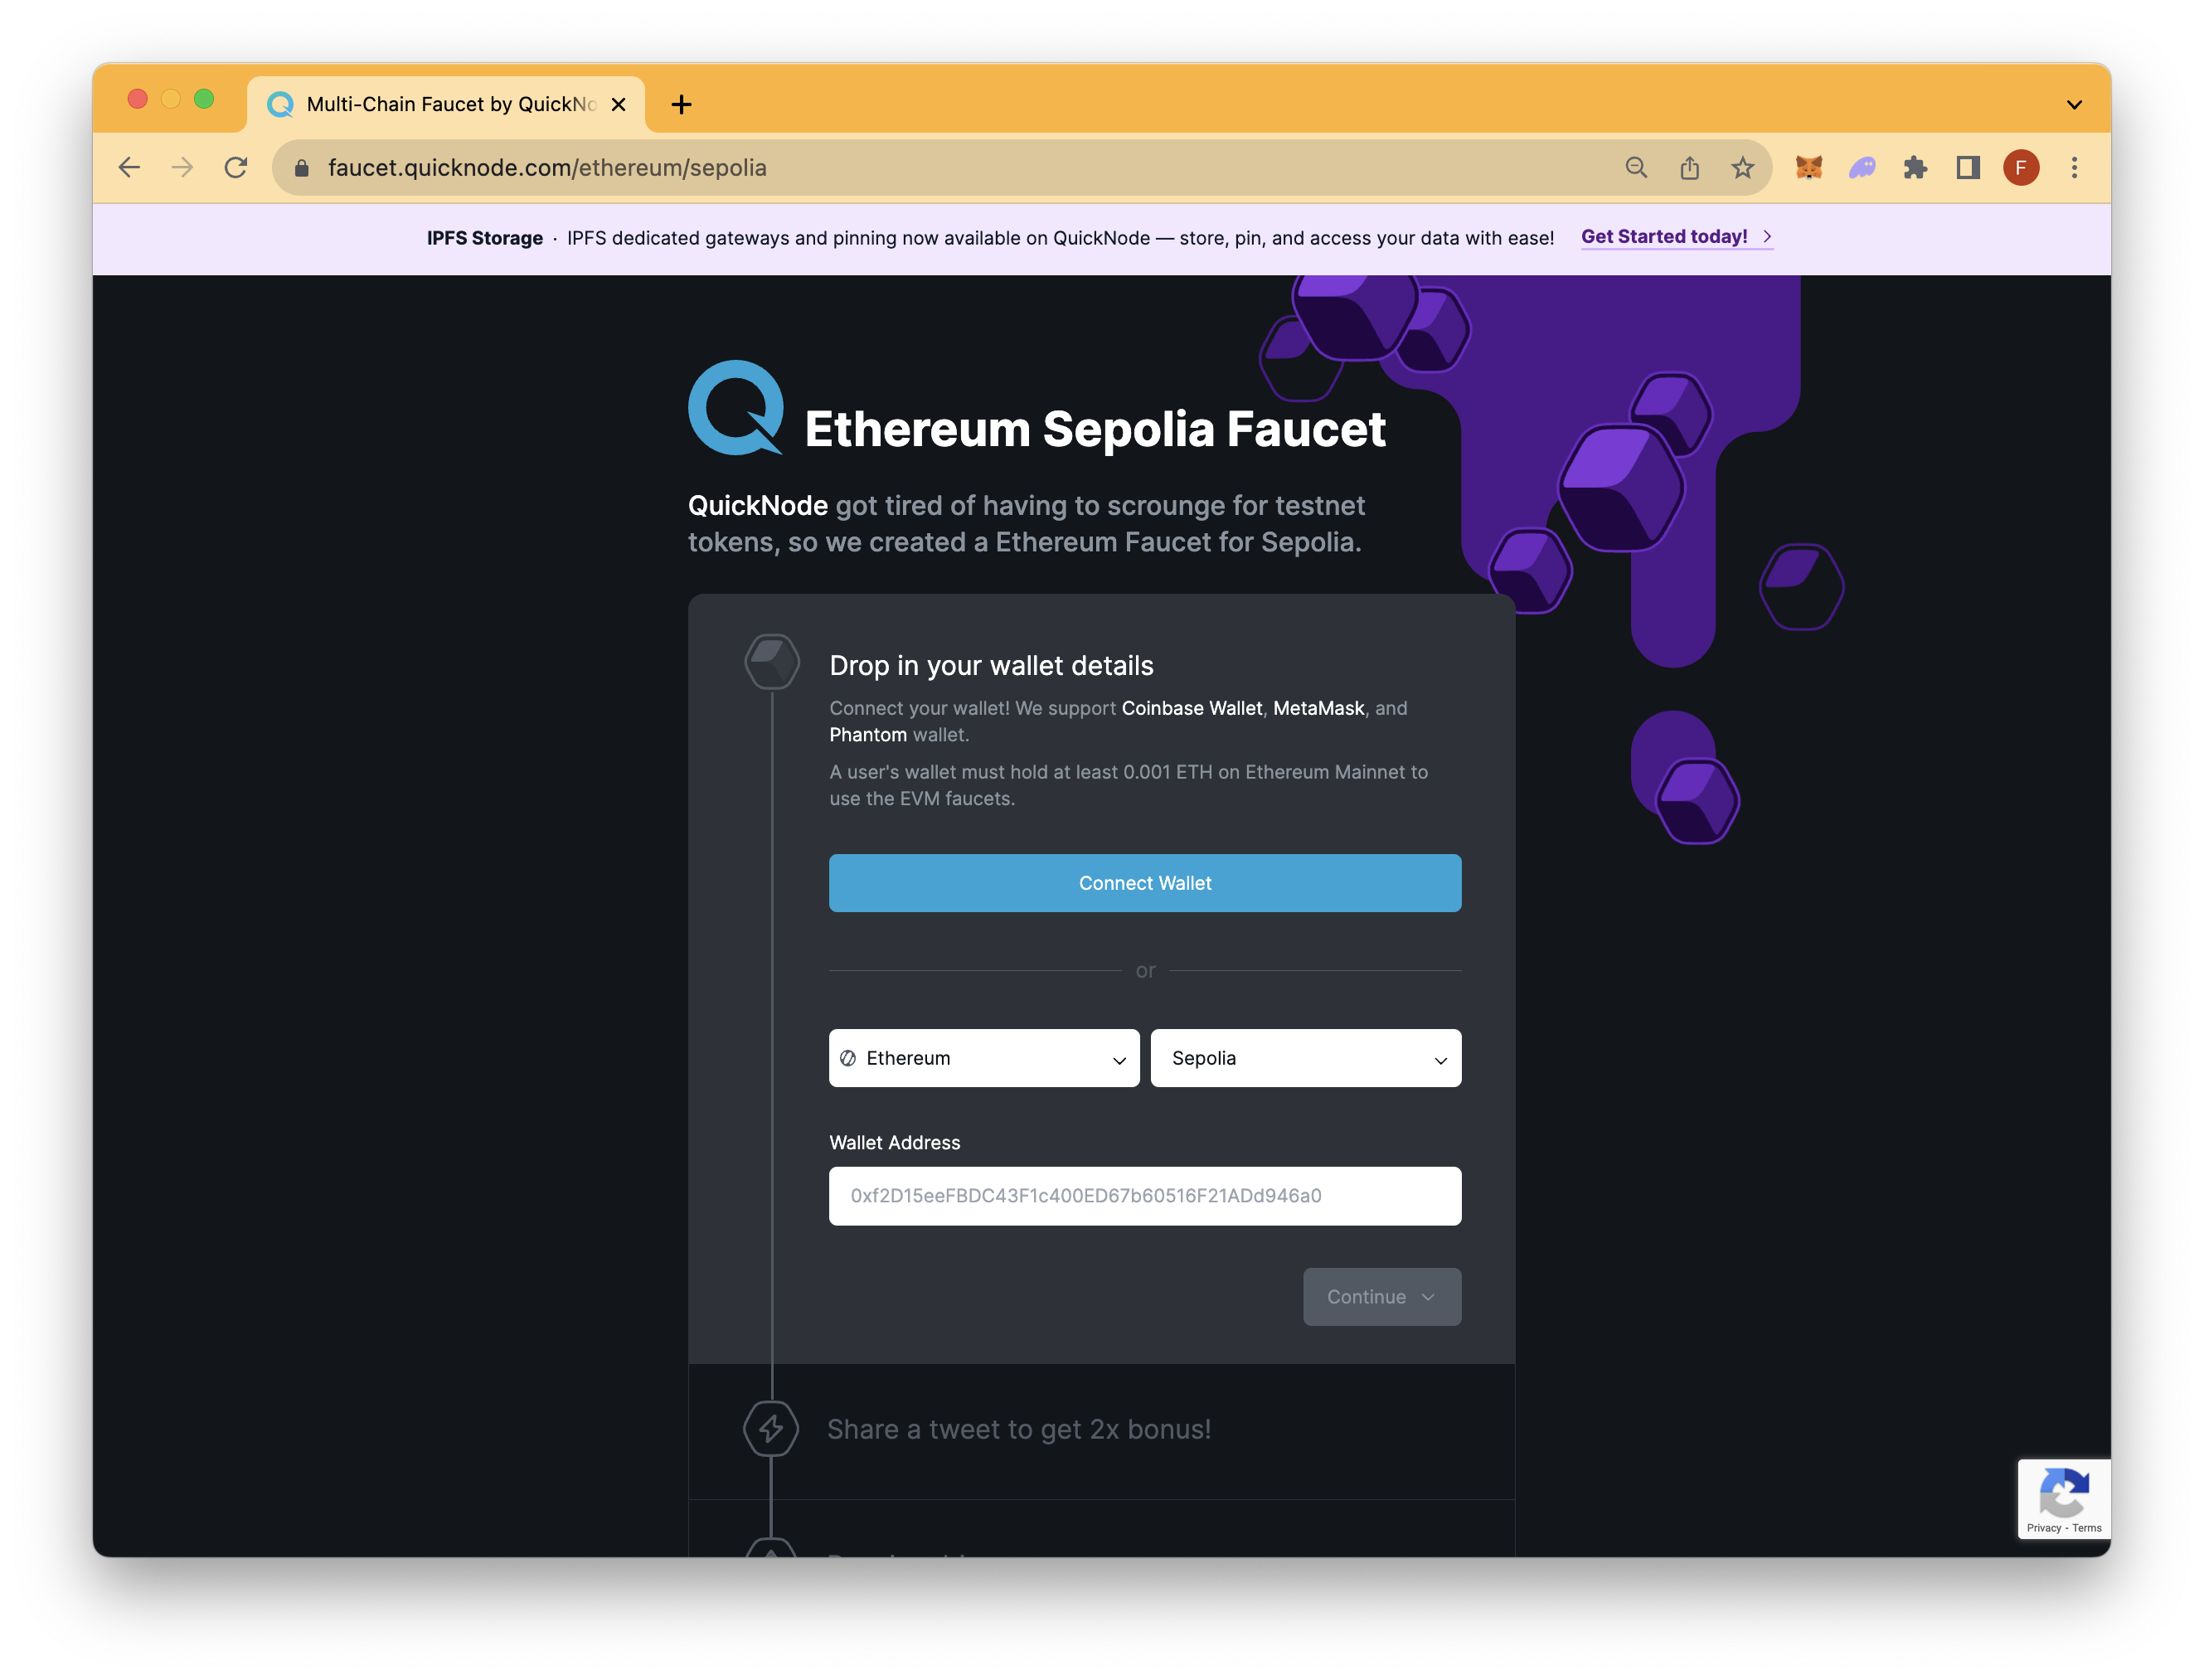
With our wallet funded, we can move onto the deplyoment section.
Deploying our contract
Head over to the Ethereum Remix IDE and make a new Solidity file, for example - IPFS.sol
Pega el siguiente código en tu nuevo script de Solidity:
// SPDX-License-Identifier: MIT
pragma solidity ^0.8.3;
contract IPFS {
    string ipfsHash;

    function sendHash(string memory x) public {
        ipfsHash = x;
    }

    function getHash() public view returns (string memory) {
        return ipfsHash;
    }
}
Let's recap the code above.
- Line 1: Specifying SPDX license type, which is an addition after Solidity ^0.6.8. Whenever the source code of a smart contract is made available to the public, these licenses can help resolve/avoid copyright issues. If you do not wish to specify any license type, you can use a special value UNLICENSED or simply skip the whole comment (it won’t result in an error, just a warning).
- Line 2: Declaring the solidity version.
- Line 3: Starting our contract named IPFS.
- Line 4: Declaring a var ipfsHash of type string to store our file’s hash.
- Line 6-8: Declaring a function sendHash() of type public means it can be accessed from outside of this function by other contracts and programs. It takes a string x as input and stores the value of x to the ipfsHash variable.
- Line 10-12: Declaring a function getHash() also to type public and mutability view, which means it can only view, not modify the Ethereum blockchain’s state and returns the hash stored in the variable ipfsHash.
Next, navigate to the Solidity Compiler tab and click Compile. You should see a green checkmark once the compilation is successful.
After, let's navigate to the Deploy & Run Transactions tab and select the Injected Web3 option under the Environment field (make sure your MetaMask is on Sepolia test network). Then, click the Deploy button and approve the transaction in your MetaMask wallet.
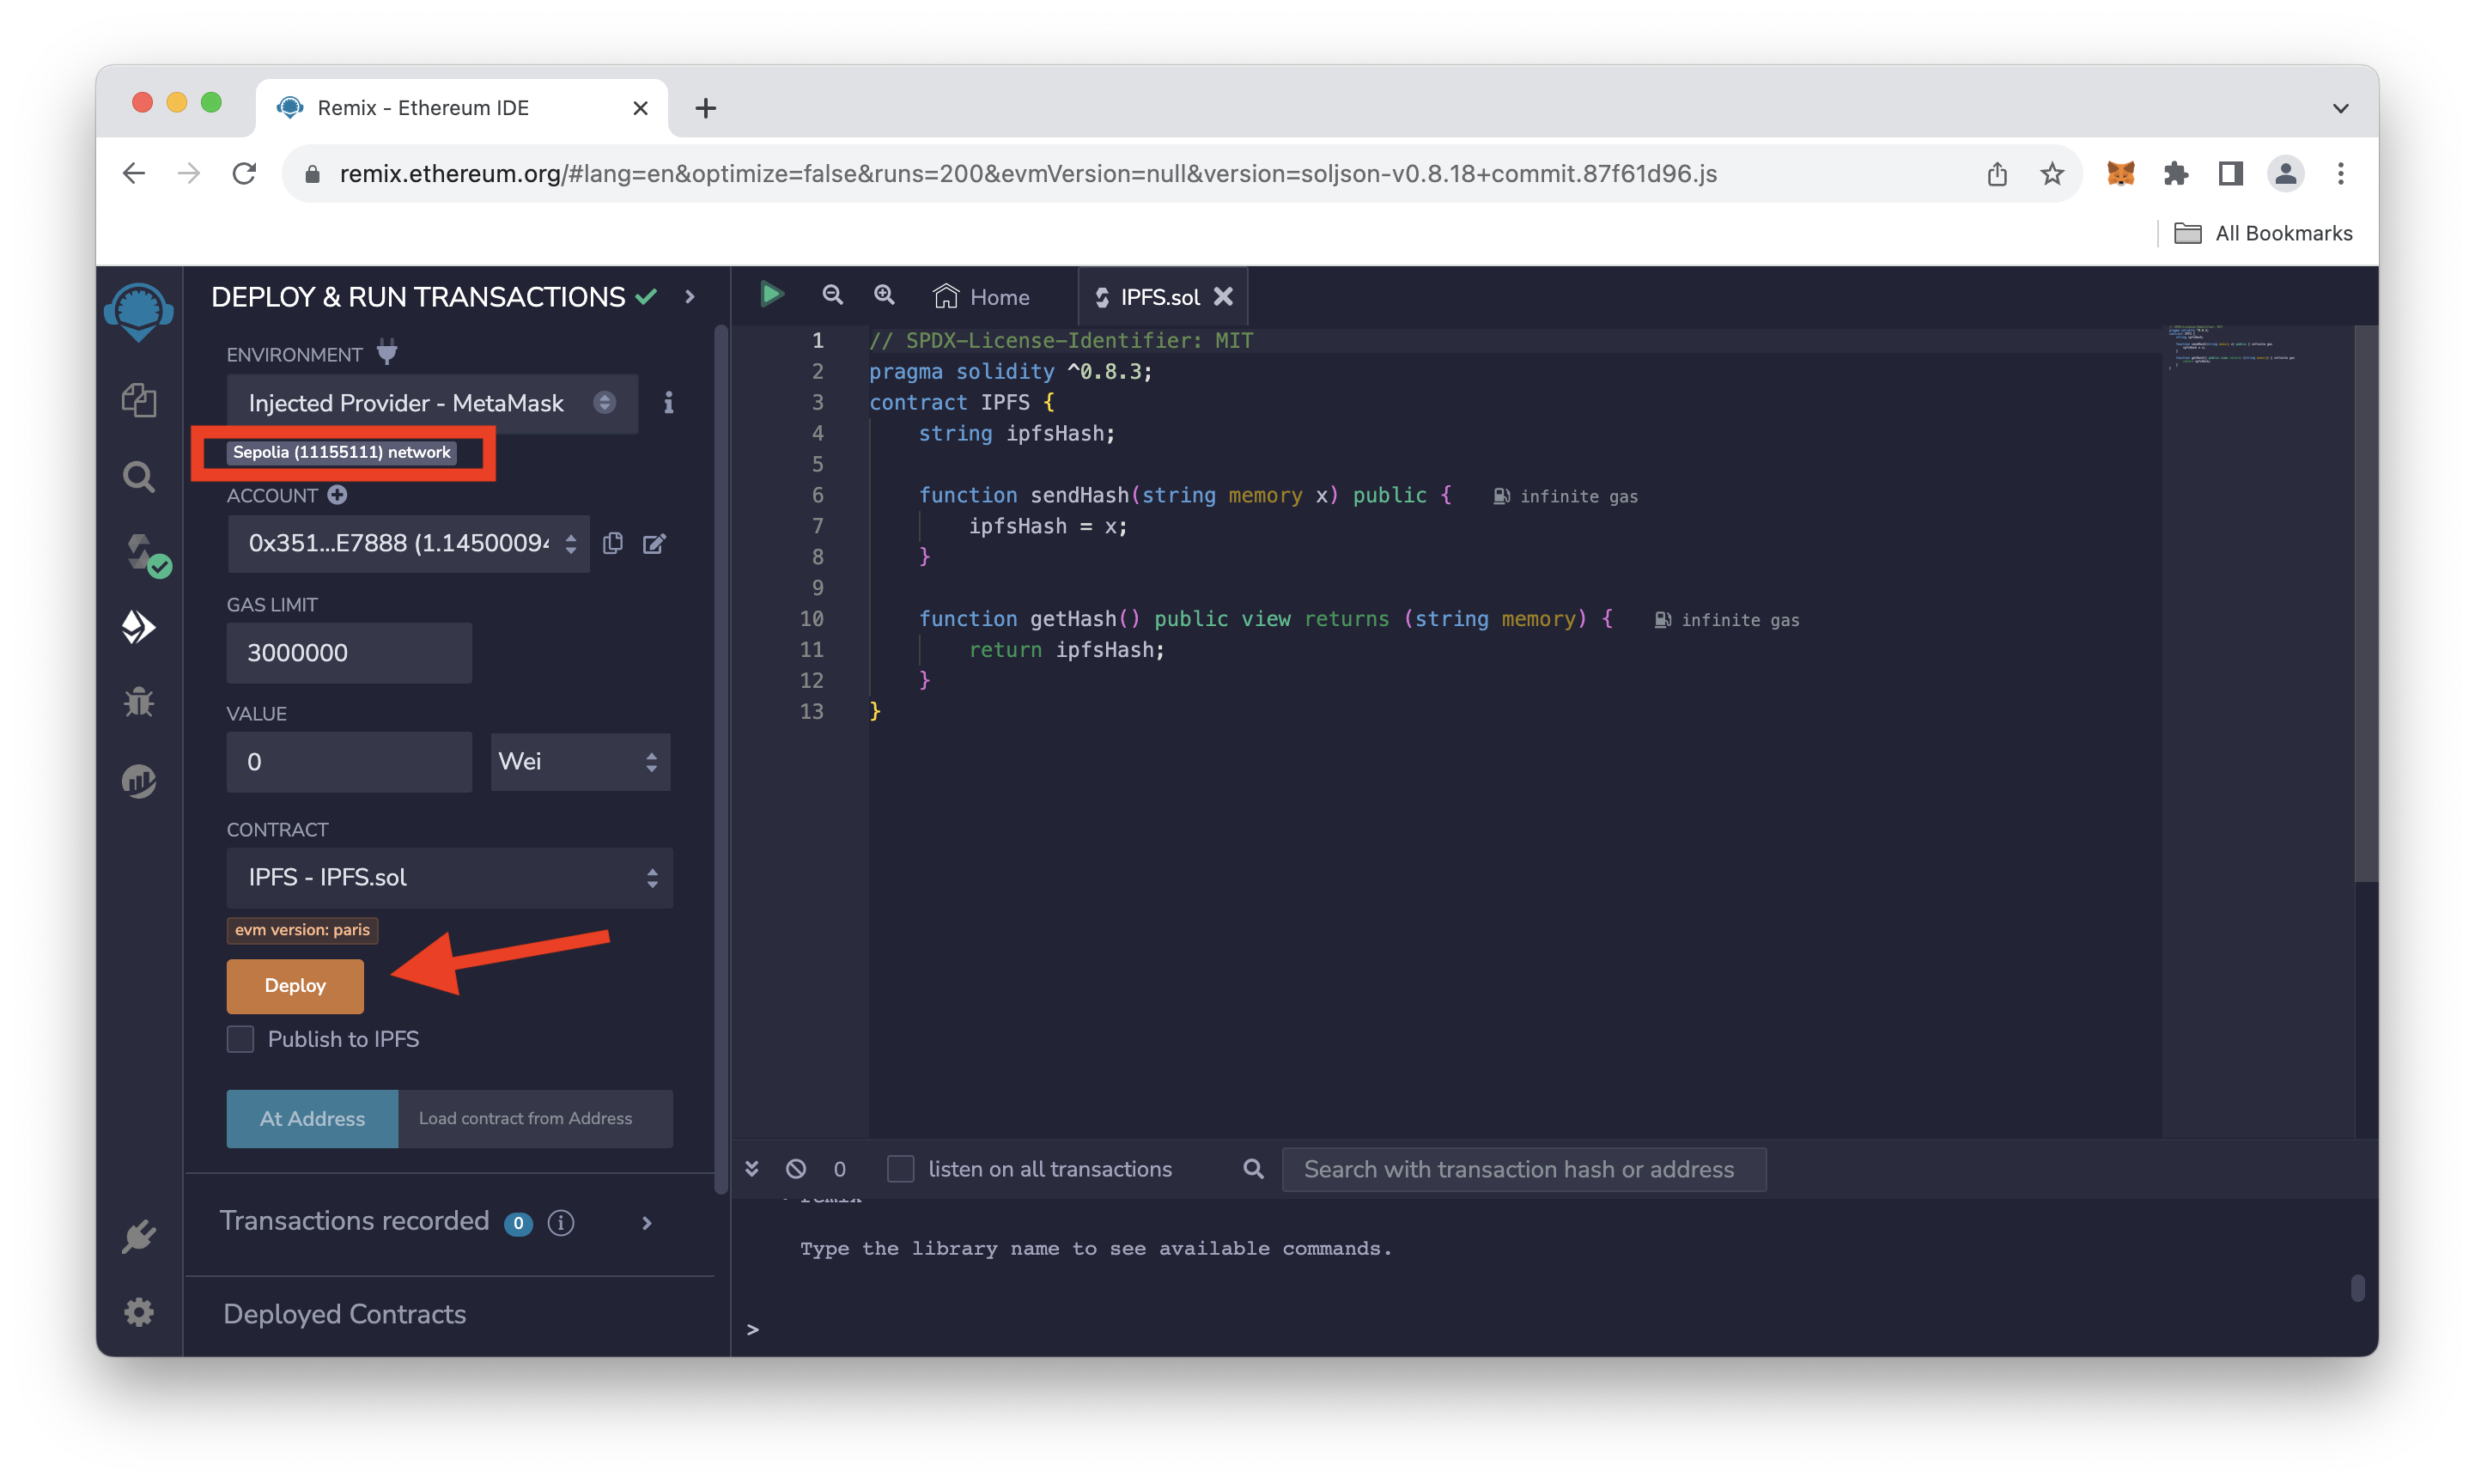
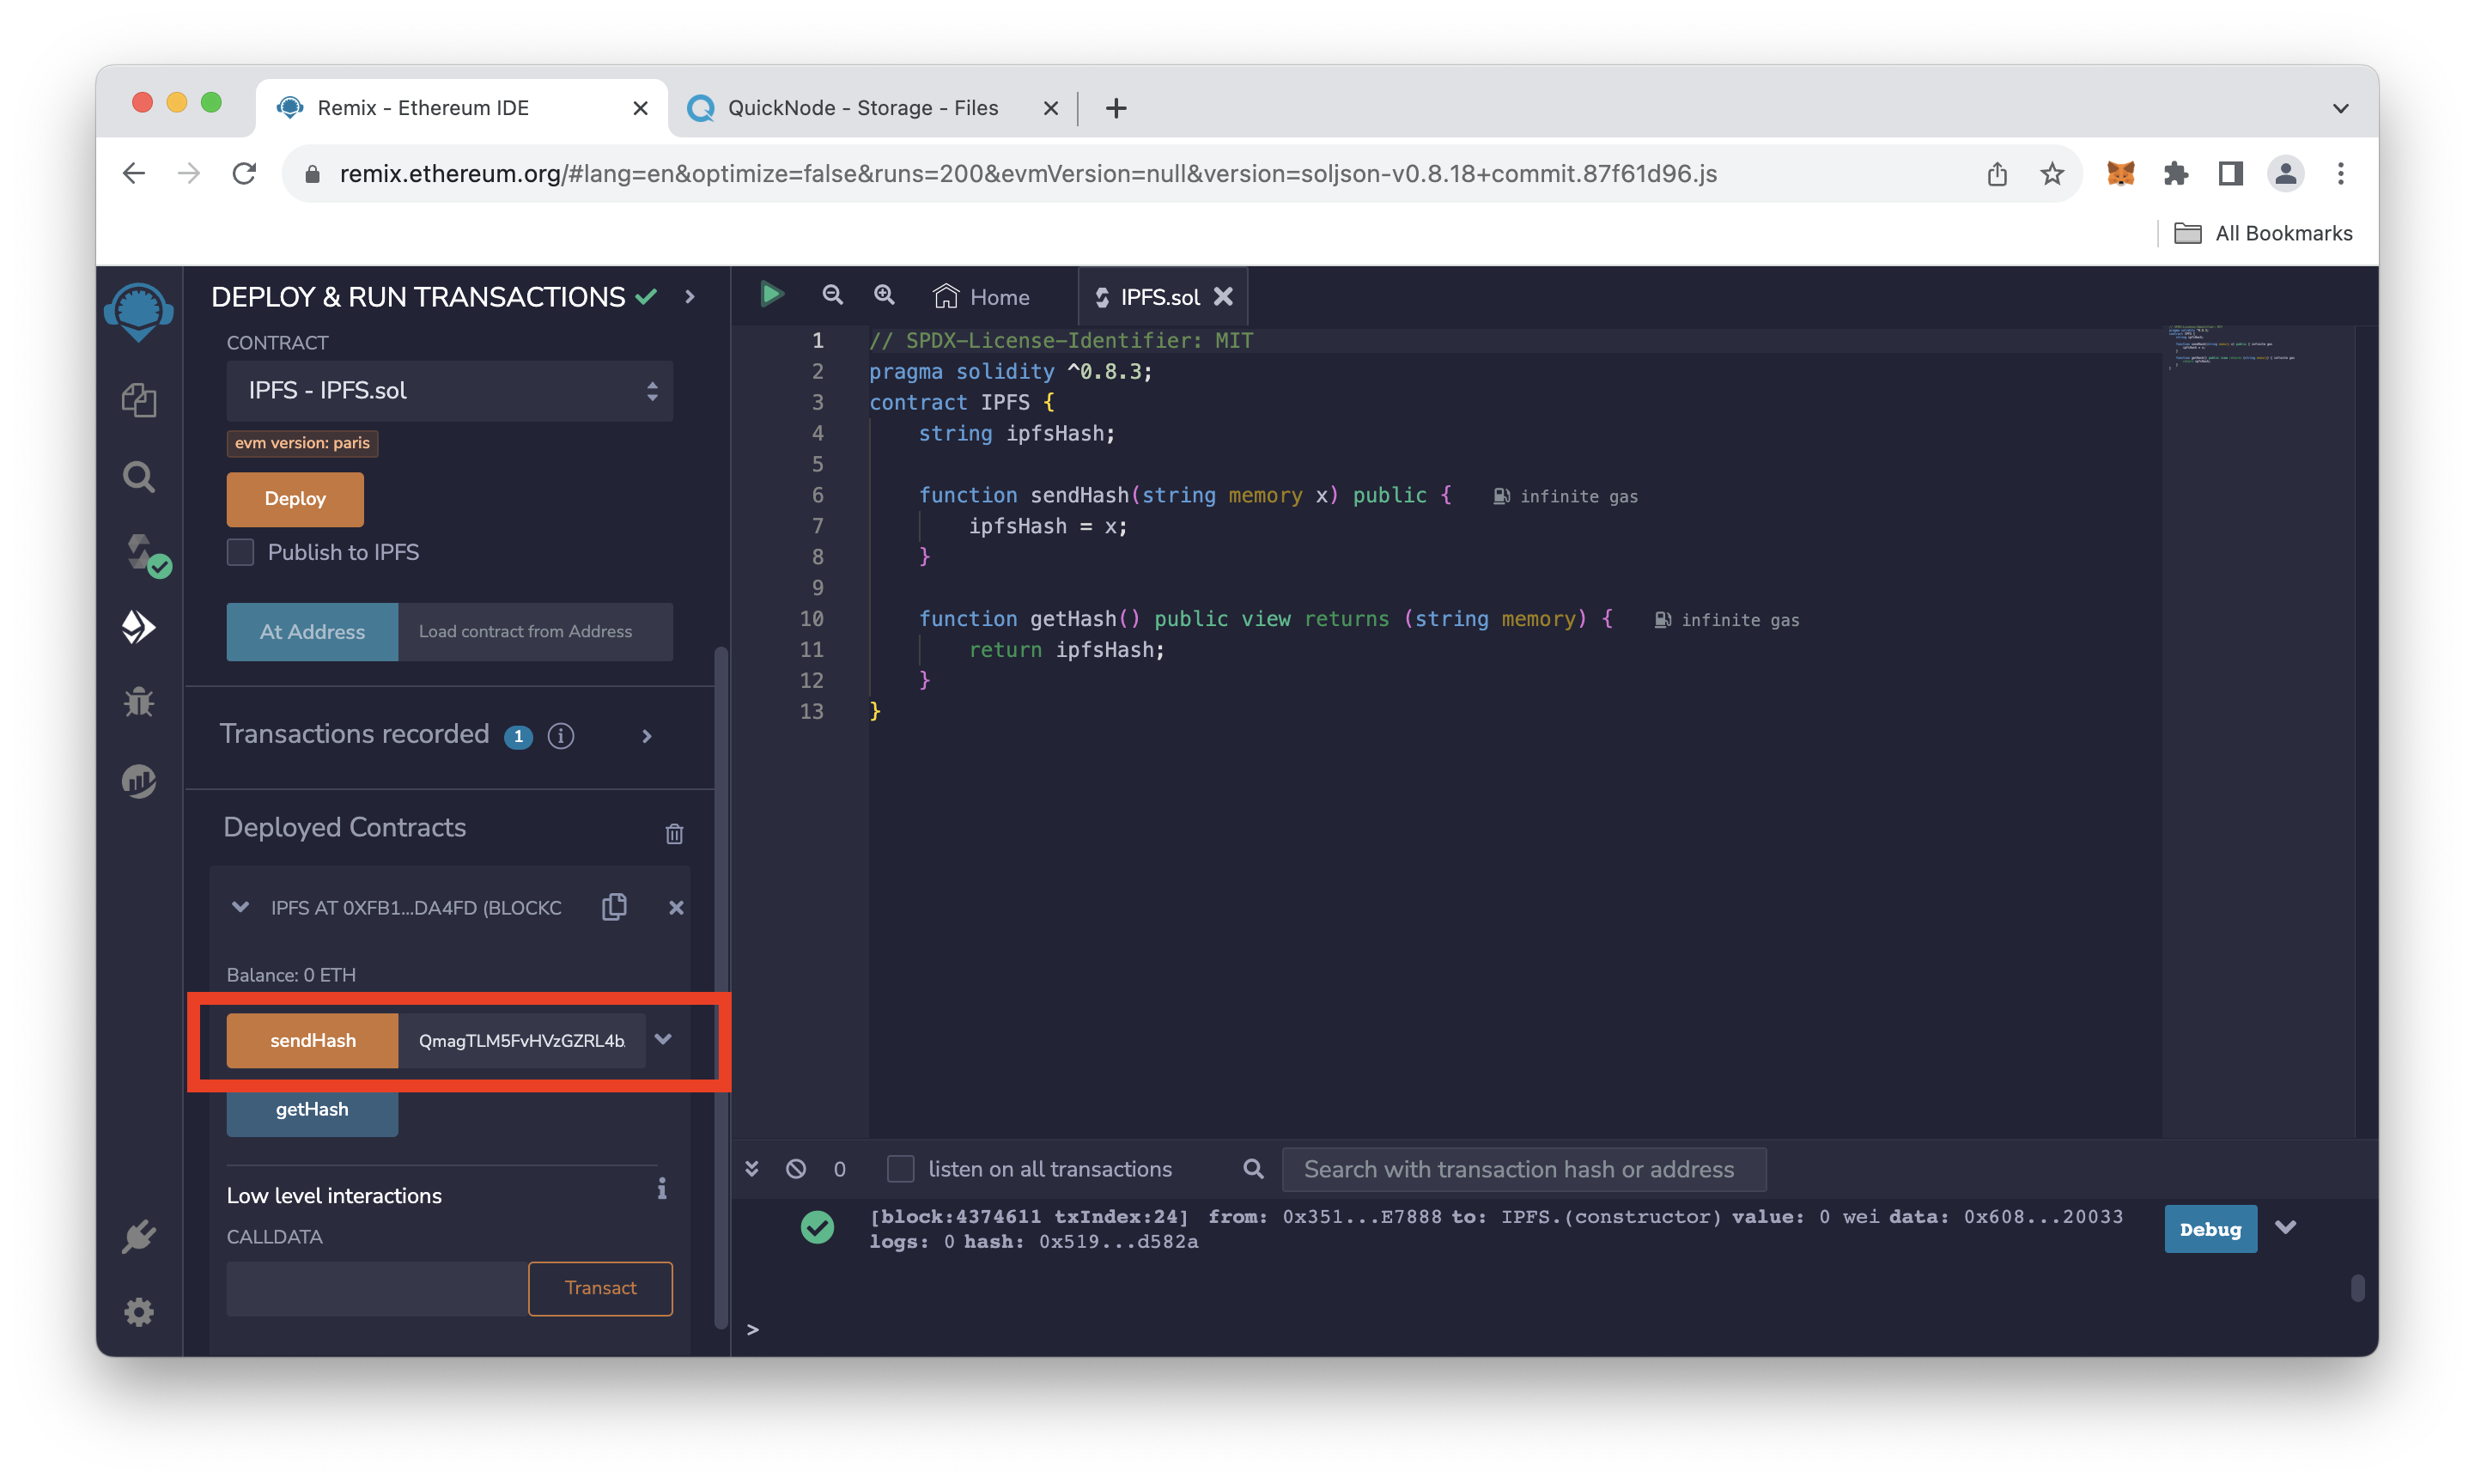
Once your smart contract is deployed, expand the Deployed Contracts section in Remix. We'll need to paste the hash which we obtained in the above section after publishing our file to IPFS in the input field near the sendHash button and click on sendHash; Then approve the transaction in Metamask.
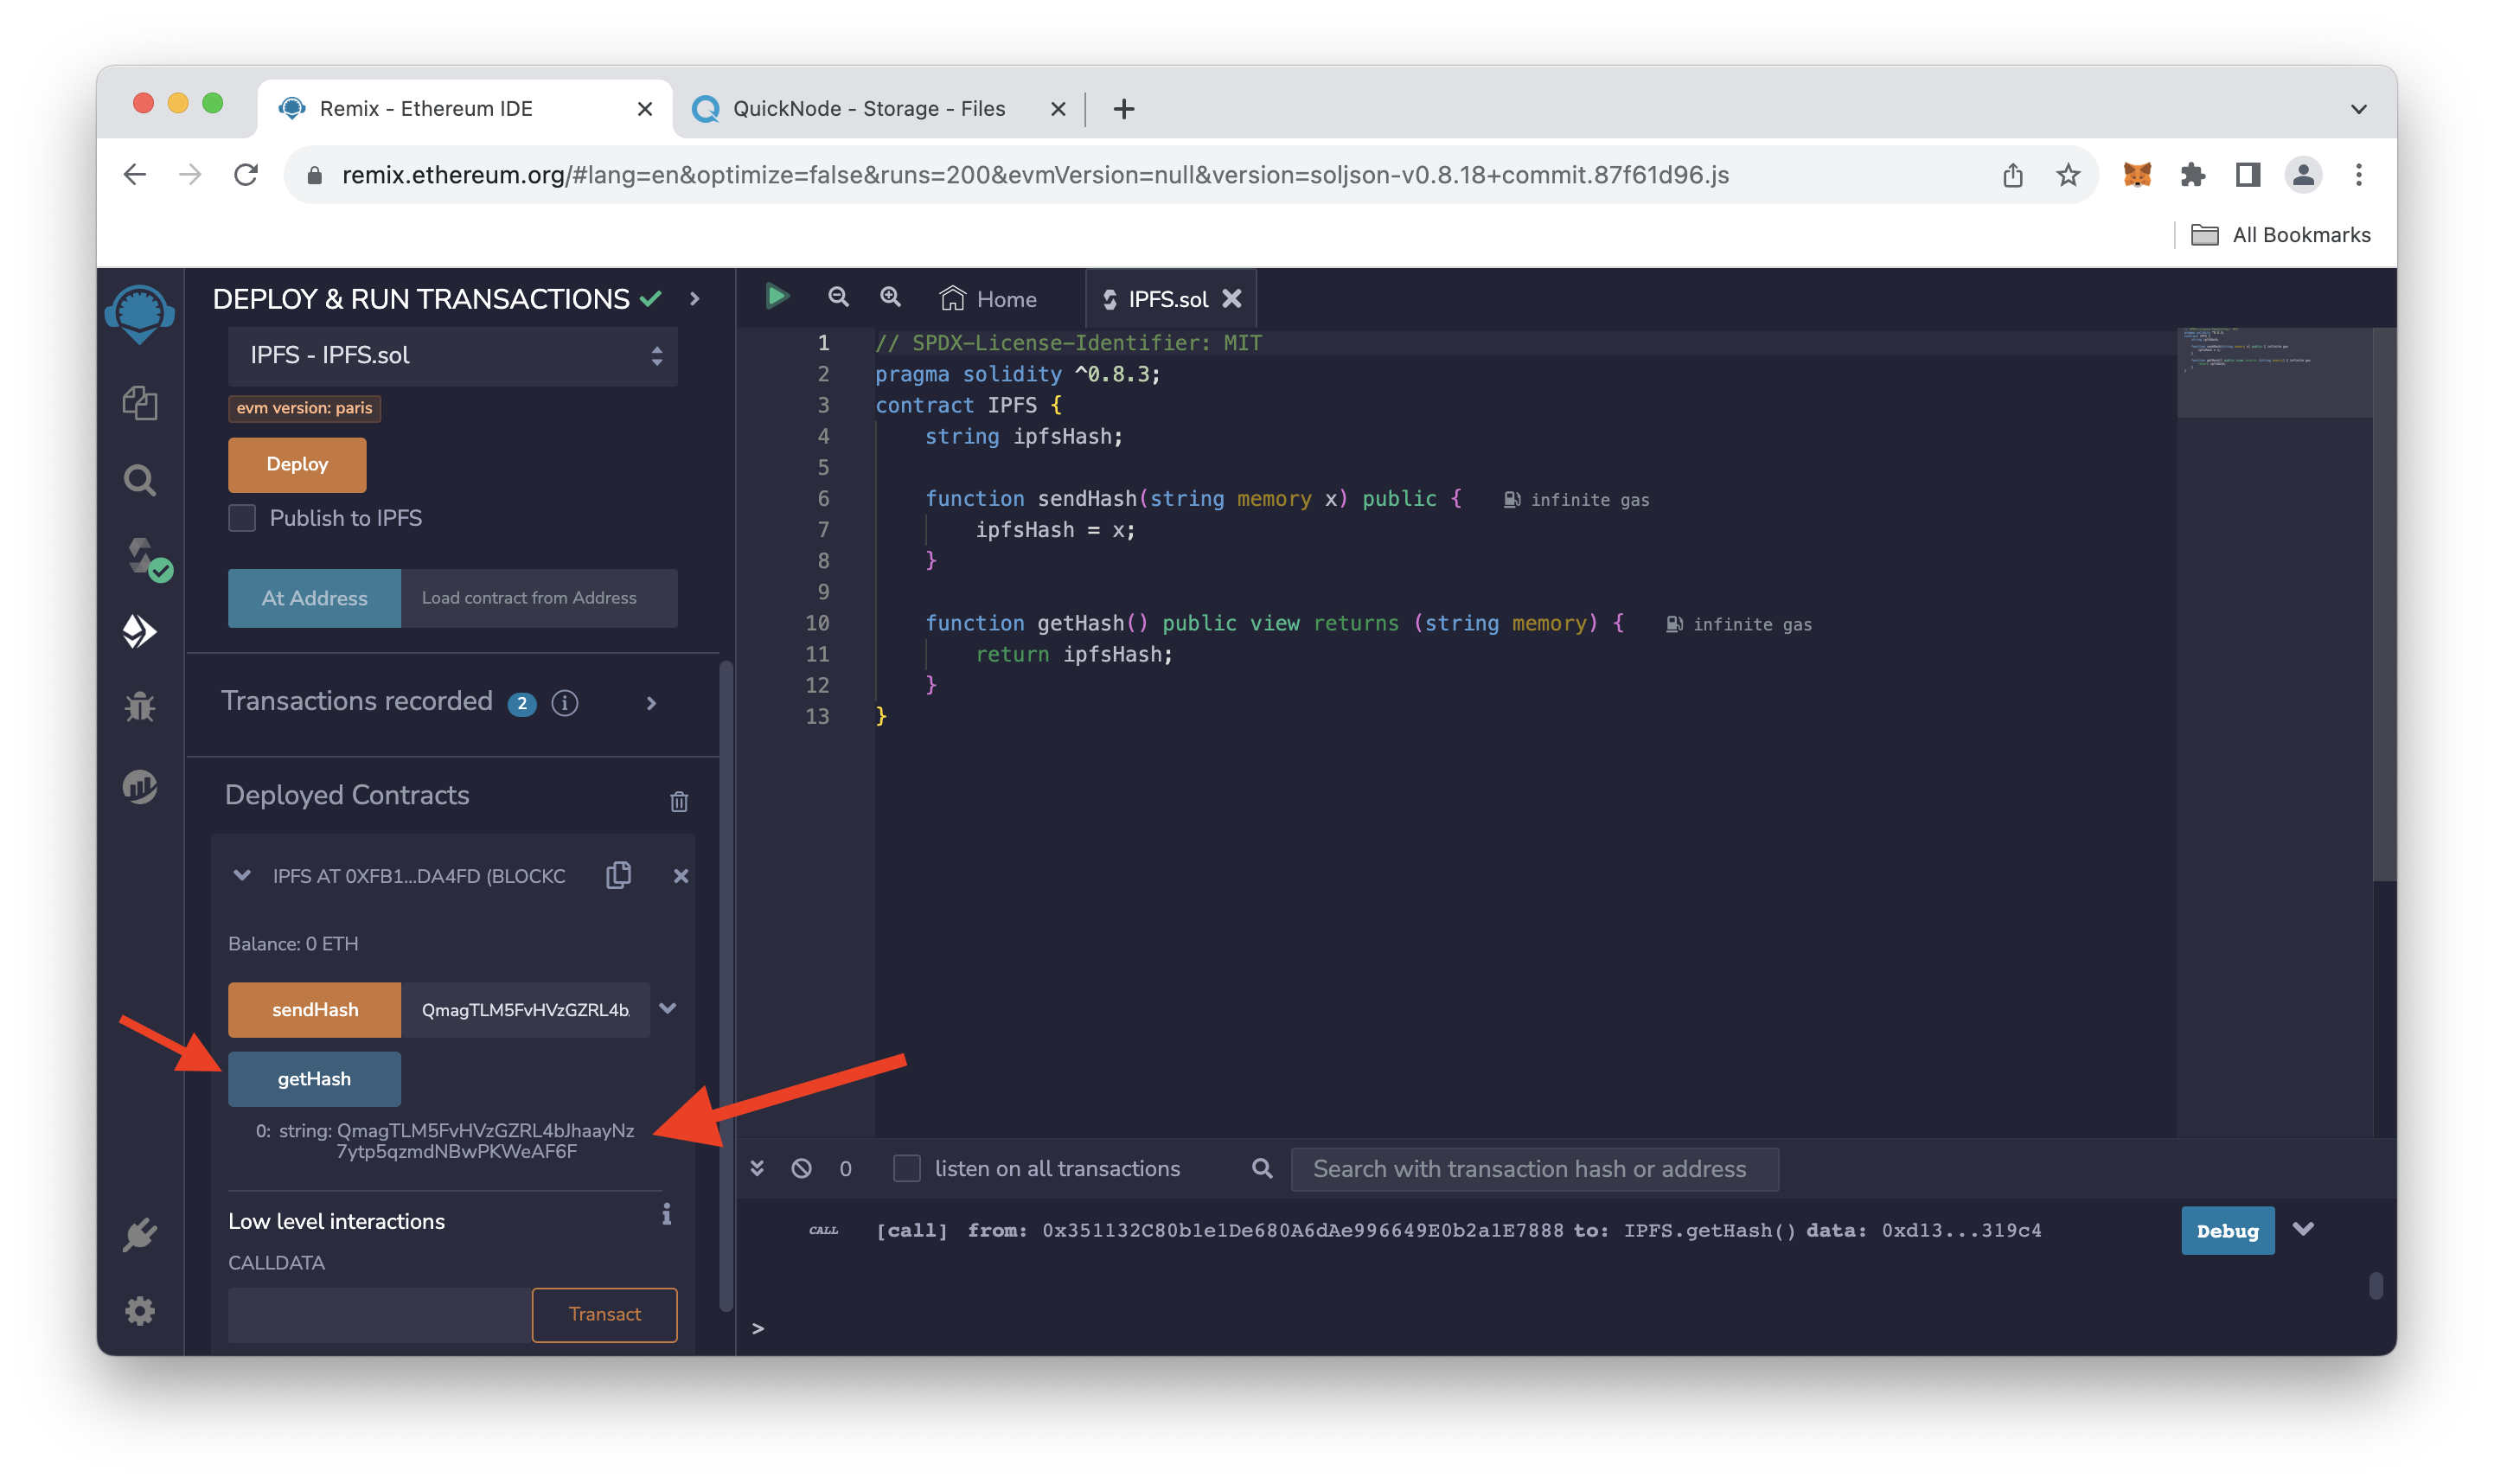
Once the transaction is confirmed, our hash will be stored in the deployed contract. To verify, click on getHash, and see the output of the hash stored in our smart contract.
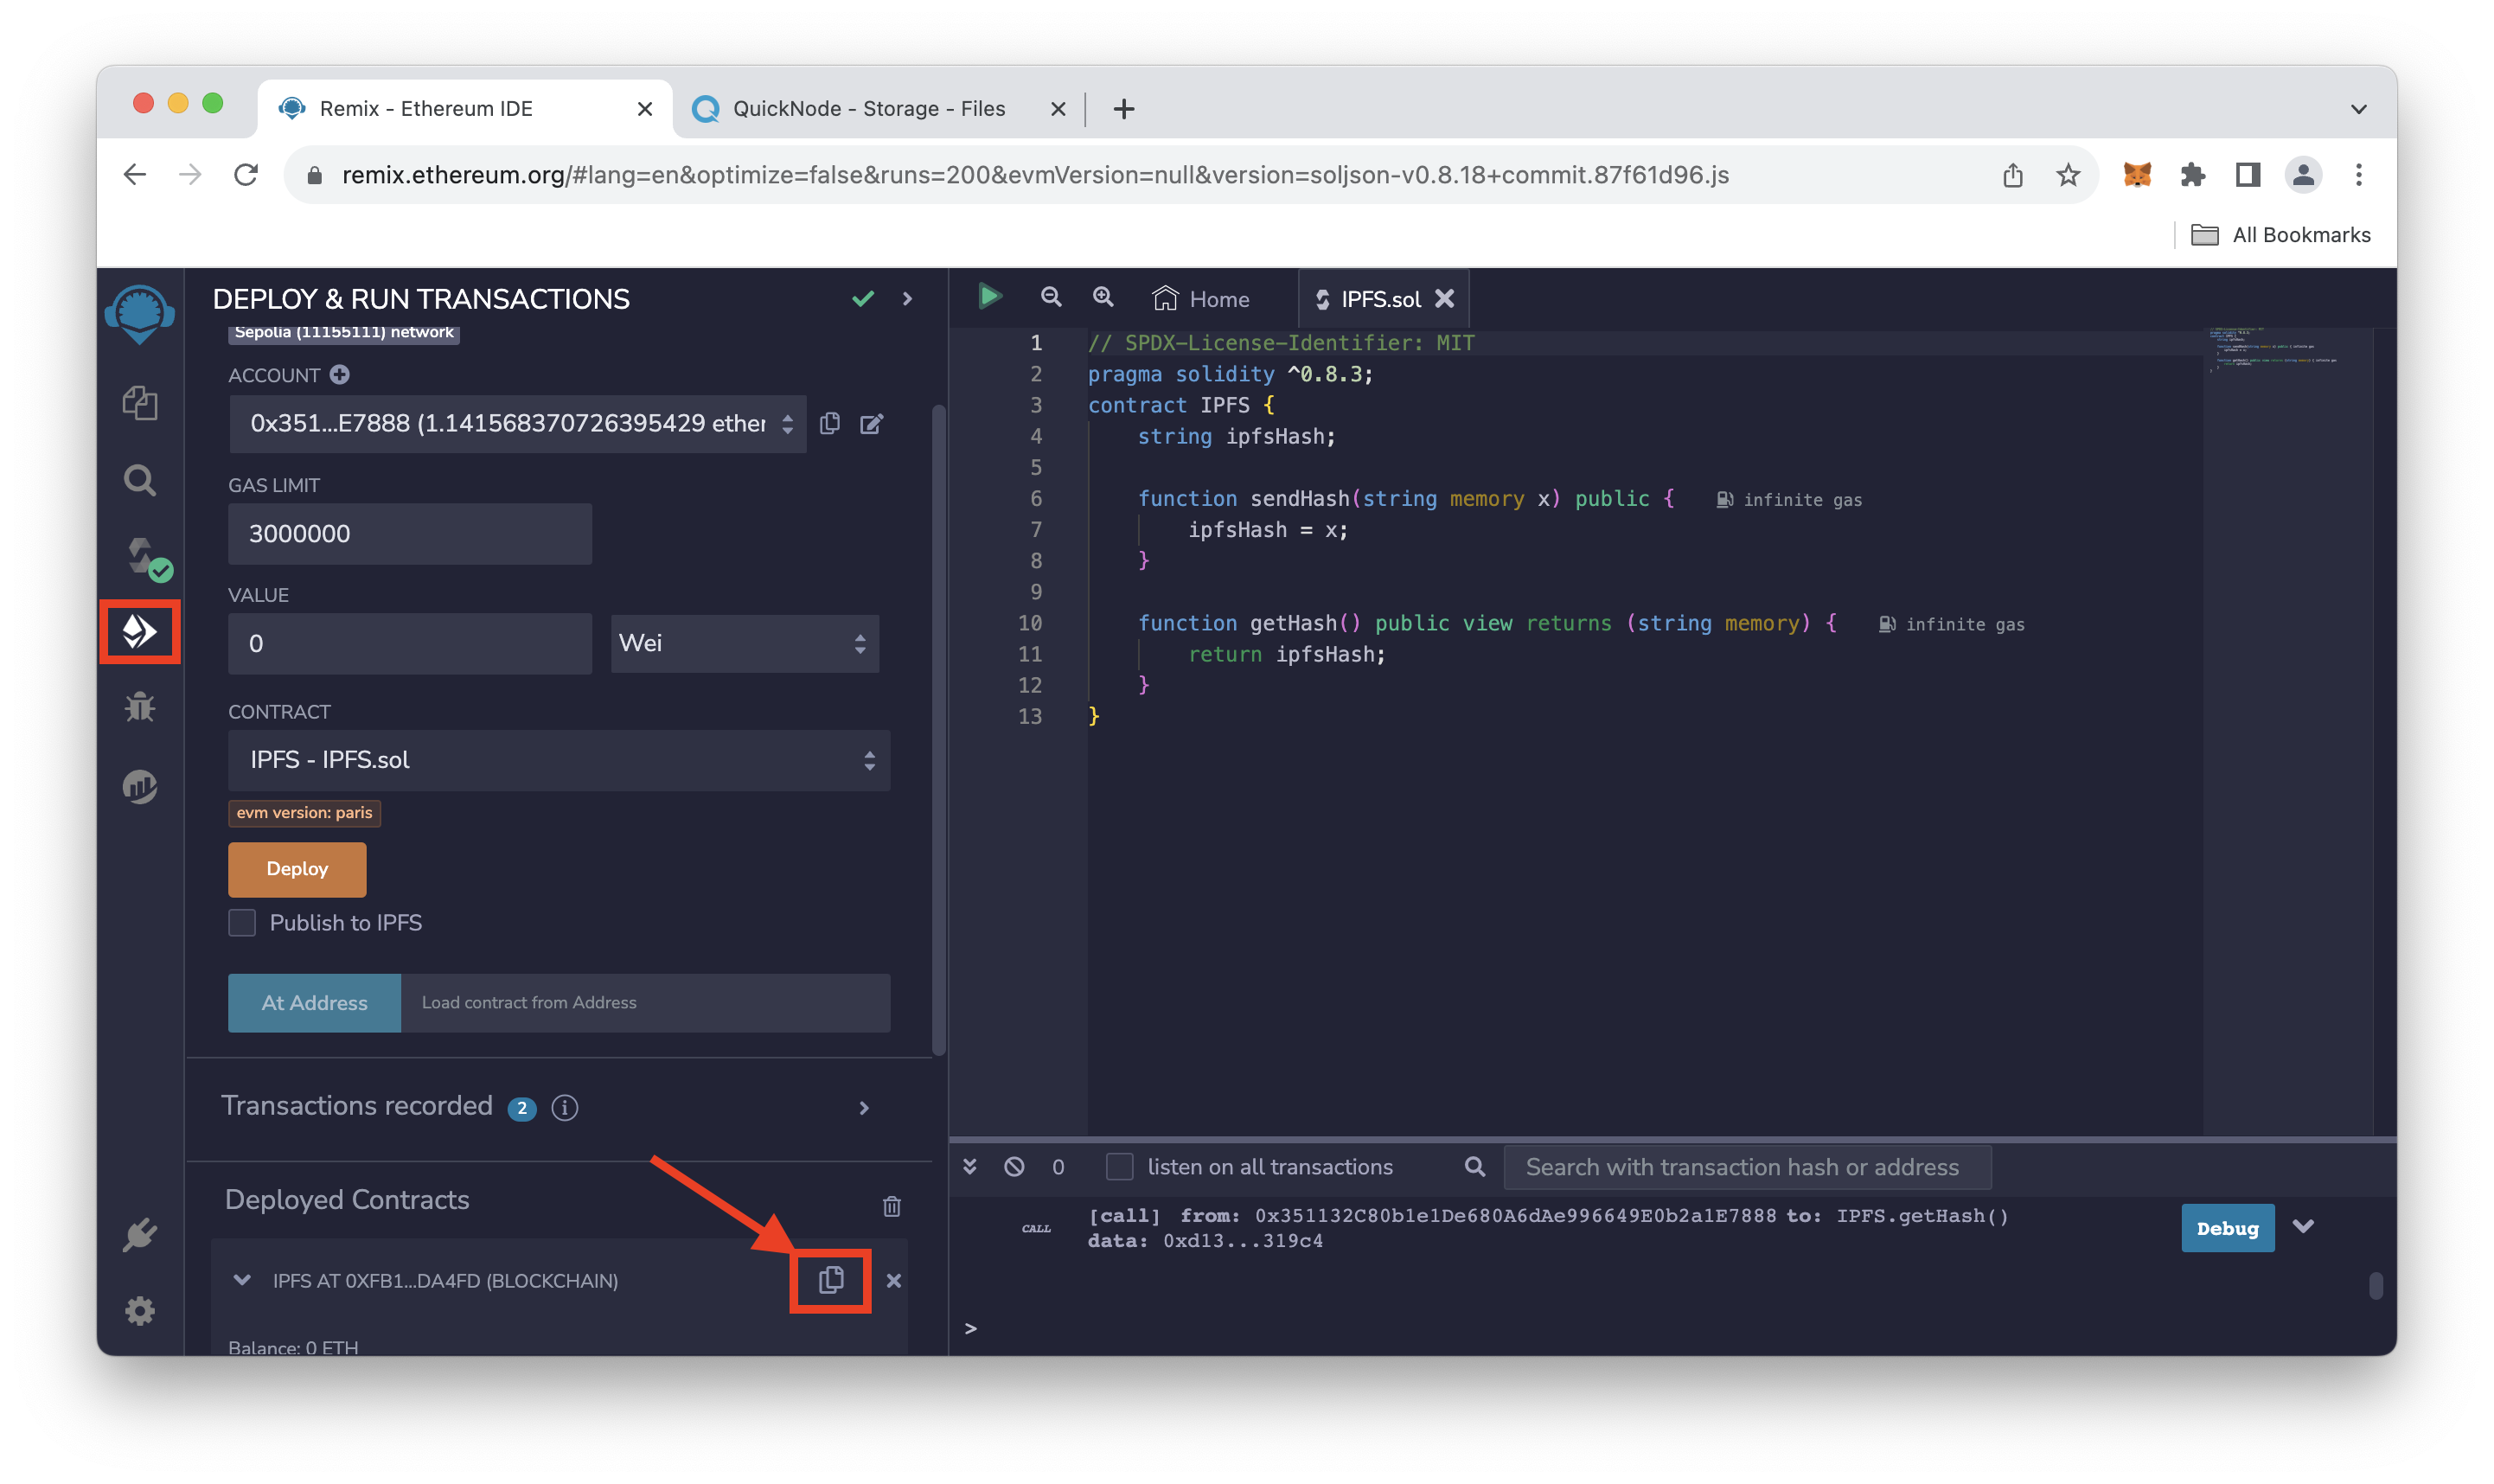
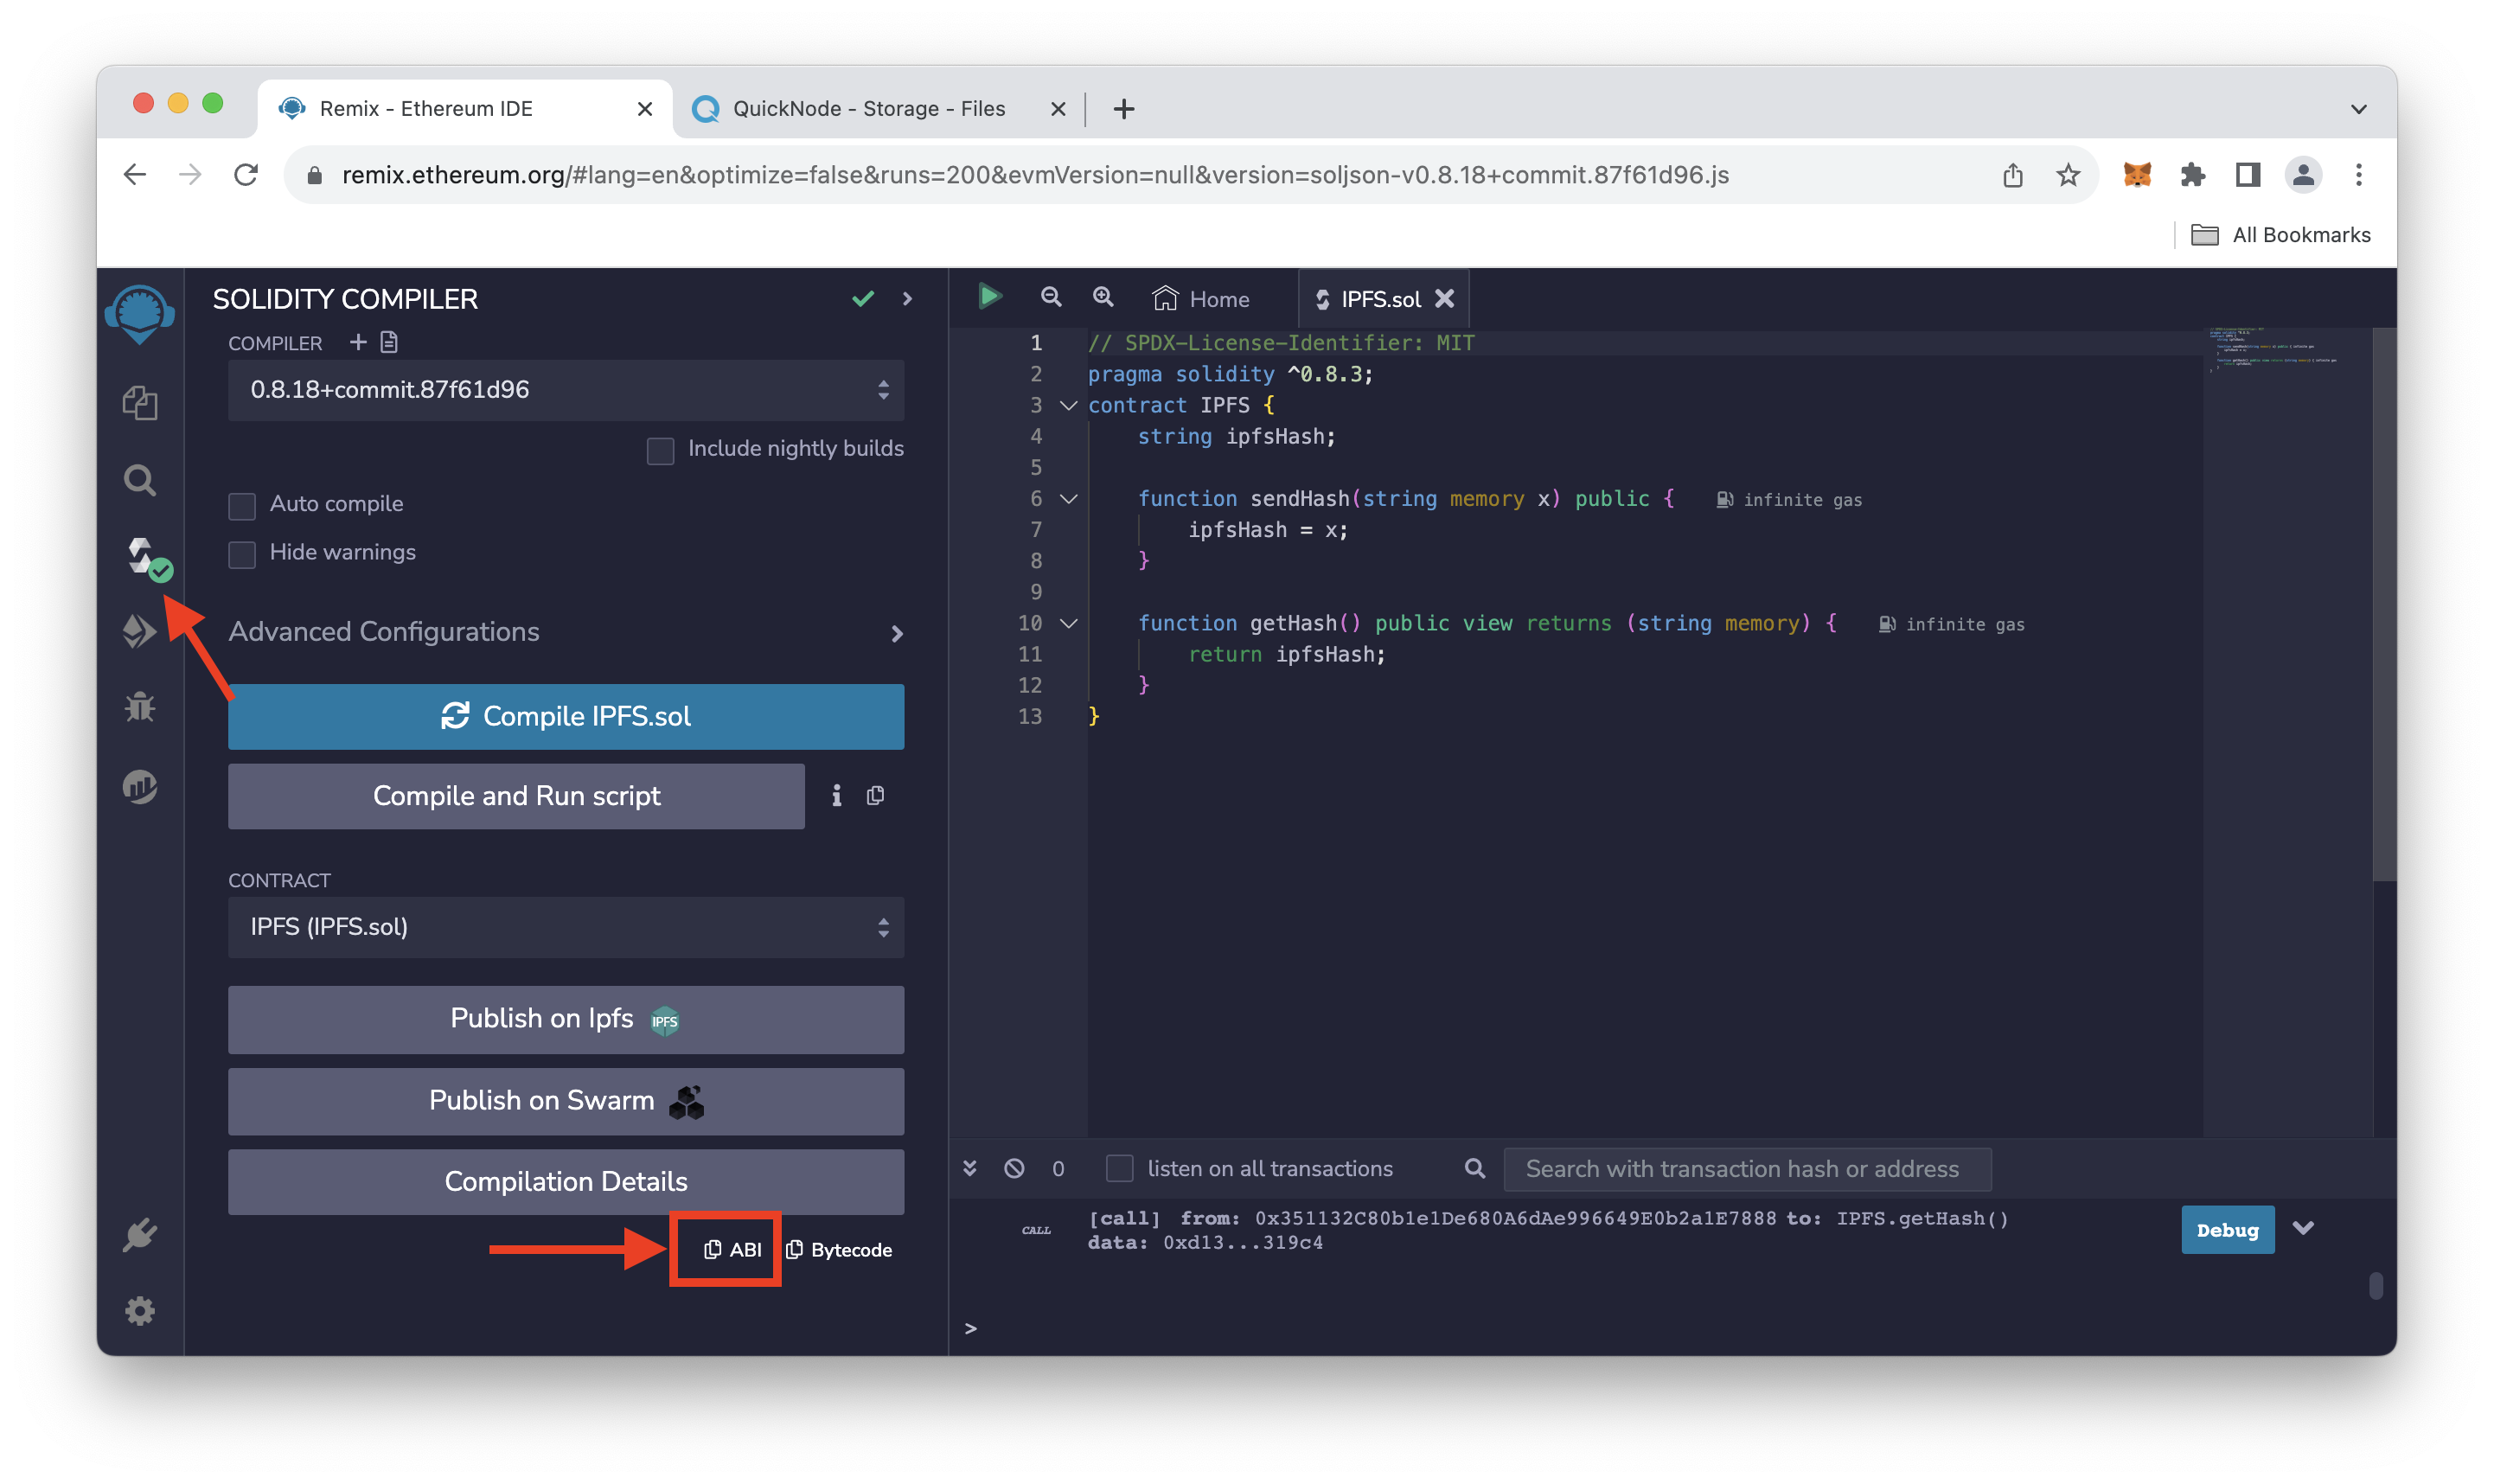
Copy and save the contract’s ABI from the Compile tab and the contract’s address from the copy button under the deployed contract section. We'll need both it later.
Learn more about ABI and how it’s generated in this guide on ABI.
Now, let’s see how we can retrieve the hash from the Ethereum blockchain and view the image using the hash.
Installing dependencies
We’ll use ethers.js to write a short script to interact with our deployed smart contract and access our image using IPFS gateway and hash. Then we’ll use a package called browserify to use our Node.js script in the browser.
We’ll install both ethers.js and browserify using npm (Node Package Manager), which comes with node.js; Learn more about ethers.js in this guide on How to connect to Ethereum network with ethers.js.
Open your terminal/cmd and run the following command to create a project folder and install dependencies:
mkdir ipfsProject
cd ipfsProject
npm init --y
echo > IPFS.js && echo > index.html
npm i ethers@5 browserify uniq
If everything goes right, ethers, browserify and uniq will be installed. Next, let's setup the file.
Viewing the file stored on IPFS
Step 1: Open the IPFS.js file and copy-paste the following code in it:
var ethers = require('ethers');

var provider = new ethers.providers.JsonRpcProvider("YOUR_QUICKNODE_ENDPOINT");
var contractAddress = "CONTRACT_ADDRESS_FROM_REMIX";
var abi = [
    {
        "inputs": [
            {
                "internalType": "string",
                "name": "x",
                "type": "string"
            }
        ],
        "name": "sendHash",
        "outputs": [],
        "stateMutability": "nonpayable",
        "type": "function"
    },
    {
        "inputs": [],
        "name": "getHash",
        "outputs": [
            {
                "internalType": "string",
                "name": "",
                "type": "string"
            }
        ],
        "stateMutability": "view",
        "type": "function"
    }
];

var contract = new ethers.Contract(contractAddress, abi, provider);

function getHashFromContract() {
    return contract.getHash()
        .then(function(hash) {
            return hash;
        })
        .catch(function(error) {
            console.error('Error fetching hash from contract:', error);
        });
}

document.addEventListener('DOMContentLoaded', function() {
    getHashFromContract().then(function(hash) {
        if (hash) {
            document.getElementById("btn").addEventListener('click', function() {
                window.location.href = "https://ipfs.io/ipfs/" + hash;
            });
        }
    });
});
Go ahead and replace YOUR_QUICKNODE_ENDPOINT with the Sepolia HTTP provider you created earlier, and CONTRACT_ADDRESS_FROM_REMIX with the address of the deployed contract from the above section.
Explicación del código anterior:
- Line 1: Importing the ethers library.
- Line 2: Storing our Quicknode’s URL in the url variable.
- Line 3: Instantiating new ethers.providers.JsonRpcProvider instance and storing it in provider.
- Line 4: Storing the contract address in the address variable.
- Line 5-32: Storing the ABI we got from the previous step in the abi variable
- Line 33: Initializing a contract instance in ethers and connecting to our deployed contract using the address,abi, and provider.
- Line 35: Calling the getHash method of our contract, which returns the hash of the image stored in the contract.
- Line 36-38: Creating onclick event listener on the ‘btn’ div of our HTML page, which we will create after this and adding our ipfs gateway with the hash as the hyperlink, so when the div is clicked, it will redirect to the image.
Now, save the file and use the browserify package to use the script above on our HTML page.
browserify ipfs.js -o bundle.js
Step 2: Copy-paste the code below into your index.html file. This file will help render our image in the browser.
<!doctype html>

<html lang="en">
  <head>
    <meta charset="utf-8">
    <meta http-equiv="X-UA-Compatible" content="IE=edge">
    <meta name="viewport" content="width=device-width, initial-scale=1">
    <title>IPFS with Ethereum</title>
    <style>
		#btn {
			position: absolute;
			top: 50%;
			left: 50%;
			margin: -100px 0 0 -150px;
			font-size: 400%;
			font-family: serif;
			text-decoration: underline;
			text-decoration-style: double;
			color: #65b7ff;
			cursor: pointer;
		}

		body{
			background-color: #ffedf3;
		}
	</style>
  </head>

  <body>
    <div id="btn">View Nyan</div>

    <script src="bundle.js"></script>
  </body>
</html>
Explicación del código anterior.
- Line 1-7: Necessary basic HTML tags.
- Line 8: Giving a title to our HTML page.
- Line 9-26: Some CSS to make the webpage look a bit presentable.
- Line 30: Creating a Div with id btn and adding View Nyan text to it.
- Line 32: Adding our bundle.js file from the previous step to our HTML page.
Now, open the index.html file in your web browser, and if you used the above CSS. It will look something like this:
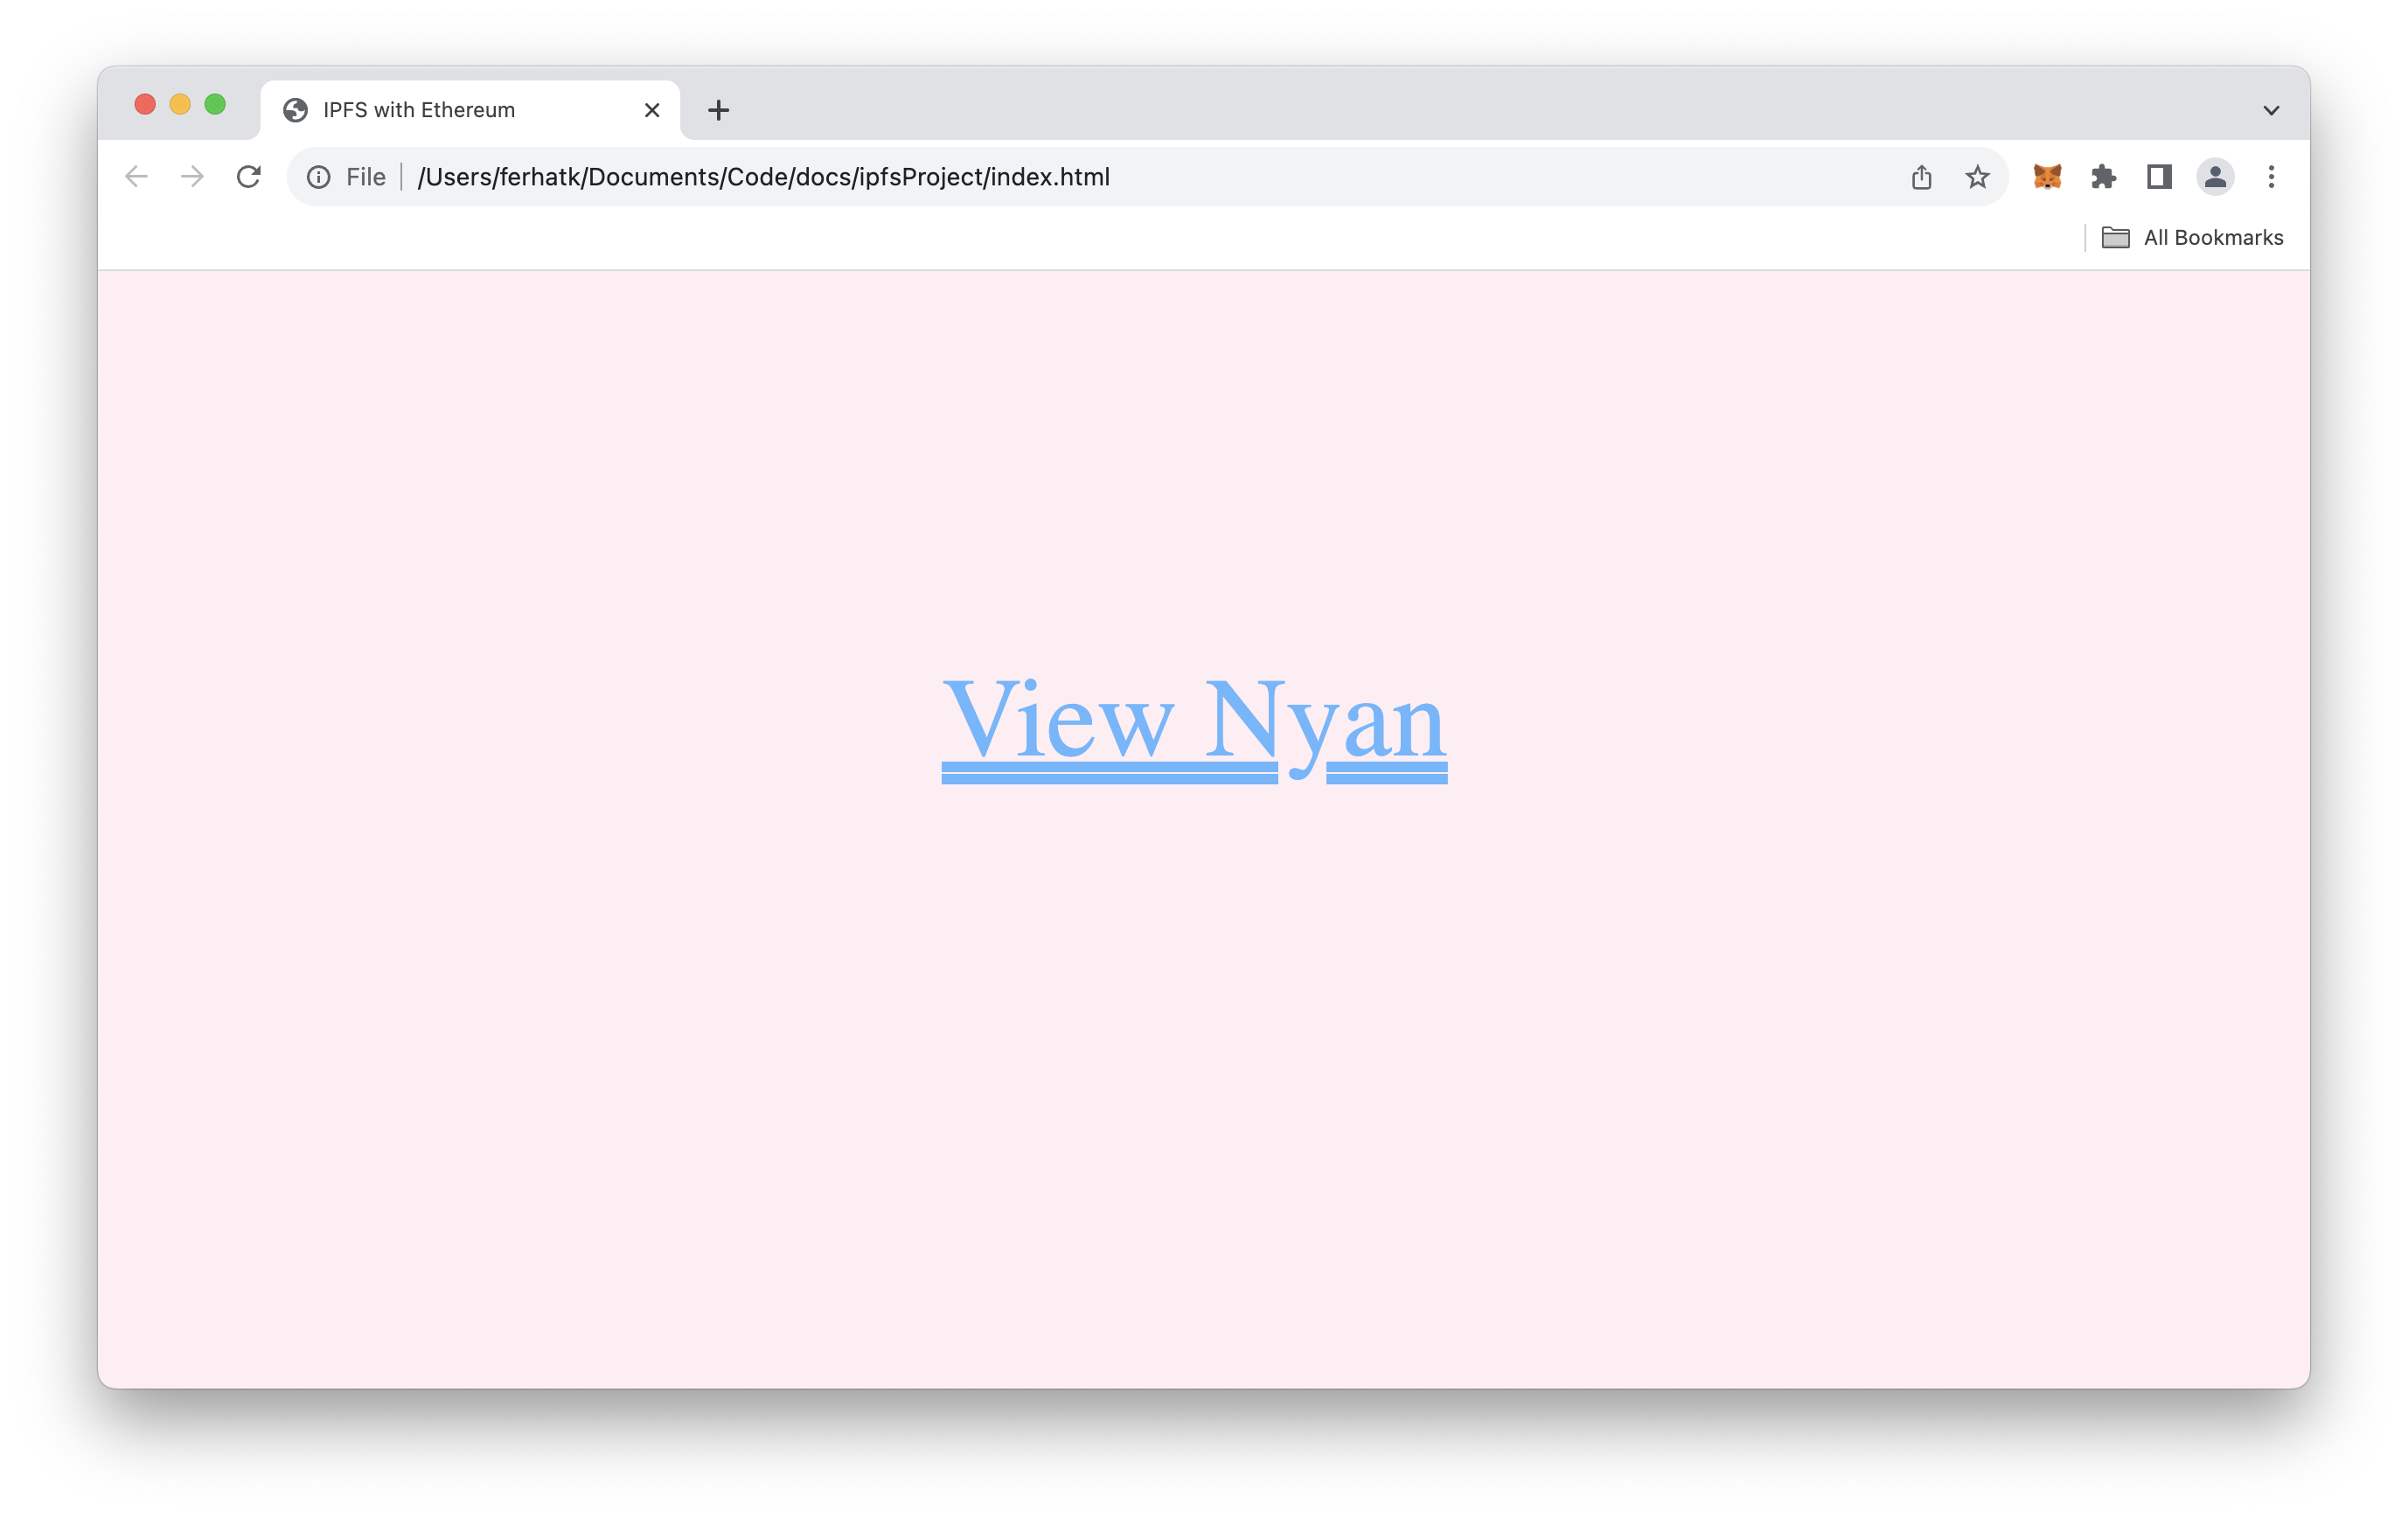
Click on View Nyan, and it will take you to the original Image which we published on IPFS.
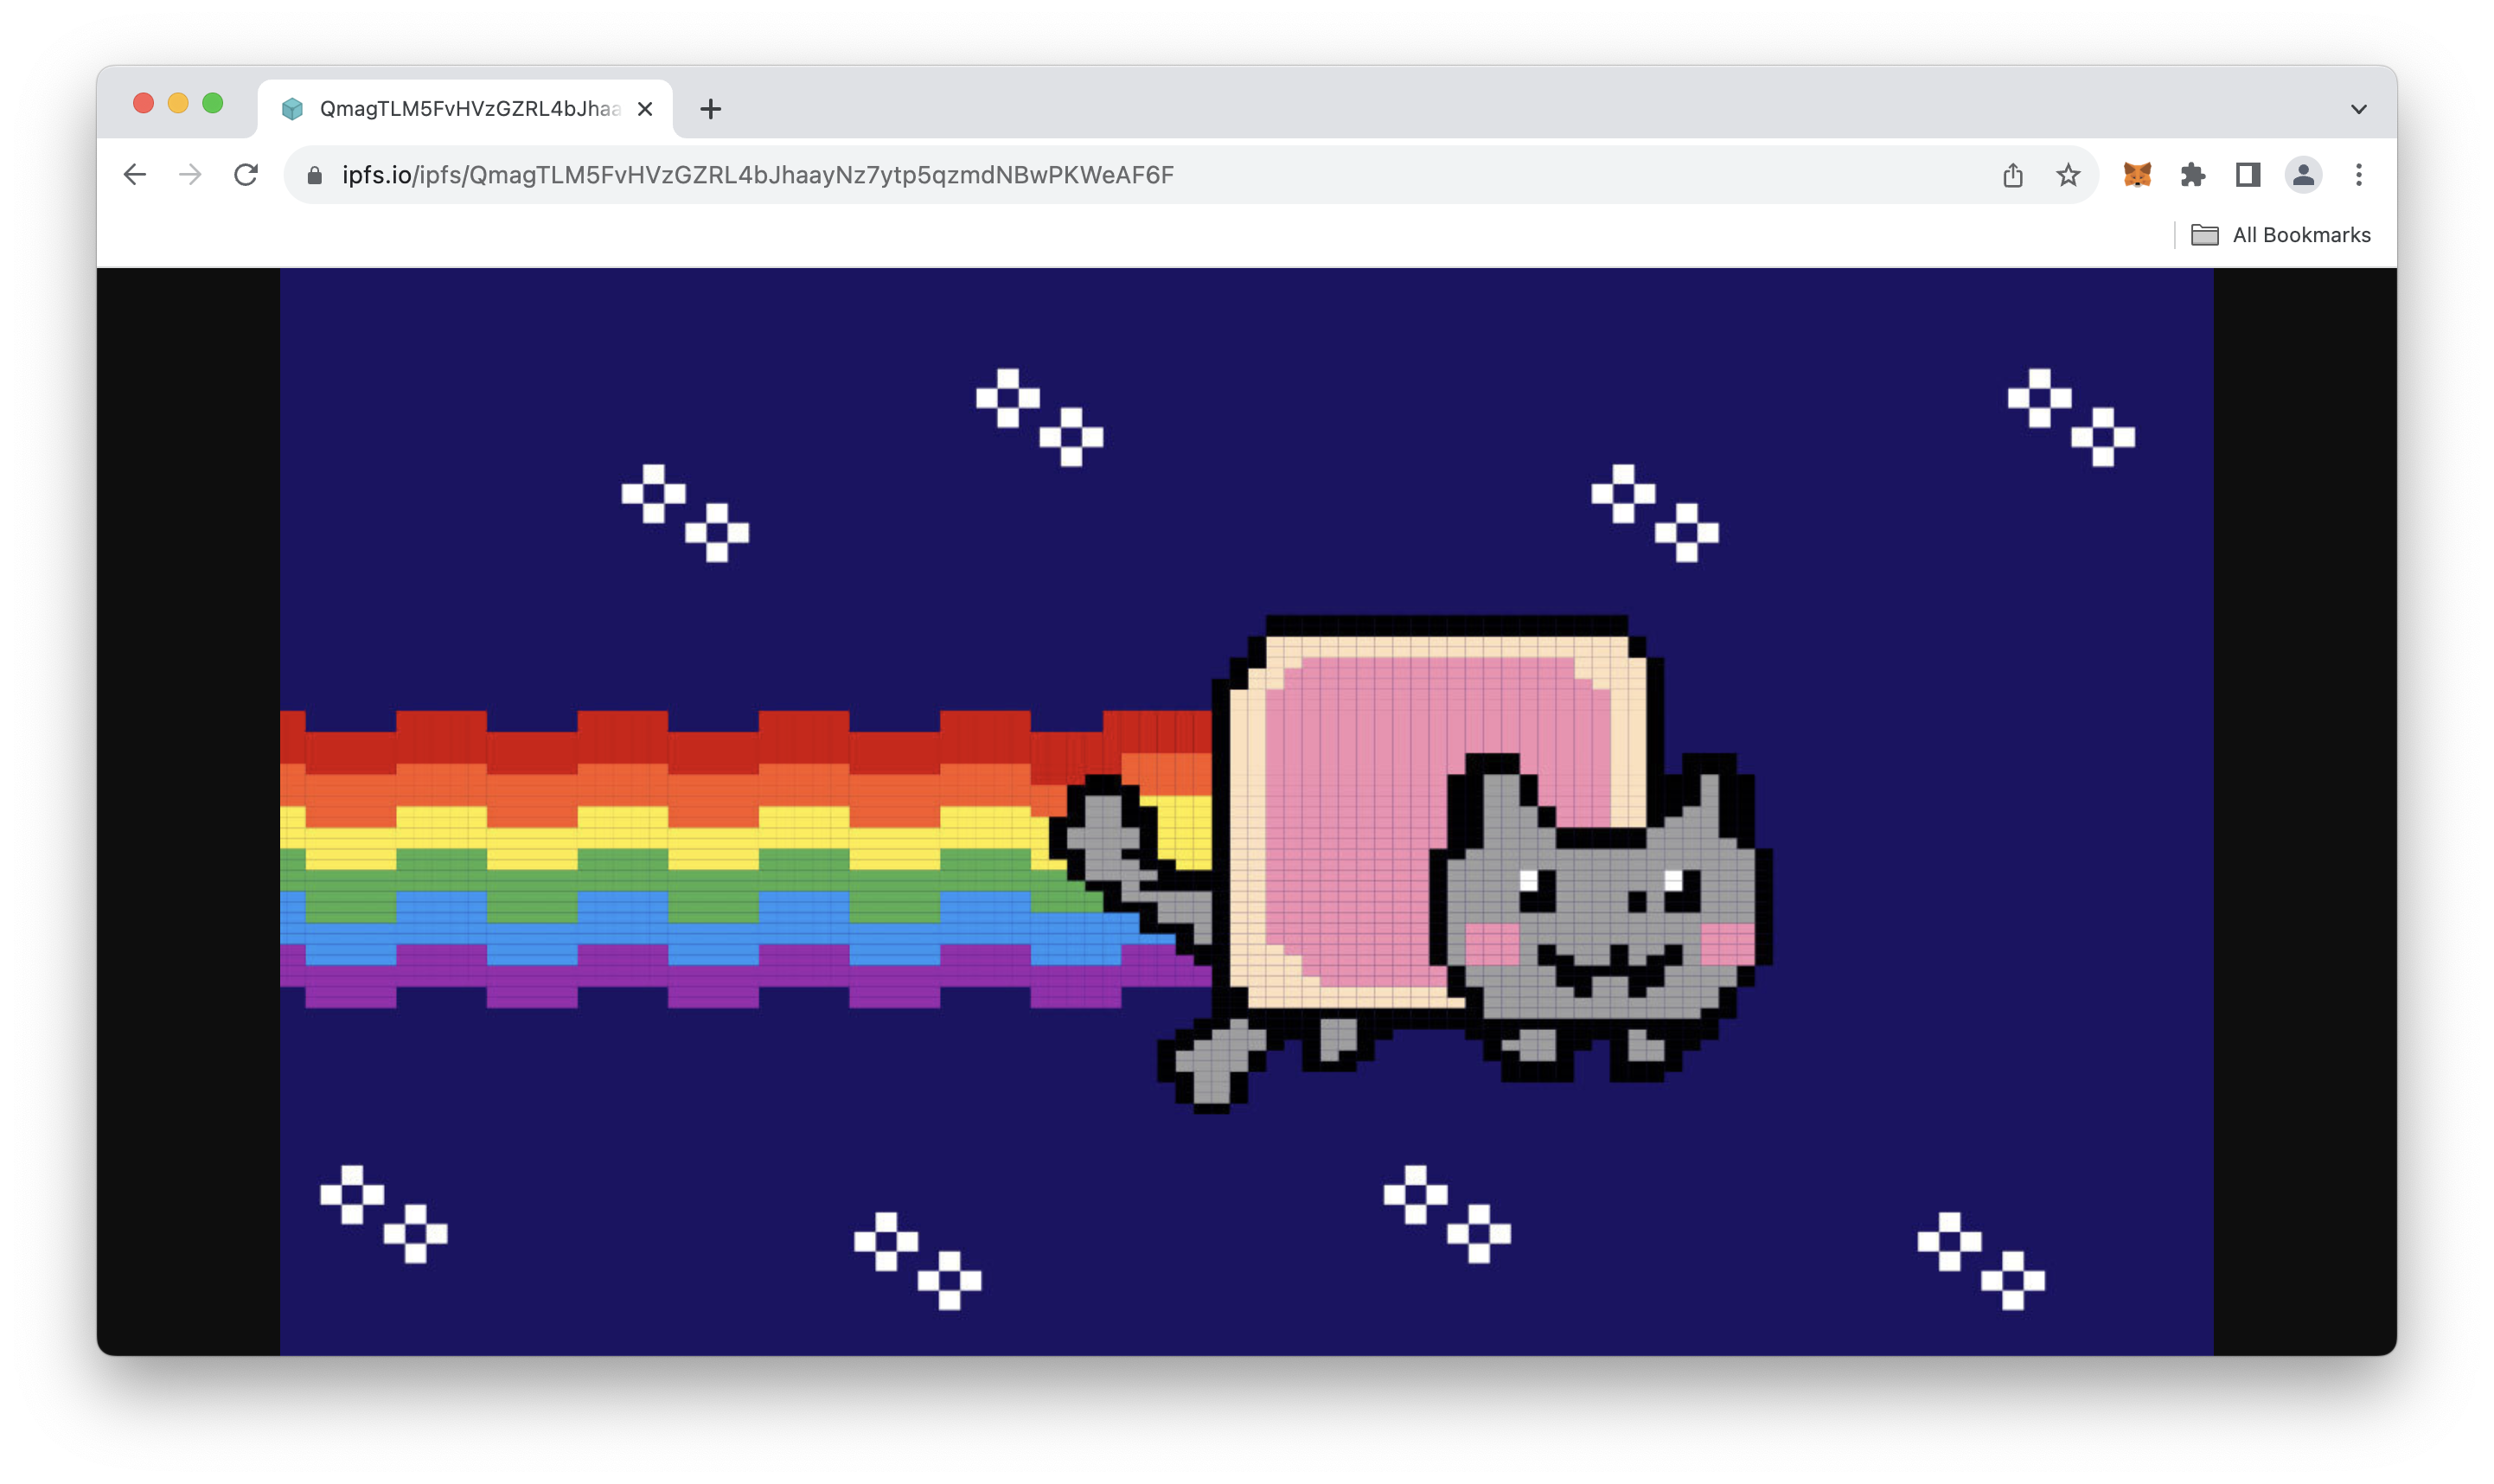
Congrats! Up until this point, you have pinned data on IPFS, deployed a smart contract and stored the IPFS hash, and finally rendered the stored hash on the browser.
Conclusión
So now that you know how to integrate IPFS and Ethereum, you can do cool projects like document versioning, verification systems, and more!
Si tienes alguna pregunta, no dudes en utilizar nuestro canal específico en Discord o enviarnos tus comentarios a través del formulario que aparece a continuación. Mantente al día de las últimas novedades siguiéndonos en Twitter y en nuestro canal de anuncios de Telegram.
¡Nos encanta recibir comentarios!
Si tienes algún comentario o sugerencia sobre nuevos temas, no dudes en hacérnoslo saber. Nos encantaría saber tu opinión.