5 min read
Overview
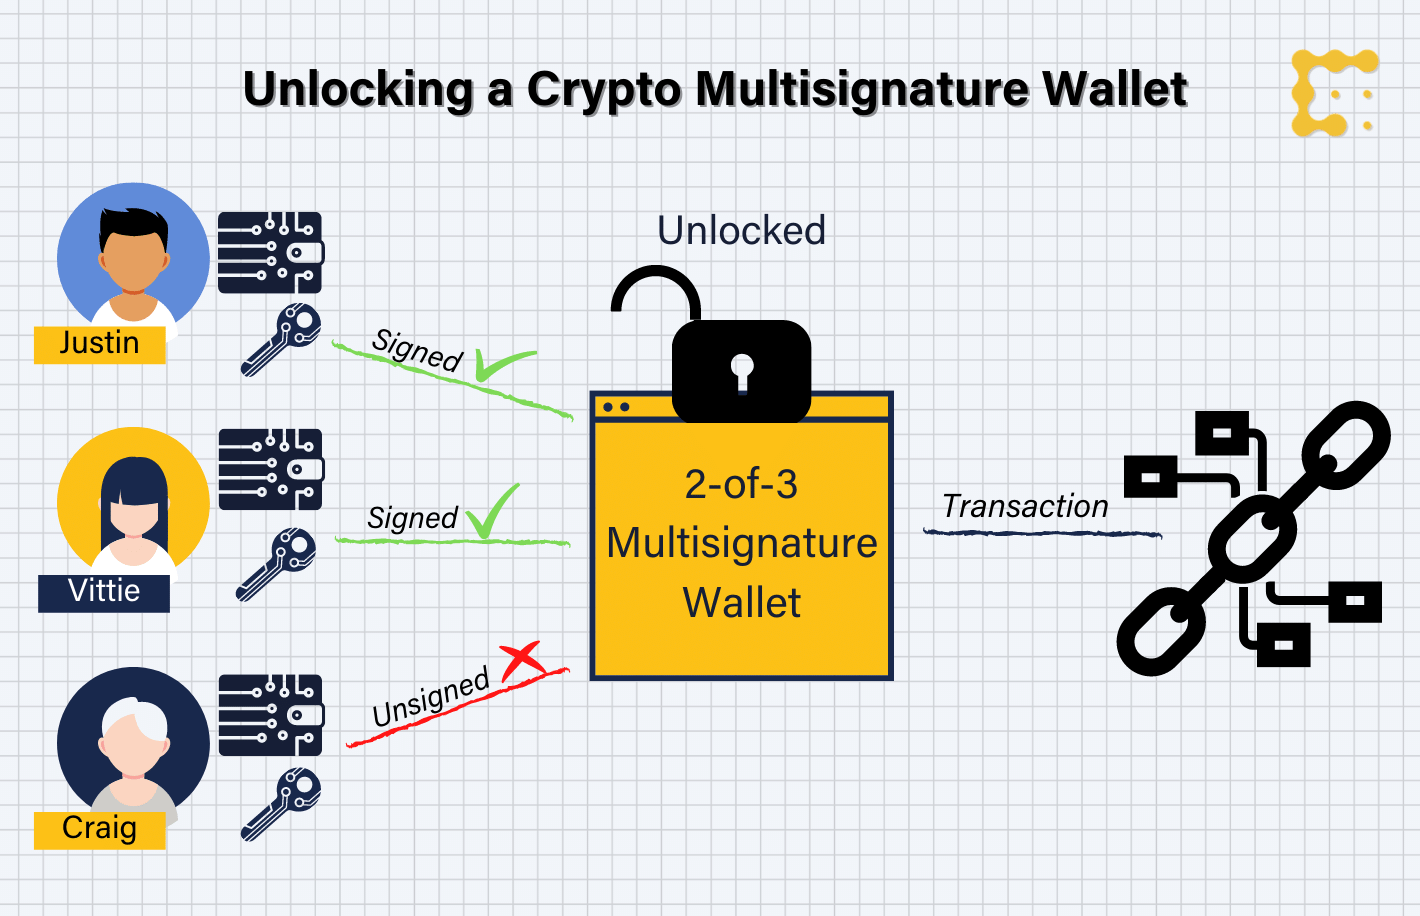
Multisig (short for multiple-signatures) wallets are crypto wallets that require more than one signature to authorize a transaction. This can be handy for managing team resources. Squads is an open-source smart contract wallet standard for Solana to allow teams and companies to easily manage their digital assets. In this guide, we will walk through some of the features of Squads and create a multisig wallet for a team.
Prefer a video walkthrough? Follow along with Sahil and learn about MultiSig wallets and watch us create one in 7 minutes.
What You Will Do
In this guide, you will:
- Create a Squad multisig wallet shared by two of your wallets
- Explore the Squad dashboard and features
- Deposit SOL into the Squad wallet
- Create and authorize a transaction from the multisig wallet
What You Will Need
- Basic knowledge of Solana Fundamentals
- Basic knowledge of Web3 Wallets
- A modern web browser like Chrome or Firefox
- A Solana Wallet with SOL or Devnet SOL (~0.1 SOL should be sufficient for creating and testing a Squad multisig wallet). Check out our Guide on Airdropping Devnet SOL.
What is Squads?
Squads defines themselves as "a crypto company operations platform that simplifies management of developer and treasury assets for teams building on Solana and SVM (Solana Virtual Machine)." Squads offers a multisig smart contract wallet that enables teams to secure treasuries, programs, validators, tokens, and NFT collections in a multisig and jointly manage them. Teams can define rules for how many signatures are required to authorize a transaction.
 Source: CoinDesk.com
Let's create a Squad and explore some of the features.
Create a Squad
Let's start by heading to https://devnet.squads.so/squads (or https://v3.squads.so/squads if you want to do mainnet). You'll be prompted to connect your wallet:
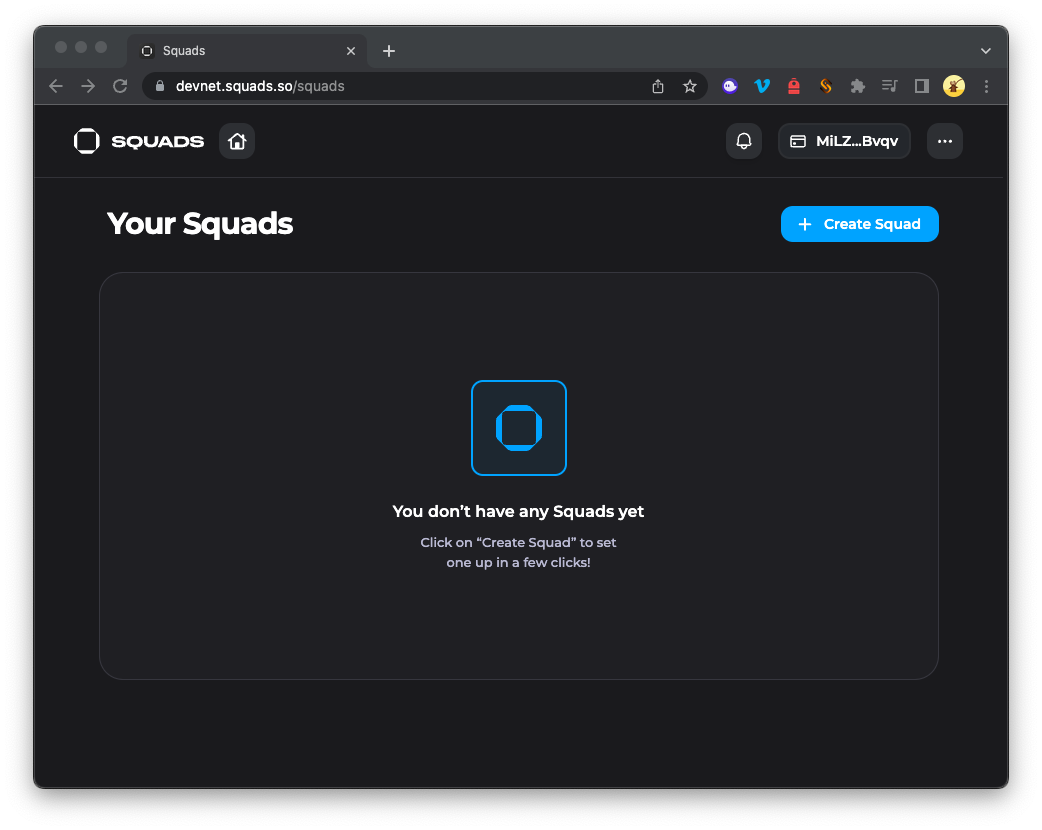
Once connected, click + Create Squad, and you should be prompted to enter some information about your Squad:
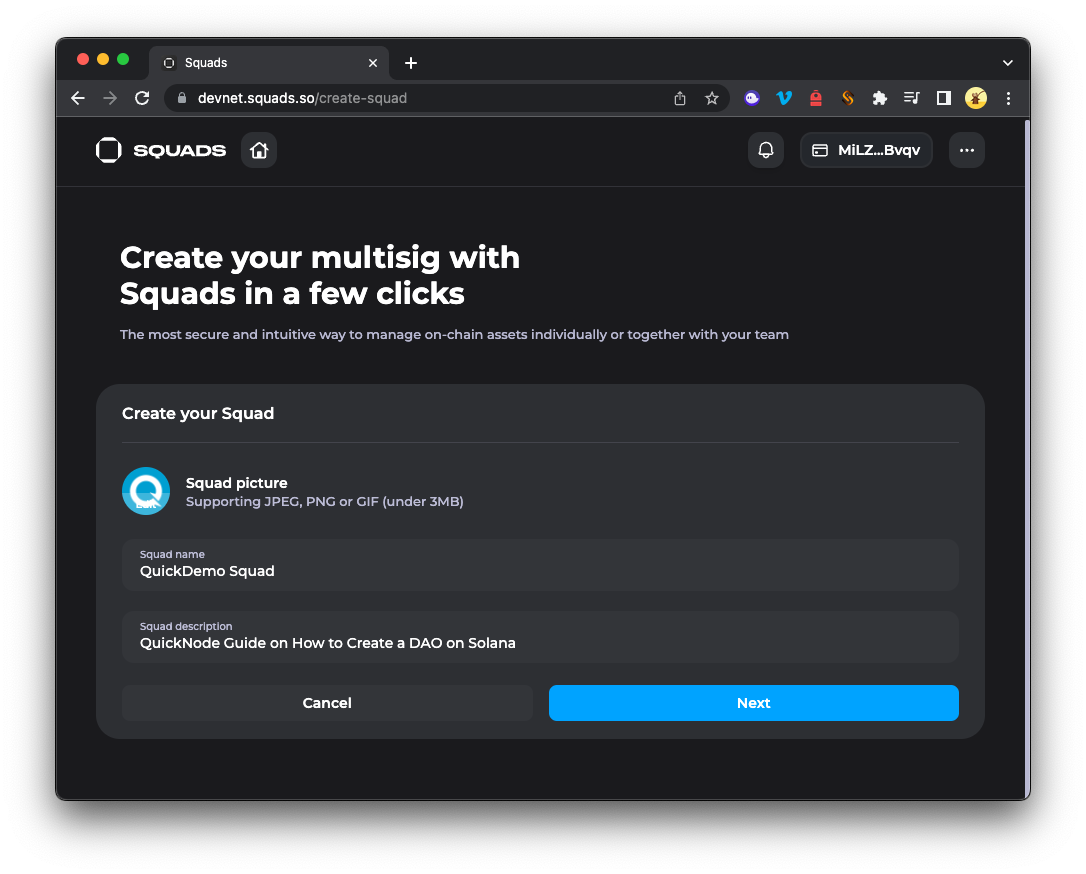
Define your Squad by giving it a name, uploading an image, and adding a description. Once you're done, click Create Squad. You will then be prompted to add members to your Squad. These are the wallets that will be able to authorize transactions from the multisig wallet. You can add as many wallets as you want, but we will just add two for this guide.
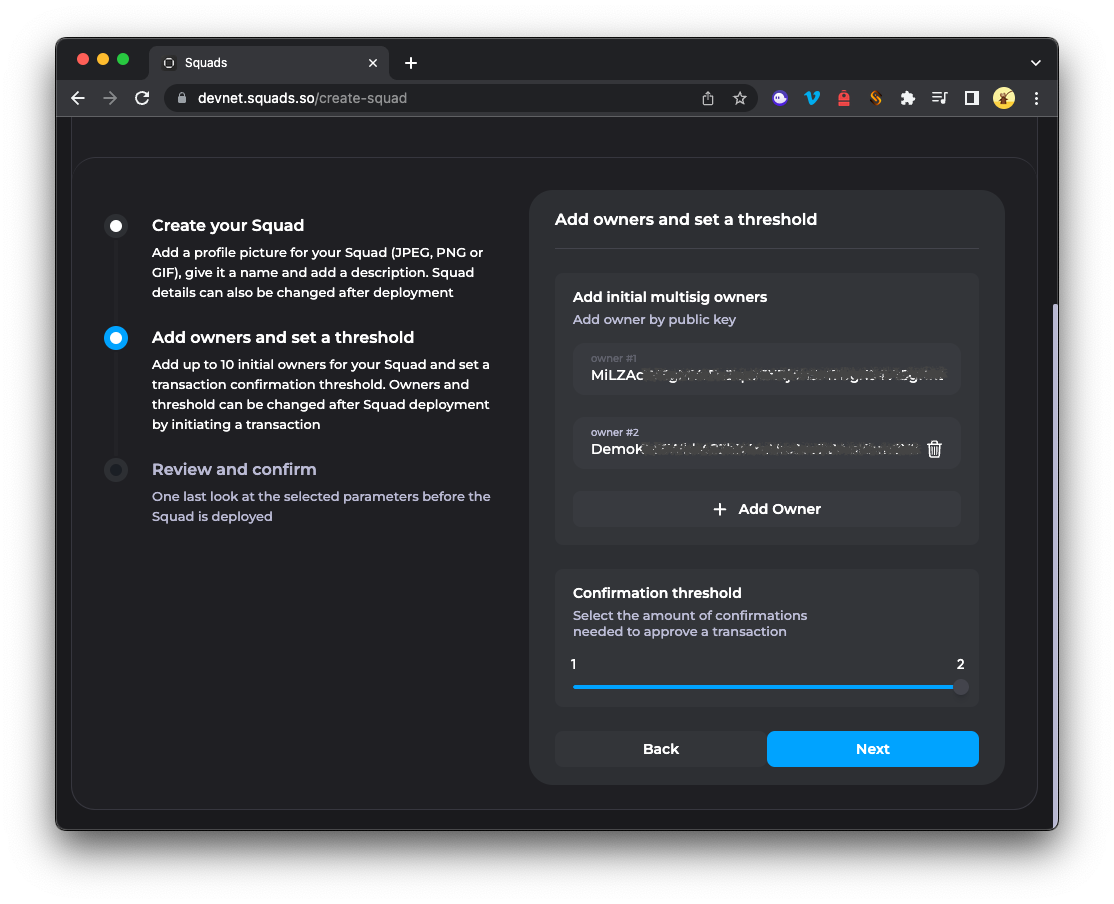
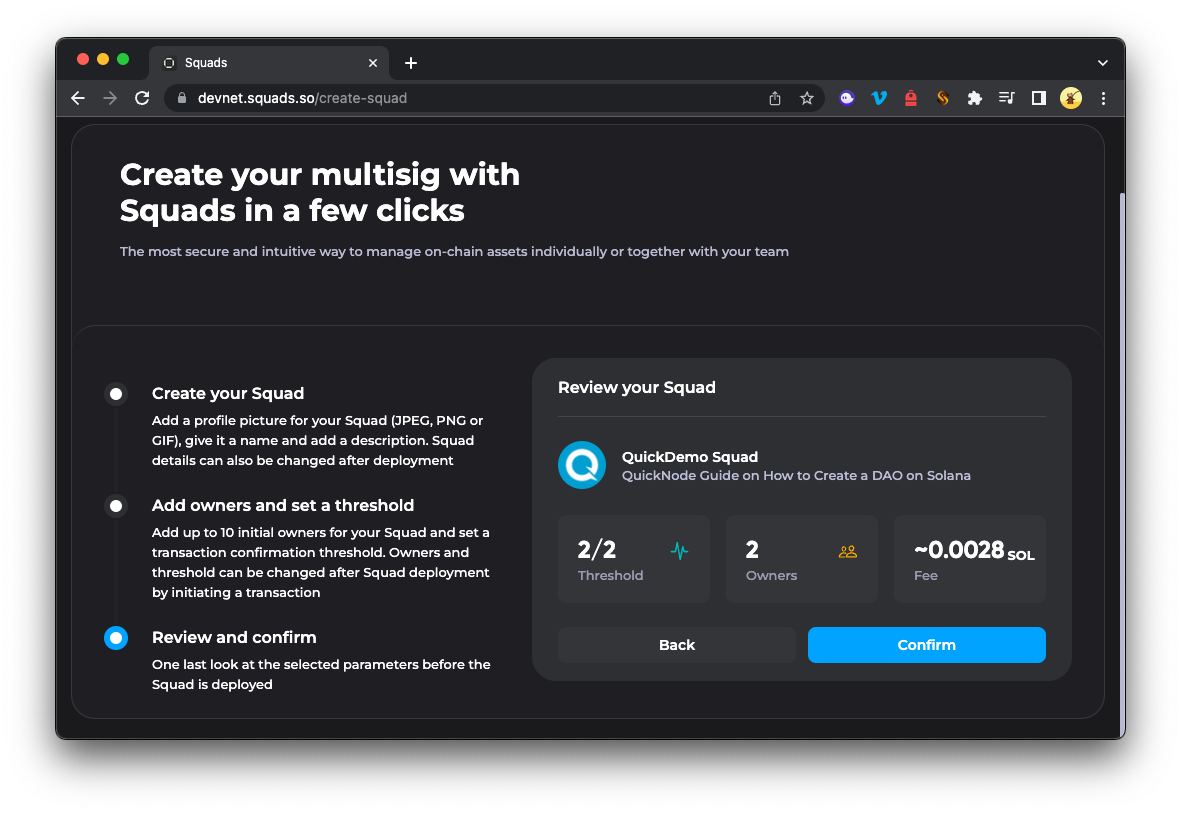
Before advancing to the next step, you will need to determine the number of signatures required to authorize a transaction. For this guide, we will set it to 2 (100% of our members are required to sign). Depending on your use case, this might be 1 wallet, it might be > 50%, or it could be 100%. Squads let's you define the requirements for your team.
Finally, review your Squad information and click Confirm. You will be prompted to sign a transaction to create the Squad. Once signed, you will be redirected to the Squad vault.
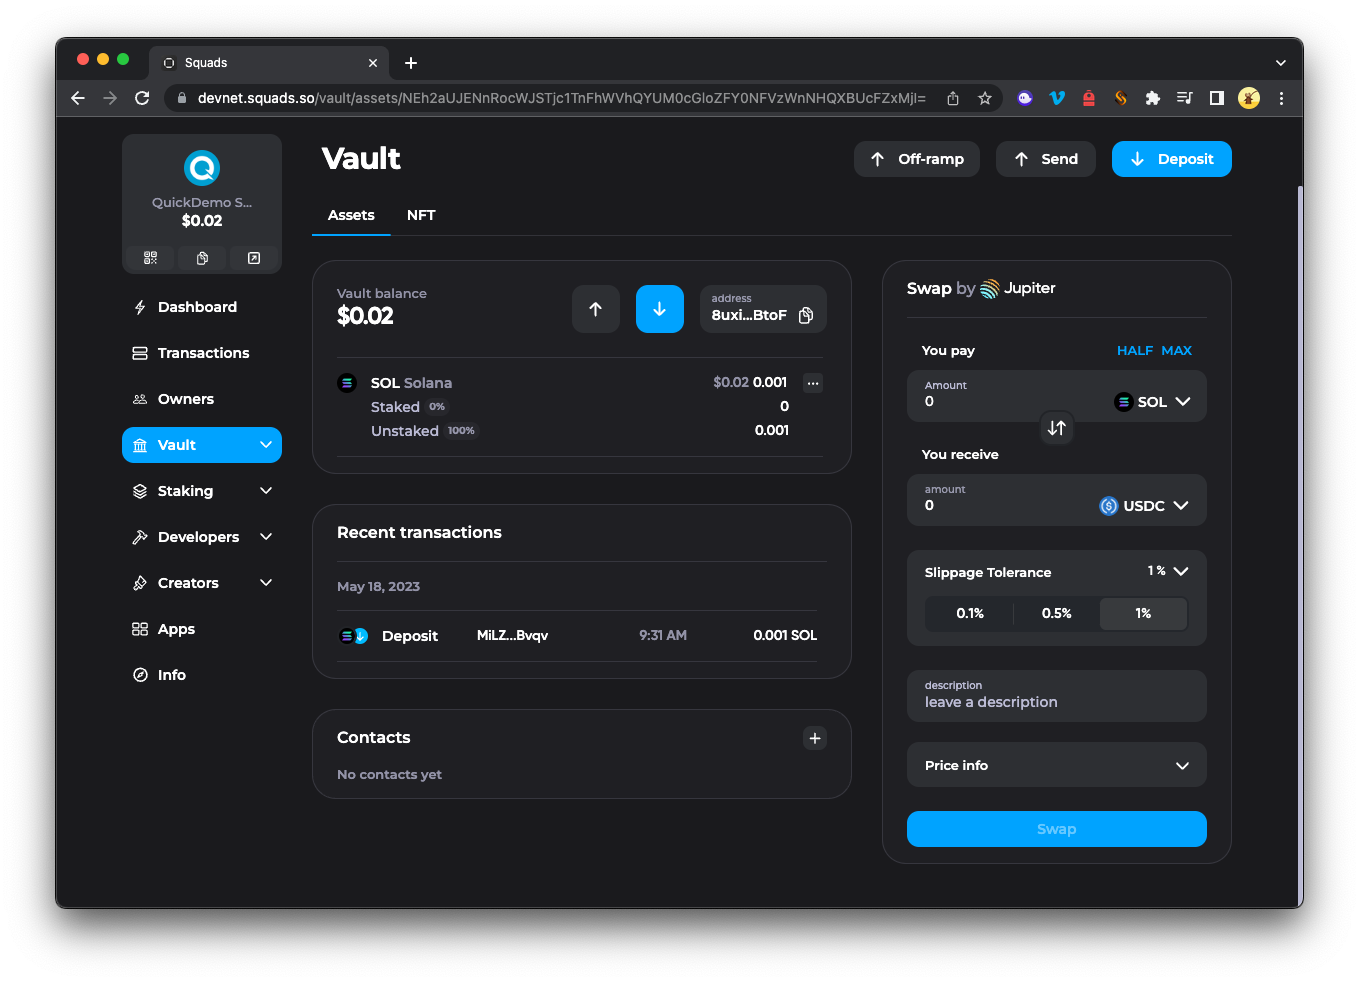
Nice job! You now have a Solana multisig wallet. Let's explore some of the features. We recommend you explore the dashboard and features by clicking around and seeing what is available. You will see the following:
- Dashboard: the multisig at a glance.
- Transactions: create and authorize transactions from the multisig wallet.
- Owners: add and remove owners from the multisig wallet.
- Vault: deposit and withdraw funds from here.
- Staking: stake your SOL to earn rewards.
- Developers: manage programs, validators, and tokens.
- Creators: manage NFT collections.
- Apps: integrate 3rd party apps.
- Info: basic information about the multisig wallet (e.g., account PDA, vault address, voting thresholds, etc.).
Deposit SOL into the Multisig Wallet
Now that we have a multisig wallet, let's deposit some SOL into it. There are two ways to deposit SOL into your multisig:
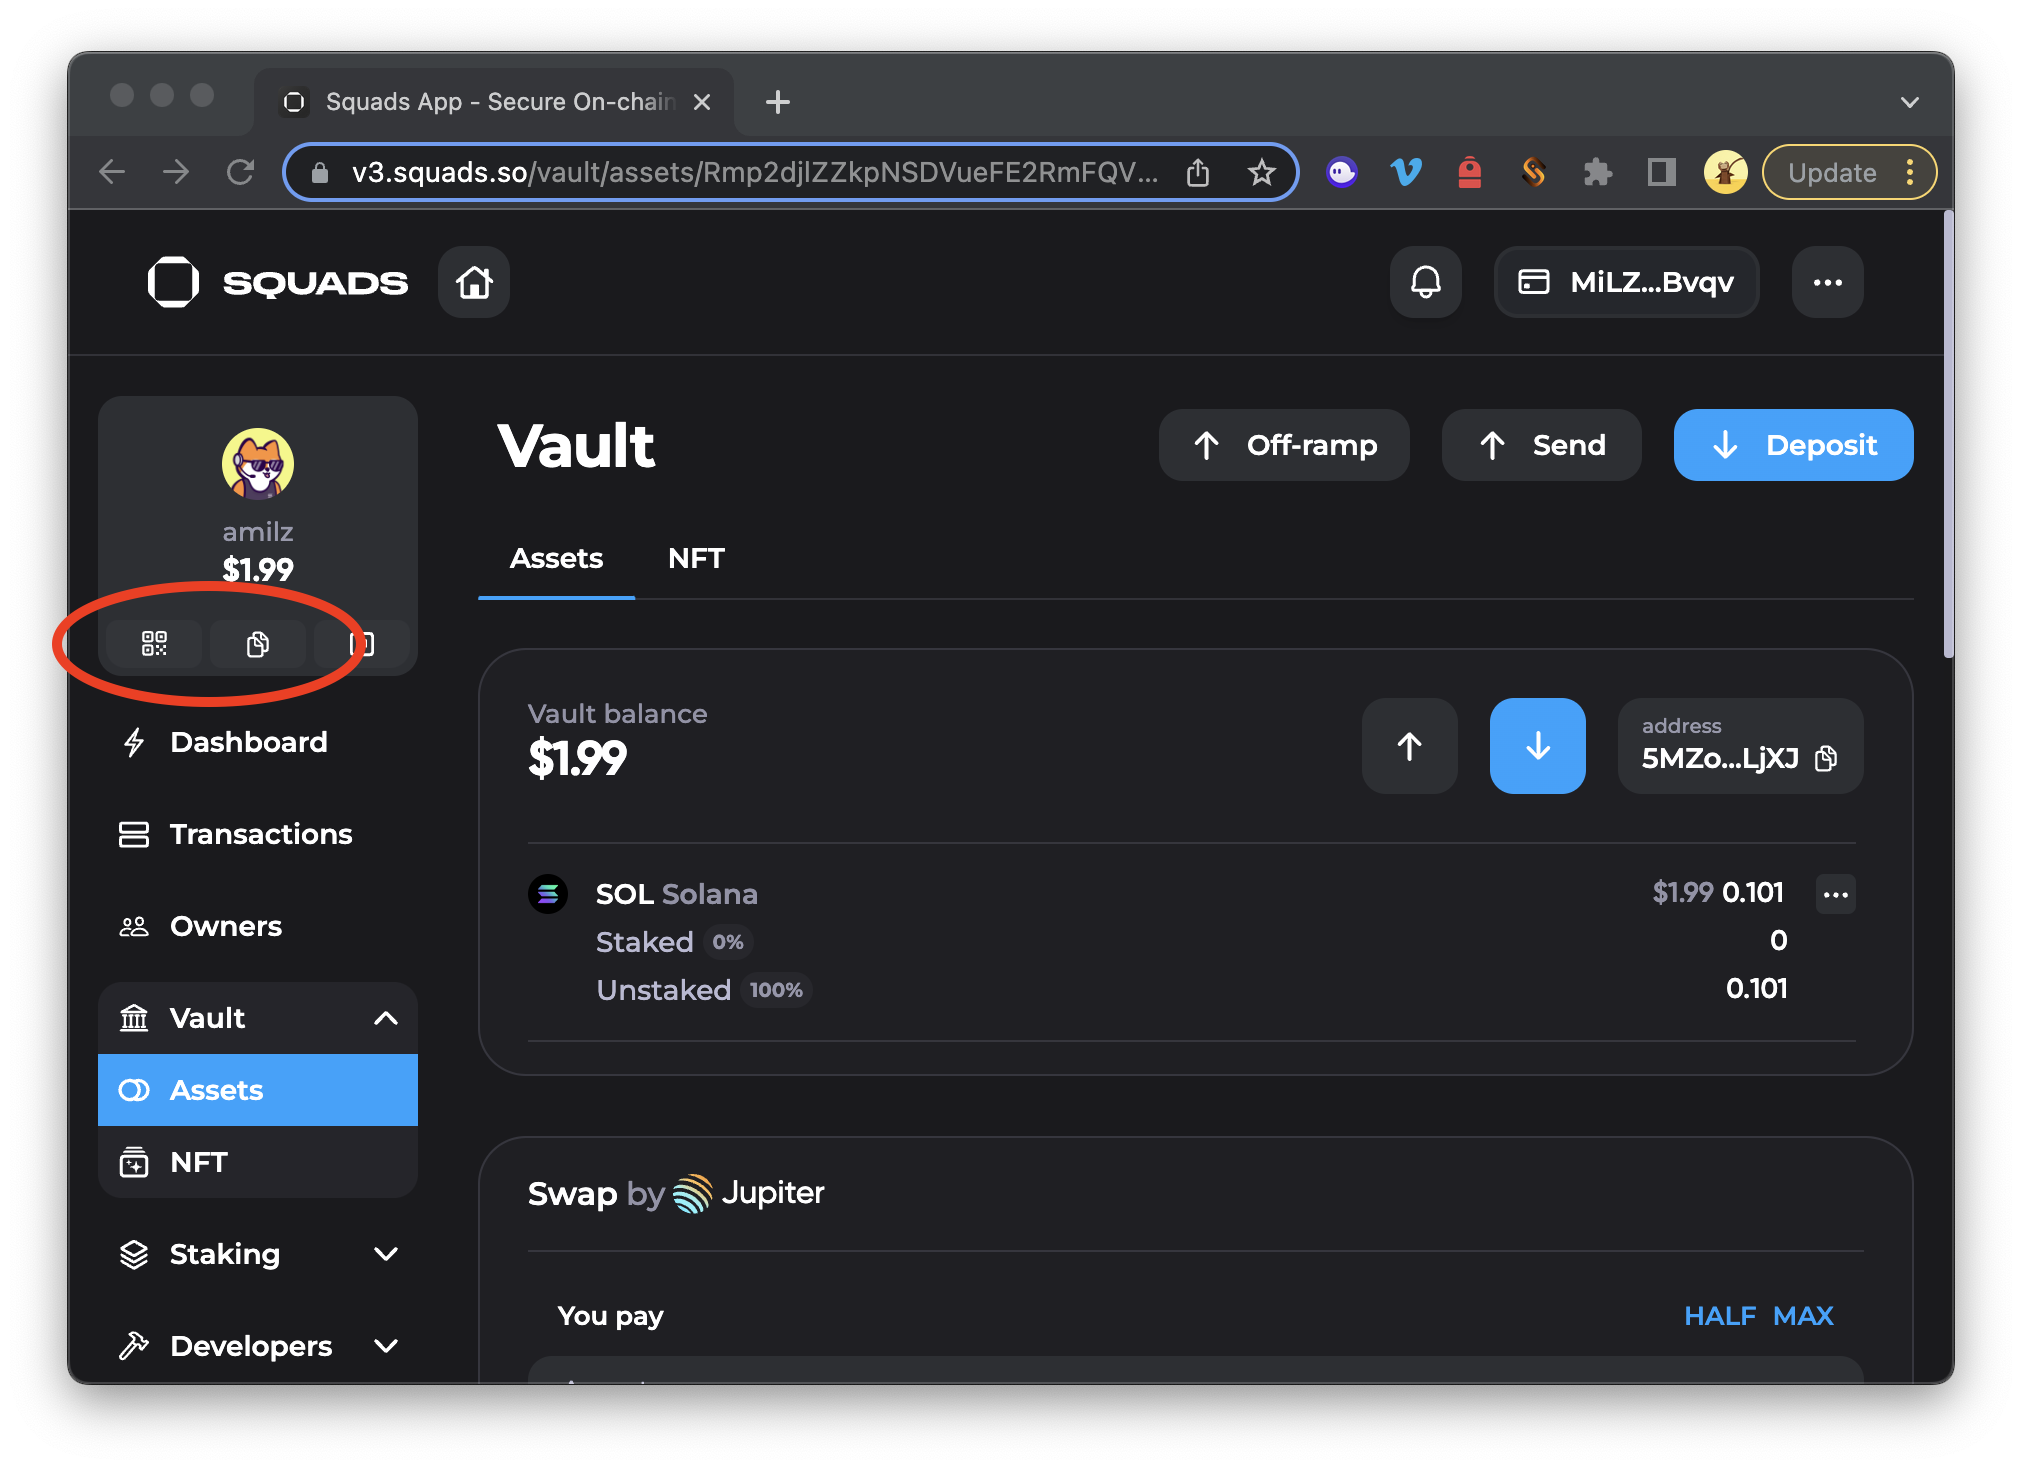
- Send SOL directly to the multisig wallet address. You can find your wallet address in the top left corner by clicking the Copy (📑) icon or the QR Icon to reveal a QR code (for depositing from a mobile wallet).
- On your vaults page, you can click
Depositand thenDeposit SOL. This will open a modal where you can enter the amount of SOL (or other assets) you want to deposit from your connected wallet.
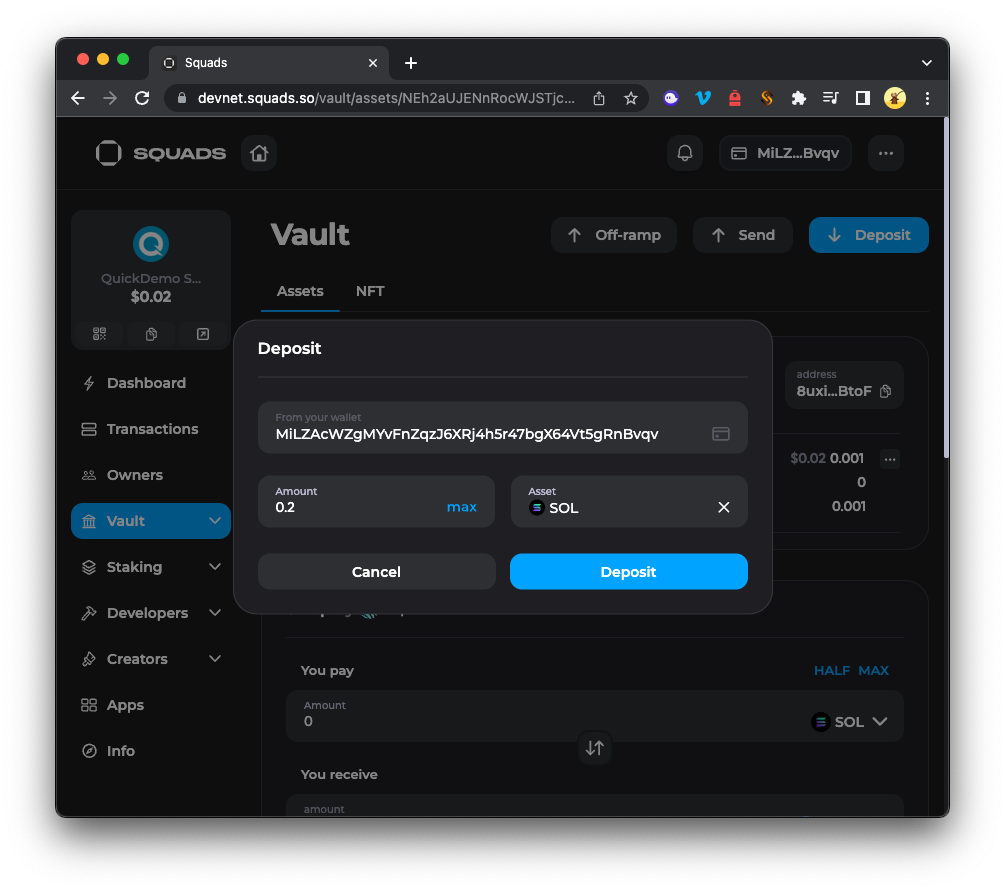
Approve the transaction, and you should see your SOL balance update in the vault.
You can follow a similar process to deposit NFTs by clicking the NFT tab (under Vault) and then clicking Deposit.
Great! Your SOL balance and NFTs are now secured by your multisig wallet. Let's create a transaction from the multisig wallet to see how co-signing works.
Create and Authorize a Transaction
Let's send some SOL back to your wallet. Click Send from the Assets tab in your Vault. This will open a modal where you can enter the amount of SOL you want to send and the address you want to send it to (or you can select an address from your connected wallet):
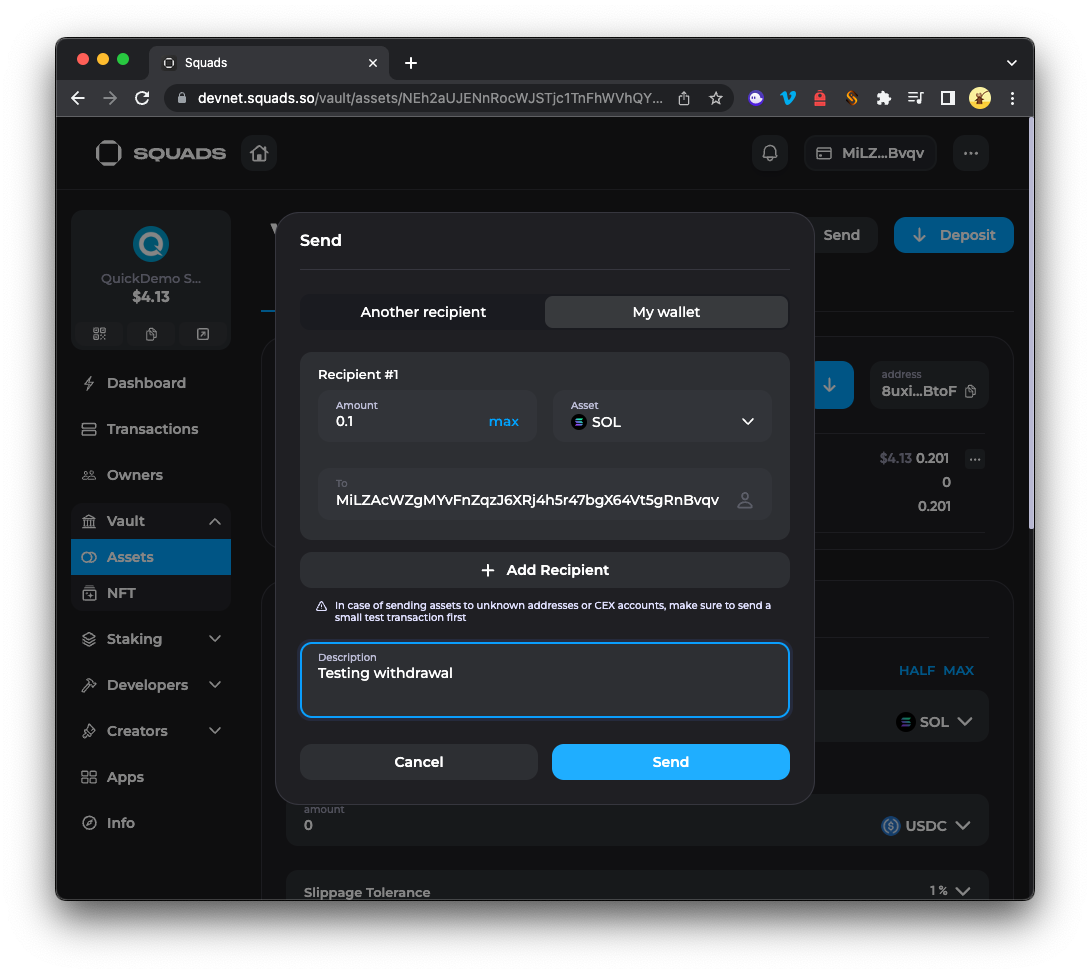
Feel free to add a memo if you want. Once you're ready, click Create Transaction. Click Send and sign the transaction from your wallet. However, unlike a "normal" transfer, the SOL will not yet be sent. Instead, it is queued for approval by the multisig wallet. Navigate to the Transactions tab to see your pending transaction. Click it to expand the transaction details:
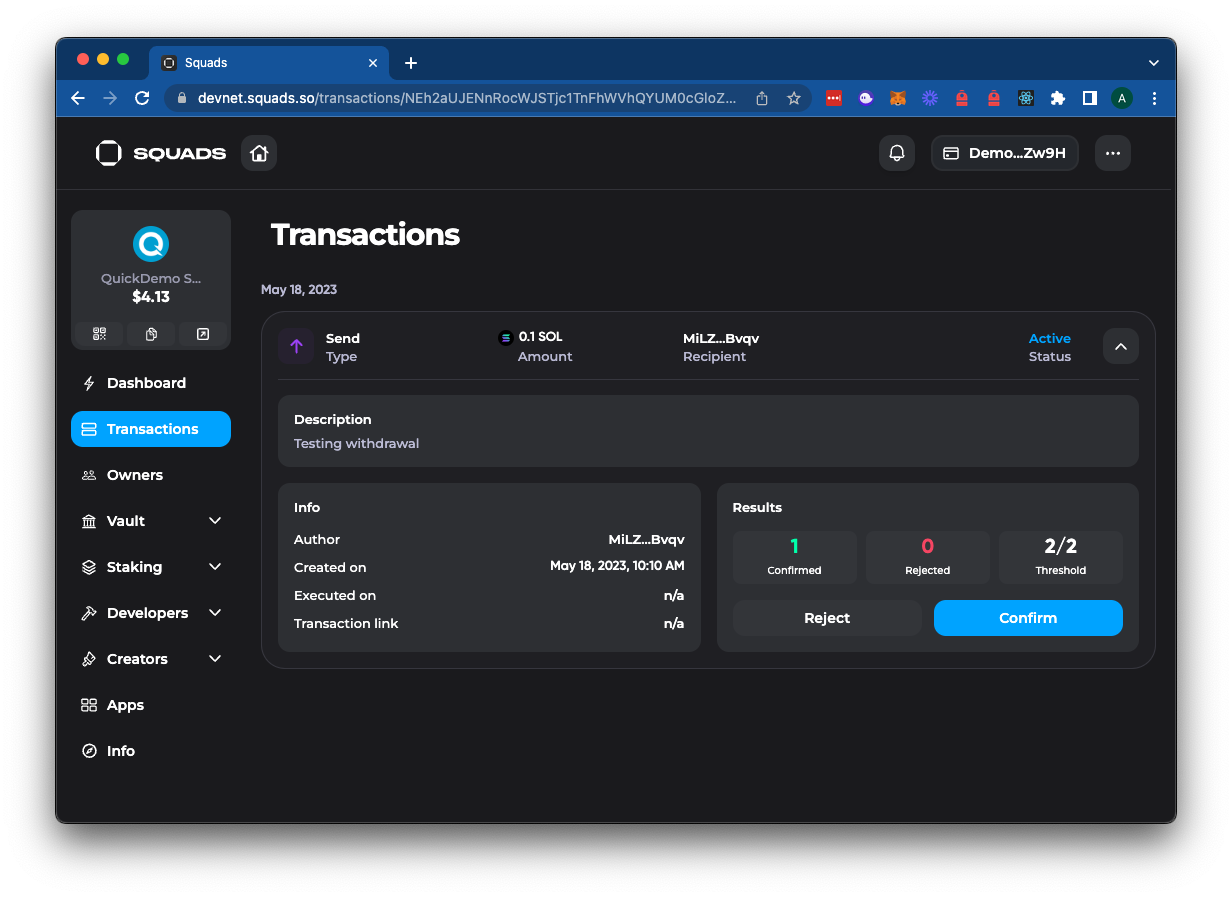
You will see that the transaction is pending approval by the multisig wallet. You should see that the transaction has been Confirmed 1 time (by your having signed the transaction already). You will also see details for the transaction approval threshold, as you specified when creating the Squad. In this case, we need 2 signatures to approve the transaction. To approve the transaction, we must connect with our second wallet. After connecting your second authorized wallet, you should be able to click Confirm to sign the transaction.
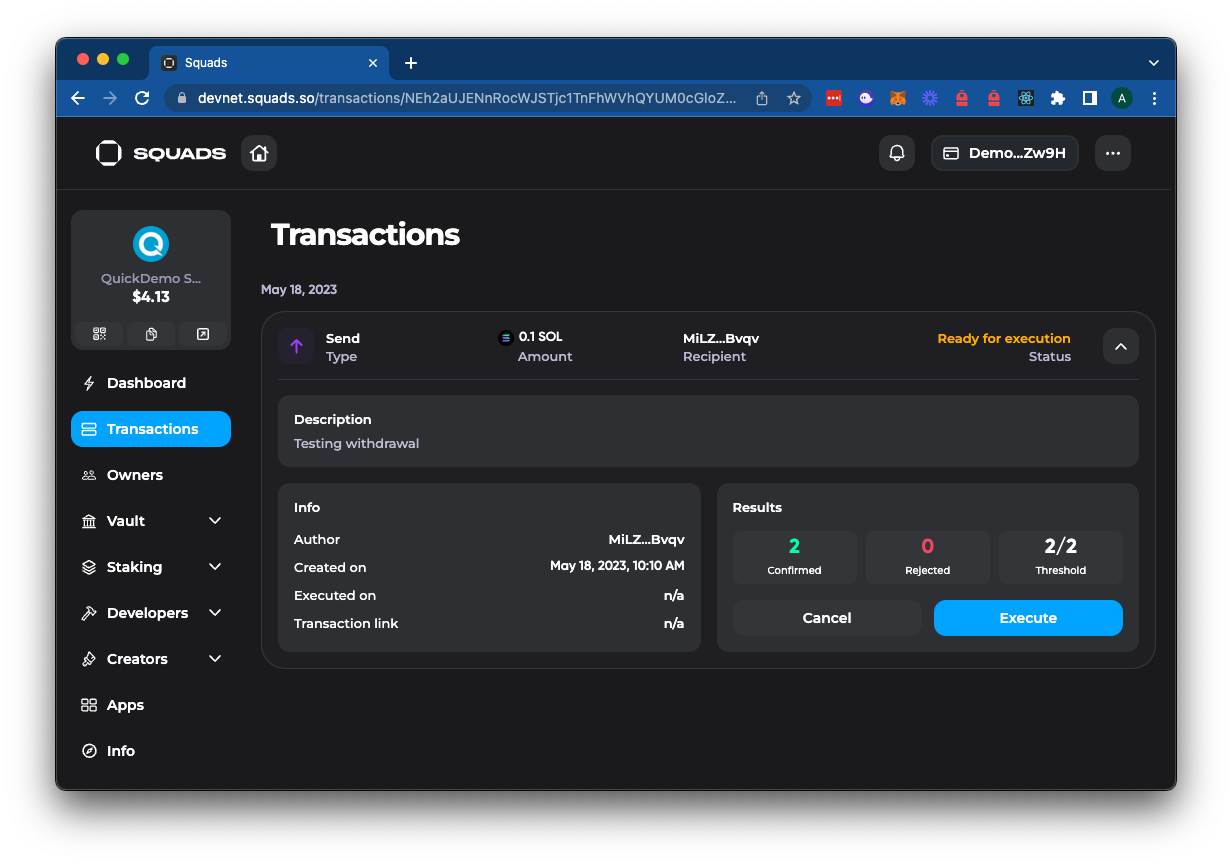
After signing, you should see the transaction status change from Active to Ready for Execution. This means the transaction has met the multisig's signer threshold and is ready to be sent to the Solana cluster. Click Execute to send the transaction to the Solana cluster:
And you should see that the transaction status should be updated to Executed, and the transaction should be visible on the Solana Explorer via the transaction link:
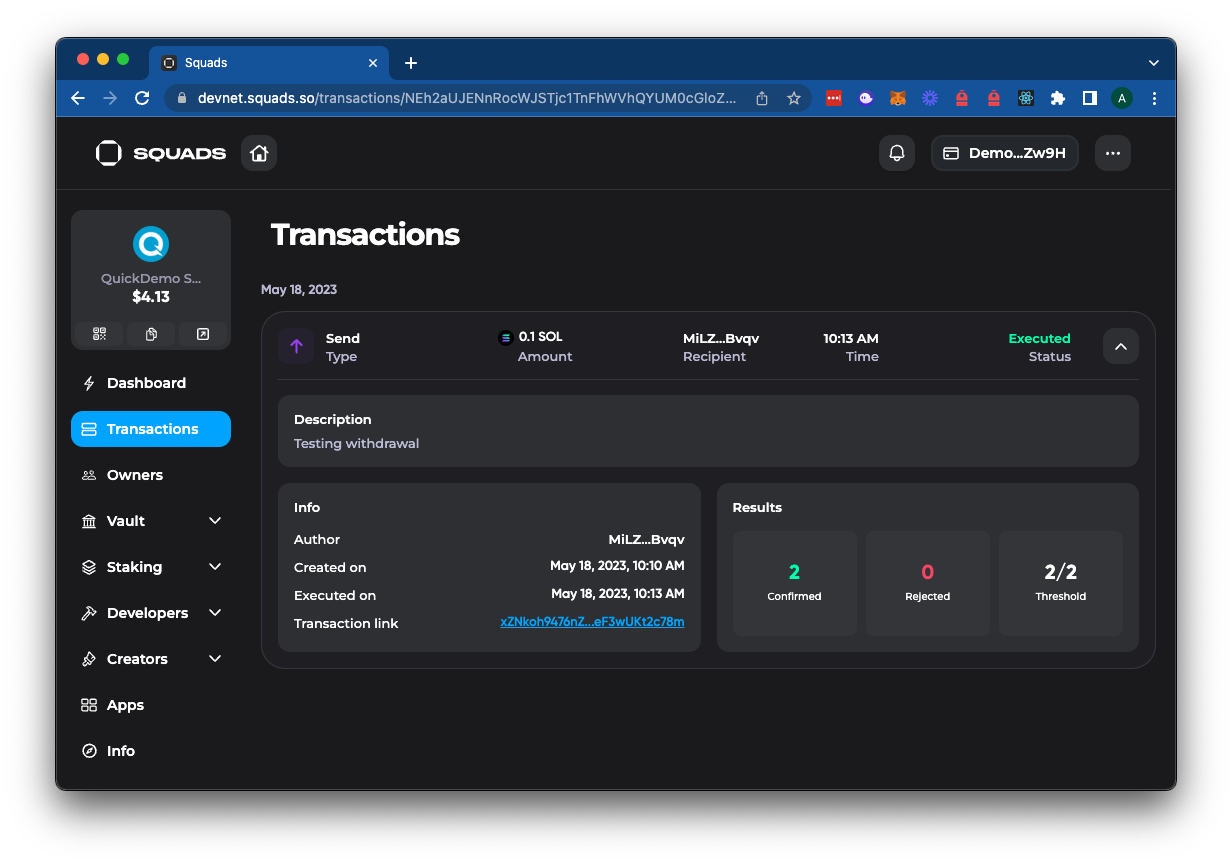
Great job.
Other Functionality and Transactions
You can follow a similar process to create and authorize transactions for NFTs and other activities you might do with your wallet. For example, you can:
- Stake your SOL to earn rewards
- Create and authorize transactions to stake your SOL
- Swap tokens using Jupiter Swap
- Buy NFTs from Tensor Marketplace
- Manage program accounts and validators
- Create and manage tokens
Rather than walking through each of these, we recommend you explore the functionality independently. Now that you know how to execute transactions, most functionality should be intuitive. For more information, check out the Squads documentation.
MultiSigning Out
Using a multisig wallet like Squads can improve the security of your team's assets, empower your team to manage assets together, and simplify the process of approving significant transactions. You now have the knowledge to create and manage a multisig wallet.
We would love to hear more about what you are building and how you are utilizing multisig wallets for your team. Drop us a line in Discord, or give us a follow on Twitter to stay up to date on all the latest information!
We ❤️ Feedback!
Let us know if you have any feedback or requests for new topics. We'd love to hear from you.