19 min read
Overview
Have an online store that you'd like add payments to powered by Solana? Solana Pay is a fast, easy-to-use, secure payment solution built on the Solana blockchain. In this step-by-step guide, we will show you how to levarage Solana Pay to accept payments via a QR code. You will be able to generate a custom QR-code for a customer's order, and customers will be able to scan it to check out!
What You Will Do
Create a Solana Pay payment portal with a QR code using Next.js 13 and React:
The steps we'll follow: 1. Create a new Next.js project. 2. Build a simple UI with React. 3. Use Next API routes to generate a terminal backend that generates payment requests and verifies successful payments. 4. Render a QR code for the payment request. 5. Test it with your Phantom wallet on your phone!What You Will Need
- Nodejs (version 16.15 or higher) installed
- TypeScript experience and ts-node installed
- Experience with Next.js and React
- Experience with Solana Pay will be helpful: review our Guide to Getting Started with Solana Pay
- A mobile wallet that supports Solana Pay (e.g., Phantom)
Create a New Next.js Project
To get started, open your terminal and run the following command to create a new Next.js project:
npx create-next-app@latest solana-pay-store
## or
yarn create next-app solana-pay-store
You will be prompted with about 5 questions on how you want to configure your project. For this guide, you can accept the default values for all of them. This will create a new directory, solana-pay-store, for your project and initialize it with the latest version of Next.js. Navigate to your new project directory:
cd solana-pay-store
Run yarn dev to start the development server and make sure the installation was successful. This will open up the project in your default browser (usually localhost:3000). You should see the default Next.js landing page:
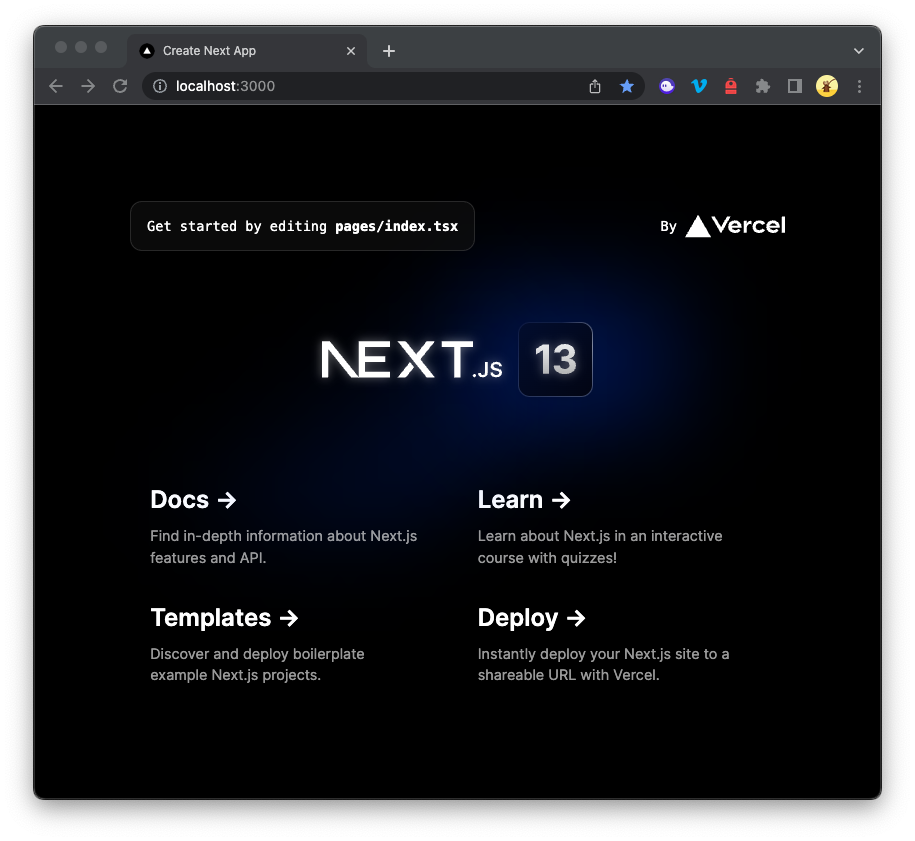
Great job. Go ahead and close the browser window and stop the development server by pressing Ctrl + C (or Cmd + C on Mac) in your terminal.
Now we need to install the Solana-web3.js and Solana Pay packages. Run the following command:
npm install @solana/web3.js @solana/pay
## or
yarn add @solana/web3.js @solana/pay
Finally, you'll need a Solana endpoint to connect to the Solana network to verify payments on chain.
Connect to a Solana Cluster with Your QuickNode Endpoint
To build on Solana, you'll need an API endpoint to connect with the network. You're welcome to use public nodes or deploy and manage your own infrastructure; however, if you'd like 8x faster response times, you can leave the heavy lifting to us. See why over 50% of projects on Solana choose QuickNode and sign up for a free account here. We're going to use a Solana Mainnet endpoint.
Copy the HTTP Provider link: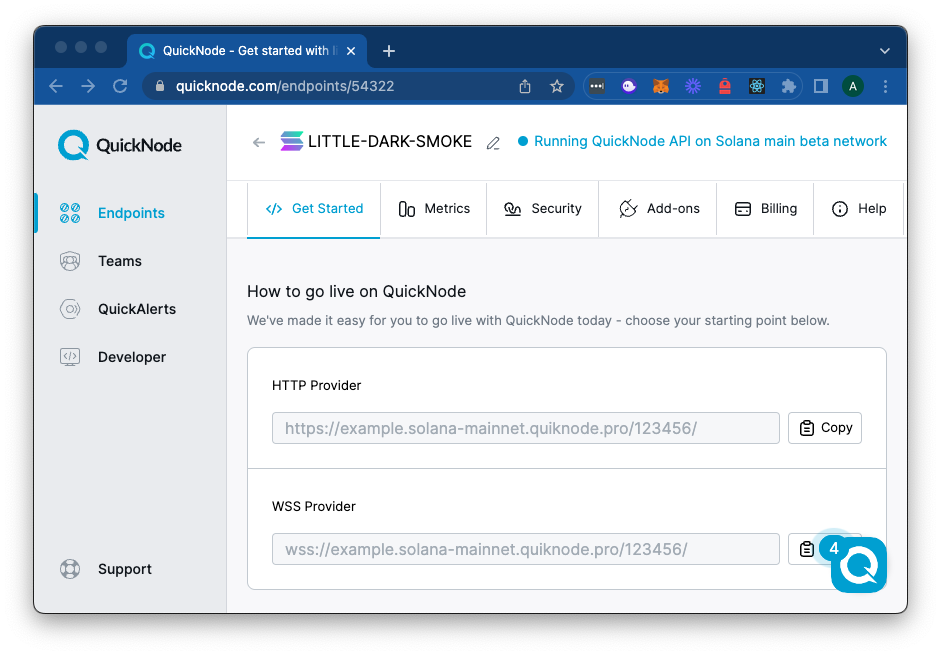
Great job. You're ready to start building your application. If you're having trouble getting set up or running into any other issues in this guide, please reach out to us on Discord.
Create Your Backend
For this demonstration, we will use Next.js API routes. API routes are a great way to create a backend for your application without setting up a separate server. "Any file inside the folder pages/api is mapped to /api/* and will be treated as an API endpoint instead of a page." You can read more about Next.js API routes here.
Navigate to pages/api and delete hello.ts. We will be replacing this file with our own API routes. Create a new file called pay.ts and add the following code:
import { NextApiRequest, NextApiResponse } from 'next';
import { Connection, Keypair, PublicKey } from '@solana/web3.js';
import { encodeURL, findReference, validateTransfer } from '@solana/pay';
import BigNumber from 'bignumber.js';

// CONSTANTS
const myWallet = 'DemoKMZWkk483hX4mUrcJoo3zVvsKhm8XXs28TuwZw9H'; // Replace with your wallet address (this is the destination where the payment will be sent)
const recipient = new PublicKey(myWallet);
const amount = new BigNumber(0.0001); // 0.0001 SOL
const label = 'QuickNode Guide Store';
const memo = 'QN Solana Pay Demo Public Memo';
const quicknodeEndpoint = 'https://example.solana-devnet.quiknode.pro/123456/'; // Replace with your QuickNode endpoint

export default async function handler(req: NextApiRequest, res: NextApiResponse) {
  // Handle Generate Payment Requests
  if (req.method === 'POST') {

  // Handle Verify Payment Requests
  } else if (req.method === 'GET') {

  // Handle Invalid Requests
  } else {
    res.status(405).json({ error: 'Method Not Allowed' });
  }
}
What we are doing here is defining some key variables that we will use throughout the application. We are also importing the necessary packages from Solana Pay and Solana-web3.js. Note that we have defined a few constants here for demonstration--you may want to make some of these values variable based on your application's needs (e.g., amount, memo, or recipient). Make sure to update the quicknodeEndpoint with your QuickNode endpoint and myWallet with your public key (this is the destination where the payment will be sent--so if this is incorrect, your payment URL will direct payments to the wrong address).
We are also defining our API handler. We will use a single handler to process our generate payment requests and verify payment requests. We are using the req.method property to determine which action to take. If the request method is POST, we will generate a payment request. If the request method is GET, we will verify a payment request. If the request method is anything else, we will return an error. You could also use a separate handler for each action, but for the sake of simplicity, we will use a single handler.
Generate Payment Requests
We will use some of the tools we created in our Guide to Getting Started with Solana Pay to get us started. Add a generateUrl function to the top-level of pay.ts, before the handler function. This will generate a Solana payment request URL that we can use to generate a QR code for our customers to scan and pay with Solana Pay.
async function generateUrl(
  recipient: PublicKey,
  amount: BigNumber,
  reference: PublicKey,
  label: string,
  message: string,
  memo: string,
) {
  const url: URL = encodeURL({
    recipient,
    amount,
    reference,
    label,
    message,
    memo,
  });
  return { url };
}
Next, we will need a way to store the payment request information. For this demo, we will use a simple in-memory data structure to store the payment request information. This will allow us to verify the payment request later on. Add a paymentRequests Map to pay.ts:
const paymentRequests = new Map<string, { recipient: PublicKey; amount: BigNumber; memo: string }>();
This will allow us to store the payment request information using the reference as the key. We will use the reference as the key because it is a unique identifier for each payment request. We will also store the recipient, amount, and memo to verify the payment request later. Keep in mind that this approach is only suitable for small-scale applications or during development. In a production environment or for a more extensive application, you should consider using a more persistent storage solution like a database (e.g., PostgreSQL, MongoDB, Redis) to store the payment request information. This will ensure that the data is not lost on server restarts and can be accessed across multiple server instances if you have a distributed or load-balanced system.
Now let's update our handler to use the generateUrl function and store the payment request information in our paymentRequests Map. Add the following code to pay.ts inside of the POST handler:
export default async function handler(req: NextApiRequest, res: NextApiResponse) {
  if (req.method === 'POST') {
    try {
      const reference = new Keypair().publicKey;
      const message = `QuickNode Demo - Order ID #0${Math.floor(Math.random() * 999999) + 1}`;
      const urlData = await generateUrl(
        recipient,
        amount,
        reference,
        label,
        message,
        memo
      );
      const ref = reference.toBase58();
      paymentRequests.set(ref, { recipient, amount, memo });
      const { url } = urlData;
      res.status(200).json({ url: url.toString(), ref });
    } catch (error) {
      console.error('Error:', error);
      res.status(500).json({ error: 'Internal Server Error' });
    }
  }
  //...
}
Here's a breakdown of what we are doing here:
- We generate a new
referencekeypair and store the public key in thereferencevariable. This is generated at random and will be unique for each payment request. - We generate a
messageto display our user's order ID. For our demonstration purposes, we are generating a random order ID. Feel free to pass whatever message you wish to your user (this should be displayed in their wallet when they are prompted to pay). - We call the
generateUrlfunction to generate a payment request URL. We are passing in therecipient,amount,reference,label,message, andmemovariables that we defined earlier. This will generate a payment request URL that we store asurlData. - We convert the
referencepublic key to a base58 string and store it asref, which we use as the key to store the payment request information in ourpaymentRequestsMap (using.set). - We respond to the client with a
200status code (success), the payment requesturl, and therefkey.
Let's test it out! Run the following command to start the server:
npm run dev
# or
yarn dev
Then in a separate terminal window, run the following cURL script to make a POST request to the /api/pay endpoint:
curl -X POST http://localhost:3000/api/pay
You should see a response similar to the following:
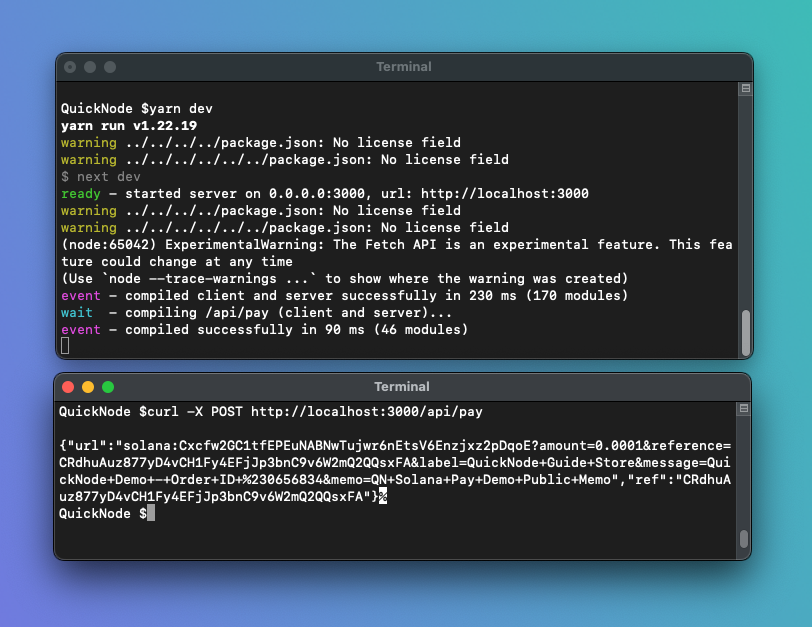
Nice job! You just created an API endpoint that generates a payment request URL and stores the payment request information in memory. Now let's create an endpoint to verify the payment request.
Verify Payment Requests
Before we move on to our frontend, we will need our backend to do some verification to ensure that the payment request is valid and that the payment has been received by our recipient wallet. We will use the reference keypair we generated earlier to find the payment. We will use the recipient, amount, and memo fields to verify that the payment has been made to the correct recipient and that the payment amount is correct (remember, we stored these values in our paymentRequests Map so that our backend knows what to look for).
Create a verifyTransaction function in pay.ts:
async function verifyTransaction(reference: PublicKey) {
  // 1 - Check that the payment request exists
  const paymentData = paymentRequests.get(reference.toBase58());
  if (!paymentData) {
    throw new Error('Payment request not found');
  }
  const { recipient, amount, memo } = paymentData;
  // 2 - Establish a Connection to the Solana Cluster
  const connection = new Connection(quicknodeEndpoint, 'confirmed');
  console.log('recipient', recipient.toBase58());
  console.log('amount', amount);
  console.log('reference', reference.toBase58());
  console.log('memo', memo);

  // 3 - Find the transaction reference
  const found = await findReference(connection, reference);
  console.log(found.signature)

  // 4 - Validate the transaction
  const response = await validateTransfer(
    connection,
    found.signature,
    {
      recipient,
      amount,
      splToken: undefined,
      reference,
      //memo
    },
    { commitment: 'confirmed' }
  );
  // 5 - Delete the payment request from local storage and return the response
  if (response) {
    paymentRequests.delete(reference.toBase58());
  }
  return response;
}
Here's a breakdown of what we are doing here:
- We check to see if the payment request exists in our
paymentRequestsMap. If it does not, we throw an error. We should only be verifying payment requests that we have generated. - We establish a connection to the Solana cluster. We are using our
quicknodeEndpointvariable that we defined earlier. Important: the payer must be connected to the same Solana cluster as specified in our backend. The payment will not be found if the buyer uses an incorrect cluster. - We find the transaction reference. This is the transaction that contains the payment request information. We use the
findReferencefunction imported fromsolana-payand pass in thereferenceparameter. - We validate the transaction. We are using the
validateTransferfunction that we imported fromsolana-payThis will return aTransactionResponseif a valid payment has been found or an error if the payment has not been found or is invalid. - If the payment is valid, we delete the payment request from our
paymentRequestsMap and return theTransactionResponse.
Now that we have our verifyTransaction function let's update our handler. Inside the handler function's GET condition, add the following code:
export default async function handler(req: NextApiRequest, res: NextApiResponse) {
  // ...
  else if (req.method === 'GET') {
    // 1 - Get the reference query parameter from the NextApiRequest
    const reference = req.query.reference;
    if (!reference) {
      res.status(400).json({ error: 'Missing reference query parameter' });
      return;
    }
    // 2 - Verify the transaction
    try {
      const referencePublicKey = new PublicKey(reference as string);
      const response = await verifyTransaction(referencePublicKey);
      if (response) {
        res.status(200).json({ status: 'verified' });
      } else {
        res.status(404).json({ status: 'not found' });
      }
    } catch (error) {
      console.error('Error:', error);
      res.status(500).json({ error: 'Internal Server Error' });
    }
  }
  // ...
}
Here's a quick breakdown of our code:
- We get the
referencequery parameter from the NextApiRequest and store it asreference. We return a400status code (bad request) if no reference was provided. Note that we expect our frontend to pass in thereferencequery parameter as a string. We will convert it to aPublicKeyin the next step. - We verify the transaction. We pass in the
referencequery parameter as aPublicKeyand store the response asresponse. If the response is valid, we return a200status code (success) and averifiedstatus. If the response is invalid, we return a404status code (not found) and anot foundstatus. If there is an error, we return a500status code (internal server error) and an error message.
Create a Frontend
Now that our backend is set up let's create a frontend to interact with our API. Let's start by replacing the contents of the default pages/index.tsx file with the following code:
import Head from 'next/head';
import Image from 'next/image';
import { useState } from 'react';
import { createQR } from '@solana/pay';

export default function Home() {

  const handleGenerateClick = async () => {

  };

  const handleVerifyClick = async () => {

  };

  return (
    <>
      <Head>
        <title>QuickNode Solana Pay Demo</title>
        <meta name="description" content="QuickNode Guide: Solana Pay" />
        <meta name="viewport" content="width=device-width, initial-scale=1" />
        <link rel="icon" href="/favicon.ico" />
      </Head>
      <main className="flex min-h-screen flex-col items-center justify-between p-24">
        <div className="z-10 w-full max-w-5xl items-center justify-between font-mono text-sm lg:flex">
          <h1 className='text-2xl font-semibold'>Solana Pay Demo</h1>
        </div>
        {<Image
          style={{ position: "relative", background: "white" }}
          src={''}
          alt="QR Code"
          width={200}
          height={200}
          priority
        />}
        <div>
          <button
            style={{ cursor: 'pointer', padding: '10px', marginRight: '10px' }}
            onClick={handleGenerateClick}
          >
            Generate Solana Pay Order
          </button>
          {<button
            style={{ cursor: 'pointer', padding: '10px' }}
            onClick={handleVerifyClick}
          >
            Verify Transaction
          </button>}
        </div>
      </main>
    </>
  );
}
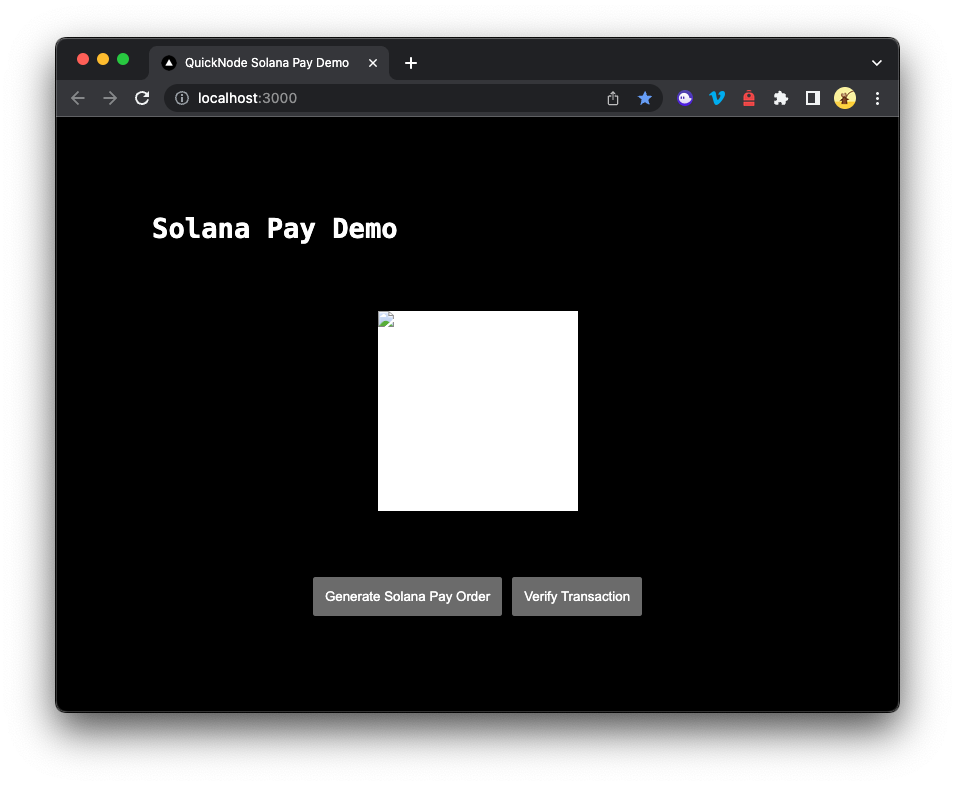
We are changing our app's homepage to a simple UI that will allow us to generate a Solana Pay order and verify a transaction. We are importing the necessary dependencies and creating two empty functions: handleGenerateClick and handleVerifyClick. Each function has a corresponding button on the page. We will fill in the functionality of these functions in the next step. If you run your app now, you should see a simple UI with two buttons:
Implement the QR Generator
In the same, pages/index.tsx file, let's start by creating two state variables: qrCode and reference. We will use these variables to store the QR code and the transaction reference. Add the following code to the top of the Home function:
  const [qrCode, setQrCode] = useState<string>();
  const [reference, setReference] = useState<string>();
We will generate a QR Code as a base64 string and store it in the qrCode state variable so that we can pass it into an Image component. We will also store the transaction reference in the reference state variable so that we can use it later to verify the transaction.
Now, let's implement the handleGenerateClick function. We will use this function to generate to send a POST request to our backend and use the URL response to create a QR code. Add the following code to the handleGenerateClick function:
  const handleGenerateClick = async () => {
    // 1 - Send a POST request to our backend and log the response URL
    const res = await fetch('/api/pay', { method: 'POST' });
    const { url, ref } = await res.json();
    console.log(url)
    // 2 - Generate a QR Code from the URL and generate a blob
    const qr = createQR(url);
    const qrBlob = await qr.getRawData('png');
    if (!qrBlob) return;
    // 3 - Convert the blob to a base64 string (using FileReader) and set the QR code state
    const reader = new FileReader();
    reader.onload = (event) => {
      if (typeof event.target?.result === 'string') {
        setQrCode(event.target.result);
      }
    };
    reader.readAsDataURL(qrBlob);
    // 4 - Set the reference state
    setReference(ref);
  };
Let's break down the handleGenerateClick function:
- We send a
POSTrequest to our backend (/api/pay) and then destructure and store the response'surlandrefproperties. - We generate a QR code from the
urlusing thecreateQRfunction from@solana/pay. We then create a blob from the QR code using apngformat and store it inqrBlob. - We are converting the blob to a base64 string using a
FileReaderand storing it inqrCode. We are then setting theqrCodestate to the base64 string. - We set the state of
referenceto therefproperty from the response. This will allow us to verify the transaction later on.
Now that we have a QR code generated let's update our page render to display it when it's available. Update the Image component in the return statement to the following:
        {qrCode && (
          <Image
            src={qrCode}
            style={{ position: "relative", background: "white" }}
            alt="QR Code"
            width={200}
            height={200}
            priority
          />
        )}
qrCode &&will hide ourImagecomponent ifqrCodeis not set, and when it is set, it will display the QR code (src={qrCode}).
If you were to run your app now, you should see a QR code generated when you click the "Generate Solana Pay Order" button! Let's create a function to verify the transaction so we can complete our payment flow.
Implement Transaction Verification
Now that we have a QR code generated let's create a function to verify the transaction so we can complete our payment flow. We will use the reference state we saved in the previous state to pass to our backend and verify the transaction. Add the following code to the handleVerifyClick function:
  const handleVerifyClick = async () => {
    // 1 - Check if the reference is set
    if (!reference) {
      alert('Please generate a payment order first');
      return;
    }
    // 2 - Send a GET request to our backend and return the response status
    const res = await fetch(`/api/pay?reference=${reference}`);
    const { status } = await res.json();

    // 3 - Alert the user if the transaction was verified or not and reset the QR code and reference
    if (status === 'verified') {
      alert('Transaction verified');
      setQrCode(undefined);
      setReference(undefined);
    } else {
      alert('Transaction not found');
    }
  };
Here's what we are doing in the handleVerifyClick function:
- We check if the
referencestate is set. If it is not set, we alert the user to generate a payment order first. - We send a
GETrequest (implied by thefetchmethod by default) to our backend (/api/pay) and pass in thereferencestate as a query parameter. We are then destructuring and storing the response'sstatusproperty. - We alert the user if the transaction was verified and reset the
qrCodeandreferencestates.
Finally, let's hide our "Verify Transaction" button if the reference state is not set. Update the Button component in the return statement to the following:
          {reference && <button
            style={{ cursor: 'pointer', padding: '10px' }}
            onClick={handleVerifyClick}
          >
            Verify Transaction
          </button>}
Great job! Let's test out our payment flow.
Test the Payment Flow
Launch your payment terminal by running the following command in your terminal:
npm run dev
## or
yarn dev
Test your payment flow by following these steps:
- Navigate to localhost:3000.
- In your browser, click the "Generate Solana Pay Order" button. You should see a QR code generated.
- Scan the QR code with a Solana-Pay-enabled wallet (e.g., Phantom).
Make sure you are on the correct cluster (e.g., Devnet) in your wallet. If you are on a different cluster than you specified in your backend, you will not be able to verify your transaction. You can change your wallet's cluster by going to "Developer Settings" and selecting the correct cluster.
If your wallet is set to mainnet, real funds will be transferred as specified on your backend.
If you need devnet SOL, you can request some here:
- Verify the transaction details in your wallet are as expected, and then approve the payment in your wallet. Wait to see a success message in your wallet.
- Once you complete the payment, click the "Verify Transaction" button. You should see an alert that the transaction was verified! Note that if you click this button before the network confirms the transaction, you will see an alert that the transaction was not found.
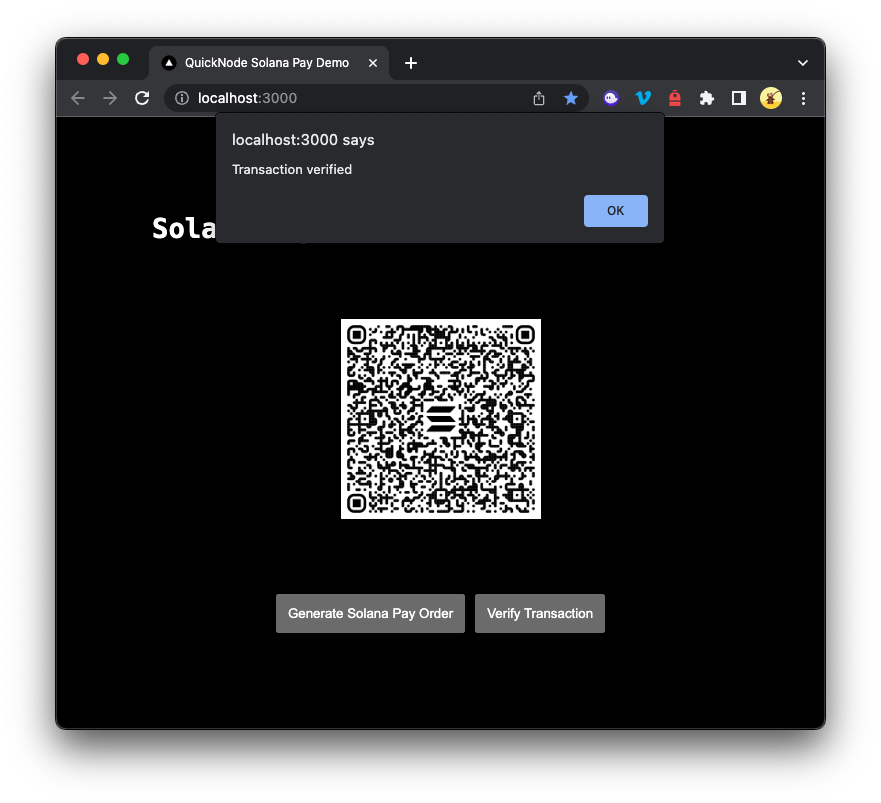
Here's what our final payment terminal should look like after verifying a payment:
Great job!
If you want to reference our code in its entirety, check out our GitHub page here.
Wrap Up
Congratulations, you have successfully built a Solana Pay Terminal using Next.js 13 and the @solana/pay library! With this terminal, you can accept payments in Solana using QR codes that can be scanned by Solana Pay-compatible wallet apps. To deploy this project in a production environment, you should consider using a more persistent storage solution like a database (e.g., PostgreSQL, MongoDB, Redis) to store the payment request information. This will ensure that the data is not lost on server restarts and can be accessed across multiple server instances if you have a distributed or load-balanced system.
If you need help or want to share what you are building with Solana Pay, let us know on Discord or Twitter.
We <3 Feedback!
If you have any feedback or questions on this guide, let us know. We'd love to hear from you!