21 min read
Overview
Solana Pay enables swift, secure payment rails on the Solana blockchain. A little-known fact, however, is that the technology behind Solana Pay can be used for more than just payments. This guide will show you how to use Solana Pay to invoke a custom Solana program.
What You Will Do
Create a Next.js 13 application that generates a QR code that is used to invoke a custom Solana program through your backend:
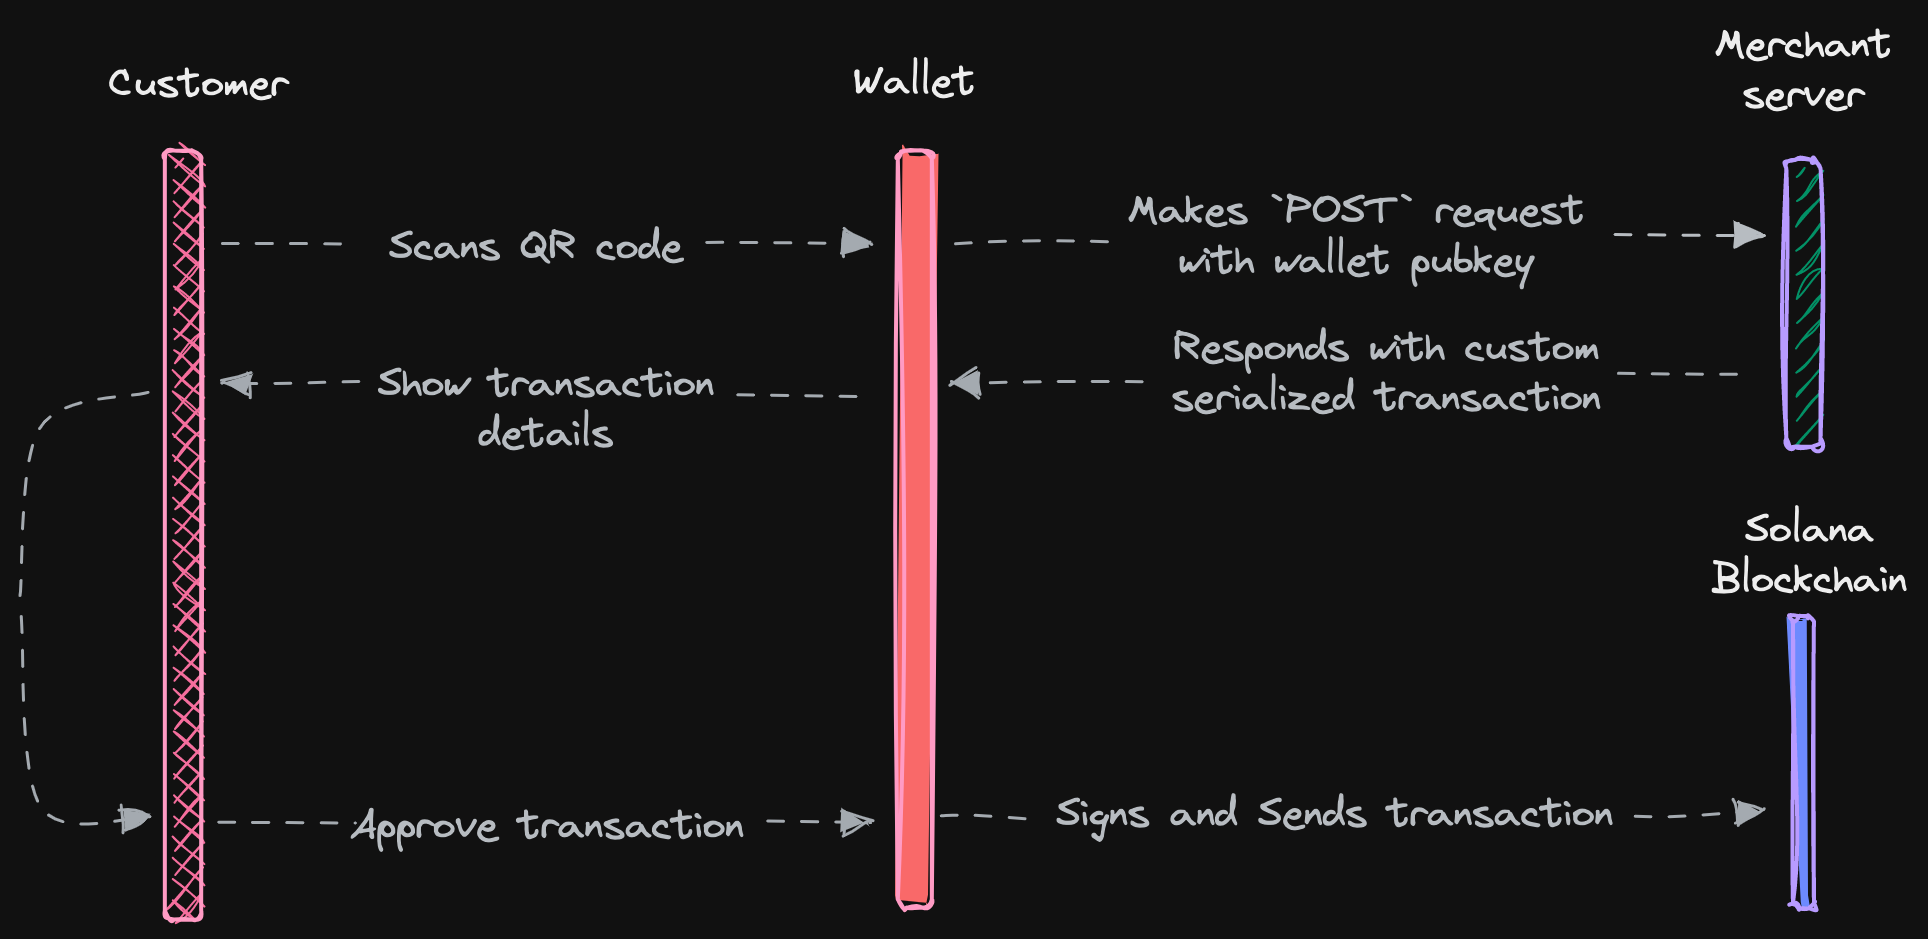 Source: Solana Pay Docs
Specifically, you will:
- Create a new Next.js project.
- Build a simple UI with React.
- Use Next API routes to generate a custom program transaction.
- Render a QR code for the user to access and sign the transaction.
- Use Solana Websockets to listen to the program and update a counter in the UI when the program is invoked.
What You Will Need
This advanced guide will use concepts from several elements of building on Solana. Please review these requisites before proceeding.
- Nodejs (version 16.15 or higher) installed
- TypeScript experience and ts-node installed
- Experience with Next.js and React
- Experience with Solana Pay will be helpful: review our Guide to Getting Started with Solana Pay and Guide to Adding Solana Pay to your dApp
- A mobile wallet that supports Solana Pay (e.g., Solflare) (Note: at present, there is a known issue with Phantom on Android, so if you have an Android device, we recommend to use Solflare instead. We will update this when the issue has been fixed.)
- Ngrok, or another service to expose your local development server to the internet (or a service like Vercel, if you want to deploy your application to the cloud)
- Experience with Solana Websocket Subscriptions (Check out our Guide: How to Create WebSocket Subscriptions to Solana Blockchain using TypeScript )
- Experience with Solana programs (Check out our Guide: Your First Anchor Program in Solana)
- Experience Deserializing Solana Account Data (Check out our Guide: How to Deserialize Account Data on Solana)
Create a New Next.js Project
To get started, open your terminal and run the following command to create a new Next.js project:
npx create-next-app@latest solana-pay-beyond
## or
yarn create next-app solana-pay-beyond
You will be prompted with about 5 questions on how you want to configure your project. For this guide, you can accept the default values for all of them. This will create a new directory, solana-pay-beyond, for your project and initialize it with the latest version of Next.js. Navigate to your new project directory:
cd solana-pay-beyond
Run yarn dev to start the development server and make sure the installation was successful. This will open up the project in your default browser (usually localhost:3000). You should see the default Next.js landing page:
Great job. Close the browser window and stop the development server by pressing Ctrl + C (or Cmd + C on Mac) in your terminal.
Now we need to install the Solana-web3.js and Solana Pay packages. Run the following command:
npm install @solana/web3.js @solana/pay
## or
yarn add @solana/web3.js @solana/pay
Finally, you'll need a Solana endpoint to connect to the Solana devnet to assemble a transaction.
Connect to a Solana Cluster with Your QuickNode Endpoint
To build on Solana, you'll need an API endpoint to connect with the network. You're welcome to use public nodes or deploy and manage your own infrastructure; however, if you'd like 8x faster response times, you can leave the heavy lifting to us. See why over 50% of projects on Solana choose QuickNode and sign up for a free account here. We're going to use a Solana Devnet endpoint.
Copy the HTTP Provider link: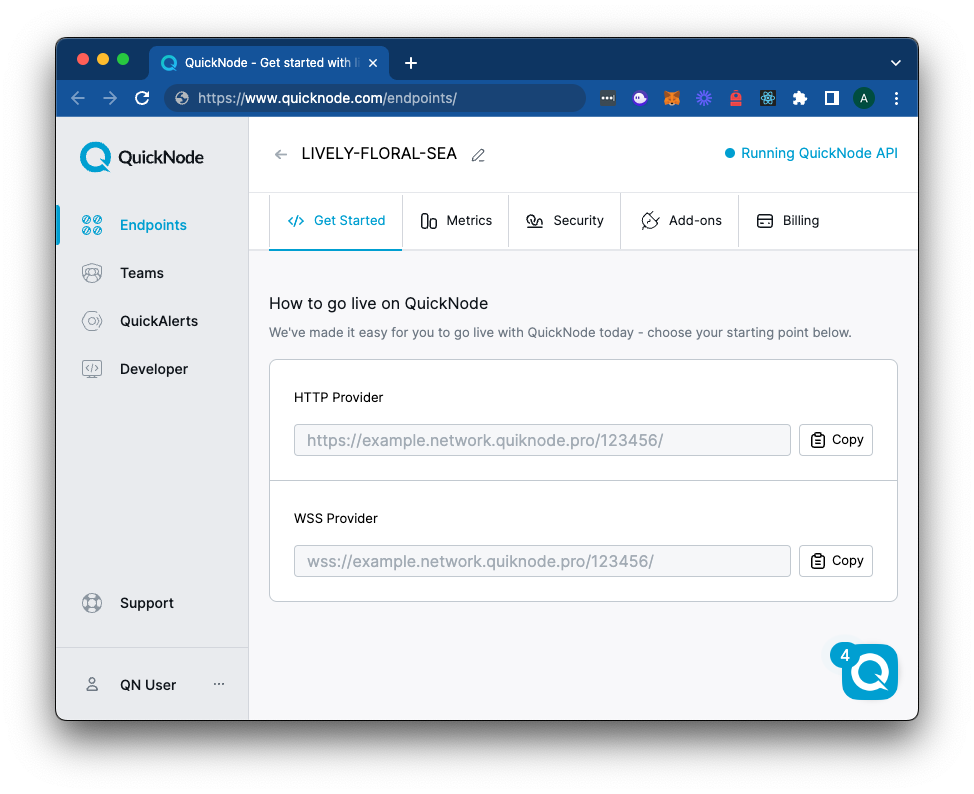
Great job. You're ready to start building your application. If you need help getting set up or running into any issues, please reach out to us on Discord.
Create a Custom Solana Program
For this demonstration, we will use a simple program incrementing a counter. We will ultimately invoke this program by calling an increment instruction with our QR code. We have already created a program for you to use in this guide (Devnet yV5T4jugYYqkPfA2REktXugfJ3HvmvRLEw7JxuB2TUf). The program includes a function called increment that will increment a counter by 1 each time it is called.
The important thing to know about our program is it creates a single PDA that stores a count state. For more information on PDAs, check out our Guide: How to use PDAs. Here's our account struct:
#[account]
pub struct Counter {
    pub count: u64,
}
If you want to see this program's source code or create your own version, check it out on Solana Playground.
Create Your Backend
Before building our backend, let's look at the steps we need to take to send a custom transaction using Solana Pay. Here's a summary of the Solana Pay spec and flow for sending custom transactions:
- User scans a QR code on the frontend.
- User's wallet sends a
GETrequest to the backend - Backend receives the request and responds with a
labelandiconURL to display to the user in their wallet. - User's wallet sends a
POSTrequest to the backend with the user'saccountid (public key as a string)* - Backend receives the request and assembles a Solana Transaction that includes the
incrementinstruction on our custom program. - Backend responds with a serialized transaction.
- User approves and signs the transaction in their wallet.
- User's wallet sends the signed transaction to the cluster for processing
In short, our backend must respond to a GET request with a label and icon URL and a POST request with a serialized transaction.
For this demonstration, we will use Next.js API routes. API routes are a great way to create a backend for your application without setting up a separate server. "Any file inside the folder pages/api is mapped to /api/* and will be treated as an API endpoint instead of a page." You can read more about Next.js API routes here.
Navigate to pages/api and delete hello.ts. We will be replacing this file with our own API routes. Create a new file called pay.ts and add the following code:
import { NextApiRequest, NextApiResponse } from 'next';
import { Connection, PublicKey, Transaction, TransactionInstruction } from '@solana/web3.js';
import crypto from 'crypto';

// CONSTANTS
const programId = new PublicKey('yV5T4jugYYqkPfA2REktXugfJ3HvmvRLEw7JxuB2TUf'); // 👈 You can use this program or create/use your own
const counterSeed = 'counter'; // This is the seed used to generate the counter account (may be different if you use a different program)
const functionName = 'increment'; // This is the name of our anchor instruction (may be different if you use a different program)
const message = `QuickNode Demo - Increment Counter`;
const quickNodeEndpoint = 'https://example.solana-devnet.quiknode.pro/0123456/'; // 👈 Replace with your own devnet endpoint
const connection = new Connection(quickNodeEndpoint, 'confirmed');
const label = 'QuickCount +1';
const icon = 'https://www.arweave.net/wtjT0OwnRfwRuUhe9WXzSzGMUCDlmIX7rh8zqbapzno?ext=png';

// Utility function to generate data for a specific Anchor instruction
function getInstructionData(instructionName: string) {
  return Buffer.from(
    crypto.createHash('sha256').update(`global:${instructionName}`).digest().subarray(0, 8)
  );
}

export default async function handler(req: NextApiRequest, res: NextApiResponse) {
  if (req.method === 'POST') {
  // POST code will be here
  } else if (req.method === 'GET') {
    res.status(200).json({ label, icon });
  } else {
    res.status(405).json({ error: 'Method Not Allowed' });
  }
}
What we are doing here is:
- defining some key variables that we will use throughout the application. We are also importing the necessary packages from Solana Pay, Solana-web3.js, and crypto (a NodeJS library).
- defining a few constants here for demonstration--you may want to make some of these values variable based on your application's needs (e.g.,
messageandlabel). Make sure to update thequicknodeEndpointwith your QuickNode endpoint. If you are using a different program than the one we provided, you will likely need to modify thecounterSeedandfunctionNameconstants. - defining our API handler. We will use a single handler to process
GETandPOSTrequests. We will use thereq.methodproperty to determine which action to take. If the request method isGET, respond with alabelandiconURL - since we defined these in our constants, we can just return them, callingres.status(200).json({ label, icon }). We will generate a transaction if the request method isPOST. If the request method is anything else, we will return an error. You could use a separate handler for each action, but for the sake of simplicity, we will use a single handler. - defining a
getInstructionDatafunction. This function will generate the data for ourincrementinstruction. We are using a hashing function to generate the serialized data that we can pass into our Transaction. This is how Anchor serializes account instructions - you can see the source code here.
Handle POST Requests - Generate a Transaction
When the wallet sends a POST request to our backend, we will need to generate a transaction. We will use the account id (public key) the wallet sends us to create the transaction. First, we will need to ensure the wallet, in fact, passed an account. Add the following code to the POST handler:
  if (req.method === 'POST') {
    try {
      const account: string = req.body?.account;
      if (!account) res.status(400).json({ error: 'Missing account field' });
      const transaction = await generateTx(account);
      res.status(200).send({ transaction, message });
    } catch (error) {
      console.error('Error:', error);
      res.status(500).json({ error: 'Internal Server Error' });
    }
  }
What we are doing here:
- Checking whether the
accountfield was passed in the request body. If it is not, we will return a400error. - If the
accountfield was passed, we will call a new function,generateTx, and pass theaccountas an argument. This function will generate a transaction that will increment the counter (we will build that next). - If the transaction was successfully generated, we will return the serialized
transactionand amessage(defined in our constants) to the wallet. The wallet will display the message to the user and ask them to confirm the transaction.
Let's create the generateTx function. Add the following code to pay.ts, below your handler:
async function generateTx(account: string) {
  // 1. Get the counter PDA
  const [counterPda] = PublicKey.findProgramAddressSync([Buffer.from(counterSeed)], programId);
  // 2. Create the data buffer with the function selector
  const data = getInstructionData(functionName);
  // 3. Build the transaction to call the increment function
  const tx = new Transaction();
  const incrementIx = new TransactionInstruction({
    keys: [
      { pubkey: counterPda, isWritable: true, isSigner: false },
    ],
    programId: programId,
    data
  });
  // 4. Set the latest blockhash and set the fee payer
  const latestBlockhash = await connection.getLatestBlockhash();
  tx.feePayer = new PublicKey(account);
  tx.recentBlockhash = latestBlockhash.blockhash;
  tx.add(incrementIx);
  // 5. Serialize the transaction
  const serializedTransaction = tx.serialize({
    verifySignatures: false,
    requireAllSignatures: false,
  });
  // 6. Encode the transaction data as base64
  const base64Transaction = serializedTransaction.toString('base64');
  return base64Transaction;
}
Let's walk through what we are doing here:
- We use the
counterSeedandprogramIdto generate the counter PDA. We must pass this account into ourincrementfunction's transaction instruction. - We generate the data buffer for our
incrementfunction. We are using thegetInstructionDatafunction we defined earlier. - We are building the transaction. We are creating a new Transaction and adding a new TransactionInstruction. We pass the
counterPda(as a writeable, non-payer account) anddatawe generated in steps 1 and 2. We also pass theprogramIdwe defined in our constants. Note: If you are using your own program, you will need to update these values based on the context defined in your program. - We fetch and set the latest blockhash and set the user's wallet as the fee payer.
- We serialize the transaction. We are setting
verifySignaturesandrequireAllSignaturesasfalsebecause we are not signing the transaction. We will let the wallet handle that. - Finally, we encode the transaction data as
base64(Base64 is a common encoding format for binary data) and return it to the wallet.
Great job! You just created a function that will generate a transaction that will increment the counter. Your backend is now ready to accept requests from the wallet. Let's test it out!
Run the following command to start the server:
npm run dev
# or
yarn dev
Then in a separate terminal window, run the following cURL script to make a GET request to the /api/pay endpoint:
curl -X GET http://localhost:3000/api/pay
This should return your label and icon that we defined in our constants. Now let's test out the POST request. Run the following cURL script to make a POST request to the /api/pay endpoint:
curl -X POST "http://localhost:3000/api/pay" \
-H "Content-Type: application/json" \
-d '{"account": "YOUR_WALLET_ADDRESS"}'
You should get a response back that looks similar to the following:
{
  "transaction":"AQAAAAAAAAAAAAAAAAAAAAAAAAAAAAAAAAAAAAAAAAAAAAAAAAAAAAAAAAAAAAAAAAAAAAAAAAAAAAAAAAAAAAABAAEDWvArSV39ujMKeO06xNO5Sx4ql4HJrmyWxnQjubHQp0iDxxzKuMff4tsV5PtxlzfcnR+CW+QUuiF+PqTIV/uDQ54RxxfTuGSHXAe+/I1AVzHOi5+zqX/ntgsd/DMy3V0VsyJ9ZUQHHexample/ZfFplpKKLcl3bpmiHJ0DTRUBAgexample",
  "message":"QuickNode Demo - Increment Counter"
}
Nice job! You just created an API endpoint that generates a transaction to our customer program and returns it to the wallet. Now let's build the front end.
Create a Front End
Now that our backend is set up, let's create a front end. The front end will be a simple React app that:
- Generates a QR code on page load that triggers the scanning wallet to make a
GETrequest to our backend - Fetch, deserialize, and display our program's account data (count)
- Create a subscription to our program's account data to update the count in real time
Open /pages/index.tsx and replace the default content with the following:
import Head from 'next/head';
import Image from 'next/image';
import { useEffect, useState } from 'react';
import { createQR, encodeURL } from '@solana/pay';
import { Connection, PublicKey } from '@solana/web3.js';
import { u64 } from '@solana/buffer-layout-utils';
import { struct } from '@solana/buffer-layout';

const quickNodeEndpoint = 'https://example.solana-devnet.quiknode.pro/0123456/'; // 👈 Replace with your own devnet endpoint
const connection = new Connection(quickNodeEndpoint, 'confirmed');
const programId = new PublicKey('yV5T4jugYYqkPfA2REktXugfJ3HvmvRLEw7JxuB2TUf');
const counterSeed = 'counter';
const [counterPda] = PublicKey.findProgramAddressSync([Buffer.from(counterSeed)], programId);
// TODO: add counter interface

export default function Home() {
  const [qrCode, setQrCode] = useState<string>();
  const [count, setCount] = useState<string>('');

  useEffect(() => {
    // TODO: Cal QR code generation
  }, []);

  const generateQr = async () => {
    // TODO: Add QR code generation
  }

  return (
    <>
      <Head>
        <title>QuickNode Solana Pay Demo: Quick Count</title>
        <meta name="description" content="QuickNode Guide: Solana Pay" />
        <meta name="viewport" content="width=device-width, initial-scale=1" />
        <link rel="icon" href="/favicon.ico" />
      </Head>
      <main className="flex min-h-screen flex-col items-center justify-between p-24">
        <div className="z-10 w-full max-w-5xl items-center justify-between font-mono text-sm lg:flex">
          <h1 className='text-2xl font-semibold'>Solana Pay Demo: QuickCount</h1>
          <h1 className='text-xl font-semibold'>Count: {count}</h1>
        </div>
        {qrCode && (
          <Image
            src={qrCode}
            style={{ position: "relative", background: "white" }}
            alt="QR Code"
            width={200}
            height={200}
            priority
          />
        )}
      </main>
    </>
  );
}
This will be a good starting point for us to work off of. Let's walk through what is here:
- Import the necessary dependencies from React, Next, and Solana. Much of this is the same as our previous Guide to Adding Solana Pay to your dApp, so we won't go into too much detail here. We are also adding a couple of imports from Solana's buffer layout libraries. We will use these to deserialize our program's account data.
- Define a few constants (these should look familiar to our backend):
quickNodeEndpoint,connection,programId, andcounterPda. We will use these to connect to our program and fetch the account data.Using .env FilesNote we are hardcoding our endpoint here for simplicity. You should use an environment variable in a production app to store your endpoint. Check Next.js docs to learn more about using environment variables.
- Define a
Homecomponent that will render our UI. The UI will display a count and QR code if they are defined (though we did not define them yet). We have also created a useEffect hook that will run when the component mounts. We will use this hook to fetch the account data and generate the QR code.
Implement the QR Generator
We will generate a QR Code as a base64 string and store it in the qrCode state variable so that it will be passed into our Image component. First, let's build out our generateQr function. Add the following code to the generateQr function:
  const generateQr = async () => {
    const apiUrl = `${window.location.protocol}/${window.location.host}/api/pay`;
    const label = 'label';
    const message = 'message';
    const url = encodeURL({ link: new URL(apiUrl), label, message });
    const qr = createQR(url);
    const qrBlob = await qr.getRawData('png');
    if (!qrBlob) return;
    const reader = new FileReader();
    reader.onload = (event) => {
      if (typeof event.target?.result === 'string') {
        setQrCode(event.target.result);
      }
    };
    reader.readAsDataURL(qrBlob);
  }
Let's dig into what this function is doing:
- We define an
apiUrl, the URL of our backend API endpoint. We are using thewindow.locationobject to get the protocol and host of our current page. We are then appending/api/payto the end of the URL. This will allow our API to work on bothlocalhostand our deployed app (instead of hard coding the URL). - We define a
labelandmessage, effectively placeholders for this demo. - We are using the
encodeURLfunction from@solana/payto create a URL that will trigger the scanning wallet to make aGETrequest to our backend. We are passing in theapiUrlas anew URL. - Finally, we render the QR code as a base64 string and store it in the
qrCodestate variable.
Now that we have a function to generate our QR code let's call it when the component mounts. Add the following code to the useEffect hook:
  useEffect(() => {
    generateQr();
  }, []);
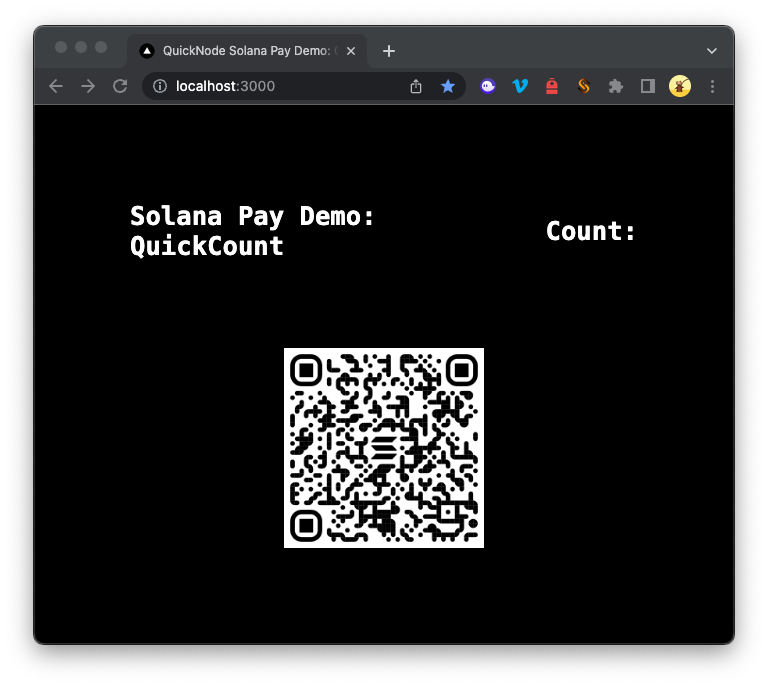
This should render our QR code when the page loads. If you were to run your app now, you should see a QR code! Here's an example of what it should look like:
Fetch and Update the Count
Let's fetch and display our program's count to the frontend to ensure our call to the program works. Our front end already includes <h1>Count: {count}</h1> in the Home component, so we just need to fetch the count data and deserialize the account. Let's start by defining our account struct. To deserialize our data, we need to know the account schema from our on-chain program struct--if you recall, this was defined with a u64 count and an 8-byte discriminator (used in all Anchor accounts). We can use the @solana/buffer-layout library to define our account struct. Add the following code above your Home component:
interface Counter {
  discriminator: bigint;
  count: bigint;
}
const CountLayout = struct<Counter>([
  u64('discriminator'),
  u64('count'),
]);
If you need a refresher on how to deserialize Solana account data, check out this guide. In short, what we are doing here, is defining our data schema, and telling it that we expect to see two different 8-byte values using the u64 layout.
Now that we have our account struct defined let's fetch the account data and deserialize it. Create a new function called fetchCount and add the following code above your Home component but after your CountLayout definition:
async function fetchCount() {
  let { data } = await connection.getAccountInfo(counterPda) || {};
  if (!data) throw new Error('Account not found');
  const deserialized = CountLayout.decode(data);
  return deserialized.count.toString();
}
We are effectively fetching the account data from our PDA and then using the CountLayout to deserialize the data. We are then returning the count value as a string. Now let's call this function in our useEffect hook. Add the following code to the useEffect hook:
  useEffect(() => {
    generateQr();
    fetchCount().then(setCount);
    const subscribe = connection.onProgramAccountChange(
      programId,
      () => fetchCount().then(setCount),
      'finalized'
    )
    return () => {
      connection.removeProgramAccountChangeListener(subscribe);
    }
  }, []);
Here we call our fetchCount function on mount and set the count state variable. This should give us the current count on the page render. We have also created a subscription to the program account change event so that we can update the count our program is invoked by using the onProgramAccountChange. If you need a refresher on Solana WebSocket methods, check out this guide. We are also returning a function that will unsubscribe from the program account change event when the component unmounts.
Awesome work! Let's recap what we have built so far. We have:
- Created and deployed a Solana counter program using Anchor
- Built a Next.js front end that
- fetches our program counter
- subscribes to changes to our program counter
- generates and displays a QR code that can be scanned by Solana Pay-compatible wallet apps
- Created a backend API endpoint that can be called by Solana Pay-compatible wallet apps when they scan the wallet. The API endpoint follows the Solana Pay API spec and will send a transaction invoking our counter to the user's wallet for their signature.
Now, all we need to do is test it out.
Test the App
Open up a new terminal window and run the following command to start the Next.js development server:
npm run dev
# or
yarn dev
This will start the Next.js development server on port 3000. Navigate to http://localhost:3000 in your browser to view the app. You should see a QR code and the current count. Unfortunately, since our app is running on localhost, our wallet app on a separate device will not be able to access our API endpoint. We will need to deploy our app to a public URL to fix this. If you're so inclined, you can publish your project to a service like Vercel or Netlify (just make sure to secure your endpoints as we mentioned before). However, for the purposes of this guide, we will use ngrok, a tool that allows you to expose a local development server to the internet. After you have installed ngrok, you will need to follow the instructions to create an account and register your API key. Once you have done this, run the following command in your terminal:
ngrok http 3000
You should see a message that looks like this:
ngrok                                                           (Ctrl+C to quit)

Session Status                online
Account                       your@email.com (Plan: Free)
Version                       3.2.2
Region                        United States (us)
Latency                       -
Web Interface                 http://127.0.0.1:xxxx
Forwarding                    https://wxyz-00-123-456-789.ngrok.io -> http://loc

Connections                   ttl     opn     rt1     rt5     p50     p90
                              0       0       0.00    0.00    0.00    0.00
Follow the forwarding URL and click 'Visit Page.' You should be directed to a ngrok.io page running your local development server (NextJS app). You should see your final app running with a valid QR code and updated count:
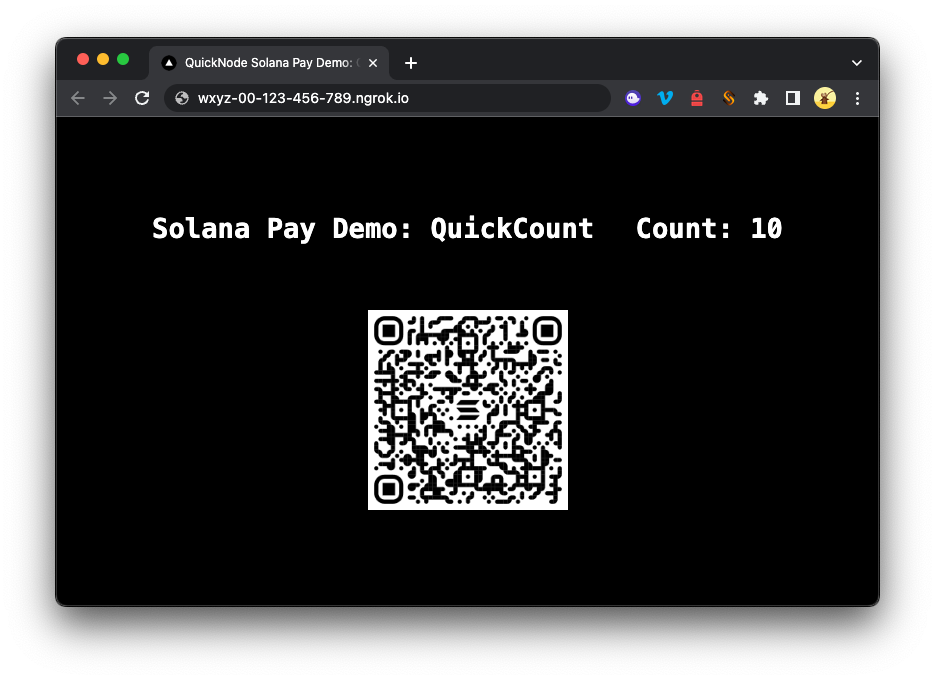
Note: the QR code above is invalid because it points to a ngrok backend that is no longer active.
Now that we have our app running let's test it out. Open your Solana Pay-compatible wallet app (at present, there is a known issue with Phantom on Android-we will update when this has been fixed) and make sure the network is set to Devnet. Then, scan the QR code. You should be prompted to sign a transaction that will invoke our counter program:

Once you have approved the transaction and it is finalized by the network, you should see the count increment in your app!
If you want to reference our code in its entirety, check out our GitHub page here.
Wrap Up
Great work! That was a lot of work, but you have successfully built an integration between Solana Pay and a custom Solana program. The possibilities for this are endless. We can't wait to see what you come up with! If you're struggling for inspiration, check out this fun Tug-of-War game built by the Solana Foundation.
If you need help or want to share what you are building with Solana Pay, let us know on Discord or Twitter.
We <3 Feedback!
If you have any feedback or questions on this guide, let us know. We'd love to hear from you!