サンプルアプリに戻る
SQL Explorer Cookbook
Query Hyperliquid on-chain data with standard SQL using Quicknode SQL Explorer.



フロントエンドフレームワーク/ライブラリ:
React
言語:
TypeScript
ビルドツール/開発サーバー:
Next.js
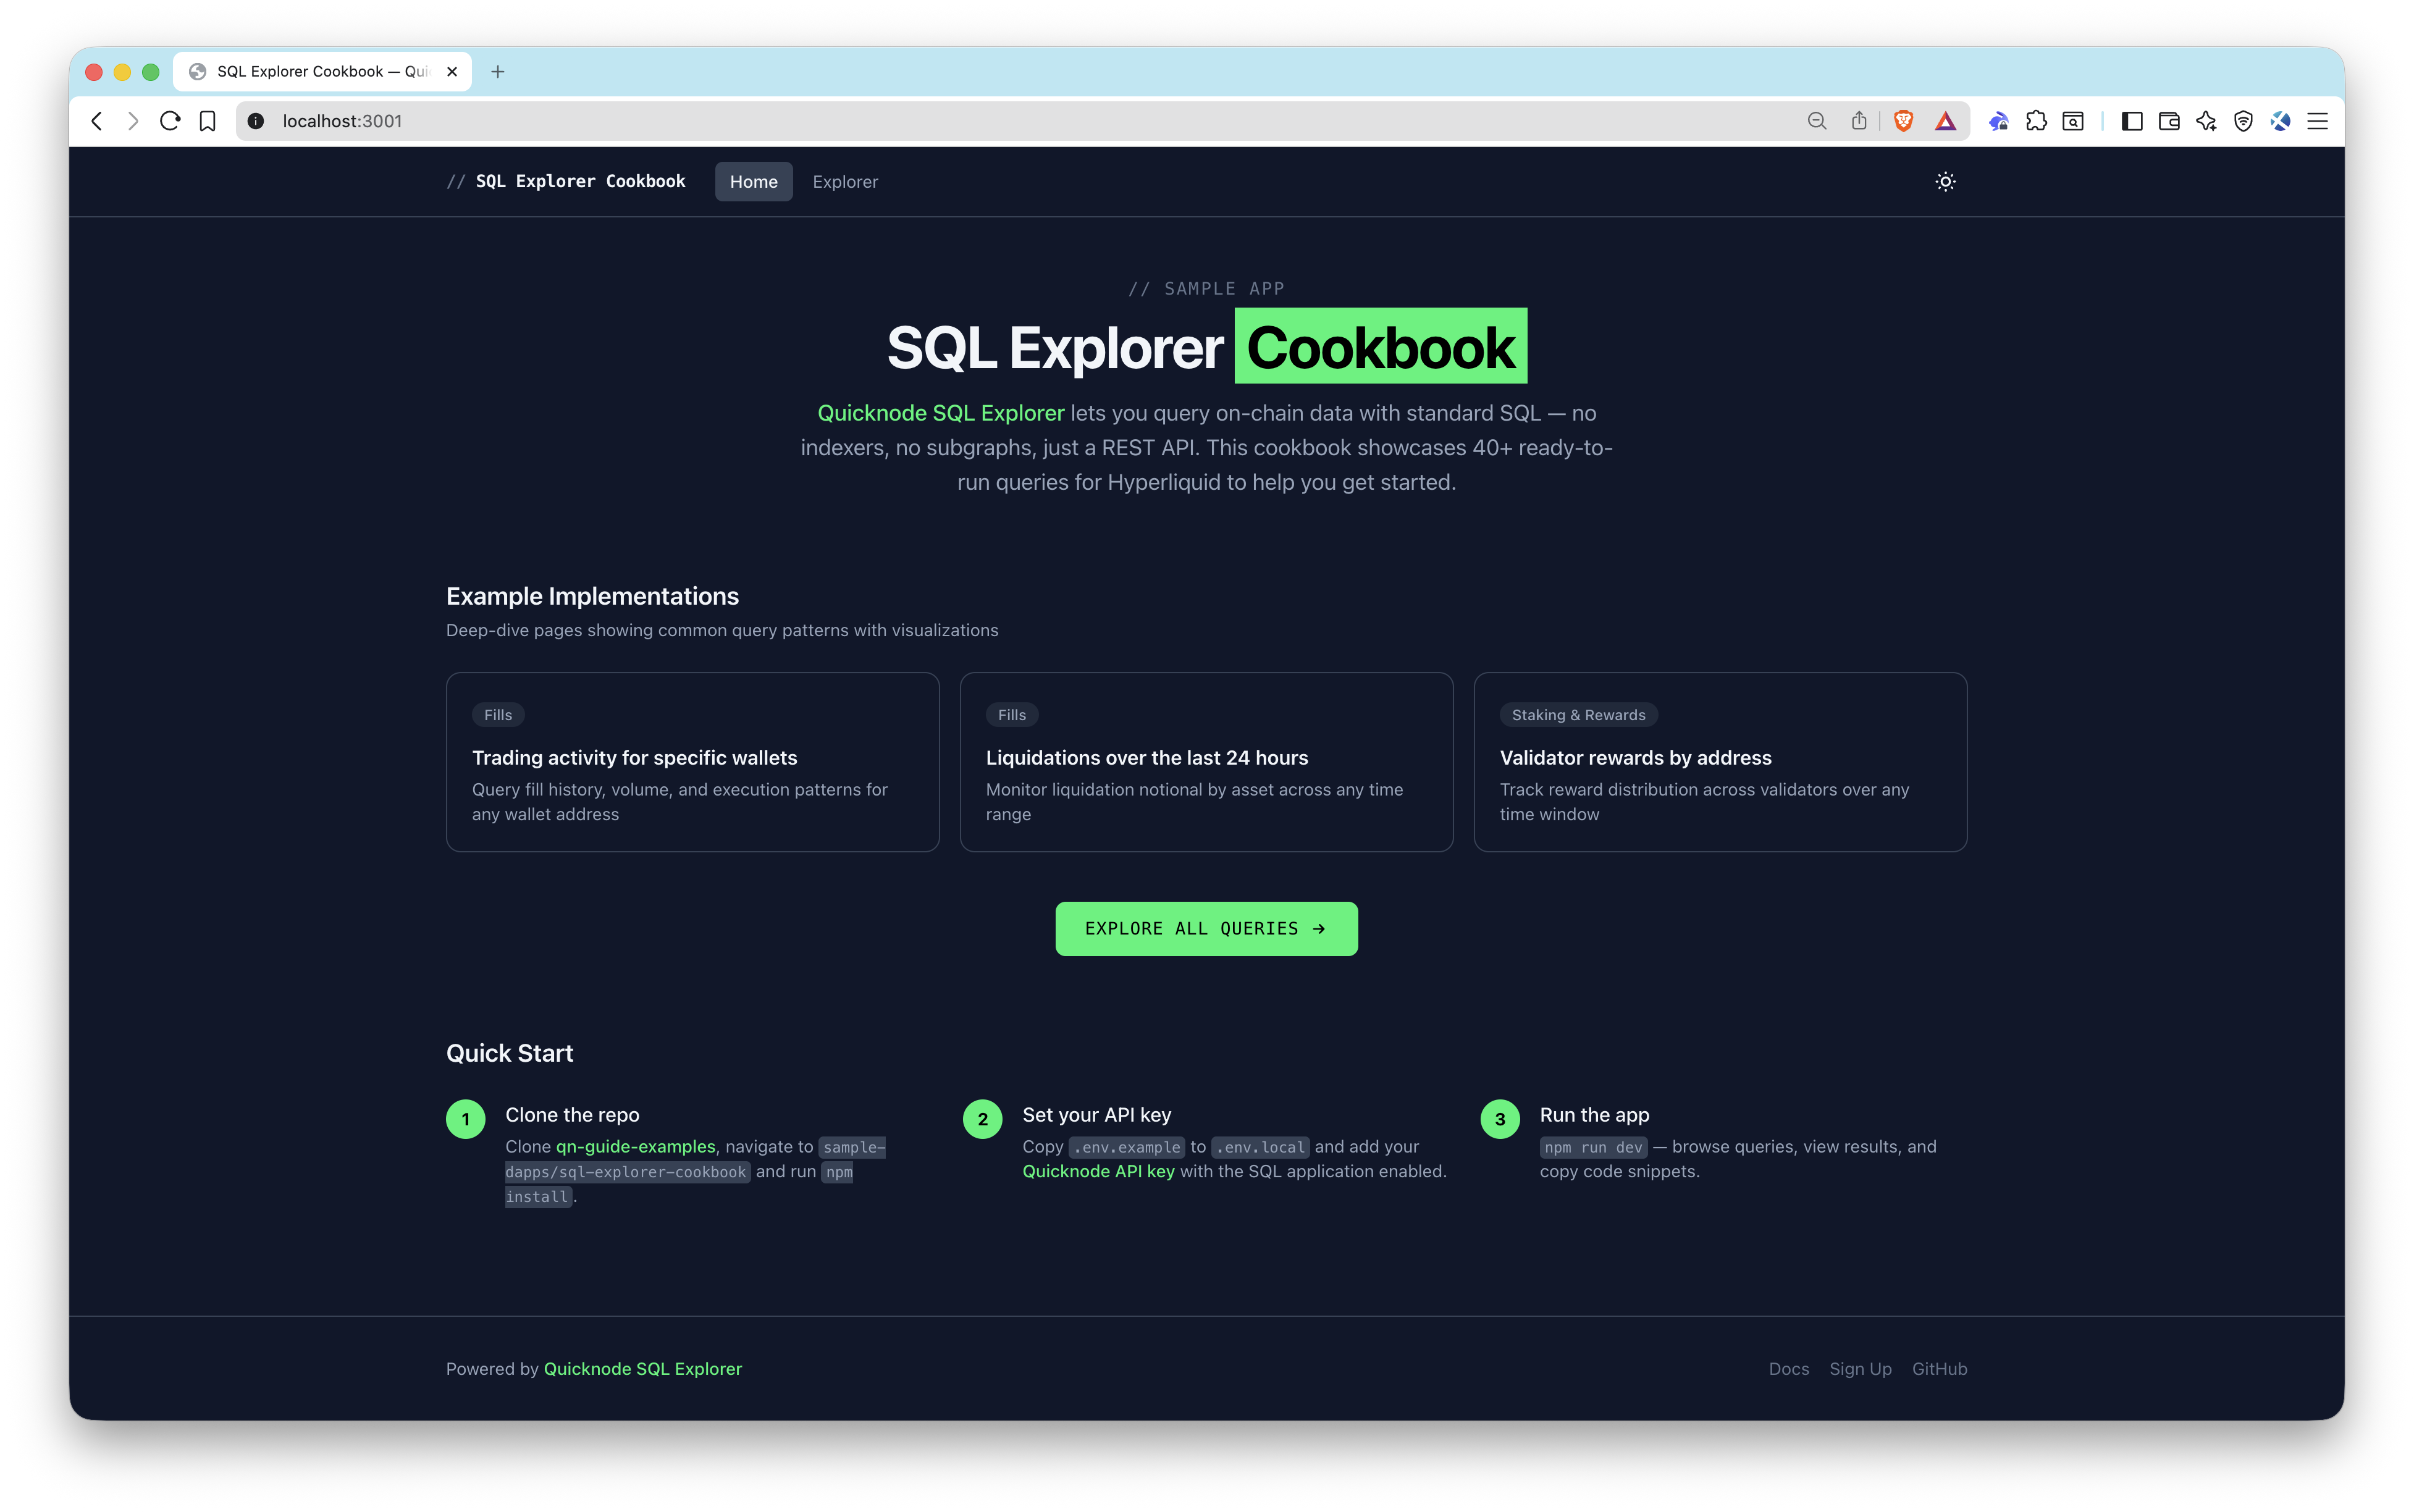
概要
Quicknode SQL Explorer lets you query on-chain data with standard SQL — no indexers, no subgraphs, just a REST API and your API key. This sample app demonstrates how to integrate SQL Explorer into a frontend, shipping with 40+ ready-to-run queries against Hyperliquid on-chain data with table and chart views so you can see results immediately.
建築
Browser (Next.js frontend)
  -> /api/query (server-side proxy route)
    -> Quicknode SQL Explorer REST API
      -> Returns structured rows
        -> Table view + Chart visualization
特長
- 40+ pre-built queries organized by category: Trading, Fills, Orders, Funding, Markets, Portfolio & Positions, Staking & Rewards
- Parameterized queries with dynamic inputs for wallet addresses, validators, and coin symbols
- Dual result views — sortable/paginated tables and bar/line/area/pie charts
- Code snippets — copy-paste ready code in SQL, curl, TypeScript, and Python for every query
- Use-case pages — deeper implementations for validator rewards, wallet activity, and liquidations
- Server-side API proxy — keeps your API key secure on the backend
前提条件
- Node.js 20+
- A Quicknode account with an API key that has the SQL application enabled (create one here)
Project Structure
src/
  app/
    api/query/route.ts          # Server-side proxy to SQL Explorer API
    explorer/page.tsx            # Query explorer page
    use-cases/
      liquidations/page.tsx     # Liquidation monitoring use case
      validator-rewards/page.tsx # Validator rewards use case
      wallet-activity/page.tsx  # Wallet activity use case
  components/
    query/                      # Query runner, results table, charts, code snippets
    ui/                         # Category filter, copy button, theme toggle
    use-cases/                  # Insights banner, stat highlights
  data/queries.ts               # All 40+ pre-built query definitions
  lib/
    sql-explorer.ts             # SQL Explorer API client
    snippets.ts                 # Code snippet generators
    chart-utils.ts              # Chart configuration helpers
    hooks/useQueryExecution.ts  # Query execution hook
Environment Variables
QUICKNODE_API_KEY=your_api_key_here          # Quicknode API key with SQL enabled
QUICKNODE_SQL_ENDPOINT=https://api.quicknode.com/sql/rest/v1/query  # SQL Explorer REST endpoint
QUICKNODE_CLUSTER_ID=hyperliquid-core-mainnet # Target cluster ID
はじめに
1. Clone the repository
git clone https://github.com/quiknode-labs/qn-guide-examples.git
cd sample-dapps/sql-explorer-cookbook
2. Install dependencies
npm install
3. Configure environment variables
cp .env.example .env.local
Edit .env.local with your Quicknode API key and endpoint details.
4. Start the development server
npm run dev
Open http://localhost:3000 to start exploring queries.
API Endpoints
POST /api/query— Server-side proxy that forwards SQL queries to the Quicknode SQL Explorer REST API and returns results
プレビュー
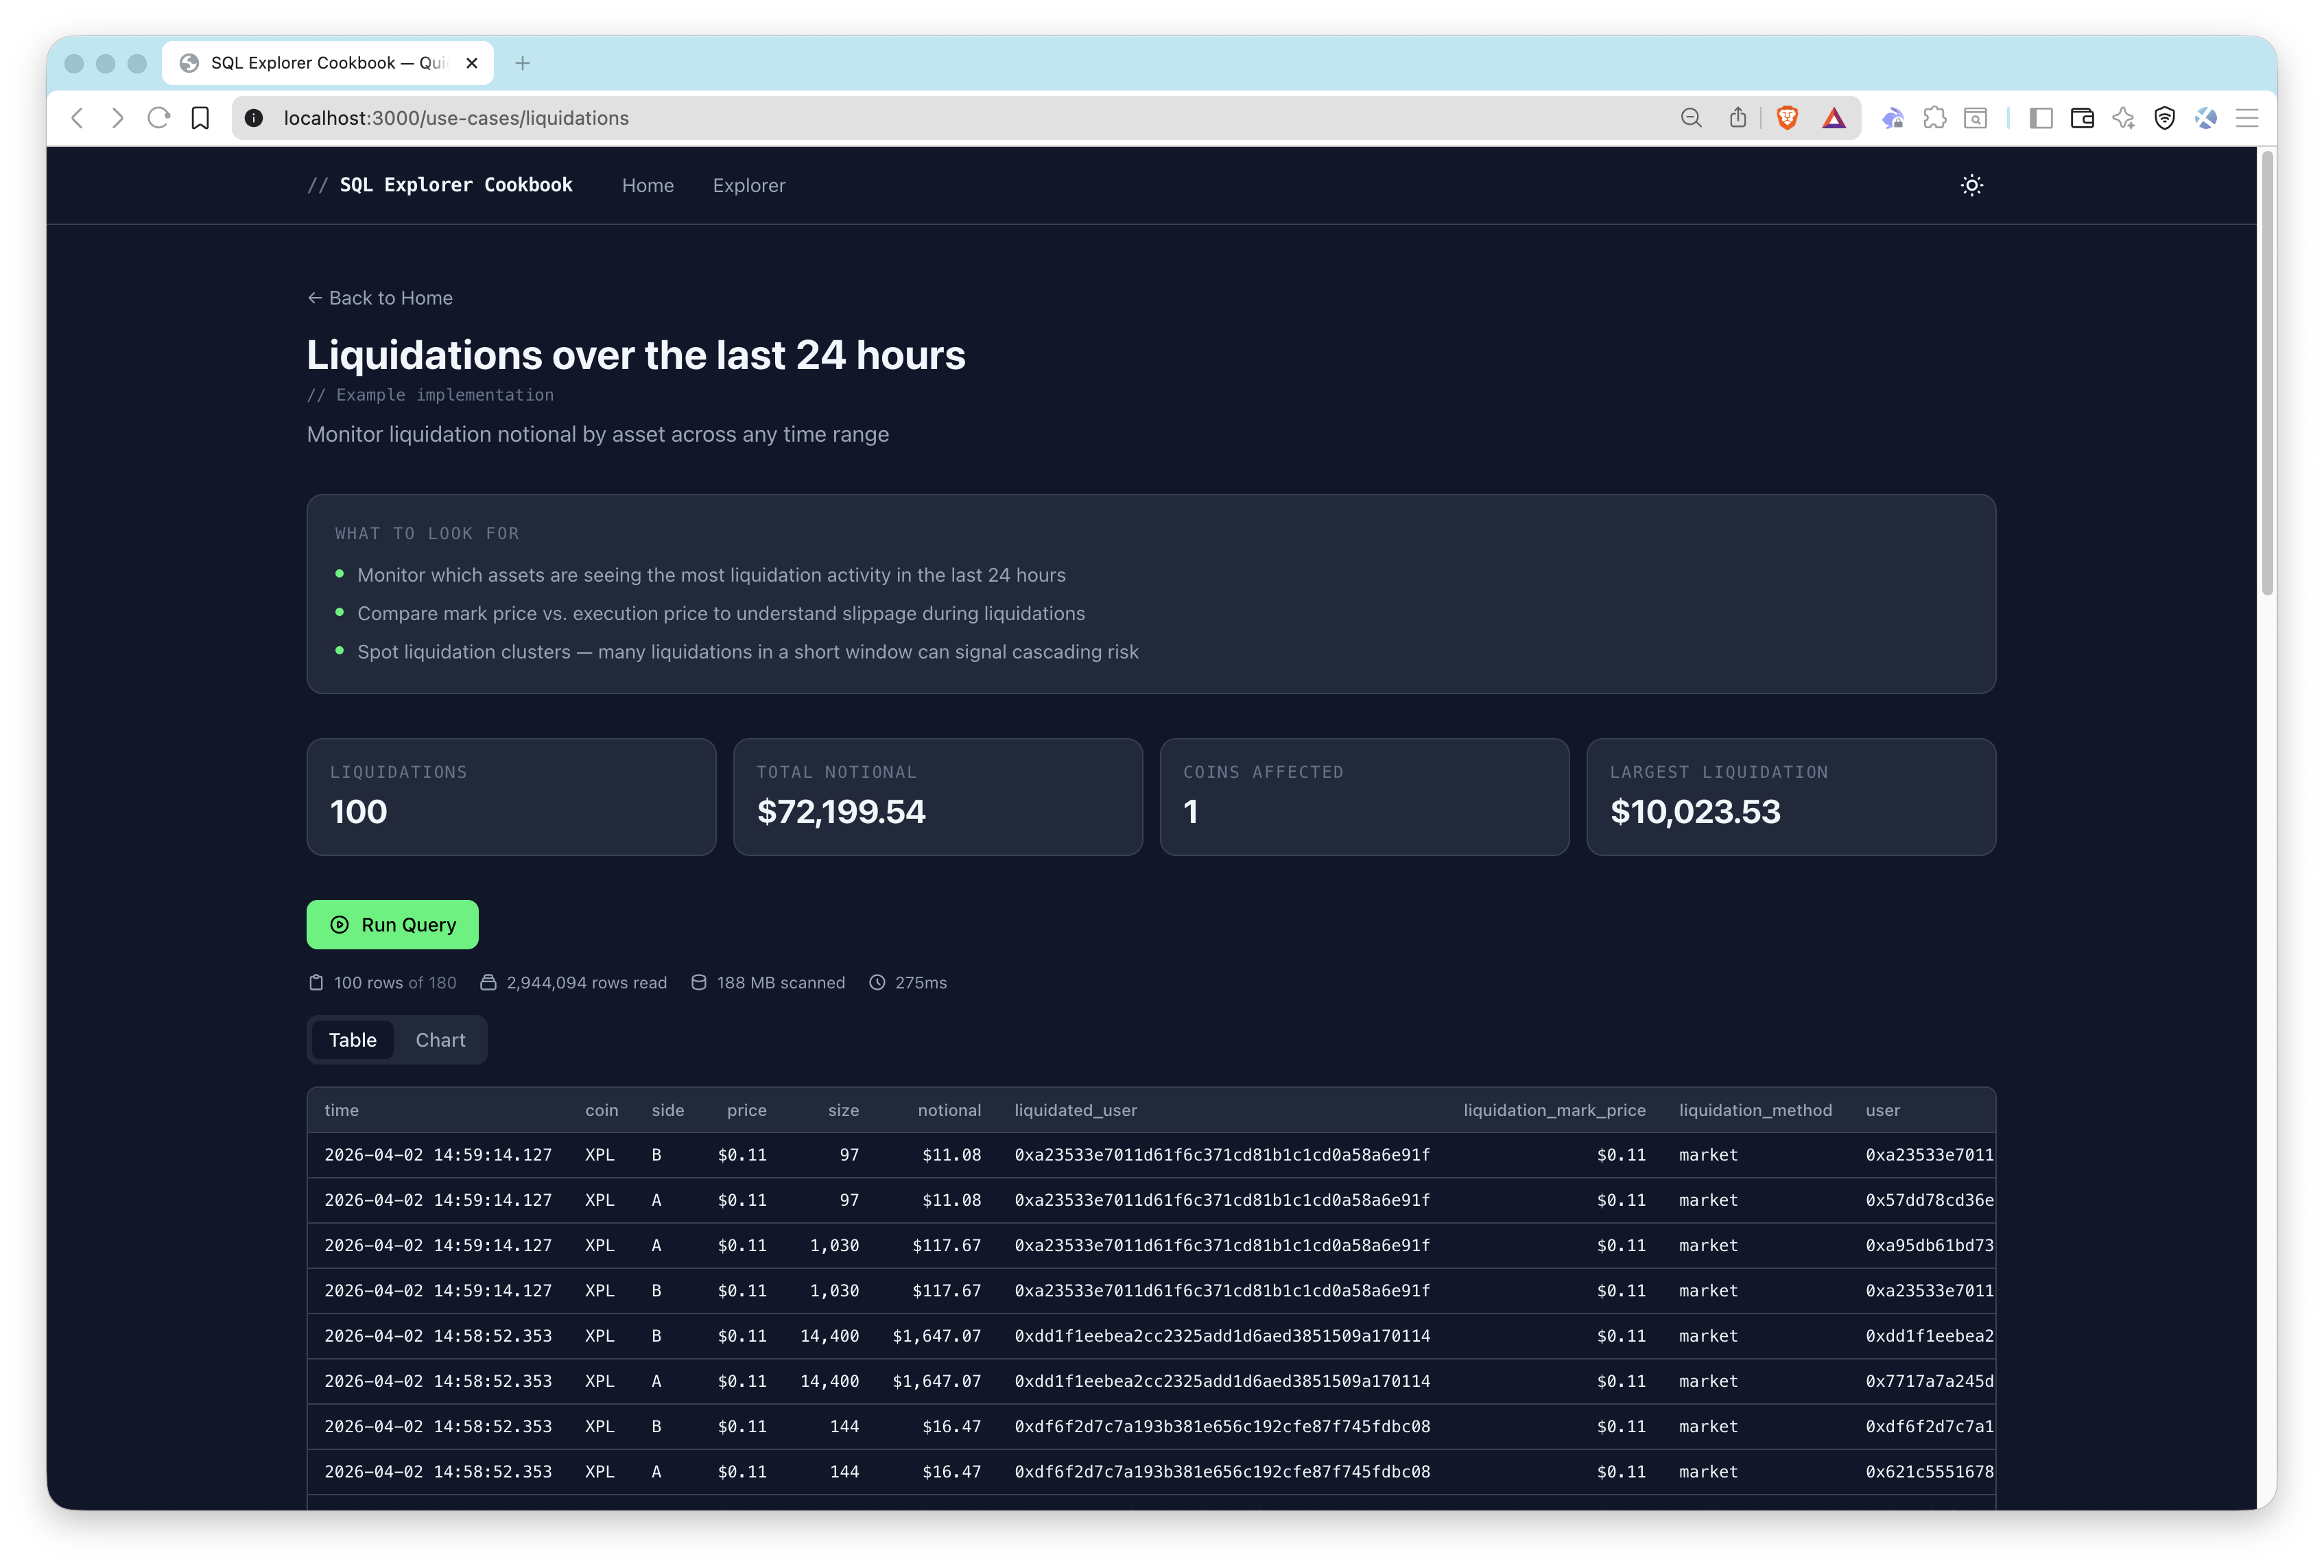
Usage
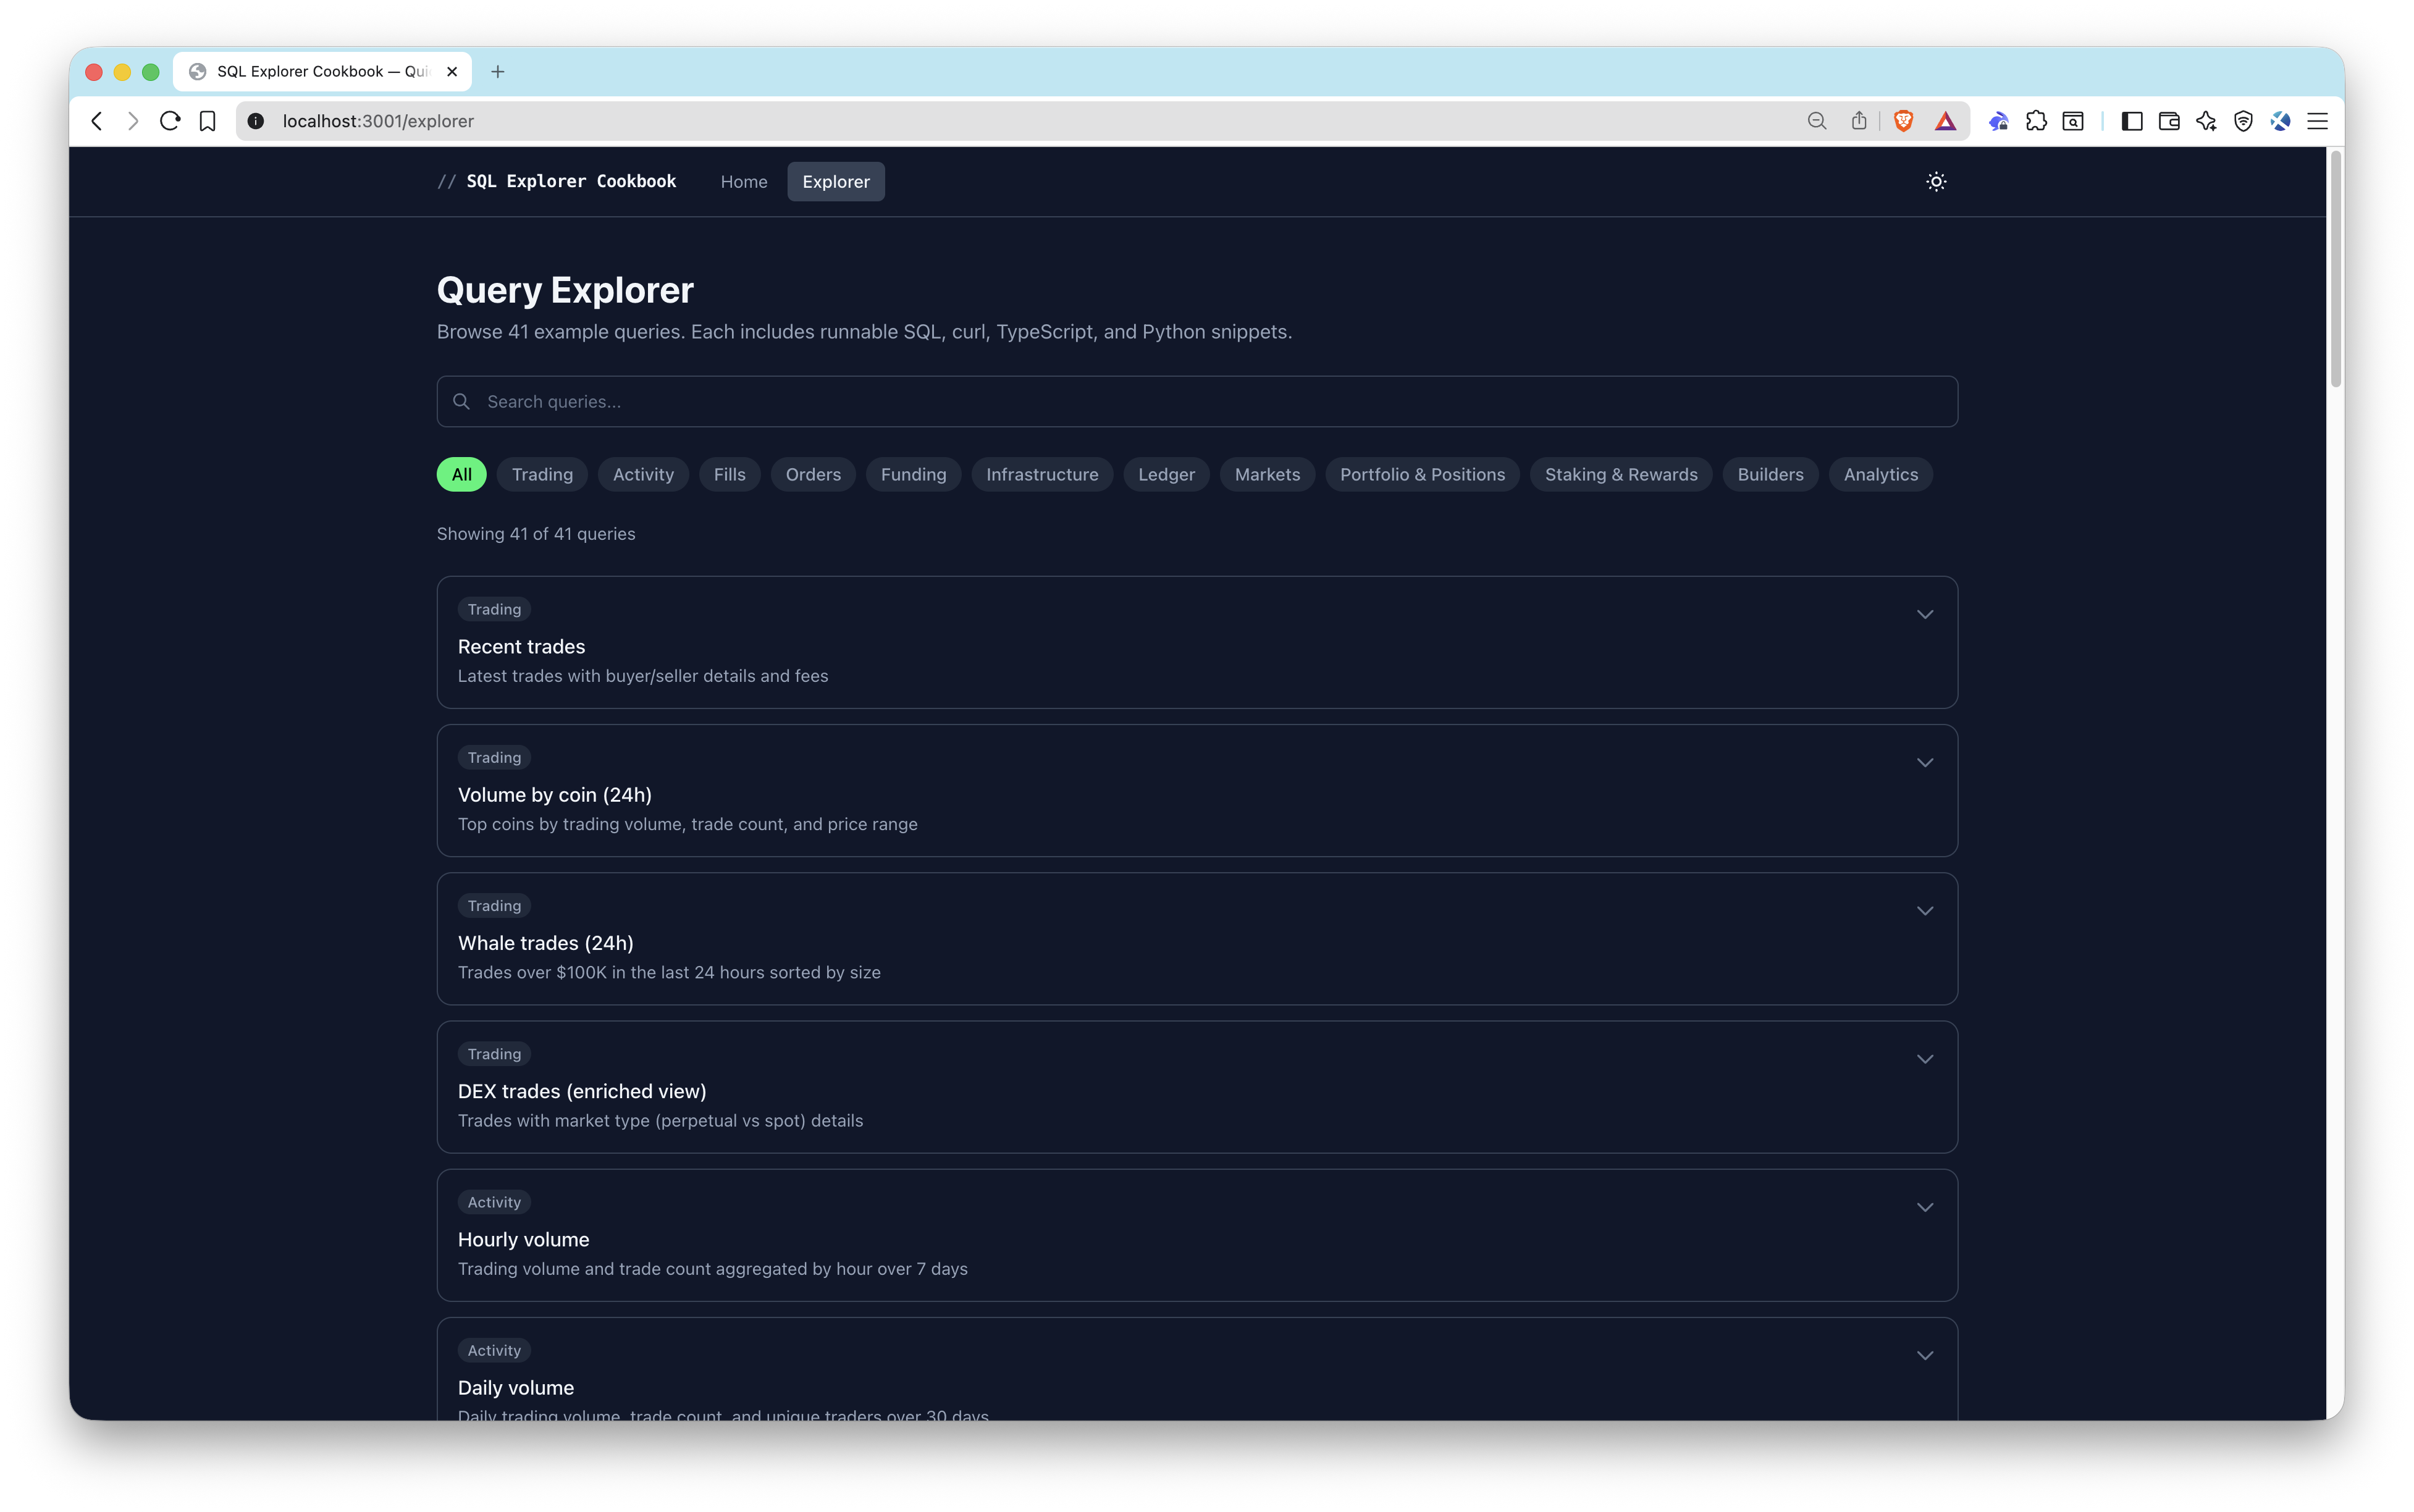
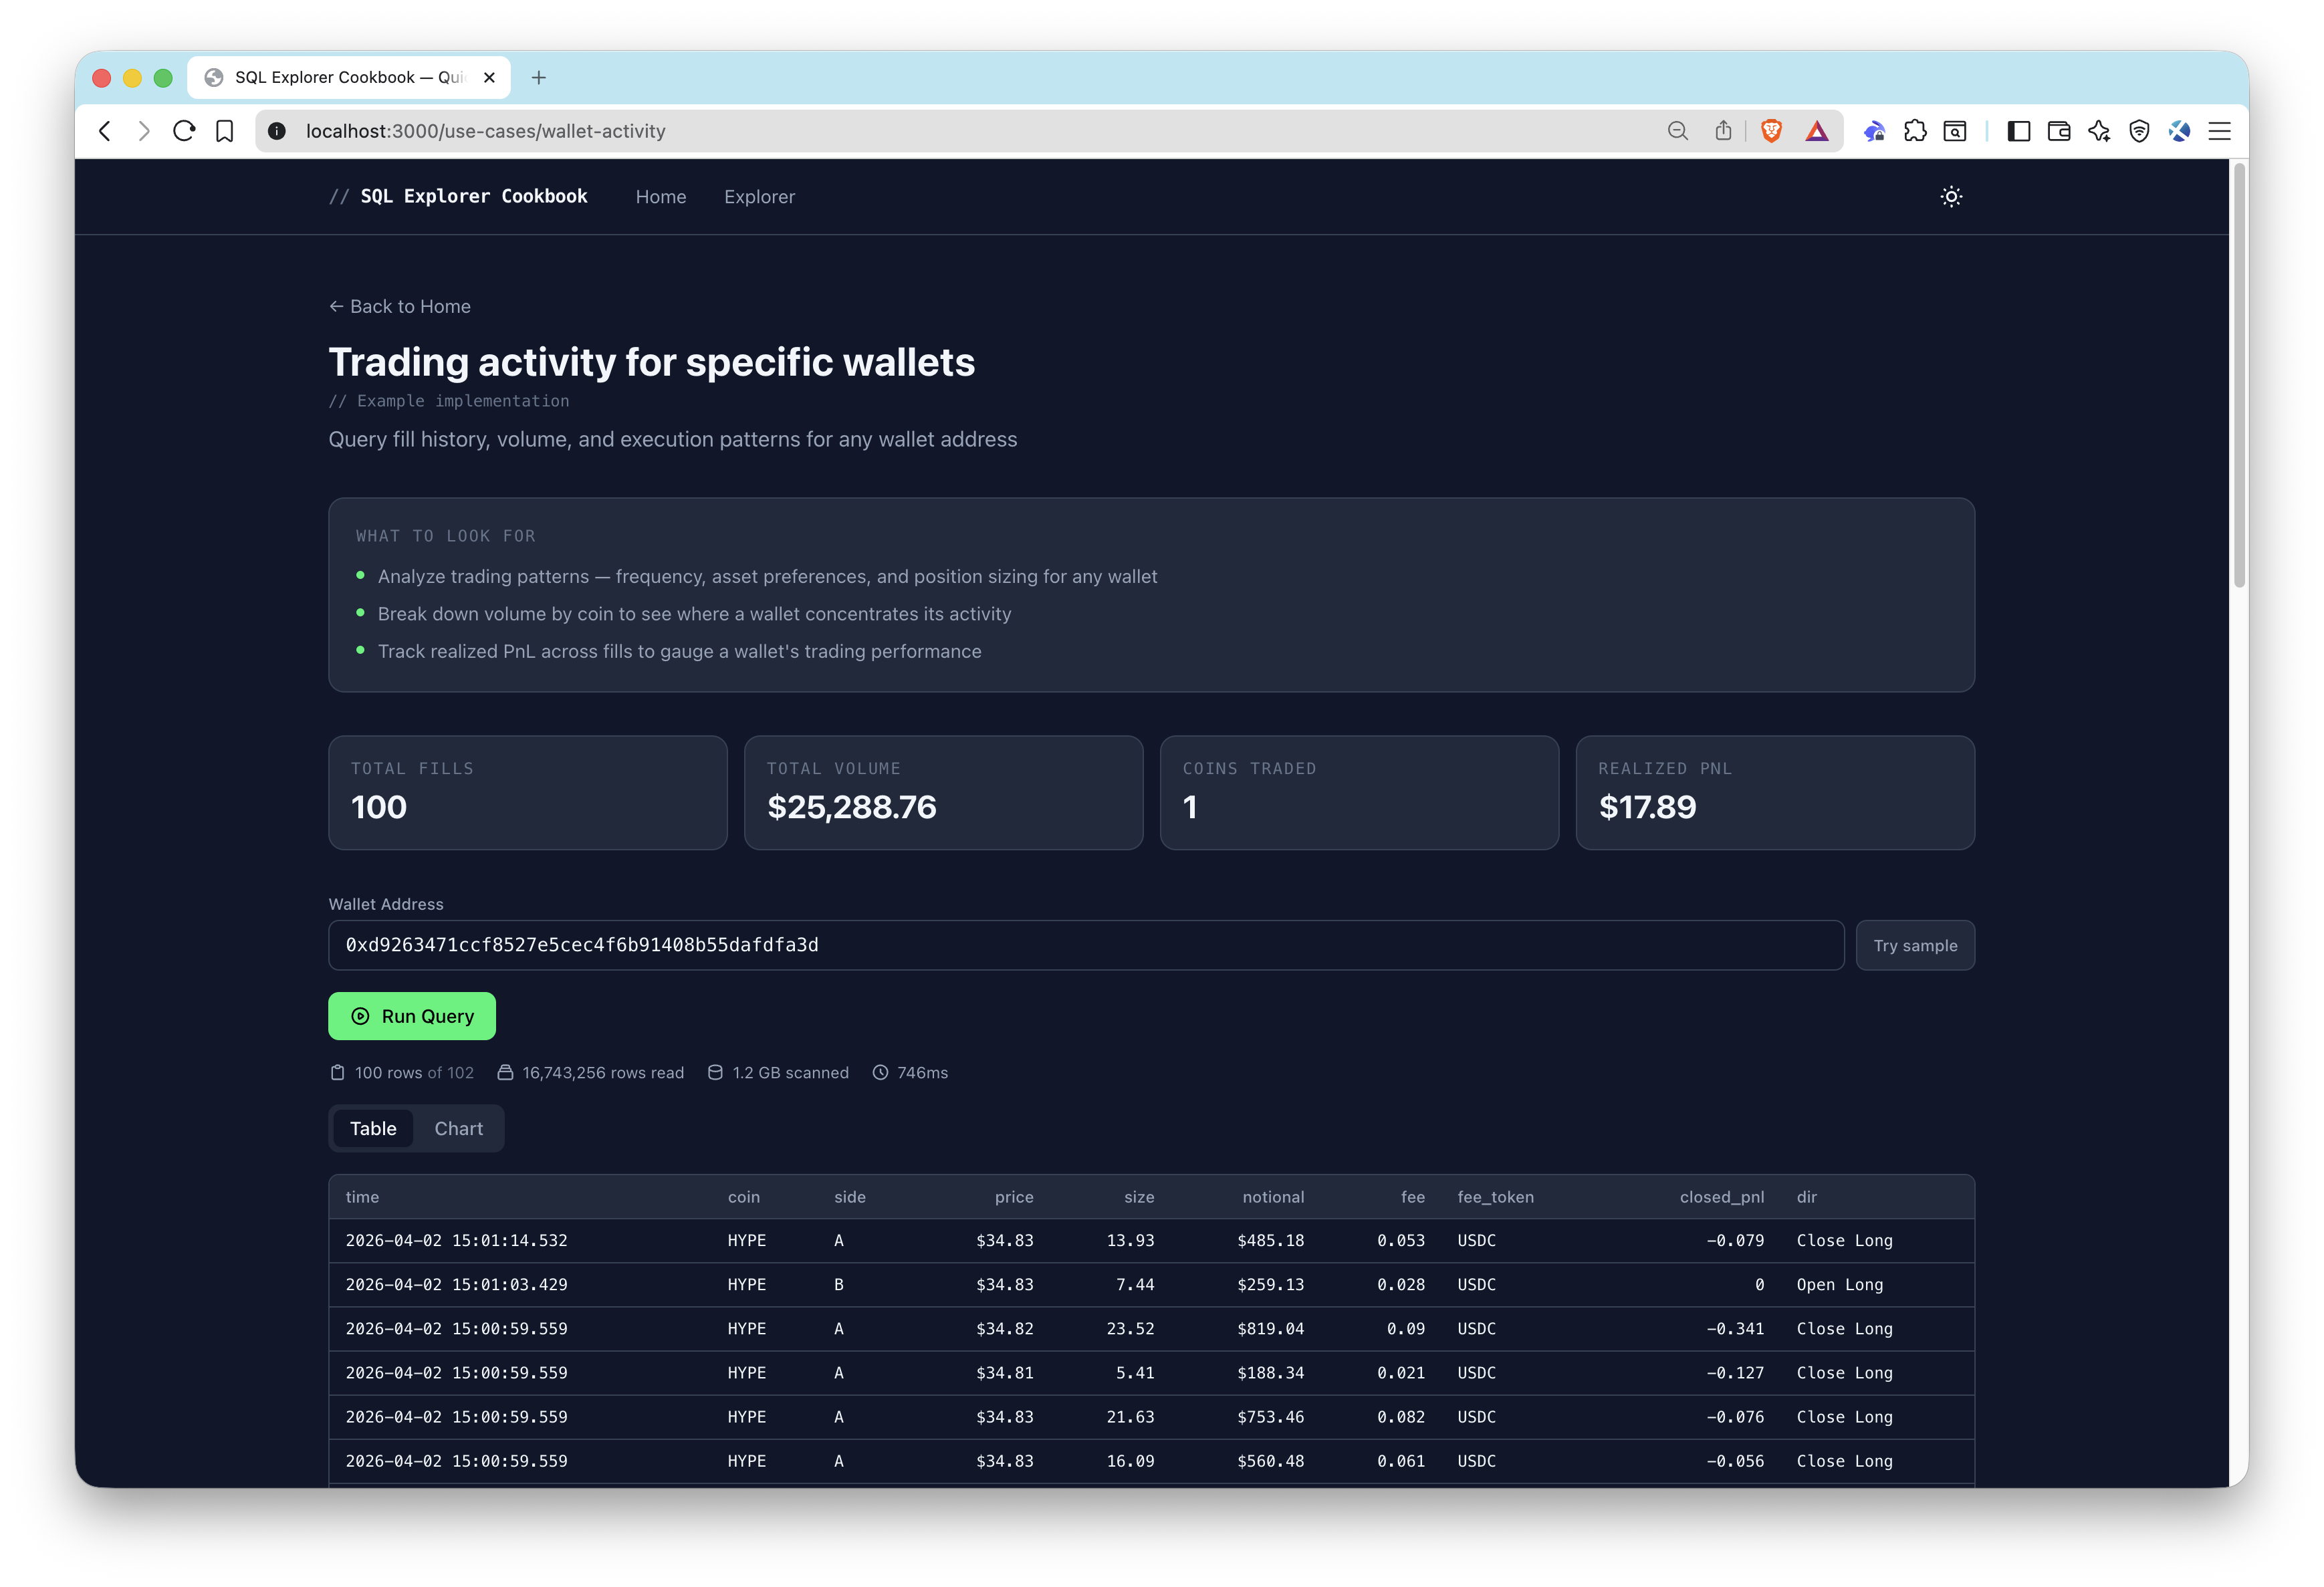
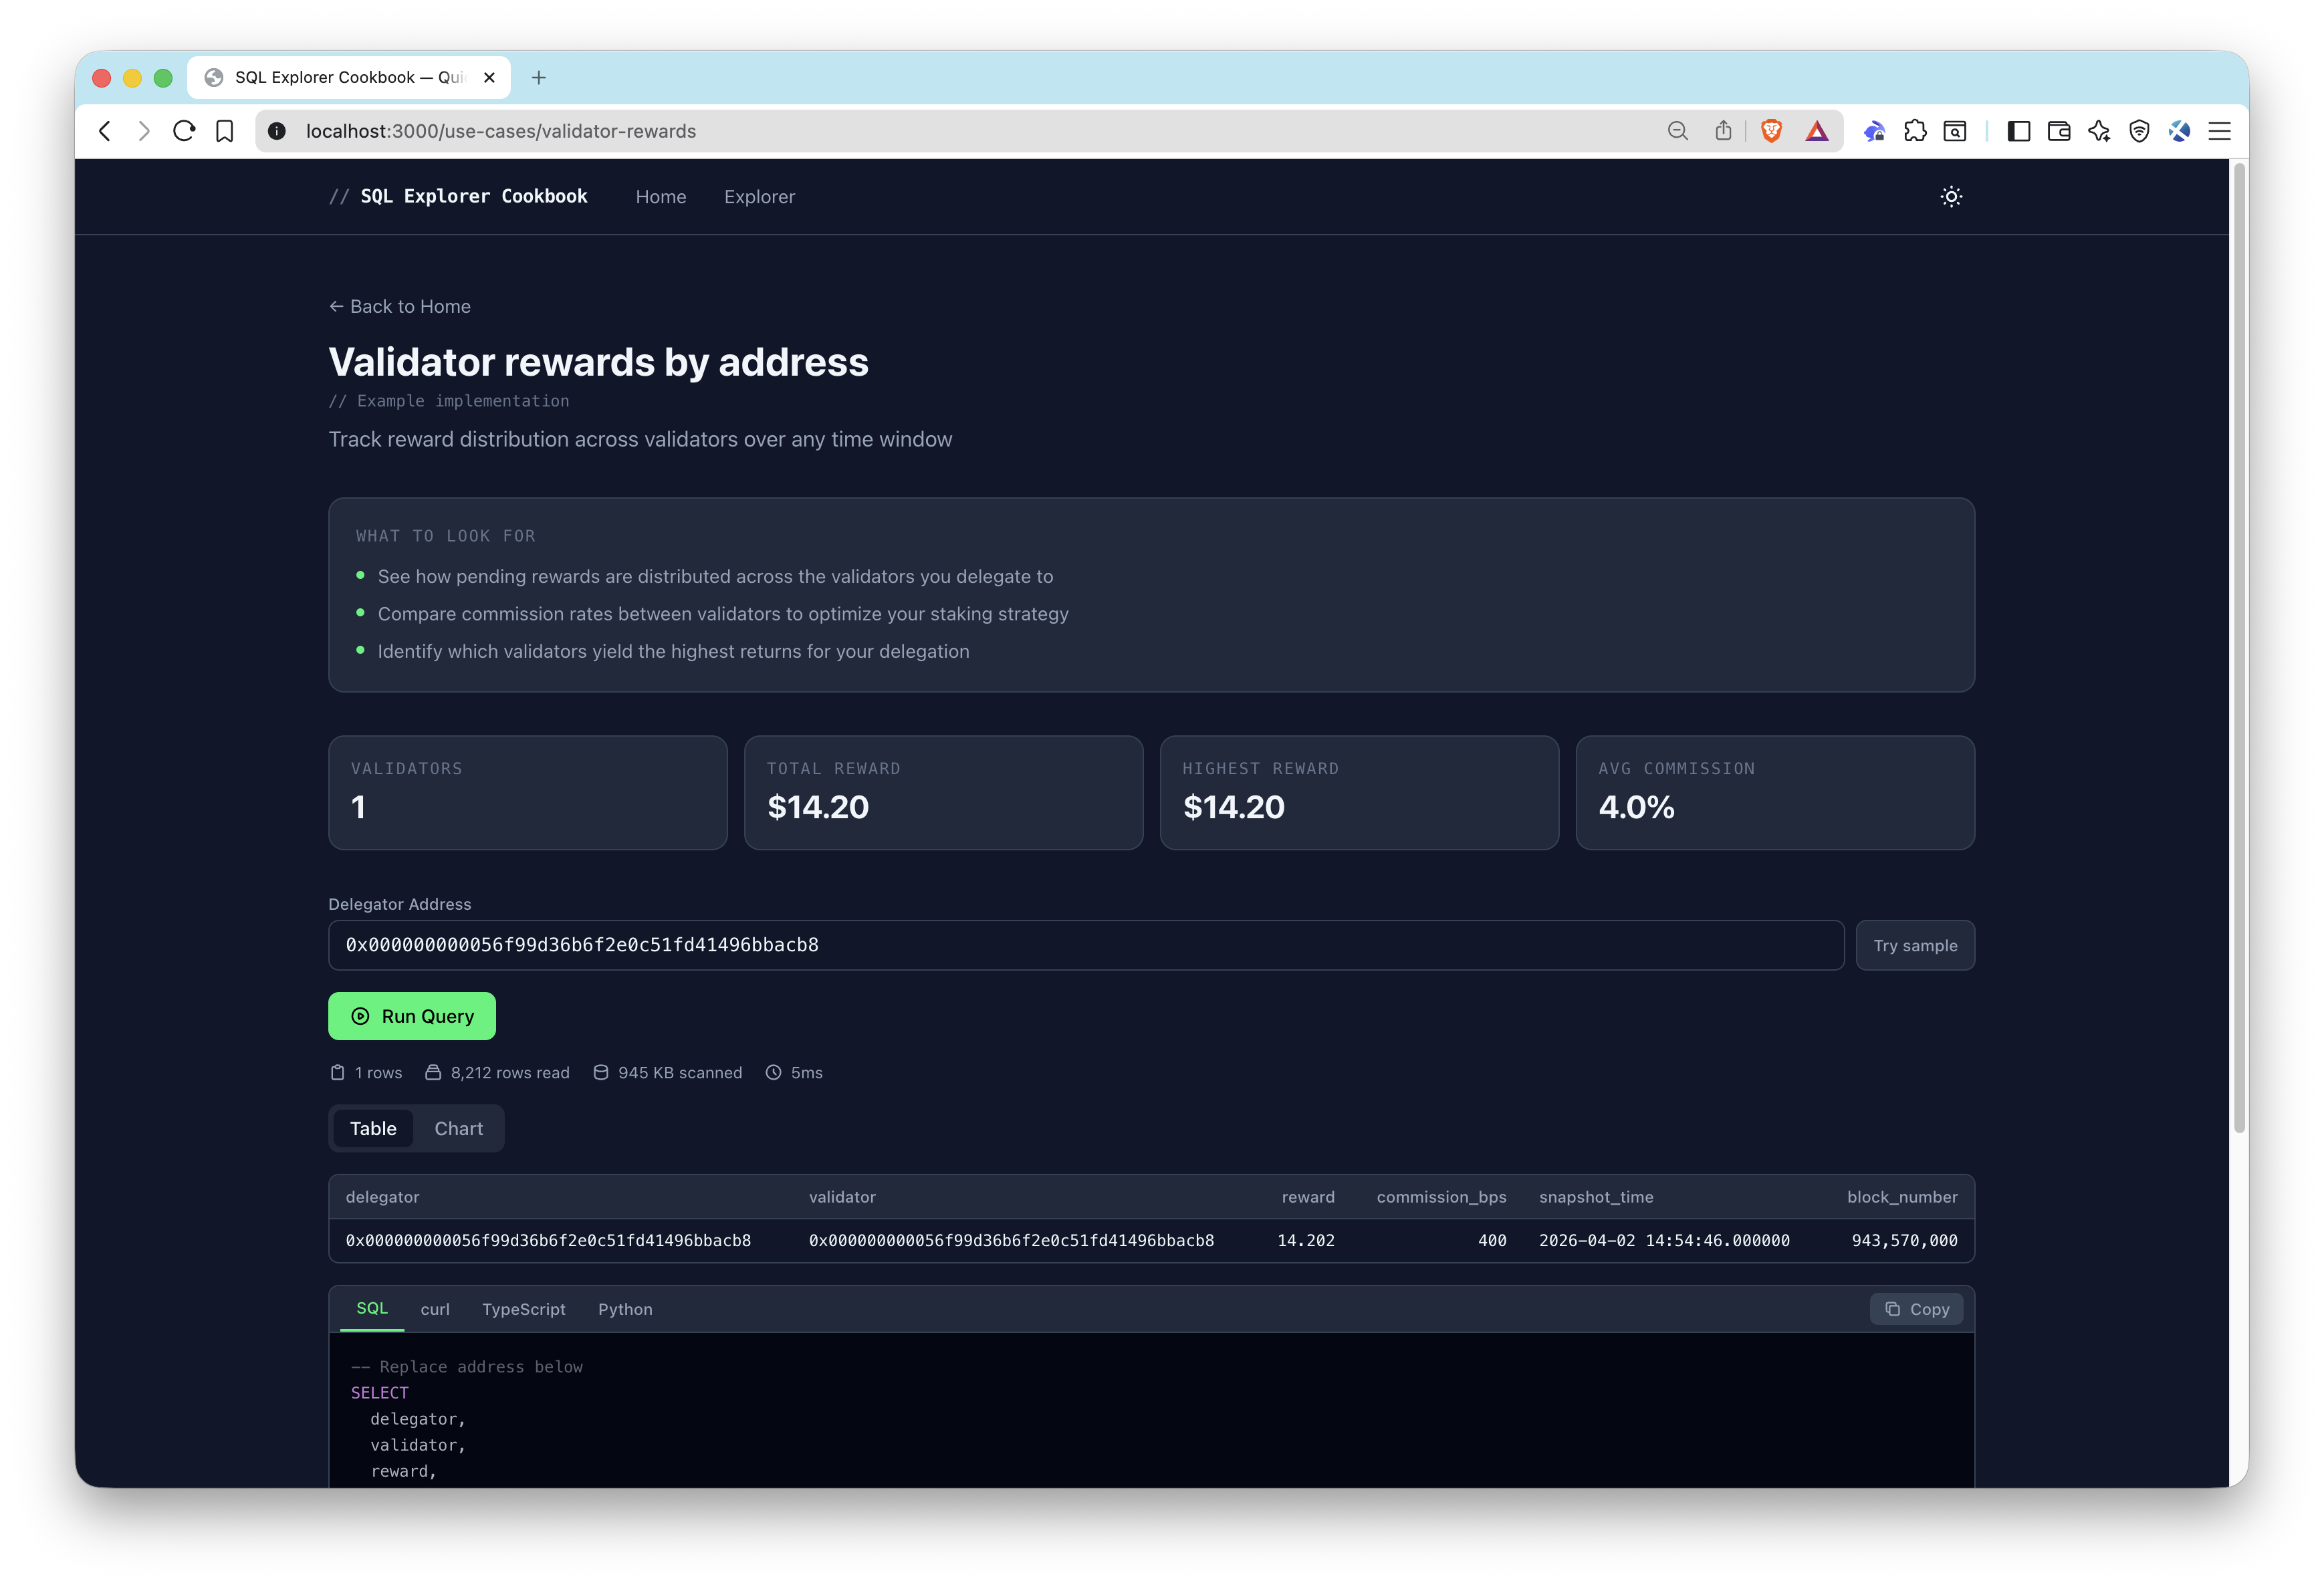
- Pick a starting point — Choose one of the 3 sample use cases (Wallet Activity, Validator Rewards, Liquidations) from the home page, or explore all 40+ pre-built queries in the explorer.
- Run a query — Click run to execute the SQL against Hyperliquid on-chain data. Results appear as a sortable table or chart.
- Customize parameters — Some queries accept dynamic inputs like wallet addresses, validators, or coin symbols. Click Try sample to populate example values, then re-run.
- Copy code snippets — Each query provides copy-paste ready code in SQL, curl, TypeScript, and Python.
Adding Custom Queries
Add entries to src/data/queries.ts:
{
  id: "my-query",
  title: "My Custom Query",
  description: "Description of what this query does",
  category: "Trading",
  sql: `SELECT * FROM hyperliquid_trades LIMIT 10`,
  chartConfig: {           // optional
    type: "bar",
    xKey: "coin",
    yKeys: ["volume_usd"],
  },
}
投稿とフィードバック
皆様からのご意見をお待ちしております。また、このサンプルアプリへのご協力も大歓迎です!
問題の報告やフィードバックの共有を行うには、GitHubのイシューを qn-ガイド-例 リポジトリ。
投稿するには、以下の手順に従ってください:
- リポジトリをフォークする
- フィーチャーブランチを作成する:git checkout -b feature/amazing-feature
- 変更をコミットします:git commit -m "素晴らしい機能を追加"
- ブランチをプッシュしてください:git push origin feature/amazing-feature
- プルリクエストを作成してください。
その他のサンプルアプリを見る