
2 min read
Overview
MetaMask is one of the essential tools for web3 development. It comes set up with Ethereum blockchain networks out of the box. But there can be some specific use cases where you might want to add a custom provider to MetaMask for faster transaction processing or to connect to a custom network. In this guide, we’ll cover how to set up a custom provider in MetaMask.
What is MetaMask?
MetaMask is a cryptocurrency wallet browser extension that connects to the Ethereum blockchain and supports other EVM (Ethereum Virtual Machine) based chains. It is one of the best wallets to interact with Decentralized Applications (dApps) and Decentralized Exchanges (DEXs). MetaMask is not limited to storing native blockchain currencies, such as ETH or BSC. It can also store ERC-20 or BEP-20 tokens. It is compatible with major browsers such as Chrome, Firefox, Brave, Microsoft Edge and mobile!
Let us see how we can set up Quicknode as the custom RPC provider in MetaMask for faster transactions.
Creating an HTTP/WSS RPC URL on Quicknode
You can create an account on Quicknode.com within a few clicks to have a custom RPC endpoint. Quicknode supports over 25 chains and counting!
Once logged in, click the Create an endpoint button, then select chain and network based on your preference.
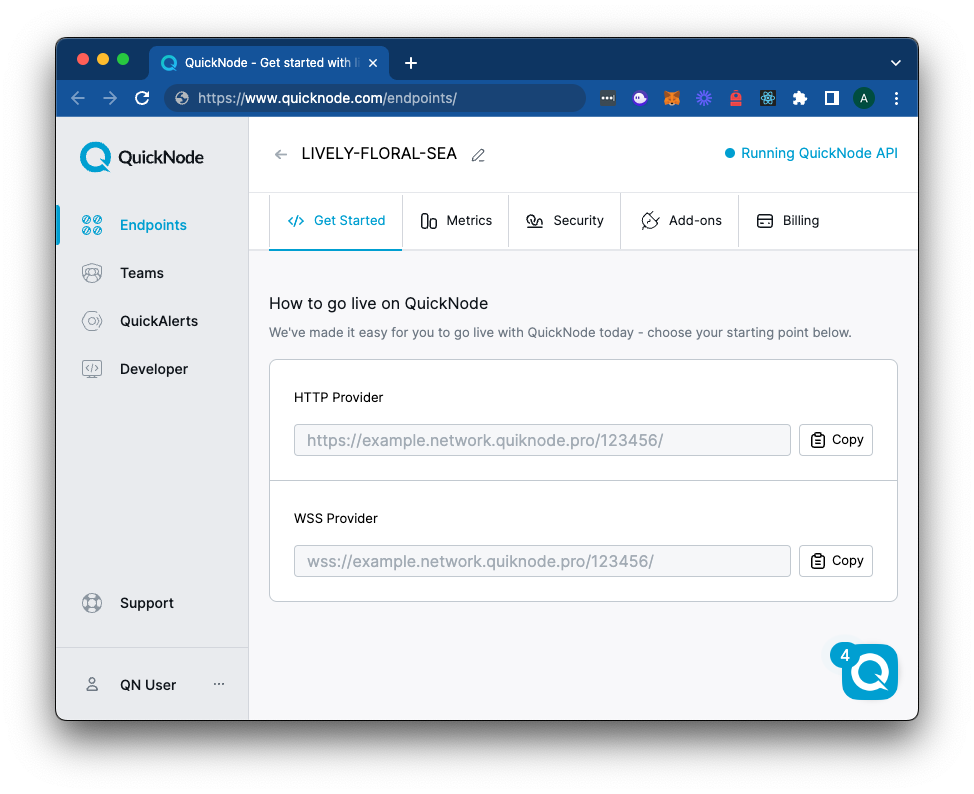
After creating your endpoint, copy the HTTP Provider link and keep it handy, as you'll need it next.
Setting Up MetaMask With a Custom Provider
Download the MetaMask browser extension if you haven't already. Make an account and keep your seed phrase safe.
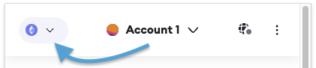
Step 1: Open the MetaMask extension, then click the Network Selector in the top-left corner.
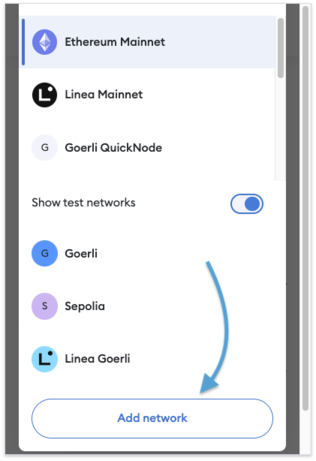
Step 2: Select Add network at the bottom of the Networks list.
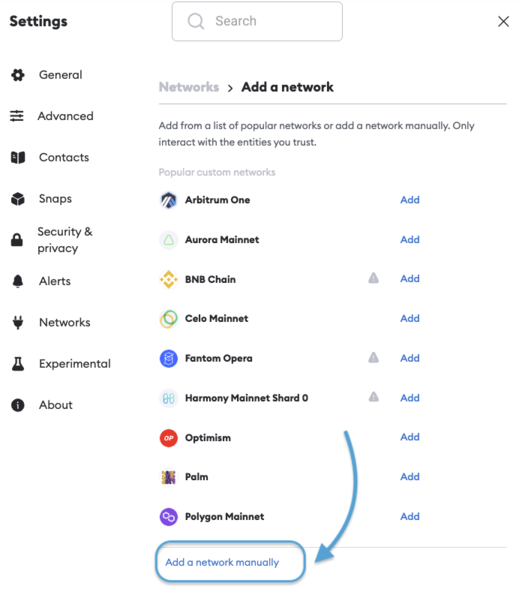
Step 3: Click Add a network manually on the page that is opened automatically after the previous step.
Step 4: Enter the custom network's relevant details in the fields.
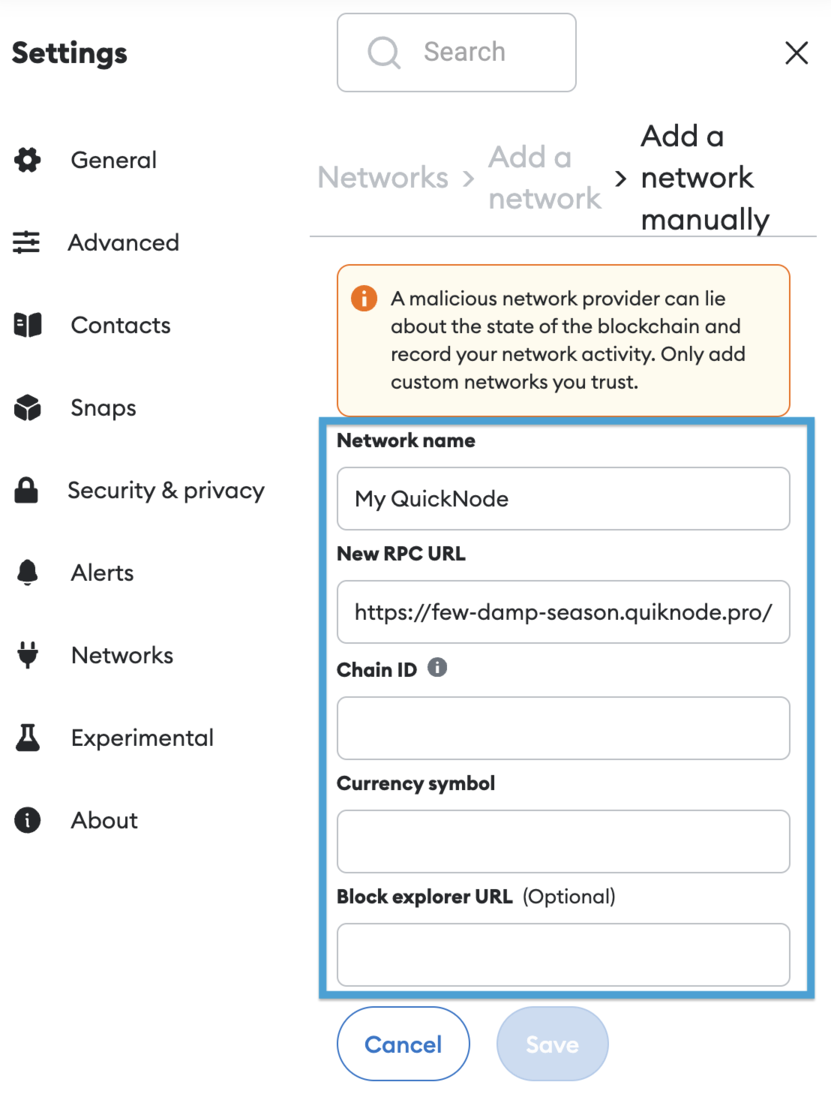
Listed below are the Chain / Network IDs for various EVM-based networks:
- Ethereum Mainnet: 1
- Ethereum Testnet Sepolia: 4
- Ethereum Testnet Hoodi: 560048
- Gnosis Chain: 100
- BNB Smart Chain Mainnet: 56
- Polygon/Matic Mainnet: 137
- Optimistic Ethereum: 10
- Arbitrum Nova: 42170
- Arbitrum One: 42161
- Base Chain: 8453
A list of all the commonly used chains can be found here.
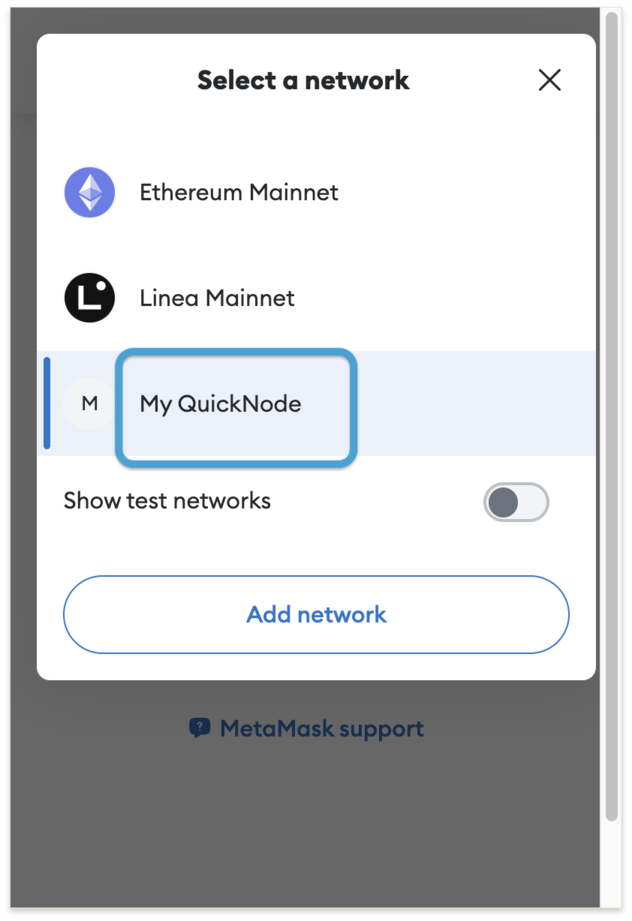
After saving your changes, navigate back to the Network selector dropdown in the top-left corner of the extension and locate your newly added network!
Conclusion
Now we've successfully added Quicknode as the custom RPC provider in the MetaMask wallet. It is always a good idea to have a custom network added to your MetaMask for faster transactions or even as a backup.
Subscribe to our newsletter for more articles and guides on Ethereum. If you have any feedback, feel free to reach out to us via Twitter. You can always chat with us on our Discord community server, featuring some of the coolest developers you’ll ever meet :)