
10 min read
This guide has been updated to reflect the new name for Solana Web3.js 2.0 — Solana Kit. We're following the latest best practices to help you stay current. Learn more about Solana Kit here.
Overview
Solana recently announced Solana Kit, a major update to their JavaScript library for interacting with the Solana blockchain. This guide will teach you the basics of sending transactions using this new library.
Let's dive in!
What You Will Do
Write a script to perform basic Solana transactions using Solana Kit:
- Airdrop SOL using native RPC method and factory function
- Create and send a transfer transaction using the new API
What You Will Need
- Knowledge of Solana basics (Guide: Introduction to Solana)
- Node.js (version 19 or higher) installed
- TypeScript and ts-node installed
- Solana CLI installed
Dependencies Used in this Guide
| Dependency | Version |
|---|---|
| @solana/kit | >=2.0 |
| @solana-program/system | ^0.5.0 |
| solana cli | 1.18.8 |
Let's get started!
What is Solana Kit?
Solana Kit is a significant update to the JavaScript library for interacting with the Solana blockchain. It introduces a new API design focusing on composability, modularity, and improved developer experience. Some key features include:
- Functional API: The new API uses a functional programming style, making it easier to compose complex operations.
- Improved TypeScript support: Better type inference and stricter types for enhanced code safety.
- Modular design: Functions are split into smaller, more focused modules, allowing for tree-shaking and smaller bundle sizes.
- Enhanced error handling: More informative error messages and improved error types.
For more information on changes to the API, check out our (Blog: What's New in Solana Kit).
Let's explore these features by creating a script to perform a basic transfer transaction.
Create a New Project
First, let's set up our project:
mkdir solana-transfer-demo && cd solana-transfer-demo
Next, initialize your project as a Node.js project:
npm init -y
Install the dependencies:
npm install @solana/kit @solana-program/system && npm install --save-dev @types/node
Note: If you are using a version of Node.js older than 18, you may need to install the
@solana-program/systempackage using the--legacy-peer-depsflag.
Add a tsconfig.json file to your project with resolveJsonModule enabled:
tsc --init --resolveJsonModule true
Create a new file called transfer.ts in your project directory.
echo > transfer.ts
Great. Let's write some code!
Import Dependencies
In your transfer.ts file, let's start by importing the necessary dependencies:
import {
    airdropFactory,
    createKeyPairSignerFromBytes,
    createSolanaRpc,
    createSolanaRpcSubscriptions,
    generateKeyPairSigner,
    lamports,
    sendAndConfirmTransactionFactory,
    pipe,
    createTransactionMessage,
    setTransactionMessageFeePayer,
    setTransactionMessageLifetimeUsingBlockhash,
    appendTransactionMessageInstruction,
    signTransactionMessageWithSigners,
    getSignatureFromTransaction,
    address,
} from "@solana/kit";
import { getTransferSolInstruction } from "@solana-program/system";

const LAMPORTS_PER_SOL = BigInt(1_000_000_000);
Here, we're importing various functions from the Solana Kit library. Note the functional style of the imports - each function is responsible for a specific task, promoting modularity and composability. The LAMPORTS_PER_SOL constant is no longer available via the SDK, so we must define it ourselves. Unlike the previous SDK, the new one utilizes bigints for all amounts (to be better compatible with Rust programming, which supports u64, a common type in Solana programs).
Create the Main Function
Next, let's create our main function that will house the logic of our script:
async function main() {
    // 1 - Establish connection to Solana cluster

    // 2 - Generate signers

    // 3 - Airdrop SOL to accounts

    // 4 - Create transfer transaction

    // 5 - Sign and send transaction
}

main();
Establish Connection to Solana Cluster
Inside the main function, let's establish a connection to our local Solana cluster:
    // 1 - Establish connection to Solana cluster
    const httpProvider = 'http://127.0.0.1:8899';
    const wssProvider = 'ws://127.0.0.1:8900';
    const rpc = createSolanaRpc(httpProvider);
    const rpcSubscriptions = createSolanaRpcSubscriptions(wssProvider);
    console.log(`✅ - Established connection to ${httpProvider}`);
Here, we're using the createSolanaRpc and createSolanaRpcSubscriptions functions to create our RPC connections. If you are familiar with the old SDK, you may notice that the new SDK uses a different approach to establishing connections. We will be using localhost for this guide, but if you are ready to connect to a remote Solana cluster, you can use your Quicknode HTTP Provider and WSS Provider endpoints from your Quicknode Dashboard.
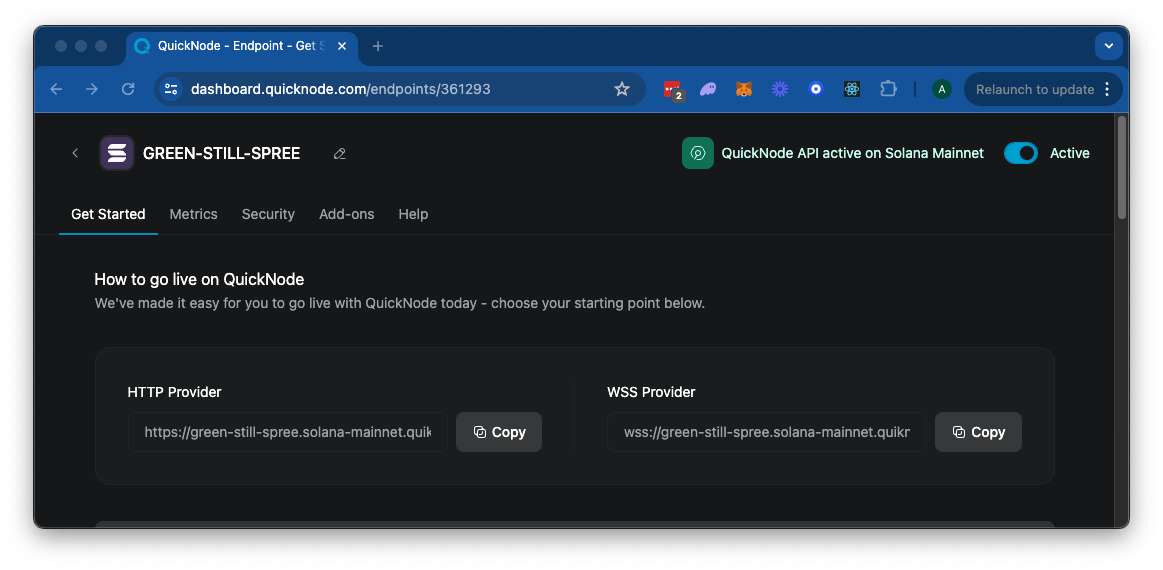
If you do not already have a Quicknode account, you can create one for free here.
Generate Signers
Now, let's generate two signers for our transaction:
    // 2 - Generate signers
    const user1 = await generateKeyPairSigner();
    console.log(`✅ - New user1 address created: ${user1.address}`);
    const user2 = await createKeyPairSignerFromBytes(new Uint8Array([/* your secret key bytes here */]));
    console.log(`✅ - user2 address generated from file: ${user2.address}`);
For learning purposes, we will generate Keypairs in two ways. First, using generateKeyPairSigner to create a new keypair for user1, and createKeyPairSignerFromBytes to create a keypair for user2 from an existing secret key. If you do not already have a secret key, you can generate one using the Solana CLI:
solana-keygen new --no-bip39-passphrase --outfile ./my-keypair.json
If you would prefer to load the secret from a file, you can use the the import statement (since we used the --resolveJsonModule flag in our tsconfig.json file):
// Add to your imports
import secret from './my-keypair.json';

    // Replace the `user2` line below with the following:
    const user2 = await createKeyPairSignerFromBytes(new Uint8Array(secret));
Airdrop SOL to Accounts
Before we can transfer SOL, we need to fund our accounts. Again, for demonstration purposes, we will use two different methods (one using the native requestAirdrop method and the other using the airdropFactory function). Add the following code to the main function:
    // 3 - Airdrop SOL to accounts
    // Using RPC method
    const tx1 = await rpc.requestAirdrop(
        user1.address,
        lamports(LAMPORTS_PER_SOL),
        { commitment: 'processed' }
    ).send();
    console.log(`✅ - user1 airdropped 1 SOL using RPC methods`);
    console.log(`✅ - tx1: ${tx1}`);

    // Using factory function
    const airdrop = airdropFactory({ rpc, rpcSubscriptions });
    const tx2 = await airdrop({
        commitment: 'processed',
        lamports: lamports(LAMPORTS_PER_SOL),
        recipientAddress: user2.address
    });
    console.log(`✅ - user2 airdropped 1 SOL using Factory Function`);
    console.log(`✅ - tx2: ${tx2}`);
Both methods are equally viable, so you can choose whichever best suits your use case. Regardless of the approach, you will need to pass the destination address, the amount of SOL to airdrop (Note that the new SDK requires us to use the lamports function which effectively extends the bigint type), and the commitment level. In this case, we are using the lamports function to convert SOL to lamports, which is the unit of measure used by Solana.
Create and Send Transfer Transaction
Now, let's create and send our transfer transaction. This process showcases several essential features of the new Solana Kit SDK:
    // 4 - Create transfer transaction
    const { value: latestBlockhash } = await rpc.getLatestBlockhash().send();

    const transactionMessage = pipe(
        createTransactionMessage({ version: 0 }),
        tx => setTransactionMessageFeePayer(user1.address, tx),
        tx => setTransactionMessageLifetimeUsingBlockhash(latestBlockhash, tx),
        tx => appendTransactionMessageInstruction(
            getTransferSolInstruction({
                amount: lamports(LAMPORTS_PER_SOL / BigInt(2)),
                destination: user2.address,
                source: user1,
            }),
            tx
        )
    );
Let's break this down:
-
RPC Calls and the
.send()Method: The new SDK introduces a consistent pattern for making RPC calls using the.send()method. This is evident in thegetLatestBlockhash()call:const { value: latestBlockhash } = await rpc.getLatestBlockhash().send();
This pattern separates the construction of the RPC request from its execution, allowing for more flexibility and composability in making requests.
-
Using Pipes for Transaction Construction: The
pipefunction is a crucial feature in the new SDK, borrowed from functional programming concepts. If you're not familiar with pipes, they allow you to chain multiple operations together, passing the result of each operation as an input to the next.const transactionMessage = pipe(createTransactionMessage({ version: 0 }),tx => setTransactionMessageFeePayer(user1.address, tx),// ... more operations);
Each function in the pipe takes the result of the previous function as its input, modifying the transaction message step by step. This approach makes the transaction construction process more readable and maintainable, especially for complex transactions.
-
Program Instructions from Separate Libraries: The
getTransferSolInstructionfunction is imported from the@solana-program/systemlibrary:import { getTransferSolInstruction } from "@solana-program/system";
This separation of program-specific instructions into their own libraries is a new pattern in Kit. It allows for better code organization and easier management of different Solana programs. You can expect to see more program-specific libraries following this pattern, making interacting with various Solana programs easier.
- Granular Transaction Construction:
Notice how the transaction is assembled step by step:
createTransactionMessage({ version: 0 }): Initializes a new transaction message.setTransactionMessageFeePayer: Sets the fee payer for the transaction.setTransactionMessageLifetimeUsingBlockhash: Sets the transaction's lifetime using a recent blockhash.appendTransactionMessageInstruction: Adds the transfer instruction to the transaction.
This granular approach gives developers more control over each aspect of the transaction and makes it easier to construct complex transactions with multiple instructions.
- Type Safety and Immutability: Using separate functions for each step in transaction construction, combined with TypeScript, provides better type safety, ensuring that errors are caught early. Each function returns a new transaction object rather than modifying an existing one, promoting immutability and reducing the chance of unintended side effects.
By leveraging these features, the new Solana Kit SDK aims to provide a more robust, flexible, and developer-friendly way to interact with the Solana blockchain. As you continue to work with the SDK, you'll find that these patterns make it easier to write clear, maintainable, and error-resistant code for your Solana applications.
Sign and Send Transaction
    // 5 - Sign and send transaction
    const signedTransaction = await signTransactionMessageWithSigners(transactionMessage);
    const sendAndConfirmTransaction = sendAndConfirmTransactionFactory({ rpc, rpcSubscriptions });

    try {
        await sendAndConfirmTransaction(
            signedTransaction,
            { commitment: 'confirmed', skipPreflight: true }
        );
        const signature = getSignatureFromTransaction(signedTransaction);
        console.log('✅ - Transfer transaction:', signature);
    } catch (e) {
        console.error('Transfer failed:', e);
    }
This section demonstrates several key features of Kit:
- We use
signTransactionMessageWithSignersto sign our transaction using any signers that may be stored in the account metas of the instruction accounts. If you look back at ourgetTransferSolInstructionfunction, you'll see that in thesourceparameter, we pass in theuser1Keypair (the signer for the source account). ThesignTransactionMessageWithSignerswill then use that signer to sign the transaction. - We create a
sendAndConfirmTransactionfunction using thesendAndConfirmTransactionFactoryfunction. - Finally, we send the signed transaction using the
sendAndConfirmTransactionfunction, and we return the transaction signature, which we obtain using thegetSignatureFromTransactionfunction.
Set Up Local Environment
For this guide, we'll use a local Solana validator. Open a new terminal window and start the validator:
solana-test-validator -r
Run the Script
To run our script, use the following command:
ts-node transfer.ts
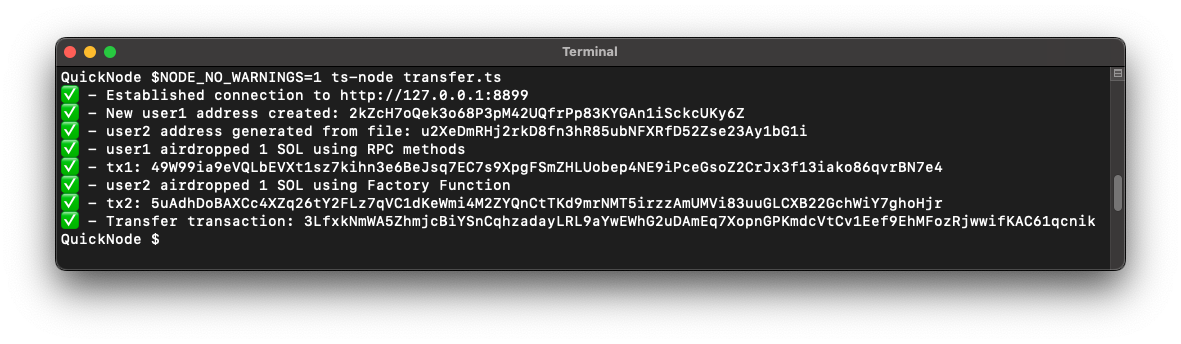
You should see output indicating successful connection, airdrop, and transfer transactions:
Great job!
Add More Instructions
If you would like, feel free to append additional instructions to the transfer transaction. For example, you could add the following instruction to your pipe to transfer SOL to another account:
        tx => appendTransactionMessageInstruction(
            getTransferSolInstruction({
                amount: lamports(LAMPORTS_PER_SOL / BigInt(3)),
                destination: address('SOME_OTHER_ADDRESS'),
                source: user1,
            }),
            tx
        )
Practicing is the best way to improve your skills, so feel free to experiment with different instructions and transactions. If you would like to see our source code for this guide, you can find it here. Happy coding!
Wrap Up
This guide explored the new Solana Kit library by creating a script to perform a basic transfer transaction. Through its functional programming style and use of factory functions, the new API promotes modularity, composability, and improved developer experience.
Some key takeaways:
- The new API allows for more granular control over transaction creation and signing.
- Factory functions provide a way to create reusable, customizable functions.
- The
pipefunction allows for clear and readable composition of operations.
As you continue to explore Kit, you'll discover even more powerful features and improvements. Happy coding!