
6 min read
Présentation générale
With the recent uptick in DeFi activity and Memecoins on the Solana blockchain, there has been a growing interest in finding ways to track new liquidity pools created on the Raydium DEX. In this guide, we will learn how to listen to the Solana blockchain for new liquidity pools created on the Raydium DEX using Solana WebSockets.
Raydium protocol may change over time. Here is a link to their GitHub repositories for their AMM and CLMM.
To ensure you are accessing the latest information on new liquidity pools created on Raydium DEX, try using the Metis Add-on, which has a /new-pools REST API Endpoint that returns the 100 most recent token and liquidity pool launches on Raydium.
Prefer a video walkthrough? Follow along with Sahil and how to use websockets to track new Raydium Liquidity Pools.
Conditions préalables
- Experience with Solana Websockets
- Knowledge of DeFi Basics
- Basic knowledge of Solana Fundamentals
- Node.js (version 18.16 or higher) installed
- Typescript and ts-node - installation instructions are indicated in the guide
What is Raydium?
Raydium is a decentralized exchange (DEX) and automated market maker (AMM) that is built on the Solana blockchain. It is designed to provide fast and low-cost trading for users. Raydium is a key player in the Solana DeFi ecosystem and has been a popular choice for users to trade and provide liquidity for various tokens.
What are Liquidity Pools?
Liquidity pools are a vital component of decentralized exchanges DeFi. They are used to facilitate trading and provide liquidity for various tokens. Liquidity pools are made up of pairs of tokens and are used to facilitate trades on DEXs. Users can often provide liquidity to these pools and earn fees in return.
Set Up Your Project
Create a New Project
Create a new project directory in your terminal with the following:
mkdir raydium-lp-tracker
cd raydium-lp-tracker
Create a file for your app, app.ts:
echo > app.ts
Initialize your project with the "yes" flag to use default values for your new package:
yarn init --yes
#or
npm init --yes
Install the Solana web3.js library:
yarn add @solana/web3.js@1
#or
npm install @solana/web3.js@1
Get a Quicknode Endpoint
Connect to a Solana Cluster with Your Quicknode Endpoint
To build on Solana, you'll need an API endpoint to connect with the network. You're welcome to use public nodes or deploy and manage your own infrastructure; however, if you'd like 8x faster response times, you can leave the heavy lifting to us.
See why over 50% of projects on Solana choose Quicknode and start your free trial here. We're going to use a Solana Mainnet endpoint.
Copy the HTTP Provider link: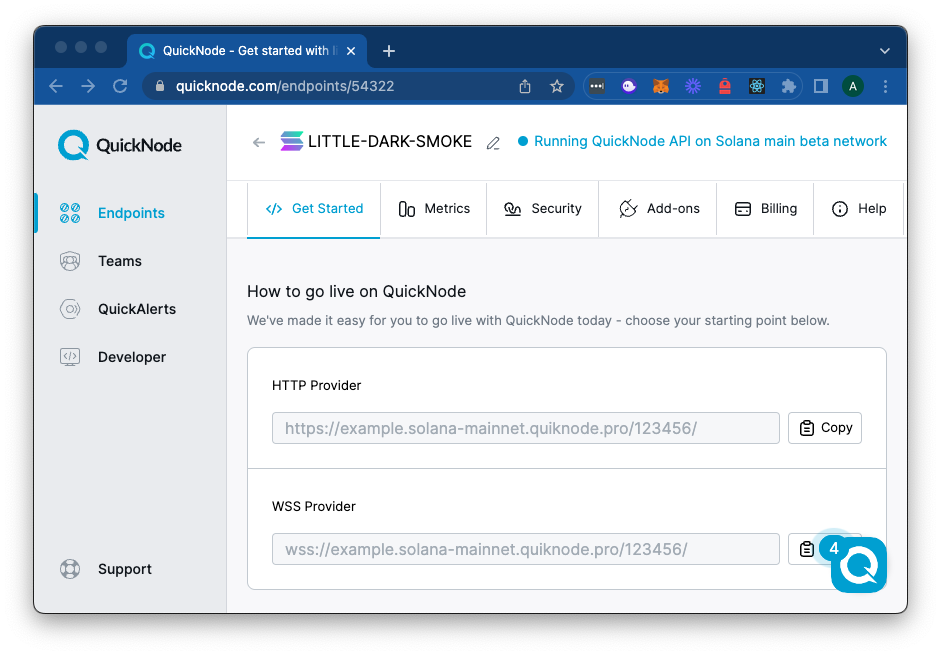
Note: we will also use the WSS Endpoint as well, so keep the window open or save the URL for later.
Import Required Libraries
Ouvrir app.ts and import the required libraries:
import { Connection, PublicKey } from '@solana/web3.js';
Define Constants
Define the constants for the Raydium DEX and your Quicknode Endpoint:
const RAYDIUM_PUBLIC_KEY = "675kPX9MHTjS2zt1qfr1NYHuzeLXfQM9H24wFSUt1Mp8";
const HTTP_URL = "YOUR_QUICKNODE_HTTP_ENDPOINT";
const WSS_URL = "YOUR_QUICKNODE_WSS_ENDPOINT";
const RAYDIUM = new PublicKey(RAYDIUM_PUBLIC_KEY);
const INSTRUCTION_NAME = "initialize2";

const connection = new Connection(HTTP_URL, {
    wsEndpoint: WSS_URL
});
Here, we just define the Raydium LP Program public key and establish our connection to the Solana mainnet. We are also defining the name of the instruction that we will be looking for in the logs. We are looking for the "initialize2" instruction, which is the Raydium LP program instruction responsible for creating new liquidity pools.
Create a WebSocket Connection
Create a function to connect to the Solana blockchain using WebSockets:
async function startConnection(connection: Connection, programAddress: PublicKey, searchInstruction: string): Promise<void> {
    console.log("Monitoring logs for program:", programAddress.toString());
    connection.onLogs(
        programAddress,
        ({ logs, err, signature }) => {
            if (err) return;

            if (logs && logs.some(log => log.includes(searchInstruction))) {
                console.log("Signature for 'initialize2':", `https://explorer.solana.com/tx/${signature}`);
                fetchRaydiumMints(signature, connection);
            }
        },
        "finalized"
    );
}
This function establishes a simple WebSocket connection to the Solana blockchain and listens for logs from the Raydium DEX program using the onLogs method.
When a log that contains the "searchInstruction" is found, we will fetch the token mints associated with the transaction (we will define this next).
Fetch LP Mints
We now need a way to fetch our Token Mints from the transaction signature. We will need to fetch the signature details and then parse the results to find the relevant information. In your program, create a new function, fetchRaydiumMints:
async function fetchRaydiumMints(txId: string, connection: Connection) {
    try {
        const tx = await connection.getParsedTransaction(
            txId,
            {
                maxSupportedTransactionVersion: 0,
                commitment: 'confirmed'
            });

        //@ts-ignore
        const accounts = (tx?.transaction.message.instructions).find(ix => ix.programId.toBase58() === RAYDIUM_PUBLIC_KEY).accounts as PublicKey[];

        if (!accounts) {
            console.log("No accounts found in the transaction.");
            return;
        }

        const tokenAIndex = 8;
        const tokenBIndex = 9;

        const tokenAAccount = accounts[tokenAIndex];
        const tokenBAccount = accounts[tokenBIndex];

        const displayData = [
            { "Token": "A", "Account Public Key": tokenAAccount.toBase58() },
            { "Token": "B", "Account Public Key": tokenBAccount.toBase58() }
        ];

        console.log("New LP Found");
        console.table(displayData);

    } catch {
        console.log("Error fetching transaction:", txId);
        return;
    }
}
There's a lot here, but it is not too complicated.
- First, we are fetching the transaction details using the
getParsedTransactionmethod. - Next, we look for the Raydium Program ID in the array of instructions and extract the accounts associated with the transaction.
- If we find the accounts, we extract the token mints from their expected positions in the array (8 and 9).
- Finally, we log the token mints to the console.
Start the Connection
Now that we have our functions defined, we can start the connection and listen for new liquidity pools:
startConnection(connection, RAYDIUM, INSTRUCTION_NAME).catch(console.error);
Run the Program
To run the program, use the following command:
ts-node app.ts
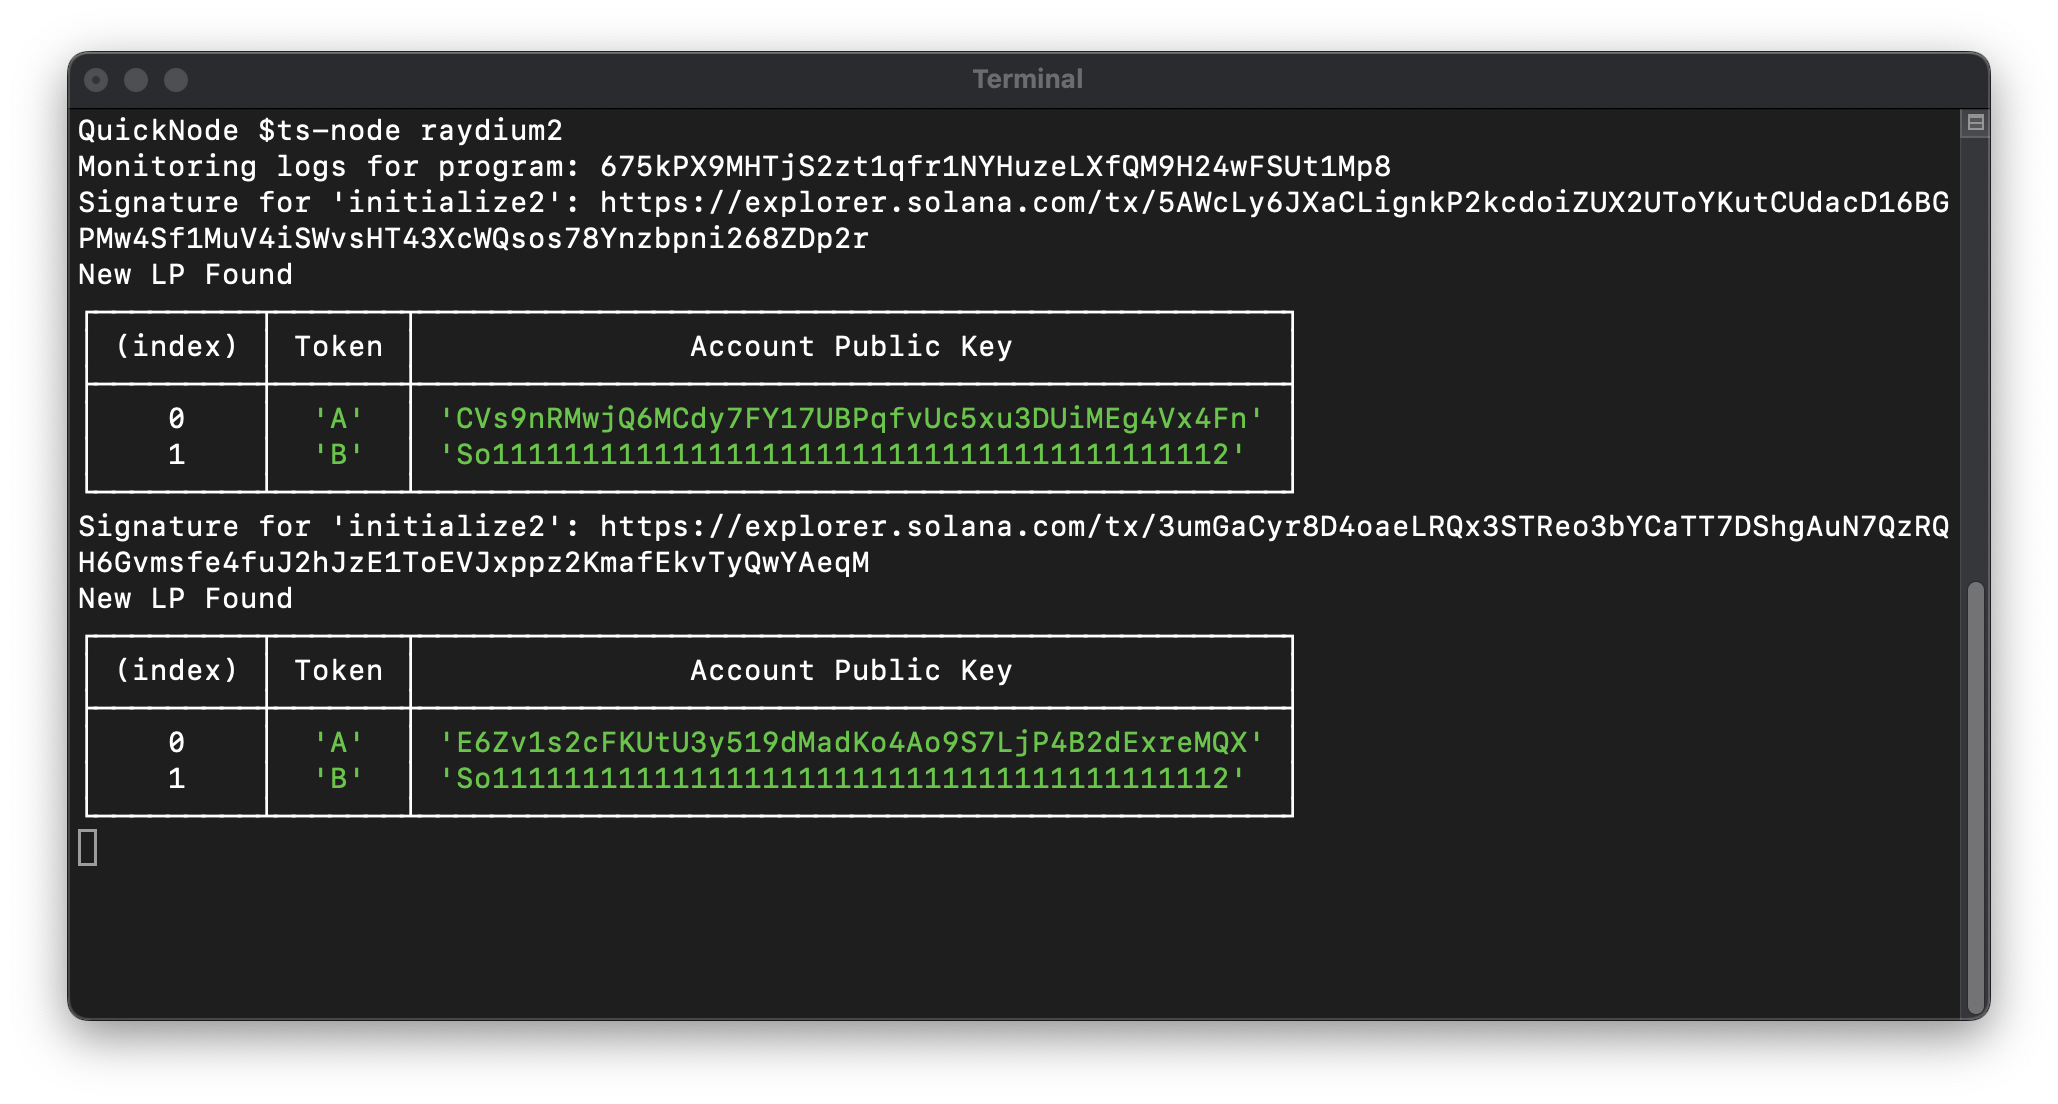
And now, sit back and watch as new liquidity pools are created on the Raydium DEX! You should see a notice in your terminal each time a new LP is created, matching our search criteria:
Wrap Up
Great Job! You now have an LP tracker that can listen for new liquidity pools created on the Raydium DEX. You can use this as a starting point to build more complex applications that track and monitor DeFi activity on the Solana blockchain or to implement custom logic in response to new liquidity pools being created.
If you have any questions or need help, feel free to reach out to us on our Discord or Twitter.