
6 min read
This guide uses Sugar v1 with Candy Machine V2, which is deprecated. For new NFT projects, see How to Launch an NFT Collection with Metaplex Core Candy Machine. This guide is for historic educational purposes only.
Présentation générale
Are you ready to launch your NFT collection on Solana? Metaplex's new Candy Machine tool, Sugar, is the tool for you to launch in no time. Sugar, Metaplex's latest version of Candy Machine, comes with a few notable improvements:
- improved upload performance
- simplified UX
- improved error handling
Vos missions
In this guide, you will create a new wallet using Solana CLI, airdrop some SOL, and deploy a Candy Machine on Solana's devnet using Sugar. You'll then deploy your Candy Machine to the web using Candy Machine UI.
Ce dont vous aurez besoin
- Nodejs installed (version 16.15 or higher)
- Solana CLI installed
- Phantom Wallet or Solflare extension installed
- Metaplex Sugar installed (**Legacy Version, V1.x **)
- A text editor
- npm or yarn installed (We will be using yarn to initialize our project and install the necessary packages. Feel free to use npm instead if that’s your preferred package manager.)
Set Up Your Project
Create a new project directory in your terminal with:
mkdir sugar-demo
cd sugar-demo
Install Sugar
This guide assumes you are using a legacy version of Sugar, V1.x. (Candy Machine v2). If you are using a newer version, check out our guide here.
Mac Installation
In your terminal enter:
<(curl -sSf https://sugar.metaplex.com/install.sh)
Note: You may need to restart your terminal after installation
Windows Installation
- Download the windows installer here.
- Run the installer as an Administrator (Right Click-->Run as Administrator). If you get a warning about an untrusted binary try clicking Plus d'informations and then Run Anyway. If you do not have this option, follow these steps:
- Right-click on the executable file and go to Properties.
- If you trust the Metaplex developer team, check the Unblock button as show in the image below. This will allow you to run this binary on your computer since Microsoft does not trust it automatically.
- Click Apply and Ok.
- Run the installer again
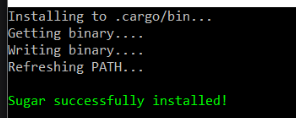
If all works correctly, you should see something like this:
Set Up a New Wallet
One of the cool new features of Sugar is that it will allow you to set your wallet and RPC configs using Solana CLI, so that you don't need to re-enter them in each of your sugar commands.
We first need to create a new wallet for specifically devnet testing with the following command:
solana-keygen new --outfile ./wallet.json
We can skip the password (by hitting Enter) as we will only use this wallet on devnet, so the funds are not important. We can confirm that the wallet we just generated is the wallet that the Solana CLI will use by running:
solana config set --keypair ./wallet.json
Establish a Connection to Your Quicknode RPC
We will need to make sure our Solana CLI is connected to a node. You're welcome to use public nodes or deploy and manage your own infrastructure, however, if you'd like 8x faster response times you can leave the heavy lifting to us.
See why over 50% of projects on Solana choose Quicknode and sign up for free here.
Make sure to launch your node under the Solana Devnet and copy the HTTP link:
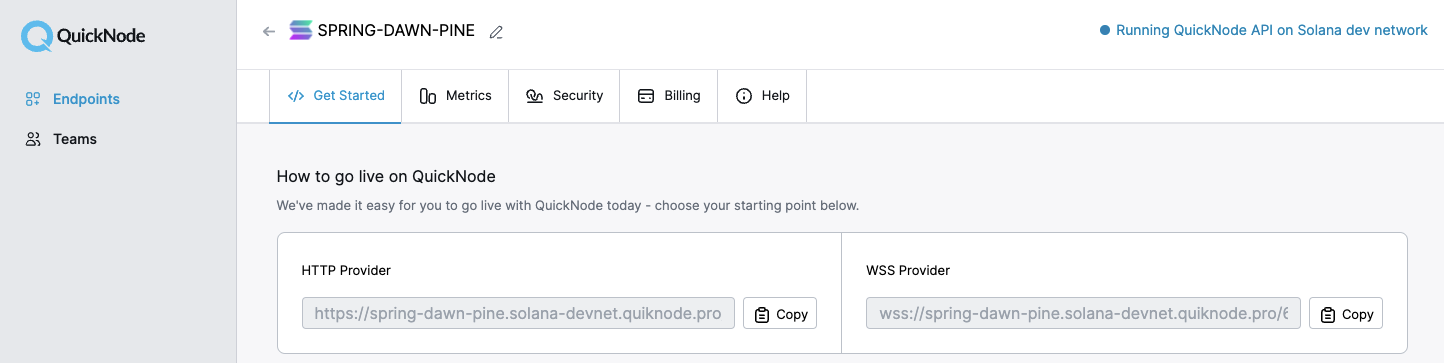
With your endpoint on the Solana Devnet setup, you can now run this command, substituting YOUR_QUICKNODE_URL with the HTTP URL you have copied:
solana config set --url YOUR_QUICKNODE_URL
Now to fund your wallet you can run the command:
solana airdrop 1
If the command is successful you should see something like this:

You can also run solana balance in your terminal and see that the 1 SOL is there.
Prepare NFT Assets
If you have used Candy Machine before, this process will be familiar. We need to create a .json file corresponding to each digital asset using a simple number format starting with 0 and increase sequentially, never skipping a number (e.g., 0.json maps to 0.png, then 1.json maps to 1.png). We can also create an optional collection.json and collection.png to enable Sugar to automatically create an on-chain collection.
Metaplex has a sample set of assets that we can download and work with to be consistent. You can edit the json to include whichever values you would like, as long as it is compliant with the URI json schema.
Download the sample set and extract the contents to ./assets/ in your project directory (this is the default directory that Sugar will look for your files).
Configure Candy Machine
Create a new file, config.json in your root project folder:
echo > config.json
Open the file and paste this config:
{
    "price": 0.01,
    "number": 10,
    "symbol": "NB",
    "sellerFeeBasisPoints": 500,
    "gatekeeper": null,
    "solTreasuryAccount": "YOUR_WALLET_ADDRESS",
    "splTokenAccount": null,
    "splToken": null,
    "goLiveDate": "2022-07-24T00:00:00Z",
    "endSettings": null,
    "whitelistMintSettings": null,
    "hiddenSettings": null,
    "uploadMethod": "bundlr",
    "awsS3Bucket": null,
    "retainAuthority": true,
    "isMutable": true,
    "creators": [
    {
      "address": "YOUR_WALLET_ADDRESS",
      "share": 100
    }
  ]
}
NOTE: you can run solana address in your terminal to obtain the wallet address that you just created.
Now, we should be all set. If you're following along to this point you should have a directory structure like this:
- sugar-demo/wallet.json
- sugar-demo/config.json
- sugar-demo/assets/[0-9].png
- sugar-demo/assets/[0-9].json
- sugar-demo/assets/collection.png
- sugar-demo/assets/collection.json
Sugar has a built in validation error that will let us check for any errors before we proceed. In terminal, run:
sugar validate

We're in business! Nice job. Let's build our Candy Machine.
Create Candy Machine
Because we've set our RPC and wallet using Solana CLI and because we've saved our assets and config.json to Sugar's default directories, our commands will be quite simple!
Upload Your Assets
In your terminal enter:
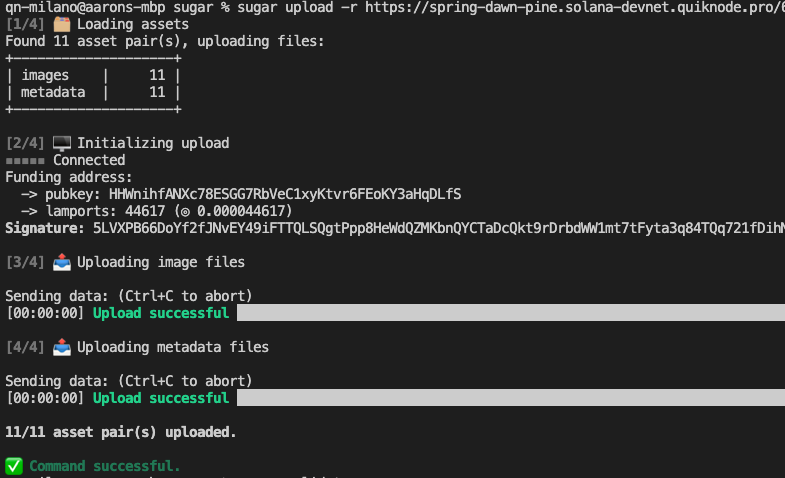
sugar upload
You should see something like this:
Deploy Candy Machine
In your terminal enter:
sugar deploy
You should see something like this:
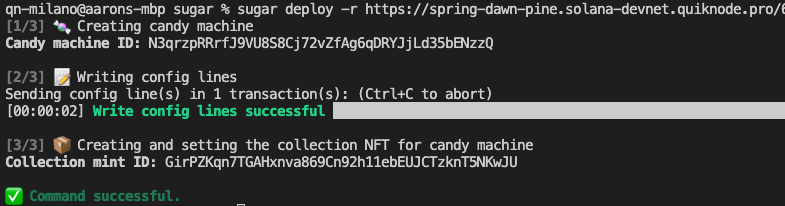
If you get a "Blockhash not found" error, try running the command again.
Make sure to store the Candy Machine ID provided in your terminal locally. We'll need this later.
Verify Candy Machine
Let's make sure everything has worked as we'd expected. In your terminal enter:
sugar verify
You should see something like this:
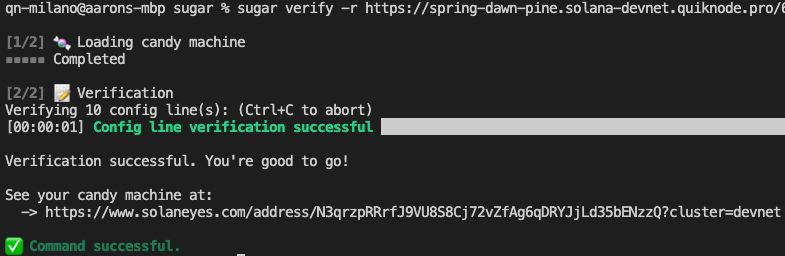
Great work!
Test Your Candy Machine
Try minting an NFT using sugar. In your terminal enter:
sugar mint
You should see something like this:

Excellent! Let's create a mint page so we can share this project with the world!
Set Up a Minting Site
For the easiest possible set up, we will be using the front end that Metaplex provides us, Candy Machine UI.
From your project directory, in your terminal enter:
git clone https://github.com/metaplex-foundation/candy-machine-ui ./candy-machine-ui/
cd candy-machine-ui
Rename the file .env.example to .env. After changing the file name, you can change the values in there to the following:
REACT_APP_CANDY_MACHINE_ID=<YOUR_CANDY_MACHINE_PUBKEY>
REACT_APP_SOLANA_NETWORK=devnet
REACT_APP_SOLANA_RPC_HOST=<YOUR_QUICKNODE_DEVNET_ENDPOINT>
If you don't remember your Candy Machine ID, you should be able to find it in cache.json in the program.candyMachine field.
With all of that information plugged in, you can now save the file. From that candy-machine-ui folder, run the following commands:
yarn install
yarn start
This will open up a browser at localhost:3000, where you can connect your wallet and have the ability to mint an NFT. Confirm that your Phantom Wallet is set to devnet and not mainnet before proceeding.
You'll need devnet SOL in your Phantom wallet to mint an NFT. You can use Solana CLI to airdrop to your Phantom wallet by entering this command in your terminal:
solana airdrop 1 YOUR_PHANTOM_WALLET_ADDRESS
Once you're ready, click "Mint". If done successfully, you should see a website like this:
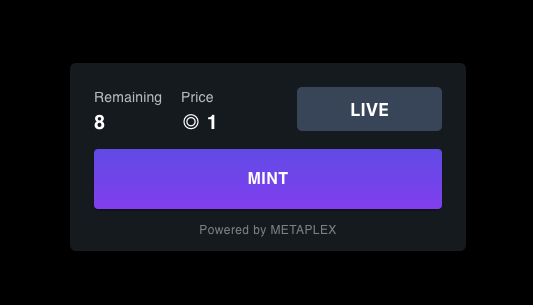
If you see an error that says “Mint Failed”, you might not have enough funds. Try again once you’ve added funds. You can view the NFT in your wallet after purchasing. Phantom may take a moment before rendering the NFT in your wallet. Ours looks like this:
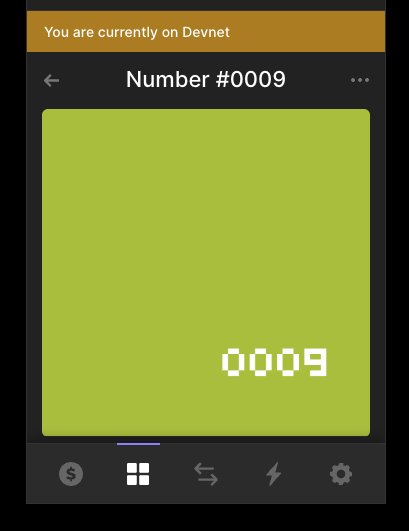
That's some sweet sugar! Nice job.
Conclusion
Congrats! You created a Candy Machine using Metaplex Sugar and have all the tools needed to run your own NFT mint. We're excited to see what NFTs you're creating! Join us on Discord or reach out to us via Twitter to share your NFT project.