Ethereum वॉलेट एक्सप्लोरर
The Ethereum Wallet Explorer uses Quicknode's Ethereum endpoint and APIs to query the blockchain for tokens, transactions, and NFTs associated with a given wallet.



अवलोकन
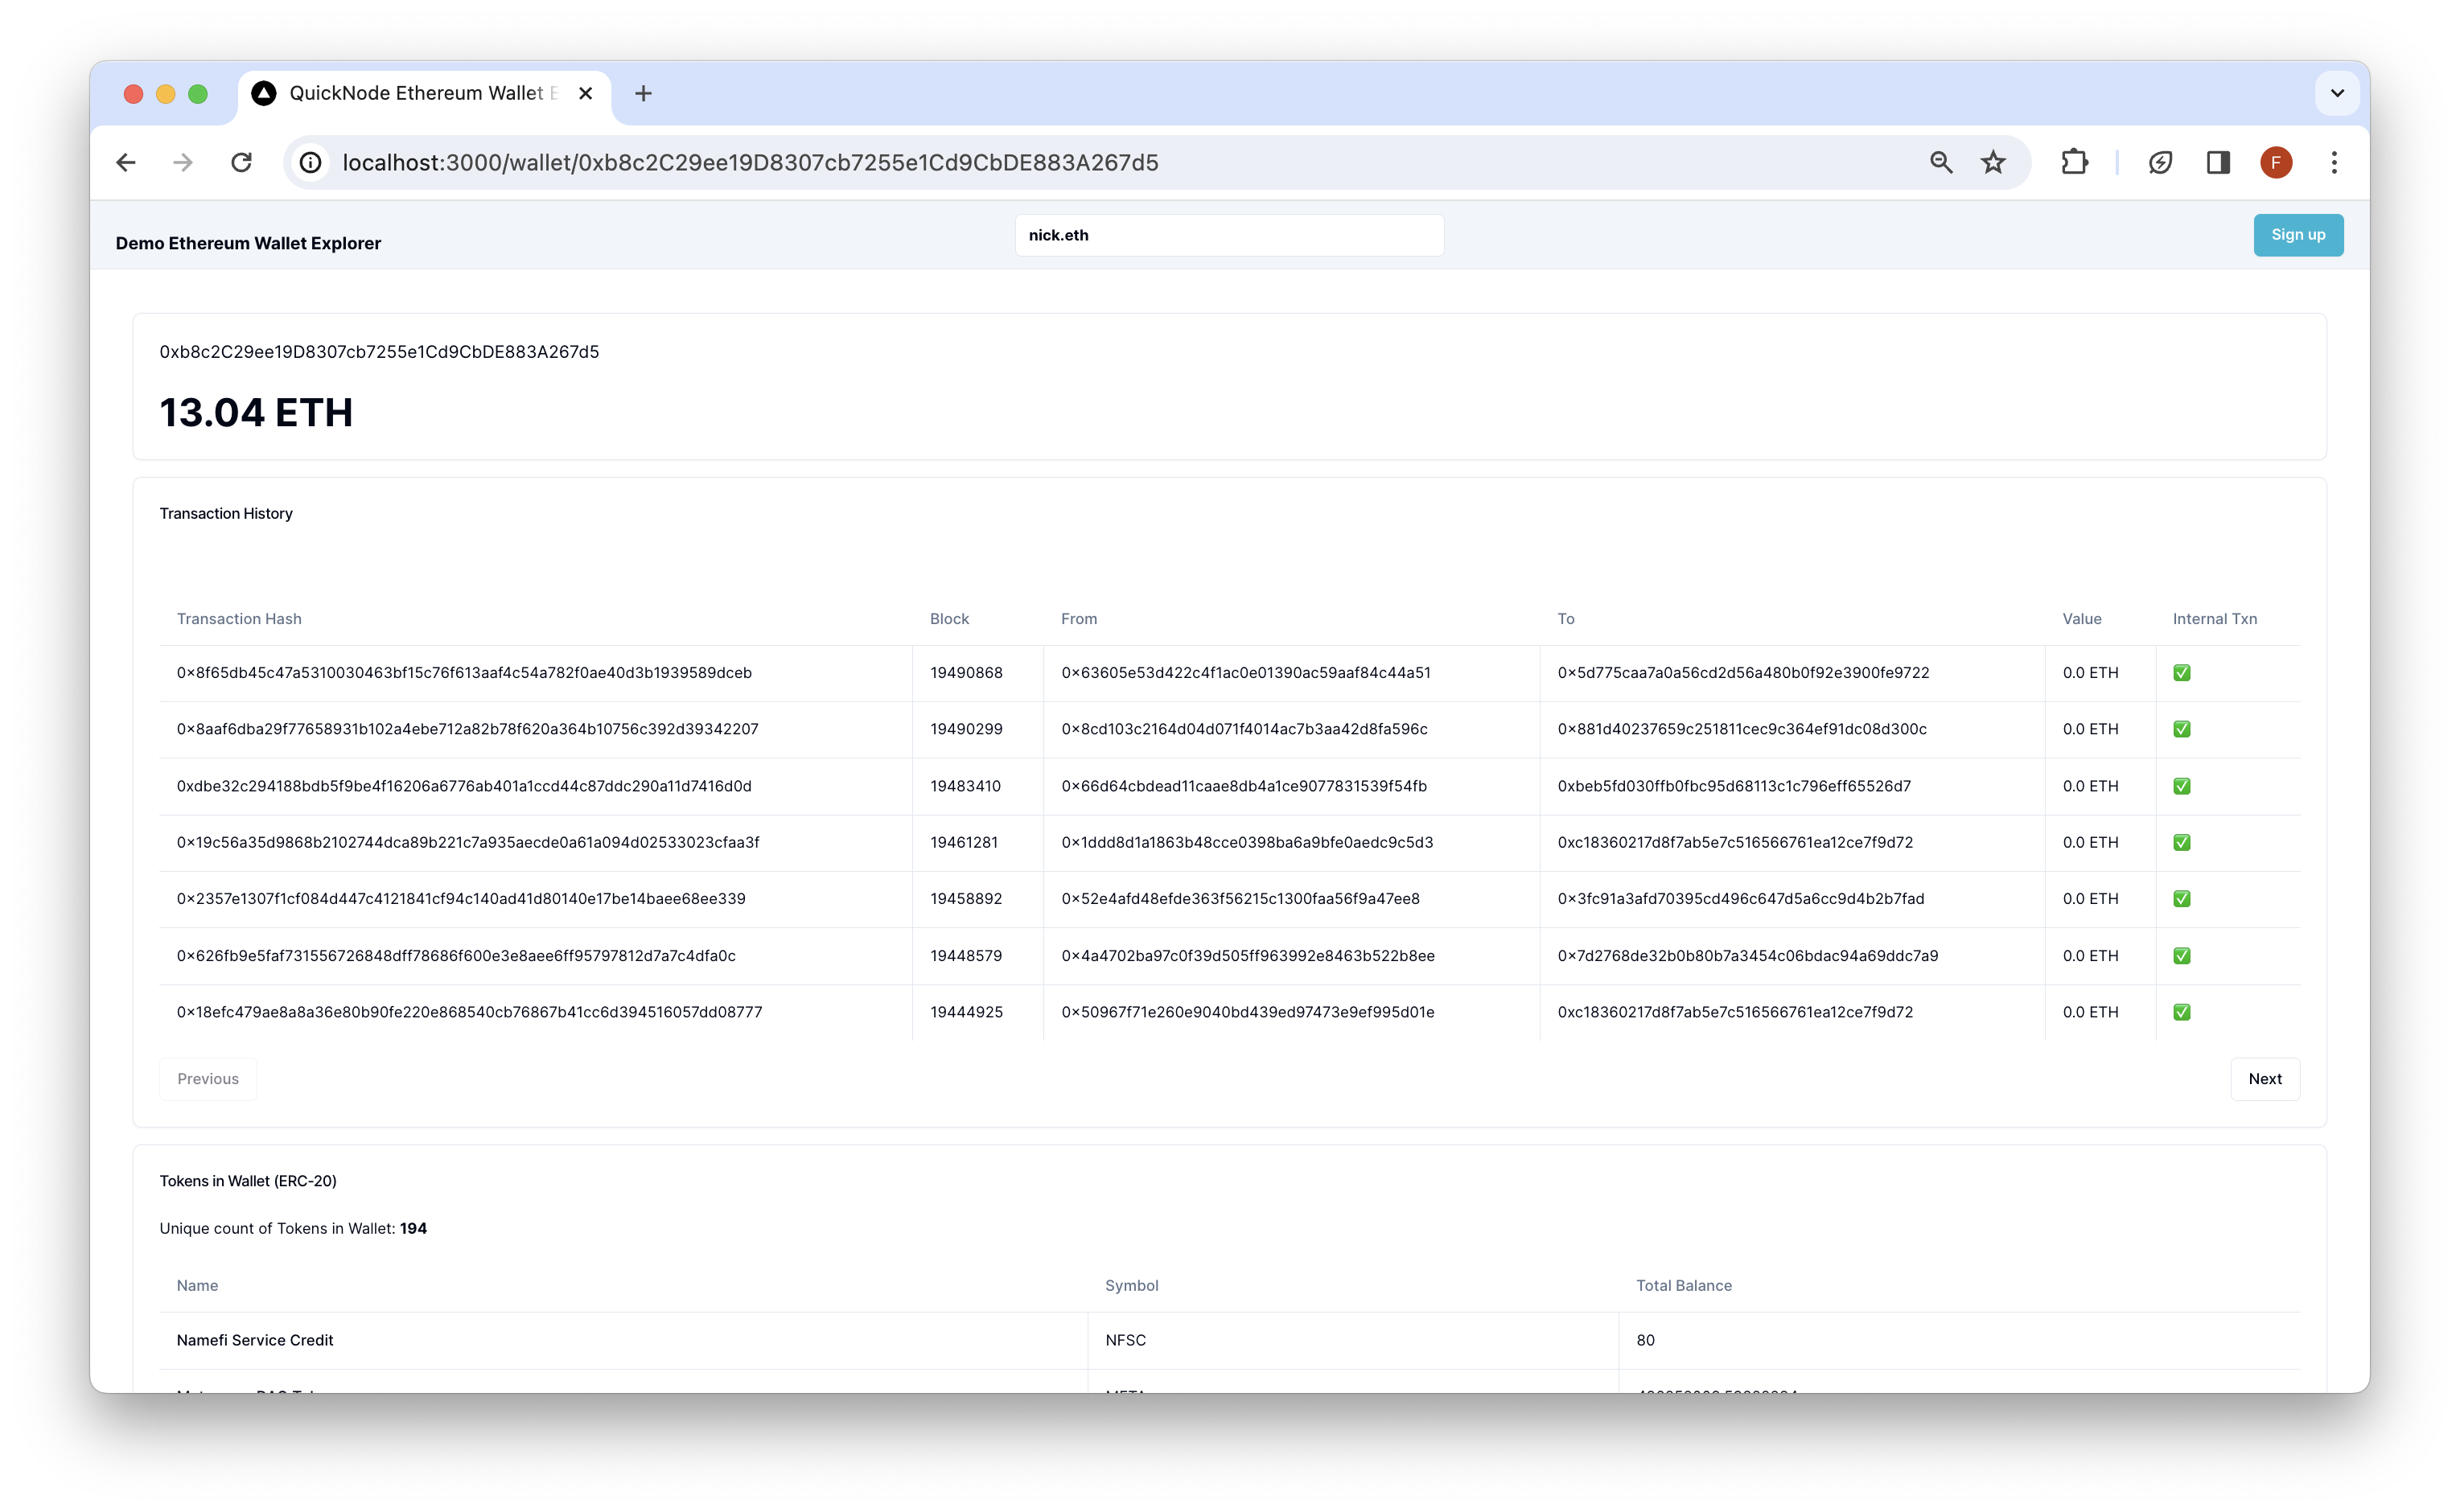
The Ethereum Wallet Explorer demonstrates how to use your Quicknode Ethereum endpoint, the Blockbook product, and an endpoint add-on to query tokens, transactions, and NFTs associated with a given wallet.
To run this demo with full functionality, you need the free Token and NFT API v2 bundle endpoint add-on and access to the ब्लॉकबुक एपीआई.
The demo uses Next.js 14 परियोजना को बूटस्ट्रैप किया गया create-next-app.
शुरू करना
Install Dependencies
सबसे पहले, आवश्यक शर्तें स्थापित करें:
NPM स्थापित करना
 # या
 धागा
 # या
 पीएनपीएम स्थापित करना
 # या
 बन इंस्टॉल
Set Environment Variables
नाम बदलें .env.example को .env.local and update with your Quicknode Ethereum Node Endpoint.
ETHEREUM_RPC_URL=https://example.ethereum-mainnet.quiknode.pro/123456/
सबसे पहले, डेवलपमेंट सर्वर चलाएं:
npm run dev
 # या
 यार्न देव
 # या
 पीएनपीएम देव
 # या
 बन देव
परिणाम देखने के लिए अपने ब्राउज़र में http://localhost:3000 खोलें।
डीऐप का उपयोग करना
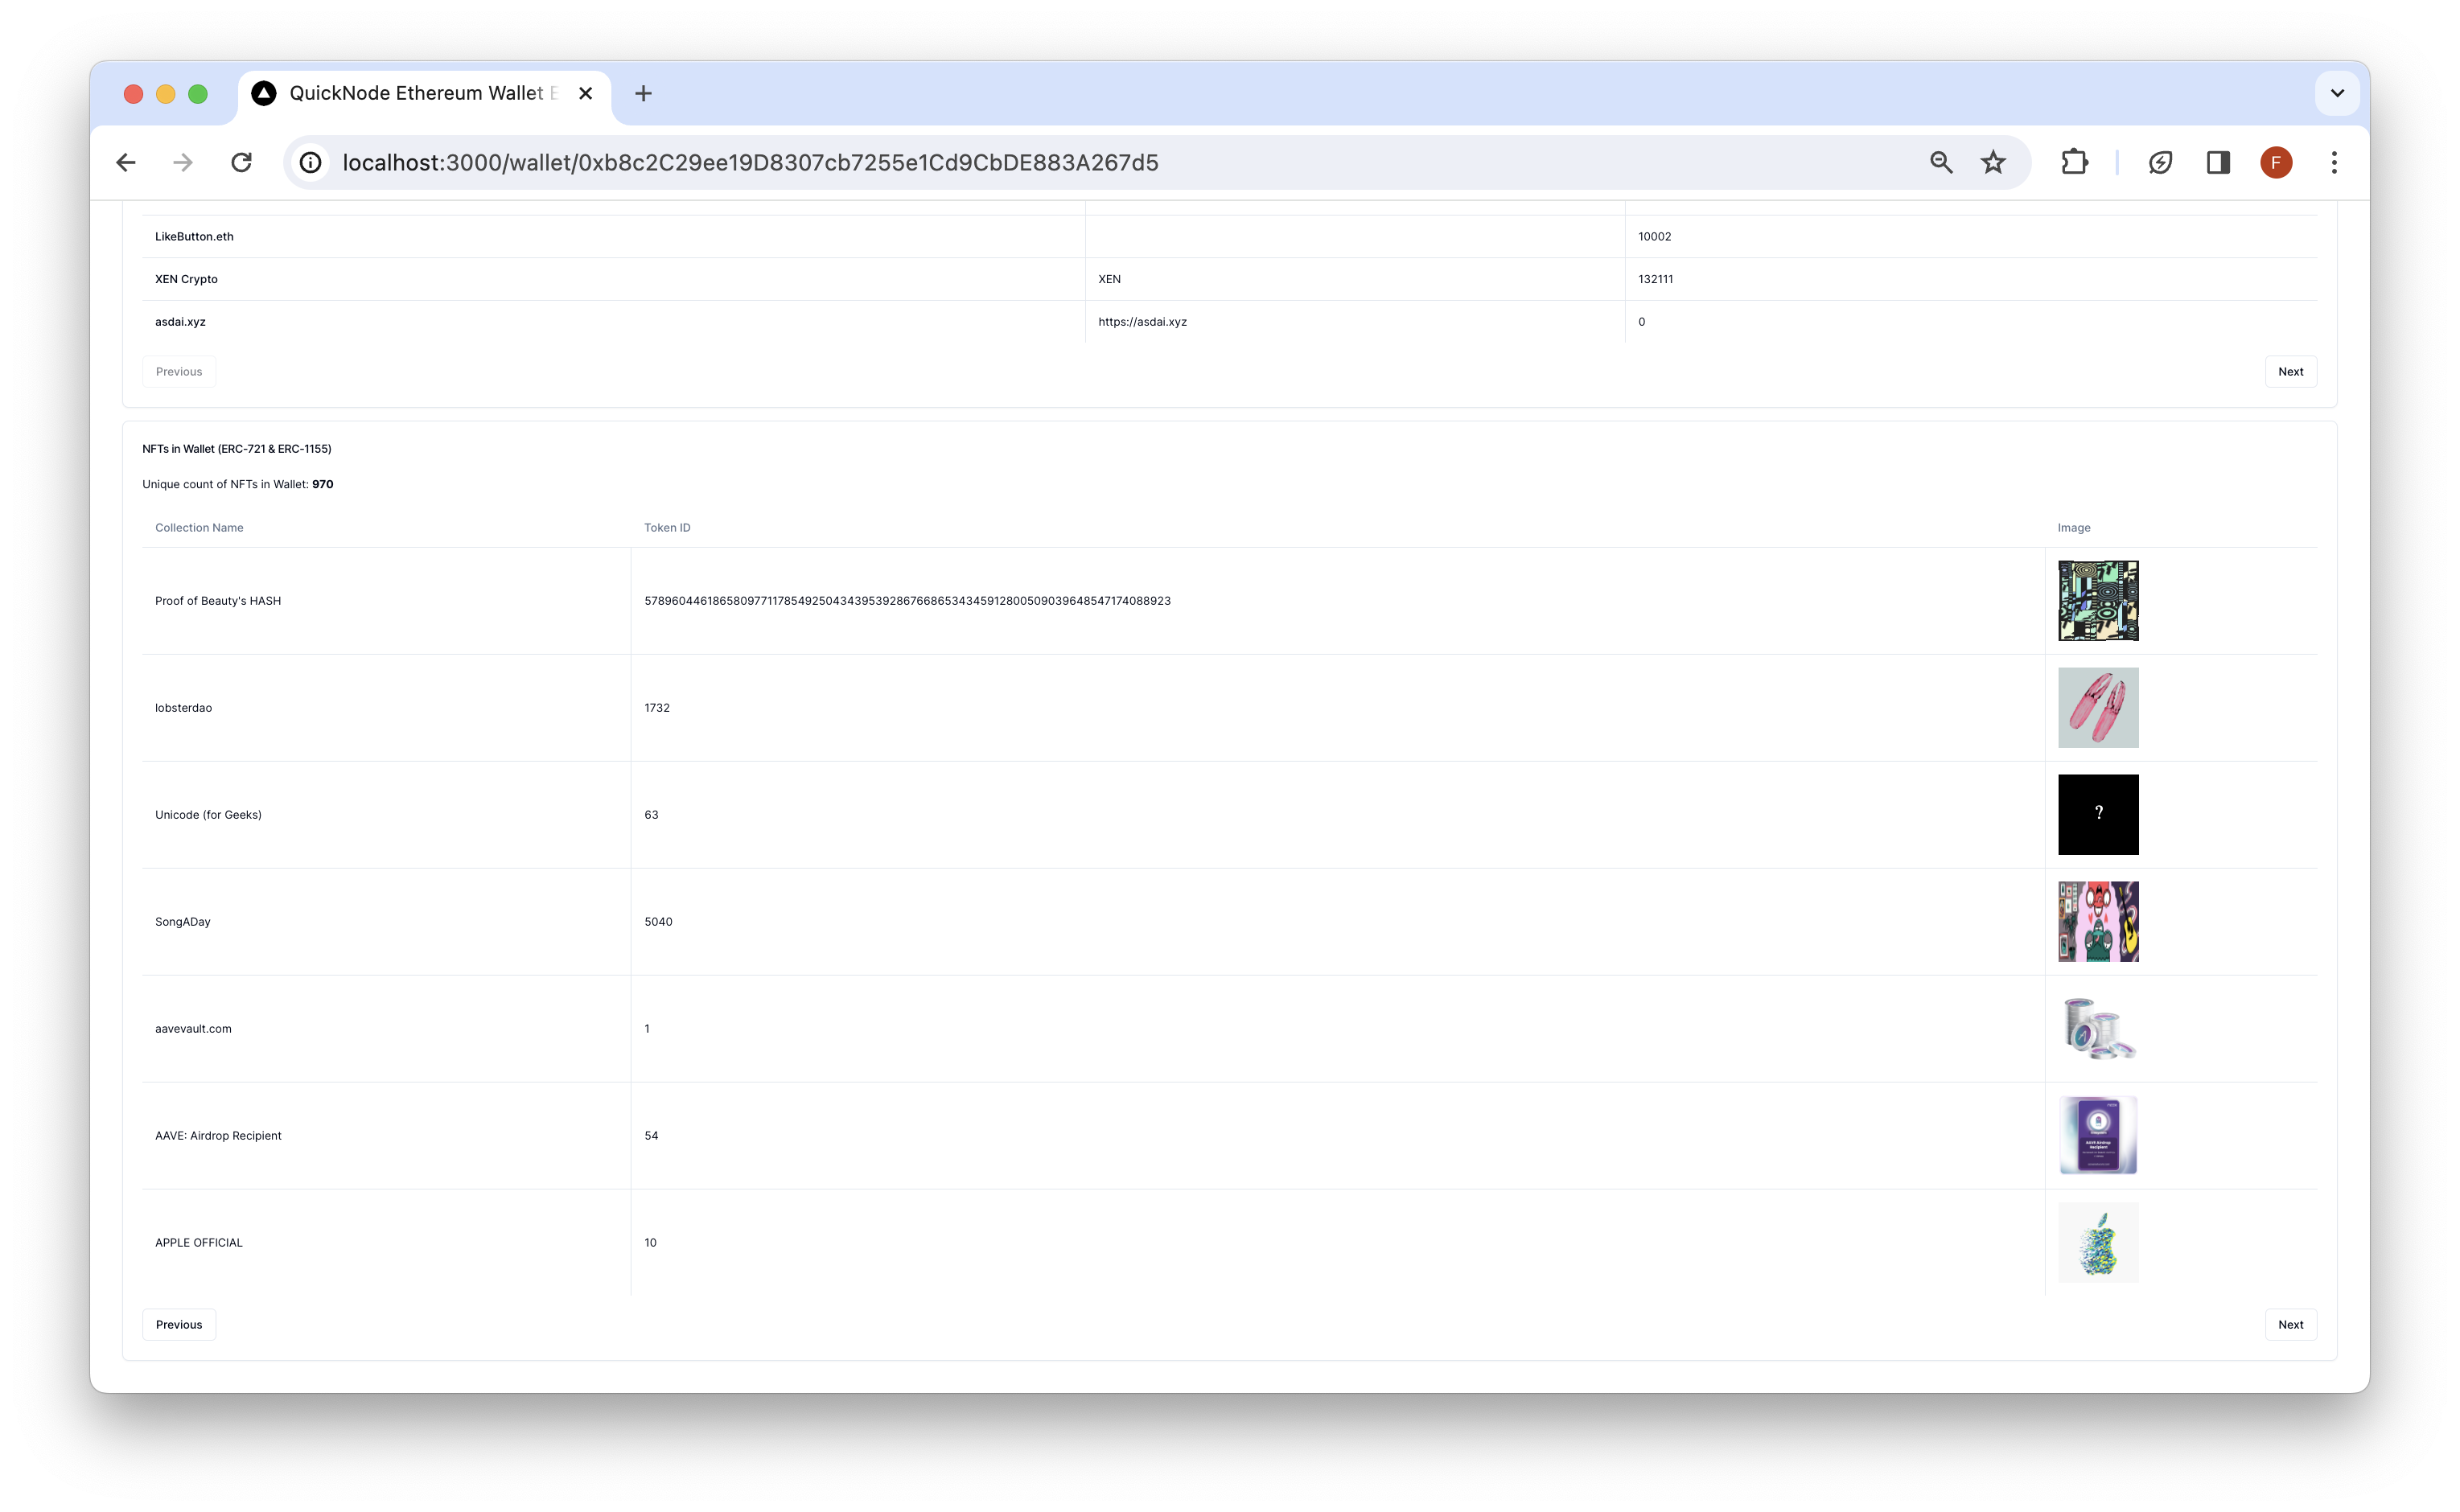
Search for an Ethereum wallet address and press enter. The Dapp will redirect to /वॉलेट/[पता] and query the Ethereum blockchain for the wallet's token balances, transactions, and NFTs. Results are rendered in respective cards.
वास्तुकला
स्रोत/
 ├── ऐप/
 │ └── एपीआई/
 │ └── बटुआ/
 ├── घटक/
 ├── अन्वेषक/
 └── शीर्षक/
-
एपीआई- Contains the API routes for the Ethereum RPC calls. These can be accessed from the client via/api/wallet/[method]?walletAddress=[address]. These GET requests use theEtherslibrary to interact with Ethereum and parse data, theToken and NFT API v2 bundleendpoint add-on to retrieve NFT and ERC-20 token information, and theब्लॉकबुक एपीआईto retrieve transaction history for any Ethereum address. -
अवयव- इसमें डैप के लिए रिएक्ट कंपोनेंट्स शामिल हैं।- The
एक्सप्लोररइस कंपोनेंट में क्लाइंट-साइड कंपोनेंट होते हैं जो एपीआई रूट को कॉल करते हैं और परिणाम प्रस्तुत करते हैं। - The
हैडरइस कंपोनेंट में डैप के लिए सर्च बार शामिल है।
- The
वर्सेल पर तैनात करें

पूर्व दर्शन
Next.js दस्तावेज़ीकरण
Next.js के बारे में अधिक जानने के लिए, निम्नलिखित संसाधनों पर एक नज़र डालें:
- Next.js डॉक्यूमेंटेशन - Next.js की विशेषताओं और API के बारे में जानें।
- Next.js सीखें - एक इंटरैक्टिव Next.js ट्यूटोरियल।
आप Next.js के GitHub रिपॉजिटरी को देख सकते हैं - आपकी प्रतिक्रिया और योगदान का स्वागत है!
- रिपॉजिटरी को फोर्क करें
- एक फीचर ब्रांच बनाएं:git checkout -b feature/amazing-feature
- अपने बदलावों को सेव करें:git commit -m "अद्भुत सुविधा जोड़ें"
- अपनी शाखा को आगे बढ़ाएं:git push origin feature/amazing-feature
- एक पुल रिक्वेस्ट खोलें।