
読了時間:8分
This guide has been updated to reflect the new name for Solana Web3.js 2.0 — Solana Kit. We're following the latest best practices to help you stay current. Learn more about Solana Kit here.
概要
In September 2024, Solana announced Solana Web3.js 2.0 - now known as Solana Kit - a major update to their JavaScript library for interacting with the Solana blockchain. Among many other things, Solana Kit introduces a new, more robust way to handle WebSocket subscriptions for monitoring on-chain events. This guide will show you how to implement account monitoring using the new subscription system, which provides better type safety and error handling than the previous version.
主な業務内容
In this guide, you'll learn how to:
- Set up a WebSocket connection using the new @solana/kit API
- Create an account subscription to monitor balance changes of the Pump.fun Fee Account
- Handle subscription cleanup and error cases
- Format and display balance changes in a user-friendly way
必要なもの
- Node.js (version 20.0 or higher recommended)
- npm or yarn package manager
- TypeScript and ts-node installed
Key Differences from Web3.js 1.0
The new @solana/kit subscription system introduces several improvements:
- Type Safety: The new API uses TypeScript generics and strict typing throughout.
- Modern Async Iteration: Uses
for await...ofloops instead of callbacks, conforming to the modern async iterator protocol. - Abort Controller Integration: Built-in support for subscription cleanup using AbortController. If you are unfamiliar, AbortController is a built-in JavaScript class that allows you to abort asynchronous operations, such as HTTP requests or WebSocket connections.
- Better Error Handling: Improved error types and handling mechanisms.
Setting Up Your Environment
1. Create a new project directory:
mkdir solana-subscriptions-v2 && cd solana-subscriptions-v2
2. Initialize a new npm project:
npm init -y
3. Install the required dependencies:
npm install @solana/kit
And the dev dependencies if you do not have them installed globally:
npm install --save-dev typescript ts-node @types/node
4. Create a TypeScript configuration file (tsconfig.json):
tsc --init
And update the configuration file with the following content:
{
  "compilerOptions": {
    "module": "NodeNext",
    "moduleResolution": "NodeNext",
    "noEmit": true,
    "target": "ESNext"
  },
}
Creating the Account Monitor
「」という名前の新しいファイルを作成します。 app.ts, and let's implement the account monitoring system step by step.
echo > app.ts
Open the file in your code editor, and let's get started!
1. Import the required dependencies:
Add the following imports to your app.ts file:
import {
    createSolanaRpcSubscriptions,
    RpcSubscriptions,
    SolanaRpcSubscriptionsApi,
    address,
    住所
} from '@solana/kit';
2. Define constants:
Below your imports, add the following constants:
const WSS_PROVIDER_URL = 'wss://your-quicknode-endpoint.example';
const LAMPORTS_PER_SOL = 1_000_000_000;
const PUMP_FUN_FEE_ACCOUNT = address("CebN5WGQ4jvEPvsVU4EoHEpgzq1VV7AbicfhtW4xC9iM");
To build on Solana, you'll need an API endpoint to connect with the network.
See why over 50% of projects on Solana choose Quicknode and sign up for an account here. We're going to use a Solana Mainnet endpoint.
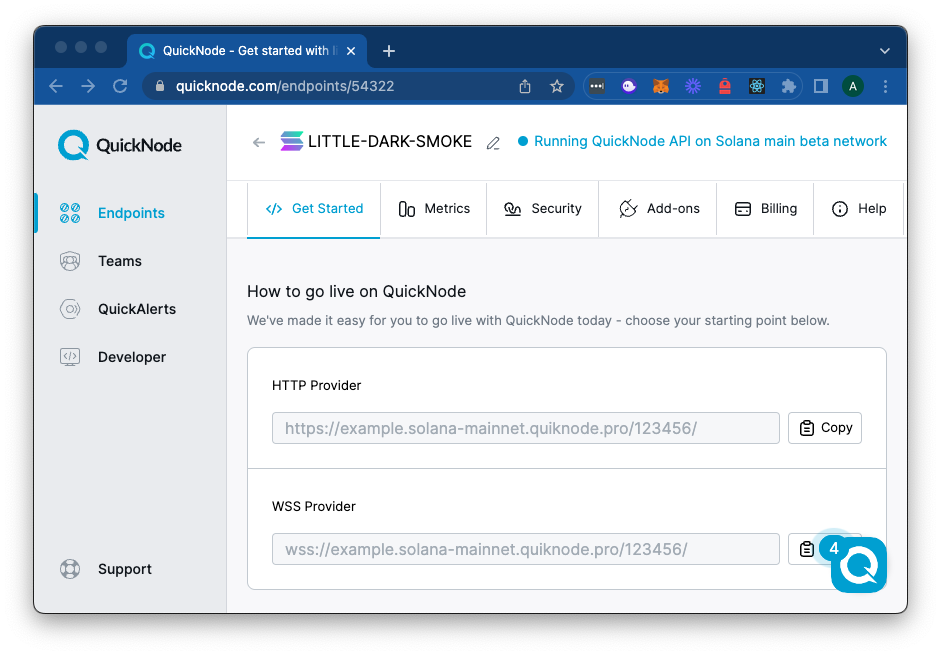
Copy the WSS Provider Link and update your WSS_PROVIDER_URL constant to match the link.
We are going to be monitoring the Pump.fun Fee Account (CebN5WGQ4jvEPvsVU4EoHEpgzq1VV7AbicfhtW4xC9iM)for balance changes, but feel free to use any Solana account you'd like. Note that the @solana/kit library requires that we use the 住所 type from the @solana/kit library--we can create an 住所 from a string using the 住所 function from the library.
3. Define helper functions:
Add the following helper function below your constants:
const lamportsToSolString = (lamports: number, includeUnit = true): string => {
    const solAmount = lamports / LAMPORTS_PER_SOL;
    return `${solAmount.toLocaleString('en-US', {
        minimumFractionDigits: 2,
        maximumFractionDigits: 2
    })} ${includeUnit ? 'SOL' : ''}`;
};
This function will format lamports as SOL with two decimal places and optionally include the unit (SOL) in the string.
4. Define interface:
Let's create an interface to define the arguments for our tracking function:
interface TrackAccountArgs {
    rpcSubscriptions: RpcSubscriptions<SolanaRpcSubscriptionsApi>;
    accountAddress: Address;
    abortSignal: AbortSignal;
}
In the previous sections, we discussed Address and AbortSignal, so let's quickly touch on RpcSubscriptions and SolanaRpcSubscriptionsApi.
In the new Solana Kit API, the methods that used to be exposed through the Connection class are now exposed via two classes: Rpc and RpcSubscriptions, one for HTTP requests and one for WebSockets. The RpcSubscriptions class gives access to WebSocket methods for tracking on-chain events (e.g., account changes, program changes, logs, slots, etc). Check out our docs for more information.
5. Create account tracking function:
Add the following to your app.ts file. We will walk through it step by step below:
async function trackAccount({ rpcSubscriptions, accountAddress, abortSignal }: TrackAccountArgs) {
    let lastLamports: number | null = null;

    try {
        const accountNotifications = await rpcSubscriptions
            .accountNotifications(accountAddress, { commitment: 'confirmed' })
            .subscribe({ abortSignal });

        try {
            for await (const notification of accountNotifications) {
                const { slot } = notification.context;
                const currentLamports = Number(notification.value.lamports);
                const delta = lastLamports !== null ? currentLamports - lastLamports : 0;
                const sign = delta > 0 ? '+' : delta < 0 ? '-' : ' ';
                console.log(`   Account change detected at slot ${slot.toLocaleString()}. New Balance: ${lamportsToSolString(currentLamports)} (${sign}${lamportsToSolString(Math.abs(delta))})`);
                lastLamports = currentLamports;
            }
        } catch (error) {
            throw error;
        }
    } catch (error) {
        throw error;
    }
}
これを詳しく見ていきましょう:
- First, we define a variable called
lastLamportsand set it tonull. This variable will be used to store the last known balance of the account so we can calculate the delta each time we receive a new notification. - Next, we create a
try/catchblock to handle errors when creating our subscription. - Inside the
tryblock, we call theaccountNotificationsmethod (similar to theonAccountChangemethod in the v1 library) on therpcSubscriptionsobject, passing in theaccountAddressそしてcommitmentoptions. We also pass in theabortSignalto cancel the subscription if needed. - Next, we create a
try/catchblock to handle errors when processing the notifications. - Inside the
tryblock, we use afor await...ofloop to iterate over the notifications received from the subscription. We get theslotfrom thecontextand thelamportsfrom the値of each notification, and we do some light processing to log the balance change to the console.
6. Create Entry Point:
Add the following to your app.ts file to execute your tracking function:
async function main() {
    console.log(`💊 Tracking Pump.fun Fee Account: ${PUMP_FUN_FEE_ACCOUNT} 💊`);
    const rpcSubscriptions = createSolanaRpcSubscriptions(WSS_PROVIDER_URL);
    const abortController = new AbortController();
    try {
        await trackAccount({
            rpcSubscriptions,
            accountAddress: PUMP_FUN_FEE_ACCOUNT,
            abortSignal: abortController.signal
        });
    } catch (e) {
        console.log('Subscription error', e);
    } finally {
        abortController.abort();
    }
}

main();
We are effectively creating an entry point for our script, which will be executed when we run our script using ts-node. We will call the メイン function at the bottom of the file.
The メイン function will use our WSS_PROVIDER_URL to create a new instance of the RpcSubscriptions class, which we will use to create our subscription. We will then call the trackAccount function, passing in the RpcSubscriptions instance, the PUMP_FUN_FEE_ACCOUNT address, and the abortController.signal.
Now, let's run our script.
Running the Monitor
When you are ready, run your script using ts-node:
ts-node app.ts
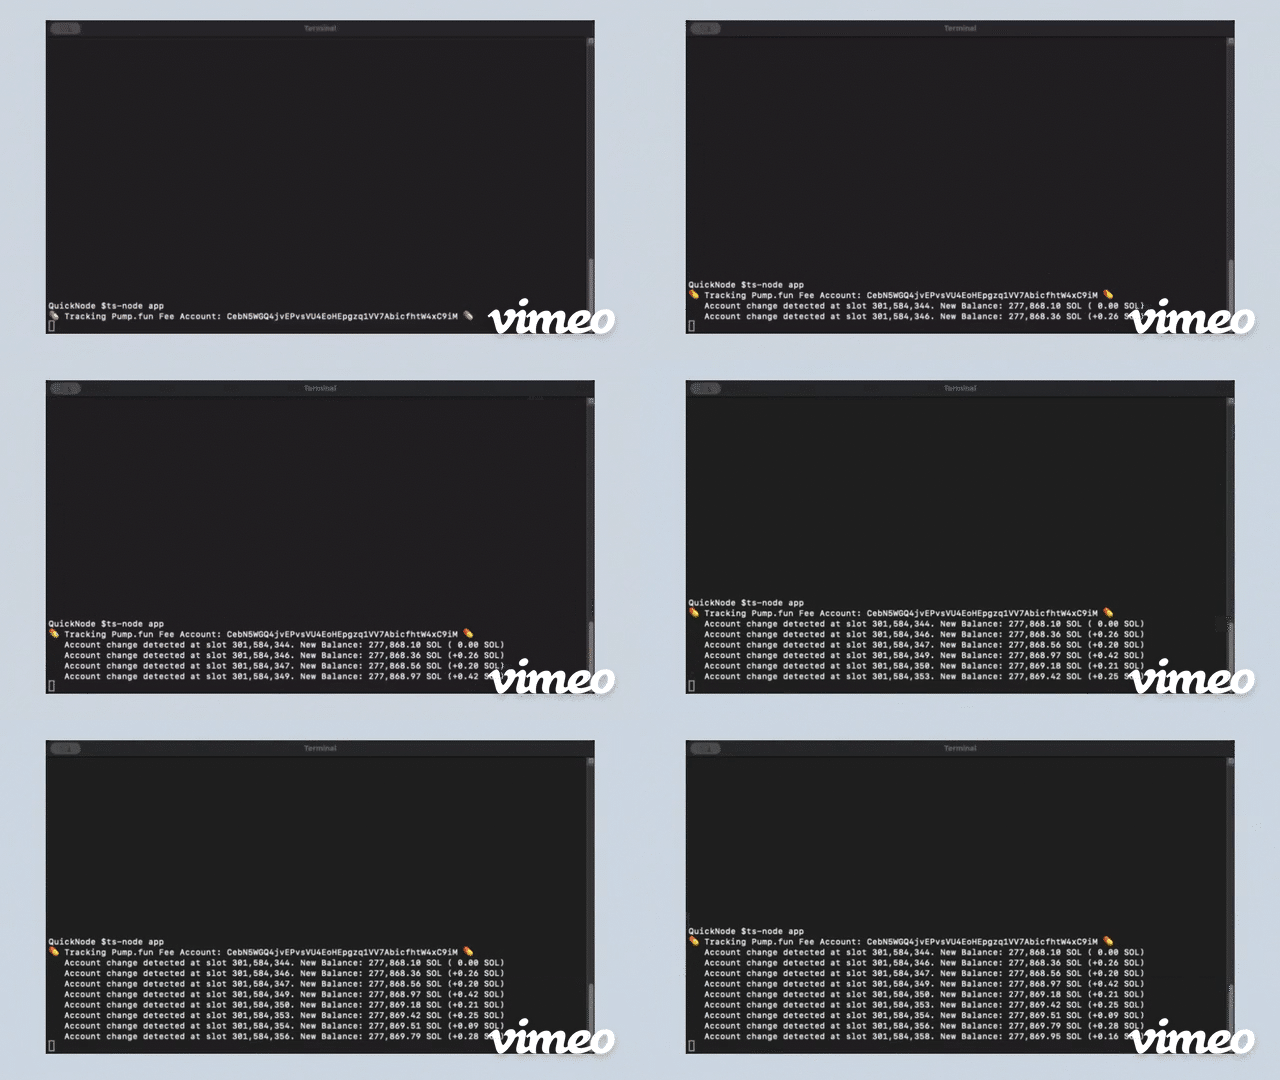
The monitor will start tracking changes to the specified account and display balance changes in this format:
Account change detected at slot 301,428,932. New Balance: 265,598.16 SOL (+0.14 SOL)
Nice job! 🚀 🚀 🚀
Billing and Optimization
Billing credits for WebSocket methods are based on the number of responses received, not the number of subscriptions created. For example, if you open an accountNotifications subscription and receive 100 responses, your account will be billed 2,000 credits (20 credits per response X 100 responses). Check the API credits page for updated billing rates.
To optimize your subscriptions and ensure you are not being charged for unnecessary subscriptions or irrelevant responses, you should consider the following:
- use AbortController or other subscription logic to cancel subscriptions when they are no longer needed.
- utilize filters for applicable methods to receive only relevant data.
Alternative Solutions
Quicknode offers several solutions for getting real-time data from Solana. Check out the following options to find the right tool for your use case:
- WebSockets: As discussed in this guide, WebSockets offer direct connections to Solana nodes for real-time updates--these are ideal for simple applications and rapid development.
- Solana gRPC (Yellowstone-compatible Geyser gRPC): Solana gRPC provides a powerful gRPC interface for streaming Solana data, with built-in filtering and historical data support.
- Streams: Managed solution for processing and routing Solana data to multiple destinations, with built-in filtering and historical data support.
For more information, check out our Blog post.
結論
Solana Kit provides a more robust, type-safe way to handle Solana WebSocket subscriptions. The new API makes it easier to manage subscriptions, handle errors, and clean up resources properly. When building applications that need to monitor Solana blockchain events, these new features help create more reliable and maintainable code.
For more information, check out: