
3 min read
개요
Sending RPC calls to get data is a common standard most blockchains follow. EtherFlow is a tool that makes it easier to send these RPC calls. This guide will explain in depth about EtherFlow, and how it works.
선행 조건
- A Blockchain (EVM-based) node.
- Web browser.
- Love for Ethereum (as EtherFlow works with EVM chains).
What is EtherFlow?
EtherFlow is an open-source, free-to-use tool that allows you to test your blockchain nodes. Using it, you can compose and debug RPC calls in two different libraries, web3.js, and ethers.js. EtherFlow was created by the Quicknode team (Auston Bunsen) to make development workflow of making calls to nodes easier; it works with any EVM-based chain like Ethereum, xDAI, BSC, Matic/Polygon, Optimism, Fantom, or Celo.
Notable features:
- Plug and play — no need to set up any config file or environment.
- JavaScript sample code in web3.js and ethers.js for all the supported calls.
- Works directly in your browser.
- Ability to share the exact call and node.
Set Up Your Quicknode Ethereum Endpoint
Any EVM-based blockchain node will work with EtherFlow, but it is a pretty complex process to create your own node, and syncing will take hours or even days. Instead, we will create a free Quicknode account here and easily generate an Ethereum endpoint.
Once you create a node, it should look like this:
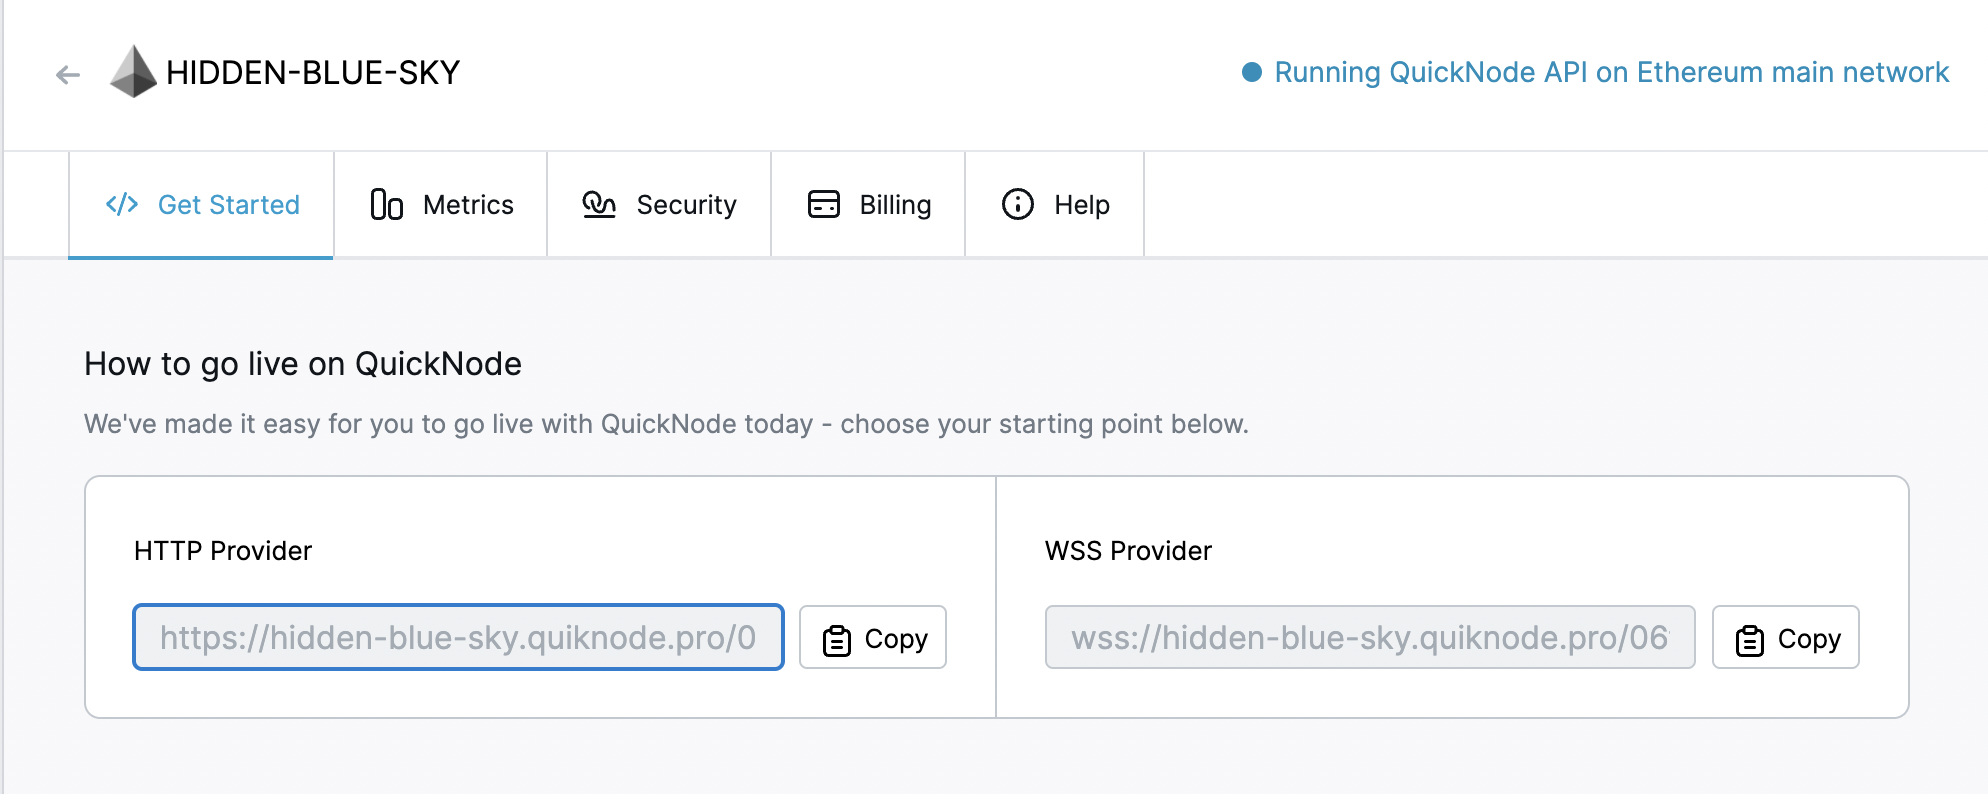
Copy either the HTTP or WSS URL. Both work with EtherFlow.
How to use EtherFlow?
Now that we have our node ready let us go ahead and check out EtherFlow. Go to https://etherflow.quiknode.io/ and paste the node URL from the last step in the field where it says 'Enter Node URL'
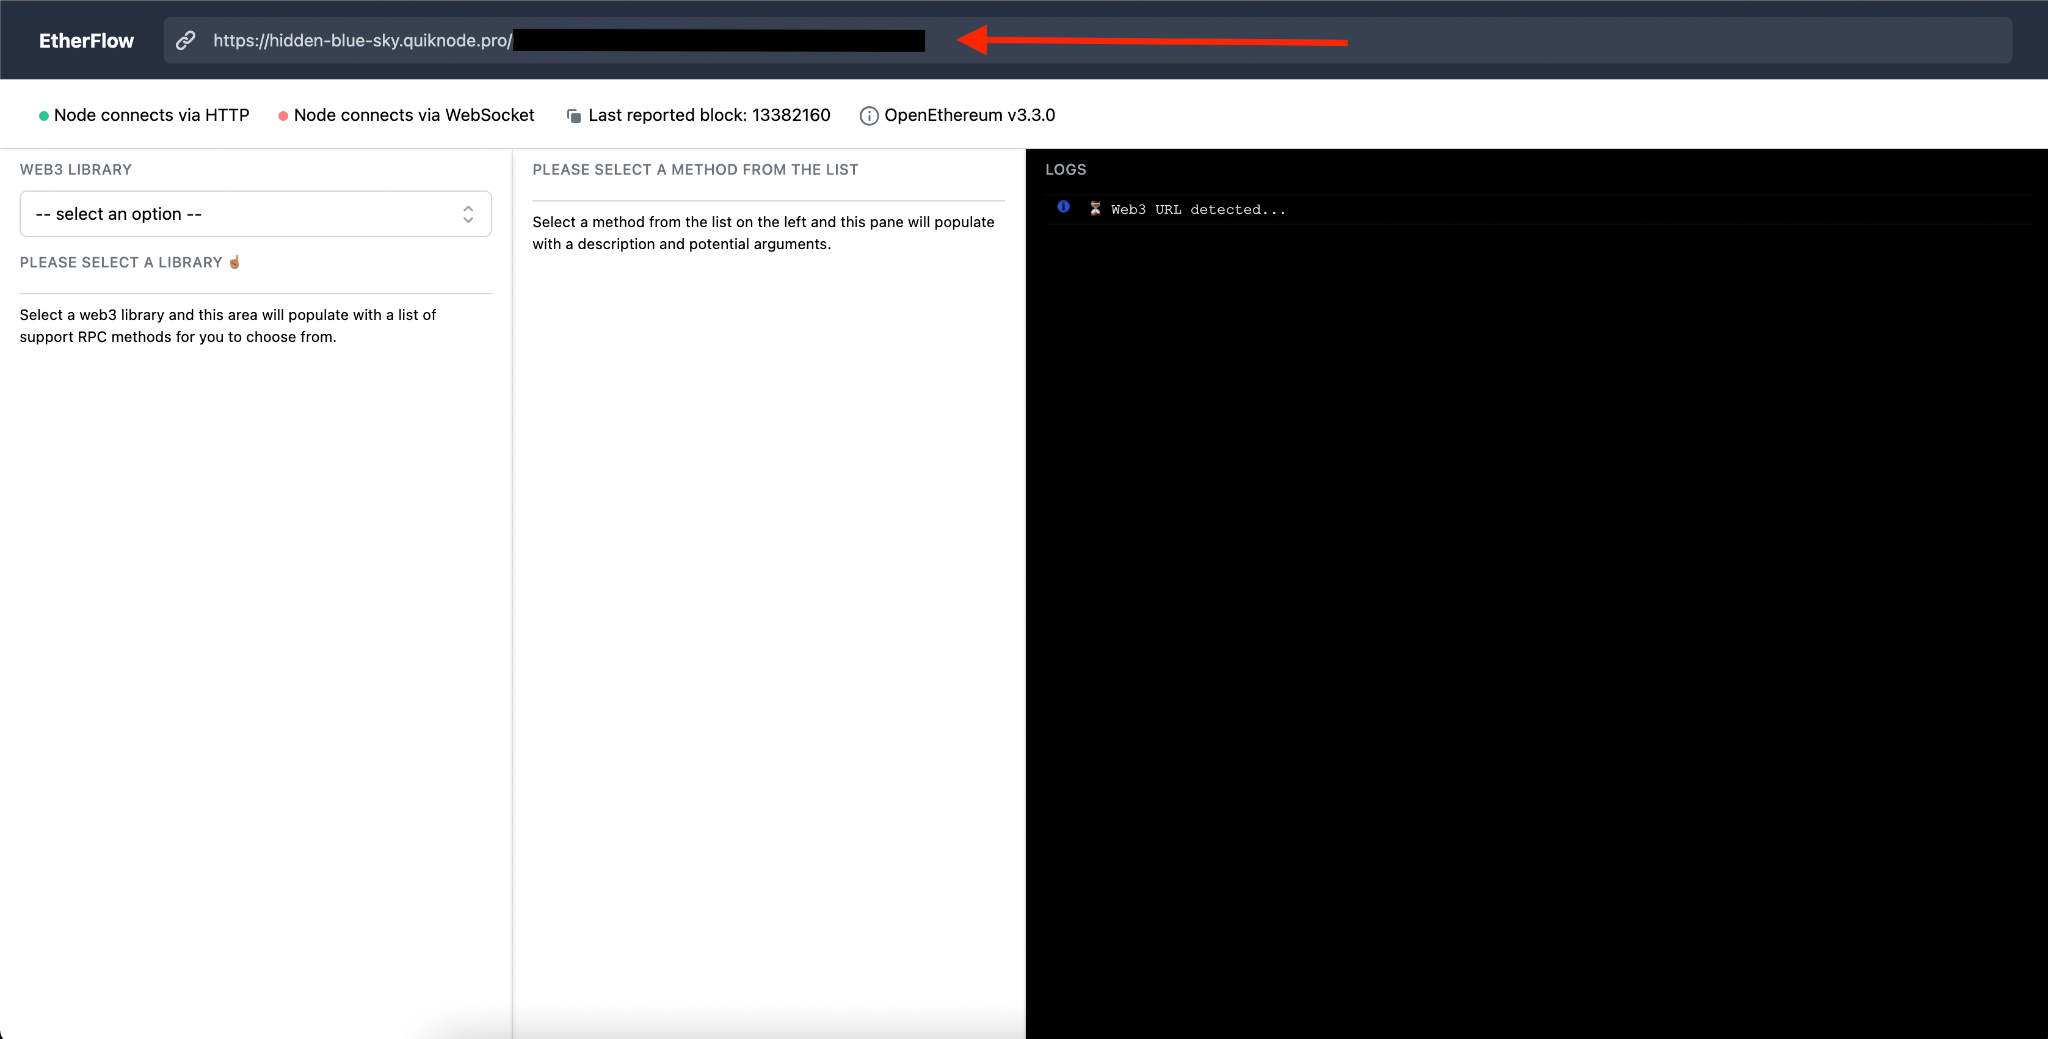
You will see the grey circle below the field turning green; the first one will turn green if you're using an HTTP URL, and the second one will turn green if you are using a WSS URL. The next information is self-explanatory, the latest block number; then the name and version of the client software the node is using.
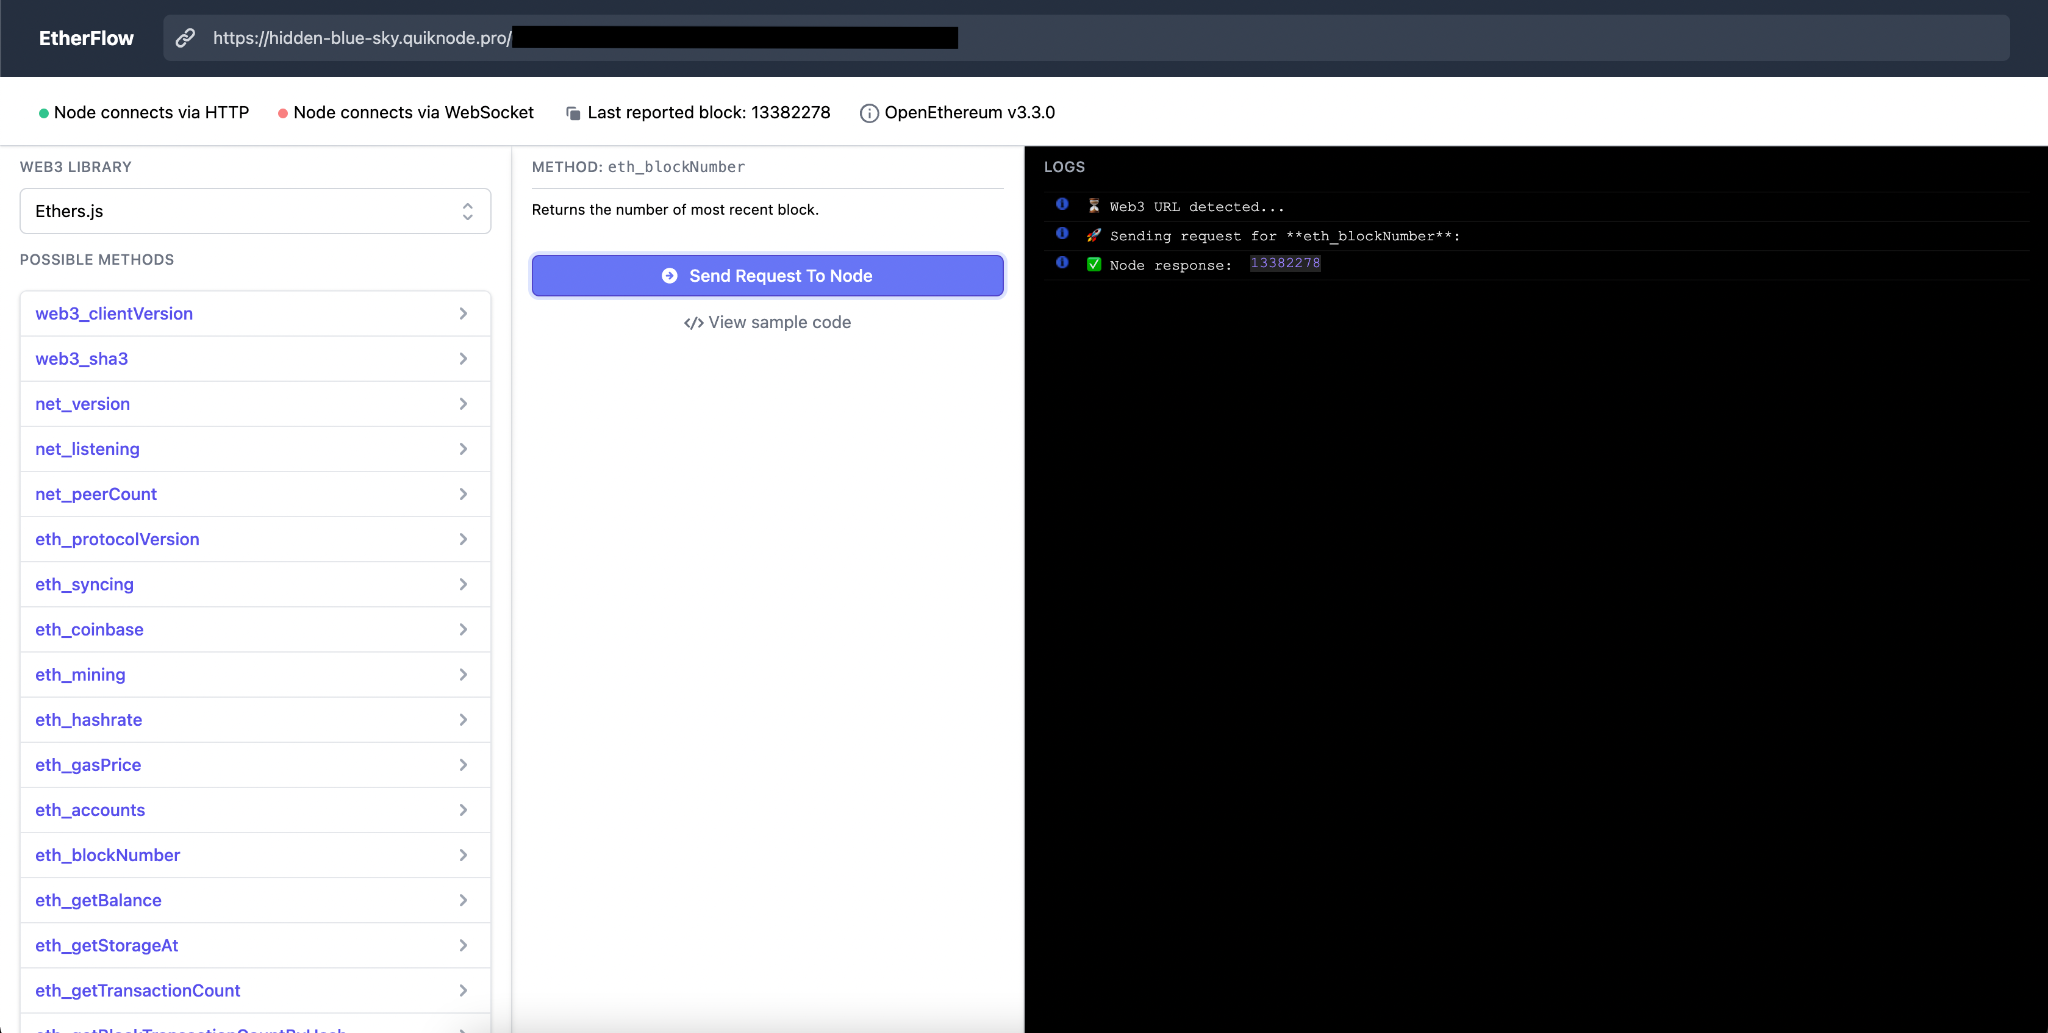
Below that, you should see a drop-down from where you can select between web3.js and ethers.js. Once you select a library, a list of methods will appear. Select a method and click on the button which says 'Send Request To Node', and you will see an output in the black console screen on the right.
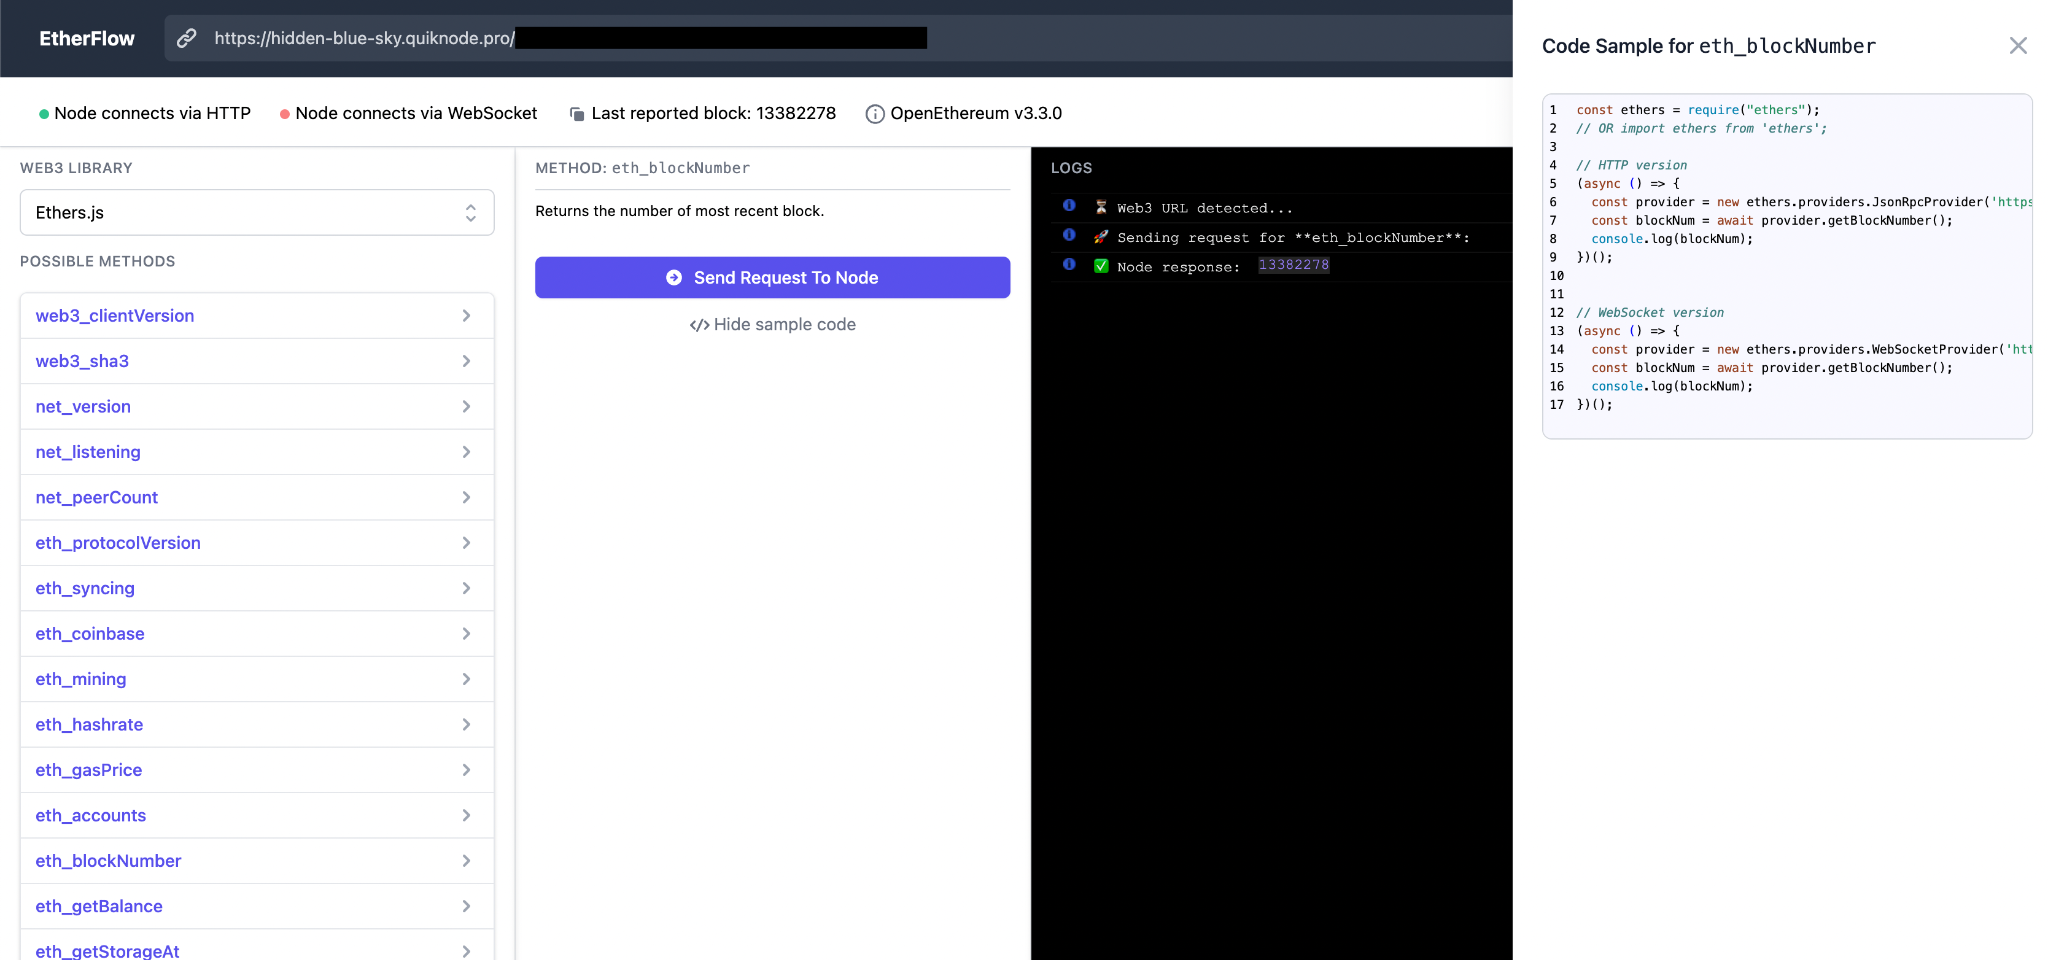
The sample code can be viewed by clicking on the 'view sample code' button; a window will appear from which you can copy the code and run it on your computer.
Our guides on getting started with web3.js and ethers.js will help you along the way should you have any questions.
Another excellent feature of EtherFlow is sharing the exact method and the node with other people. Just copy the URL and domain bar, and when pasted in the browser, EtherFlow will start with the exact configuration.
Note: It is discouraged to share your node URL with anyone.
Conclusion
If you are reading this, congrats, you made it to the end. In this guide, we learned how awesome EtherFlow is and how to use it.
Subscribe to our newsletter for more articles and guides on Ethereum. If you have any feedback, feel free to reach out to us via Twitter. You can always chat with us on our Discord community server, featuring some of the coolest developers you’ll ever meet :)