
4 min read
개요
Ethereum is a very lovely blockchain to work with, but recently, heavy traffic and many people building on it have resulted in the chain being a bit congested. Layer 2 solutions solve this issue by extending Ethereum's scalability. Polygon (FKA MATIC) is one such solution. It is an Ethereum sidechain with lower gas fees along with the security of Ethereum. Today in this guide, we will learn more about the Matic/Polygon chain and how to deploy a smart contract on Matic/Polygon.
Prefer a video walkthrough? Follow along with Radek and learn how to deploy a smart contract on Polygon in 7 minutes.
선행 조건
- A Polygon node.
- Web browser.
- MetaMask installed in the browser.
- Love of polygon.
Why Polygon?
With the rapid adoption of Ethereum, the problem of scalability arose, where gas prices started getting higher as more and more people wanted to get that precious Ethereum block space. Polygon, which was launched as MATIC network, was created to provide a scalable solution to Ethereum. It is a Proof-of-stake blockchain, just like other PoS blockchains, with the exception that transactions are collected and then settled on the Ethereum blockchain. This gives Polygon the interoperability, liquidity, and security of Ethereum.
Polygon's main chain is a Proof-of-Stake (PoS) sidechain. Where MATIC, the native token of Polygon network, is used as staking token to validate transactions and vote on network upgrades. MATIC is also used to pay for the gas fees on Polygon.
Now that we know what Polygon is let us deploy a contract on this fantastic network.
Setting Up a Quicknode Polygon Endpoint
We'll deploy our contract on Polygon Mumbai testnet. We can simply sign up with a free Quicknode accounthere and easily generate a Polygon endpoint.
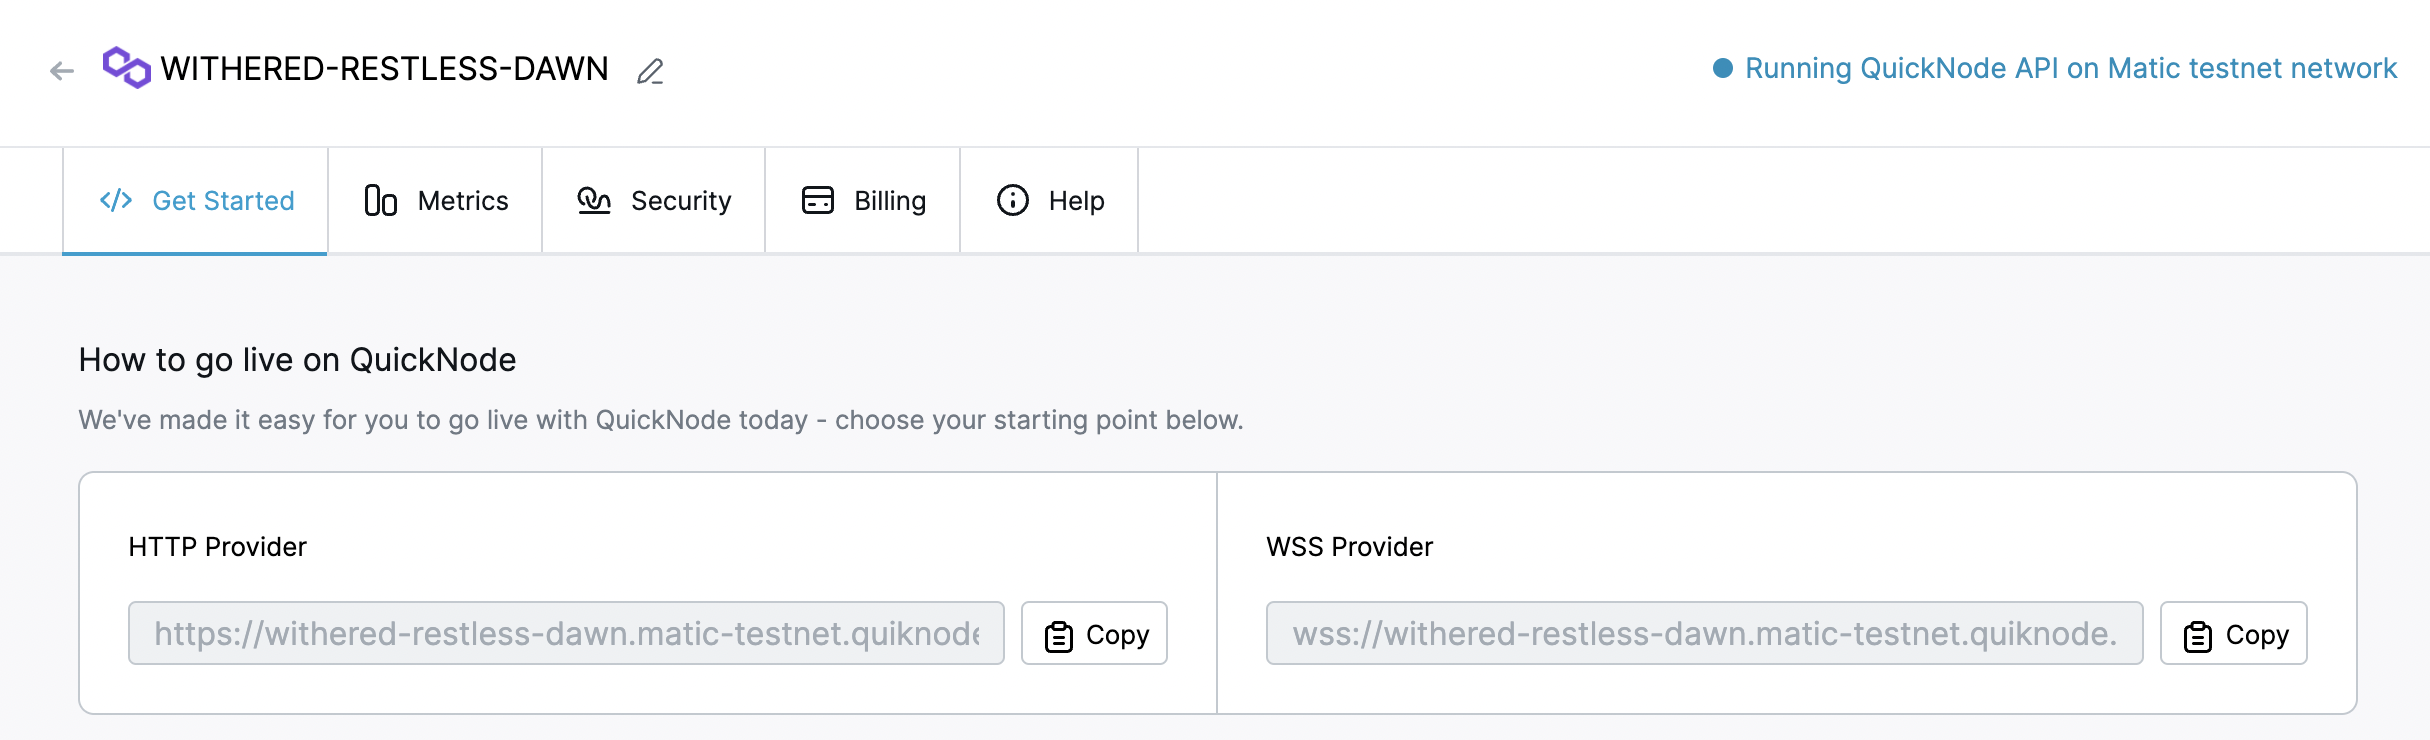
Copy the HTTP URL, which will be needed in the next step.
Setting up MetaMask with Polygon node.
After creating your Quicknode Polygon Node, we’ll have to set it up in the MetaMask wallet as a custom RPC.
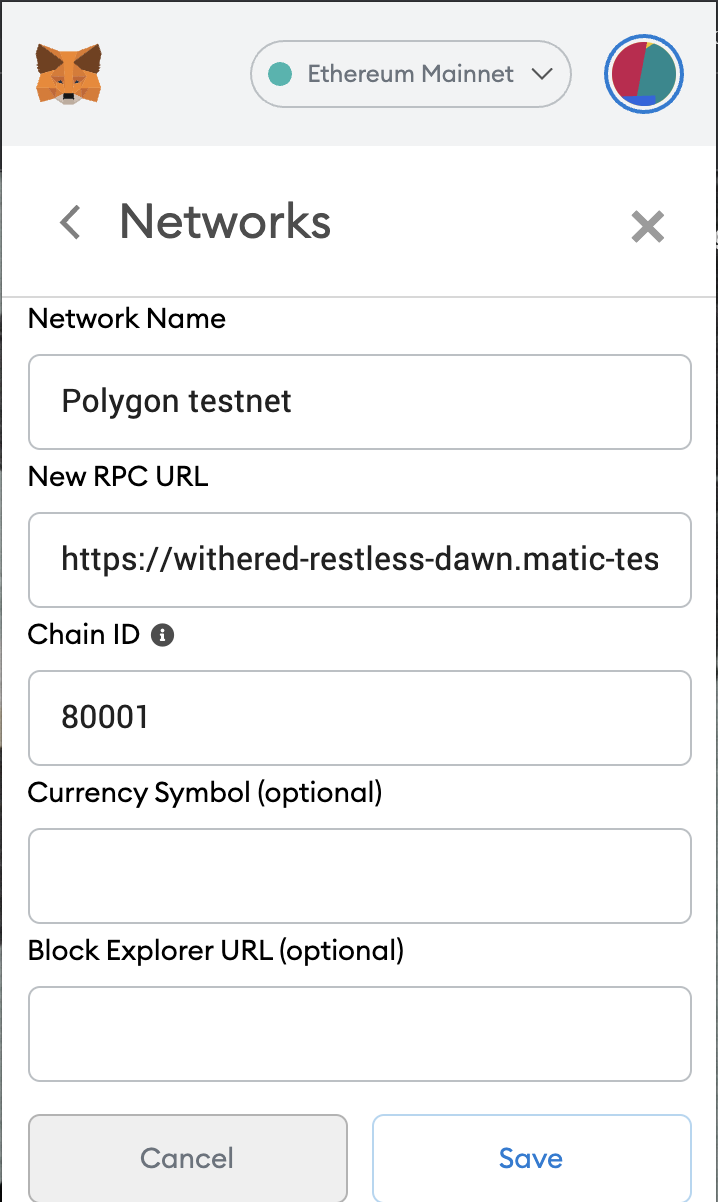
Getting test MATIC
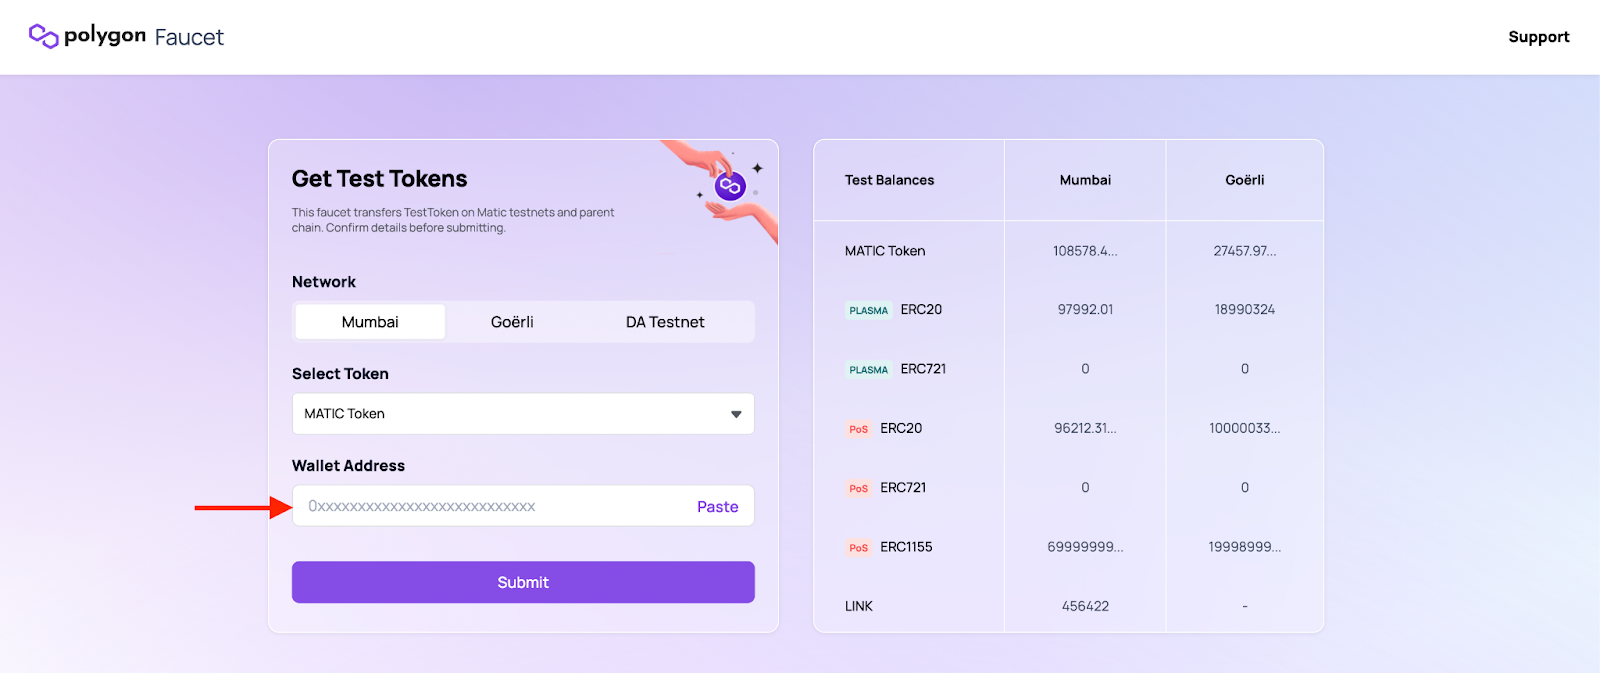
We will need some test MATIC to pay for gas fees to deploy and interact with the smart contract.
Copy your address from MetaMask, paste it into the address field of Polygon faucet, and click on submit. The faucet will send you 0.1 test MATIC.
Writing the contract
Time to write our smart contract, go to REMIX Ethereum and make a new solidity file, for example: mumbai01.sol
Paste the following code into your new Solidity script:
// SPDX-License-Identifier: MIT
pragma solidity >=0.4.0 <0.7.0;
contract SimpleStorage {
    uint storedData;
    function set(uint x) public {
        storedData = x;
    }
    function get() public view returns (uint) {
        return storedData;
    }
}
Explanation of the code above.
Line 1: Specifying SPDX license type, which is an addition after Solidity ^0.6.8.
Whenever the source code of a smart contract is made available to the public, these licenses can help resolve/avoid copyright issues. If you do not wish to specify any license type, you can use a special license UNLICENSED or simply skip the whole comment (it won’t result in an error, just a warning).
Line 2: On the first line, we are declaring which Solidity compiler we want to use. For instance, we are targeting any version between ≥ 0.4.0 그리고 <0.7.0.
Line 3: We are declaring our contract here and naming it as SimpleStorage.
Line 4: Declaring a uint (Unsigned Integer) variable named storedData, this variable will be used to store data.
Line 5-7: Next, we will add a set function, using which we will change the value of our variable storeData. The set function accepts a parameter x whose value we are placing into storeData. In addition, the function is marked as public which means that the function can be called outside the scope of this function and by other contracts.
Line 8-10: We will add a get function to retrieve the value of storeData variable. This function is marked as view, which tells the Solidity compiler that this is a read-only function.
Other than that, the get function also has returns (uint), which means that the function will return a uint value.
Deploying the contract
Now click on the Solidity logo from the left menu and click on compile. After successful compilation, a green tick will appear on the Solidity logo.
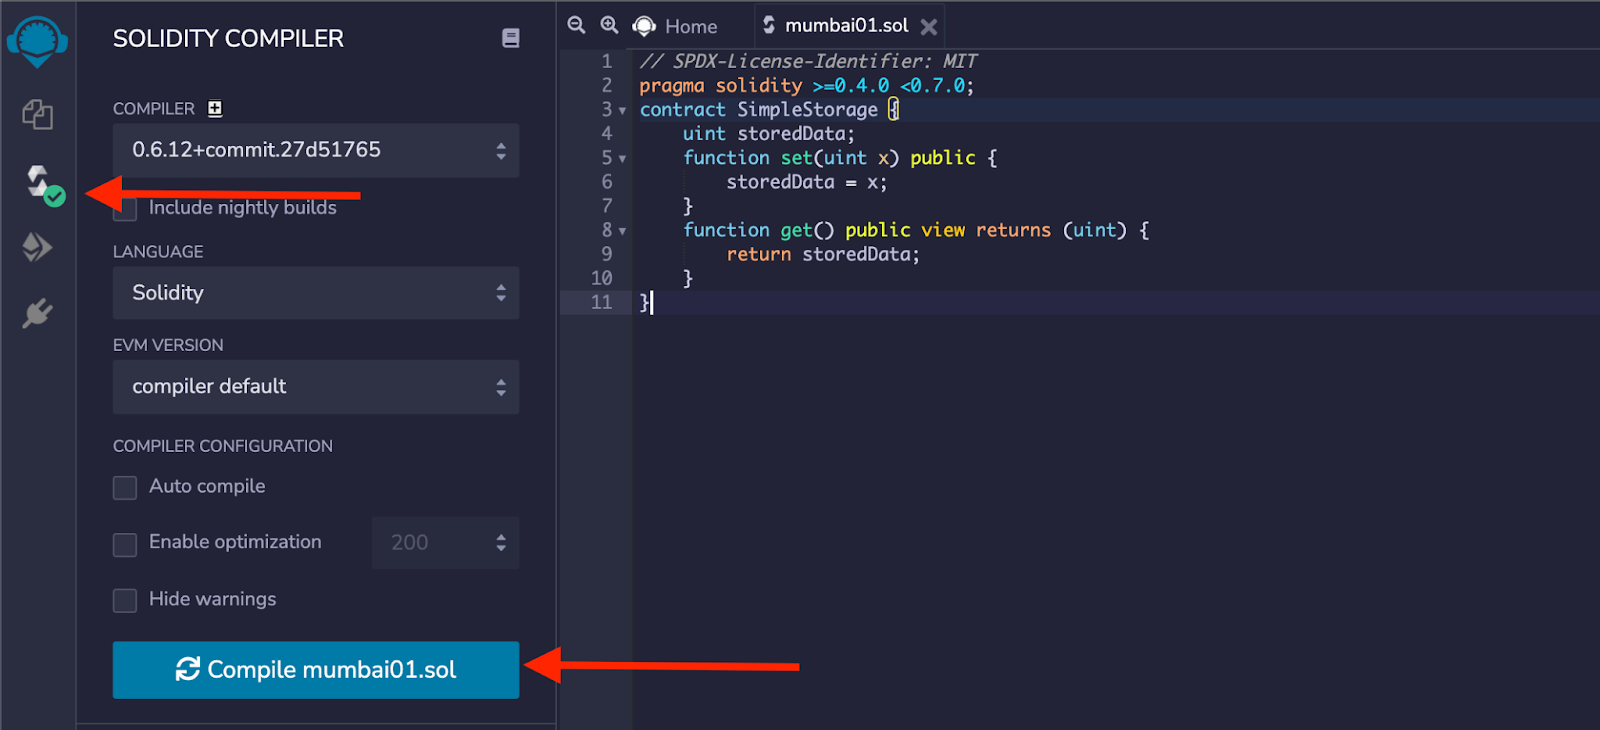
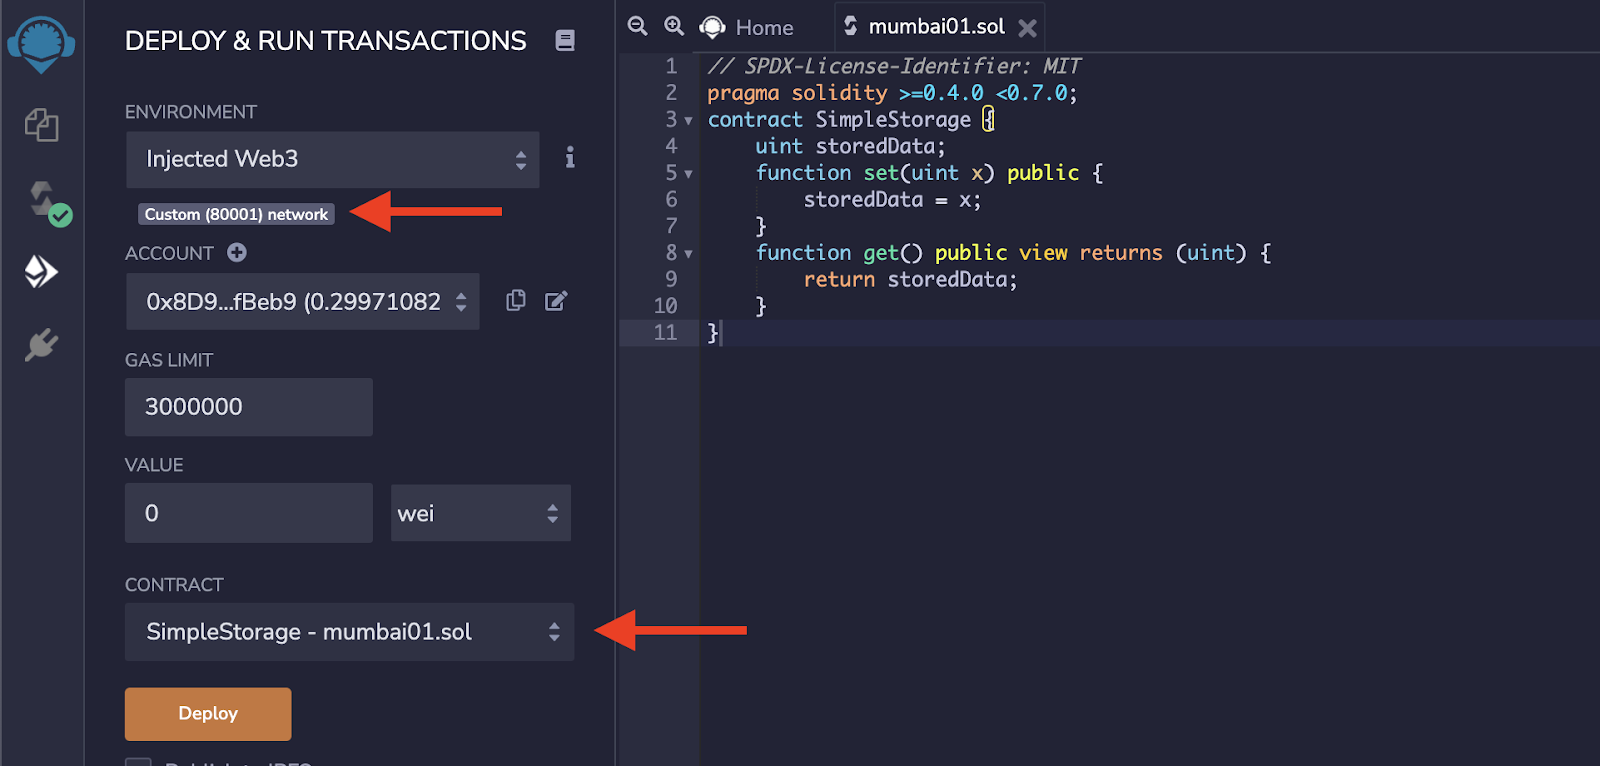
Now, click on the option from the left menu to deploy the complied contract and select Injected Web3 as the environment. Below the environment, the name and chainid of our network will appear. In this case, 'custom 80001' for Matic testnet. Make sure you have the correct contract name selected under the contract option. Once you have checked everything, click on "Deploy" and accept the transaction from the MetaMask pop-up window.
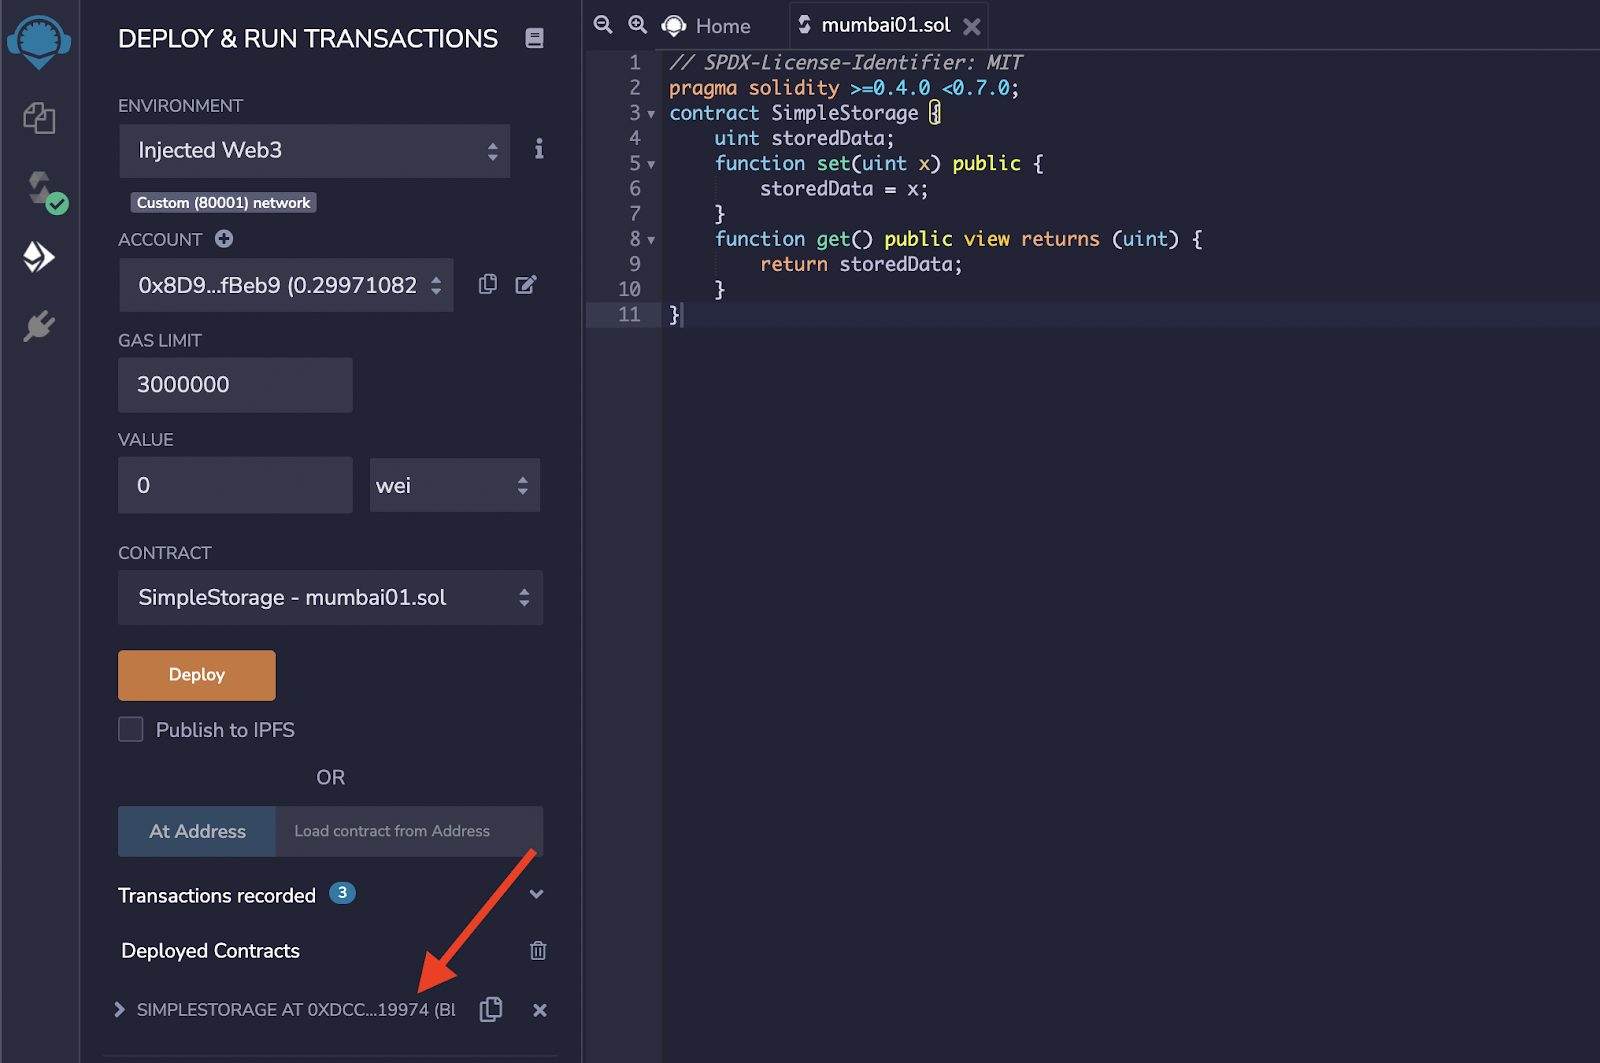
Once the contract deployment transaction is approved, the deployed contract will appear under the `Deployed Contracts` section.
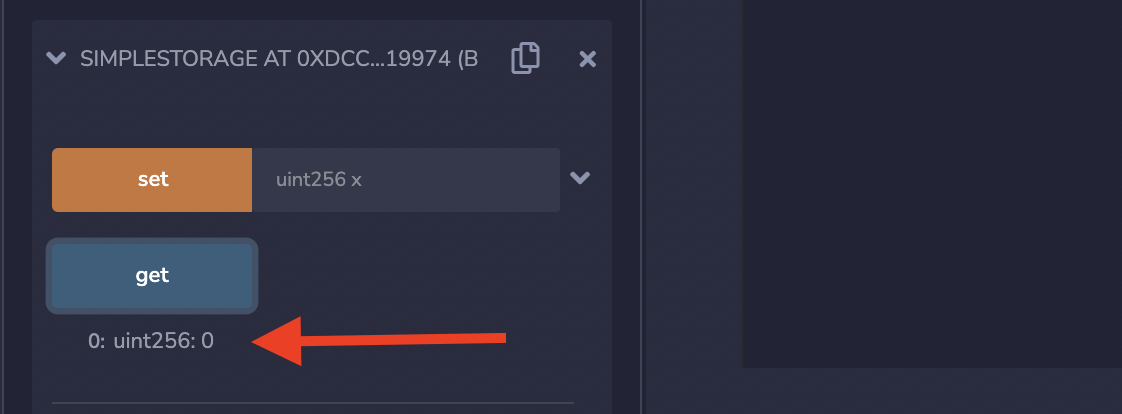
Expand the deployed contract and click on "get". It will return the value of storedData, which is currently zero since we have not input any number yet.
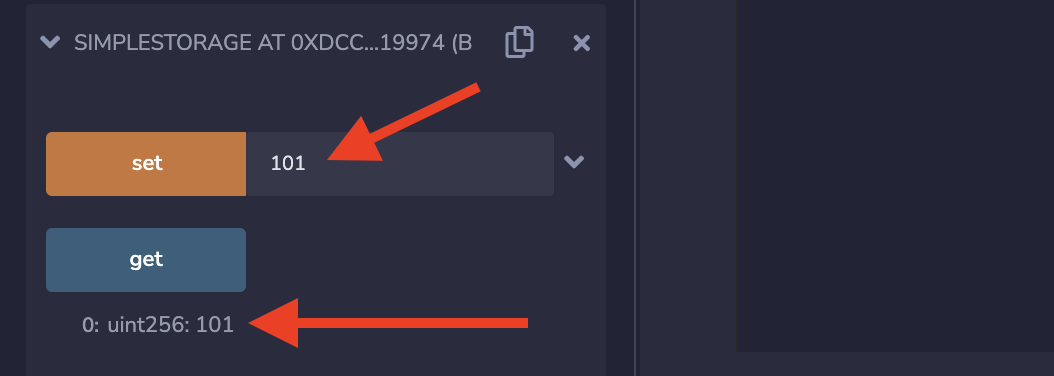
To input a value, enter a number in the field near the set button, click on "set" and approve the transaction from the MetaMask pop-up. Once the transaction is approved, the value of storedData will be the input number. To verify this, click on "get", and the previously input value will be printed.
This is how contracts are deployed Polygon!
Conclusion
A big thank you and kudos if you are reading this; you learned what MATIC/Polygon is, how to set up a Quicknode Polygon node in MetaMask, get test MATIC, deploy a smart contract, and interact with it!
Subscribe to our newsletter for more articles and guides on Ethereum. If you have any feedback, feel free to reach out to us via Twitter. You can always chat with us on our Discord community server, featuring some of the coolest developers you’ll ever meet :)