x402
Een voorbeeldapp die x402 Quicknode demonstreert voor toegang tot blockchain-API’s op basis van ‘pay-per-request’. Koppel je wallet, verifieer je identiteit via SIWE en roep RPC-/REST-methoden aan over meerdere blockchains heen met EVM-betalingshandtekeningen.



Overzicht
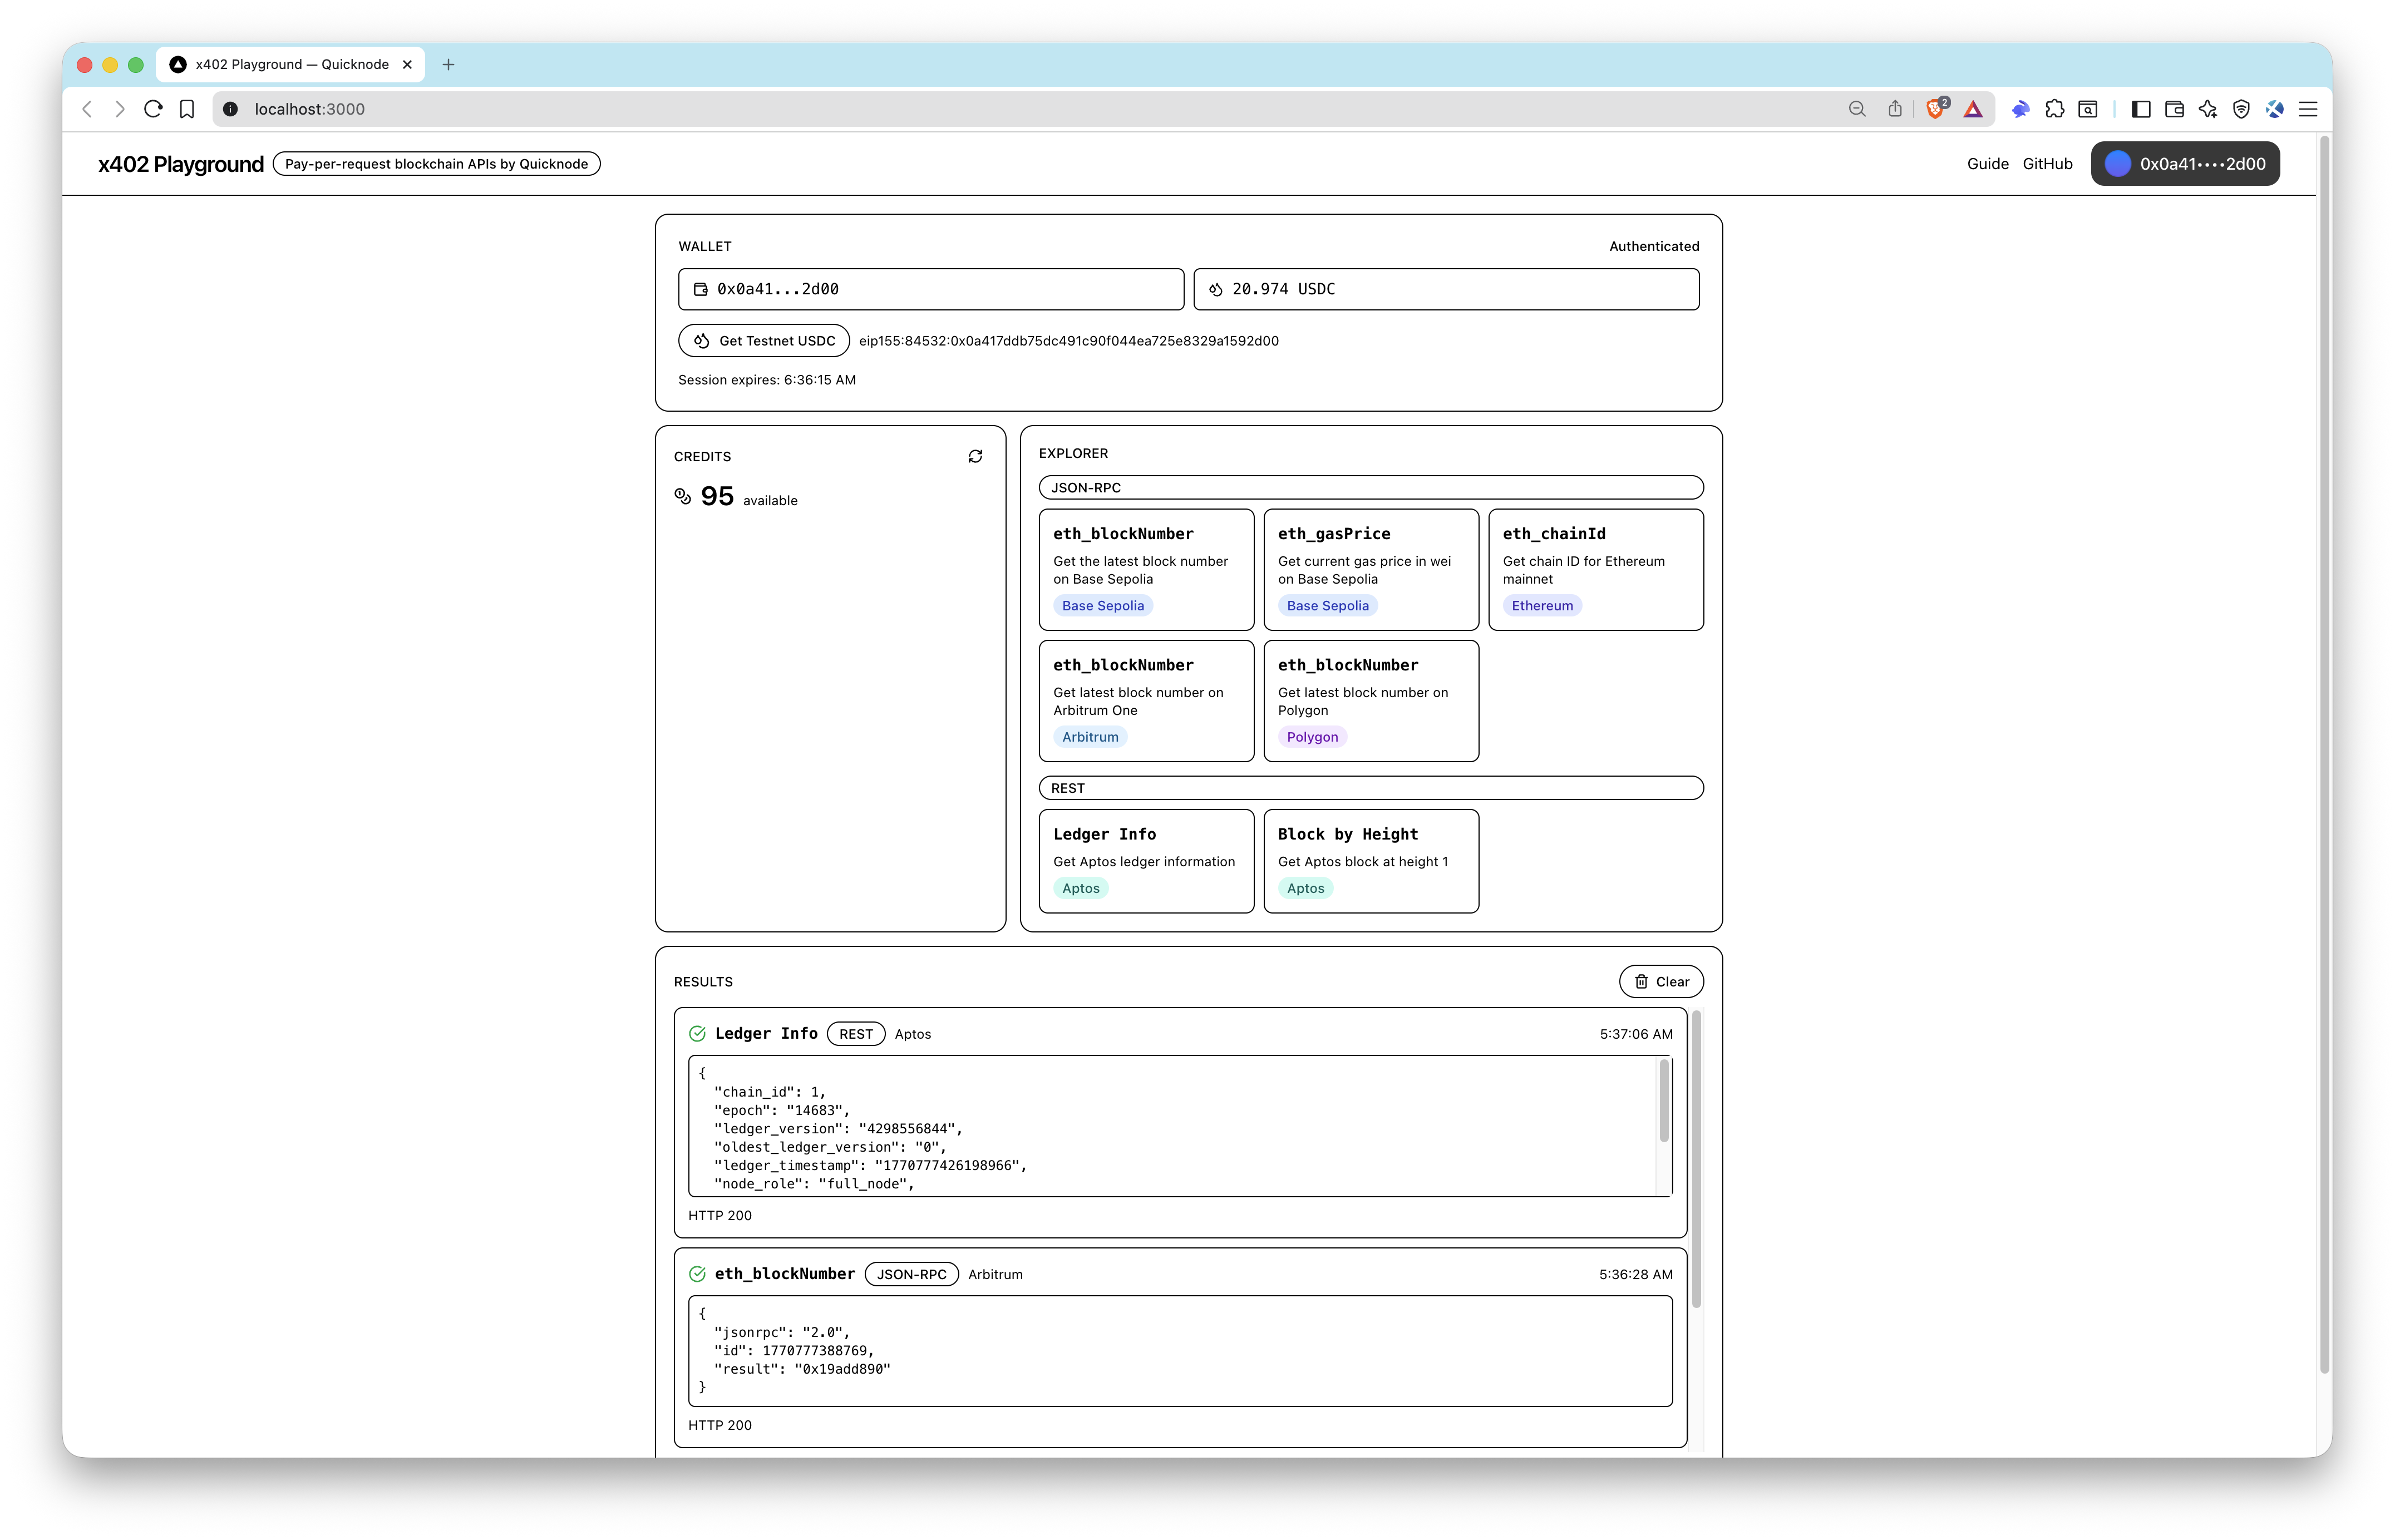
This sample app demonstrates Quicknode's x402 protocol for pay-per-request blockchain API access. The x402 protocol enables seamless micropayments for API calls — each request is paid for with an EVM signature, removing the need for traditional API keys or subscription plans.
Connect your wallet, authenticate with Sign-In with Ethereum (SIWE), and request testnet USDC from the faucet. When you execute blockchain methods, if you don't have enough credits, the app will automatically purchase test credits using your testnet USDC. Execute RPC/REST methods across multiple networks including Ethereum, Base Sepolia, Arbitrum, Polygon, and Aptos.
Architectuur
Wallet ──► SIWE Auth ──► JWT Token
                            │
                            ▼
              x402 Fetch Wrapper (JWT + EVM payment signature)
                            │
                            ▼
              Quicknode x402 API ──► Blockchain RPC / REST
Each API request is wrapped by @x402/fetch, which automatically signs a payment authorization using your connected wallet. The x402 backend verifies the signature, deducts credits, and proxies the request to the target blockchain network.
Kenmerken
- Wallet Connection via ConnectKit (MetaMask, Coinbase Smart Wallet, etc.)
- SIWE Authentication to receive a session JWT
- Testnet USDC Faucet on Base Sepolia — credits are automatically purchased with testnet USDC when needed
- Multi-Chain RPC/REST Execution across Ethereum, Base Sepolia, Arbitrum, Polygon, and Aptos
- Payment Metadata Inspection returned with each response
- JSON-RPC, REST, gRPC-Web, and WebSocket method support
Supported Methods
As all JSON-RPC, REST, gRPC-Web, and WebSocket methods are supported, you can call any method available on the target network. For demonstration, the app includes buttons for popular methods:
| Methode | Protocol | Netwerk |
|---|---|---|
eth_blockNumber | JSON-RPC | Base Sepolia, Arbitrum, Polygon |
eth_gasPrice | JSON-RPC | Base |
eth_chainId | JSON-RPC | Ethereum |
| Ledger Info | REST | Aptos |
| Block by Height | REST | Aptos |
Vereisten
Projectopbouw
src/
├── app/                  # Next.js App Router (pages & layouts)
├── components/
│   ├── providers.tsx     # Wagmi + React Query + ConnectKit providers
│   └── wallet-connection-shell.tsx
├── hooks/
│   ├── use-x402-auth.ts  # SIWE authentication state
│   ├── use-credits.ts    # Credit balance fetching
│   └── use-x402-fetch.ts # Authenticated fetch wrapper
└── lib/
    ├── constants.ts      # x402 URLs, chain IDs, contract addresses
    ├── methods.ts        # Available RPC/REST method definitions
    ├── types.ts          # TypeScript types
    └── x402.ts           # Core x402 logic (auth, credits, execution)
Omgevingsvariabelen
| Variabele | Standaard | Beschrijving |
|---|---|---|
NEXT_PUBLIC_X402_BASE_URL | https://x402.quicknode.com/ | x402 API base URL |
Maak een .env.local file to override, but the default points to the public x402 endpoint which you can use for testing without any setup.
NEXT_PUBLIC_X402_BASE_URL=https://x402.quicknode.com/
Aan de slag
1. Clone the repository
git clone https://github.com/quiknode-labs/qn-guide-examples.git
cd qn-guide-examples/sample-dapps/x402-quicknode
2. Installeer de afhankelijkheden
pnpm installeren
3. Start de ontwikkelingsserver
pnpm dev
Open http://localhost:3000 in your browser. Connect your wallet, authenticate with SIWE, request testnet USDC from the faucet, and start making pay-per-request API calls — credits are automatically purchased with your testnet USDC when needed.
Voorbeeld
- Maak een fork van de repository
- Maak een feature-branch aan:git checkout -b feature/amazing-feature
- Sla je wijzigingen op:git commit -m "Geweldige functie toevoegen"
- Pusht je branch:git push origin feature/amazing-feature
- Dien een pull-verzoek in.