Interact with Smart Contracts using the Command Line
Interact with Smart Contracts using the Command Line
In the last article, we learned how to create and manage wallets and addresses using sbt-ethereum, so we strongly recommend reading that article first. This week, we will learn how to interact with Smart Contracts using sbt-ethereum!

May 8, 2019 — 5 min read

Using sbt-ethereum to interact with Ethereum Smart Contracts
In the last article, we learned how to create and manage wallets and addresses using sbt-ethereum, so we strongly recommend reading that article first. This week, we will learn how to interact with Smart Contracts using sbt-ethereum!
First, start sbt-ethereum by moving into sbt directory and running this command:
./sbtw
Now let’s check our basic set up:
ethAddressAliasList
ethNodeChainIdPrint
ethNodeUrl
ethAddressBalance default-sender
These commands will help us know a couple of things:
Which addresses are configured and what are their alias names?
What is current Ethereum network ID (chain ID)?
What is the configured node URL?
What is the balance of my default-sender address? (you can check for other addresses too!)
Remember, sbt supports rich tab completion, so use that!
Let’s switch to Ethereum testnet Ropsten:
Change chain ID using this command (
Ropstennetwork ID — 3)
ethNodeChainIdOverrideSet 3
Change Node URL3
By default, sbt has configured a Node URL for all the networks (they don’t recommend it for production), but if you want to use own URL you can set it by using this command. Wanna run your own Ethereum Node? Signup for Quicknode.
ethNodeUrlOverrideSet <Your node url>
Create a new Wallet:
ethKeystoreWalletV3Create
Let’s give an Alias to our address, so we don’t need to copy paste it again:
ethAddressAliasSet ropsten <Your Node address>
Now, if you don’t have any Ether, get it from the Ropsten faucet. Once you get the testnet Ether, you can check your balance using:
ethAddressBalance ropsten
這裡, ropsten is an alias we gave to our wallet address.
Interacting with the Smart Contracts
Let’s interact with a Smart Contract now. I have deployed a Smart Contract on the Ropsten network so we can play with it. Here is the deployed Contract at address 0xBaC18C78D7BEAEbc99EBc2C3392Befe9b3A6A347
pragma solidity ^0.4.10;

contract Fortune {
  string[] public fortunes; // automatically generates an indexed getter (only)

  function Fortune( string initialFortune ) public {
    addFortune( initialFortune );
  }

  function addFortune( string fortune ) public {
    fortunes.push( fortune );

    FortuneAdded( msg.sender, fortune );
  }

  function drawFortune() public view returns ( string fortune ) {
    fortune = fortunes[ shittyRandom() % fortunes.length ];
  }

  function countFortunes() public view returns ( uint count ) {
    count = fortunes.length;
  }

  function shittyRandom() private view returns ( uint number ) {
    number = uint( block.blockhash( block.number - 1 ) );
  }

  event FortuneAdded( address author, string fortune );
}
To interact with the Smart Contract, we need to first load it on sbt. Let’s see how we’ll do that:
Create an alias for contract address:
ethAddressAliasSet fortune 0xBaC18C78D7BEAEbc99EBc2C3392Befe9b3A6A347
Just double check if it is set correctly usingethAddressAliasList .
Next, we need to upload the ABI of the fortune contract, so we can run contracts functions using the command line. There are two ways to load an ABI on sbt :
Manually
Using Etherscan API
Yes, you can integrate Etherscan with sbt! But we do this manually in this tutorial. To get the ABI, follow these steps:
Go to http://ropsten.etherscan.io/ (our contract is on Ropsten network)
Plug the address of the contract —
0xBaC18C78D7BEAEbc99EBc2C3392Befe9b3A6A347— into the search field in the upper right and hit “Go”. (Etherscan doesn’t know anything about our sbt-ethereum aliasfortune, so we can’t use that!)On the page that comes up, look for a tab that says “Code” with a small green checkmark. Click on that.
Scroll down until you see the “Contract ABI” section.
Copy the ABI using the copy button at the top right corner of the Contract ABI box.
Next, upload this ABI on sbt using below command:
ethContractAbiDefaultImport fortune
Here fortune is an alias for our contract address, remember?
Before calling Smart Contract functions, we will override our default sender address, so all the transactions go through that address.
ethAddressSenderOverride ropsten
Here ropsten is alias name for our wallet address.
Before moving forward, make a back up here. Always make backups! Otherwise, your work may get lost.
ethShoeboxBackup
Calling Smart Contract Functions
Now we’re all set! We can call Smart Contract functions now.
We have two types of command to interact with the Smart Contract:
ethTransactionView — For reading from the Smart Contract
ethTransactionInvoke — For writing into the Smart Contract
Our contract has some functions like:
addFortune — To add a new fortune
countFortunes — To get the total number of fortune
drawFortune — to randomly draw a new fortune.
And fortunes array, where all the fortunes are stored.
So let’s draw a fortune:
ethTransactionView fortune drawFortune
Result:
[info] The function 'drawFortune' yields 1 result.
[info]  + Result 1 of type 'string', named 'fortune', is "You will meet someone special today!!"
[success] Total time: 1 s, completed 7 May, 2019 3:00:43 PM
Let’s also add a fortune using this command:
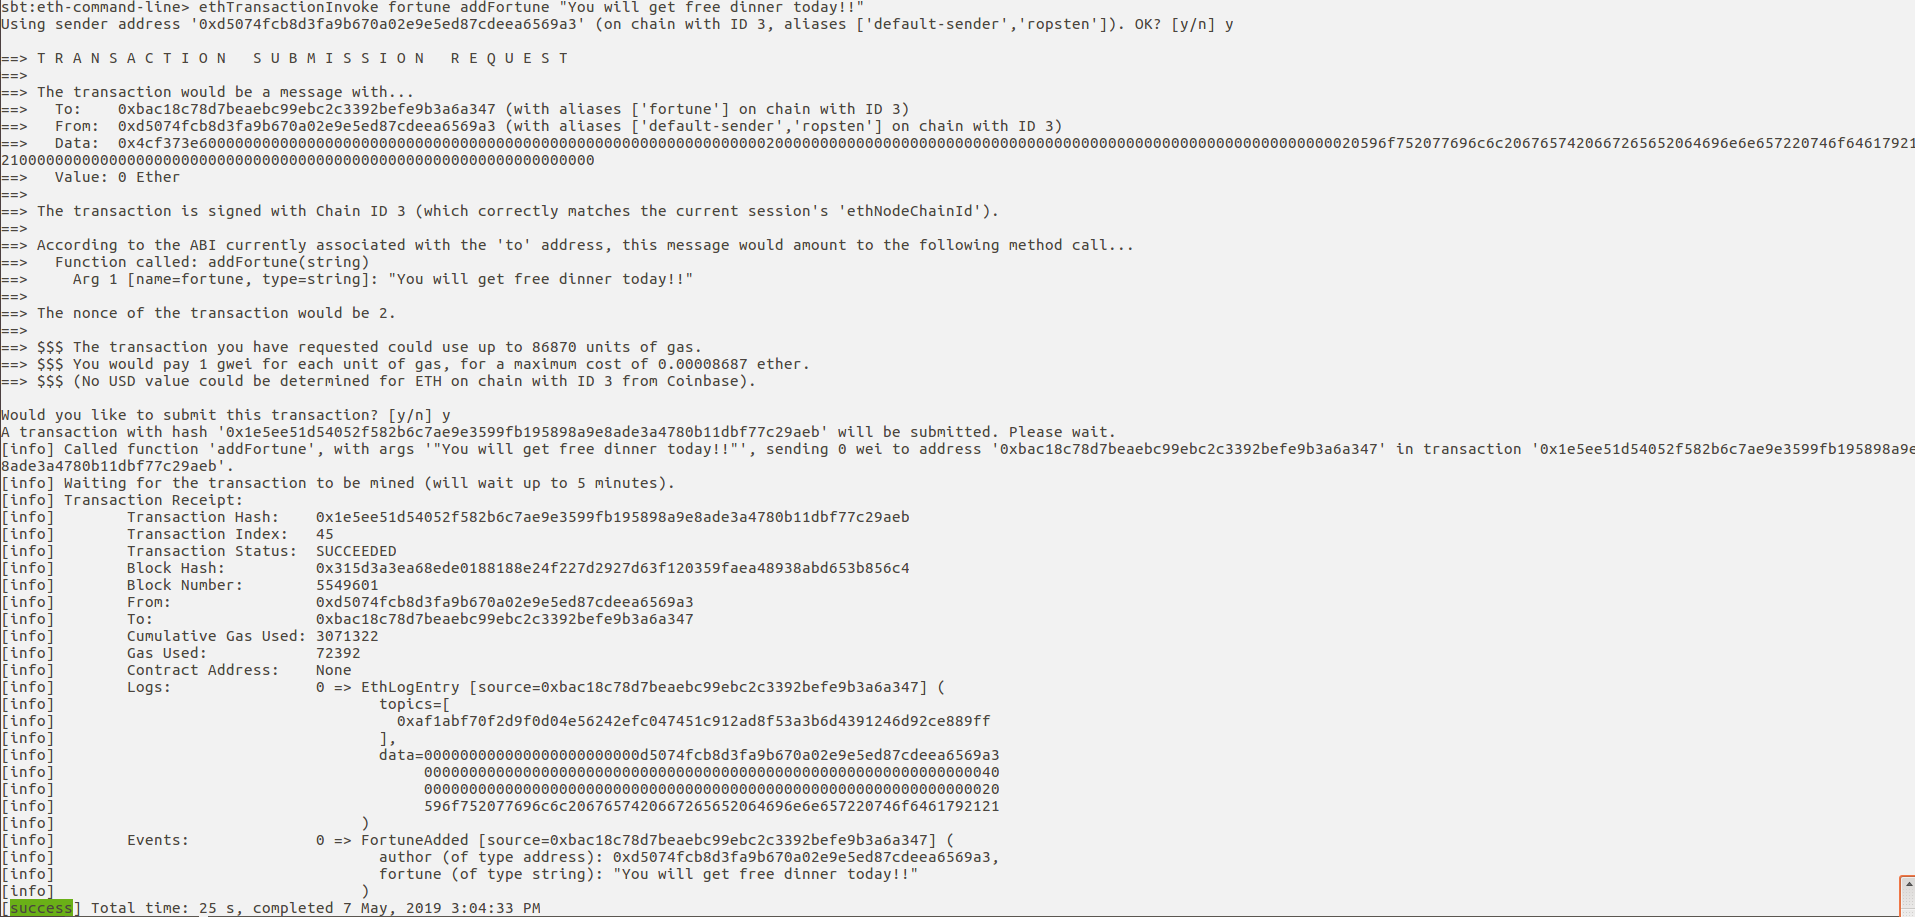
ethTransactionInvoke fortune addFortune "You will get free dinner today!!"
This will ask your passphrase (which you used while creating the wallet), create the transaction, and submit it. Once mined, it will print the transaction receipt in the terminal. Below is how it looks like:
You can check our fortune message from the fortunes array too.
ethTransactionView fortune fortunes 1
Here you can see how we are passing 1 as an argument. When you will Tab, it will show what kind of variable you need to pass. Below is an example:
sbt:eth-command-line> ethTransactionView fortune fortunes <mapping key, of type uint256> sbt:eth-command-line> ethTransactionView fortune fortunes 1 [info] The function 'fortunes' yields 1 result. [info] + Result 1 of type 'string' is "You will kick some a** today!"[success] Total time: 2 s, completed 7 May, 2019 3:10:15 PM
結論
That’s it for today! In the next article, we will create and deploy a Smart contract using sbt command line. Let us know what you think in the comments section below!
需要專案協助或有任何疑問嗎?請透過此表單、TwitterQuicknode 或在Discord 上聯絡我們!
關於Quicknode
Quicknode 成立於 2017 年,為開發者與企業Quicknode 機構級的區塊鏈基礎設施。憑藉 99.99% 的正常運行時間以及對 80 多條區塊鏈的支持,各團隊得以在無需妥協的情況下,開發並擴展鏈上應用程式。
隨時掌握最新資訊
將最新的工程見解、產品更新及 Web3 新聞直接送至您的收件匣。