
4 min read
概述
On Ethereum, before being included in a block, transactions remain in what is called a pending transaction queue, tx pool, or mempool - they all mean the same thing. Miners then select a subset of all pending transactions from this queue to mine - there are a lot of benefits to being able to access and analyze this information for traders, people who want to save fees on gas, and more.
In this guide, we will learn how to stream pending transactions from Ethereum and similar chains with ethers.js.
Prefer a video walkthrough? Follow along with Noah and learn how to stream pending transactions with Ethers.js in 8 minutes.
先决条件
- Node.js installed on your system
- A text editor
- Terminal aka Command Line
- An Ethereum node
What is a Pending Transaction?
To write or update any on the Ethereum network, someone needs to create, sign and send a transaction. Transactions are how the external world communicates with the Ethereum network. When sent to the Ethereum network, a transaction stays in a queue known as mempool where transactions wait to be processed by miners - the transactions in this waiting state are known as pending transactions. The small fee required to send a transaction is known as a gas; Transactions get included in a block by miners, and they are prioritized based on the amount of gas price they include which goes to the miner.
You can get more information on mempool and pending transactions here.
Why do we want to see pending transactions?
By examining pending transactions, one can do the following:
- Estimate gas: We can theoretically look at pending transactions to predict the next block's optimal gas price.
- For Trading analytics: We can analyze pending transactions on decentralized exchanges. To predict market trends using the analysis.
- Front running: In DeFi, you can preview upcoming oracle related transactions related to price and potentially issue a liquidation for a vault on MKR, COMP, and other protocols.
There can be many use cases for streaming pending transactions - we won't cover them all here.
We’ll use ethers.js to stream these pending transactions with WebSockets. Let’s see how to install ethers.js before writing our code.
Installing ethers.js
Our first step here would be to check if node.js is installed on the system or not. To do so, copy-paste the following in your terminal/cmd:
$ node -v
If not installed, you can download the LTS version of NodeJS from the official website.
Now that we have node.js installed let’s install the ethers.js library using npm (Node Package Manager), which comes with Node.js.
$ npm i ethers@5.7
Make sure that your Ethers.js installation version is 5.7
The most common issue at this step is an internal failure with `node-gyp.` You can follow node-gyp installation instructions here.
Note: You will need to have your python version match one of the compatible versions listed in the instructions above if you encounter the node-gyp issue.
Another common issue is a stale cache; clear your npm cache by simply typing the below into your terminal:
$ npm cache clean
If everything goes right, ethers.js will be installed on your system.
Set Up Your Quicknode Ethereum Endpoint
We could use pretty much any Ethereum client, such as Geth or OpenEthereum (fka Parity), for our purposes today. Since to stream incoming new pending transactions, a node connection must be stable and reliable; it’s a challenging task to maintain a node, we'll just create a free Quicknode account here and easily set up an Ethereum endpoint. After you've created your free Ethereum endpoint, copy your WSS (WebSocket) Provider endpoint:
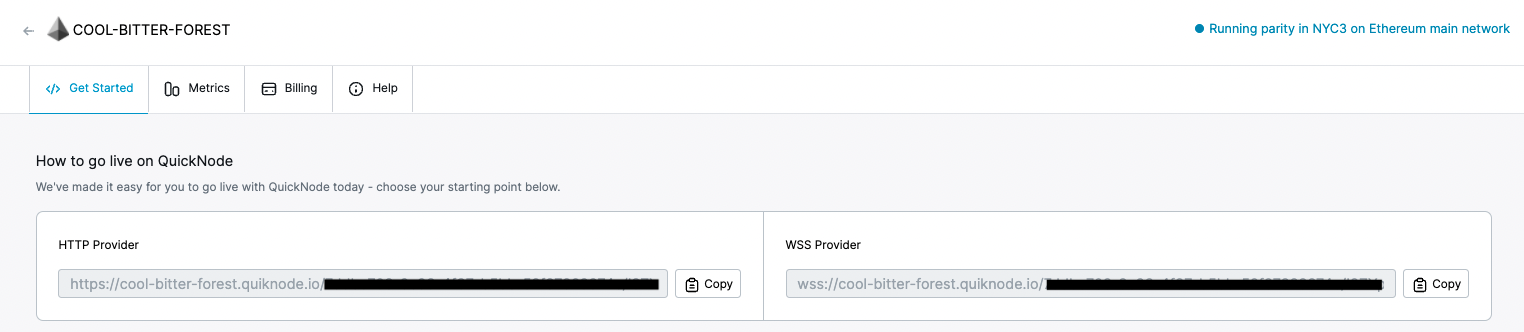
You'll need this later, so copy it and save it.
Streaming pending transactions
Create a short script file pending.js, which will have a transaction filter on incoming pending transactions. Copy-paste the following in the file:
var ethers = require("ethers");
var url = "ADD_YOUR_ETHEREUM_NODE_WSS_URL";

var init = function () {
  var customWsProvider = new ethers.providers.WebSocketProvider(url);

  customWsProvider.on("pending", (tx) => {
    customWsProvider.getTransaction(tx).then(function (transaction) {
      console.log(transaction);
    });
  });

  customWsProvider._websocket.on("error", async () => {
    console.log(`Unable to connect to ${ep.subdomain} retrying in 3s...`);
    setTimeout(init, 3000);
  });
  customWsProvider._websocket.on("close", async (code) => {
    console.log(
      `Connection lost with code ${code}! Attempting reconnect in 3s...`
    );
    customWsProvider._websocket.terminate();
    setTimeout(init, 3000);
  });
};

init();
So go ahead and replace `ADD_YOUR_ETHEREUM_NODE_WSS_URL` with the WSS (WebSocket) provider from the section above.
Explanation of the code above.
Line 1: Importing the ethers library.
Line 2: Setting our Ethereum node URL.
Line 4: Creating the init function.
Line 5: Instantiating an ethers WebSocketProvider instance.
Line 7: Creating an event listener for pending transactions that will run each time a new transaction hash is sent from the node.
Line 8-10: Getting the whole transaction using the transaction hash obtained from the previous step and printing the transaction in the console.
Line 13-16: A function to restart the WebSocket connection if the connection encounters an error.
Line 17-21: A function to restart the WebSocket connection if the connection ever dies.
Line 24: Calling the init function.
Now, let’s run our script.
$ node pending
If everything goes right, you must see incoming pending transactions. Something like this
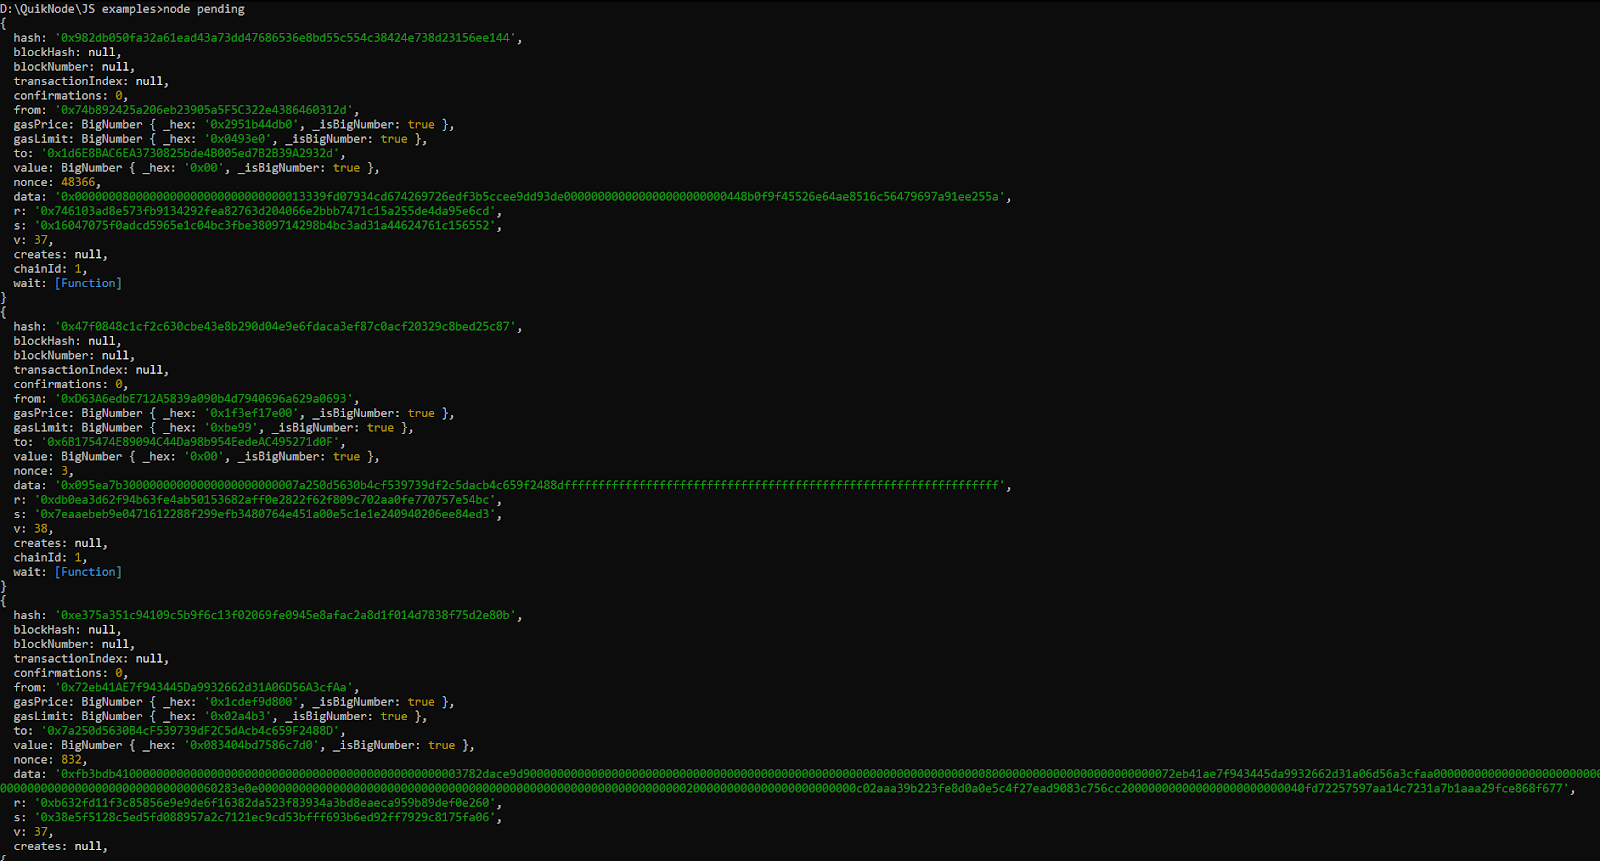
Use Ctrl+c to stop the script.
结论
Here we saw how to get pending transactions from the Ethereum network using ethers,js. Learn more about Event filters and Transaction filters in ethers.js in their documentation.
Subscribe to our newsletter for more articles and guides on Ethereum. If you have any feedback, feel free to reach out to us via Twitter. You can always chat with us on our Discord community server, featuring some of the coolest developers you’ll ever meet :)