Intermitente Solana
La aplicación Solana Blinker te permite crear Solana y analizar las URL Solana para obtener las acciones correspondientes.



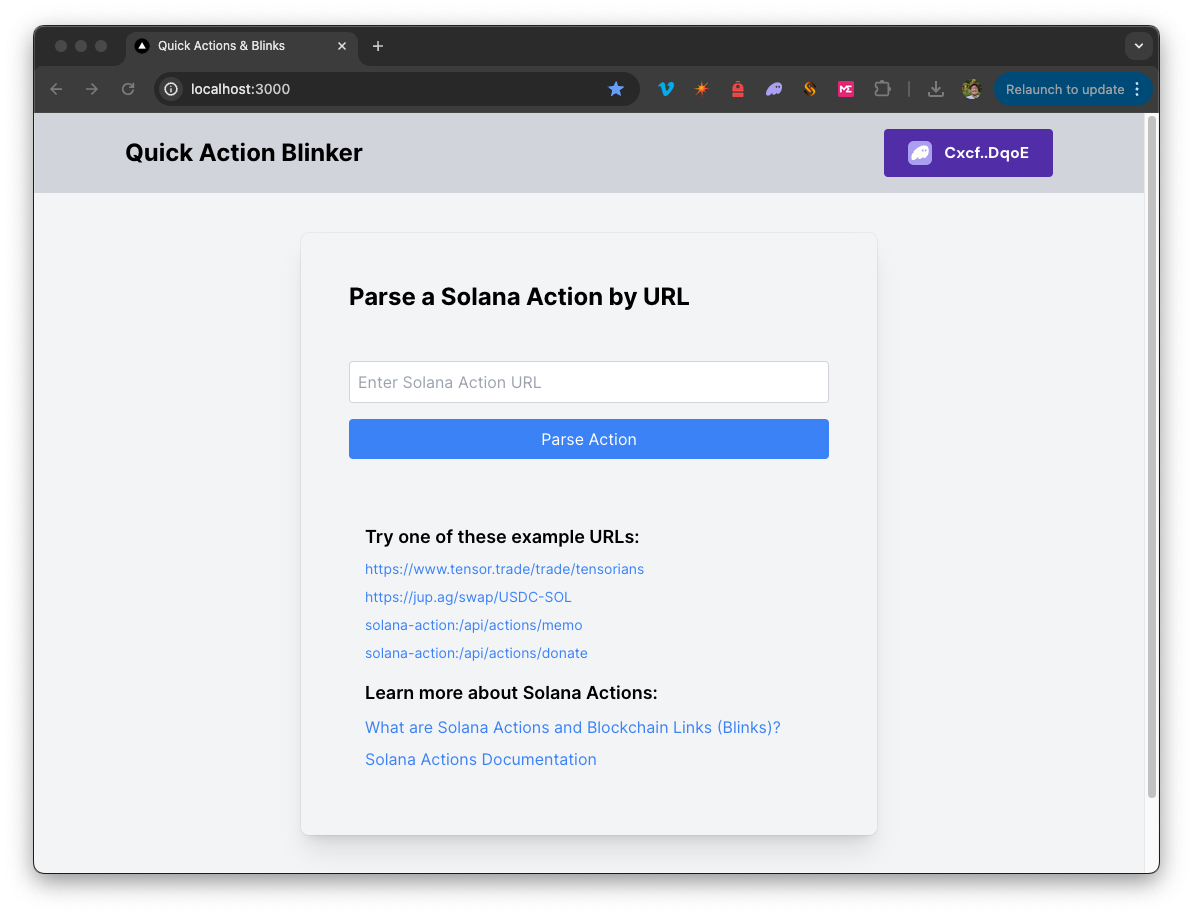
Resumen
La aplicación Solana Blinker te permite crear e interactuar con Solana mediante el análisis de las URL Solana para obtener las acciones correspondientes. Con esta herramienta, puedes introducir una URL de acción válida para ver sus detalles, conectar tu monedero para ejecutar las acciones disponibles y crear nuevas acciones siguiendo la estructura proporcionada. Tanto si analizas acciones existentes como si creas otras nuevas, esta aplicación simplifica el proceso de interacción con las URL Solana .
Utiliza un Next.js 14 proyecto puesto en marcha con create-next-app.
Antecedentes
Solana ofrecen una forma estandarizada de enviar transacciones o mensajes firmables desde una aplicación directamente al usuario. Los Blinks son aplicaciones de cliente que convierten Solana en interfaces de usuario compartibles y ricas en metadatos para interactuar con las Actions y ejecutarlas. Para obtener más información, consulta nuestra guía sobre Solana .
Primeros pasos
Instalar las dependencias
Abre el directorio del proyecto:
cdsolana
A continuación, instala las dependencias:
npm instalar
# o
yarn
# o
pnpm instalar
# o
bun install
Configurar variables de entorno
Asegúrate de tener a mano unendpoint Quicknode endpoint conseguir uno gratis aquí.
- Cambiar nombre
.env.examplea.env.localy actualízalo con tu EndpointSolana Quicknode Solana . - Asegúrate de actualizar el clúster para garantizar que las URL de tus transacciones apunten al explorador correcto (utiliza únicamente los valores de la enumeración proporcionados en el
.env.examplearchivo).
QN_ENDPOINT=mainnet
mainnet# mainnet| devnet | testnet  local
En primer lugar, ejecuta el servidor de desarrollo:
npm ejecutar dev
# o
yarn dev
# o
pnpm dev
# o
bun dev
Abre http://localhost:3000 en tu navegador para ver el resultado.
Cómo utilizar la Dapp
- Introduce una URL Solana válida en el campo de entrada. Puedes copiar y pegar uno de los enlaces de ejemplo que aparecen en la página de inicio.
- Haz clic en «Analizar acción» para ver los detalles de la acción analizada.
- Verás los detalles analizados de la URL de la acción. Para ver y ejecutar las acciones disponibles, conecta un monedero.
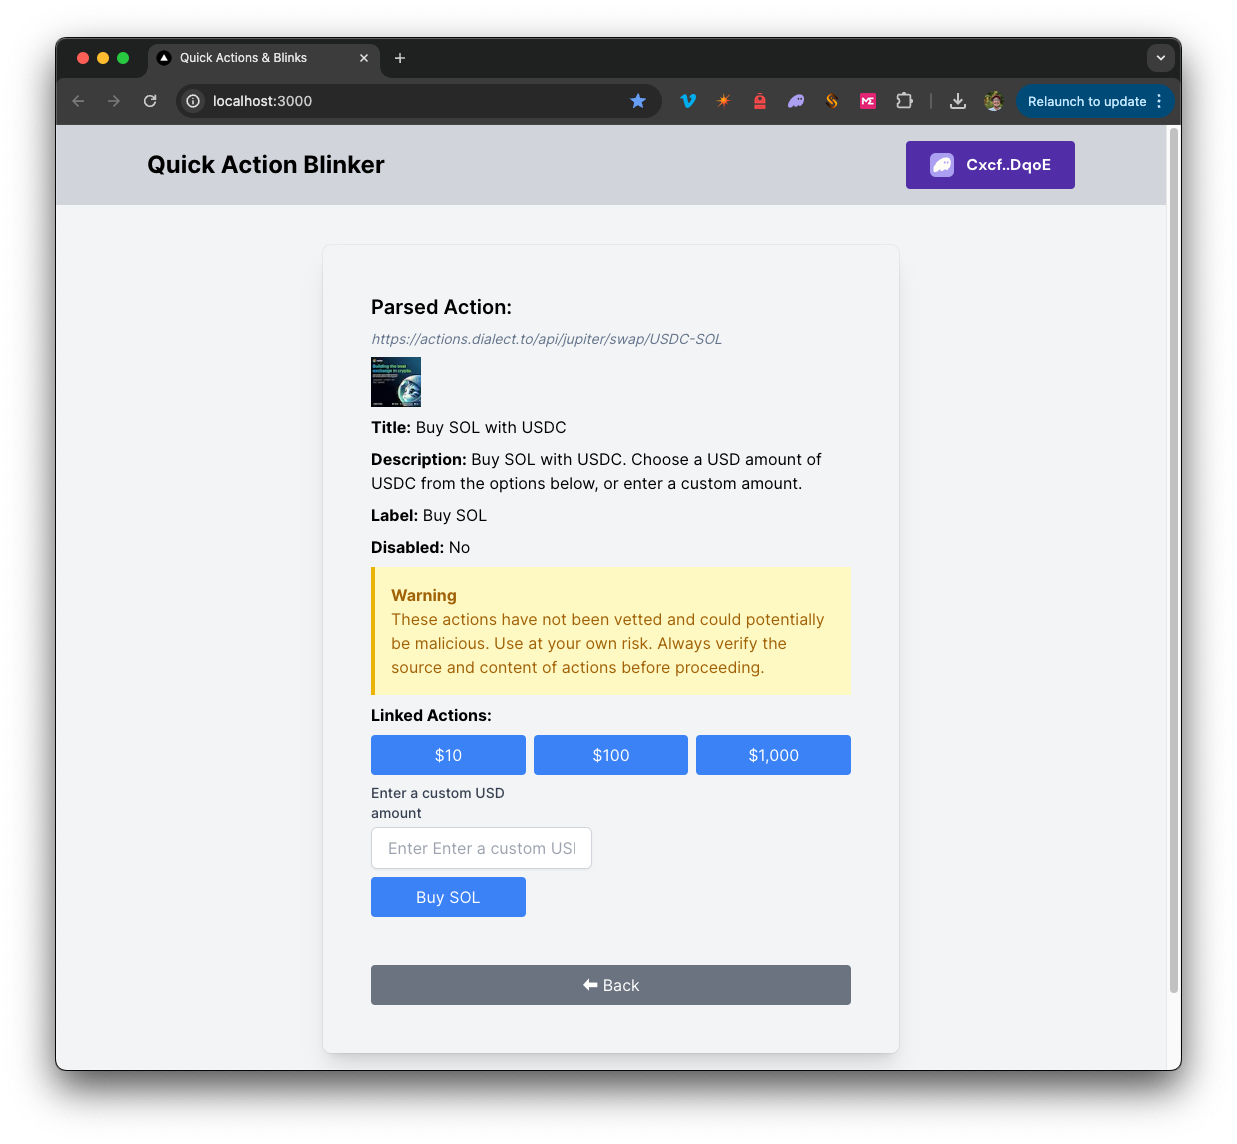
- Haz clic en cualquiera de las acciones disponibles para ejecutarla (tendrás que firmar la transacción cuando te lo solicite tu monedero).
- Puedes crear acciones adicionales siguiendo la estructura que se indica en
solana
Arquitectura
src/
├── app/
│   ├── page.tsx # Página principal de Blink
│   └── layout.tsx # Diseño de la página
│   └── api/
│       └── solana
│           └── sendAndConfirm/route.ts # Enviar y confirmar transacción
│       └── acciones/
│           └── memo/route.ts  # Crea una Solana «Memo» de Solana
│           └── donate/route.ts  # Crea una Solana «Donate» de Solana
└── componentes/
│   ├── ActionComponents/     # Incluye componentes para analizar y ejecutar Solana
│   ├── Blink.tsx        # Componente principal
│   ├── SolanaProviders.tsx     # Proveedores de contexto del adaptador de monedero
│   └── [componentes de apoyo]
└── hooks/
│   ├── useActionFetch.ts  # Obtiene y analiza Solana a partir de URL
│   └── useTransactionProcessor.ts  # Ejecuta Solana
└── utils/ # incluye diversas funciones de utilidad y constantes
Implementar en Vercel
Documentación de Next.js
Para obtener más información sobre Next.js, echa un vistazo a los siguientes recursos:
- Documentación de Next.js: descubre las funciones y la API de Next.js.
- Aprende Next.js: un tutorial interactivo sobre Next.js.
Puedes echar un vistazo al repositorio de Next.js en GitHub: ¡tus comentarios y aportaciones son bienvenidos!
- Hacer un fork del repositorio
- Crear una rama de características:git checkout -b feature/amazing-feature
- Guarda los cambios:git commit -m "Añadir una función increíble"
- Envía tu rama:git push origin feature/amazing-feature
- Abre una solicitud de incorporación de cambios.