Carte thermique Hyperliquid
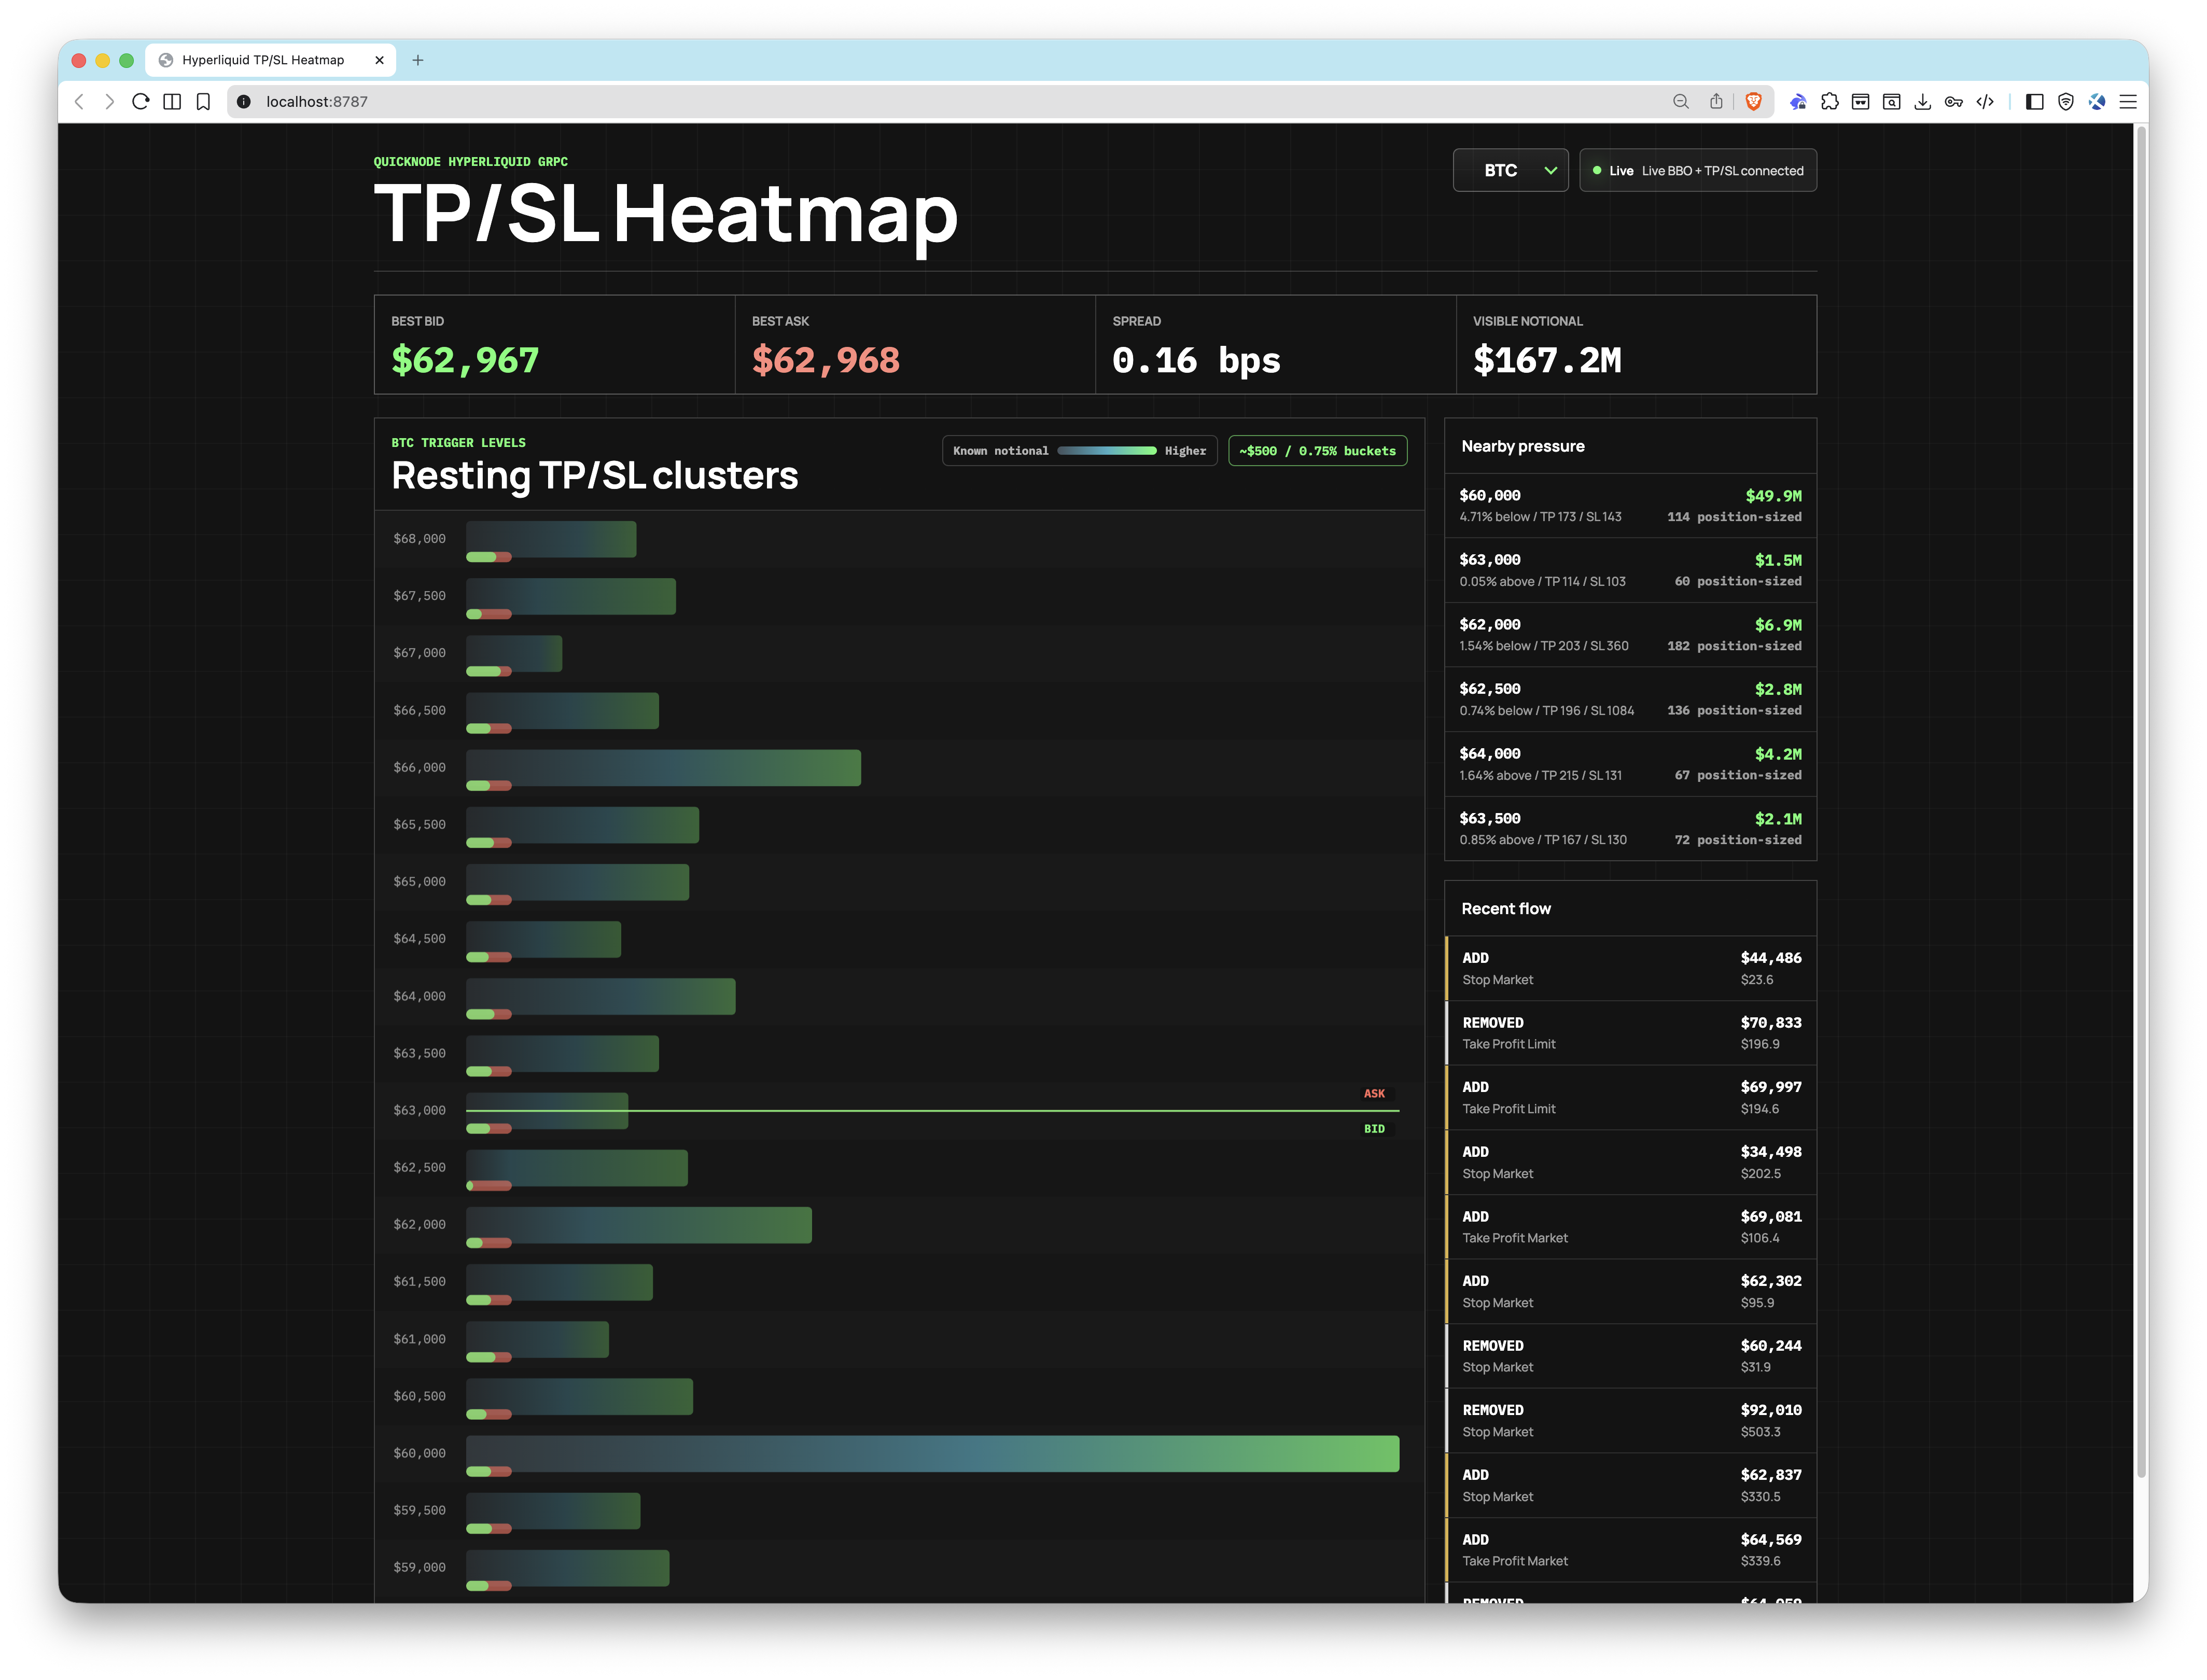
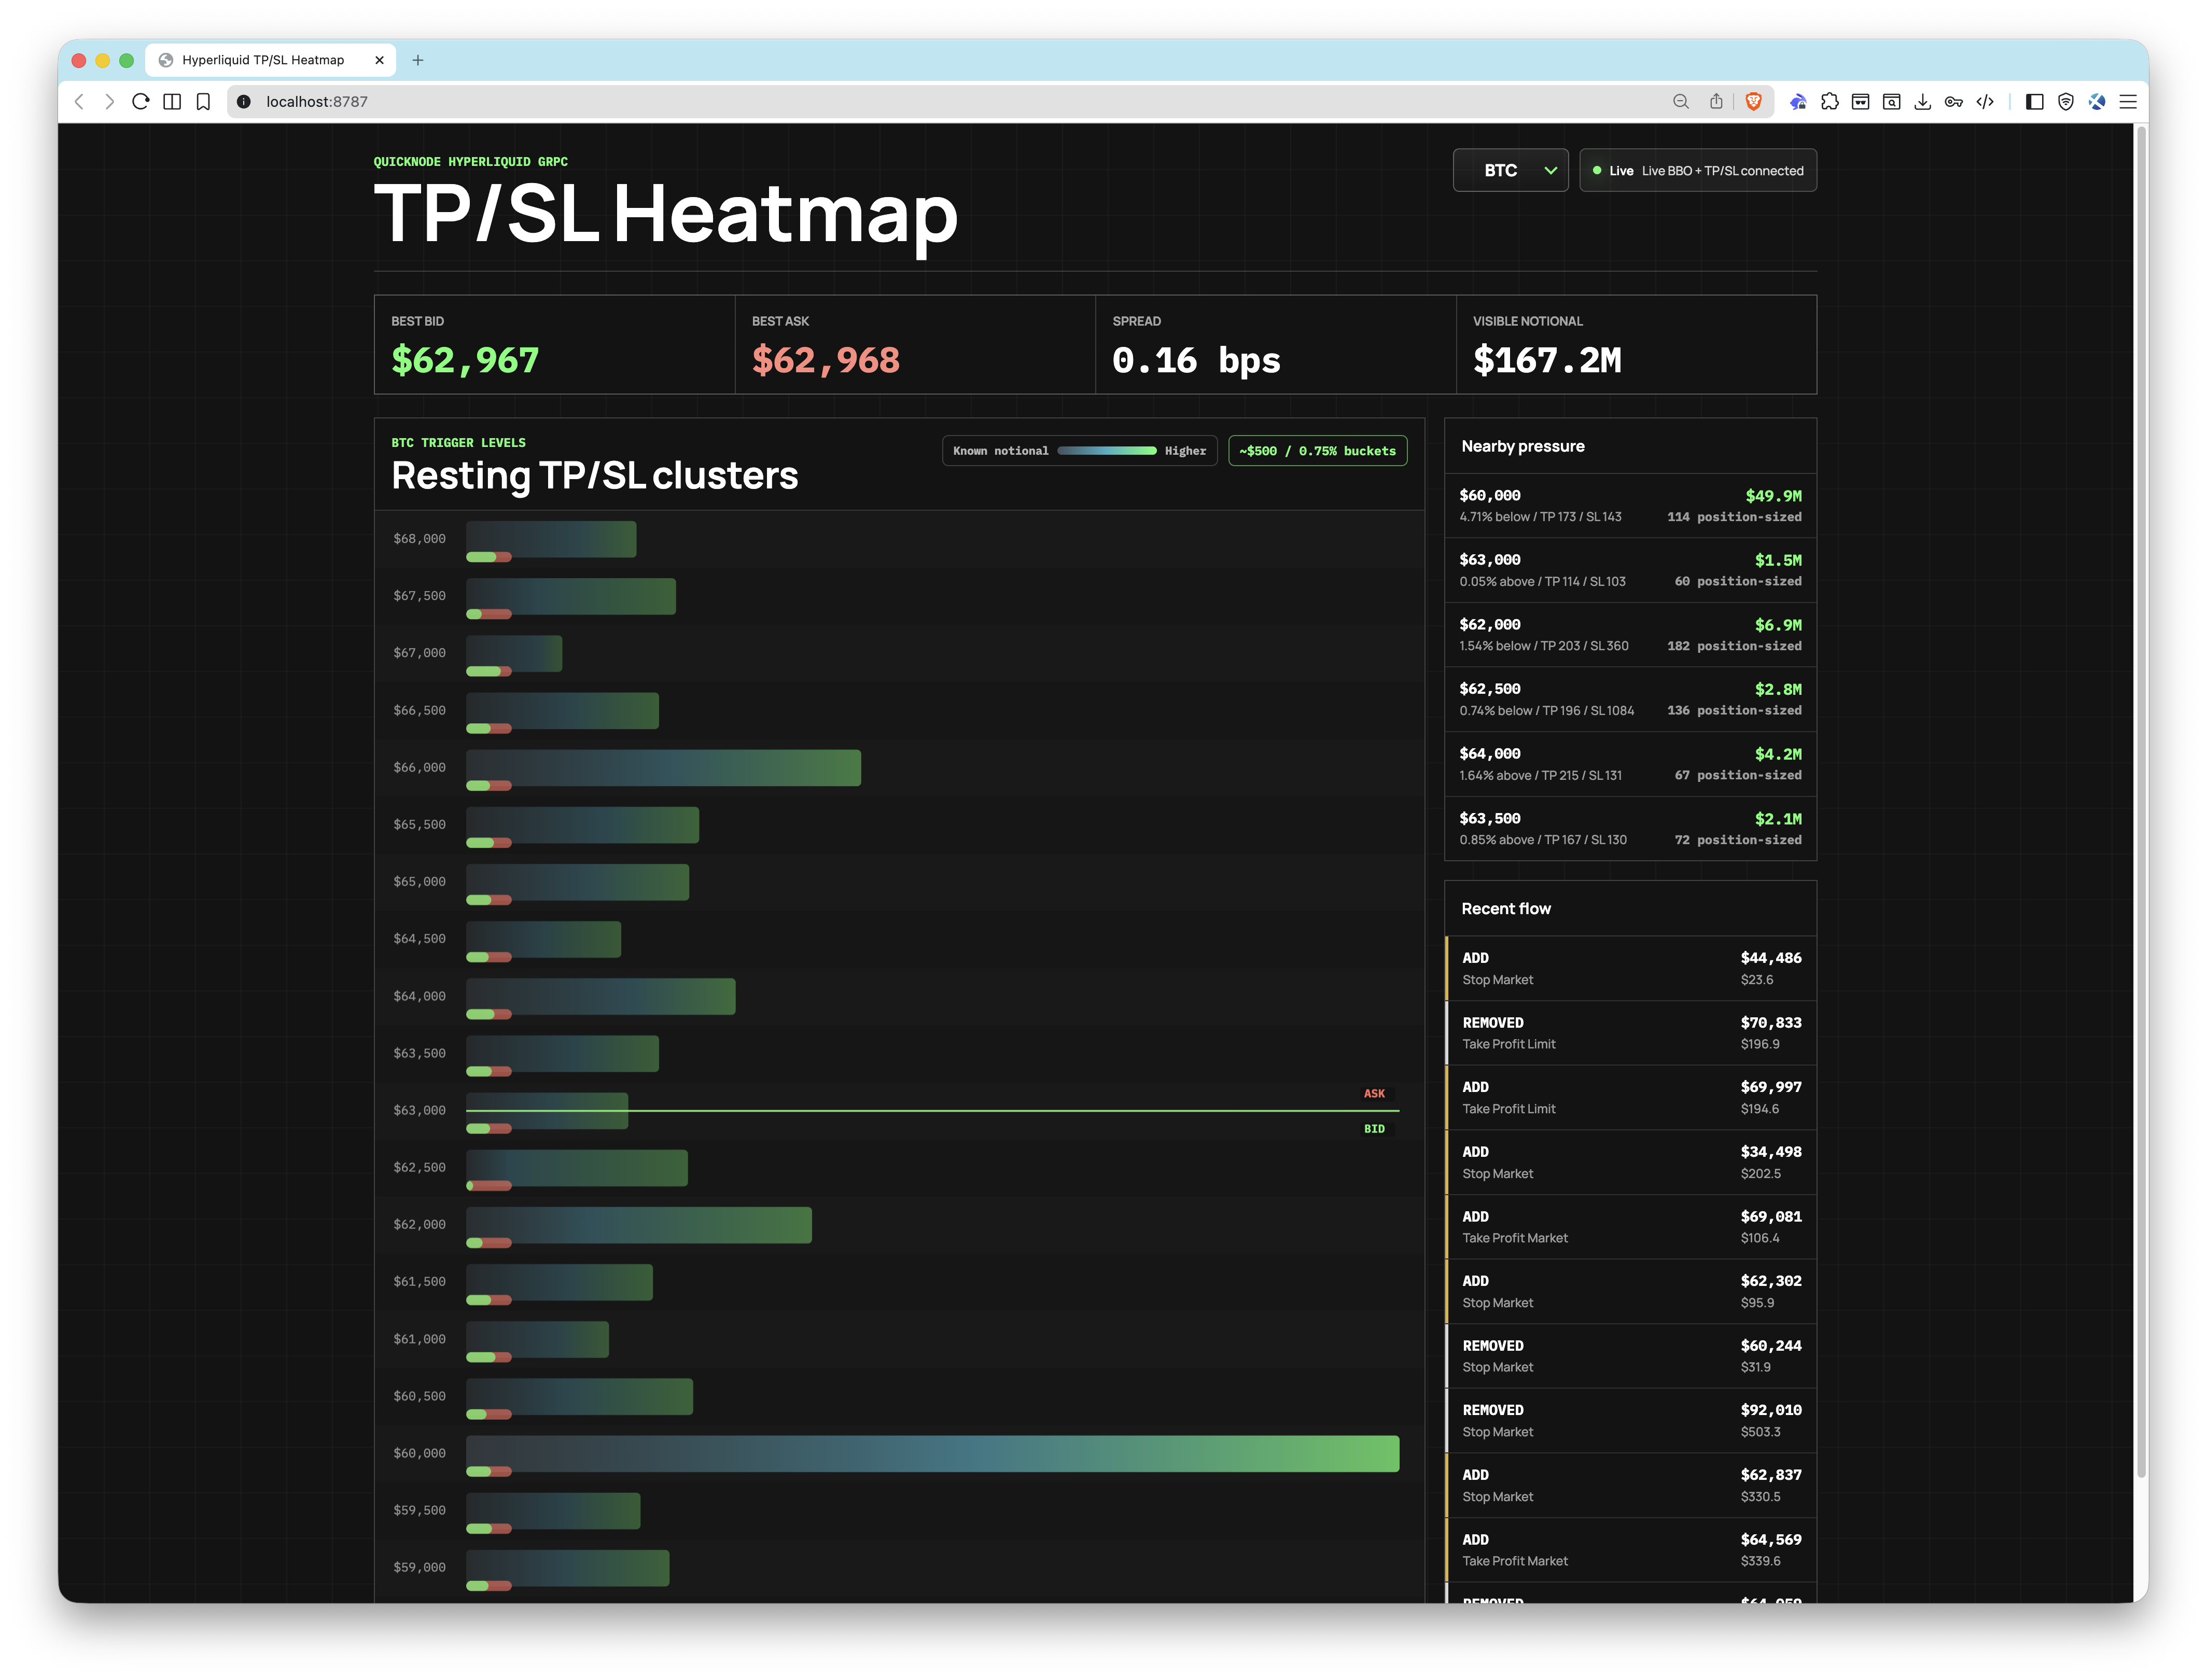
Un tableau de bord accessible via un navigateur en temps réel qui visualise les ordres de déclenchement Hyperliquid inactifs Hyperliquid sous forme de clusters de niveaux de prix, indexés sur les cours acheteur/vendeur en temps réel provenantstreams gRPC Quicknode .


Présentation générale
This app connects to Quicknode's Hyperliquid gRPC endpoint to stream live TP/SL trigger order events (StreamTpslUpdates) and best bid/offer prices (StreamBboBook). Open orders are clustered into configurable price buckets and pushed to the browser over WebSocket, where a canvas-based heatmap renders the aggregated trigger pressure at each price level in real time.
The app ships with a built-in demo mode that uses a synthetic feed, so you can explore the UI without any credentials.
This example app is provided for educational and demonstration purposes only.
Architecture
Browser (React + Canvas)
        ▲
        │  WebSocket
        │
Node.js HTTP + WebSocket Server
        │
        ├── gRPC: StreamTpslUpdates ──┐
        │                             ├── Quicknode Hyperliquid gRPC Endpoint
        └── gRPC: StreamBboBook ──────┘
Caractéristiques
- Real-time TP/SL heatmap: price-bucket clusters updated live from Quicknode gRPC streams
- BBO anchor: current bid and ask prices overlaid on the heatmap for market context
- TP/SL mix indicator: each bucket shows a small green/red marker for take-profit vs. stop-loss share
- Multi-asset support: monitor BTC, ETH, SOL, HYPE, and any other Hyperliquid perp symbol simultaneously
- Configurable bucket width:
BUCKET_SIZE_PCTscales bucket size relative to the current mid price - Demo mode: runs with a synthetic feed when credentials are missing or
DEMO_MODE=true - Health endpoint:
GET /healthreturns server status and current run mode as JSON
Conditions préalables
- Quicknode account with a Hyperliquid endpoint (gRPC access required)
- Node.js v18+
- pnpm
Structure du projet
proto/
  orderbook.proto           # gRPC service definition
src/
  client/
    App.tsx                 # Coin selector and WebSocket client
    HeatmapCanvas.tsx       # Canvas-based heatmap renderer
    main.tsx                # React entry point
    styles.css              # App styles
  server/
    cluster-store.ts        # Order clustering and BBO state
    config.ts               # Env var loading
    demo.ts                 # Synthetic demo feed
    grpc.ts                 # gRPC client setup
    server.ts               # HTTP + WebSocket server
    streams.ts              # Live gRPC stream connections
  shared/
    types.ts                # Shared TypeScript types
Environment Variables
Copier .env.example à .env and fill in your credentials:
# https://your-endpoint.hype-mainnet.quiknode.pro:10000
QUICKNODE_GRPC_ENDPOINT=your-endpoint.hype-mainnet.quiknode.pro:10000
QUICKNODE_GRPC_TOKEN=your-auth-token
TARGET_COINS=BTC,ETH,SOL
DEFAULT_COIN=BTC
BUCKET_SIZE_PCT=0.75
DEMO_MODE=false
PORT=8787
| Variable | Description |
|---|---|
QUICKNODE_GRPC_ENDPOINT | Your Quicknode Hyperliquid gRPC endpoint (host:port) |
QUICKNODE_GRPC_TOKEN | Auth token for the gRPC endpoint |
TARGET_COINS | Comma-separated list of Hyperliquid perp symbols to monitor |
DEFAULT_COIN | Which coin to display on load (must be in TARGET_COINS) |
BUCKET_SIZE_PCT | Bucket width as a percentage of mid price (e.g., 0.75 = ~$500 buckets on BTC near $64k) |
DEMO_MODE | Set to vrai to force demo mode regardless of credentials |
PORT | HTTP server port (default: 8787) |
Pour commencer
1. Clone the repo
git clone https://github.com/quiknode-labs/qn-guide-examples.git
cd qn-guide-examples/sample-dapps/hyperliquid-tpsl-heatmap
2. Install dependencies
pnpm install
3. Configure environment
cp .env.example .env
Open .env and set QUICKNODE_GRPC_ENDPOINT et QUICKNODE_GRPC_TOKEN with your Quicknode Hyperliquid endpoint credentials. Omitting them will start the app in demo mode automatically.
4. Start the app
pnpm dev
Open http://localhost:8787 in your browser.
Aperçu
- Créer une branche du dépôt
- Créer une branche de fonctionnalité :git checkout -b feature/amazing-feature
- Validez vos modifications :git commit -m "Ajout d'une fonctionnalité géniale"
- Publiez votre branche :git push origin feature/amazing-feature
- Créez une demande de fusion.