
19 min read
Overview
Uniswap V4 introduces hooks, a powerful way to add custom logic at important points during pool operations. Hooks are separate smart contracts that work with Uniswap pools, allowing developers to change swap behavior, create complex strategies, and make custom AMM logic without changing the entire protocol.
In this guide, we'll show you how to build a simple hook that adds a basic feature. This will help you learn how to develop more complex custom hooks. Let's get started!
What You Will Do
- Learn about Uniswap V4 Hooks
- Create a custom Hook smart contract
- Test the Hook smart contract with scripts and with Anvil
- Deploy and test the Hook smart contract via a local fork
What You Will Need
- Experience with Ethereum and DeFi
- Foundry installed
Uniswap Hooks
Uniswap V4 hooks are smart contracts that can step in at specific times during a swap, letting developers customize and expand what liquidity pools can do. These hooks work with the main protocol at set times, allowing for more features without making the core contracts less secure.
Key points about Uniswap V4 hooks:
- Hooks can be triggered before or after important actions like swaps, adding or removing liquidity, and starting a pool
- Each hook is its own smart contract, so you can develop and test it on its own
- You can use multiple hooks together to create complex pool behaviors
- Custom logic runs within the swap transaction, which uses less gas than separate contracts
- Devs can add new hooks without changing the main Uniswap protocol
Hooks let you control pool operations in detail. They allow for custom fee structures, changing liquidity distribution, and complex trading strategies right in the pool logic. By stepping in at key moments in the swap process, hooks can add risk controls, make capital use more efficient, and even help create new financial tools on the blockchain.
Some examples of what you can do with hooks:
- Orders that only happen under certain conditions (like limit orders or stop-loss)
- Changing fees based on market conditions
- Automatic liquidity management strategies
- Running arbitrage between different pools
- Creating new AMM curves or ways to set prices
This level of customization lets you create pools that fit specific market conditions or trading needs. You can develop and use hooks separately, and combine them to create complex pool behaviors, running custom logic right in the swap process to save gas. This design lets you add features that usually need multiple transactions or coordination off the blockchain.
In the following sections, we'll cover the core concepts of hooks you'll want to know such as Hooks lifecycle, IHook interface, and Hook flags.
Hook Lifecycle
Hooks can work with the swap process at several important points:
- Before Initialize: Runs before a pool starts
- After Initialize: Runs after a pool starts
- Before Swap: Runs before a swap happens
- After Swap: Runs after a swap happens
- Before Add Liquidity: Runs before liquidity is added to a pool
- After Add Liquidity: Runs after liquidity is added to a pool
- Before Remove Liquidity: Runs before liquidity is taken out of a pool
- After Remove Liquidity: Runs after liquidity is taken out of a pool
By creating these hook functions, developers can make custom behaviors that happen at specific times during pool operations.
IHook Interface
The IHook interface is what your hook contract needs to implement. It defines the functions that Uniswap V4 will call at different points in the pool's operations. Here's a simplified version of what it might look like:
interface IHook {
    function beforeInitialize(address sender, uint160 sqrtPriceX96) external returns (bytes4);
    function afterInitialize(address sender, uint160 sqrtPriceX96) external returns (bytes4);
    function beforeSwap(address sender, address recipient, bool zeroForOne, uint256 amountSpecified, uint160 sqrtPriceLimitX96) external returns (bytes4);
    function afterSwap(address sender, address recipient, bool zeroForOne, uint256 amountSpecified, uint160 sqrtPriceLimitX96) external returns (bytes4);
    function beforeAddLiquidity(address sender, uint256 amount0, uint256 amount1) external returns (bytes4);
    function afterAddLiquidity(address sender, uint256 amount0, uint256 amount1) external returns (bytes4);
    function beforeRemoveLiquidity(address sender, uint256 amount0, uint256 amount1) external returns (bytes4);
    function afterRemoveLiquidity(address sender, uint256 amount0, uint256 amount1) external returns (bytes4);
}
Hook Flags
When you create a hook, you need to specify which functions it implements. This is done using hook flags. These flags are bit flags that indicate which hook functions are active. For example:
uint160 constant BEFORE_SWAP_FLAG = 1 << 0;
uint160 constant AFTER_SWAP_FLAG = 1 << 1;
uint160 constant BEFORE_ADD_LIQUIDITY_FLAG = 1 << 2;
// ... and so on for other hook functions
You combine these flags to indicate which functions your hook implements. For instance, if your hook implements beforeSwap and afterSwap, you would use:
uint160 public constant FLAGS = BEFORE_SWAP_FLAG | AFTER_SWAP_FLAG;
In the following sections, we'll walk through creating a simple hook to show how you can use these tools in practice.
Project Prerequisite: Create a Quicknode Endpoint
Before getting into the code, let's set up some prerequisites like getting a RPC URL. You're welcome to use public nodes or deploy and manage your own infrastructure; however, if you'd like 8x faster response times, you can leave the heavy lifting to us. Sign up for an account here.
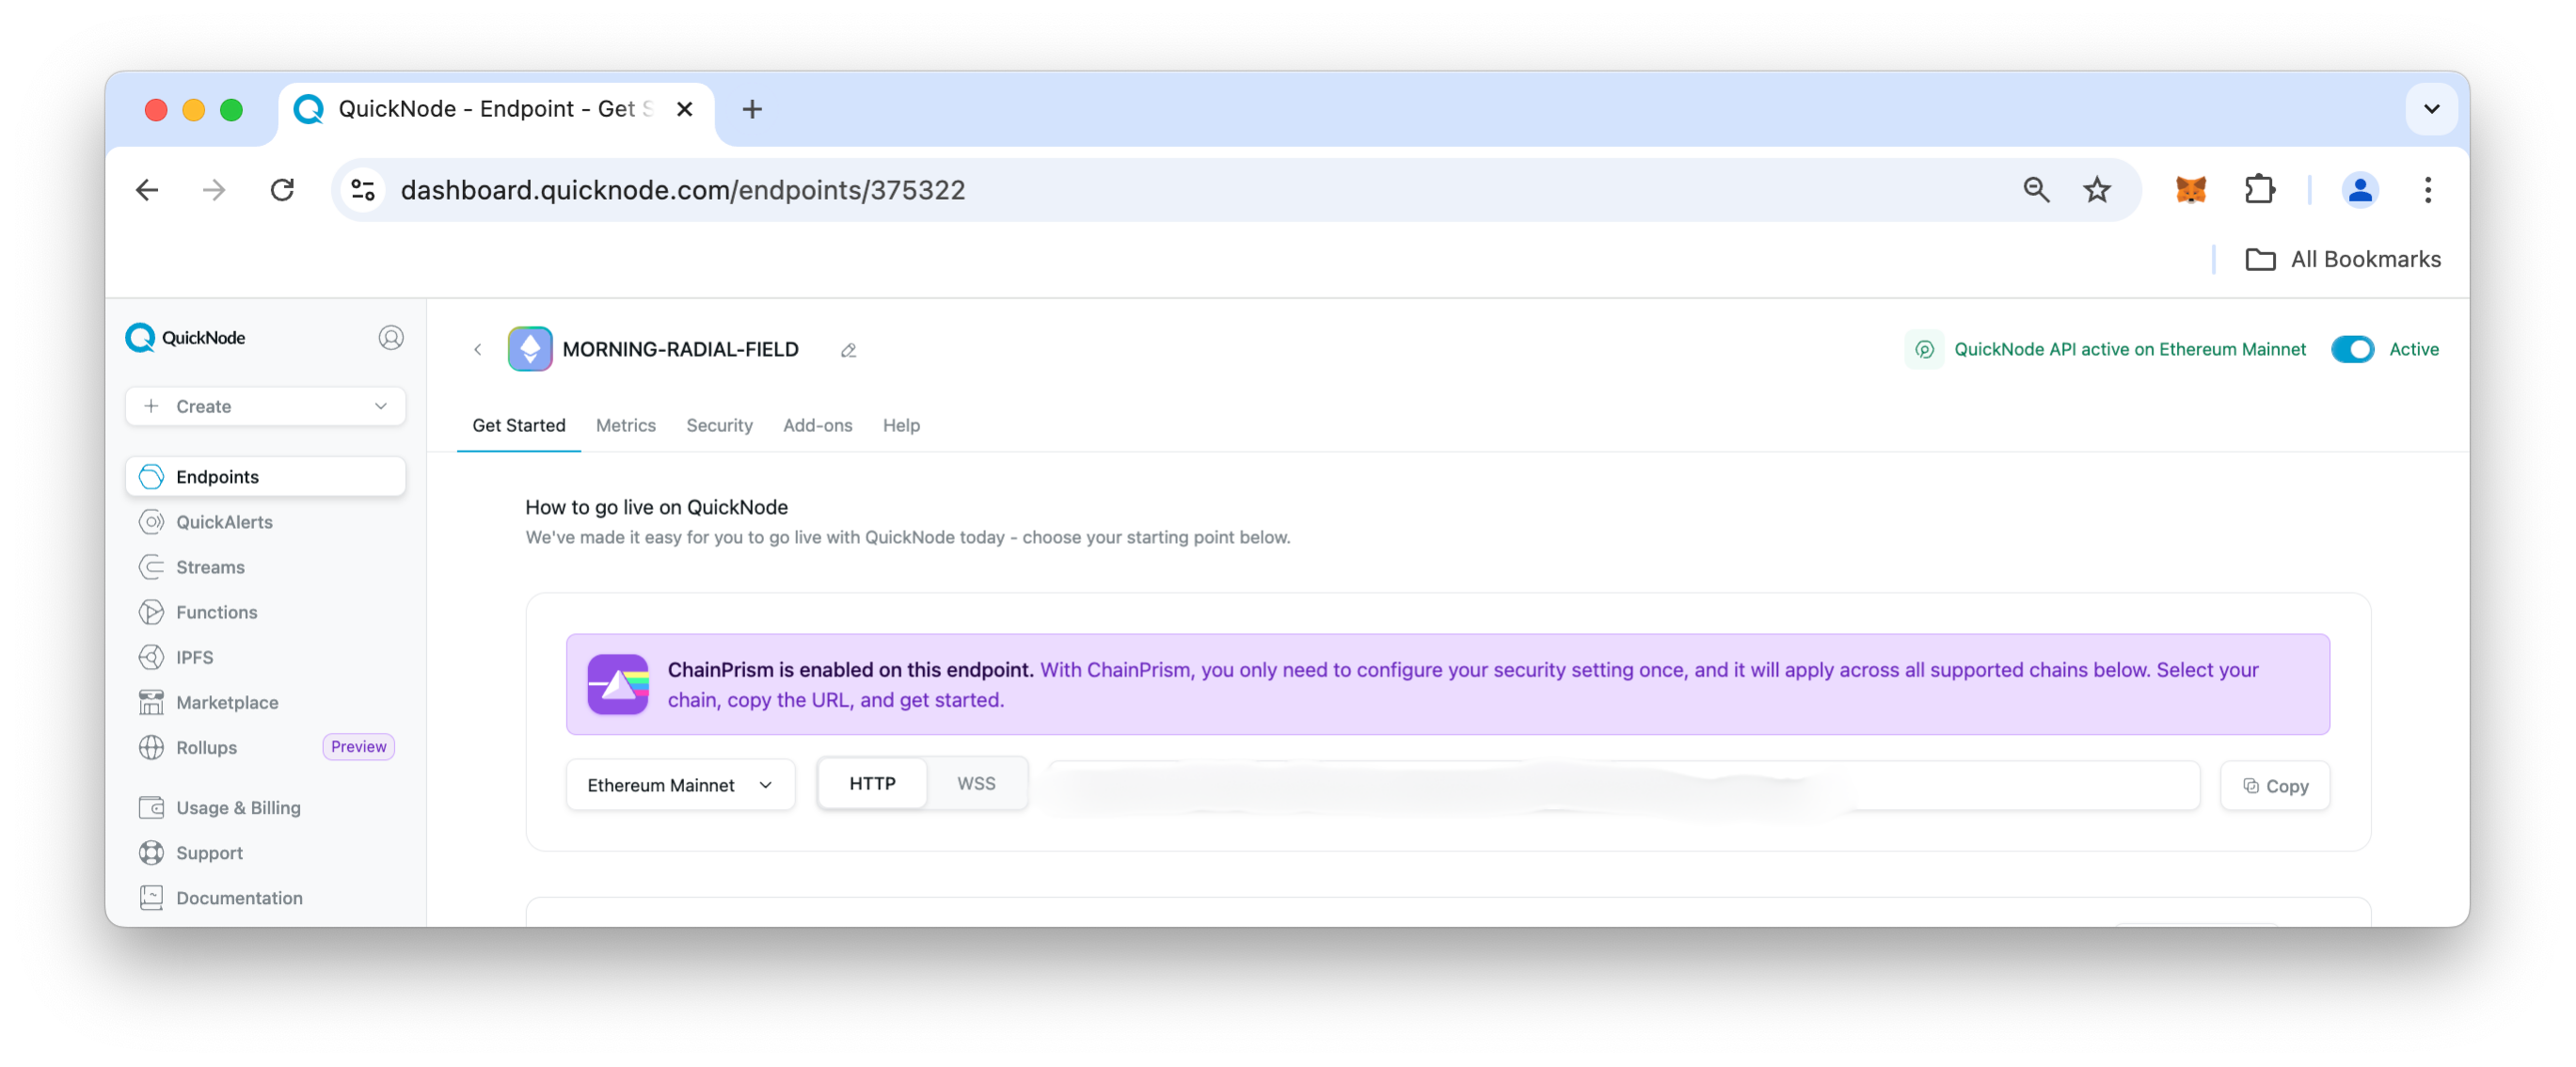
Once logged into Quicknode, click the Create an endpoint button, then select the Ethereum chain and Sepolia network.
After creating your endpoint, copy the HTTP Provider URL link and keep it handy, as you'll need it in the local testnet section.
Implementing Your First Uniswap Hook
Now that we've covered the core concepts and got our prerequisites completed, let's dive into creating your first Uniswap V4 hook. We'll use the v4-template as our starting point, which provides a solid foundation for hook development.
Directory Set Up
Use the v4-template as a starting point. You can do this by clicking "Use this Template" on the GitHub repository, or by cloning it:
git clone git@github.com:uniswapfoundation/v4-template.git
cd v4-template
The template includes an example hook Counter.sol which demonstrates beforeSwap() and afterSwap() hooks (feel free to take a glance now). The test template Counter.t.sol preconfigures the v4 pool manager, test tokens, and test liquidity, which will be helpful for testing our hook.
Install Dependencies
First, ensure you have Foundry installed and up to date:
foundryup
Next, install the project dependencies:
forge install
Although you could technically run the forge tests command now, we will hold off until we add our own custom hook logic.
Customize the Hook Contract
Now, let's create our own hook. We'll implement a "Swap Limiter" hook that restricts the number of swaps a single address can perform within a certain time frame. This adds a basic form of rate limiting to the pool.
First, create a file called src/SwapLimiterHook.sol. Then, open the file and include the following code:
// SPDX-License-Identifier: MIT
pragma solidity ^0.8.26;

import {BaseHook} from "@openzeppelin/uniswap-hooks/src/base/BaseHook.sol";

import {Hooks} from "@uniswap/v4-core/src/libraries/Hooks.sol";
import {IPoolManager, SwapParams} from "@uniswap/v4-core/src/interfaces/IPoolManager.sol";
import {PoolKey} from "@uniswap/v4-core/src/types/PoolKey.sol";
import {PoolId, PoolIdLibrary} from "@uniswap/v4-core/src/types/PoolId.sol";
import {BeforeSwapDelta, BeforeSwapDeltaLibrary} from "@uniswap/v4-core/src/types/BeforeSwapDelta.sol";

contract SwapLimiterHook is BaseHook {
    using PoolIdLibrary for PoolKey;

    uint256 public constant MAX_SWAPS_PER_HOUR = 5;
    uint256 public constant HOUR = 3600;

    mapping(address => uint256) public lastResetTime;
    mapping(address => uint256) public swapCount;

    event SwapLimitReached(address indexed user, uint256 timestamp);

    constructor(IPoolManager _poolManager) BaseHook(_poolManager) {}

    function getHookPermissions() public pure override returns (Hooks.Permissions memory) {
        return Hooks.Permissions({
            beforeInitialize: false,
            afterInitialize: false,
            beforeAddLiquidity: false,
            afterAddLiquidity: false,
            beforeRemoveLiquidity: false,
            afterRemoveLiquidity: false,
            beforeSwap: true,
            afterSwap: false,
            beforeDonate: false,
            afterDonate: false,
            beforeSwapReturnDelta: false,
            afterSwapReturnDelta: false,
            afterAddLiquidityReturnDelta: false,
            afterRemoveLiquidityReturnDelta: false
        });
    }

    // Main function to enforce swap limit
    function _beforeSwap(address sender, PoolKey calldata, SwapParams calldata, bytes calldata)
        internal
        override
        returns (bytes4, BeforeSwapDelta, uint24)
    {
        uint256 currentTime = block.timestamp;
        if (currentTime - lastResetTime[sender] >= HOUR) {
            swapCount[sender] = 0;
            lastResetTime[sender] = currentTime;
        }

        require(swapCount[sender] < MAX_SWAPS_PER_HOUR, "Swap limit reached for this hour");

        swapCount[sender]++;

        if (swapCount[sender] == MAX_SWAPS_PER_HOUR) {
            emit SwapLimitReached(sender, currentTime);
        }

        return (BaseHook.beforeSwap.selector, BeforeSwapDeltaLibrary.ZERO_DELTA, 0);
    }

    function getRemainingSwaps(address user) public view returns (uint256) {
        if (block.timestamp - lastResetTime[user] >= HOUR) {
            return MAX_SWAPS_PER_HOUR;
        }
        return MAX_SWAPS_PER_HOUR - swapCount[user];
    }
}
This "Swap Limiter" hook contract implements the following features:
- Swap Limit: It restricts each address to a maximum of 5 swaps per hour (configurable via
MAX_SWAPS_PER_HOUR). - Time-based Reset: The swap count for each address resets every hour.
- beforeSwap Hook: We override the internal
_beforeSwapfunction (rather than the externalbeforeSwap). The OpenZeppelinBaseHookexposes the externalbeforeSwapwith anonlyPoolManagerguard and delegates to our_beforeSwapimplementation, so the PoolManager is the only caller that can trigger it. This function checks if the sender has exceeded their swap limit for the current hour. If not, it increments their swap count. - Remaining Swaps Check: A
getRemainingSwapsfunction allows users (or the front-end) to check how many swaps they have left in the current hour. - Event Logging: An event is emitted when a user reaches their swap limit, which could be useful for monitoring or alerting purposes.
Optionally, to check that your file syntax is set up properly, you can run the forge compile command.
Create a Test File
Now that we've created our hook, we need to create a test file. First, create a file called test/SwapLimiterHook.t.sol. Then, include the following code:
// SPDX-License-Identifier: MIT
pragma solidity ^0.8.26;

import {Test, console} from "forge-std/Test.sol";

import {IHooks} from "@uniswap/v4-core/src/interfaces/IHooks.sol";
import {Hooks} from "@uniswap/v4-core/src/libraries/Hooks.sol";
import {TickMath} from "@uniswap/v4-core/src/libraries/TickMath.sol";
import {IPoolManager, SwapParams} from "@uniswap/v4-core/src/interfaces/IPoolManager.sol";
import {PoolKey} from "@uniswap/v4-core/src/types/PoolKey.sol";
import {BalanceDelta} from "@uniswap/v4-core/src/types/BalanceDelta.sol";
import {PoolId, PoolIdLibrary} from "@uniswap/v4-core/src/types/PoolId.sol";
import {CurrencyLibrary, Currency} from "@uniswap/v4-core/src/types/Currency.sol";
import {StateLibrary} from "@uniswap/v4-core/src/libraries/StateLibrary.sol";
import {LiquidityAmounts} from "@uniswap/v4-core/test/utils/LiquidityAmounts.sol";
import {Constants} from "@uniswap/v4-core/test/utils/Constants.sol";
import {IPositionManager} from "@uniswap/v4-periphery/src/interfaces/IPositionManager.sol";

import {EasyPosm} from "./utils/libraries/EasyPosm.sol";
import {BaseTest} from "./utils/BaseTest.sol";

import {SwapLimiterHook} from "../src/SwapLimiterHook.sol";

contract SwapLimiterHookTest is BaseTest {
    using EasyPosm for IPositionManager;
    using PoolIdLibrary for PoolKey;
    using CurrencyLibrary for Currency;
    using StateLibrary for IPoolManager;

    Currency currency0;
    Currency currency1;

    PoolKey poolKey;

    SwapLimiterHook hook;
    PoolId poolId;

    uint256 tokenId;
    int24 tickLower;
    int24 tickUpper;

    event SwapLimitReached(address indexed user, uint256 timestamp);

    function setUp() public {
        // Deploys all required artifacts (PoolManager, PositionManager, SwapRouter, Permit2)
        deployArtifactsAndLabel();

        (currency0, currency1) = deployCurrencyPair();

        // Deploy the hook to an address with the correct flags
        address flags = address(
            uint160(Hooks.BEFORE_SWAP_FLAG) ^ (0x4444 << 144) // Namespace the hook to avoid collisions
        );
        bytes memory constructorArgs = abi.encode(poolManager);
        deployCodeTo("SwapLimiterHook.sol:SwapLimiterHook", constructorArgs, flags);
        hook = SwapLimiterHook(flags);

        // Create the pool
        poolKey = PoolKey(currency0, currency1, 3000, 60, IHooks(hook));
        poolId = poolKey.toId();
        poolManager.initialize(poolKey, Constants.SQRT_PRICE_1_1);

        // Provide full-range liquidity to the pool
        tickLower = TickMath.minUsableTick(poolKey.tickSpacing);
        tickUpper = TickMath.maxUsableTick(poolKey.tickSpacing);

        uint128 liquidityAmount = 10_000e18;

        (uint256 amount0Expected, uint256 amount1Expected) = LiquidityAmounts.getAmountsForLiquidity(
            Constants.SQRT_PRICE_1_1,
            TickMath.getSqrtPriceAtTick(tickLower),
            TickMath.getSqrtPriceAtTick(tickUpper),
            liquidityAmount
        );

        (tokenId,) = positionManager.mint(
            poolKey,
            tickLower,
            tickUpper,
            liquidityAmount,
            amount0Expected + 1,
            amount1Expected + 1,
            address(this),
            block.timestamp,
            Constants.ZERO_BYTES
        );
    }

    function testDirectBeforeSwap() public {
        address sender = address(this);
        SwapParams memory params;
        bytes memory hookData;

        // Direct hook calls must come from the PoolManager (onlyPoolManager guard)
        for (uint256 i = 0; i < 5; i++) {
            vm.prank(address(poolManager));
            (bytes4 selector,,) = hook.beforeSwap(sender, poolKey, params, hookData);
            assertEq(selector, IHooks.beforeSwap.selector);
            console.log("Swap %d, Remaining swaps: %d", i + 1, hook.getRemainingSwaps(sender));
        }

        // The 6th call reverts with "Swap limit reached for this hour"
        vm.prank(address(poolManager));
        vm.expectRevert();
        hook.beforeSwap(sender, poolKey, params, hookData);
    }

    function testSwapLimiter() public {
        uint256 amountIn = 1e18;

        console.log("Initial remaining swaps: %d", hook.getRemainingSwaps(address(swapRouter)));

        // Perform 5 swaps (should succeed). The hook keys its limit on the
        // PoolManager caller, which is the swap router.
        for (uint256 i = 0; i < 5; i++) {
            BalanceDelta swapDelta = swapRouter.swapExactTokensForTokens({
                amountIn: amountIn,
                amountOutMin: 0, // Very bad, but we want to allow for unlimited price impact
                zeroForOne: true,
                poolKey: poolKey,
                hookData: Constants.ZERO_BYTES,
                receiver: address(this),
                deadline: block.timestamp + 1
            });
            assertEq(int256(swapDelta.amount0()), -int256(amountIn));
            console.log("Swap %d succeeded. Remaining swaps: %d", i + 1, hook.getRemainingSwaps(address(swapRouter)));
        }

        // The 6th swap should revert (the hook reverts inside the PoolManager call)
        vm.expectRevert();
        swapRouter.swapExactTokensForTokens({
            amountIn: amountIn,
            amountOutMin: 0,
            zeroForOne: true,
            poolKey: poolKey,
            hookData: Constants.ZERO_BYTES,
            receiver: address(this),
            deadline: block.timestamp + 1
        });

        // Check remaining swaps
        uint256 remainingSwaps = hook.getRemainingSwaps(address(swapRouter));
        console.log("Final remaining swaps: %d", remainingSwaps);
        assertEq(remainingSwaps, 0, "Should have 0 remaining swaps");
    }

    function testSwapLimitReachedEvent() public {
        address sender = address(this);
        SwapParams memory params;
        bytes memory hookData;

        for (uint256 i = 0; i < 4; i++) {
            vm.prank(address(poolManager));
            hook.beforeSwap(sender, poolKey, params, hookData);
        }

        vm.expectEmit(true, false, false, true);
        emit SwapLimitReached(sender, block.timestamp);
        vm.prank(address(poolManager));
        hook.beforeSwap(sender, poolKey, params, hookData);
    }
}
These tests cover the main functionality of our SwapLimiterHook contract which enforces the swap limit, resets the swap count after an hour, and checks the remaining swaps for a user.
Let's recap the main functionality in the test code.
-
testDirectBeforeSwapfunction:- Pranks the PoolManager and directly calls the
beforeSwapfunction of the hook 5 times (theonlyPoolManagerguard means only the PoolManager can call it) - Checks that each call returns the correct selector
- Logs remaining swaps after each call
- Expects the 6th call to revert with
"Swap limit reached for this hour"
- Pranks the PoolManager and directly calls the
-
testSwapLimiterfunction:- Logs initial remaining swaps
- Performs 5 real swaps through the swap router, each time logging the successful swap and remaining swaps
- Expects the 6th swap to revert because the hook reverts inside the PoolManager call
- Checks that final remaining swaps is 0
-
testSwapLimitReachedEventfunction:- Pranks the PoolManager and calls
beforeSwap4 times - Expects the
SwapLimitReachedevent to be emitted on the 5th call - Performs the 5th call to
beforeSwap
- Pranks the PoolManager and calls
Execute the tests with the following command:
forge test
You'll see this when the tests finish:
Ran 3 tests for test/SwapLimiterHook.t.sol:SwapLimiterHookTest
[PASS] testDirectBeforeSwap() (gas: 106960)
[PASS] testSwapLimitReachedEvent() (gas: 81907)
[PASS] testSwapLimiter() (gas: 400399)
Suite result: ok. 3 passed; 0 failed; 0 skipped; finished in 3.48ms (4.15ms CPU time)
If you want to see the console.log statements, you can add the -vv flag to your test command. Optionally, pass v multiple times to increase the verbosity (e.g. -v, -vv, -vvv) to see more in-depth information (e.g., print execution traces)
Remember to adjust the tests as needed based on your specific implementation and any additional features you may add to the hook.
Local Development with Anvil and Quicknode
To test your hook in a more realistic environment, you can use Anvil, a local testnet node, forked from a live network using Quicknode.
First, start Anvil in a separate terminal window, forking from your Quicknode RPC:
anvil --fork-url https://your-quicknode-endpoint.quiknode.pro/your-api-key/
This will start a local testnet node that's a fork of the current state of the network your Quicknode RPC is connected to.
The v4-template no longer ships a single monolithic Anvil.s.sol. Instead, it splits deployment into focused scripts under the script/ directory. To deploy and exercise your hook on Anvil, you'll run two scripts: one that deploys the Uniswap V4 contracts locally, and one that mines a salt and deploys your hook.
Step 1: Deploy the Uniswap V4 contracts locally
The template includes script/testing/00_DeployV4.s.sol, which deploys Permit2, the PoolManager, the PositionManager, and the V4 swap router to your local Anvil node. In a new terminal window, run:
forge script script/testing/00_DeployV4.s.sol \
    --rpc-url http://localhost:8545 \
    --private-key 0xac0974bec39a17e36ba4a6b4d238ff944bacb478cbed5efcae784d7bf4f2ff80 \
    --broadcast \
    --code-size-limit 40000
The private key above corresponds to the first account generated by Anvil. You'll see the addresses of the deployed contracts logged in the output:
Deployed Permit2 at: 0x000000000022D473030F116dDEE9F6B43aC78BA3
Deployed V4PoolManager at: 0x0D9BAf34817Fccd3b3068768E5d20542B66424A5
Deployed V4PositionManager at: 0x90aAE8e3C8dF1d226431D0C2C7feAaa775fAF86C
Deployed V4SwapRouter at: 0xB61598fa7E856D43384A8fcBBAbF2Aa6aa044FfC
The --code-size-limit 40000 flag raises Anvil's contract size limit, which the Uniswap V4 contracts require. If you forget it, deployment will fail with a contract-size error.
Step 2: Deploy your hook
Now create a deployment script for the hook. Hooks must be deployed to an address whose lowest bits encode the permissions they use, so we use HookMiner to find a salt that produces a matching CREATE2 address. Create a file called script/DeploySwapLimiter.s.sol with the following code:
// SPDX-License-Identifier: MIT
pragma solidity ^0.8.26;

import {Hooks} from "@uniswap/v4-core/src/libraries/Hooks.sol";
import {HookMiner} from "@uniswap/v4-periphery/src/utils/HookMiner.sol";

import {BaseScript} from "./base/BaseScript.sol";

import {SwapLimiterHook} from "../src/SwapLimiterHook.sol";

/// @notice Mines the address and deploys the SwapLimiterHook contract
contract DeploySwapLimiterScript is BaseScript {
    function run() public {
        // Hook contracts must have specific flags encoded in the address
        uint160 flags = uint160(Hooks.BEFORE_SWAP_FLAG);

        // Mine a salt that will produce a hook address with the correct flags
        bytes memory constructorArgs = abi.encode(poolManager);
        (address hookAddress, bytes32 salt) =
            HookMiner.find(CREATE2_FACTORY, flags, type(SwapLimiterHook).creationCode, constructorArgs);

        // Deploy the hook using CREATE2
        vm.startBroadcast();
        SwapLimiterHook swapLimiter = new SwapLimiterHook{salt: salt}(poolManager);
        vm.stopBroadcast();

        require(address(swapLimiter) == hookAddress, "DeploySwapLimiterScript: Hook Address Mismatch");
    }
}
This script inherits from the template's BaseScript, which wires up the V4 contract addresses for you (poolManager, positionManager, swapRouter, and permit2) and provides the canonical CREATE2_FACTORY address. Run it against the same Anvil node:
forge script script/DeploySwapLimiter.s.sol \
    --rpc-url http://localhost:8545 \
    --private-key 0xac0974bec39a17e36ba4a6b4d238ff944bacb478cbed5efcae784d7bf4f2ff80 \
    --broadcast \
    --code-size-limit 40000
When it finishes, you'll see Script ran successfully and your hook will be deployed to a mined address that encodes the BEFORE_SWAP_FLAG.
To create a pool, add liquidity, and swap against your deployed hook, use the template's numbered scripts (script/01_CreatePoolAndAddLiquidity.s.sol, script/02_AddLiquidity.s.sol, and script/03_Swap.s.sol). Set the hookContract address in script/base/BaseScript.sol to the address you just deployed, then run those scripts the same way. The unit tests we wrote earlier already exercise the full pool-and-swap lifecycle against the hook in a single run.
Wrap Up
Congrats! You've now learned how to create, test, and deploy a custom hook for Uniswap V4. From understanding the basics of hooks to implementing a custom hook and deploying it to a local Anvil fork, you've covered the essential steps in Uniswap V4 hook development.
Stay up to date with the latest in blockchain development by following Quicknode on Twitter (@Quicknode) or joining the Discord community.