
6 min read
概要
Uniswap is one of the most discussed and important projects in the DeFi space. It’s a pretty popular project for many reasons - in this guide, we will learn how to interact with the Uniswap smart contracts using a JavaScript library called ethers.js and uniswap’s js sdk.
主な業務内容
- Learn about Uniswap V2
- Learn about the Uniswap SDK
- Interact with Uniswap via code
必要なもの
- Node.js installed on your system
- A text or Code editor
- Terminal aka Command Line
- An Ethereum node
What is Uniswap?
Uniswap is a protocol for the decentralized exchange of tokens on the Ethereum blockchain. Uniswap protocol is deployed as the set of smart contracts and is entirely decentralized, permissionless, and is censorship-resistant. It is built on the concept of Liquidity pools, automated market makers, or, to be precise, a constant product market maker.
Hayden Adams built the first version of Uniswap with vyper and deployed that version of the Uniswap protocol on the Ethereum Mainnet in 2018. In 2020 a second version was released named Uniswap V2; the main feature was the addition of the ERC20-ERC20 liquidity pools. Before V2, each liquidity pool had to consist of ETH as one of the currencies. For example, to trade from USDC to DAI, the user had to trade USDC for ETH and then ETH for DAI, which usually resulted in higher gas fees and more slippage. Offering ERC20-ERC20 pools was also better for liquidity providers who didn’t want to supply ETH. V2 has few other features, including on-chain price feeds and flash swaps. V2 is entirely written in Solidity.
Now let us understand smart contracts in Uniswap. Uniswap V2 has two smart contract systems: core and periphery.
Core: This consists of one factory and many pairs of contracts. Factory contract is responsible for creating many pair contracts. It is not recommended for users to interact with core contracts directly; instead, use a periphery contract because core contracts are very minimal and functionally straightforward:
- Factory: The factory contract’s role is to create different markets on Uniswap called pairs and act as a registry for different markets. It also makes sure that only one smart contract is formed per unique token pair.
- Pairs: The markets which the factory creates are known as pairs. It consists of unique token pair. Its primary purpose is to act as automated market makers and keep track of token balances in a pool. They also emit data that can be used to built decentralized price oracles.
Periphery: Periphery consists of a bunch of domain-specific smart contracts which help in interaction with the core:
- Library: The library provides features that enable convenient fetching of data and pricing.
- Router: The router contract uses the library and supports all the basic requirements of a front-end offering trading and liquidity management functionality.
We’ll use Uniswap Javascript SDK and ethers.js to interact with the Uniswap protocol.
What is Uniswap Javascript SDK?
Uniswap Javascript SDK helps in interacting with Uniswap V2 and builds on top of Uniswap V2. It runs on any machine/environment which can execute Javascript. The SDK is written in TypeScript and has a robust test suite, performs arbitrary precision arithmetic, and supports rounding to significant digits or fixed decimal places.
To learn more about ether.js, you can refer to this guide on How to connect to the Ethereum network with ethers.js.
Installing the required libraries.
We’ll install the ethers.js and uniswap js sdk using npm (Node Package Manager), which comes with Node.js. Let’s check if node.js is installed on our system. Copy-paste the following in your terminal/cmd:
$ node -v
If not installed, you can download the LTS version of NodeJS from the official website.
Now that we have Node.js installed, let’s install the Ethers.js (version 5.7) and Uniswap SDK using npm (Node Package Manager), which comes with Node.js.
$ npm install @uniswap/sdk
$ npm install ethers@5.7
The most common issue at this step is an internal failure with `node-gyp.` You can follow node-gyp installation instructions here.
Note: You will need to have your python version match one of the compatible versions listed in the instructions above if you encounter the node-gyp issue.
Another common issue is a stale cache; clear your npm cache by simply typing the below into your terminal:
$ npm cache clean
If everything goes right, both the libraries will be installed on your system.
Set Up Your Quicknode Ethereum Endpoint
We could use pretty much any Ethereum client, such as Geth or OpenEthereum (fka Parity), for our purposes today. Since that is a bit too involved for just querying prices, we'll just grab a free endpoint from Quicknode to make this easy. It can be a testnet (like Ropstepn, Rinkeby or Kovan) or Mainnet. After you've created your free ethereum endpoint, copy your HTTP Provider endpoint:
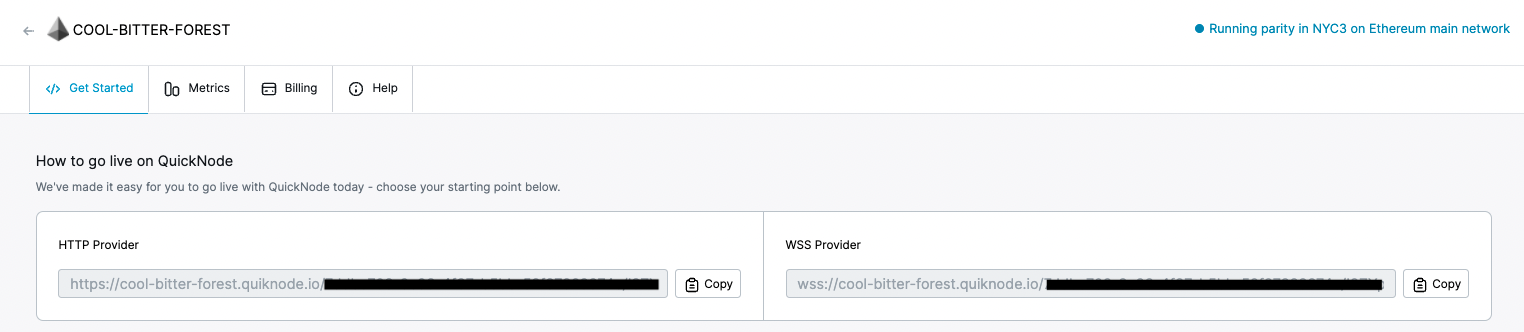
You'll need this later, so copy it and save it.
Interacting with Uniswap
We’ll get the price of Wrapped ether (WETH) price in DAI and vice versa; then we’ll get the trading price of WETH’s in DAI and then again calculate WETH’s price DAI after the trade.
Create a new JS file named index.js and copy-paste the following code in it (for the front end, you’ll need to change the syntax to ES6):
const { ChainId, Fetcher, WETH, Route, Trade, TokenAmount, TradeType } = require ('@uniswap/sdk');
const ethers = require('ethers');

const url = 'ADD_YOUR_ETHEREUM_NODE_URL';
const customHttpProvider = new ethers.providers.JsonRpcProvider(url);

const chainId = ChainId.MAINNET;
const tokenAddress = '0x6B175474E89094C44Da98b954EedeAC495271d0F'

const init = async () => {
	const dai = await Fetcher.fetchTokenData(chainId, tokenAddress, customHttpProvider);
	const weth = WETH[chainId];
	const pair = await Fetcher.fetchPairData(dai, weth, customHttpProvider);
	const route = new Route([pair], weth);
	const trade = new Trade(route, new TokenAmount(weth, '100000000000000000'), TradeType.EXACT_INPUT);
	console.log("Mid Price WETH --> DAI:", route.midPrice.toSignificant(6));
	console.log("Mid Price DAI --> WETH:", route.midPrice.invert().toSignificant(6));
	console.log("-".repeat(45));
	console.log("Execution Price WETH --> DAI:", trade.executionPrice.toSignificant(6));
	console.log("Mid Price after trade WETH --> DAI:", trade.nextMidPrice.toSignificant(6));
}

init();
So go ahead and replace `ADD_YOUR_ETHEREUM_NODE_URL` with the http provider from the section above.
Explanation of the code above:
- Line 1-2: Importing the Uniswap SDK and ethers library with necessary Uniswap packages
- Line 4: Setting our Ethereum node URL
- Line 5: Instantiating an ethers JsonRpcProvider instance.
- Line 7: Defining chain id to mainnet.
- Line 8: Specifying token address to DAI; always confirm the address before using Uniswap You can get the address of any ERC20 token from etherscan.io token tracker.
- Line 10: Defining the init variable as an async function.
- Line 11: Creating a pointer to the DAI token and fetching the token data using the Fetcher object by passing chain id, token address, and customHttpProvider as arguments.
- Line 12: Defining our other token Wrapped ether.
- Line 13: Instantiating the pair object, the pair object allows interaction with a specific market, fetching the pair data of WETH and DAI pair.
- Line 14: Instantiating the route object and passing pair array and WETH as the input token.
- Line 15: Creating a new trade to get the execution price of WETH in DAI, Providing 100 WETH in input with 15 zeros and specifying trade type.
- Line 16: Getting midprice of WETH in DAI. Note: midprice in the context of Uniswap is the price that reflects the ratio of reserves in one or more pairs. It also represents the price at which you could theoretically trade a tiny amount (ε) of one token for the other.
- Line 17: Getting midprice of DAI in WETH.
- Line 18: Printing a dashed line for better output representation.
- Line 19: Getting the exact execution price of WETH in DAI. Note: Execution price is the ratio of assets sent/received. The Uniswap swapping of pairs is based on execution price rather than Mid-price.
- Line 20: Getting midprice of WETH in DAI after the trade.
- Line 23: Calling the init function.
Now, save the script file and run it using the following command:
$ node index
If everything goes according to the plan, it’ll give an output something similar to this:

結論
Now that we know how to use Uniswap Javascript SDK, you are all set to use this to build your own next big thing in DeFi.
Subscribe to our newsletter for more articles and guides on Ethereum. If you have any feedback, feel free to reach out to us via Twitter. You can always chat with us on our Discord community server, featuring some of the coolest developers you’ll ever meet :)