概述
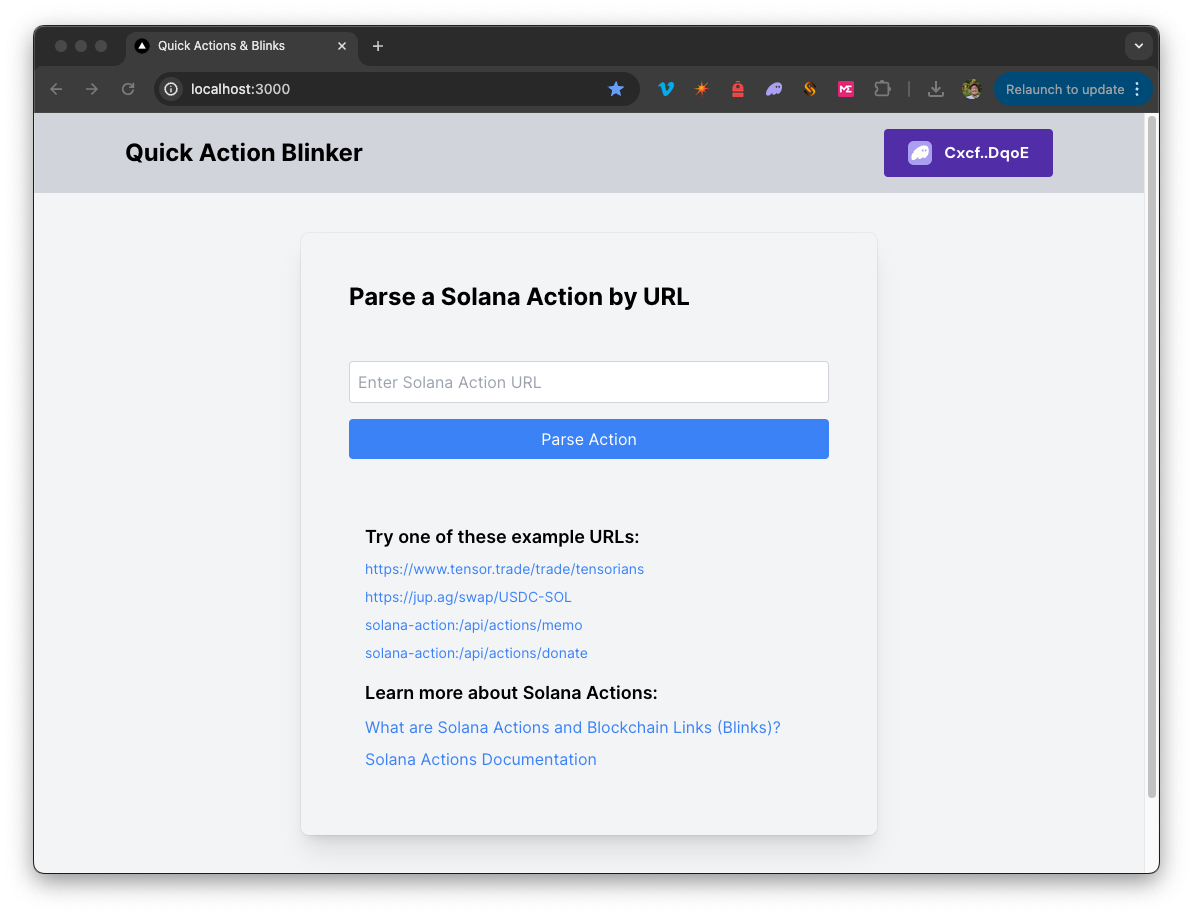
The Solana Action Blinker application allows you to create and interact with Solana Actions by parsing Solana Action URLs into their corresponding actions. With this tool, you can input a valid Action URL to view its details, connect your wallet to execute available actions, and create new actions following the provided structure. Whether you're parsing existing actions or building new ones, this app simplifies the process of interacting with Solana Action URLs.
It uses a Next.js 14 project bootstrapped with create-next-app.
Background
Solana Actions provide a standardized way to deliver signable transactions or messages from an application directly to a user. Blinks are client apps that convert Solana Actions into shareable, metadata-rich UIs for interacting with and executing Actions. For more information, check out our Guide on Solana Actions.
入门指南
Install Dependencies
Open the project directory:
cd sample-dapps/solana-action-blinker
Then, install the dependencies:
npm install
# or
yarn
# or
pnpm install
# or
bun install
Set Environment Variables
Make sure you have a Quicknode endpoint handy--you can get one free here.
- 重命名
.env.example到.env.localand update with your Quicknode Solana Node Endpoint. - Make sure to update the cluster to ensure your transaction URLs point to the correct explorer (use only of the enum values provided in the
.env.examplefile).
QN_ENDPOINT=https://example.solana-mainnet.quiknode.pro/123456
NEXT_PUBLIC_CLUSTER=mainnet-beta # mainnet-beta | devnet | testnet | local
First, run the development server:
npm run dev
# or
yarn dev
# or
pnpm dev
# or
bun dev
Open http://localhost:3000 with your browser to see the result.
Using the Dapp
- Enter a valid Solana Action URL in the input field. You may copy and paste one of the example links on the homepage.
- Click "Parse Action" to see the parsed action details.
- You will see the parsed details of the action URL. To see and execute available actions, connect a wallet.
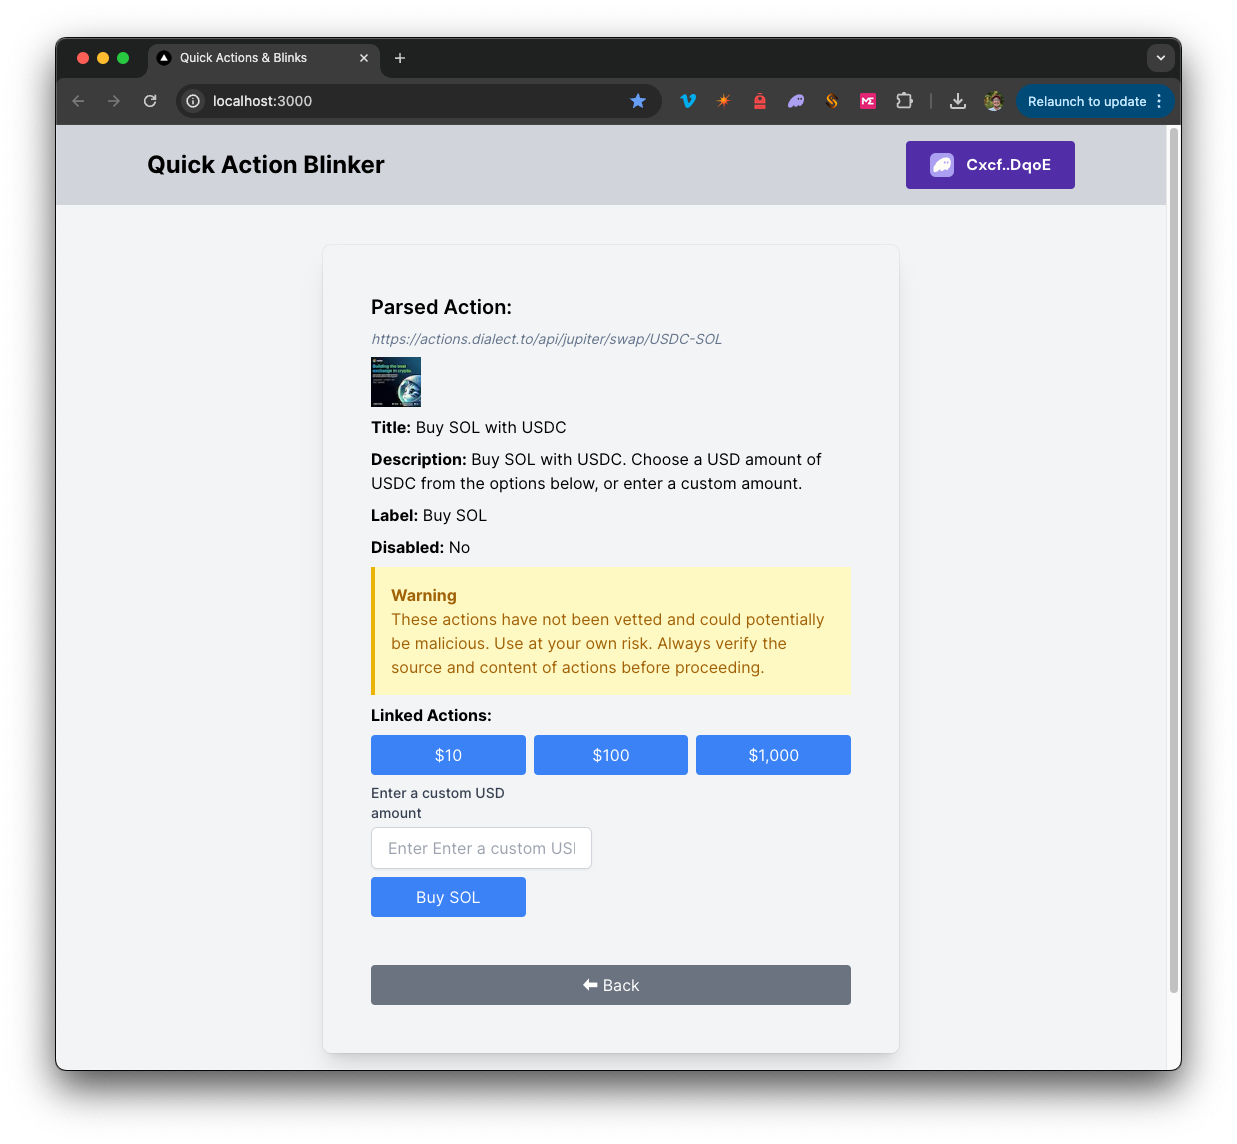
- Click any of the available actions to execute the action (you will need to sign the transaction when prompted by your wallet).
- You may create additional actions by following the structure in
solana-action-blinker/app/api/actions
建筑
src/
├── app/
│   ├── page.tsx # Main page for Blink
│   └── layout.tsx # layout for the page
│   └── api/
│       └── solana/
│           └── sendAndConfirm/route.ts # Send and Confirm Transaction
│       └── actions/
│           └── memo/route.ts  # Creates a Memo Solana Action
│           └── donate/route.ts  # Creates a Donate Solana Action
└── components/
│   ├── ActionComponents/     # includes components for parsing and executing Solana Actions
│   ├── Blink.tsx        # Main component
│   ├── SolanaProviders.tsx     # Wallet Adapter Context providers
│   └── [supporting components]
└── hooks/
│   ├── useActionFetch.ts  # Fetches and parses Solana Actions from URLs
│   └── useTransactionProcessor.ts  # Executes Solana Transactions
└── utils/ # includes various utility functions and constants
部署到 Vercel
Next.js Documentation
To learn more about Next.js, take a look at the following resources:
- Next.js Documentation - learn about Next.js features and API.
- Learn Next.js - an interactive Next.js tutorial.
You can check out the Next.js GitHub repository - your feedback and contributions are welcome!
- 分叉该仓库
- 创建一个功能分支:git checkout -b feature/amazing-feature
- 提交您的更改:git commit -m "添加超棒的功能"
- 推送您的分支:git push origin feature/amazing-feature
- 提交一个拉取请求。