Jupiter Ultra Swap Demo
A single-page Solana swap UI demonstrating token swaps using Jupiter Ultra API



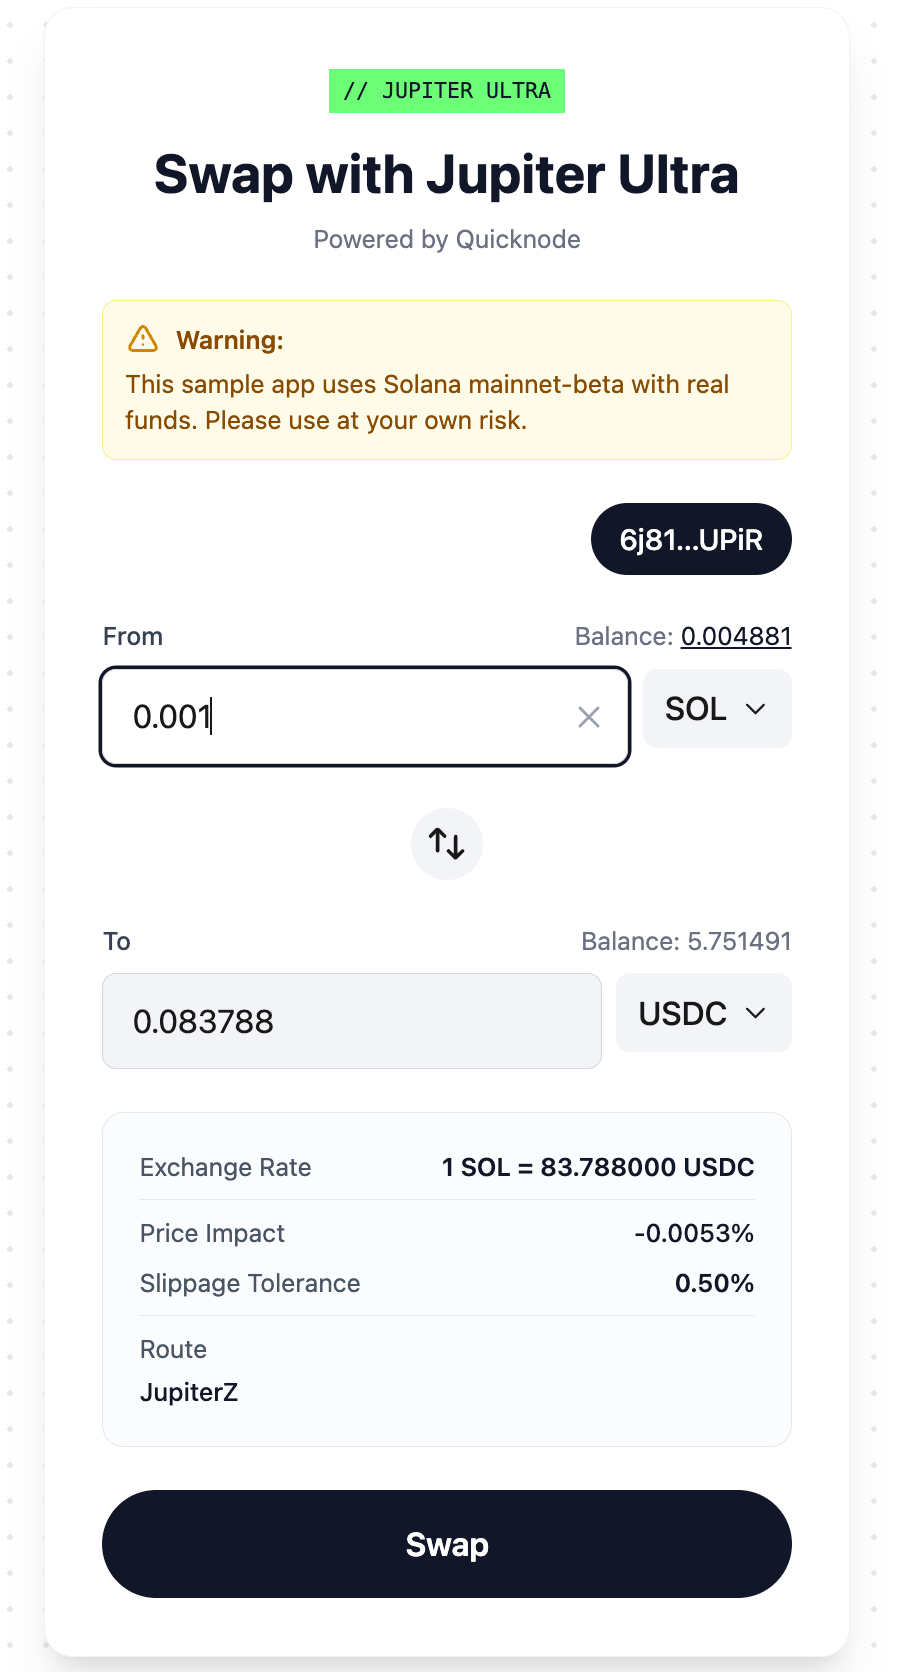
Übersicht
This Solana-based single-page application facilitates token exchanges through Jupiter Ultra API integration, paired with Quicknode RPC and Solana Wallet Adapter technologies. The application provides a seamless interface for users to swap tokens on the Solana blockchain with real-time balance updates and transaction tracking.
For a detailed walkthrough of the Jupiter Ultra API integration and implementation details, see the companion guide: How to Swap Tokens With Jupiter Ultra API.
Jupiter Ultra Swap is only available on Solana mainnet-beta. This means executing swaps will trade real tokens and incur real network fees. You could lose value due to price movement, slippage, or selecting the wrong token pair. Test with small amounts first.
Architektur
┌─────────────────┐
│   Next.js UI    │
│  (Client Side)  │
└────────┬────────┘
         │
         ├─ Wallet Adapter (Phantom, Backpack, Solflare)
         │
         ├─ API Routes (Server Side)
         │  ├─ /api/tokens
         │  ├─ /api/balances
         │  ├─ /api/quote
         │  ├─ /api/execute
         │  └─ /api/rpc
         │
         ├─ Jupiter Ultra API
         │  └─ Token swaps & quotes
         │
         └─ Quicknode RPC
            └─ Solana blockchain interactions
Funktionen
- Multi-Wallet Support: Connect with Phantom, Backpack, or Solflare wallets
- Token Selection: Choose from a comprehensive list of verified Solana tokens for swap
- Real-Time Balances: View live token balances directly from the blockchain
- Swap Quotes: Get instant swap quotes before executing transactions
- Transaction Execution: Use Jupiter Ultra's Quote → Order → Sign → Execute → Status lifecycle
- Transaction Tracking: Monitor swap status and view transaction details on Solana Explorer
Voraussetzungen
- Node.js (v18 or higher)
- A Quicknode Solana endpoint
- A Jupiter API key for swap functionality
- A Solana wallet (Phantom, Backpack, or Solflare) with mainnet access
- A small amount of mainnet-beta SOL for transaction fees
- A small amount of tokens to swap (USDC recommended for testing)
To get your Quicknode RPC URL:
- Sign up at Quicknode
- Create a new Solana endpoint
- Copy the HTTP Provider URL
Projektstruktur
jupiter-ultra-swap/
├── app/
│   ├── api/               # Server-side API routes
│   │   ├── balances/      # Token balance queries
│   │   ├── execute/       # Swap execution
│   │   ├── quote/         # Swap quotes
│   │   ├── rpc/           # RPC proxy
│   │   └── tokens/        # Token list
│   ├── providers/         # React context providers
│   ├── globals.css        # Global styles
│   ├── layout.tsx         # Root layout
│   └── page.tsx           # Main swap interface
├── components/            # Swap UI components
├── hooks/                 # Custom React hooks
│   ├── useWallet.ts       # Wallet connection logic
│   ├── useTokens.ts       # Token data management
│   └── useSwap.ts         # Swap orchestration
├── lib/                   # Utility libraries
│   ├── jupiter-client.ts  # Jupiter API client
│   ├── solana-kit.ts      # Solana RPC client
│   └── types.ts           # TypeScript definitions
└── .env.example           # Environment variables template
Erste Schritte
1. Clone the repository:
git clone https://github.com/quiknode-labs/qn-guide-examples.git
cd qn-guide-examples/solana/jupiter-ultra-swap
2. Install dependencies:
npm installieren
3. Configure environment variables:
cp .env.example .env.local
Edit .env.local and add your Quicknode RPC URL and Jupiter API key.
# Quicknode Solana RPC endpoint
QUICKNODE_RPC_URL=your_quicknode_rpc_endpoint_here

# Jupiter API key for swap functionality
JUPITER_API_KEY=your_jupiter_api_key_here
4. Run the development server:
npm run dev
5. Open the application:
Navigate to http://localhost:3000 in your browser.
API Endpoints
The application includes the following server-side API routes:
/api/tokens: Returns the list of available tokens for swapping/api/balances: Fetches token balances for a connected wallet/api/quote: Gets swap quotes from Jupiter Ultra API/api/execute: Executes the swap transaction/api/rpc: Proxies RPC requests to Quicknode
Vorschau
- Das Repository forken
- Erstelle einen Feature-Branch:git checkout -b feature/amazing-feature
- Speichere deine Änderungen:git commit -m "Tolle Funktion hinzufügen"
- Deinen Branch pushen:git push origin feature/amazing-feature
- Erstelle einen Pull Request.