Solana -Explorer
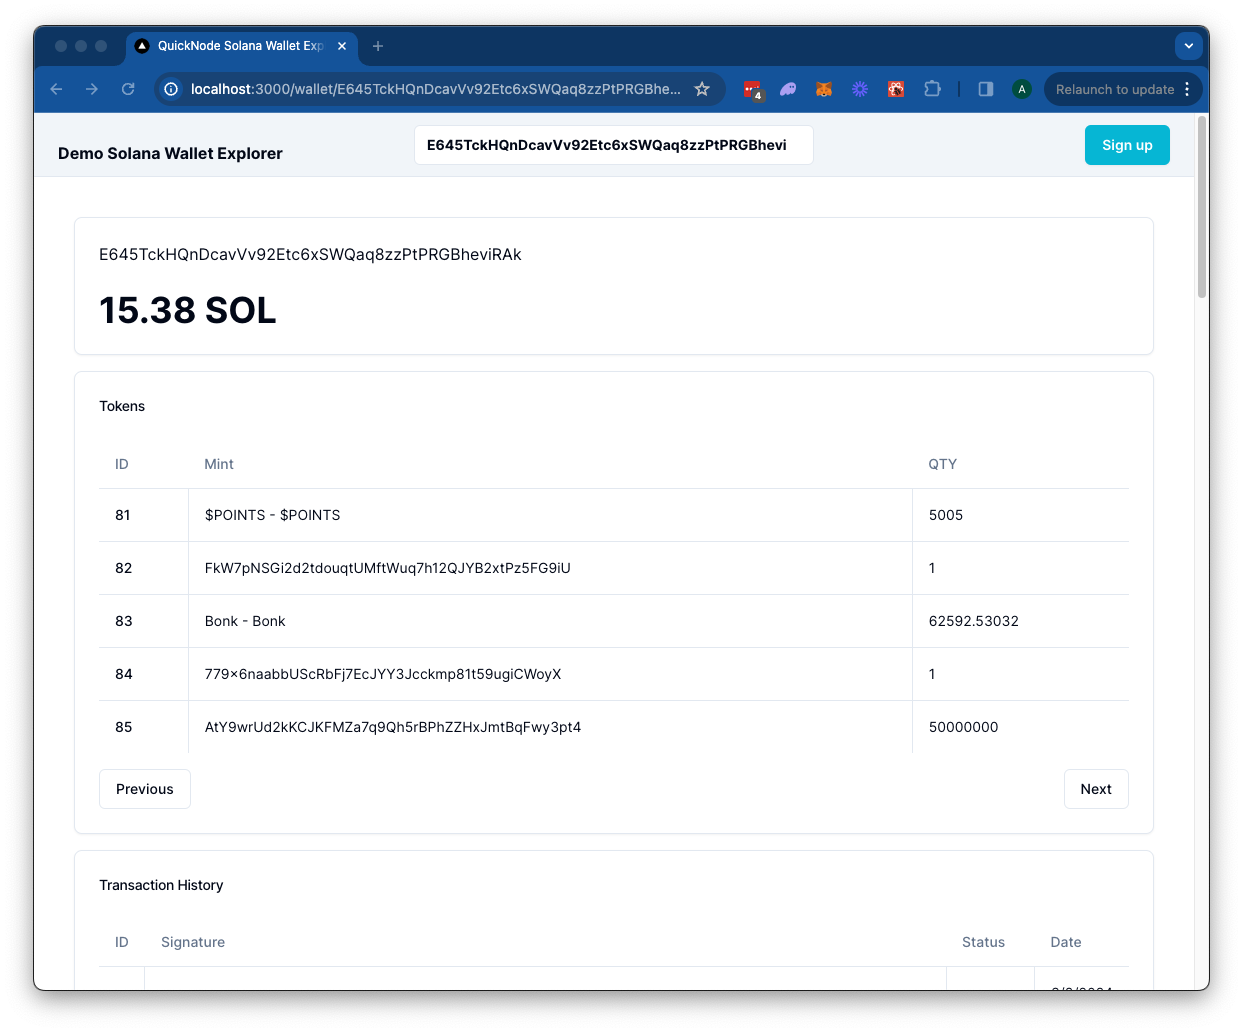
The Solana Wallet Explorer leverages a Quicknode Solana Endpoint to retrieve token balances, transaction history, and NFTs for a specified wallet on the Solana blockchain.

](https://vercel.com/new/clone?repository-url=https%3A%2F%2Fgithub.com%2Fquiknode-labs%2Fqn-guide-examples%2Ftree%2Fmain%2Fsample-dapps%2Fsolana-wallet-explorer&env=SOLANA_RPC_URL,DAS_API_ENABLED,NEXT_PUBLIC_FETCH_JUPLIST&envDescription=SOLANA_RPC_URL%3A%20Use%20Quicknode%20Solana%20Mainnet%20Endpoint%20%7C%20DAS_API_ENABLED%20%3D%20true%20with%20the%20Metaplex%20product%20enabled%20in%20the%20Quicknode%20Dashboard%20%7C%20NEXT_PUBLIC_FETCH_JUPLIST%20%3D%20true%20to%20fetch%20token%20names&envLink=https%3A%2F%2Fdashboard.quicknode.com%2Fendpoints&project-name=starter-solana-explorer&repository-name=starter-solana-explorer&redirect-url=https%3A%2F%2Fdashboard.quicknode.com%2Fendpoints&demo-title=Quicknode%20Starter%20Solana%20Explorer&demo-image=https%3A%2F%2Fgithub.com%2Fquiknode-labs%2Fqn-guide-examples%2Ftree%2Fmain%2Fsample-dapps%2Fsolana-wallet-explorer%2Fpublic%2Fdemo.png)

Übersicht
The Solana Wallet Explorer leverages a Quicknode Solana Endpoint to retrieve token balances, transaction history, and NFTs for a specified wallet on the Solana blockchain. It uses a Next.js 14 Projekt, das mit create-next-app.
Erste Schritte
Abhängigkeiten installieren
First, install the dependencies:
npm install
# oder
yarn
# oder
pnpm install
# oder
bun install
Umgebungsvariablen festlegen
Stellen Sie sicher, dass Sie einenendpoint zur Hand haben – hier könnenendpoint kostenlos einen erhalten.
Umbenennen .env.example zu .env.local and add your Quicknode Solana endpoint. Set DAS_API_ENABLED zu wahr only if you have access to the Metaplex product.
SOLANA_RPC_URL=https://example.solana-mainnet.quiknode.pro/123456/
DAS_API_ENABLED=true
NEXT_PUBLIC_FETCH_JUPLIST=true
Starten Sie zunächst den Entwicklungsserver:
npm run dev
# oder
yarn dev
# oder
pnpm dev
# oder
bun dev
Öffnen Sie http://localhost:3000 in Ihrem Browser, um das Ergebnis anzuzeigen.
Nutzung der Dapp
Search for a Solana wallet address and press enter.
The Dapp will redirect to /wallet/[address] and query the Solana blockchain for the wallet's token balances, transactions, and NFTs. Results are rendered in respective cards.
Architektur
src/
├── app/
│   └── api/
│       └── wallet/
├── components/
    ├── explorer/
    └── header/
api- Contains the API routes for the Solana RPC calls. These can be accessed from the client via/api/wallet/[method]?walletAddress=[address]. These GET requests utilize thesolana.jslibrary and Metaplex Digital Asset Standard framework to handle queries.components- Contains the React components for the dapp.- Die
explorercomponent contains client-side components that call the API routes and render the results. - Die
Kopfzeilecomponent contains the search bar for the dapp.
- Die
Auf Vercel bereitstellen

Vorschau
Next.js-Dokumentation
Wenn Sie mehr über Next.js erfahren möchten, sehen Sie sich die folgenden Ressourcen an:
- Next.js-Dokumentation – Erfahren Sie mehr über die Funktionen und die API von Next.js.
- Next.js lernen – ein interaktives Next.js-Tutorial.
Schaut euch doch mal das Next.js-GitHub-Repository an – wir freuen uns über euer Feedback und eure Beiträge!
- Das Repository forken
- Erstelle einen Feature-Branch:git checkout -b feature/amazing-feature
- Speichere deine Änderungen:git commit -m "Tolle Funktion hinzufügen"
- Deinen Branch pushen:git push origin feature/amazing-feature
- Erstelle einen Pull Request.