Clignotant Solana
L'application Solana Blinker vous permet de créer Solana et d'analyser les URL Solana pour les transformer en actions correspondantes.



Présentation générale
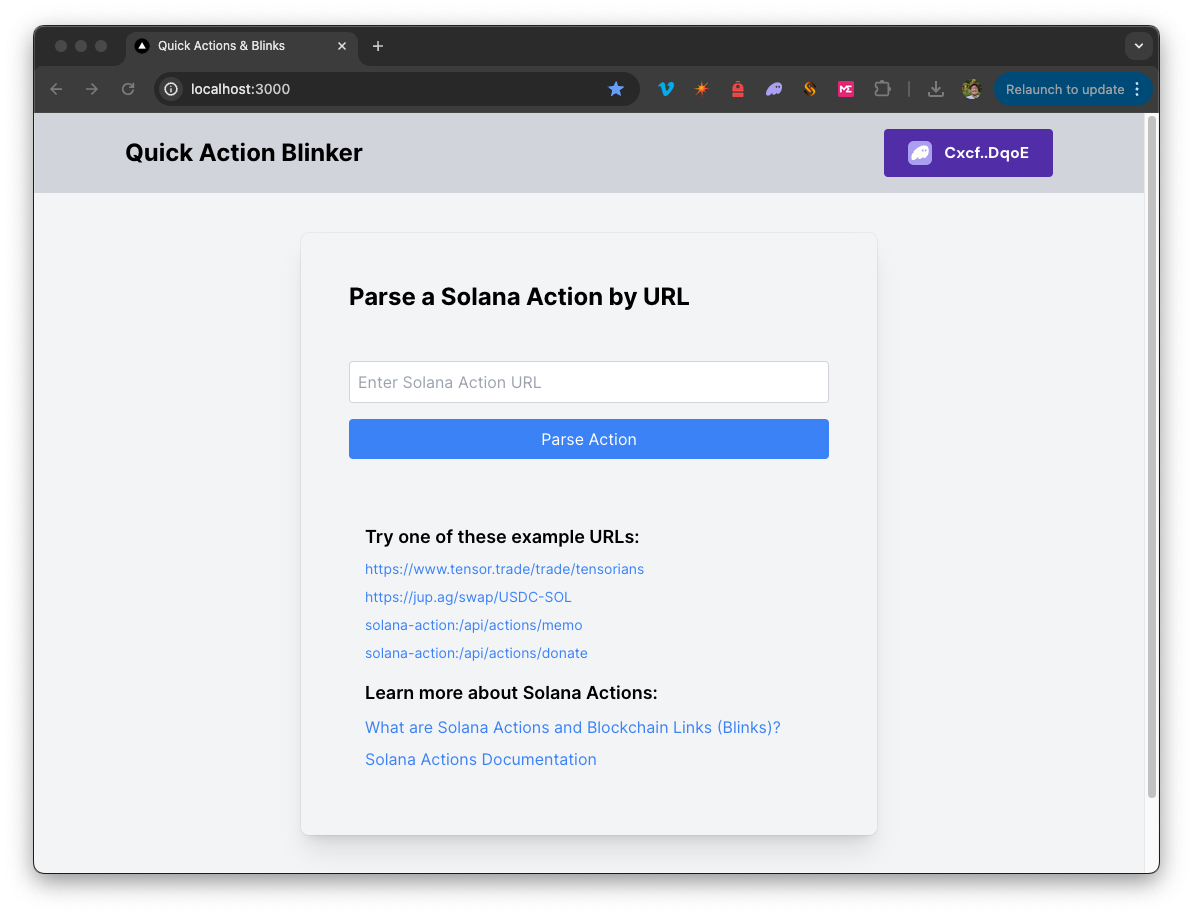
L'application Solana Blinker vous permet de créer Solana et d'interagir avec Solana en analysant les URL Solana pour les transformer en actions correspondantes. Grâce à cet outil, vous pouvez saisir une URL d'action valide pour consulter ses détails, connecter votre portefeuille afin d'exécuter les actions disponibles et créer de nouvelles actions en suivant la structure fournie. Que vous analysiez des actions existantes ou que vous en créiez de nouvelles, cette application simplifie le processus d'interaction avec les URL Solana .
Il utilise un Next.js 14 projet lancé grâce à create-next-app.
Background
Solana constituent un moyen standardisé de transmettre des transactions ou des messages signables depuis une application directement à un utilisateur. Les « Blinks » sont des applications client qui transforment Solana en interfaces utilisateur partageables et riches en métadonnées, permettant d'interagir avec ces Actions et de les exécuter. Pour plus d'informations, consultez notre guide sur Solana ».
Pour commencer
Installer les dépendances
Ouvrez le répertoire du projet :
cdsolana
Ensuite, installez les dépendances :
npm installer
# ou
yarn
# ou
pnpm installer
# ou
bun install
Définir les variables d'environnement
Assurez-vous d'avoir unendpoint Quicknode à portée de mainendpoint pouvez en obtenir un gratuitement ici.
- Renommer
.env.exampleà.env.localet remplacez-le par Endpoint de votreSolana Quicknode Solana . - Veillez à mettre à jour le cluster afin de vous assurer que vos URL de transaction pointent vers le bon explorateur (utilisez uniquement les valeurs d'énumération fournies dans le
.env.examplefichier).
QN_ENDPOINT=mainnet
mainnet# mainnet| devnet | testnet  local
Commencez par lancer le serveur de développement :
npm exécuter dev
# ou
yarn dev
# ou
pnpm dev
# ou
bun dev
Ouvrez http://localhost:3000 dans votre navigateur pour voir le résultat.
Utilisation de la Dapp
- Saisissez une URL Solana valide dans le champ de saisie. Vous pouvez copier-coller l'un des liens d'exemple figurant sur la page d'accueil.
- Cliquez sur « Analyser l'action » pour afficher les détails de l'action analysée.
- Vous verrez les détails analysés de l'URL de l'action. Pour consulter et exécuter les actions disponibles, connectez un portefeuille.
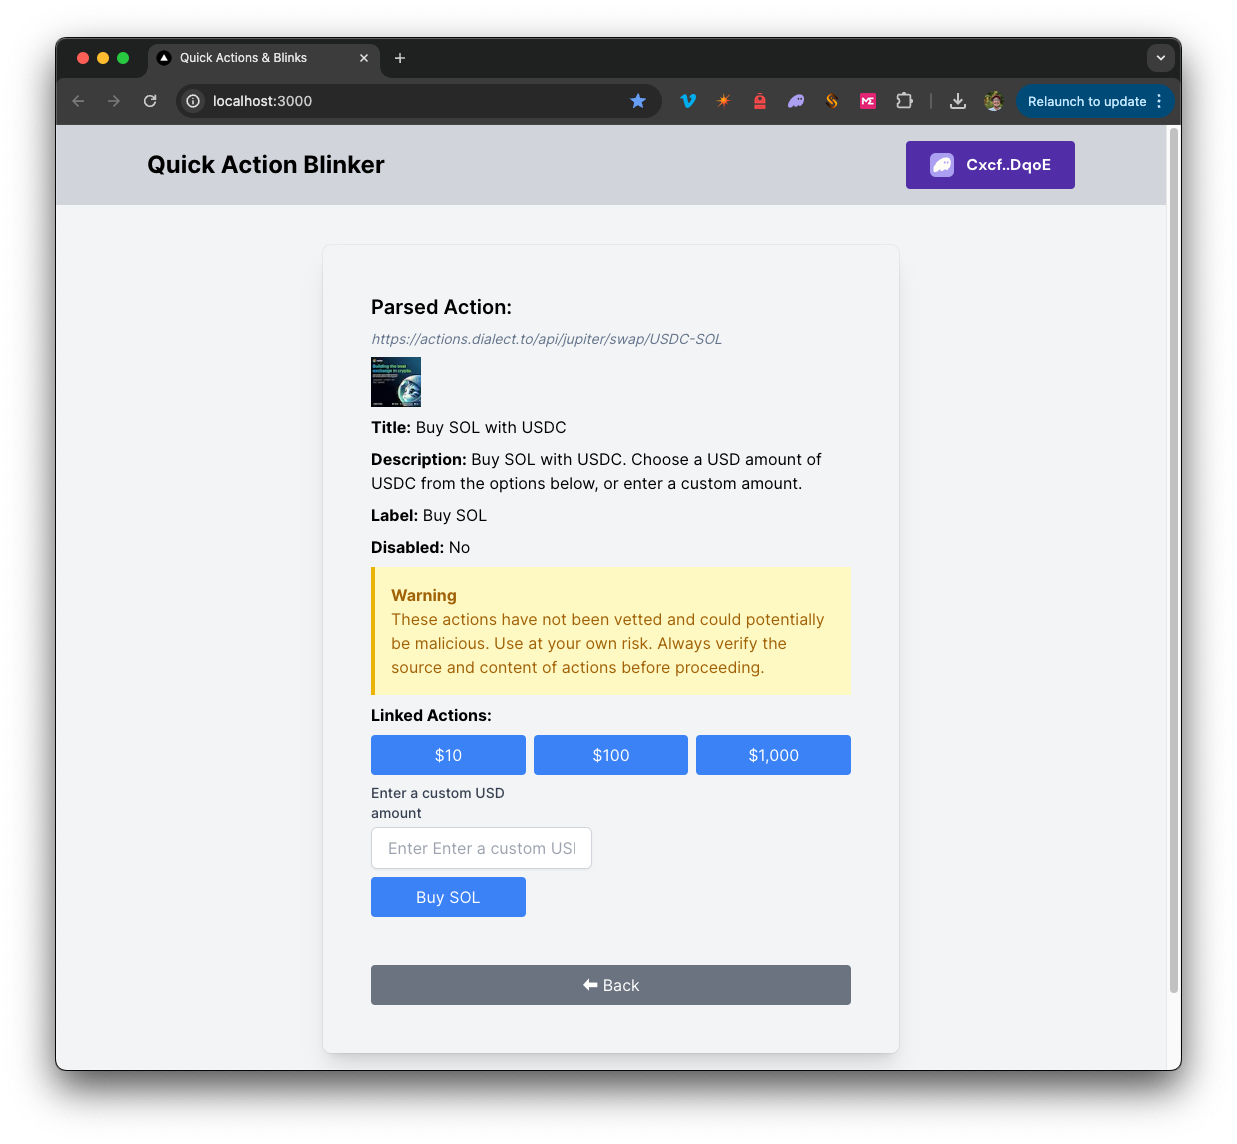
- Cliquez sur l'une des actions disponibles pour l'exécuter (vous devrez signer la transaction lorsque votre portefeuille vous y invitera).
- Vous pouvez créer des actions supplémentaires en suivant la structure indiquée dans
solana
Architecture
src/
├── app/
│   ├── page.tsx # Page principale de Blink
│   └── layout.tsx # Mise en page de la page
│   └── api/
│       └── solana
│           └── sendAndConfirm/route.ts # Envoyer et confirmer une transaction
│       └── actions/
│           └── memo/route.ts  # Crée une Solana « Memo »
│           └── donate/route.ts  # Crée une Solana « Donate »
└── components/
│   ├── ActionComponents/     # Comprend des composants pour l'analyse et l'exécution Solana
│   ├── Blink.tsx        # Composant principal
│   ├── SolanaProviders.tsx     # Fournisseurs de contexte pour l'adaptateur de portefeuille
│   └── [composants associés]
└── hooks/
│   ├── useActionFetch.ts  # Récupère et analyse Solana à partir d'URL
│   └── useTransactionProcessor.ts  # Exécute Solana
└── utils/ # Contient diverses fonctions utilitaires et constantes
Déployer sur Vercel
Documentation Next.js
Pour en savoir plus sur Next.js, consultez les ressources suivantes :
- Documentation Next.js: découvrez les fonctionnalités et l'API de Next.js.
- Apprenez Next.js – un tutoriel interactif sur Next.js.
Vous pouvez consulter le dépôt GitHub de Next.js: vos commentaires et vos contributions sont les bienvenus !
- Créer une branche du dépôt
- Créer une branche de fonctionnalité :git checkout -b feature/amazing-feature
- Validez vos modifications :git commit -m "Ajout d'une fonctionnalité géniale"
- Publiez votre branche :git push origin feature/amazing-feature
- Créez une demande de fusion.