Explorateur Solana
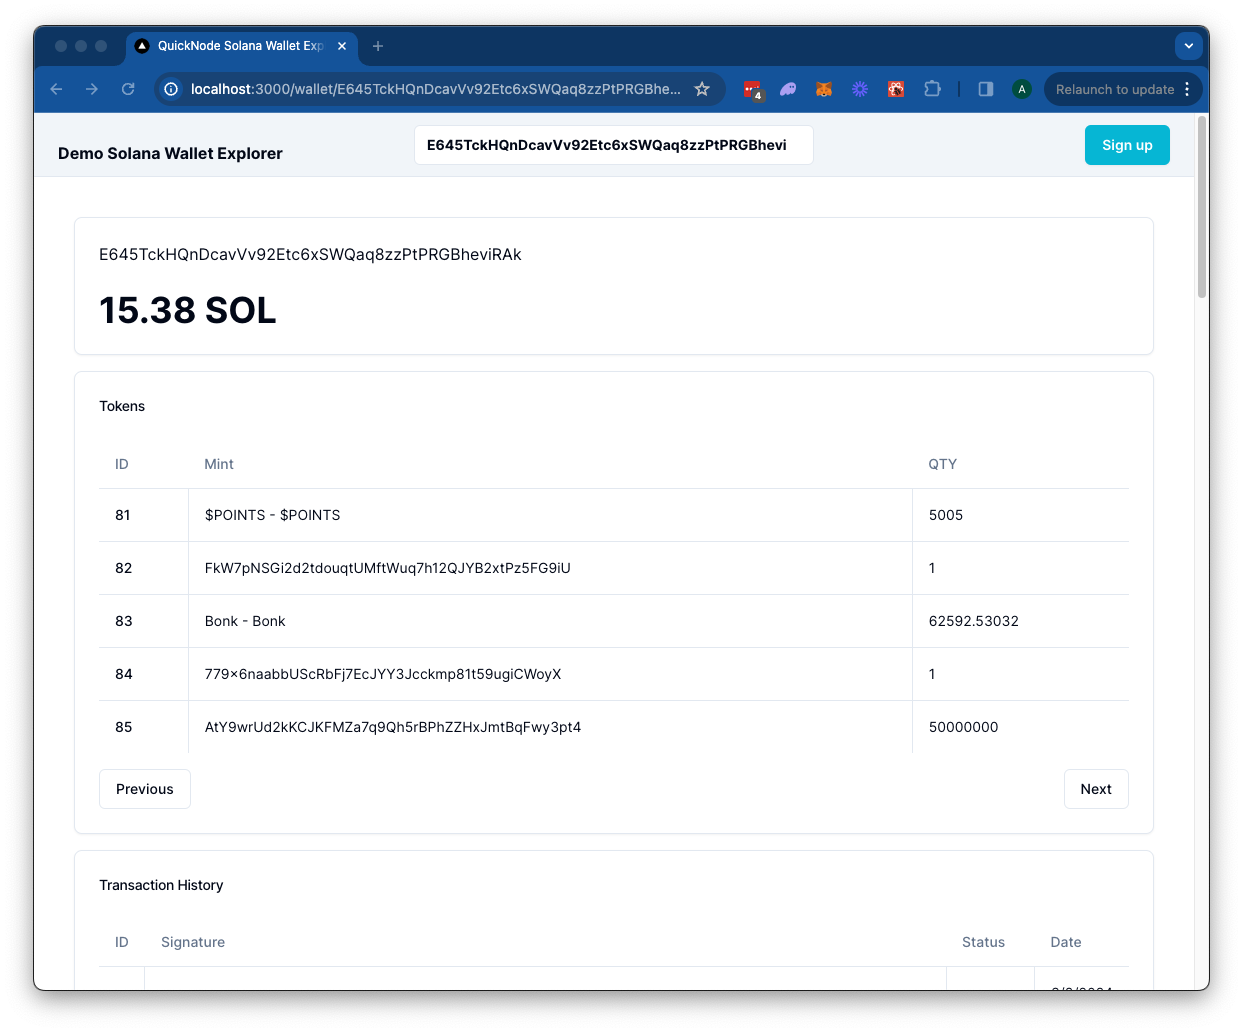
L'explorateur de portefeuille Solana utilise une API Quicknode Solana Endpoint pour récupérer les soldes de jetons, l'historique des transactions et les NFT d'un portefeuille donné sur la blockchain Solana .

](https://vercel.com/new/clone?repository-url=https%3A%2F%2Fgithub.com%2Fquiknode-labs%2Fqn-guide-examples%2Ftree%2Fmain%2Fsample-dapps%2Fsolana-wallet-explorer&env=SOLANA_RPC_URL,DAS_API_ENABLED,NEXT_PUBLIC_FETCH_JUPLIST&envDescription=SOLANA_RPC_URL%3A%20Use%20Quicknode%20Solana%20Mainnet%20Endpoint%20%7C%20DAS_API_ENABLED%20%3D%20true%20with%20the%20Metaplex%20product%20enabled%20in%20the%20Quicknode%20Dashboard%20%7C%20NEXT_PUBLIC_FETCH_JUPLIST%20%3D%20true%20to%20fetch%20token%20names&envLink=https%3A%2F%2Fdashboard.quicknode.com%2Fendpoints&project-name=starter-solana-explorer&repository-name=starter-solana-explorer&redirect-url=https%3A%2F%2Fdashboard.quicknode.com%2Fendpoints&demo-title=Quicknode%20Starter%20Solana%20Explorer&demo-image=https%3A%2F%2Fgithub.com%2Fquiknode-labs%2Fqn-guide-examples%2Ftree%2Fmain%2Fsample-dapps%2Fsolana-wallet-explorer%2Fpublic%2Fdemo.png)

Présentation générale
L'explorateur de portefeuille « Solana » s'appuie sur une API Quicknode Solana Endpoint pour récupérer les soldes de jetons, l'historique des transactions et les NFT d'un portefeuille donné sur la blockchain Solana . Il utilise un Next.js 14 projet lancé grâce à create-next-app.
Pour commencer
Installer les dépendances
Commencez par installer les dépendances :
npm installer
# ou
yarn
# ou
pnpm installer
# ou
bun install
Définir les variables d'environnement
Assurez-vous d'avoir unendpoint Quicknode à portée de mainendpoint pouvez en obtenir un gratuitement ici.
Renommer .env.example à .env.local et ajoutez votre Quicknode Solana endpoint . Définissez DAS_API_ENABLED à vrai à condition que vous ayez accès à la Produit Metaplex.
SOLANA_RPC_URL=https://example.solana-mainnet.quiknode.pro/123456/
DAS_API_ENABLED=true
NEXT_PUBLIC_FETCH_JUPLIST=true
Commencez par lancer le serveur de développement :
npm exécuter dev
# ou
yarn dev
# ou
pnpm dev
# ou
bun dev
Ouvrez http://localhost:3000 dans votre navigateur pour voir le résultat.
Utilisation de la Dapp
Recherchez une adresse de portefeuille « Solana » et appuyez sur Entrée.
L'application Dapp vous redirigera vers /wallet/[adresse] et interroger la blockchain Solana pour obtenir les soldes en jetons, les transactions et les NFT du portefeuille. Les résultats s'affichent dans des fiches dédiées.
Architecture
src/
├── app/
│   └── api/
│       └── wallet/
├── components/
    ├── explorer/
    └── header/
API- Contient les routes API pour les appels RPC de Solana . Le client peut y accéder via/api/wallet/[méthode]?walletAddress=[adresse]. Ces requêtes GET utilisent le@solana/web3.jsla bibliothèque et le cadre Metaplex Digital Asset Standard pour traiter les requêtes.composants- Contient les composants React destinés à la dapp.- Le
explorateurLe composant contient des éléments côté client qui appellent les routes de l'API et affichent les résultats. - Le
en-têteCe composant contient la barre de recherche de la dapp.
- Le
Déployer sur Vercel

Aperçu
Documentation Next.js
Pour en savoir plus sur Next.js, consultez les ressources suivantes :
- Documentation Next.js: découvrez les fonctionnalités et l'API de Next.js.
- Apprenez Next.js – un tutoriel interactif sur Next.js.
Vous pouvez consulter le dépôt GitHub de Next.js: vos commentaires et vos contributions sont les bienvenus !
- Créer une branche du dépôt
- Créer une branche de fonctionnalité :git checkout -b feature/amazing-feature
- Validez vos modifications :git commit -m "Ajout d'une fonctionnalité géniale"
- Publiez votre branche :git push origin feature/amazing-feature
- Créez une demande de fusion.