Solana ・ブリンカー
「Solana Blinker」アプリを使用すると、Solana を作成したり、Solana URLを解析して対応するアクションを取得したりすることができます。



概要
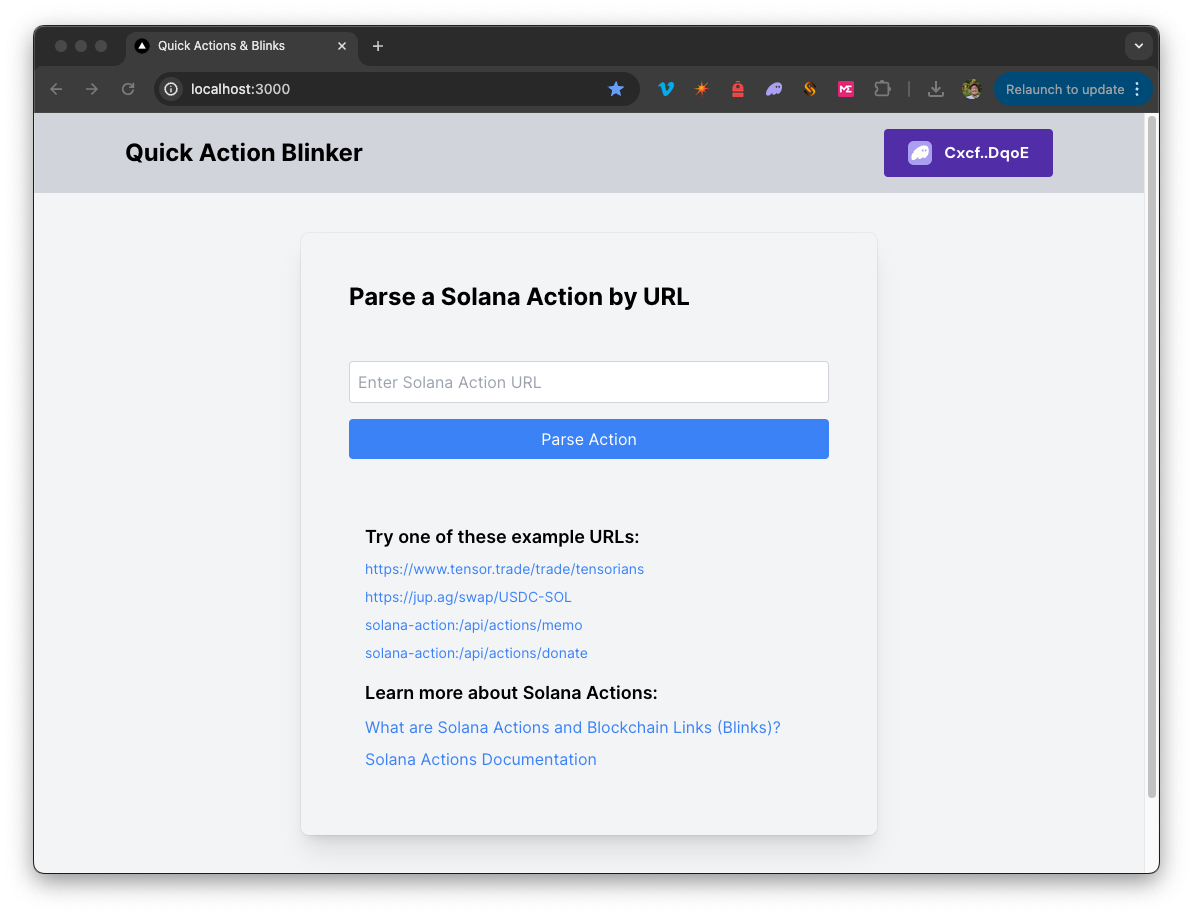
「Solana Blinker」アプリケーションを使用すると、Solana 解析して対応するアクションに変換し、Solana や操作を行うことができます。このツールを使えば、有効なAction URLを入力して詳細を確認したり、ウォレットを接続して利用可能なアクションを実行したり、指定された構造に従って新しいアクションを作成したりすることができます。既存のアクションを解析する場合でも、新しいアクションを構築する場合でも、このアプリSolana URLとのやり取りが簡単になります。
これには Next.js 14 以下のツールを使用して立ち上げられたプロジェクト create-next-app.
背景
Solana 、アプリケーションからユーザーに直接、署名可能なトランザクションやメッセージを配信するための標準化された方法を提供します。 Blinks は、Solana 、アクションとのやり取りや実行を行うための、共有可能でメタデータが豊富な UI に変換するクライアントアプリです。 詳細については、 Solana に関するガイドをご覧ください。
はじめに
依存関係をインストールする
プロジェクトディレクトリを開きます:
cdsolana
次に、依存関係をインストールします:
npm install
# または
yarn
# または
pnpm install
# または
bun install
環境変数の設定
endpoint 必ず手元に用意しておいてくださいendpoint こちらから無料で取得できます。
- 名前を変更する
.env.example~へ.env.localそして、Quicknode のSolana Endpointに更新してください。 - トランザクションのURLが正しいエクスプローラーを指すように、必ずクラスターを更新してください(
.env.exampleファイル)。
QN_ENDPOINT=mainnet
mainnet#mainnet| devnet |testnet  local
まず、開発サーバーを起動します:
npm run dev
# または
yarn dev
# または
pnpm dev
# または
bun dev
ブラウザでhttp://localhost:3000を開くと、結果を確認できます。
Dappの利用方法
- 入力欄に有効なSolana を入力してください。ホームページに掲載されているサンプルリンクのいずれかをコピーして貼り付けることもできます。
- 「アクションの解析」をクリックすると、解析されたアクションの詳細が表示されます。
- アクションURLの解析結果が表示されます。利用可能なアクションを確認・実行するには、ウォレットを接続してください。
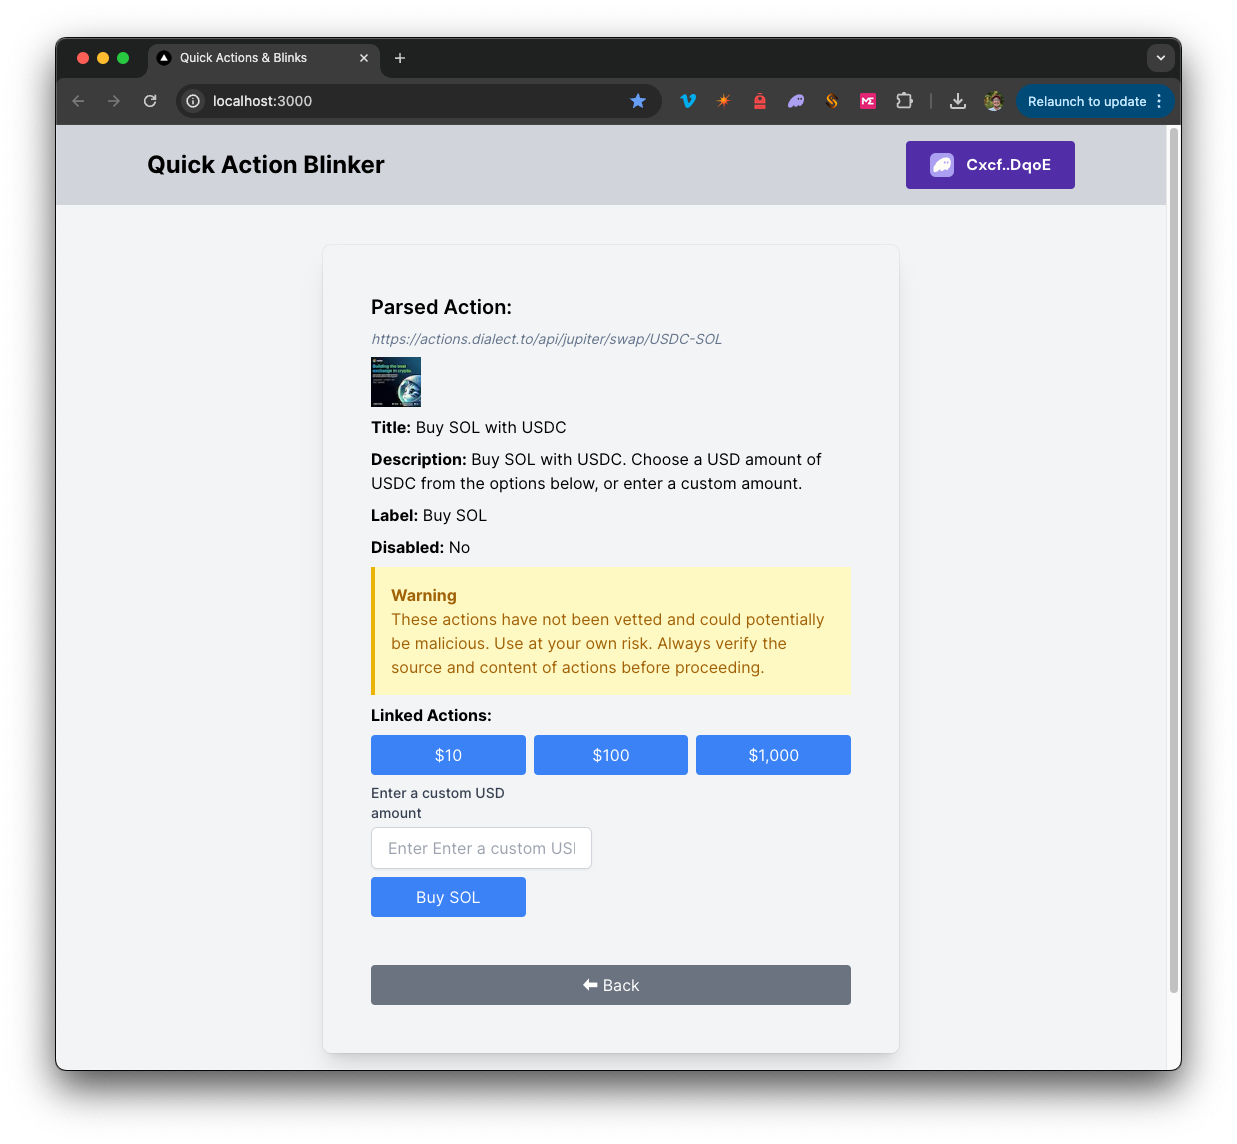
- 利用可能なアクションのいずれかをクリックして、そのアクションを実行してください(ウォレットからプロンプトが表示されたら、トランザクションに署名する必要があります)。
- 以下の構造に従って、追加のアクションを作成することができます。
solana
建築
src/
├── app/
│   ├── page.tsx # Blinkのメインページ
│   └── layout.tsx # ページのレイアウト
│   └── api/
│       └──solana
│           └── sendAndConfirm/route.ts # トランザクションの送信と確認
│       └── actions/
│           └── memo/route.ts  #Solana MemoSolana を作成する
│           └── donate/route.ts  #Solana DonateSolana を作成
└── components/
│   ├── ActionComponents/     #Solana 解析および実行を行うコンポーネントを含みます
│   ├── Blink.tsx        # メインコンポーネント
│   ├── SolanaProviders.tsx     # ウォレットアダプターのコンテキストプロバイダー
│   └── [サポートコンポーネント]
└── hooks/
│   ├── useActionFetch.ts  #Solana を取得・解析する
│   └── useTransactionProcessor.ts  #Solana を実行する
└── utils/ # 各種ユーティリティ関数や定数を定義
Vercelへのデプロイ
Next.js ドキュメント
Next.js についてさらに詳しく知りたい場合は、以下のリソースをご覧ください:
- Next.js ドキュメント- Next.js の機能と API について学びましょう。
- Next.js を学ぶ- インタラクティブな Next.js チュートリアル。
Next.jsのGitHubリポジトリをご覧ください。皆様からのフィードバックや貢献を歓迎します!
- リポジトリをフォークする
- フィーチャーブランチを作成する:git checkout -b feature/amazing-feature
- 変更をコミットします:git commit -m "素晴らしい機能を追加"
- ブランチをプッシュしてください:git push origin feature/amazing-feature
- プルリクエストを作成してください。