サンプルアプリに戻る
Solana Token Minter
The Solana Token Minter app allows you to create fungible tokens on the Solana blockchain with built-in support for IPFS image uploads.
著者



フロントエンドフレームワーク/ライブラリ:
React/Next.js
言語:
TypeScript
ビルドツール/開発サーバー:
Next.js
概要
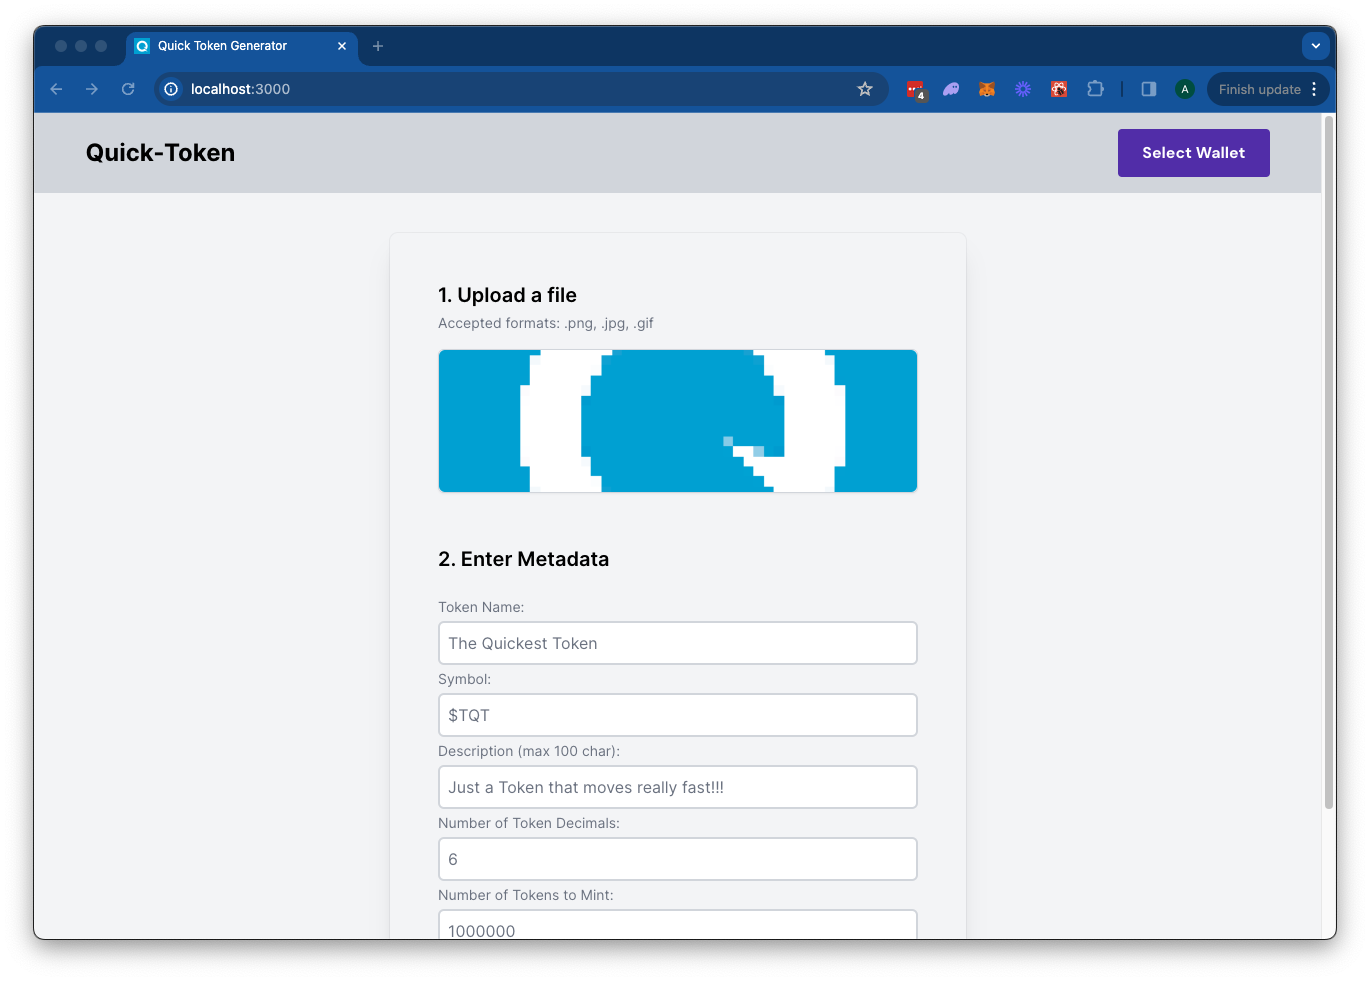
The Solana Token Minter app allows you to create fungible tokens on the Solana blockchain with built-in support for IPFS image uploads using Quicknode's IPFS API. Simply upload an image for your token metadata, fill out the token details, and connect your wallet. Click "Mint" to upload your metadata to IPFS and mint your token seamlessly.This app uses Next.js 14 以下のツールを使用して立ち上げられたプロジェクト create-next-app.
はじめに
依存関係をインストールする
プロジェクトディレクトリを開きます:
cd sample-dapps/solana-token-maker
次に、依存関係をインストールします:
npm install
# または
yarn
# または
pnpm install
# または
bun install
環境変数の設定
endpoint 必ず手元に用意しておいてくださいendpoint こちらから無料で取得できます。
- 名前を変更する
.env.example~へ.env.localand update with your Quicknode Solana Node Endpoint and Quicknode IPFS key. - トランザクションのURLが正しいエクスプローラーを指すように、必ずクラスターを更新してください(
.env.exampleファイル)。 - You can use Quicknode's public IPFS Gateway URL or replace it with your own.
QN_IPFS_API=QN_abc123456789xyz_REPLACE_THIS
QN_ENDPOINT=https://example.solana-mainnet.quiknode.pro/123456
NEXT_PUBLIC_CLUSTER=mainnet-beta # mainnet-beta | devnet | testnet | local
NEXT_PUBLIC_GATEWAY_URL=https://quicknode.quicknode-ipfs.com/ipfs/
まず、開発サーバーを起動します:
npm run dev
# または
yarn dev
# または
pnpm dev
# または
bun dev
ブラウザでhttp://localhost:3000を開くと、結果を確認できます。
Dappの利用方法
- Upload an Image (this will be used for your token metadata)
- Fill out the form with the token details
- ウォレットを接続する
- Make sure you have ~0.04 SOL in your wallet to cover the new account fees
- If you are using Devnet, you can get free SOL from the Solana Faucet
- Click "Mint" to upload your image and metadata to IPFS and mint your token!
建築
src/
├── app/
│   ├── page.tsx
│   └── layout.tsx
│   └── api/
│       └── solana/
│           └── createMintTx/route.ts   # Create New Mint Transaction
│           └── sendAndConfirm/route.ts # Send and Confirm Transaction
│       └── upload/
│           └── image/route.ts  # IPFS Image Upload
│           └── json/route.ts   # IPFS JSON Upload
└── components/
    ├── SolanaProviders.tsx     # Wallet Adapter Context providers
    ├── Minter.tsx              # Main component
    └── [supporting components]
Vercelへのデプロイ
Next.js ドキュメント
Next.js についてさらに詳しく知りたい場合は、以下のリソースをご覧ください:
- Next.js ドキュメント- Next.js の機能と API について学びましょう。
- Next.js を学ぶ- インタラクティブな Next.js チュートリアル。
Next.jsのGitHubリポジトリをご覧ください。皆様からのフィードバックや貢献を歓迎します!
投稿とフィードバック
皆様からのご意見をお待ちしております。また、このサンプルアプリへのご協力も大歓迎です!
問題の報告やフィードバックの共有を行うには、GitHubのイシューを qn-ガイド-例 リポジトリ。
投稿するには、以下の手順に従ってください:
- リポジトリをフォークする
- フィーチャーブランチを作成する:git checkout -b feature/amazing-feature
- 変更をコミットします:git commit -m "素晴らしい機能を追加"
- ブランチをプッシュしてください:git push origin feature/amazing-feature
- プルリクエストを作成してください。
その他のサンプルアプリを見る