Solana Action Blinker
A aplicação Solana Blinker permite-lhe criar Solana e analisar URLs Solana para identificar as ações correspondentes.



Visão geral
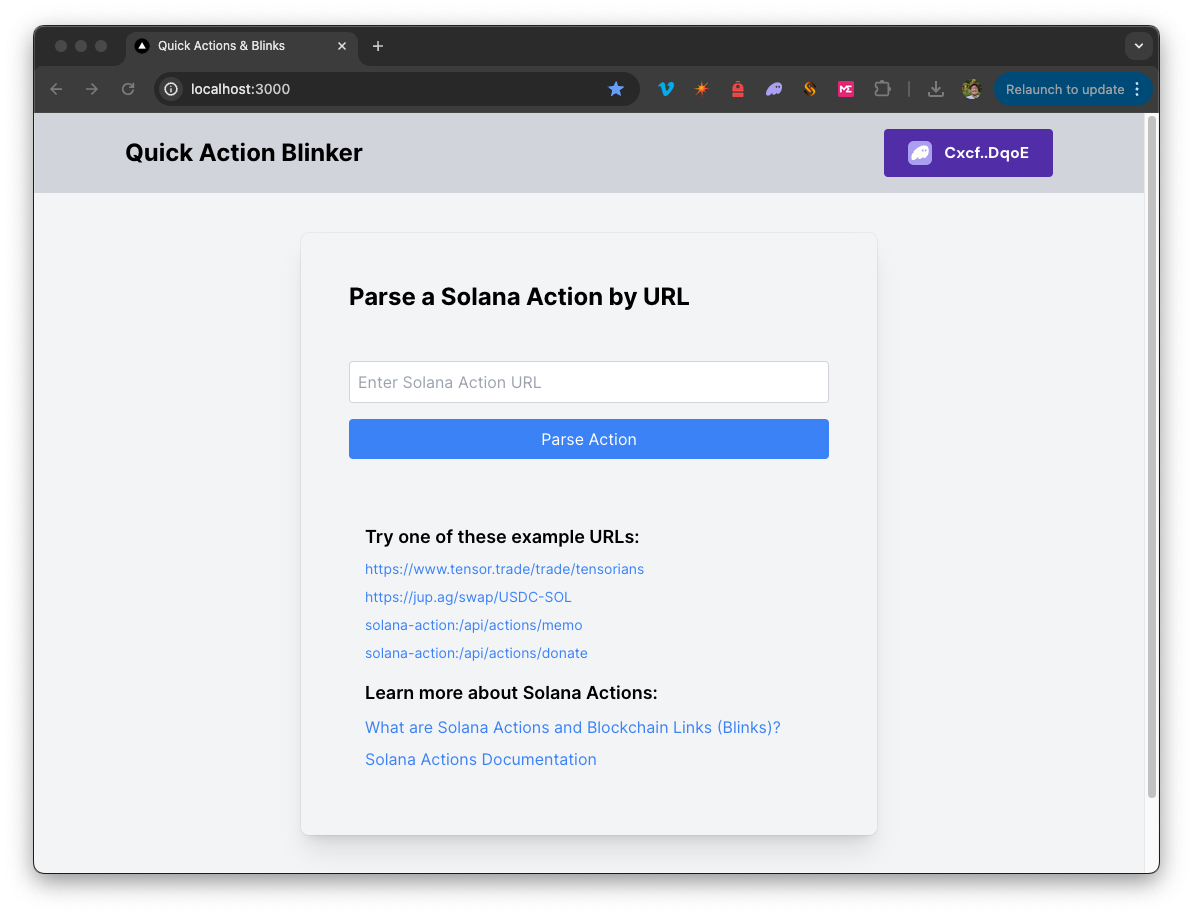
A aplicação Solana Blinker permite-lhe criar e interagir com Solana , analisando os URLs Solana para identificar as ações correspondentes. Com esta ferramenta, pode introduzir um URL válido de uma ação para visualizar os seus detalhes, ligar a sua carteira para executar as ações disponíveis e criar novas ações seguindo a estrutura fornecida. Quer esteja a analisar ações existentes ou a criar novas, esta aplicação simplifica o processo de interação com os URLs Solana .
Utiliza um Next.js 14 projeto iniciado com create-next-app.
Background
Solana Actions provide a standardized way to deliver signable transactions or messages from an application directly to a user. Blinks are client apps that convert Solana Actions into shareable, metadata-rich UIs for interacting with and executing Actions. For more information, check out our Guide on Solana Actions.
Primeiro passos
Instalar dependências
Abra o diretório do projeto:
cd sample-dapps/solana-action-blinker
Em seguida, instale as dependências:
npm instalar
# ou
yarn
# ou
pnpm instalar
# ou
bun install
Definir variáveis de ambiente
Certifique-se de que tem umendpoint Quicknode endpoint pode obter um gratuitamente aqui.
- Renomear
.env.examplepara.env.locale atualize com o seu EndpointSolana Quicknode Solana . - Certifique-se de que atualiza o cluster para garantir que os URLs das suas transações apontam para o explorador correto (utilize apenas os valores da enumeração fornecidos no
.env.exampleficheiro).
QN_ENDPOINT=mainnet
mainnet# mainnet| devnet | testnet  local
Primeiro, execute o servidor de desenvolvimento:
npm executar dev
# ou
yarn dev
# ou
pnpm dev
# ou
bun dev
Aceda a http://localhost:3000 no seu navegador para ver o resultado.
Utilizar a Dapp
- Introduza um URL Solana válido Solana no campo de entrada. Pode copiar e colar um dos links de exemplo que se encontram na página inicial.
- Clique em «Analisar ação» para ver os detalhes da ação analisada.
- Irá ver os detalhes analisados do URL da ação. Para ver e executar as ações disponíveis, ligue uma carteira.
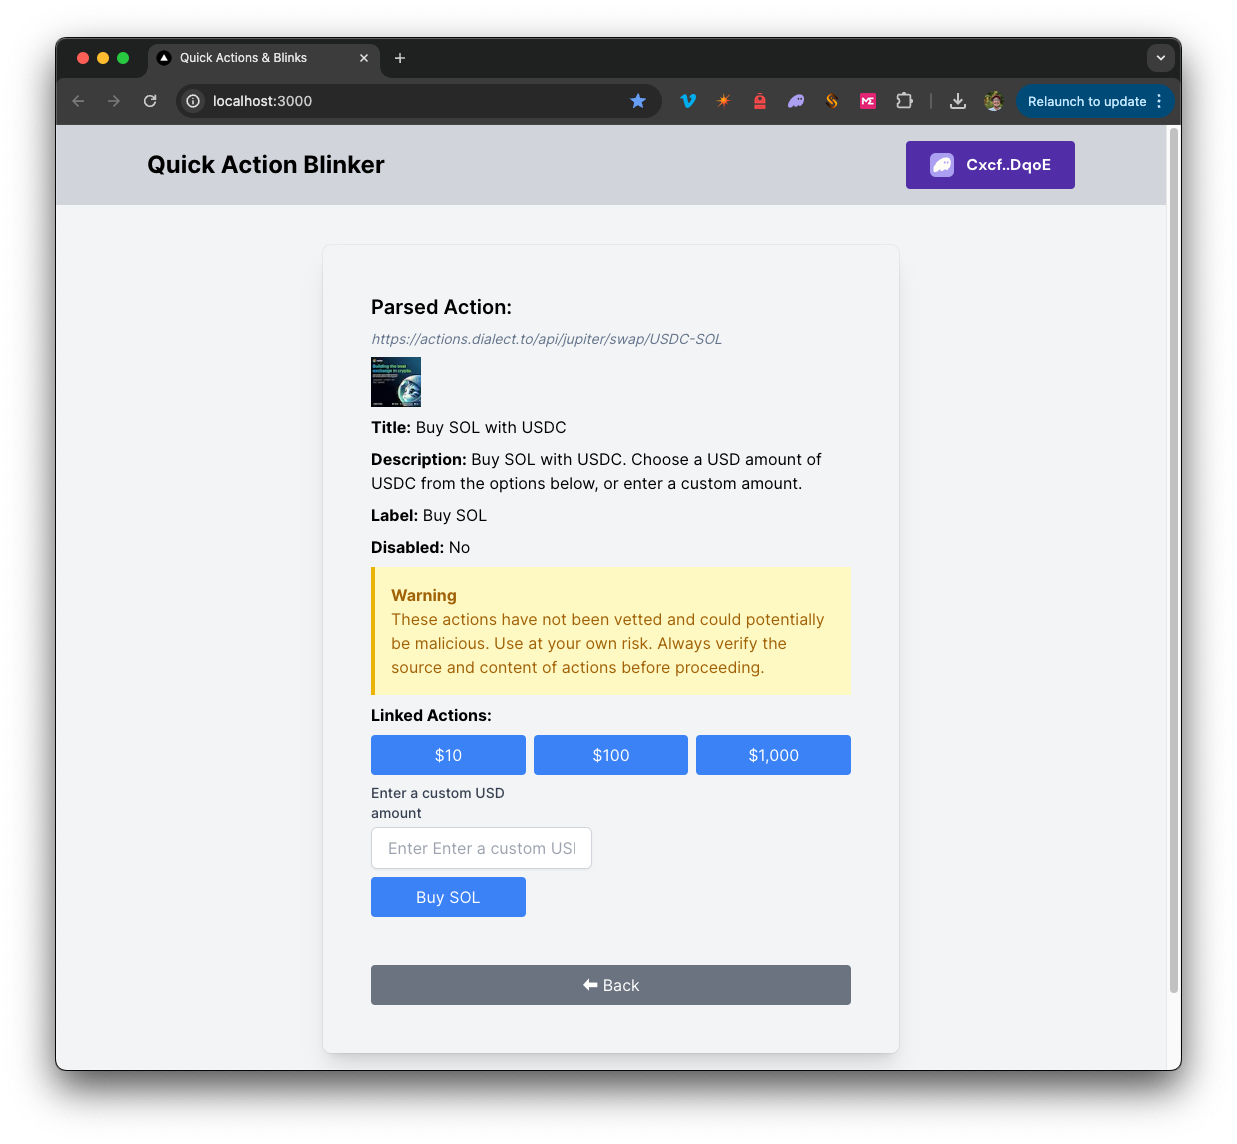
- Clique em qualquer uma das ações disponíveis para executar a ação (terá de assinar a transação quando a sua carteira lhe solicitar).
- Pode criar ações adicionais seguindo a estrutura apresentada em
solana
Arquitetura
src/
├── app/
│   ├── page.tsx # Página principal do Blink
│   └── layout.tsx # layout da página
│   └── api/
│       └── solana
│           └── sendAndConfirm/route.ts # Enviar e confirmar transação
│       └── actions/
│           └── memo/route.ts  # Cria uma Solana «Memo» Solana
│           └── donate/route.ts  # Cria uma Solana «Donate» Solana
└── componentes/
│   ├── ActionComponents/     # inclui componentes para analisar e executar Solana
│   ├── Blink.tsx        # Componente principal
│   ├── SolanaProviders.tsx     # Fornecedores de contexto do adaptador de carteira
│   └── [componentes de suporte]
└── hooks/
│   ├── useActionFetch.ts  # Obtém e analisa Solana a partir de URLs
│   └── useTransactionProcessor.ts  # Executa Solana
└── utils/ # inclui várias funções utilitárias e constantes
Implantar no Vercel
Documentação do Next.js
Para saber mais sobre o Next.js, consulte os seguintes recursos:
- Documentação do Next.js — conheça as funcionalidades e a API do Next.js.
- Aprenda Next.js — um tutorial interativo sobre o Next.js.
Podes consultar o repositório do Next.js no GitHub — os teus comentários e contribuições são bem-vindos!
- Fazer fork do repositório
- Criar uma branch de funcionalidades:git checkout -b feature/amazing-feature
- Faça commit das suas alterações:git commit -m "Add amazing feature"
- Faça push da sua branch:git push origin feature/amazing-feature
- Abrir um Pull Request.