Swap de Meta-Agregação Titan
A single-page Solana swap UI built on the Titan Gateway Meta-Aggregation API



Visão geral
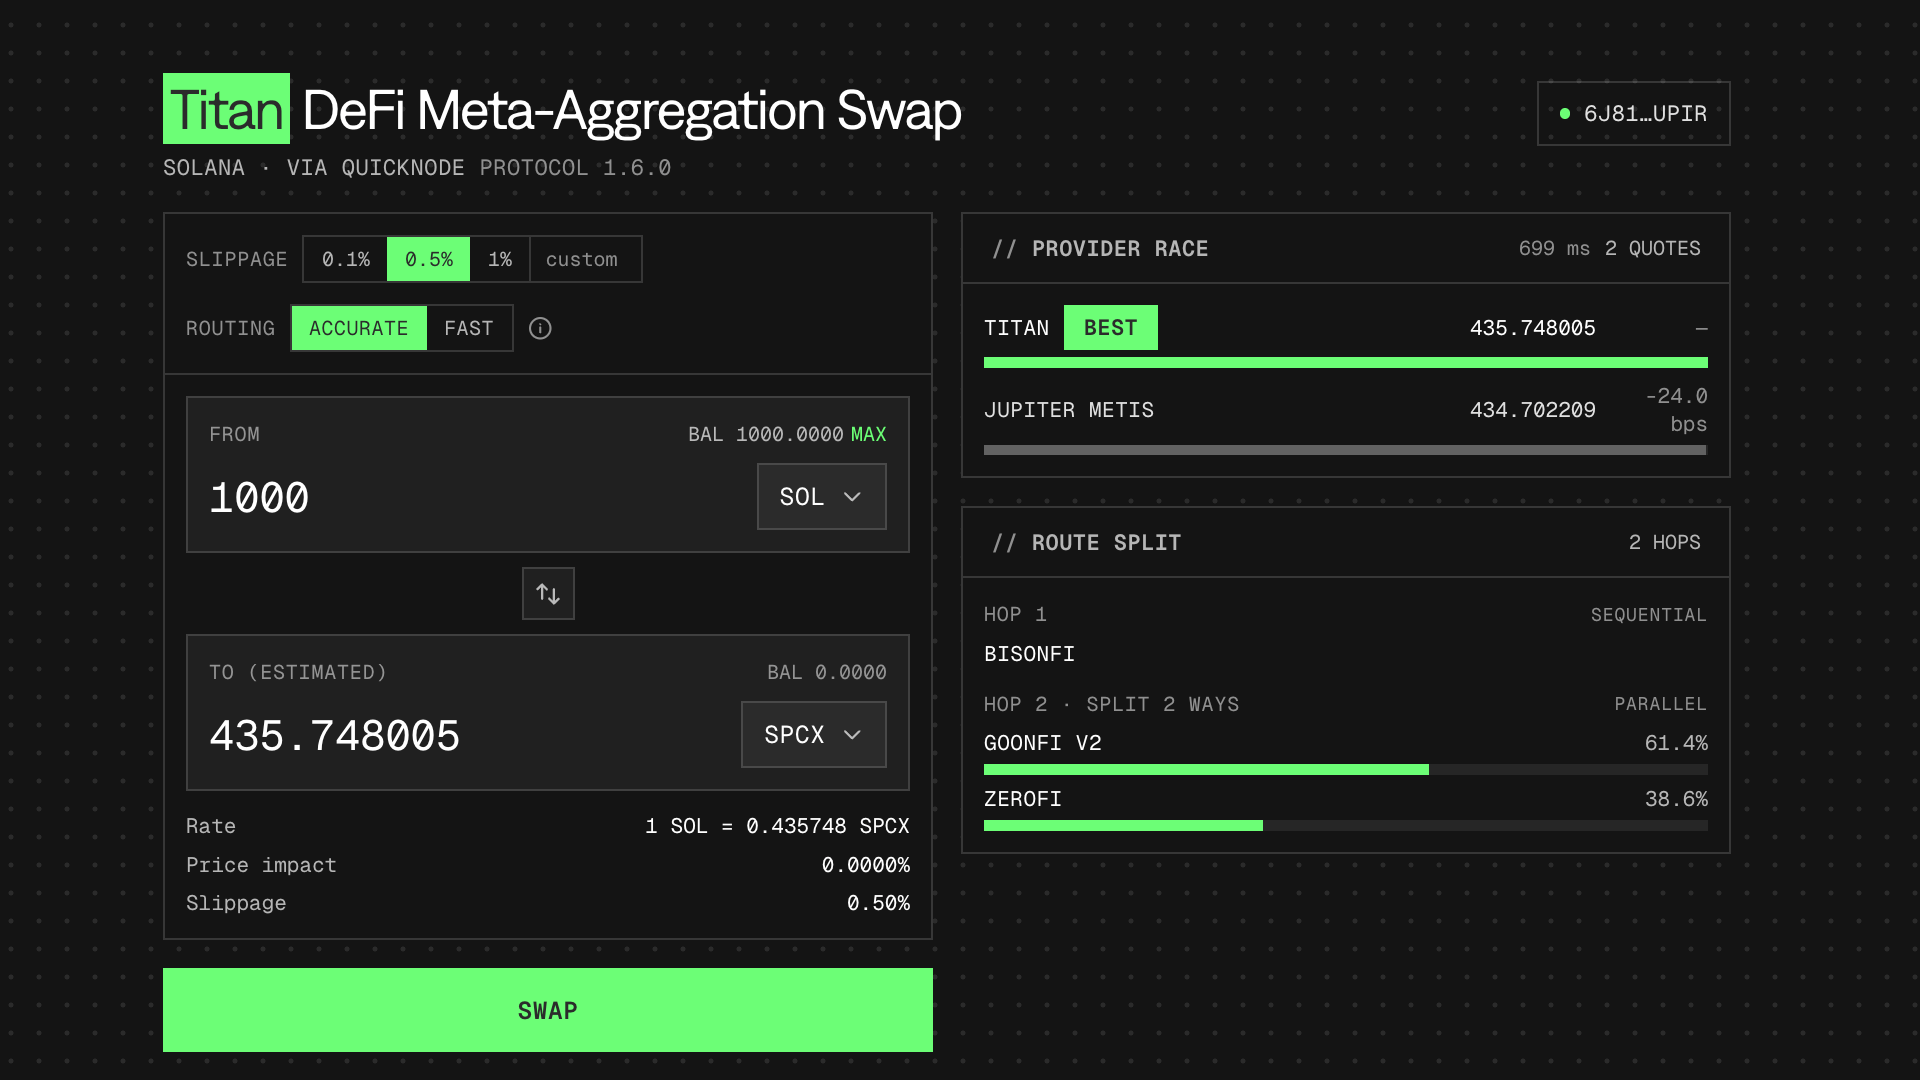
This Solana single-page application is built on the Titan Meta-Aggregation API, served through Quicknode RPC. The app demonstrates what makes Titan's Meta-Aggregation API interesting: multiple providers competing for the best route, the onchain venues a route touches, and a self-custodial build → sign → send flow you own end to end.
For a detailed walkthrough of the Titan Meta-Aggregation API integration, see the companion guide: How to Swap Tokens With the Titan Meta-Aggregation API.
Titan Gateway is only available on Solana mainnet. Executing swaps will trade real tokens and incur real network fees. You could lose value due to price movement, slippage, or selecting the wrong token pair. Test with small amounts first.
Arquitetura
Both credentials stay on the server. Browser code talks to local Next.js route handlers: /api/titan/* calls the Gateway (decoding MessagePack and normalizing pubkeys), and /api/rpc proxies Solana JSON-RPC to the Quicknode endpoint. Neither the Gateway auth nor the RPC token ever reaches the client.
Browser ──> /api/titan/* ──> Titan Gateway (MessagePack decode, server-only)
        └─> /api/rpc     ──> Quicknode Solana RPC (token server-only)
Because the RPC proxy carries only HTTP JSON-RPC (no WebSocket), the app confirms transactions by polling getSignatureStatuses rather than via a signature subscription.
Recursos
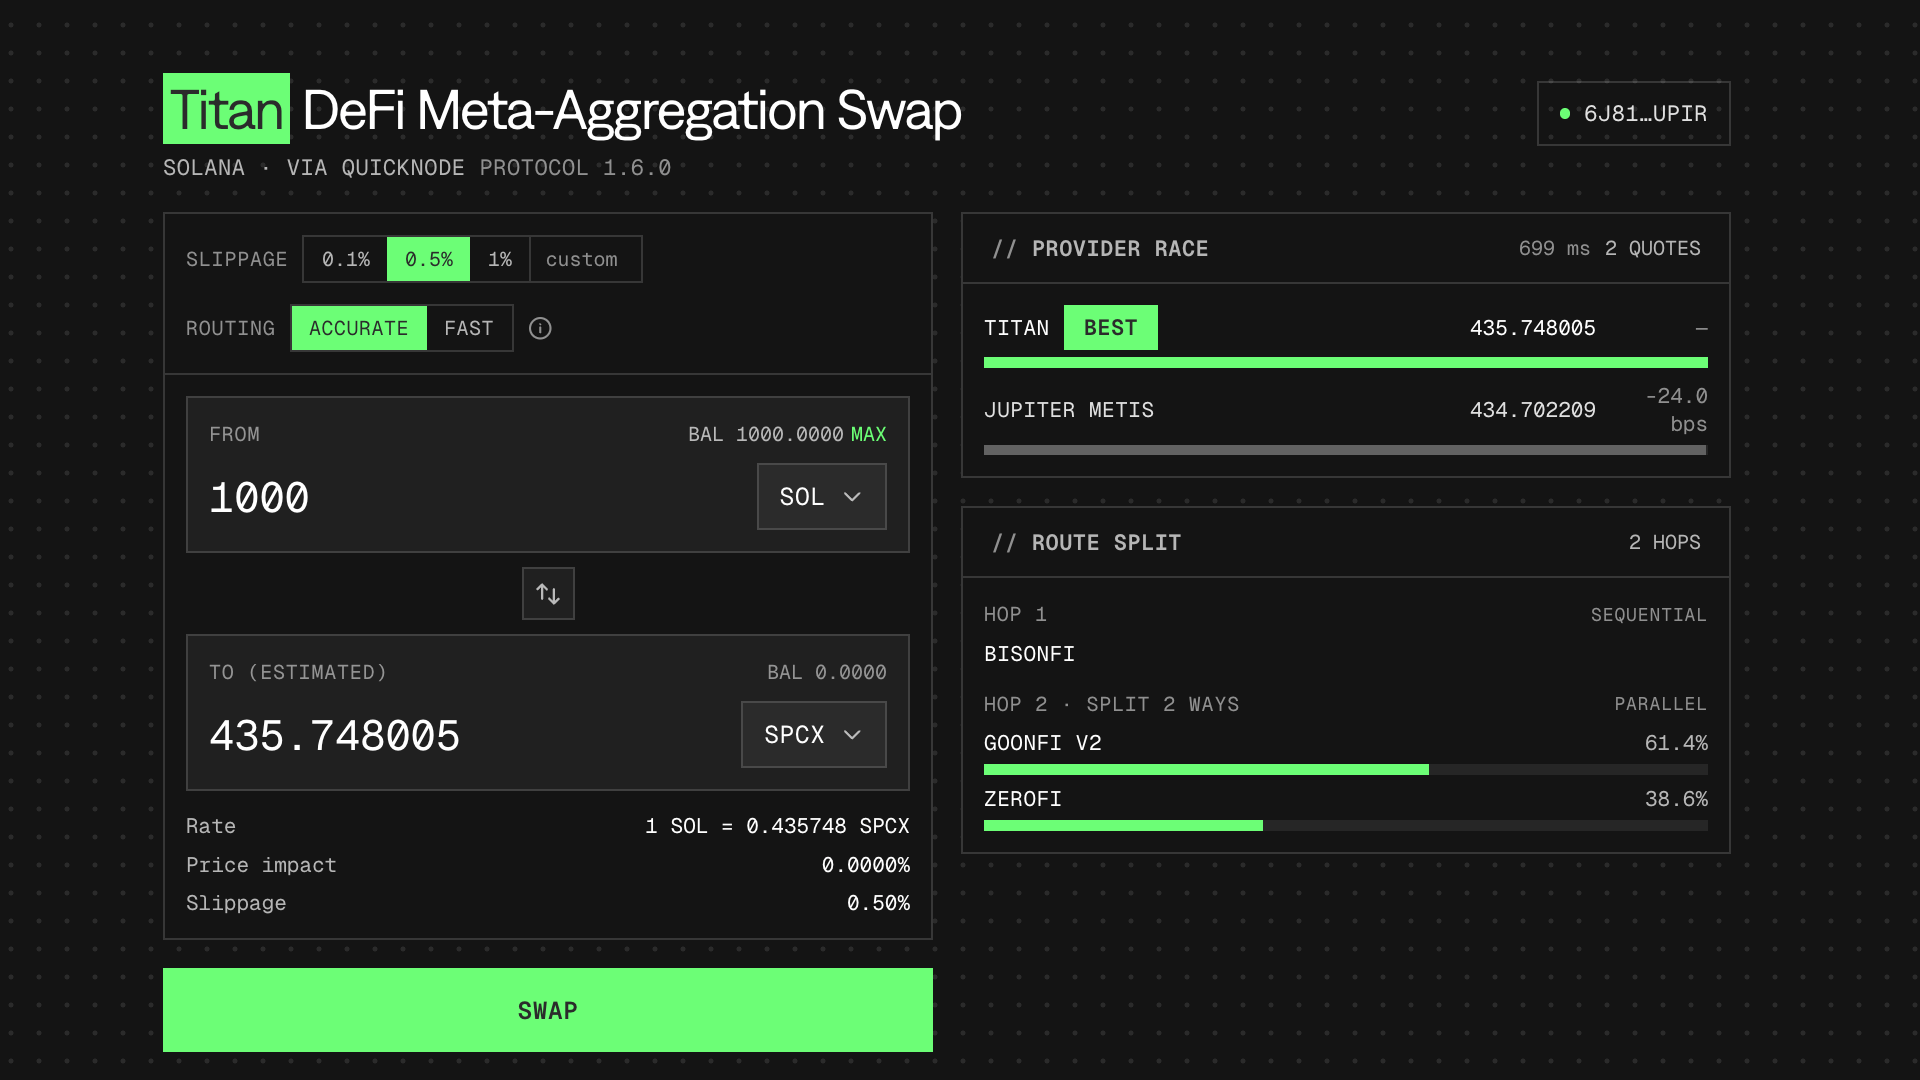
- Provider race: Titan sources quotes from several providers (its own DART router plus other aggregators and RFQ venues). The UI shows every competing quote side by side, the basis points each is behind the leader, and which one Titan picks as the expected winner.
- Composable instructions: Titan returns instructions and address lookup tables, not a sealed transaction. The app builds a v0 transaction itself, the wallet signs it, and it's submitted and confirmed through Quicknode RPC.
- Accurate vs. Fast: A toggle that maps to Titan's
simulateparameter, with the round-trip latency shown next to the results. - Price vs. swap endpoints: An unconnected wallet uses the lightweight
/quote/priceendpoint for an indicative rate; a connected wallet uses/quote/swapfor the full provider race and executable instructions.
Prerequisites
- Node.js (v24 or higher)
- A Quicknode Solana endpoint
- Access to Quicknode's Swap API with Titan
- A Solana wallet (Phantom or Solflare) with mainnet access
- A small amount of mainnet SOL for transaction fees
- A small amount of tokens to swap (USDC recommended for testing)
To get your Quicknode RPC URL:
- Sign up at Quicknode
- Create a new Solana endpoint
- Enable the Titan DeFi Meta-Aggregation REST API
- Copy the Solana endpoint URL and Meta-Aggregation API URL
Project Structure
titan-swap/
├── app/
│   ├── api/titan/            # Server proxy: info, providers, venues, price, swap
│   ├── api/rpc/              # Server proxy: Solana JSON-RPC (hides Quicknode token)
│   ├── layout.tsx
│   ├── page.tsx              # Main swap UI
│   ├── globals.css           # Tailwind v4 + Quicknode dark design tokens
│   └── providers/WalletProvider.tsx
├── components/
│   ├── ProviderRace.tsx      # Competing-provider visualization
│   ├── VenueSplit.tsx        # Venues touched by the winning route
│   ├── SimulationToggle.tsx  # Accurate vs. Fast (simulate param)
│   ├── SlippageControl.tsx
│   ├── TokenInput.tsx / TokenSelector.tsx / SwapButton.tsx / StatusMessage.tsx
│   └── SwapCard.tsx / WalletButton.tsx
├── hooks/
│   ├── useQuote.ts           # /quote/swap (connected) or /quote/price
│   ├── useSwap.ts            # build → sign → send → confirm
│   ├── useTokenBalances.ts   # balances via Quicknode RPC
│   ├── useTokenList.ts
│   └── useTitanMeta.ts       # providers / venues / info
└── lib/
    ├── titan-server.ts       # server-only Gateway client (MessagePack)
    ├── titan.ts              # client fetchers for /api/titan/*
    ├── build-swap-tx.ts      # instructions + ALTs -> VersionedTransaction
    ├── tokens.ts             # token metadata registry
    └── types.ts
Environment Variables
Copiar .env.local.example para .env.local and fill in the values. Both URLs are server-only and are never exposed to the browser:
# https://your-endpoint.solana-mainnet.quiknode.pro/YOUR_TOKEN/
QUICKNODE_RPC_URL=your_quicknode_solana_rpc_url
TITAN_GATEWAY_URL=your_titan_gateway_addon_url
# TITAN_GATEWAY_AUTH=optional_bearer_token
| Variável | Descrição |
|---|---|
QUICKNODE_RPC_URL | Your Quicknode Solana mainnet RPC endpoint URL. The browser's wallet adapter talks to the same-origin /api/rpc proxy, which forwards to this URL. |
TITAN_GATEWAY_URL | The Swap API's Titan base URL shown in your Quicknode dashboard. With or without a trailing /api/v1 — the proxy normalizes it. |
TITAN_GATEWAY_AUTH | Optional bearer token, only if your Gateway URL doesn't already embed auth. |
Primeiro passos
1. Clone the repository:
git clone https://github.com/quiknode-labs/qn-guide-examples.git
cd qn-guide-examples/solana/titan-swap
2. Install dependencies:
npm install
3. Configure environment variables:
cp .env.local.example .env.local
Edit .env.local and add your Quicknode RPC URL and Swap API Titan URL.
4. Run the development server:
npm run dev
5. Open the application:
Navigate to http://localhost:3000 in your browser.
API Endpoints
The application includes the following server-side API routes:
/api/titan/info: Returns Titan Gateway metadata/api/titan/providers: Lists the providers competing for routes/api/titan/venues: Lists the onchain venue program ids used for route mapping/api/titan/price: Indicative rate via Titan's/quote/priceendpoint/api/titan/swap: Full provider race and executable instructions via/quote/swap/api/rpc: Proxies Solana JSON-RPC requests to Quicknode
Pré-visualização
- Fazer fork do repositório
- Criar uma branch de funcionalidades:git checkout -b feature/amazing-feature
- Faça commit das suas alterações:git commit -m "Add amazing feature"
- Faça push da sua branch:git push origin feature/amazing-feature
- Abrir um Pull Request.