Voltar aos aplicativos de exemplo
Solana Token Minter
The Solana Token Minter app allows you to create fungible tokens on the Solana blockchain with built-in support for IPFS image uploads.
Author



Framework/Biblioteca de Frontend:
React/Next.js
Idioma:
TypeScript
Servidor de ferramentas de compilação/desenvolvimento:
Next.js
Visão geral
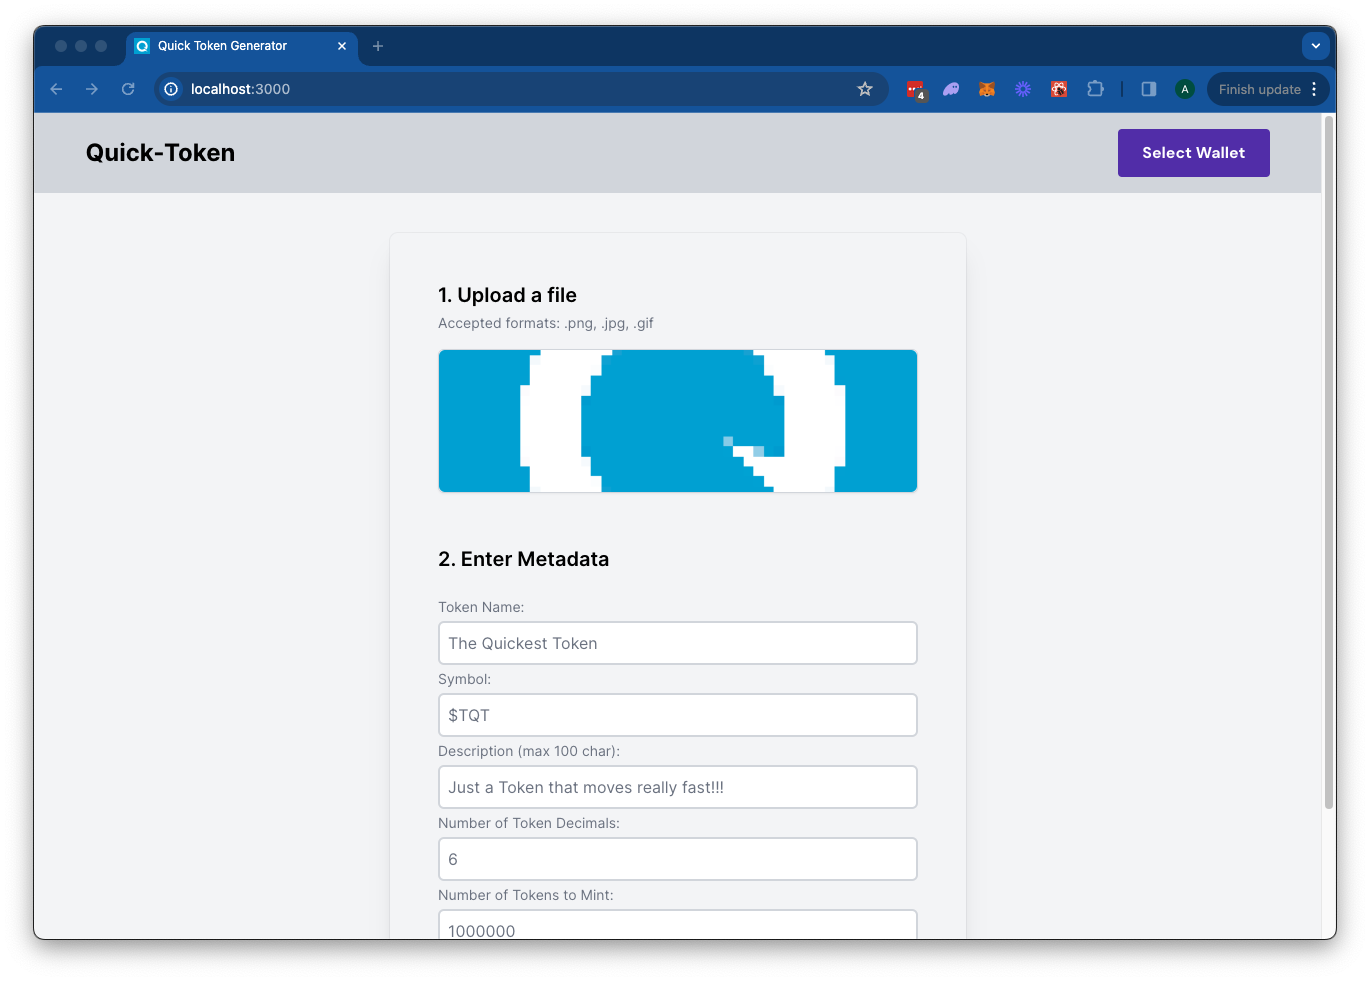
The Solana Token Minter app allows you to create fungible tokens on the Solana blockchain with built-in support for IPFS image uploads using Quicknode's IPFS API. Simply upload an image for your token metadata, fill out the token details, and connect your wallet. Click "Mint" to upload your metadata to IPFS and mint your token seamlessly.This app uses Next.js 14 projeto iniciado com create-next-app.
Primeiro passos
Instalar dependências
Abra o diretório do projeto:
cd sample-dapps/solana-token-maker
Em seguida, instale as dependências:
npm instalar
# ou
yarn
# ou
pnpm instalar
# ou
bun install
Definir variáveis de ambiente
Certifique-se de que tem umendpoint Quicknode endpoint pode obter um gratuitamente aqui.
- Renomear
.env.examplepara.env.localand update with your Quicknode Solana Node Endpoint and Quicknode IPFS key. - Certifique-se de que atualiza o cluster para garantir que os URLs das suas transações apontam para o explorador correto (utilize apenas os valores da enumeração fornecidos no
.env.exampleficheiro). - You can use Quicknode's public IPFS Gateway URL or replace it with your own.
QN_IPFS_API=QN_abc123456789xyz_REPLACE_THIS
QN_ENDPOINT=https://example.solana-mainnet.quiknode.pro/123456
NEXT_PUBLIC_CLUSTER=mainnet-beta # mainnet-beta | devnet | testnet | local
NEXT_PUBLIC_GATEWAY_URL=https://quicknode.quicknode-ipfs.com/ipfs/
Primeiro, execute o servidor de desenvolvimento:
npm executar dev
# ou
yarn dev
# ou
pnpm dev
# ou
bun dev
Aceda a http://localhost:3000 no seu navegador para ver o resultado.
Utilizar a Dapp
- Carregar uma imagem (esta será utilizada para os metadados do seu token)
- Preencha o formulário com os dados do token
- Ligue a sua carteira
- Certifica-te de que tens cerca de 0,04 SOL na tua carteira para cobrir as taxas de abertura da nova conta
- Se estiver a utilizar o Devnet, pode obter SOL gratuitamente através do Solana
- Clique em «Mint» para carregar a sua imagem e os metadados para IPFS criar o seu token!
Arquitetura
src/
├── app/
│   ├── page.tsx
│   └── layout.tsx
│   └── api/
│       └── solana/
│           └── createMintTx/route.ts   # Create New Mint Transaction
│           └── sendAndConfirm/route.ts # Send and Confirm Transaction
│       └── upload/
│           └── image/route.ts  # IPFS Image Upload
│           └── json/route.ts   # IPFS JSON Upload
└── components/
    ├── SolanaProviders.tsx     # Wallet Adapter Context providers
    ├── Minter.tsx              # Main component
    └── [supporting components]
Implantar no Vercel
Documentação do Next.js
Para saber mais sobre o Next.js, consulte os seguintes recursos:
- Documentação do Next.js — conheça as funcionalidades e a API do Next.js.
- Aprenda Next.js — um tutorial interativo sobre o Next.js.
Podes consultar o repositório do Next.js no GitHub — os teus comentários e contribuições são bem-vindos!
Contribuições e feedback
Gostaríamos de receber seu feedback e contribuições para este aplicativo de exemplo!
Para relatar problemas ou enviar feedback, abra uma issue no GitHub em qn-guide-examples repositório.
Para contribuir, siga estas etapas:
- Fazer fork do repositório
- Criar uma branch de funcionalidades:git checkout -b feature/amazing-feature
- Faça commit das suas alterações:git commit -m "Add amazing feature"
- Faça push da sua branch:git push origin feature/amazing-feature
- Abrir um Pull Request.
Explorar mais aplicativos de exemplo