Phoenix Perps-Dashboard
Ein Echtzeit-Dashboard für SOL-Perpetual-Futures, entwickelt mit React und TypeScript und basierend auf der öffentlichen REST- und WebSocket-API von Phoenix. Es ist kein API-Schlüssel erforderlich.



Übersicht
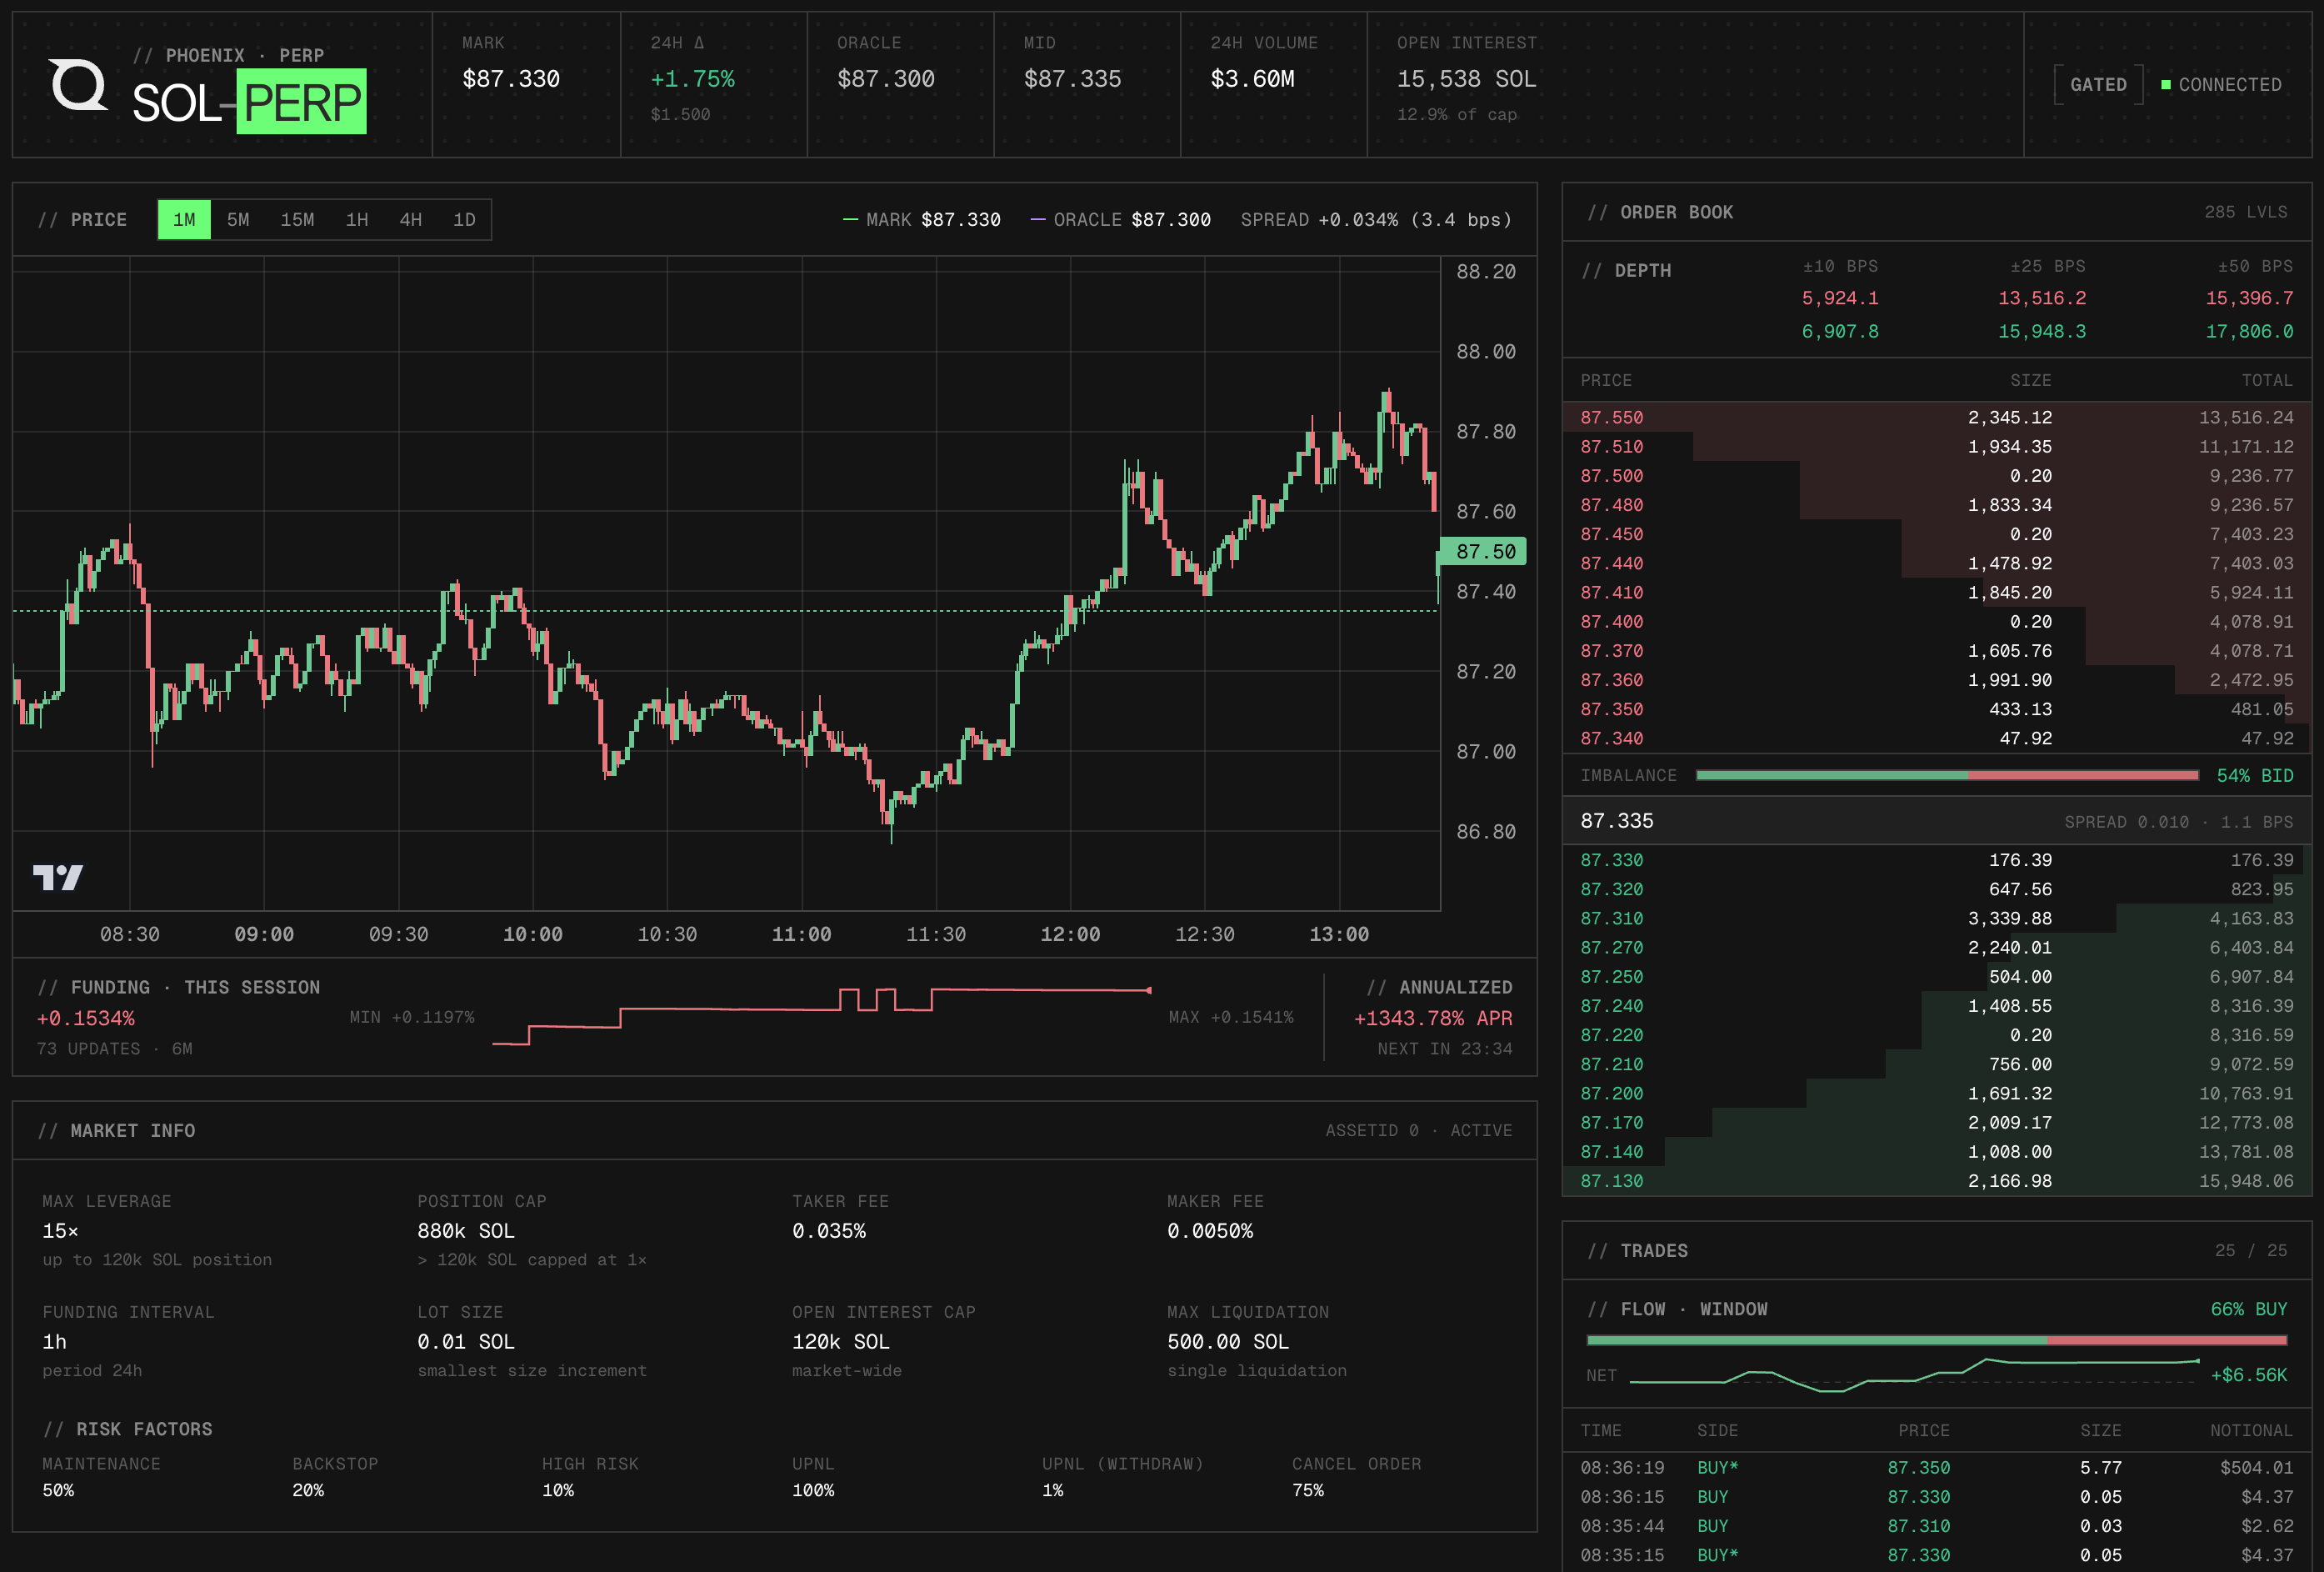
Phoenix ist eine Solana Börse für Perpetuals. Dieses Dashboard veranschaulicht, wie man mithilfe der öffentlichen REST- und WebSocket-API von Phoenix ein Live-Marktterminal für SOL-PERP aufbaut, das die gesamte Datenpipeline abdeckt: Einlesen historischer Candlesticks und statischer Marktkonfigurationen über REST, Abonnieren von sechs Echtzeitkanälen über eine einzige gemeinsame WebSocket-Verbindung sowie Darstellen eines interaktiven Candlestick-Charts zusammen mit einem Live-Orderbuch, einem Handels-Feed und einem Funding-Strip.
Es sind weder ein API-Schlüssel noch signierte Header noch eine Wallet-Verbindung erforderlich. Alle Daten stammen aus dem öffentlichen Bereich von Phoenix perp-api.phoenix.trade Endpunkte. Um das Dashboard um On-Chain-Abfragen (Transaktionsverlauf, Kontostand) zu erweitern, verbinden Sie ein Quicknode Solana endpoint.
Die vollständige Anleitung zur Architektur dieses Dashboards finden Sie unter „Erstellen eines Echtzeit-Dashboards für SOL-Perps mit der Phoenix-API“.
Architektur
Phoenix REST-API (https://perp-api.phoenix.trade)
  → App.tsx-Seeds beim Laden: historische Kerzencharts + statische Marktkonfiguration

Phoenix WebSocket (wss://perp-api.phoenix.trade/v1/ws)
  → PhoenixWebSocket.tsx verwaltet eine gemeinsame Verbindung
      → Marktkanal      → MarketOverview (Header-Statistiken)
      → fundingRate-Kanal → MarketOverview + Funding-Strip
      → Kerzen-Kanal     → PriceChart (OHLCV + Überlagerungen)
      → Orderbuch-Kanal   → Orderbuch (oberste Geld-/Briefkurse)
      → Kanal „trades“      → TradeFeed (jüngste Ausführungen)
      → Kanal „Börse“    → Badge „Verbindungsstatus“
  Nur REST → Marktinfo (Gebühren, Hebelstufen, Tick-/Lotgröße)
Funktionen
- Aktueller Marktpreis, Oracle-Preis, 24-Stunden-Veränderung, 24-Stunden-Handelsvolumen, Open Interest und Funding-Rate in einer feststehenden Kopfzeile
- Kerzendiagramm mit Überlagerung des Markpreises (grün) und des Oracle-Preises (violett gestrichelt); der Spread wird rot hervorgehoben, wenn er 10 Basispunkte überschreitet
- Sechs Zeitrahmen (1 min, 5 min, 15 min, 1 Std., 4 Std., 1 Tag) – beim Wechsel werden die Kerzen sofort aus dem REST-Speicher neu geladen
- Echtzeit-L2-Orderbuch mit den höchsten Geld- und Briefkursen sowie dem kumulierten Volumen und dem Spread
- Live-Handelsübersicht mit den 25 letzten ausgeführten Geschäften, einschließlich Gegenpartei, Kurs, Volumen und Nominalwert
- Finanzierungsleiste unterhalb des Diagramms, die den lokalen Zinsverlauf der Sitzung, den annualisierten effektiven Jahreszins und den Countdown bis zur nächsten Abrechnung anzeigt
- Statisches Marktinformationsfeld mit Gebühren, maximaler Hebelwirkung, Stufenübersicht und Margenanforderungen
- WebSocket-Wiederverbindung mit exponentiellem Backoff (bis zu 15 Sekunden)
Voraussetzungen
- Node.js 20+
- npm oder pnpm
Projektstruktur
src/
├── api.ts                          # REST-Hilfsfunktionen (Kerzen, Marktkonfiguration)
├── types.ts                        # Gemeinsame TypeScript-Typen
├── App.tsx                         # Stammkomponente; stellt beim Laden REST-Daten bereit
├── ws/
│   └── PhoenixWebSocket.tsx        # WebSocket-Anbieter + React-Kontext
├── components/
│   ├── ConnectionStatus.tsx        # Anzeige des WS-Verbindungsstatus
│   ├── MarketInfo.tsx              # Marktkonfigurationsbereich (Gebühren, Hebel, Finanzierung)
│   ├── MarketOverview.tsx          # Statistikleiste im Kopfbereich
│   ├── Orderbook.tsx               # Live-Tabelle mit Geld- und Briefkursen
│   ├── PriceChart.tsx              # Candlestick-Chart mit Funding-Leiste
│   └── TradeFeed.tsx               # Aktuelle Handelsdaten
└── utils/
    ├── format.ts                   # Hilfsfunktionen zur Zahlenformatierung
    └── useFundingCountdown.ts      # Countdown-Hook für die nächste Funding-Abrechnung
Erste Schritte
1. Das Repo klonen
git clone https://github.com/quiknode-labs/qn-guide-examples.git
cdsolana
2. Abhängigkeiten installieren
npm installieren
3. Starten Sie den Entwicklungsserver
npm run dev
Öffnen Sie http://localhost:5173 in Ihrem Browser. Das Dashboard stellt eine Verbindung zu Phoenix her und beginnt sofort mit der Übertragung von Live-Daten.
Es sind keine Umgebungsvariablen erforderlich. Das Dashboard stellt eine direkte Verbindung zu den öffentlichen REST- und WebSocket-Endpunkten von Phoenix her.
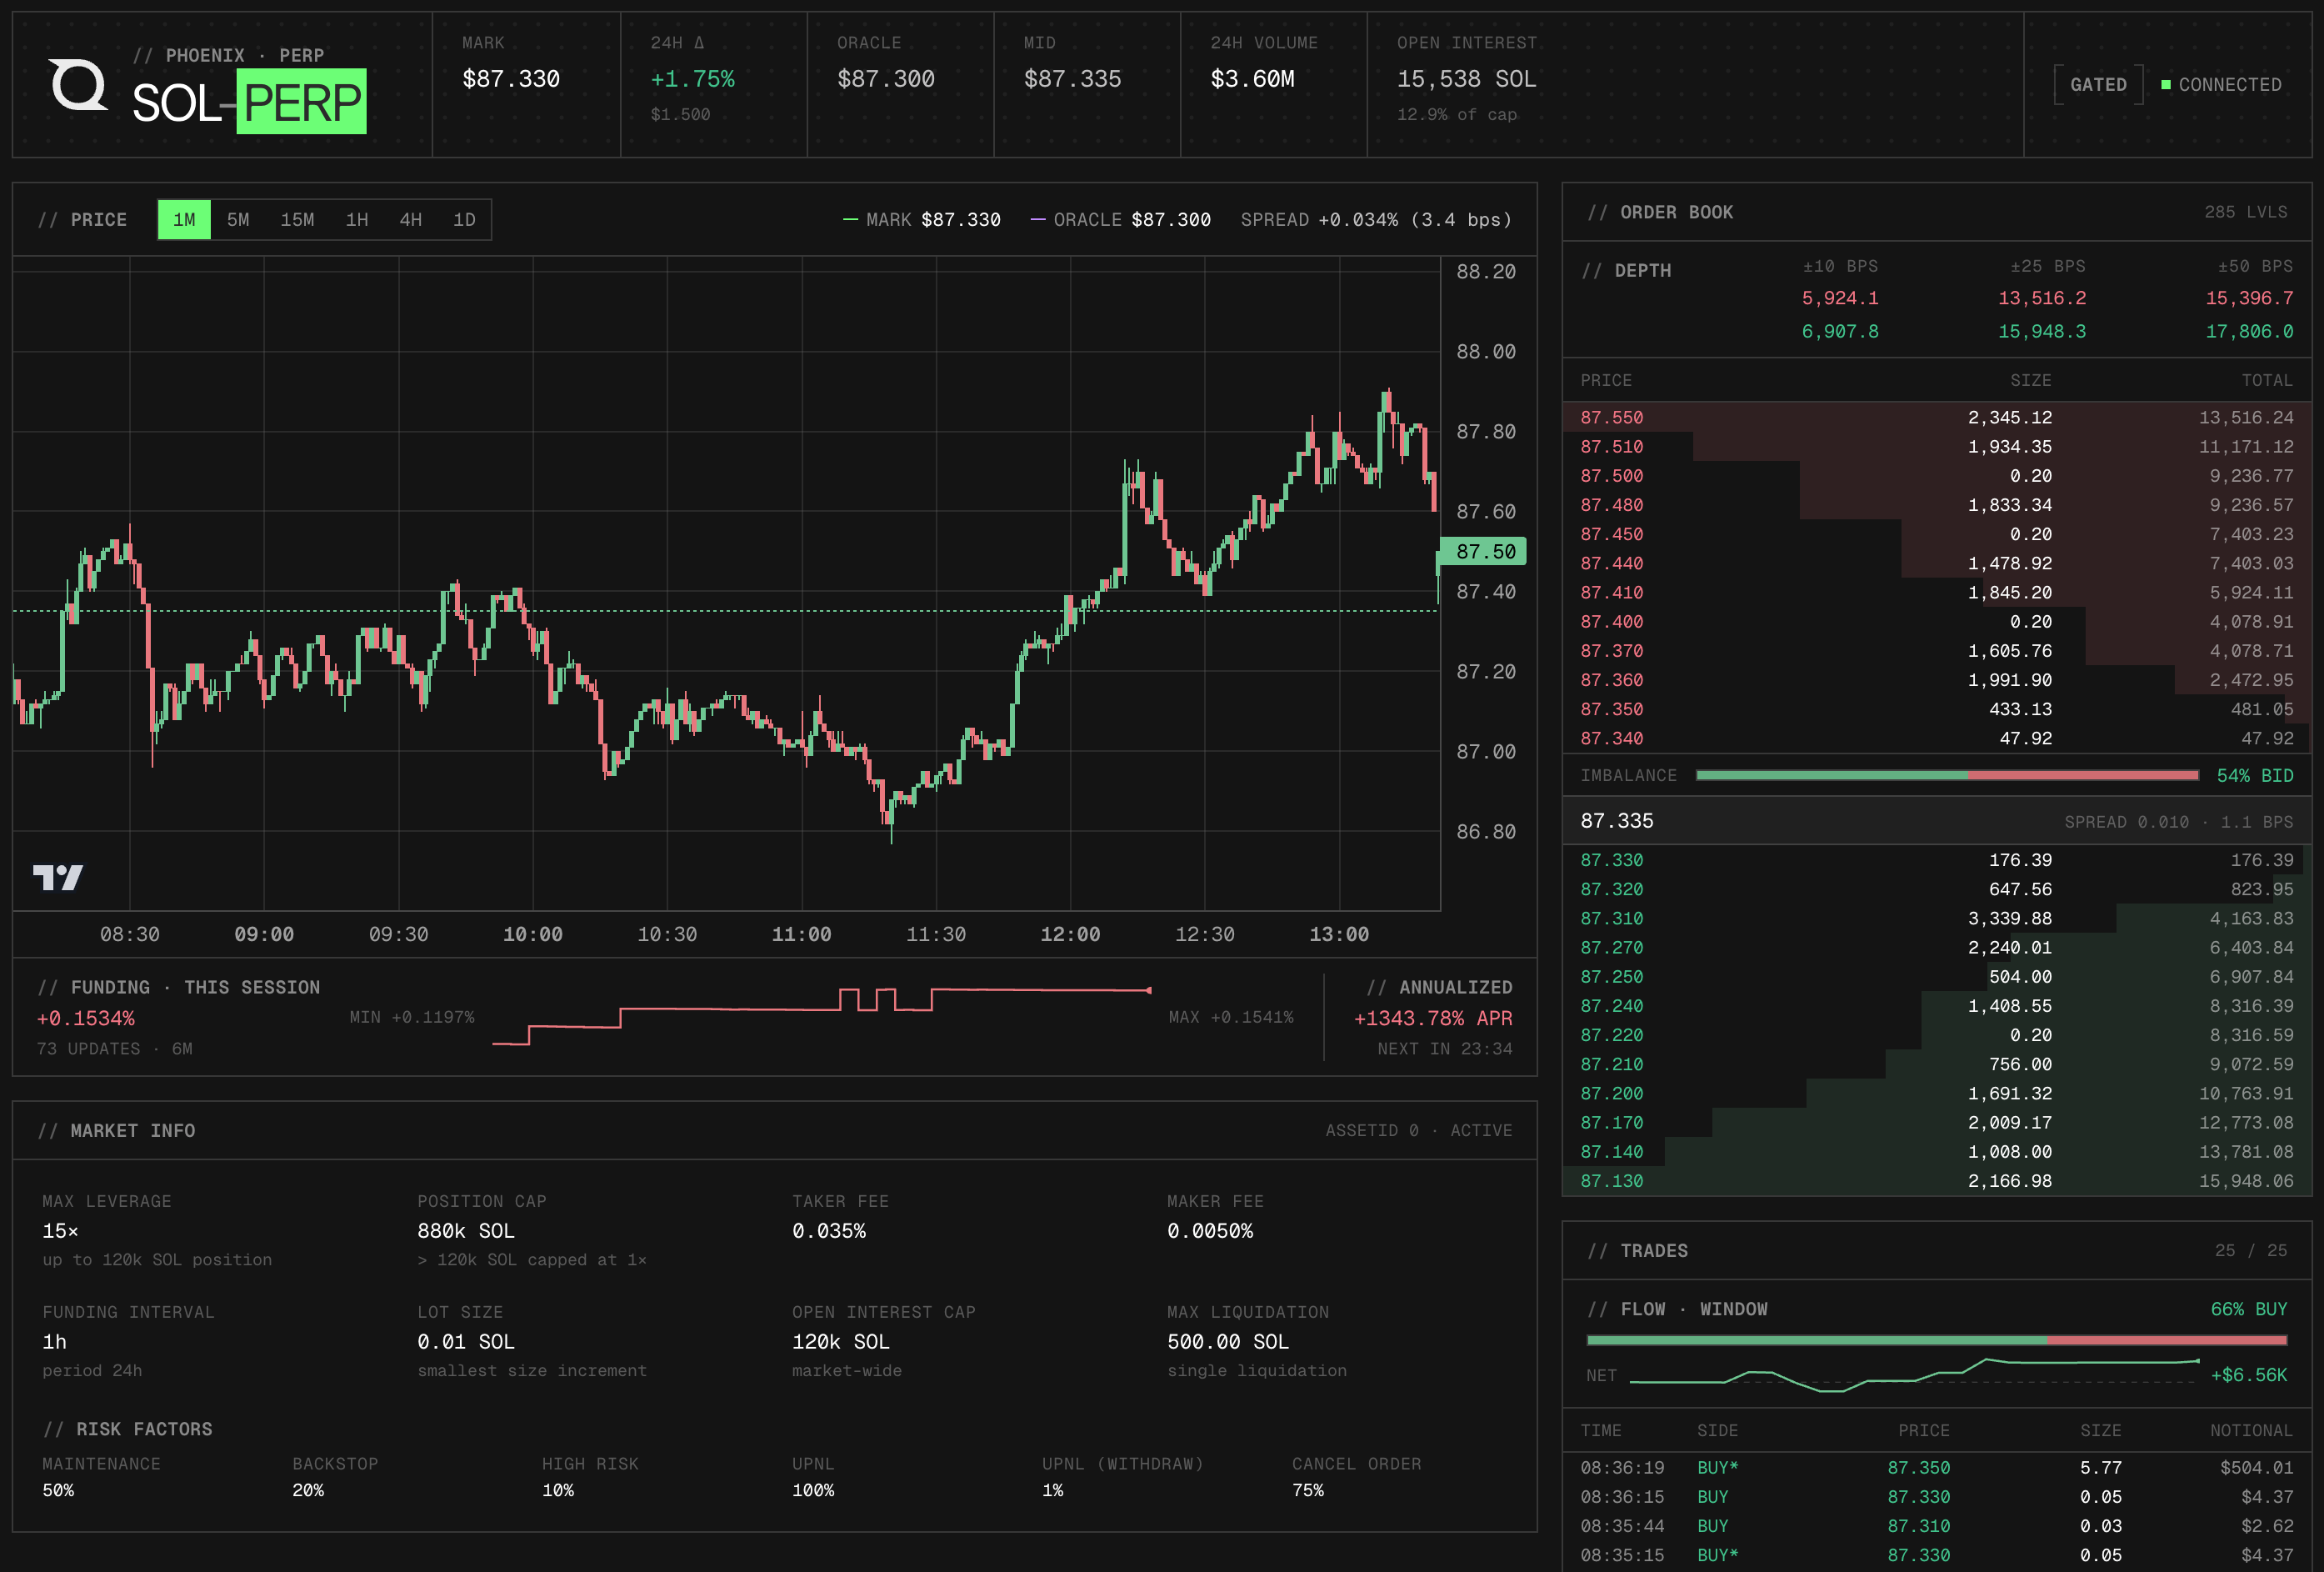
Vorschau
- Das Repository forken
- Erstelle einen Feature-Branch:git checkout -b feature/amazing-feature
- Speichere deine Änderungen:git commit -m "Tolle Funktion hinzufügen"
- Deinen Branch pushen:git push origin feature/amazing-feature
- Erstelle einen Pull Request.