
閱讀時間 9 分鐘
Metaplex Core has superseded Programmable NFTs (pNFTs) as the recommended standard for new Solana NFT projects. If you are starting a new project, see What is Metaplex Core and How to Mint Your First Core NFT instead. This guide is for historic educational purposes only.
概覽
A 2022 battle for market share between NFT marketplaces nearly eliminated enforcement of creator royalties for Solana NFTs. In response, Metaplex has recently launched a new token standard, Programmable NFTs. The standard, among other things, empowers creators to enable royalties enforcement by specifying which programs can transfer their NFTs. In this guide, you will mint a Programmable NFT with metadata to Solana's devnet from your terminal using the Solana Web3 library and Metaplex JS SDKs.
您需要準備的物品
- Nodejs (version 16.15 or higher) installed
- TypeScript experience and ts-node installed
- A Solana Paper wallet (.json) with Devnet SOL (Example script)
Note: This guide assumes that you have completed our Guide: How to Mint an NFT on Solana using TypeScript. We will reuse quite a bit of the code from this guide.
Programmable NFTs
Programmable NFTs are a new asset class that allows for flexible configuration of various lifecycle rules, including certain transfer restrictions that creators can use to enforce royalties. You will likely be impacted if you are a creator, protocol developer, or user of Solana NFTs.
Note: The existing NonFungible asset class will continue to exist--creators can choose to continue using it or migrate to the ProgrammableNonFungible standard.
From Metaplex's Github, here's how the standard will work:
- Programmable NFTs can include “rule sets” that can be configured by creators. Creators can enable royalties enforcement by specifying in these rule sets which programs may transfer their NFTs.
- Mint, burn, transfer, delegate, and revoke instructions will be sent to the Token Metadata Program instead of SPL Token to validate against creator-applied rulesets.
- Programmable NFTs support both allow-list and deny-list-based approaches to royalty enforcement (providing optionality to creators).
- The Metaplex Foundation will provide an optional rule set based on an allow-list that will be updated periodically to only include programs that pay creator royalties for convenience. Creators can use this allow-list or a custom allow or deny list.
If you are a protocol developer, ensuring your program is on the allow-list and not on the deny list of major rulesets is important.
Let's create a Programmable NFT.
Set Up Your Project
Create a new project directory in your terminal with the following:
mkdir pnft
cd pnft
Create a file for your app, app.ts:
echo > app.ts
Initialize your project with the "yes" flag to use default values for your new package:
yarn init --yes
#or
npm init --yes
Create a tsconfig.json with .json importing enabled:
tsc -init --resolveJsonModule true --target es2020
You'll need to store your paper wallet with devnet SOL in a new file called guideSecret.json in the main directory. To generate a new paper wallet, follow this script
If you already have a wallet and just need devnet SOL, you can airdrop some by entering your wallet address below:
Note: Sending airdrop requests too frequently may trigger a 429 (Too Many Requests) error.
Install Solana Web3 Dependency
We will need to add the Solana Web3 library and Metaplex JS SDK for this exercise. In your terminal, enter:
yarn add @solana/web3.js@1 @metaplex-foundation/js
#or
npm install @solana/web3.js@1 @metaplex-foundation/js
We will need a few components from these libraries and our secret key. Import them in app.ts at line 1 by adding:
import { Connection, Keypair, PublicKey } from "@solana/web3.js";
import { Metaplex, keypairIdentity, bundlrStorage, toMetaplexFile, toBigNumber } from "@metaplex-foundation/js";
import { TokenStandard } from '@metaplex-foundation/mpl-token-metadata';
import secret from './guideSecret.json';
Connect to a Solana Cluster with Your Quicknode Endpoint
To build on Solana, you'll need an API endpoint to connect with the network. You're welcome to use public nodes or deploy and manage your own infrastructure; however, if you'd like 8x faster response times, you can leave the heavy lifting to us.
See why over 50% of projects on Solana choose Quicknode and start your free trial 這裡. We're going to use a Solana Devnet endpoint.
Copy the HTTP Provider link: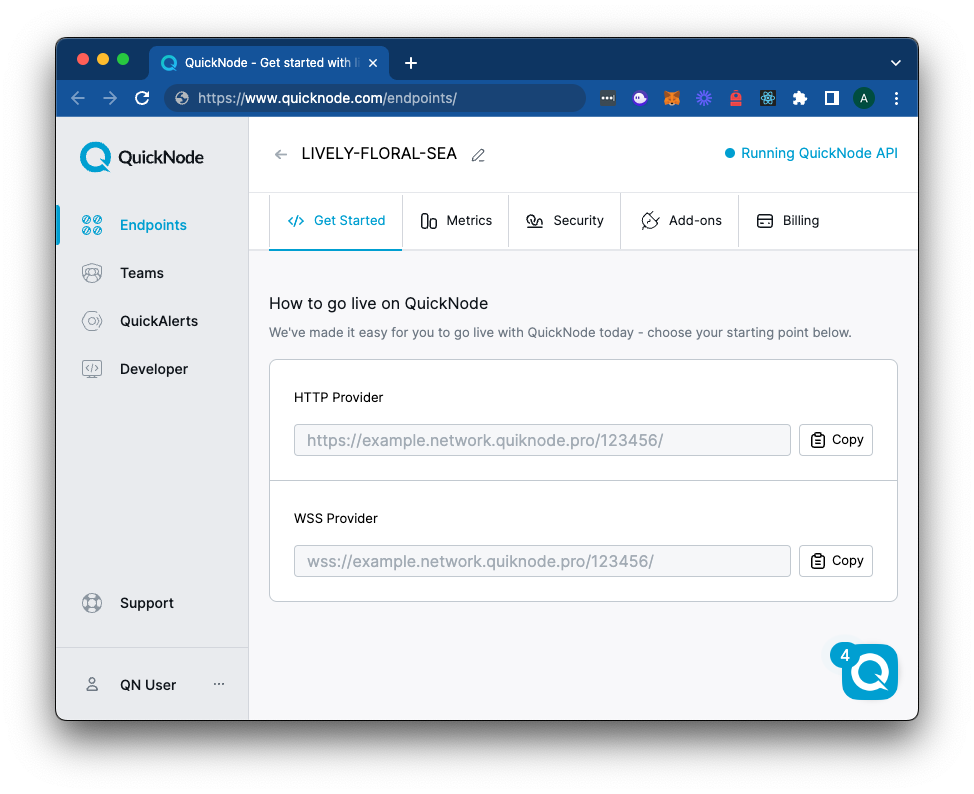
Inside app.ts under your import statements, declare your RPC and establish your Connection to Solana:
const QUICKNODE_RPC = 'https://example.solana-devnet.quiknode.pro/0123456/';
const SOLANA_CONNECTION = new Connection(QUICKNODE_RPC);
Finally, define your wallet and establish an instance of Metaplex. Under your connection, add:
const WALLET = Keypair.fromSecretKey(new Uint8Array(secret));
const METAPLEX = Metaplex.make(SOLANA_CONNECTION)
    .use(keypairIdentity(WALLET))
    .use(bundlrStorage({
        address: 'https://devnet.bundlr.network',
        providerUrl: QUICKNODE_RPC,
        timeout: 60000,
    }));
Your environment should look like this.
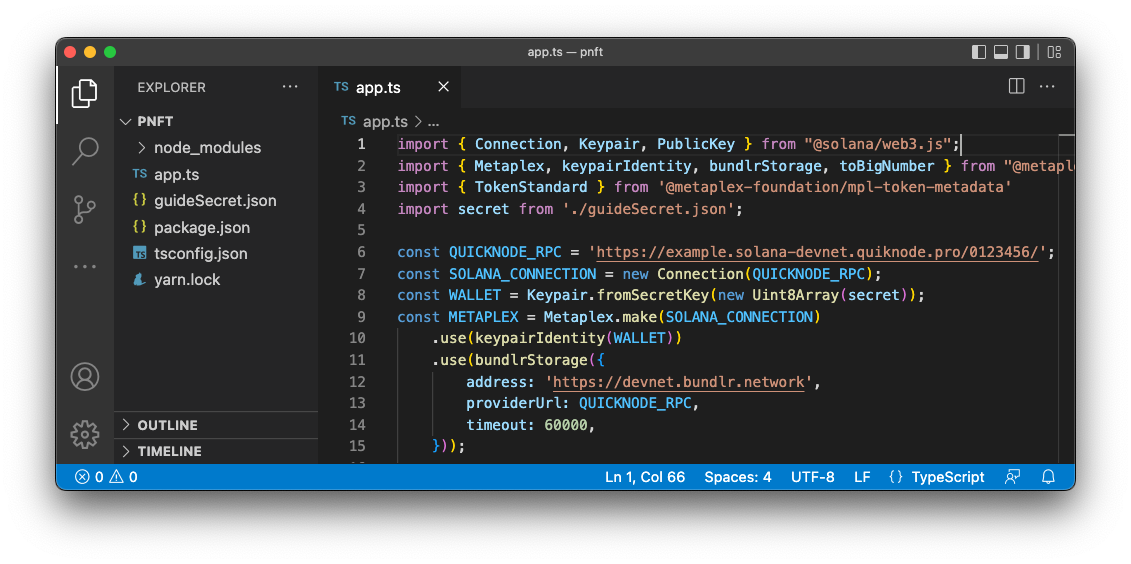
Ready? Let's build!
Create NFT Config
We will use an already-updated metadata URI for this guide: https://arweave.net/yIgHNXiELgQqW8QIbFM9ibVV37jhvfyW3mFcZGRX-PA. You are welcome to use your own or use ours to follow along with the guide. If you're interested in uploading your own image and metadata, check out our Guide: How to Mint an NFT on Solana using Typescript.
Even though we are using already-existing metadata, we still need to supply some information about our NFT that will be stored on-chain. Specifically, we need to define our name, symbol, and royalties.
const CONFIG = {
    imgName: 'Quicknode Pixel',
    symbol: 'QNPIX',
    sellerFeeBasisPoints: 500,//500 bp = 5%
    creators: [
        { address: WALLET.publicKey, share: 100 },
    ],
    metadata: 'https://arweave.net/yIgHNXiELgQqW8QIbFM9ibVV37jhvfyW3mFcZGRX-PA'
};
Feel free to adjust the config to your NFT's specifications. You can add multiple creators in your creators array. Just make sure your total share is 100 (CONFIG.creators.reduce((accumulator, creator) => accumulator + creator.share, 0) === 100).
Create Mint Function
Let's create our mint function. We will pass in the elements of our CONFIG object. Create a new function, mintProgrammableNft:
async function mintProgrammableNft(
    metadataUri: string,
    name: string,
    sellerFee: number,
    symbol: string,
    creators: { address: PublicKey, share: number }[]
) {
    console.log(`Minting pNFT`);
    try {

    }
    catch (err) {
        console.log(err);
    }
}
Though you can use Metaplex's prebuilt mint function, we will use their builders tools to create a TransactionInstruction. This will give us more flexibility in sending calls to the network. The main difference between minting a "Standard" NFT versus a programmable one is adding tokenStandard: TokenStandard.ProgrammableNonFungible to our mint parameters.
Inside your try statement, add:
        const transactionBuilder = await METAPLEX
            .nfts()
            .builders()
            .create({
                uri: metadataUri,
                name: name,
                sellerFeeBasisPoints: sellerFee,
                symbol: symbol,
                creators: creators,
                isMutable: true,
                isCollection: false,
                tokenStandard: TokenStandard.ProgrammableNonFungible,
                ruleSet: null
            });
This should look very familiar to our mint call in our previous guide on Minting NFTs with this SDK. You will notice that in addition to tokenStandard, we have also passed a ruleSet parameter. tokenStandard is where we specify that this is a pNFT, ProgrammableNonFungible,以及 ruleSet is where we can define what rules to set for the NFT. By default (this field is optional), the value is null, which sets the rules to the Metaplex default community-maintained ruleset.
Let's send our transaction to the cluster by calling Metaplex's rpc().sendAndConfirmTransaction() method (which abstracts some of the common requirements like assembling the transaction and fetching a recent blockhash) and verifying a successful transaction. After your .create() call, add the following code:
        let { signature, confirmResponse } = await METAPLEX.rpc().sendAndConfirmTransaction(transactionBuilder);
        if (confirmResponse.value.err) {
            throw new Error('failed to confirm transaction');
        }
        const { mintAddress } = transactionBuilder.getContext();
        console.log(`   Success!🎉`);
        console.log(`   Minted NFT: https://explorer.solana.com/address/${mintAddress.toString()}?cluster=devnet`);
        console.log(`   Tx: https://explorer.solana.com/tx/${signature}?cluster=devnet`);
You will notice here that we can use the transaction builder's getContext() method to fetch the mint address of our NFT. We use it to generate a URL to the NFT on Solana Explorer.
Mint Your NFT
Finally, we are ready to mint our NFT. Inside, app.ts, call your function by passing in our CONFIG elements:
mintProgrammableNft(
    CONFIG.metadata,
    CONFIG.imgName,
    CONFIG.sellerFeeBasisPoints,
    CONFIG.symbol,
    CONFIG.creators
);
And in your console, enter the following:
ts-node app
You should see something like this in your terminal:
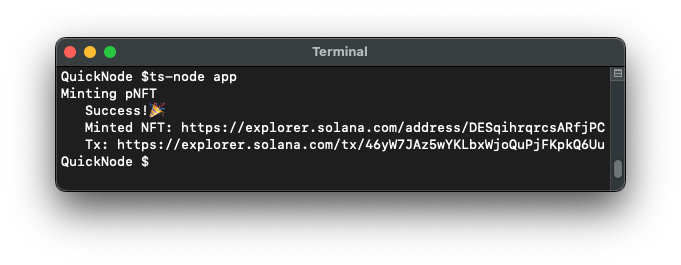
And you should be able to see your minted NFT on Solana Explorer:
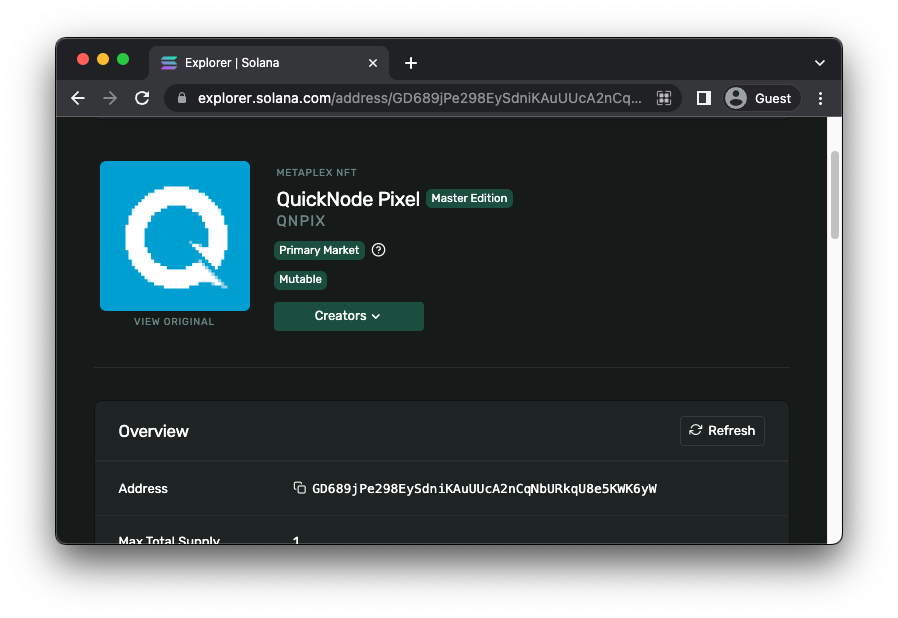
Nice job!
Bonus! Transfer Your NFT
If you want to send your new NFT to a friend, you can use Metaplex's 轉帳 function. Let's add a new function, transferNft, to our app.ts file:
        const { mintAddress } = transactionBuilder.getContext();
        console.log(`   Success!🎉`);
        console.log(`   Minted NFT: https://explorer.solana.com/address/${mintAddress.toString()}?cluster=devnet`);
        console.log(`   Tx: https://explorer.solana.com/tx/${signature}?cluster=devnet`);

        // 👇 Add this code
        const destination = new PublicKey('YOUR_FRIENDS_PUBLIC_KEY'); // replace with your friend's public key
        const transferTransactionBuilder = await METAPLEX.nfts().builders().transfer({
            nftOrSft: {address: mintAddress, tokenStandard: TokenStandard.ProgrammableNonFungible},
            authority: WALLET,
            fromOwner: WALLET.publicKey,
            toOwner: destination,
        });
        // Name new variables since we already have a signature and confirmResponse
        let { signature: sig2, confirmResponse: res2 } = await METAPLEX.rpc().sendAndConfirmTransaction(transferTransactionBuilder, {commitment: 'finalized'});
        if (res2.value.err) {
            throw new Error('failed to confirm transfer transaction');
        }
        console.log(`   Tx: https://explorer.solana.com/tx/${sig2}?cluster=devnet`);
In this code, we are creating a new transaction builder, transferTransactionBuilder, and passing in the mint address of our NFT, our wallet, and our friend's public key. We then send the transaction to the cluster and verify a successful transaction. Nice job!
Doing More with Programmable NFTs
Programmable NFTs are still very new, so we are keeping an eye on all the upcoming changes. We will add supplemental content around creating rulesets, handling pNFTs in your transactions, and more. How are you using pNFTs? What are you most excited about? Let us know on Discord or Twitter.