
15 min read
This guide uses Sugar V2 with Candy Machine V3, which has been deprecated. For new NFT projects, see How to Launch an NFT Collection with Metaplex Core Candy Machine. This guide is for historic educational purposes only.
概覽
Are you ready to launch your NFT collection on Solana? Metaplex's Candy Machine CLI, Sugar, is the tool for you to launch in no time. If you have used previous versions of Candy Machine, you will notice that Sugar has a few significant improvements:
- improved upload performance
- simplified UX
- improved error handling
您將負責的工作內容
In this guide, you will create a new wallet using Solana CLI, airdrop some SOL, and deploy a Candy Machine on Solana's devnet using Sugar. You'll then deploy your Candy Machine to the web using the Solana dApp Scaffold and Metaplex's new modular JS framework, Umi.
您需要準備的物品
- Node.js installed (version 16.15 or higher)
- Solana CLI installed
- Phantom Wallet or Solflare extension installed
- Metaplex Sugar installed (**Latest Version, V2.x+ **) (installation instructions below)
- A text editor
- npm or yarn installed (We will use yarn to initialize our project and install the necessary packages. Feel free to use npm instead if that's your preferred package manager.)
Set Up Your Project
Create a new project directory in your terminal with the following:
mkdir sugar-demo
cd sugar-demo
Install Sugar
During installation, you will be asked which version you want to use. V1.x is for Candy Machine v2, V2.x is for Candy Machine v3. This guide assumes you are using V2.x. (Candy Machine v3). If you are using an older version, check out our guide here.
Mac Installation
In your terminal, enter:
bash <(curl -sSf https://sugar.metaplex.com/install.sh)
Note: You may need to restart your terminal after installation
Windows Installation
- Download the Windows installer here.
- Run the installer as an Administrator (Right Click-->Run as Administrator). If you get a warning about an untrusted binary, try clicking 更多資訊 and then Run Anyway. If you do not have this option, follow these steps:
- Right-click on the executable file and go to Properties.
- If you trust the Metaplex developer team, check the Unblock button as shown in the image below. This will allow you to run this binary on your computer since Microsoft does not trust it automatically.
- Click Apply and Ok.
- Run the installer again
If all works correctly, you should see something like this:
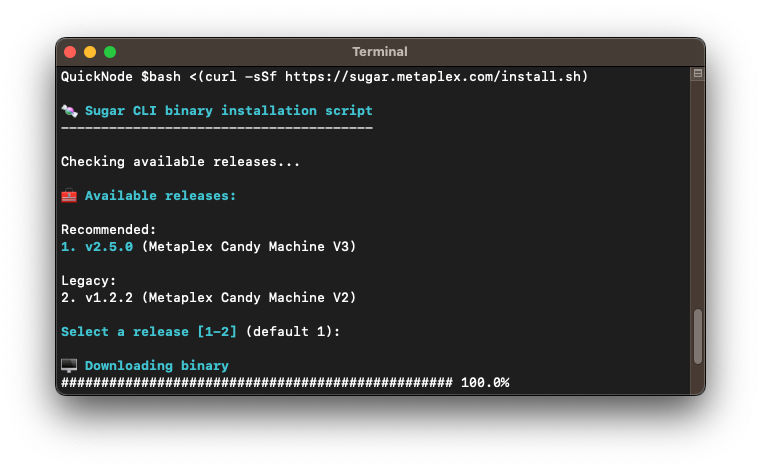
You should be able to verify your sugar installation by entering sugar --version in your terminal. You should see something like this:
Quicknode % sugar --version
sugar-cli 2.5.0
Set Up a New Wallet
One of the cool new features of Sugar is that it will allow you to set your wallet and RPC configs using Solana CLI so that you don't need to re-enter them in each of your Sugar commands.
We first need to create a new wallet for specifically devnet testing with the following command:
solana-keygen new --no-bip39-passphrase --outfile ./wallet.json
We can confirm that the wallet we just generated is the wallet that the Solana CLI will use by running the following:
solana config set --keypair ./wallet.json
Note: we are using a relative path to our wallet in this example as we will not be changing directories, but you may include a full path if you prefer.
Establish a Connection to Your Quicknode RPC
Connect to a Solana Cluster with Your Quicknode Endpoint
To build on Solana, you'll need an API endpoint to connect with the network. You're welcome to use public nodes or deploy and manage your own infrastructure; however, if you'd like 8x faster response times, you can leave the heavy lifting to us.
See why over 50% of projects on Solana choose Quicknode and start your free trial 這裡. We're going to use a Solana Devnet endpoint.
Copy the HTTP Provider link: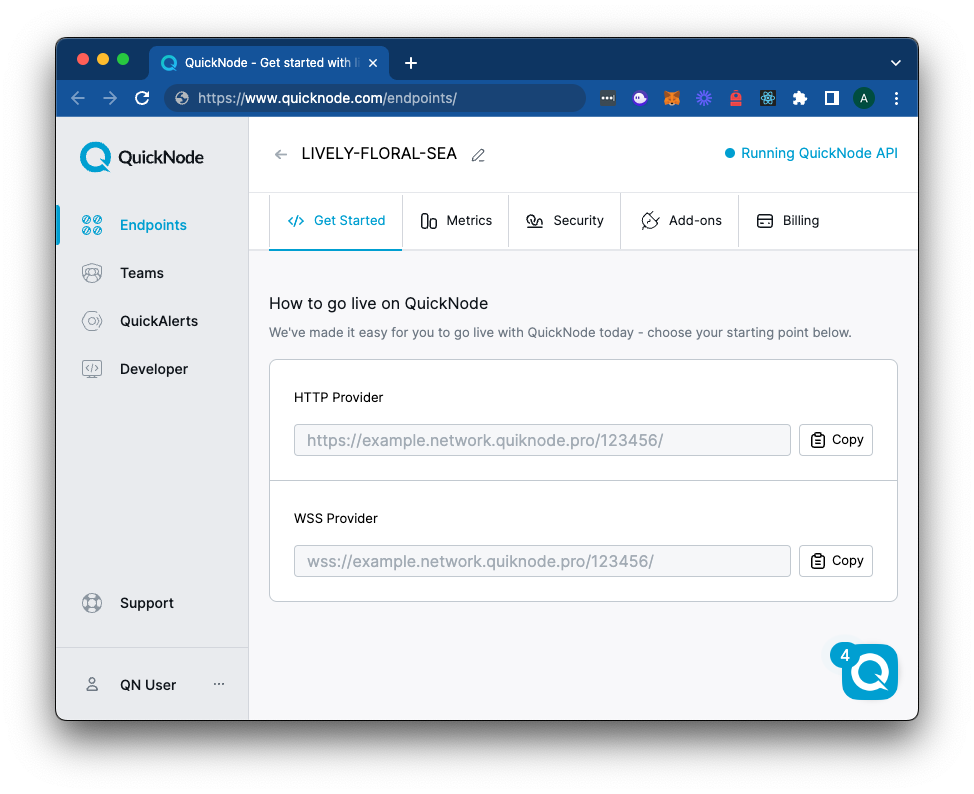
With your endpoint on the Solana Devnet setup, you can now run this command, substituting YOUR_QUICKNODE_URL with the HTTP URL you have copied:
solana config set --url YOUR_QUICKNODE_URL
Now to fund your wallet, you can run the command:
solana airdrop 1
If the command is successful, you should see something like this:
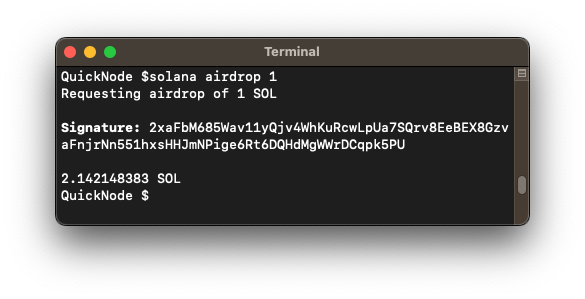
You can also run solana balance in your terminal and see that the 1 SOL is there.
Prepare NFT Assets
If you have used Candy Machine before, this process will be familiar. We must create a .json file corresponding to each digital asset using a simple number format starting with 0 and increasing sequentially, never skipping a number (e.g., 0.json maps to 0.png, then 1.json maps to 1.png). We can also create an optional collection.json and collection.png to enable Sugar to create an on-chain collection automatically.
Metaplex has a sample set of assets that we can download and work with to be consistent. You can edit the json to include whichever values you would like, as long as it is compliant with the URI json schema.
Download the sample set and extract the contents to ./assets/ in your project directory (the default directory that Sugar will look for your files).
Configure Candy Machine
Create a new file, config.json, in your root project folder:
echo > config.json
Open the file and paste this config:
{
    "number": 10,
    "symbol": "NB",
    "sellerFeeBasisPoints": 500,
    "isMutable": true,
    "isSequential": false,
    "ruleSet": null,
    "creators": [
        {
            "address": "YOUR_WALLET_ADDRESS",
            "share": 100
        }
    ],
    "uploadMethod": "bundlr",
    "awsS3Bucket": null,
    "retainAuthority": true,
    "awsConfig": null,
    "nftStorageAuthToken": null,
    "shdwStorageAccount": null,
    "pinataConfig": null,
    "hiddenSettings": null,
    "guards": {
        "default": {
          "solPayment": {
            "value": 0.01,
            "destination": "YOUR_WALLET_ADDRESS"
          },
          "startDate": {
            "date": "2022-10-23T20:00:00Z"
          }
        }
      }
}
Make sure to replace YOUR_WALLET_ADDRESS with the wallet address you created earlier.
NOTE: you can run solana address in your terminal to obtain the wallet address that you just created.
Now, we should be all set. If you're following along to this point, you should have a directory structure like this:
sugar-demo/
├── wallet.json
├── config.json
└── assets/
  ├── [0-9].png
  ├── [0-9].json
  ├── collection.png
  └── collection.json
Sugar has a built-in validation tool that will let us check for errors before proceeding. In the terminal, run:
sugar validate
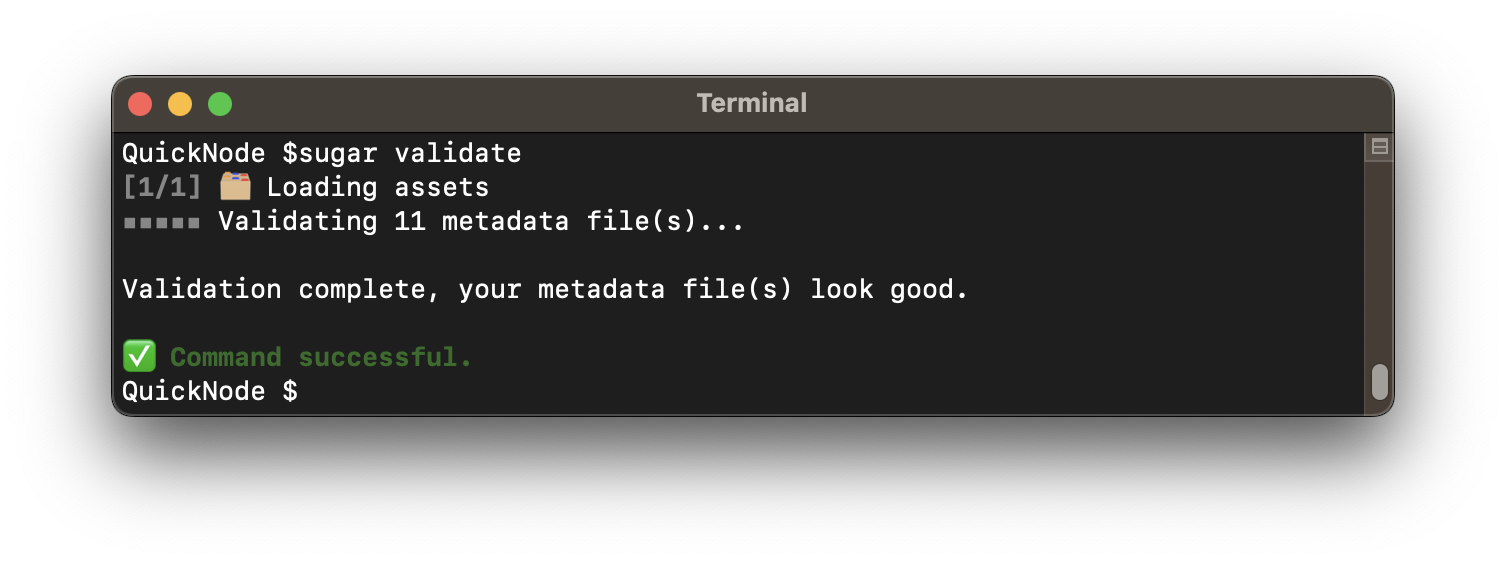
Note: You may see a warning, "missing properties.category". This is fine as the attribute is not included in the Metaplex sample files.
We're in business! Nice job. Let's build our Candy Machine.
Create a Candy Machine
Because we have set our RPC and wallet using Solana CLI and saved our 資產 以及 config.json to Sugar's default directories, our commands will be pretty simple!
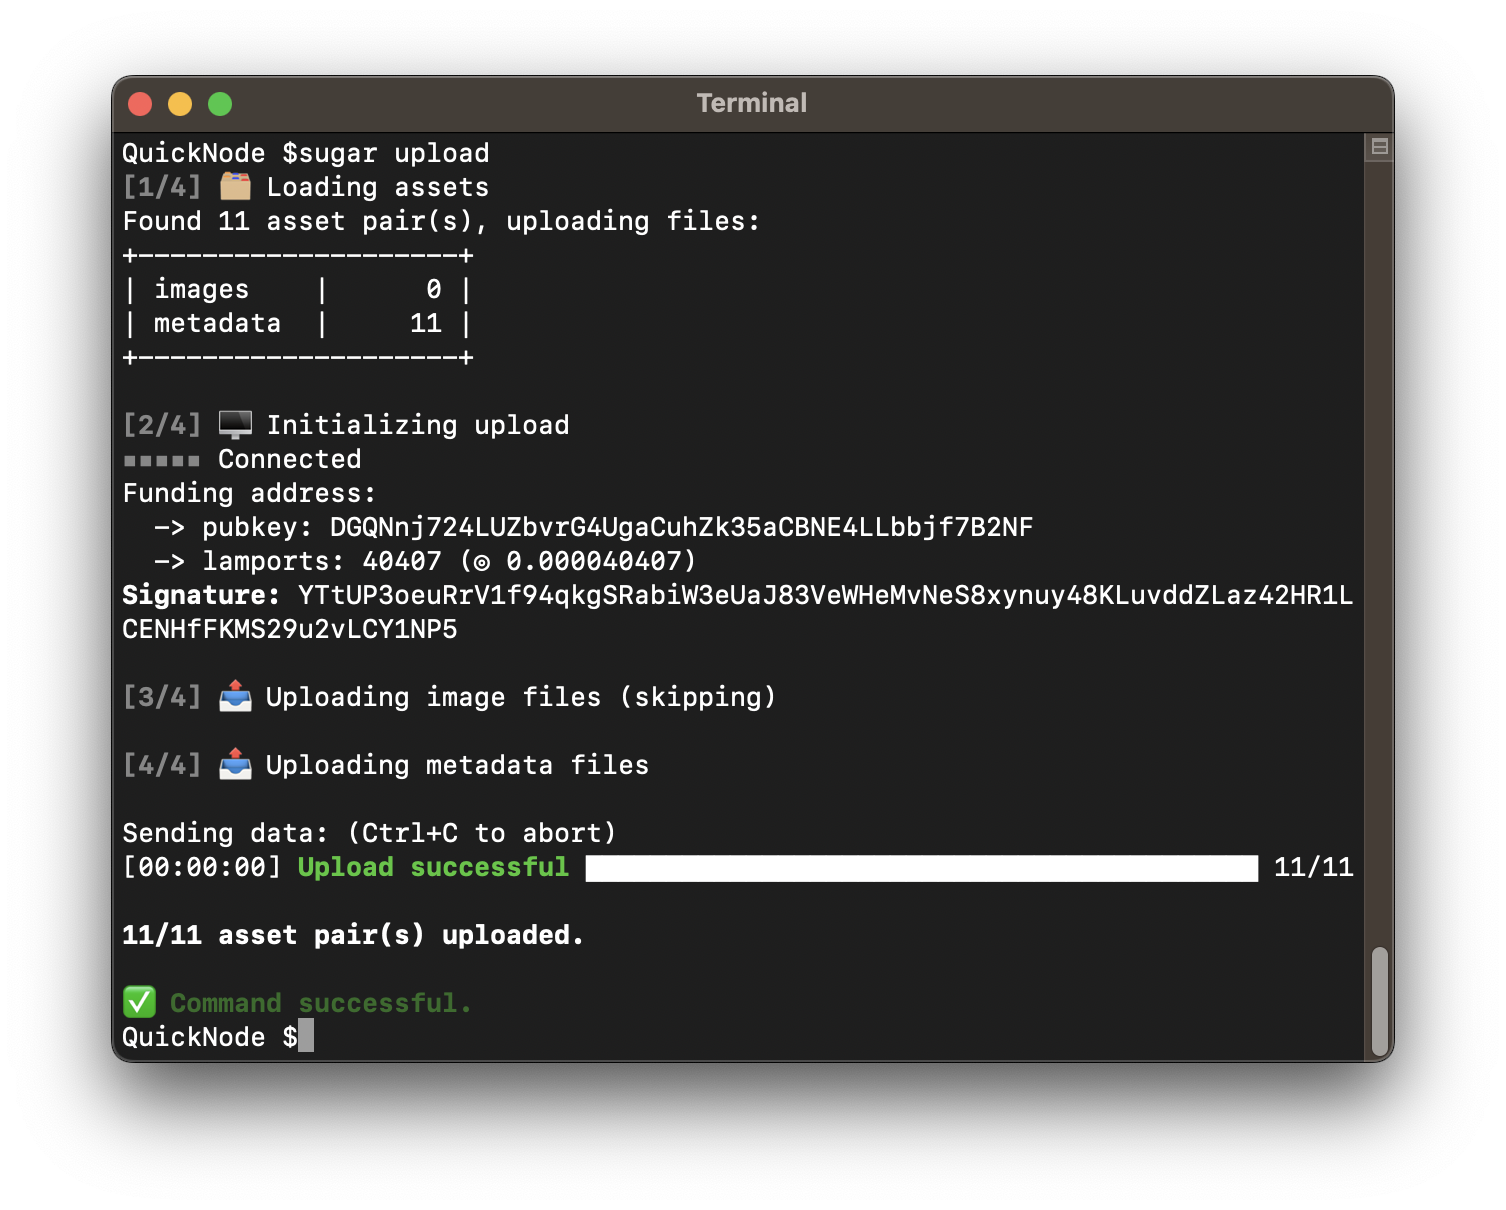
Upload Your Assets
In your terminal, enter:
sugar upload
您應該會看到類似以下的內容:
Deploy Candy Machine
In your terminal, enter:
sugar deploy
您應該會看到類似以下的內容:
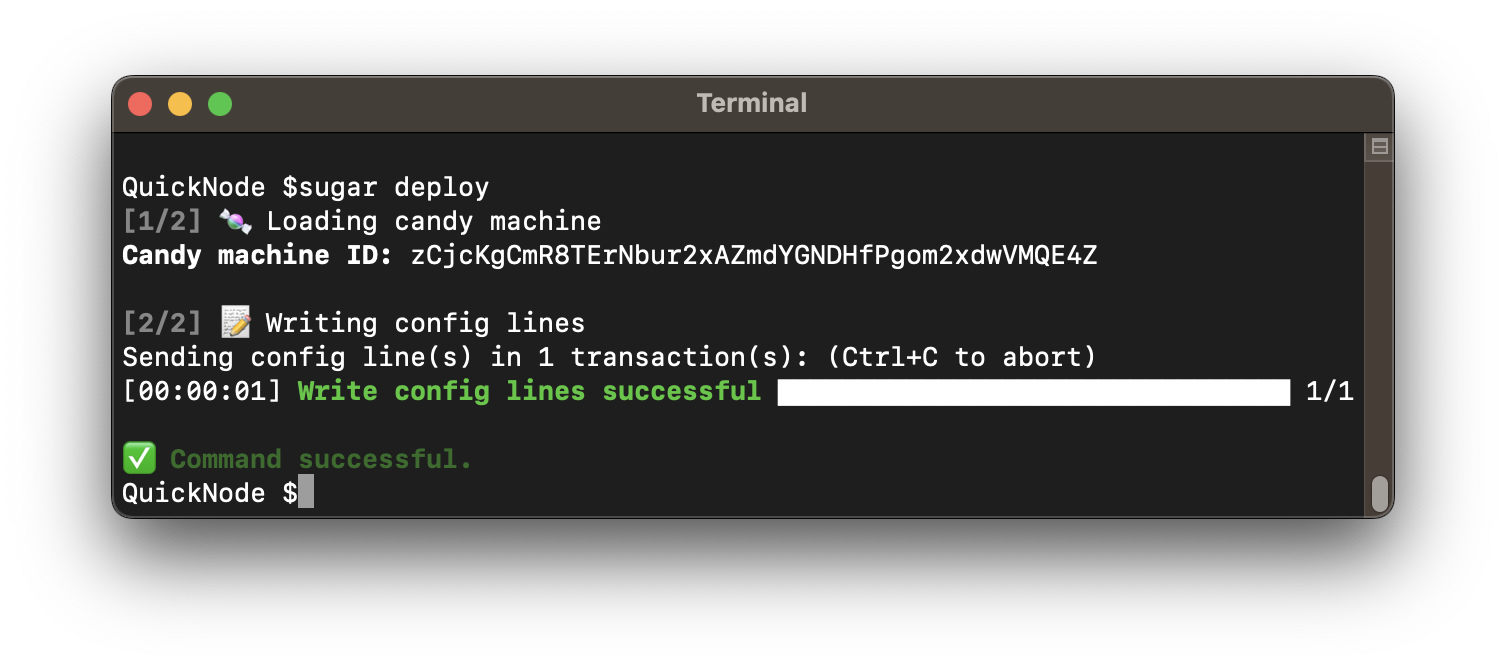
If you get a "Blockhash not found" error, try rerunning the command.
Make sure to store the Candy Machine ID provided in your terminal locally. We will need this later.
Verify Candy Machine
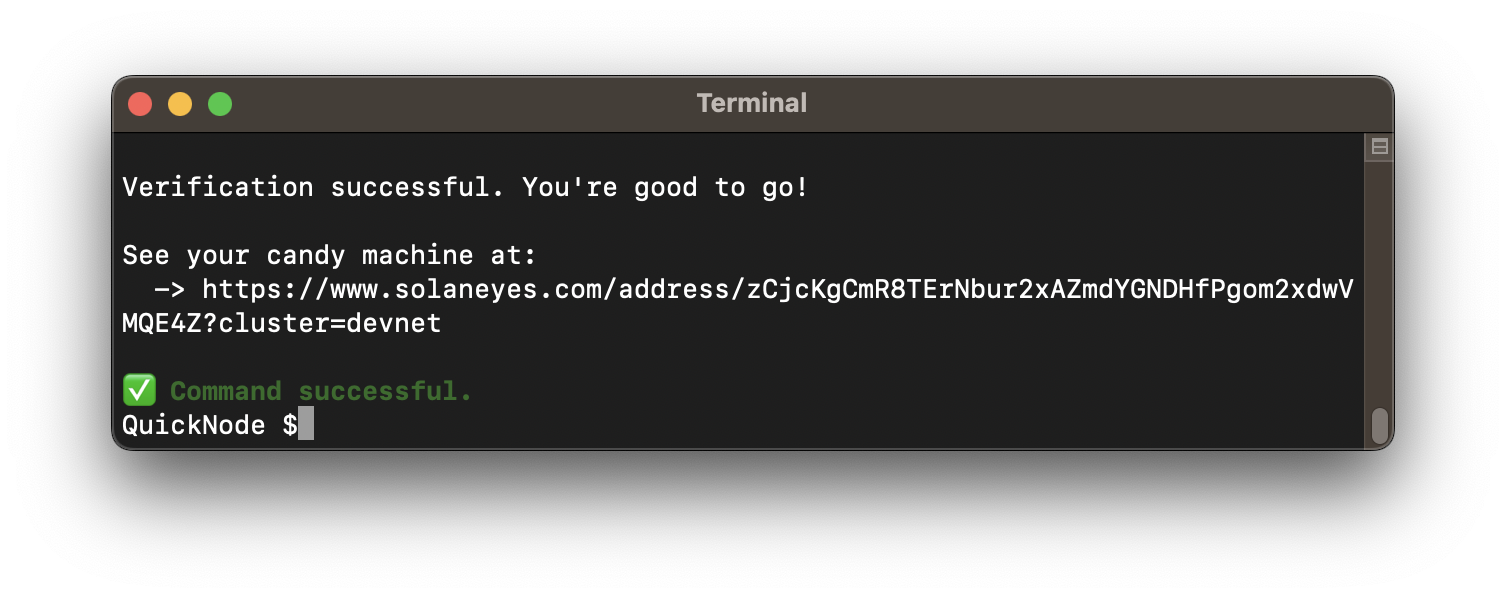
Let's make sure everything has worked as we'd expected. In your terminal, enter:
sugar verify
您應該會看到類似以下的內容:
Great work!
Test Your Candy Machine
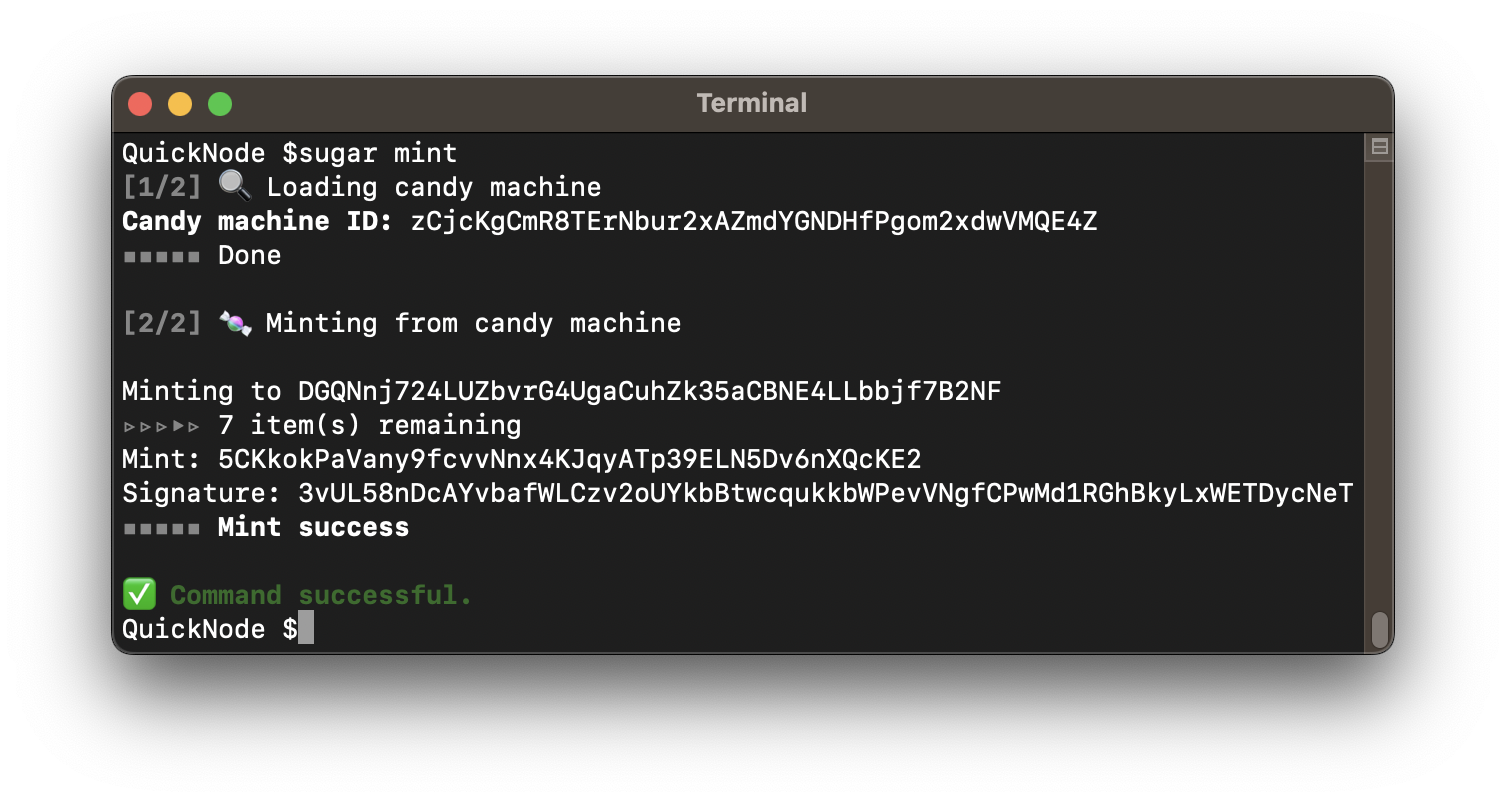
Try minting an NFT using sugar. In your terminal, enter:
sugar mint
您應該會看到類似以下的內容:
Add Your Candy Guards
By default, when you deploy your Candy Machine, only you can mint NFTs. You must implement candy guards to define the criteria by which others can mint your NFTs (e.g., start time, payment amount, payment token, whitelist tokens, etc.). Since we already defined our guards in our config.json, we can run the following:
sugar guard add
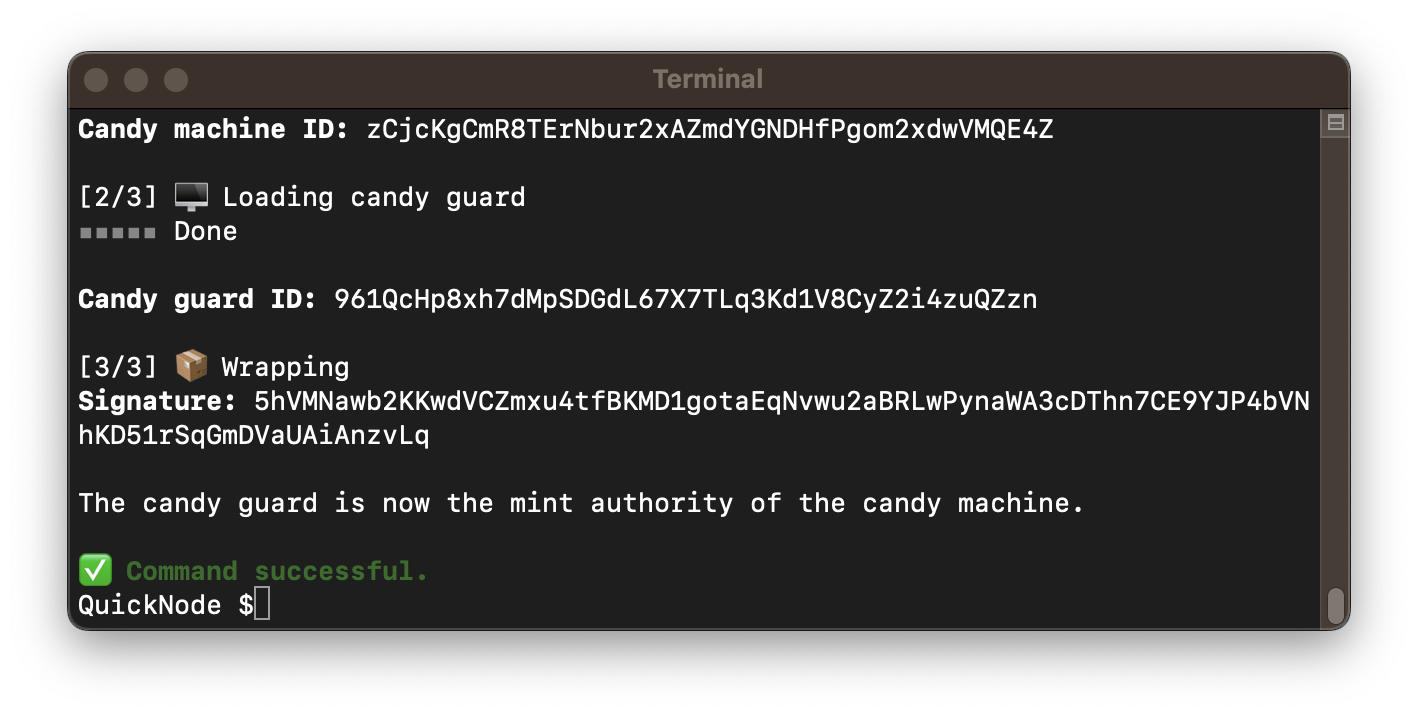
Excellent! Let's create a mint page to share this project with the world!
Set Up a Minting Site
For a speedy deployment, we will be using the Solana dApp Scaffold, a handy tool that includes a Next.JS app with Solana Wallet Adapter already integrated.
Clone the dApp Scaffold
From your project directory, in your terminal, enter:
git clone https://github.com/solana-labs/dapp-scaffold ./candy-machine-ui/
cd candy-machine-ui
安裝依賴項
Install the included dependencies. In your terminal, enter:
yarn
We will need a few additional metaplex packages to get our minting site up and running. In your terminal, enter:
yarn add @metaplex-foundation/mpl-candy-machine@alpha @metaplex-foundation/mpl-token-metadata@alpha @metaplex-foundation/mpl-toolbox @metaplex-foundation/umi @metaplex-foundation/umi-bundle-defaults @metaplex-foundation/umi-signer-wallet-adapters
Create a .env File
Create a file, .env in the candy-machine-ui folder:
echo > .env
Add the following values in the new .env file (replacing the values with your own):
NEXT_PUBLIC_RPC=<YOUR_QUICKNODE_URL>
NEXT_PUBLIC_CANDY_MACHINE_ID=<YOUR_CANDY_MACHINE_PUBKEY>
NEXT_PUBLIC_TREASURY=<YOUR_WALLET_ADDRESS>
If you don't remember your Candy Machine ID, you should be able to find it in cache.json 在 program.candyMachine field.
With all that information plugged in, you can save the file.
Add Mint NFT Button
We must add a button to our minting site to allow users to mint an NFT. First, duplicate the RequestAirdrop component and rename it to CandyMint. In your terminal, copy the file by entering the following:
cp ./src/components/RequestAirdrop.tsx ./src/components/CandyMint.tsx
開啟 CandyMint.tsx and change the exported component name from RequestAirdrop 至 CandyMint. You should also change the text in the button from <span>Airdrop 1 </span> 至 <span>Mint NFT </span>.
Finally, let's update our constant declarations and clear the contents of the onClick function, so we have a clean slate to work with. Your file should look like this:
//...Default Imports (we will replace these later)

export const CandyMint: FC = () => {
    // 👇 Update these constant declarations
    const { connection } = useConnection();
    const wallet = useWallet();
    const { getUserSOLBalance } = useUserSOLBalanceStore();

    // TODO - Create an Umi instance

    // 👇 Update this onClick function
    const onClick = useCallback(async () => {
      if (!publicKey) {
          console.log('error', 'Wallet not connected!');
          notify({ type: 'error', message: 'error', description: 'Wallet not connected!' });
          return;
      }
      // TODO - Add minting logic here
    }, []);

    return (
        <div className="flex flex-row justify-center">
            <div className="relative group items-center">
                <div className="m-1 absolute -inset-0.5 bg-gradient-to-r from-indigo-500 to-fuchsia-500
                    rounded-lg blur opacity-20 group-hover:opacity-100 transition duration-1000 group-hover:duration-200 animate-tilt"></div>
                <button
                    className="px-8 m-2 btn animate-pulse bg-gradient-to-br from-indigo-500 to-fuchsia-500 hover:from-white hover:to-purple-300 text-black"
                    onClick={onClick}
                >
                    <span>Mint NFT </span>
                </button>
            </div>
        </div>
    );
};
We need to add the CandyMint component to our Home View. Open ./sugar-demo/candy-machine-ui/src/views/home/index.tsx and add the following import statement:
// Components
import { RequestAirdrop } from '../../components/RequestAirdrop';
// 👇 Add this line
import { CandyMint } from '../../components/CandyMint';
And add the CandyMint component to the HomeView component:
          <RequestAirdrop />
          {/* 👇 Add this line */}
          <CandyMint />
Great job! You should now have a new button, but before we test it, we need to add mint functionality. Let's do that.
Add Mint Functionality
Return to ./sugar-demo/candy-machine-ui/src/components/CandyMint.tsx and replace the default imports with the following:
import { useConnection, useWallet } from '@solana/wallet-adapter-react';
import { FC, useCallback, useMemo } from 'react';
import { notify } from "../utils/notifications";
import useUserSOLBalanceStore from '../stores/useUserSOLBalanceStore';
import { createUmi } from '@metaplex-foundation/umi-bundle-defaults';
import { generateSigner, transactionBuilder, publicKey, some } from '@metaplex-foundation/umi';
import { fetchCandyMachine, mintV2, mplCandyMachine, safeFetchCandyGuard } from "@metaplex-foundation/mpl-candy-machine";
import { walletAdapterIdentity } from '@metaplex-foundation/umi-signer-wallet-adapters';
import { mplTokenMetadata } from '@metaplex-foundation/mpl-token-metadata';
import { setComputeUnitLimit } from '@metaplex-foundation/mpl-toolbox';
import { clusterApiUrl } from '@solana/web3.js';
import * as bs58 from 'bs58';

// These access the environment variables we defined in the .env file
const quicknodeEndpoint = process.env.NEXT_PUBLIC_RPC || clusterApiUrl('devnet');
const candyMachineAddress = publicKey(process.env.NEXT_PUBLIC_CANDY_MACHINE_ID);
const treasury = publicKey(process.env.NEXT_PUBLIC_TREASURY);
Create a Umi Instance
Let's create a memoized Umi instance using our Quicknode Endpoint and the mplCandyMachine and mplTokenMetadata plugins. We will use this to mint our NFTs. Replace // TODO - Create Umi instance with:
    const umi = useMemo(() =>
        createUmi(quicknodeEndpoint)
            .use(walletAdapterIdentity(wallet))
            .use(mplCandyMachine())
            .use(mplTokenMetadata()),
        [wallet, mplCandyMachine, walletAdapterIdentity, mplTokenMetadata, quicknodeEndpoint, createUmi]
    );
This will create a Umi instance that uses our wallet connected via the wallet adapter, our Quicknode endpoint, and a couple of Metaplex plugins.
Add Minting Logic
Let's update our onClick function to mint an NFT using Umi's transaction builder. Replace the onClick function with the following code, and then we will walk through what is happening:
    const onClick = useCallback(async () => {
        if (!wallet.publicKey) {
            console.log('error', 'Wallet not connected!');
            notify({ type: 'error', message: 'error', description: 'Wallet not connected!' });
            return;
        }

        // Fetch the Candy Machine.
        const candyMachine = await fetchCandyMachine(
            umi,
            candyMachineAddress,
        );
        // Fetch the Candy Guard.
        const candyGuard = await safeFetchCandyGuard(
            umi,
            candyMachine.mintAuthority,
        );
        try {
            // Mint from the Candy Machine.
            const nftMint = generateSigner(umi);
            const transaction = await transactionBuilder()
                .add(setComputeUnitLimit(umi, { units: 800_000 }))
                .add(
                    mintV2(umi, {
                        candyMachine: candyMachine.publicKey,
                        candyGuard: candyGuard?.publicKey,
                        nftMint,
                        collectionMint: candyMachine.collectionMint,
                        collectionUpdateAuthority: candyMachine.authority,
                        mintArgs: {
                            solPayment: some({ destination: treasury }),
                        },
                    })
                );
            const { signature } = await transaction.sendAndConfirm(umi, {
                confirm: { commitment: "confirmed" },
            });
            const txid = bs58.encode(signature);
            console.log('success', `Mint successful! ${txid}`)
            notify({ type: 'success', message: 'Mint successful!', txid });

            getUserSOLBalance(wallet.publicKey, connection);
        } catch (error: any) {
            notify({ type: 'error', message: `Error minting!`, description: error?.message });
            console.log('error', `Mint failed! ${error?.message}`);
        }
    }, [wallet, connection, getUserSOLBalance, umi, candyMachineAddress, treasury]);
Let's walk through what is happening here:
- First, we check to make sure the wallet is connected. If it is not, we notify the user and return.
- Next, we fetch the Candy Machine and Candy Guard using the
fetchCandyMachine以及safeFetchCandyGuardfunctions from the mpl-candy-machine package. We need these for our minting transaction. - Next, we generate a signer using Umi's
generateSignerfunction. This will be used to mint our NFT. - Next, we create a transaction using Umi's
transactionBuilderfunction. This will be used to mint our NFT:
- We add a
setComputeUnitLimitinstruction to the transaction. This safety measure prevents the transaction from failing due to exceeding the compute unit limit. - We add a
mintV2instruction to the transaction. This is the instruction that will mint our NFT. We pass our umi instance and an object with the following properties:candyMachine: The candy machine's public key.candyGuard: The candy guard's public key.nftMint: The signer we generated earlier.collectionMint: The collection mint's public key.collectionUpdateAuthority: The collection update authority's public key.mintArgs: An object containing the mint arguments associated with your Candy Guard (this may be different depending on your Candy Guard). For thesolPaymentguard, we must pass the目的地of the payment (the treasury's public key).
- We send the transaction and notify the user of the result. Note that umi returns transaction signatures as a Unit8Array, so we must encode it to base58 before displaying it to the user.
- Finally, we call
getUserSOLBalance(a store action built into the scaffold) to update the user's SOL balance.
Nice job! Our site should now be able to mint NFTs.
Mint an NFT
Now that we have added the minting logic, let's start and test the site. In your terminal, run the following:
紗線 開發
This will open up a browser at localhost:3000, where you can connect your wallet and have the ability to mint an NFT. Confirm that your Phantom Wallet is set to devnet and not mainnet before proceeding.
You'll need devnet SOL in your Phantom wallet to mint an NFT. You can use Solana CLI to airdrop to your Phantom wallet by entering this command in your terminal:
solana airdrop 1 YOUR_PHANTOM_WALLET_ADDRESS
Once you're ready, click "Mint". If done successfully, you should see a website like this:
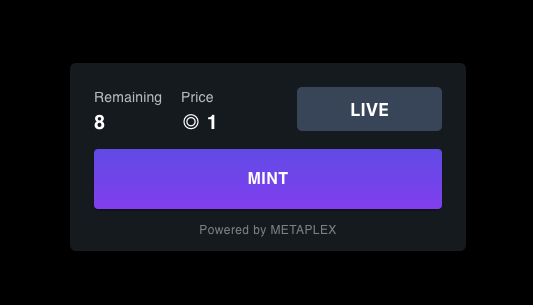
If you see an error that says “Mint Failed,” you might not have enough funds. Try again once you have added funds. You can view the NFT in your wallet after purchasing. Phantom may take a moment before rendering the NFT in your wallet. Ours looks like this:
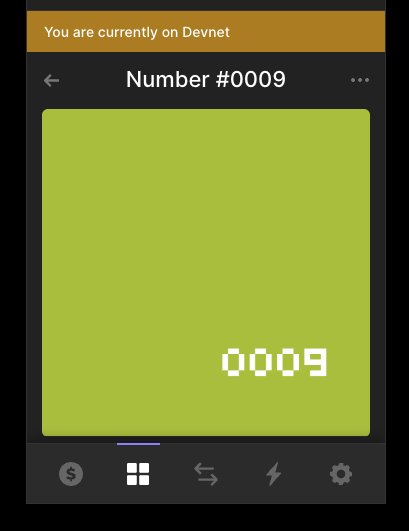
That's some sweet sugar! Nice job.
結論
Congrats! You created a Candy Machine using Metaplex Sugar and Umi. You now have all the tools needed to run your own NFT mint. We're excited to see what NFTs you're creating! Join us on Discord or reach out to us via Twitter to share your NFT project.