
18 min read
概覽
With a growing demand for NFTs on Solana, so does the need for lower storage costs. Minting thousands of NFTs on Solana can cost thousands of dollars in rent fees. What if your business case requires millions of NFTs or more? State compression is a tool that enables you to store many accounts into a single account, reducing the cost of storage. Effectively, this allows us to use Solana's ledger to validate data stored off-chain. We can do this by using a cryptographic concept called a Merkle tree. In this guide, we will learn about compression on Solana and how to mint and fetch compressed NFTs.
您將負責的工作內容
- Learn about NFT compression on Solana
- Write a script to mint and fetch a compressed NFT on Solana's devnet
您需要準備的物品
- Experience with Solana NFTs (Guide: Solana NFT Metadata Deep Dive)
- Nodejs (version 16.15 or higher) installed
- Typescript experience and ts-node installed
- Quicknode Endpoint with DAS Add-on Installed:
Get DAS Add-on
If you do not already have one, you will need a Quicknode account with a Solana endpoint. You can sign up for an account here.
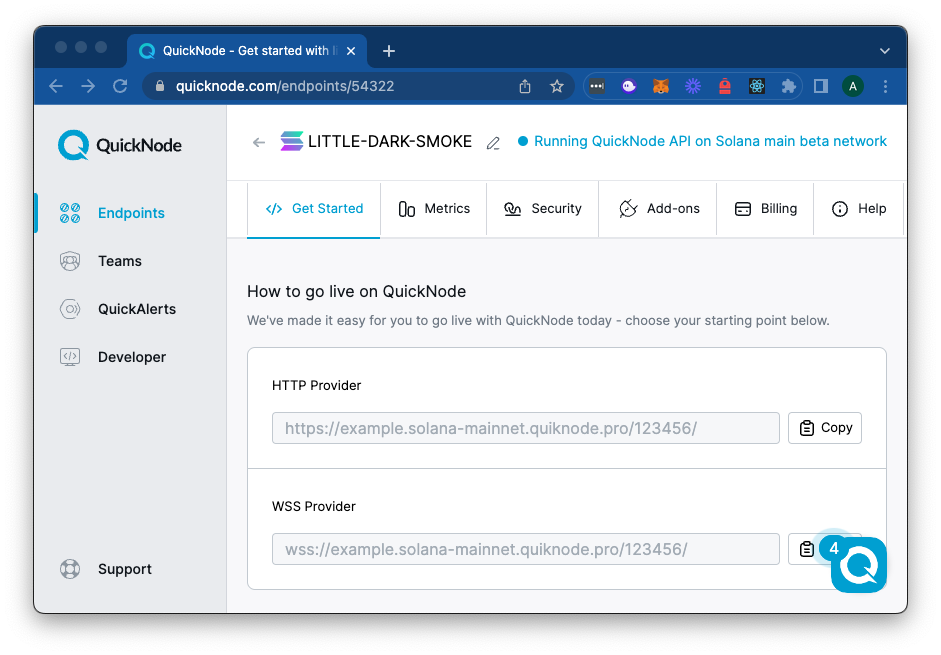
To use the DAS API, you'll need to use a Solana endpoint with the DAS Add-on installed. You can install the DAS Add-on to your endpoint on your endpoint page (https://dashboard.quicknode.com/endpoints/YOUR_ENDPOINT_ID/add-ons).
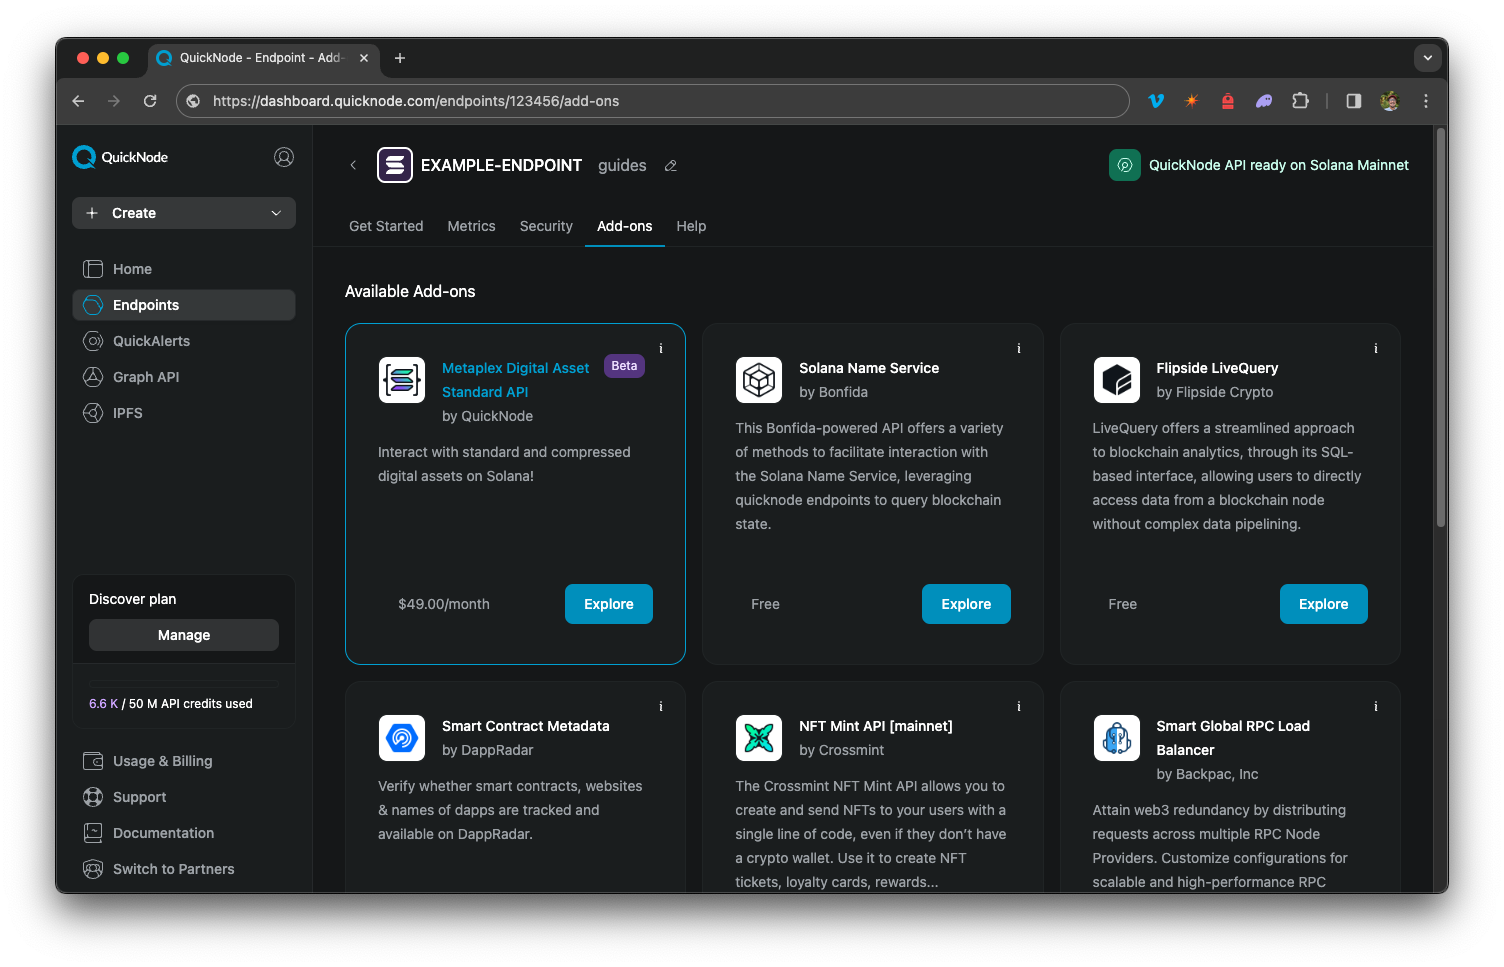
Make sure to add the Digital Asset Standard Add-on to your endpoint before proceeding.
本指南中使用的依賴項
| 依賴關係 | 版本 |
|---|---|
| @metaplex-foundation/digital-asset-standard-api | ^1.0.0 |
| @metaplex-foundation/umi | ^0.8.10 |
| @metaplex-foundation/umi-bundle-defaults | ^0.8.10 |
| @metaplex-foundation/mpl-bubblegum | ^3.1.2 |
| @metaplex-foundation/mpl-token-metadata | ^3.1.2 |
| @solana/spl-account-compression | ^0.2.0 |
| @solana/spl-token | ^0.3.11 |
| @solana/web3.js | ^1.87.6 |
我們開始吧!
What are Compressed NFTs?
Compressed NFTs leverage cryptographic techniques to efficiently store and verify large amounts of data on the blockchain. Two key concepts in this process are hashing and Merkle trees.
-
Hashing: This is the process by which an input, such as an NFT's metadata or associated media file, is converted into a fixed-size string of bytes known as a hash. Each hash is unique; even a slight alteration in the input leads to a vastly different hash, making it nearly impossible to deduce the original input from the hash alone. This unique characteristic ensures that it is immediately noticeable if the NFT data changes.
-
Merkle trees is a data structure that is used to store hashes of the individual pieces of data in large datasets in a way that allows for efficient and secure verification of the contents of the dataset. Every piece of data (called a
葉片) is hashed and then paired with another hash to create a new hash. This process is repeated until only one hash is left, called theroot. The root hash is used to verify the integrity of the data.
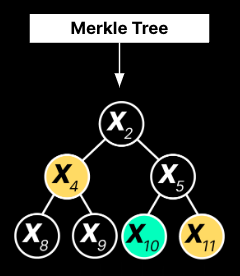 Source: Solana & Metaplex Foundation
In the simple example image above, imagine each leaf (e.g., X8, X9, X10, X11) as an individual NFT. The root hash, X2, acts as a compact representation of the entire collection of NFTs. You can see that the root is derived from hashing X4 以及 X5:
X4is derived from hashingX8以及X9,以及X5is derived from hashingX10以及X11.
To verify a single NFT, one only needs a small number of hashes leading back to the root rather than the entire collection. This is especially useful for collections with hundreds or thousands of NFTs, making operations like transfers and verifications less resource-intensive.
Key Concepts for Compressed NFTs
To create Compressed NFTs, we will first need to create a Merkle Tree that can store our NFT data. Doing so requires an understanding of several critical parameters:
-
Depth: This represents the number of levels within the Merkle Tree, from the root down to the leaves, where each leaf can be an NFT. This will be determined ultimately by how many NFTs you want to store in the tree. The deeper the tree, the more NFTs you can store, but the more hashes you will need to verify a single NFT. -
Max Buffer Size: Since users on Solana might be modifying multiple NFTs in the same tree at once, we need to be able to support changes to the tree without one change invalidating another. Solana uses a special type of Merkle tree, called a concurrent Merkle tree, to support this. ThemaxBufferSizeeffectively sets a changelog for managing updates and changes to the tree's proof. -
Canopy Depth: The canopy is the number of proof nodes that are cached and stored on the chain. A large canopy helps reduce the number of proofs that must be fetched to verify an NFT. There is a balance here between cost and composability. A larger canopy will reduce the number of proofs that need to be fetched (and therefore make it easier for programs to interact with the NFT), but it will also increase the cost of storing the tree on the chain.
With that, let's go ahead and create one!
Setup a New Project
mkdir compressed-nft && cd compressed-nft && echo > app.ts
We will be using several packages from Metaplex and Solana to create and fetch compressed NFTs:
| 依賴關係 | 說明 |
|---|---|
@metaplex-foundation/umi-bundle-defaults | Preconfigured Umi bundles for Metaplex. |
@metaplex-foundation/umi | Core Umi framework for Solana development. |
@metaplex-foundation/mpl-token-metadata | Metaplex token metadata contract library. |
@metaplex-foundation/mpl-bubblegum | Metaplex library for NFT compression. |
@solana/spl-account-compression | Solana program library for account compression. |
@solana/web3.js | Solana's JavaScript API for interacting with the blockchain. |
@metaplex-foundation/digital-asset-standard-api | JS API to fetch Solana Digital asset data. |
Install necessary dependencies:
yarn init -y
yarn add @metaplex-foundation/umi-bundle-defaults @metaplex-foundation/umi @metaplex-foundation/mpl-token-metadata @metaplex-foundation/mpl-bubblegum @solana/spl-account-compression @solana/web3.js@1 @metaplex-foundation/digital-asset-standard-api
或
npm init -y
npm i @metaplex-foundation/umi-bundle-defaults @metaplex-foundation/umi @metaplex-foundation/mpl-token-metadata @metaplex-foundation/mpl-bubblegum @solana/spl-account-compression @solana/web3.js@1 @metaplex-foundation/digital-asset-standard-api
Import Dependencies
Open app.ts in a code editor of choice, and on line 1, import the following:
import { createUmi } from '@metaplex-foundation/umi-bundle-defaults';
import { none } from '@metaplex-foundation/umi';
import { mplTokenMetadata } from '@metaplex-foundation/mpl-token-metadata';
import {
    mplBubblegum,
    createTree,
    fetchTreeConfigFromSeeds,
    MetadataArgsArgs,
    mintV1,
    findLeafAssetIdPda
} from '@metaplex-foundation/mpl-bubblegum';
import {
    getConcurrentMerkleTreeAccountSize,
    ALL_DEPTH_SIZE_PAIRS,
} from "@solana/spl-account-compression";
import {
    PublicKey,
    Umi,
    createSignerFromKeypair,
    generateSigner,
    keypairIdentity
} from '@metaplex-foundation/umi';
import { LAMPORTS_PER_SOL } from '@solana/web3.js';
import { DasApiAsset, dasApi } from '@metaplex-foundation/digital-asset-standard-api';
These imports will allow us to create an instance of Umi (Metaplex's JS Framework) and use the Solana compression programs to create and fetch compressed NFTs.
Establish a Connection to Solana
Connect to a Solana Cluster with Your Quicknode Endpoint
To build on Solana, you'll need an API endpoint to connect with the network. You're welcome to use public nodes or deploy and manage your own infrastructure; however, if you'd like 8x faster response times, you can leave the heavy lifting to us.
See why over 50% of projects on Solana choose Quicknode and start your free trial 這裡. We're going to use a Solana Devnet endpoint.
Copy the HTTP Provider link: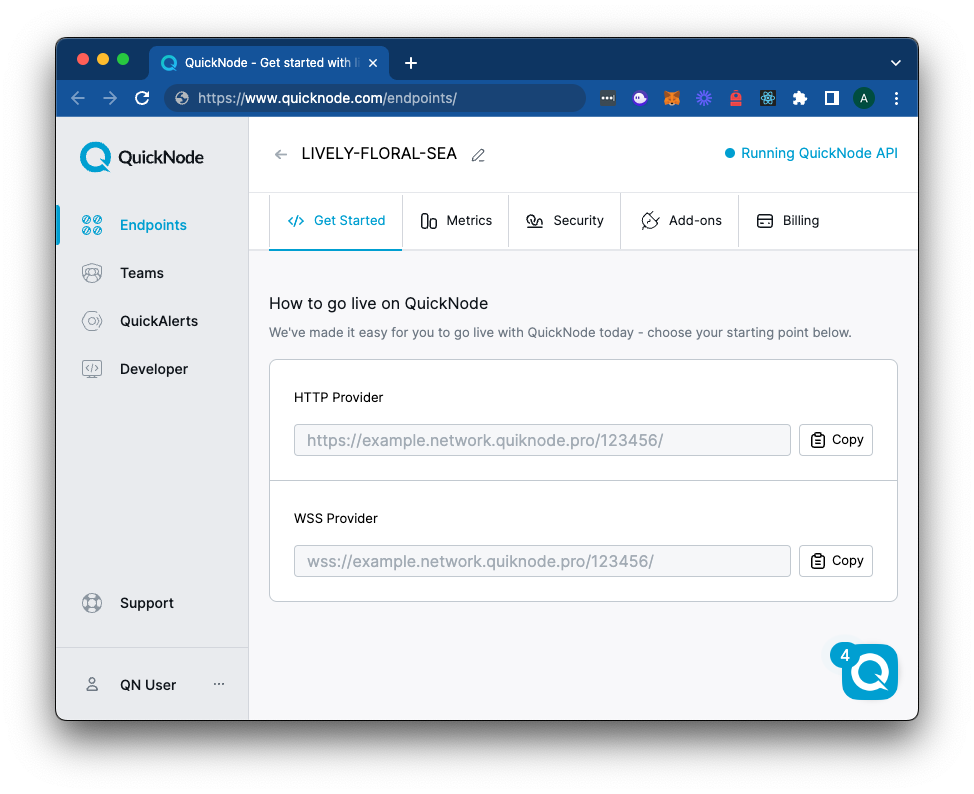
Define your Solana endpoint (make sure to replace the endpoint with your own), and add it to below your imports:
const endpoint = "https://example.solana-devnet.quiknode.pro/123456/";
Create an Umi Instance
To use Metaplex's Bubblegum program for minting Compressed NFTs, we must create an instance of Umi with our endpoint. Umi is a JS framework that makes interacting with the Solana blockchain easy. It provides a set of tools to help you build on Solana. First, you will need a keypair to sign transactions. You can create a new keypair using the solana-keygen command line tool or use an existing one:
solana-keygen new --no-bip39-passphrase --outfile ./my-keypair.json
You should see an output like this:
Generating a new keypair
Wrote new keypair to ./my-keypair.json
========================================================================
pubkey: E9tb...NzT7                         # 👈 THIS IS YOUR PUBLIC KEY
========================================================================
Head over to Quicknode Multi-chain Faucet and get some Devnet SOL to fund your account.
Below your endpoint, establish an instance of Umi with your secret key:
const umi = createUmi(endpoint)
    .use(mplTokenMetadata())
    .use(mplBubblegum());
    .use(dasApi());
const secret = new Uint8Array(/* 📋 Paste your secret from my-keypair.json (e.g., [0, 0, ... 0, 0]) key here */);
const myKeypair = umi.eddsa.createKeypairFromSecretKey(secret);
const wallet = createSignerFromKeypair(umi, myKeypair);
umi.use(keypairIdentity(wallet));
Our Umi instance will be used to send transactions to the devnet cluster and to query the DAS API. We are using four plug-ins:
mplTokenMetadata(): This plug-in provides a set of methods to interact with the Metaplex Token Metadata program.mplBubblegum(): This plug-in provides a set of methods to interact with the Metaplex Bubblegum program (Compressed NFTs).dasApi(): This plug-in provides a set of methods to interact with the Digital Asset Standard API.keypairIdentity(): This plug-in provides a set of methods to sign and send transctions with the Solana blockchain using our keypair.
Define NFT Metadata
Feel free to create your own metadata or use the following example. In your code, add a 元資料 object:
const metadata: MetadataArgsArgs = {
    name: 'QN Pixel',
    symbol: 'QNPIX',
    uri: "https://qn-shared.quicknode-ipfs.com/ipfs/QmQFh6WuQaWAMLsw9paLZYvTsdL5xJESzcoSxzb6ZU3Gjx",
    sellerFeeBasisPoints: 500,
    collection: none(),
    creators: [],
};
If you prefer to use your own metadata, you can replace the 元資料 object with your custom metadata. To upload a .json and image file to IPFS, you can use a Quicknode IPFS Gateway.
Define Helper Functions
We have created a couple of helper functions that will help us calculate the depth and buffer size of our Merkle tree and print the details of an asset. Add the following code to your app.ts file:
function calculateDepthForNFTs(nftCount: number): number {
    let depth = 0;
    while (2 ** depth < nftCount) {
        depth++;
    }
    return depth;
}

function calcuateMaxBufferSize(nodes: number): number {
    let defaultDepthPair = ALL_DEPTH_SIZE_PAIRS[0];
    let maxDepth = defaultDepthPair.maxDepth;
    const allDepthSizes = ALL_DEPTH_SIZE_PAIRS.flatMap(
        (pair) => pair.maxDepth,
    ).filter((item, pos, self) => self.indexOf(item) == pos);

    for (let i = 0; i <= allDepthSizes.length; i++) {
        if (Math.pow(2, allDepthSizes[i]) >= nodes) {
            maxDepth = allDepthSizes[i];
            break;
        }
    }
    return ALL_DEPTH_SIZE_PAIRS.filter((pair) => pair.maxDepth == maxDepth)?.[0]
        ?.maxBufferSize ?? defaultDepthPair.maxBufferSize;
}

async function printAsset(umi: Umi, assetId: PublicKey<string>, retries = 5, retryDelay = 5000) {
    while (retries > 0) {
        try {
            const asset = await umi.rpc.getAsset(assetId);
            printAssetDetails(asset, true, false);
            return;
        } catch (e) {
            await new Promise((resolve) => setTimeout(resolve, retryDelay));
            retries--;
        }
    }
}

function printAssetDetails(asset: DasApiAsset, showAttributes = true, showJson = false): void {
    const { name, token_standard: standard, attributes } = asset.content.metadata;
    const { compressed } = asset.compression;
    const { json_uri, files } = asset.content;

    const imgUrl = files?.find(file => file.mime === 'image/png' || file.mime === 'image/jpeg')?.uri;

    console.table({
        name,
        standard,
        compressed,
        json_uri,
        imgUrl
    });
    if (showAttributes && attributes) {
        console.table(attributes);
    }
    if (showJson) {
        console.log(JSON.stringify(asset, null, 2));
    }
}
Though we won't go into detail on each of these, here is a brief overview of what each function does:
calculateDepthForNFTs(): This function calculates the depth of the Merkle tree based on the number of NFTs we want to store in it. This is calculated by finding the smallest power of 2 that is greater than or equal to the number of NFTs.calcuateMaxBufferSize(): This function calculates the maximum buffer size for the Merkle tree based on the number of nodes in the tree. This is calculated using a pre-defined list of depth-size pairs (from thespl-account-compressionpackage),ALL_DEPTH_SIZE_PAIRS.printAssetDetails(): This function parses and logs the details of an asset to the console in an easy-to-read format.printAsset(): This function fetches an asset from the DAS API with retry logic. It will retry fetching the asset up to 5 times with a 5 second delay between each attempt--this is helpful as we wait for the asset to be minted and indexed. Once found, it will invokeprintAssetDetails()to log the asset to the console.
Outline Your Main Function
Add the following code to your app.ts file to outline our main function that we will be creating:
const main = async ({ nftCount, umi, metadata }: { nftCount: number, umi: Umi, metadata: MetadataArgsArgs}) => {
    // 0 - Check Costs
    console.log(`👾 Initializing a Merkle Tree for ${nftCount.toLocaleString()} Compressed NFTs.`);

    // 1 - Create a Merkle Tree
    console.log(`   Creating Merkle Tree...${merkleTree.publicKey.toString()}`);

    // 2 - Mint NFT
    console.log(`🎨 Minting an example NFT`);

    // 3 - Fetch NFT
    console.log(`   Fetching from the chain (this may take a few moments)...`);

}

main({ nftCount: 10_000, umi, metadata }).catch(console.error);
This function will be the main entry point for our script. It will be responsible for:
- creating a Merkle tree,
- minting an NFT, and
- fetching the NFT from the chain.
Let's build it!
Pre-checks
Before we create a Merkle tree, let's check the costs of creating and storing the tree. We can do this by calculating the depth and buffer size of the tree. Add the following code to the proper section within the main function of your app.ts file:
    // 0 - Check Costs
    console.log(`👾 Initializing a Merkle Tree for ${nftCount.toLocaleString()} Compressed NFTs.`);

    const balance = await umi.rpc.getBalance(umi.payer.publicKey);
    console.log(`   Wallet Balance: ◎${(Number(balance.basisPoints) / LAMPORTS_PER_SOL).toLocaleString()}`);

    const merkleStructure = {
        maxDepth: calculateDepthForNFTs(nftCount),
        maxBufferSize: calcuateMaxBufferSize(nftCount),
        canopyDepth: 0,
    }

    const canopyDepth = merkleStructure.maxDepth > 20 ? merkleStructure.maxDepth - 10 :
        merkleStructure.maxDepth > 10 ? 10 :
            Math.floor(merkleStructure.maxDepth / 2);

    merkleStructure.canopyDepth = canopyDepth;


    console.log(`   Max Depth: ${merkleStructure.maxDepth}`);
    console.log(`   Max Buffer Size: ${merkleStructure.maxBufferSize}`);
    console.log(`   Canopy Depth: ${merkleStructure.canopyDepth}`);

    const requiredSpace = getConcurrentMerkleTreeAccountSize(
        merkleStructure.maxDepth,
        merkleStructure.maxBufferSize,
        merkleStructure.canopyDepth,
    );
    console.log(`   Total size: ${requiredSpace.toLocaleString()} bytes.`);

    const { basisPoints } = await umi.rpc.getRent(requiredSpace);
    const storageCost = Number(basisPoints);

    if (Number(balance.basisPoints) < storageCost) {
        throw new Error(`Insufficient funds. Need at least ◎${(storageCost / LAMPORTS_PER_SOL).toLocaleString(undefined)} for storage`);
    }

    console.log(`   Total cost: ◎ ${(storageCost / LAMPORTS_PER_SOL).toLocaleString(undefined)}`);
Here we are doing a few things:
- First, we use
umi.rpc.getBalance()to check our wallet balance. - Next, we define our Merkle Structure,
merkleStructure, which includes our Merkle tree's depth, buffer size, and canopy depth. We calculate the canopy depth and buffer size based on the number of NFTs you wish to mint. We do this utilizing our helper functions. - We also create some logic for determining the canopy depth based on the depth of the tree. This is a balance between cost and composability and will ultimately depend on your project's requirements.
- Finally, we calculate the size and rent required for a Merkle tree based on our specifications using
getConcurrentMerkleTreeAccountSize()以及umi.rpc.getRent(). We then check if we have enough funds to cover the storage cost.
Let's move on to creating our Merkle tree.
Create a Merkle Tree
Next, let's add some functionality that sends a request to the cluster to create a tree. Then, after the tree is created, we will fetch its configuration. Add the following to your main function:
    // 1 - Create a Merkle Tree
    const merkleTree = generateSigner(umi);
    console.log(`   Creating Merkle Tree...${merkleTree.publicKey.toString()}`);

    const builder = await createTree(umi, {
        merkleTree,
        maxDepth: merkleStructure.maxDepth,
        maxBufferSize: merkleStructure.maxBufferSize,
        canopyDepth: merkleStructure.canopyDepth,
    });
    console.log(`   Sending request (this may take a few moments)...`);
    const { blockhash, lastValidBlockHeight } = await umi.rpc.getLatestBlockhash();
    await builder.sendAndConfirm(umi, {
        send: { commitment: 'finalized' },
        confirm: { strategy: { type: 'blockhash', blockhash, lastValidBlockHeight } },
    });

    let treeFound = false;
    while (!treeFound) {
        try {
            const treeConfig = await fetchTreeConfigFromSeeds(umi, {
                merkleTree: merkleTree.publicKey,
            });
            treeFound = true;
            console.log(`🌲 Merkle Tree created: ${merkleTree.publicKey.toString()}. Config:`)
            console.log(`     - Total Mint Capacity ${Number(treeConfig.totalMintCapacity).toLocaleString()}`);
            console.log(`     - Number Minted: ${Number(treeConfig.numMinted).toLocaleString()}`);
            console.log(`     - Is Public: ${treeConfig.isPublic}`);
            console.log(`     - Is Decompressible: ${treeConfig.isDecompressible}`);
        } catch (error) {
            await new Promise((resolve) => setTimeout(resolve, 5000));
        }
    }
Let's break this down:
- First, we create a new signer for the Merkle tree using
generateSigner(). This will be the account that holds the Merkle tree. - We then use Umi's
createTree()instruction builder to create a new Merkle Tree instruction. We pass ourmerkleStructureas arguments to the builder. - We then send the instruction to the cluster using
sendAndConfirm(). This will create the Merkle tree on the Solana blockchain. - Finally, we fetch the tree's configuration using
fetchTreeConfigFromSeeds(). This will return the tree's configuration, including its capacity, number of minted NFTs, and whether it is public and decompressible. We have set up awhileloop that will retry if not found, as it may take a few moments for the tree to be indexed.
Mint an NFT
Great--we have a Merkle tree, so now we can mint an NFT. Add the following code to your main function:
    // 2 - Mint NFT
    console.log(`🎨 Minting an example NFT`);

    const leafOwner = generateSigner(umi).publicKey;
    await mintV1(umi, { leafOwner, merkleTree: merkleTree.publicKey, metadata }).sendAndConfirm(umi);
    const assetId = findLeafAssetIdPda(umi, { merkleTree: merkleTree.publicKey, leafIndex: 0 });
    console.log(`🍃 NFT Minted: ${assetId[0].toString()}`);
Here, we simply create a new account for our new leaf (where our NFT will be stored) and mint the NFT using mintV1(). Note that we need to pass our leafOwner 以及 merkleTree public keys, as well as the 元資料 for the NFT. Once minted, We then fetch the NFT's mint address (asset ID) using findLeafAssetIdPda().
Fetch the NFT
Finally, let's fetch the NFT from the chain using the DAS API. Since we have done a lot of set up, all we have to do is call printAsset() with our assetId. Add the following code to your main function:
    // 3 - Fetch NFT
    console.log(`   Fetching from the chain (this may take a few moments)...`);
    await printAsset(umi, assetId[0]);
If you would like to learn more about the DAS API, check out our DAS API Docs and DAS API Guide.
Great job! You can find the full code for our script on GitHub.
Run the Script
To run the script, execute the following command in your terminal:
ts-node app.ts
You should see the output like this:
qn@guides compressed-nft % ts-node app
👾 Initializing a Merkle Tree for 10,000 Compressed NFTs.
   Wallet Balance: ◎4.533
   Max Depth: 14
   Max Buffer Size: 64
   Canopy Depth: 10
   Total size: 97,272 bytes.
   Total cost: ◎ 0.678
   Creating Merkle Tree...H4tsJtvJqGaPAXkUJXqAfe3vsWp8zLewyKoscRkNyGpw
   Sending request (this may take a few moments)...
🌲 Merkle Tree created: H4tsJtvJqGaPAXkUJXqAfe3vsWp8zLewyKoscRkNyGpw. Config:
     - Total Mint Capacity 16,384
     - Number Minted: 0
     - Is Public: false
     - Is Decompressible: 1
🎨 Minting an example NFT
🍃 NFT Minted: 5BS5Tk2N7516RK5ZdUBqJRYHVNofexjLk6qdfTKEWuCx
   Fetching from the chain (this may take a few moments)...
┌────────────┬────────────────────────────────────────────────────────────────────────────────────────────┐
│  (index)   │                                           Values                                           │
├────────────┼────────────────────────────────────────────────────────────────────────────────────────────┤
│    name    │                                         'QN Pixel'                                         │
│  standard  │                                       'NonFungible'                                        │
│ compressed │                                            true                                            │
│  json_uri  │ 'https://qn-shared.quicknode-ipfs.com/ipfs/QmQFh6WuQaWAMLsw9paLZYvTsdL5xJESzcoSxzb6ZU3Gjx' │
│   imgUrl   │ 'https://qn-shared.quicknode-ipfs.com/ipfs/QmZkvx76VSidDznVhyRoPsRkJY6ujqrEMKte25ppAp9YV4' │
└────────────┴────────────────────────────────────────────────────────────────────────────────────────────┘
┌─────────┬────────┬──────────────┐
│ (index) │ value  │  trait_type  │
├─────────┼────────┼──────────────┤
│    0    │ 'Blue' │ 'Background' │
└─────────┴────────┴──────────────┘
🔥 Nice job!
Keep Building
You have successfully created and fetched a compressed NFT on Solana! You can now use this script as a starting point to build your own compressed NFT minting application.
If you're stuck, have questions, or just want to talk about what you're building, drop us a line on Discord or Twitter!