5 min read
This guide mentions the Trade Butler Bot project, which may not be actively maintained. While the information provided may still be useful, we recommend exploring alternative solutions for the most current practices. If you’d like to see an updated version of this guide, please let us know!
Overview
Bots are often made to automate manual workflows; one such type is trading bots. Trade Butler is a very secure and popular trading bot so let’s see how we can run Trade Butler Bot backed by robust Quicknode infrastructure.
What are trading bots?
Trading bots are a hot topic right now, think of them as an application where you put a certain amount of money, and they make more money for you; this seems too good to be true, but with the advancement in tech, a lot of bots have been developed which prevents you from losing money in trading. Most of the trading bots work on prediction; they buy and sell digital currencies/tokens; based on future price predictions, which can be risky. But there are other types of trading bots that work on arbitrage where they buy a particular token from an exchange and sell it on another exchange for a profit; for example, a token is selling for a rate of 100 USD on exchange X and 101 USD on exchange Y so the bot will buy the token from X and sell it on Y. This 1 USD profit doesn’t look like a lot of profit but this can be huge when a large quantity is involved or when multiple trades are made.
What is a Trade Butler Bot?
Trade Butler Bot is a local trading bot that makes automated Uniswap trades. Trade Butler is a cross-platform bot that runs locally on a user’s machine. It gives the user the flexibility of setting limits and only executes trades when specified conditions are triggered.
Following are features of Trade Butler Bot:
- Runs Locally: The bot runs locally except for the standard APIs and interaction with Uniswap.
- Security: As the bot runs locally, the private keys are stored locally on the user’s machine.
- Gas saving: As the bot runs locally, users don’t need to pay gas for order adjustments, allowing users to change runtime strategies.
- Loaded with features: Trade Butler Bot is feature-rich; it can snipe listings, execute various trade types even before they are updated on Uniswap itself, has buy/sell limits.
- Flexibility: Can be set up for any kind of token.
You need to have at least one TBB token in your wallet to run the bot. You can get TBB on Uniswap. Refer to Pricing tiers of using Trade Butler Bot on their website.
Trade Butler Bot is open source and only uses private keys for Uniswap contract interaction.
Set Up Your Quicknode Ethereum Endpoint
We could use pretty much any Ethereum client, such as Geth or OpenEthereum (fka Parity), for our purposes today. Since that is a bit too involved for trading, we'll just grab a free endpoint from Quicknode to make this easy. We’ll need a Ropsten endpoint as it is first recommended to test the bot on a testnet. After you've created your free ethereum endpoint, copy your HTTP and WSS Provider endpoint:
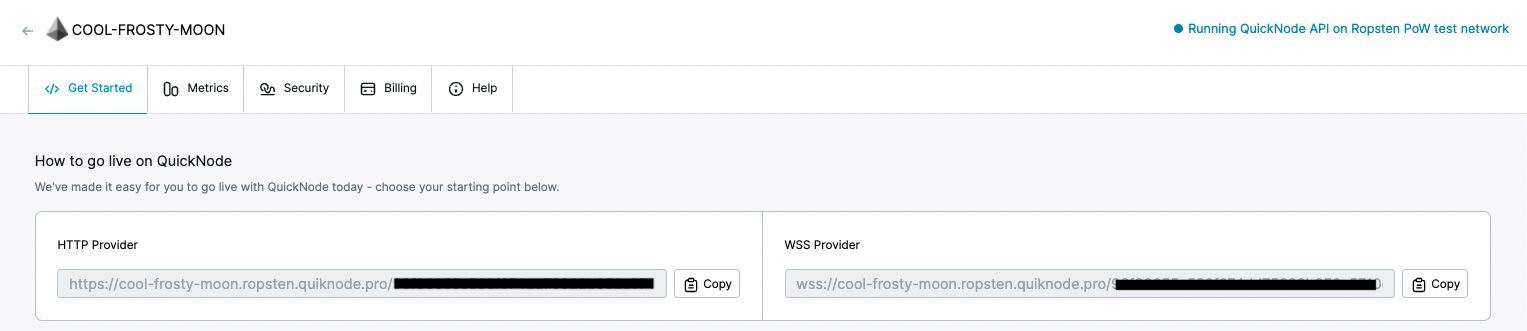
You'll need this later, so copy it and save it.
Getting the private key
We’ll need a private key to run Trade Butler Bot. Trade Butler uses a private key to generate a public address and interact with the Uniswap contracts.
You can follow Quicknode guides to generate Private key and Ethereum address in JavaScipt, Ruby, Python, Go, PHP.
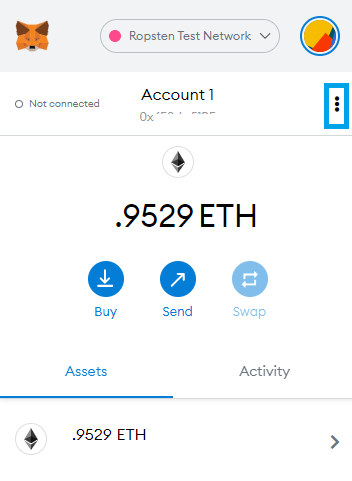
You can also get a Private Key from your MetaMask wallet. To do so, open your MetaMask browser plugin, select Ropsten network and click on the three dots below the favicon.
Now, click on Account details.
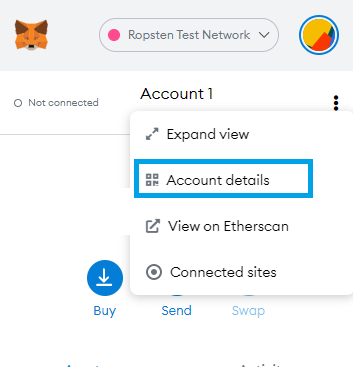
Then click on Export Private Key.
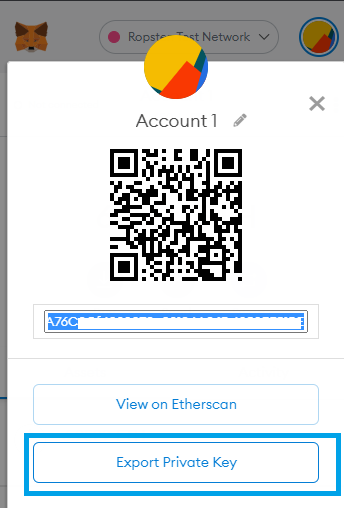
Enter your password and click on confirm. It should now show your private key something like this.
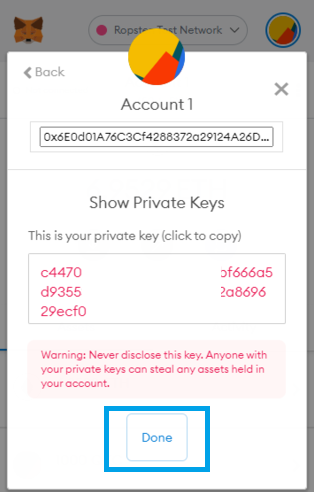
Copy and save the private key along with the address; we’ll need it in the next step.
Running Trade Butler Bot (Building from code)
You’ll need node.js and git installed in your system to run Trade Butler Bot from the source.
Clone the master of Trade Butler Bot into a directory
$ git clone https://bitbucket.org/draukan/trade-butler-bot-release/src/master/
Then install the npm modules by typing.
$ npm install
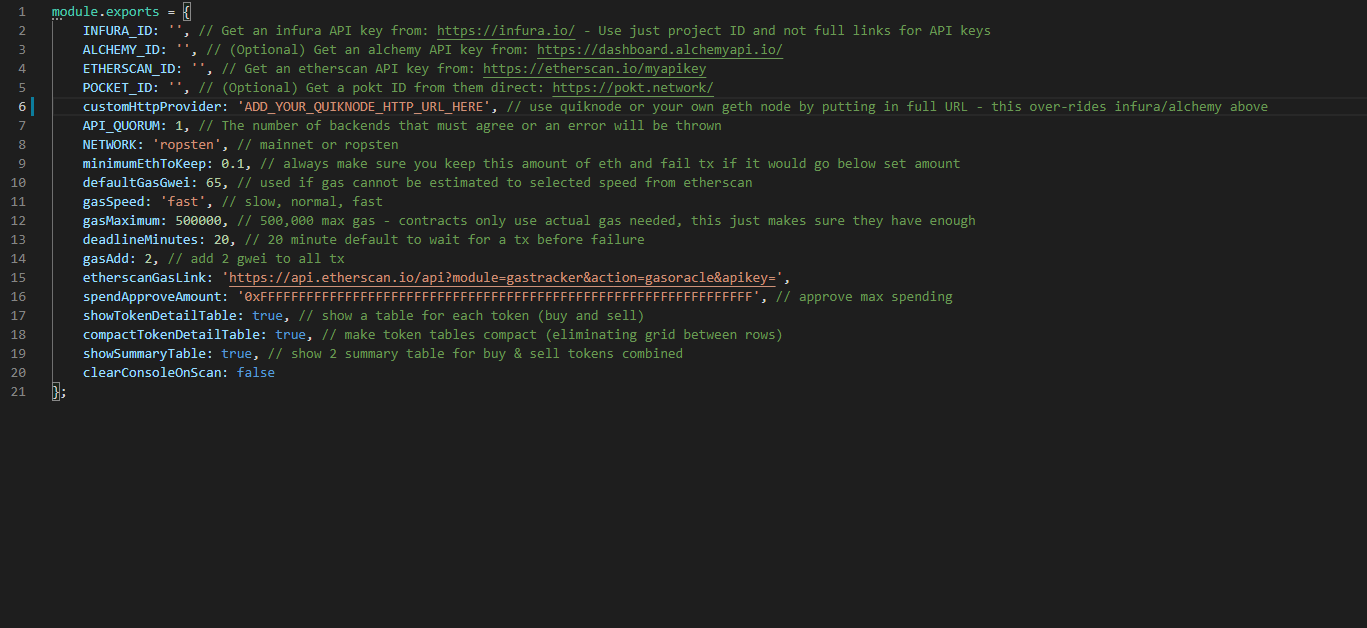
Open the master directory in a code editor and open setup.js, and add your Quicknode HTTP URL from the previous step on line 6 between the quotes (in the place of ADD_YOUR_QUICKNODE_HTTP_URL_HERE in the image below)
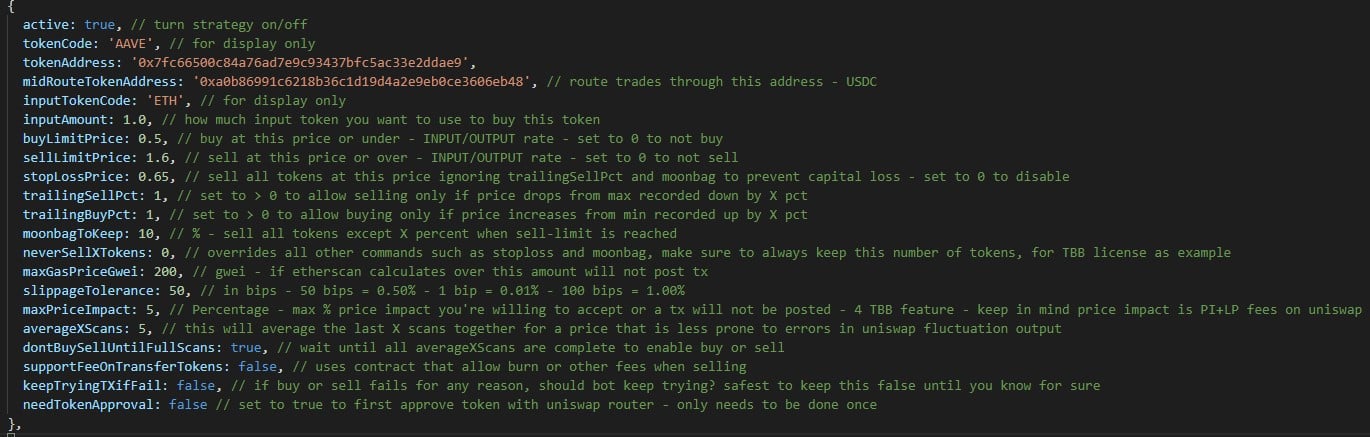
Now, open wallet-key.js and add your wallet address and private key on lines 2 and 3. We can set a token as active or inactive by stating the active status of that token in the index.js file as true or false, respectively. We can also set buying and selling price limits for that token. We can even add a new token in index.js by following the template of other tokens. The following is an example.
Run the bot using
$ node index
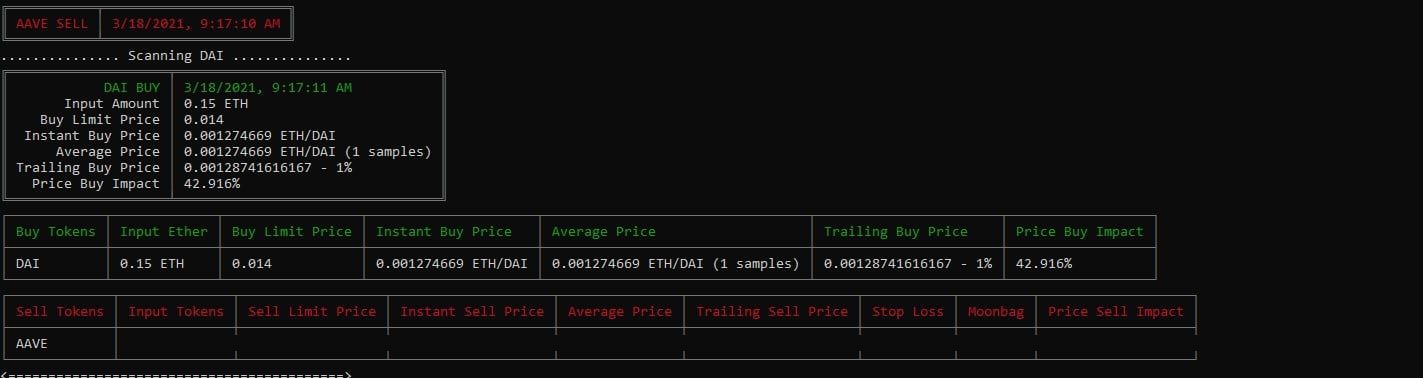
It should look like this.
Running Trade Butler Bot (GUI/App version)
Now, let’s see how to run the GUI version of the Trade Butler Bot. To do so, download and open the GUI application; based on your Operating System from here. Click on the personal settings option and select trade settings.
Add the Quicknode HTTP and WSS URLs from the previous step in the fields under the Custom HTTP Provider and Custom WSS Provider options.
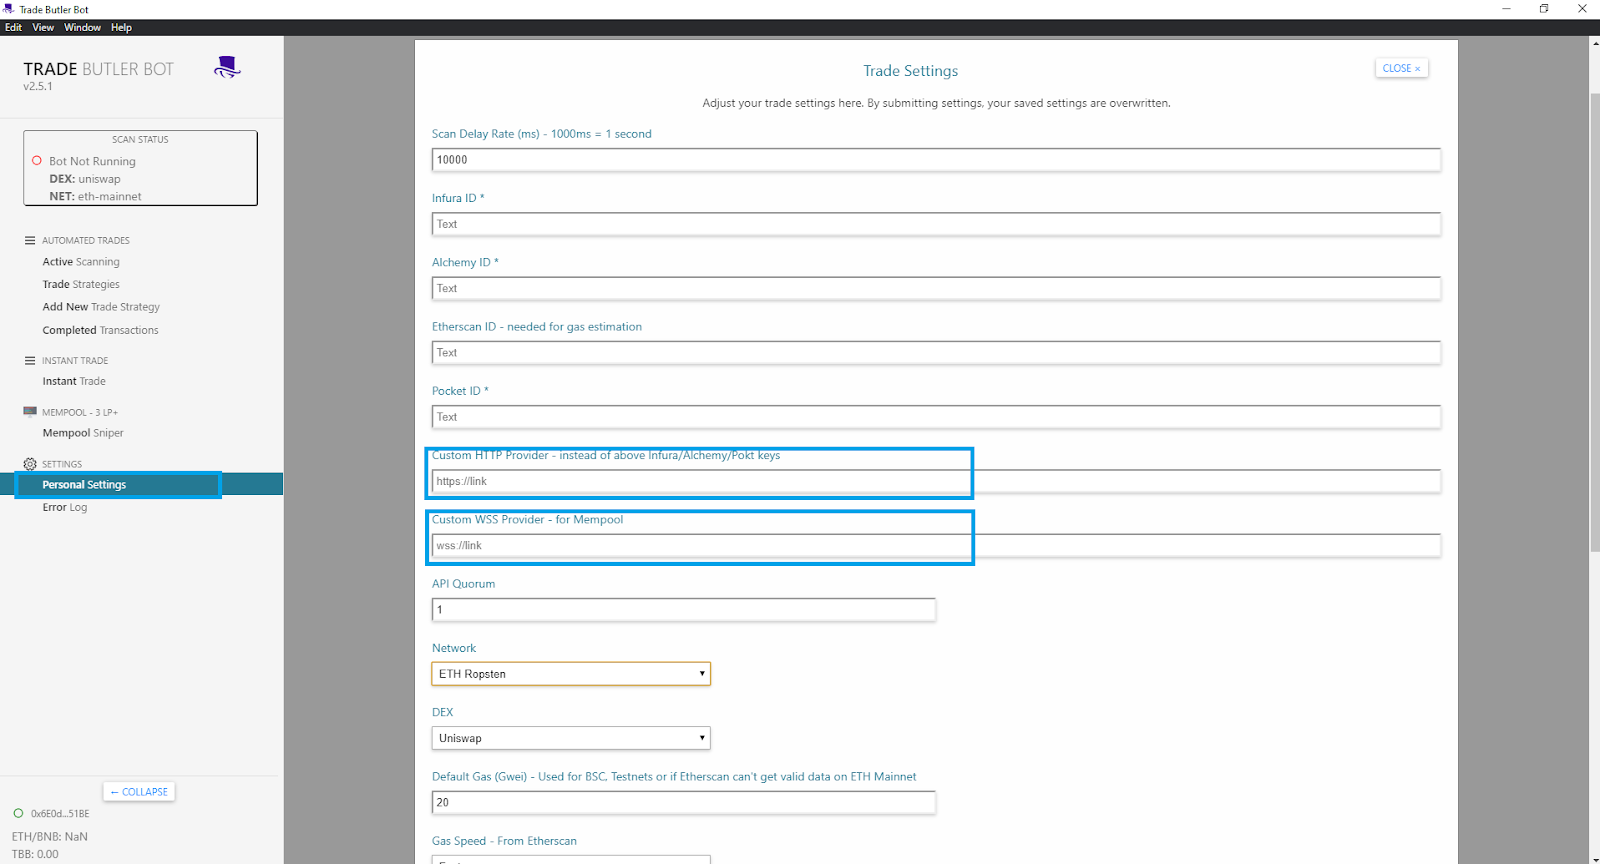
You will have to set scan delays, change network, change DEX and gas settings in the trade settings section. Save the settings, and the bot application will reload.
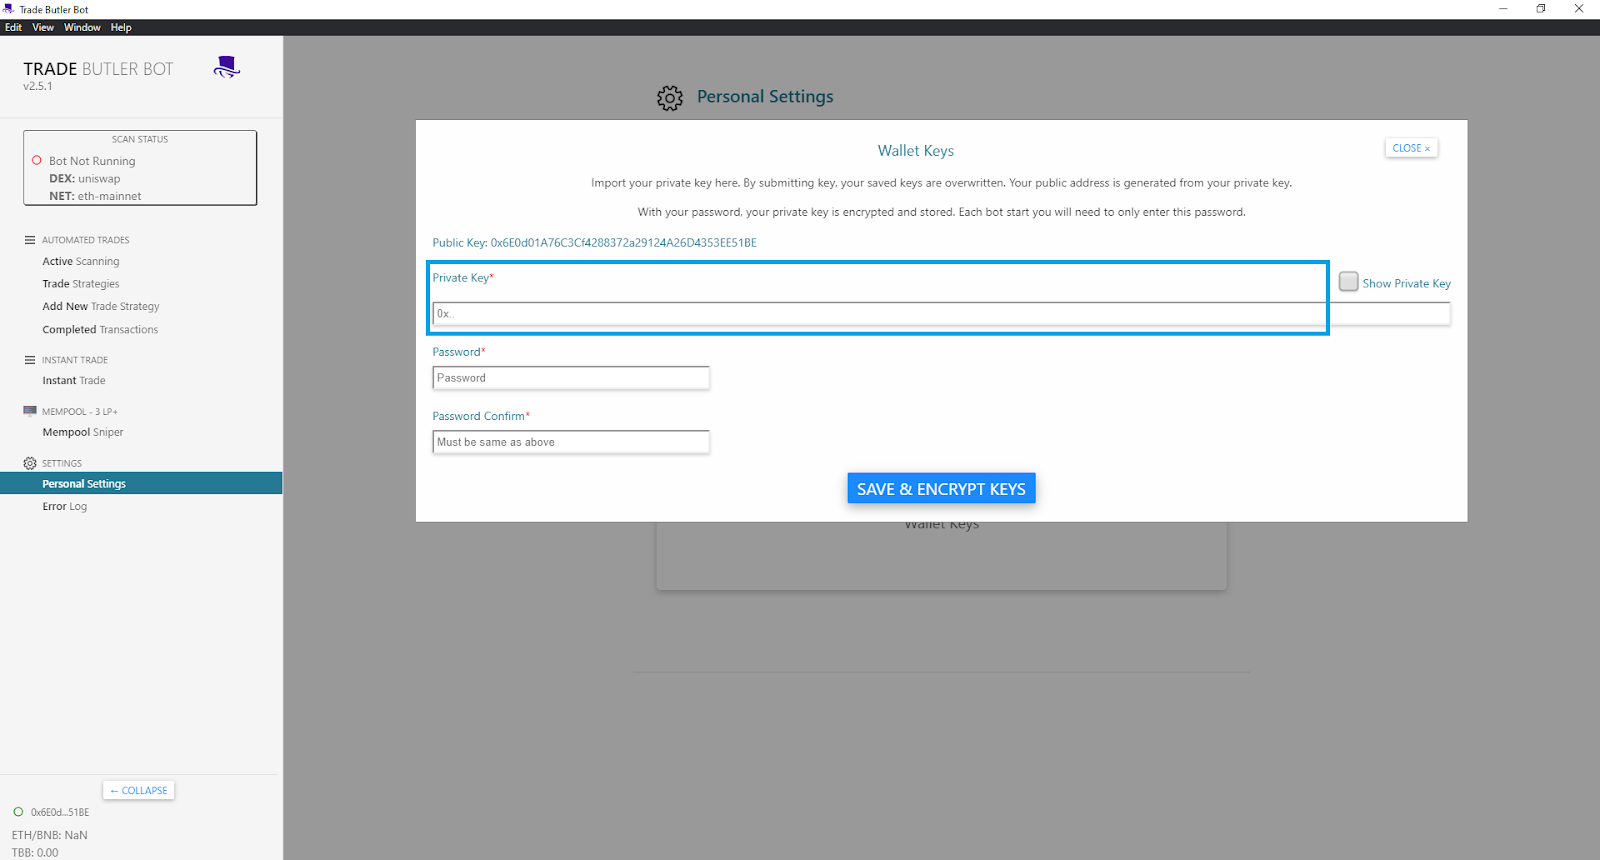
Now open the wallet keys option and enter your private key from the previous step into the personal key field with 0x prefix, and set a password that will be required every time you run the bot. Save the keys, and the bot will reload again.
Note: Trade Butler Bot requires TBB to be deposited into your account to work. You can get TBB from Uniswap.
Conclusion
You are all set to trade like a pro and make money using Trade Butler Bot.
Subscribe to our newsletter for more articles and guides on Ethereum. If you have any feedback, feel free to reach out to us via Twitter. You can always chat with us on our Discord community server, featuring some of the coolest developers you’ll ever meet :)