
38 min read
Overview
Prefer a video walkthrough? Follow along with Sahil and learn how to mint a cross-chain NFT.
In the rapidly evolving web3 ecosystem, blockchain interoperability has become essential to bridge the gap between isolated blockchain networks. This guide will walk you through the process of minting an NFT on one blockchain by using your funds on another blockchain by sending a transaction on that blockchain using the Chainlink Cross-Chain Interoperability Protocol (CCIP). Imagine attending an event with NFT ticket sales on Polygon while your funds are on Avalanche; CCIP allows you to buy the NFT that lives on Polygon by sending a transaction on Avalanche with your funds that are on Avalanche. By the end, you'll have a solid understanding of how to leverage CCIP for cross-chain NFT minting.
What You Will Do
In this guide, you will learn:
- What cross-chain interoperability is, and why it matters
- What is Chainlink CCIP, and what are its core capabilities
- How to mint an NFT on one blockchain from another using CCIP
- Real-world use cases for cross-chain dApps
What You Will Need
Before you begin, make sure you have the following:
- Basic knowledge of blockchain concepts
- Experience with ERC 721 NFTs and NFTs.
- An EVM-compatible wallet (e.g., MetaMask)
- Node.js installed
- Hardhat installed (we will cover it as well during the guide)
| Dependency | Version |
|---|---|
| node.js | >8.9.4 |
What is Cross-chain
The adoption of smart contracts initially centered on Ethereum due to its pioneering role in supporting programmable smart contracts. However, Ethereum's rising transaction fees prompted users to explore more cost-effective alternatives, leading to the rapid growth of a multi-chain ecosystem.
This ecosystem comprises various layer-1 blockchains, sidechains, subnets, and layer-2 rollups, each offering unique strengths and use cases. Some blockchains excel in gaming applications, while others are better suited for DeFi or NFT projects. Cross-chain interoperability plays a crucial role in this landscape, facilitating seamless communication and data sharing between these diverse blockchain networks. This connectivity enhances the flexibility and functionality of decentralized applications by bridging the gap between them, opening up exciting possibilities for developers and users alike.
What is CCIP
Chainlink CCIP, or Chainlink Cross-Chain Interoperability Protocol, is one such protocol that provides a secure and efficient way for decentralized applications (dApps) and web3 entrepreneurs to interact seamlessly across different blockchains. CCIP facilitates token transfers and arbitrary messaging, enabling developers to trigger actions on receiving smart contracts, such as minting NFTs, rebalancing indexes, or executing custom functions.
Chainlink CCIP is in the “Early Access” stage of development, which means that Chainlink CCIP currently has functionality which is under development and may be changed in later versions.
Use Cases of Cross-chain dApps
Cross-chain interoperability opens up a world of possibilities for developers and users. Some common use cases of cross-chain dApps include:
- Cross-chain lending: Users can lend and borrow various tokens across multiple decentralized finance (DeFi) platforms running on different chains.
- Low-cost transaction computation: CCIP can offload the computation of transaction data to cost-optimized chains, reducing transaction fees.
- Optimizing cross-chain yield: Users can leverage CCIP to move collateral to new DeFi protocols, maximizing yield opportunities across chains.
- Creating new dApps: CCIP allows users to harness the network effects of specific chains while utilizing the computational and storage capabilities of others.
Development
Now, let's dive into the technical aspect of cross-chain NFT minting using CCIP. In this section, we'll provide step-by-step instructions and code examples to guide you through the development process. You'll learn how to set up the required infrastructure, write smart contracts, and execute cross-chain NFT minting transactions.
All smart contracts and related files, including tasks, utilized in this guide, are openly available on GitHub, and credit goes to their respective creators.
NFT Details
Before jumping into the coding, let’s decide on the specifications of the NFT that we mint, such as its name, description, and how it looks. Then, store everything in a JSON metadata file.
We will use the following JSON file to determine the metadata. Our NFT image and metadata are stored on IPFS. Thus, you do not need to create any JSON file. However, if you want to upload your own image, you'd need to upload the image and metadata on IPFS. To learn more about using IPFS, check our How to Create and Host a Blog with IPFS using Quicknode and How to Create and Deploy an ERC-721 (NFT) guides.
{
    "name": "QN CCIP NFT",
    "description": "Cross Chain NFT",
    "image": "https://ipfs.io/ipfs/Qme68BnvU3Y3fYymZRXgqjYsVLe7MogeM11mXYzsD8gAmo/qn_pixel.png",
    "attributes": [
        {
            "trait_type": "Year",
            "value": "2023"
        },
        {
            "trait_type": "Quality",
            "value": "98"
        },
        {
            "trait_type": "Type",
            "value": "Pixel"
        },
    ]
}
Our NFT's metadata is stored on IPFS. We will use this URL in the following sections.
Faucet
In this guide, we will use Polygon Amoy Testnet and Avalanche Fuji Testnet. Thus, you need to get some POL (on Amoy) and AVAX (on Fuji) test tokens.
To get your test tokens,
- Go to the Quicknode's Faucet
- Select chain and network
- Type your wallet address
- Click Continue and follow the instructions
Configuration
Hardhat is a development environment used to compile, deploy, and test smart contracts for EVM-based blockchains. We will use Hardhat to compile, deploy, and test smart contracts for this guide.
Open your terminal in any directory you want and run the following code.
This code creates a folder named ccip-nft-project, initializes a project, installs Hardhat, and then runs Hardhat, respectively.
mkdir ccip-nft-project && cd ccip-nft-project
npm init --yes
npm install --save-dev hardhat
npx hardhat init
Select Create a TypeScript project and follow the instructions.
👷 Welcome to Hardhat v2.17.4 👷
✔ What do you want to do? · Create a TypeScript project
✔ Hardhat project root: ·
✔ Do you want to add a .gitignore? (Y/n) · y
✔ Do you want to install this sample project's dependencies with npm (@nomicfoundation/hardhat-toolbox)? (Y/n) · y
Then, install the following packages.
npm install --save-dev @chainlink/contracts@^0.6.1 @chainlink/contracts-ccip@^0.7.3 @chainlink/env-enc@^1.0.5 @nomicfoundation/hardhat-toolbox@^2.0.1 ethers@^5.7.2
Polygon Amoy and Avalanche Fuji Endpoints
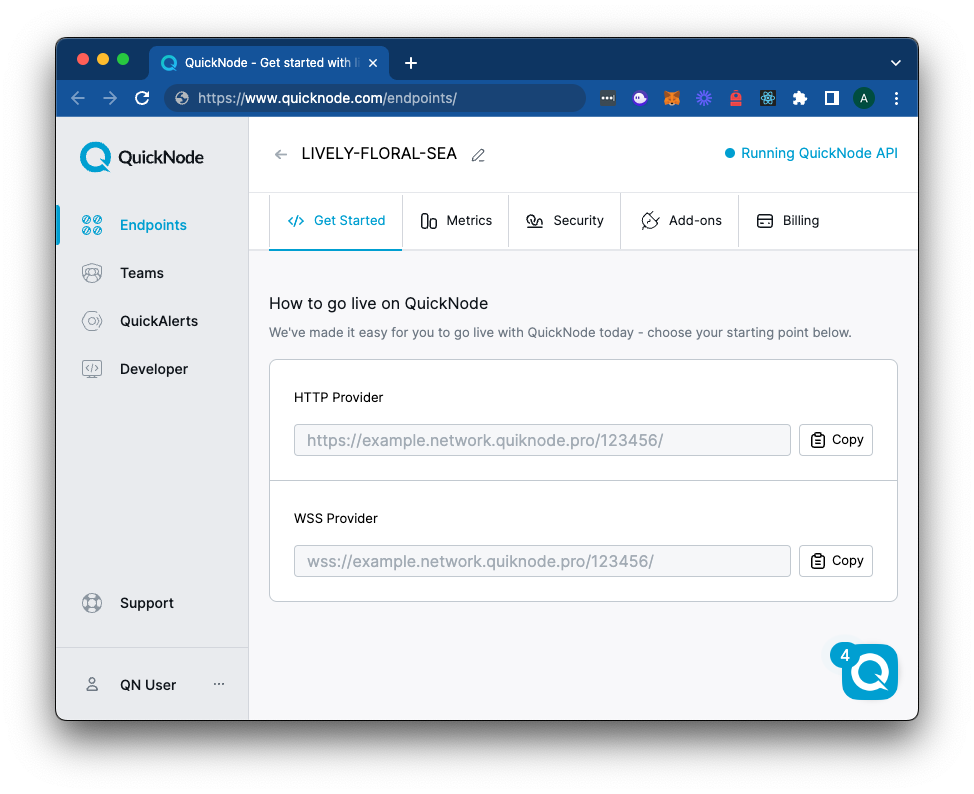
To deploy smart contracts on Polygon Amoy and Avalanche Fuji blockchains, you'll need API endpoints to communicate with the network. You're welcome to use public nodes or deploy and manage your own infrastructure; however, if you'd like faster response times, you can leave the heavy lifting to us. Sign up for an account here.
Once logged in, click the Create an endpoint button, then select the Polygon chain and Amoy network.
After creating your endpoint, copy the HTTP Provider link and keep it handy, as you'll need it next.
If your account supports more than one endpoint, repeat the same process for Avalanche Fuji. If not, you can use the following public endpoint.
https://api.avax-test.network/ext/bc/C/rpc
Environment Variables
First, create environment variables to determine variables such as private key and RPC endpoint URLs for Polygon Amoy and Avalanche Fuji, which are required to interact with blockchains.
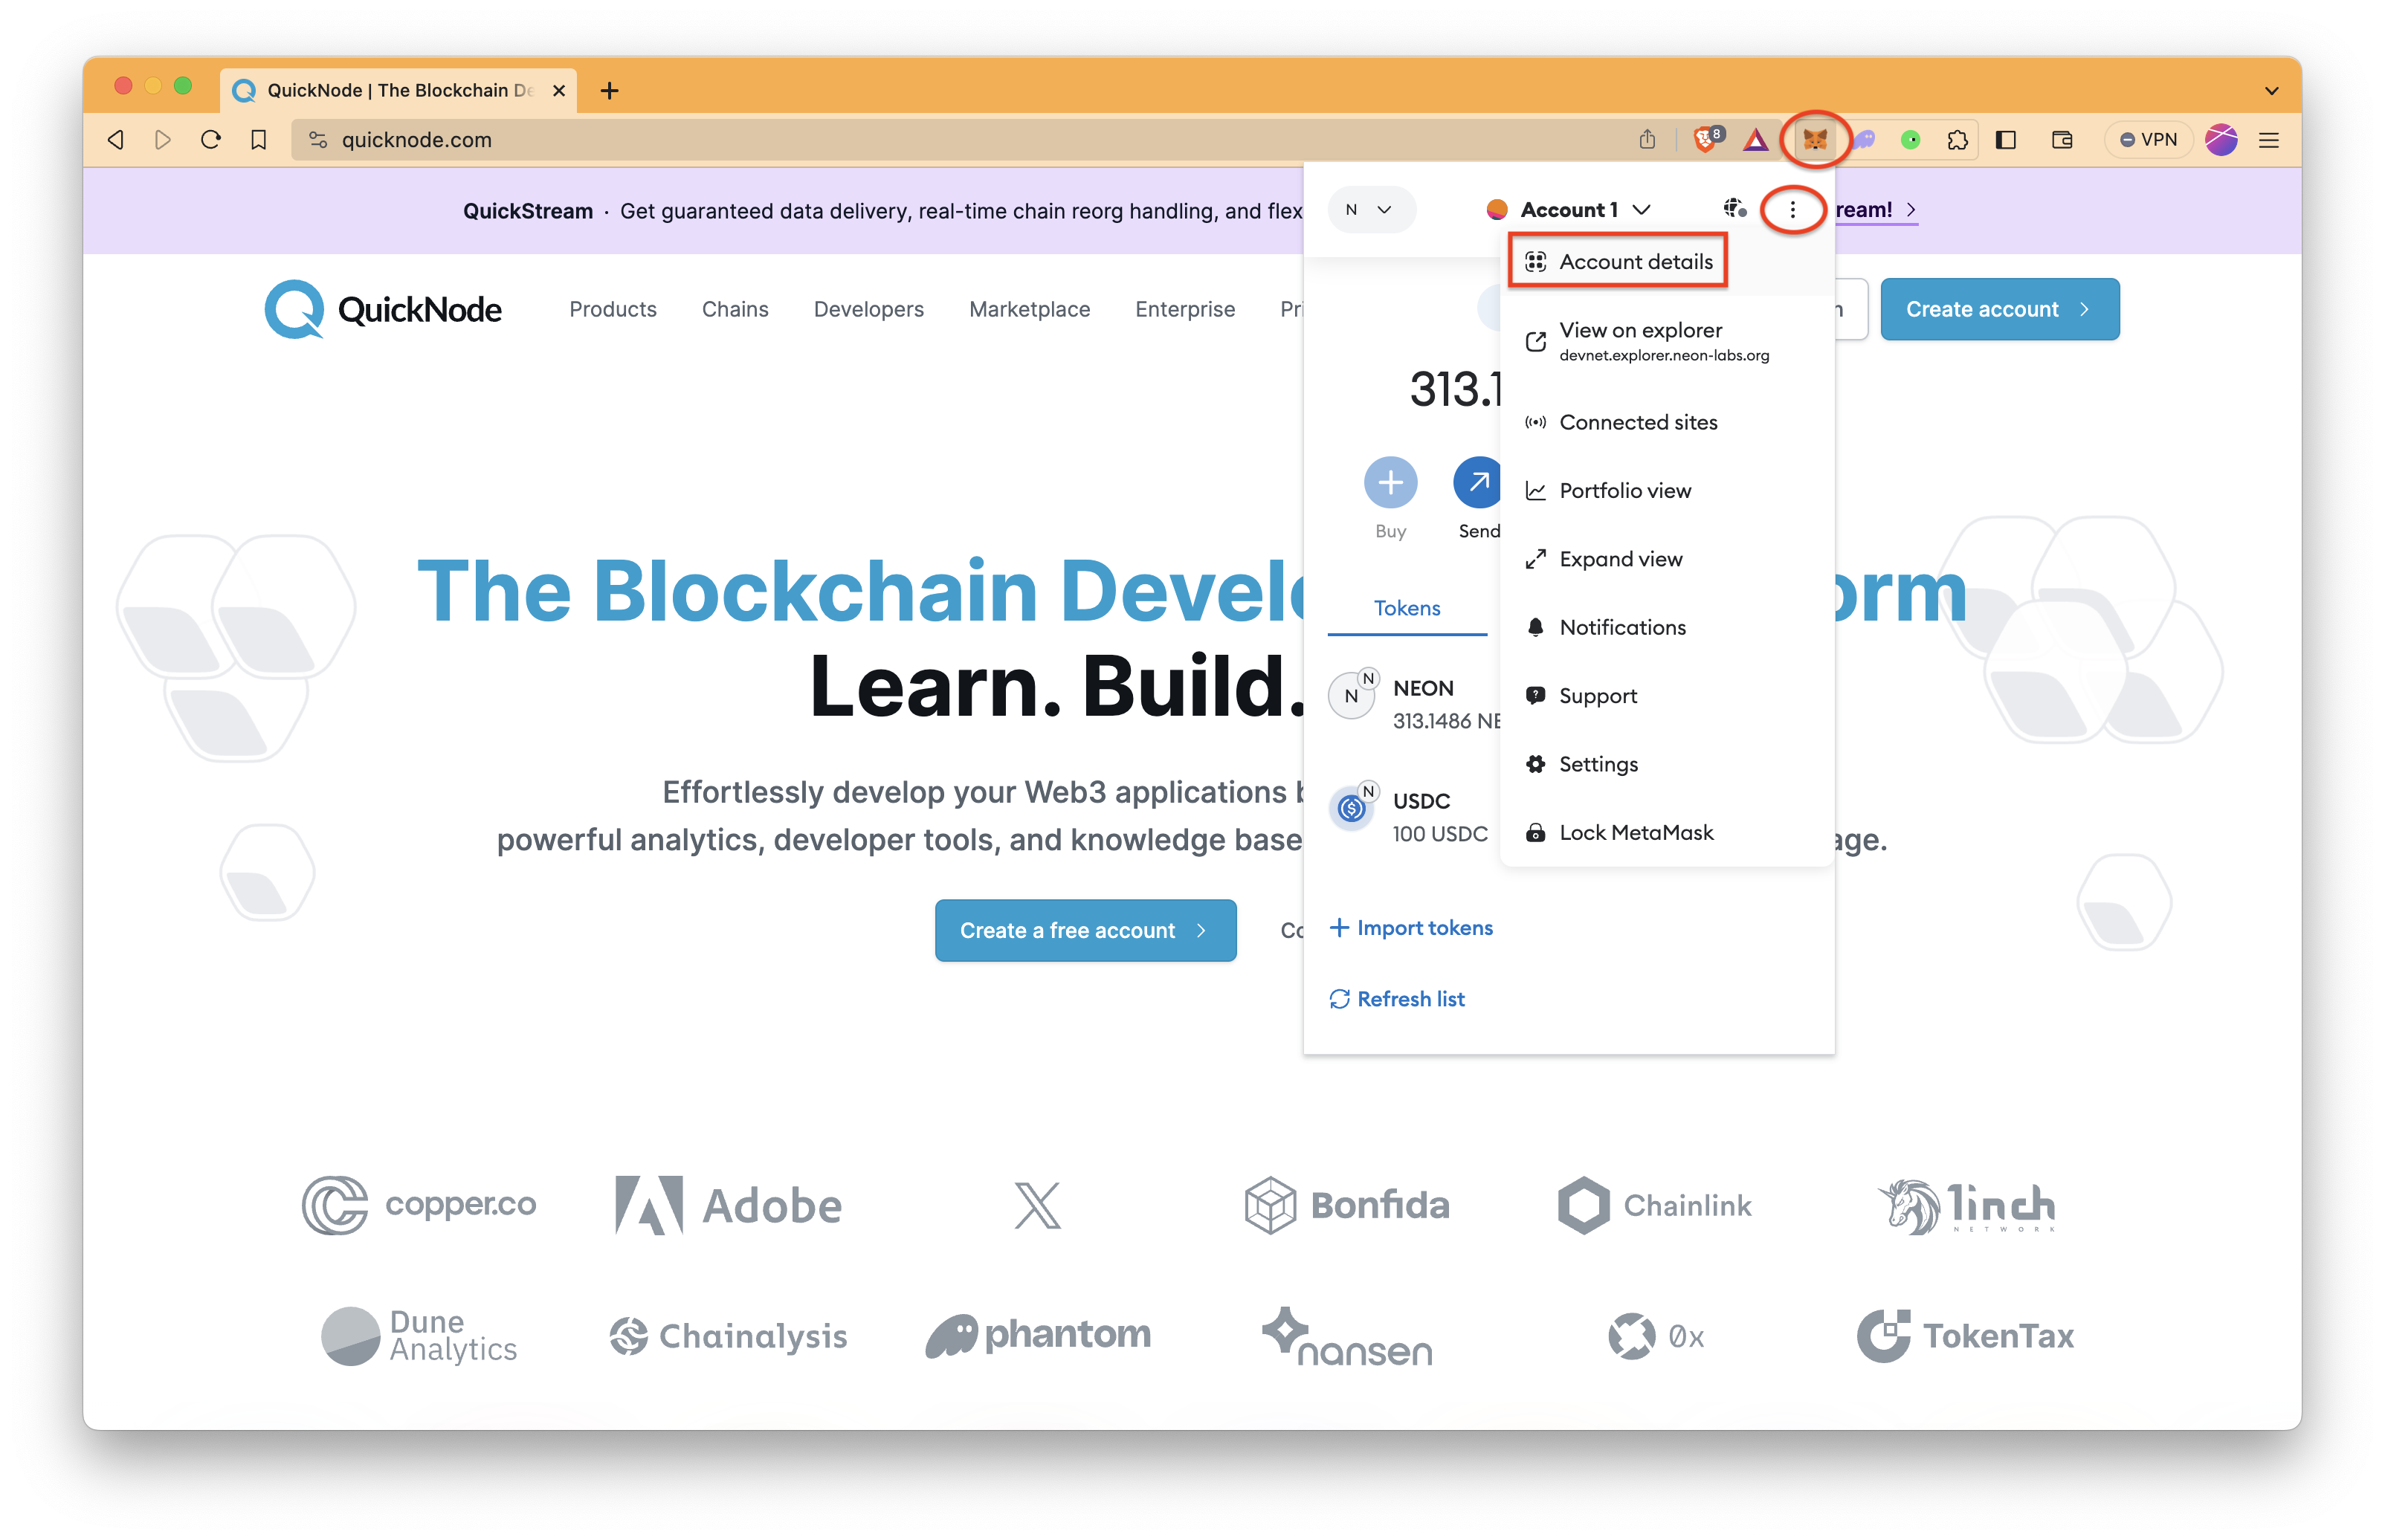
If you do not know how to get your private key, click here.
To get your private key;
- Click MetaMask icon, a stylized fox head, on your browser. If it is not seen, check the Extensions page of your browser.
- Click ⋮ symbol and then Account details.
- Then, click Show private key and follow instructions.
For further protection, we'll utilize the @chainlink/env-enc package. By establishing a new .env.enc file, it encrypts sensitive data instead of keeping it as plain text in the .env file.
1. Set a password for encrypting and decrypting the environment variable file.
npx env-enc set-pw
2. Set the following environment variables: PRIVATE_KEY, POLYGON_AMOY_RPC_URL, and AVALANCHE_FUJI_RPC_URL. Run the command below and follow the instructions.
npx env-enc set
Your console output should be like the one below while setting the environment variables.
> npx env-enc set
Please enter the variable name (or press ENTER to finish):
PRIVATE_KEY
Please enter the variable value (input will be hidden):
****************************************************************
Would you like to set another variable? Please enter the variable name (or press ENTER to finish):
POLYGON_AMOY_RPC_URL
Please enter the variable value (input will be hidden):
****************************************************************************************************
Would you like to set another variable? Please enter the variable name (or press ENTER to finish):
AVALANCHE_FUJI_RPC_URL
Please enter the variable value (input will be hidden):
******************************************
- The
.env.encfile will be automatically generated.
Hardhat Configuration
In this section, we modify the configuration file for the Hardhat project. It sets up the project's configuration, including the Solidity version network settings for the Hardhat network, Polygon Amoy, and Avalanche Fuji networks. It loads environment variables using dotenvenc for sensitive information like private keys and RPC URLs.
Open hardhat.config.ts with your code editor, and modify as below.
import * as dotenvenc from '@chainlink/env-enc'
dotenvenc.config();

import { HardhatUserConfig } from "hardhat/config";
import "@nomicfoundation/hardhat-toolbox";
// import './tasks'

const PRIVATE_KEY = process.env.PRIVATE_KEY;
const POLYGON_AMOY_RPC_URL = process.env.POLYGON_AMOY_RPC_URL;
const AVALANCHE_FUJI_RPC_URL = process.env.AVALANCHE_FUJI_RPC_URL;

const config: HardhatUserConfig = {
  solidity: "0.8.19",
  networks: {
    hardhat: {
      chainId: 31337,
    },

    polygonAmoy: {
      url: POLYGON_AMOY_RPC_URL !== undefined ? POLYGON_AMOY_RPC_URL : "",
      accounts: PRIVATE_KEY !== undefined ? [PRIVATE_KEY] : [],
      chainId: 80002,
    },
    avalancheFuji: {
      url: AVALANCHE_FUJI_RPC_URL !== undefined ? AVALANCHE_FUJI_RPC_URL : "",
      accounts: PRIVATE_KEY !== undefined ? [PRIVATE_KEY] : [],
      chainId: 43113,
      allowUnlimitedContractSize: true,
    },
  },
};

export default config;
Smart Contracts
In this tutorial, we will send cross-chain minting transaction on Avalanche Fuji Testnet in order to mint the NFT on Polygon Amoy Testnet. So, our destination blockchain will be Polygon Amoy, while Avalanche Fuji is the source destination.
For the cross-chain NFT minting process, we need the following smart contracts.
- MyNFT.sol: This is the NFT contract representing the ERC-721 token. It will be deployed on the destination blockchain.
- DestionationMinter.sol: This contract's primary purpose is to receive and execute cross-chain minting requests for NFTs. It will be deployed on the destination blockchain.
- SourceMinter.sol: This contract allows users to initiate the minting process on a destination chain by sending a CCIP message, and it handles the fees either in the native tokens or Chainlink's LINK token. It will be deployed on the source blockchain.
- Withdraw.sol: This contract provides functions for withdrawing Ether and ERC-20 tokens from
SourceMinter.sol.
Each contract is provided as an example and should not be used in a production environment due to the use of hardcoded values and unaudited code. You can see the repository for cross-chain mint here.
Create the folder structure and files for smart contracts by running the code below.
mkdir contracts/utils
echo > contracts/DestinationMinter.sol
echo > contracts/MyNFT.sol
echo > contracts/SourceMinter.sol
echo > contracts/utils/Withdraw.sol
You can delete the Lock.sol smart contract, which is an automatically created sample smart contract.
MyNFT.sol
The MyNFT.sol contract inherits ERC721URIStorage for managing NFT metadata and Ownable for ownership control. It allows the contract owner to mint NFTs to specified addresses, each associated with a unique token URI.
Open the MyNFT.sol file and modify it as below.
As you may realize, the IPFS URL that defines NFT metadata is used in defining TOKEN_URI. If you would like to use your own NFT metadata, change it accordingly. For more information on how to upload files to IPFS using Quicknode, check out our guide, here.
// SPDX-License-Identifier: MIT
pragma solidity 0.8.19;

import "@openzeppelin/contracts/token/ERC721/extensions/ERC721URIStorage.sol";
import "@openzeppelin/contracts/access/Ownable.sol";

/**
 * THIS IS AN EXAMPLE CONTRACT THAT USES HARDCODED VALUES FOR CLARITY.
 * THIS IS AN EXAMPLE CONTRACT THAT USES UN-AUDITED CODE.
 * DO NOT USE THIS CODE IN PRODUCTION.
 */
contract MyNFT is ERC721URIStorage, Ownable {
    string constant TOKEN_URI =
        "https://ipfs.io/ipfs/QmTKNJyrRpzbnB4XUyKKRDxtTaLhvc5sXbcdWz5tSg9sEM/qn_ccip_nft.json";
    uint256 internal tokenId;

    constructor() ERC721("MyNFT", "MNFT") {}

    function mint(address to) public onlyOwner {
        _safeMint(to, tokenId);
        _setTokenURI(tokenId, TOKEN_URI);
        unchecked {
            tokenId++;
        }
    }
}
DestinationMinter.sol
The primary purpose of the DestinationMinter.sol contract to receive and execute cross-chain minting requests for NFTs. It initializes with a reference to the MyNFT contract and listens for incoming CCIP messages. When a message is received, it attempts to call the corresponding function on the MyNFT contract, emitting a MintCallSuccessfull event upon success.
Open the DestinationMinter.sol file with your code editor, and modify it like the below.
// SPDX-License-Identifier: MIT
pragma solidity 0.8.19;

import {CCIPReceiver} from "@chainlink/contracts-ccip/src/v0.8/ccip/applications/CCIPReceiver.sol";
import {Client} from "@chainlink/contracts-ccip/src/v0.8/ccip/libraries/Client.sol";
import {MyNFT} from "./MyNFT.sol";

/**
 * THIS IS AN EXAMPLE CONTRACT THAT USES HARDCODED VALUES FOR CLARITY.
 * THIS IS AN EXAMPLE CONTRACT THAT USES UN-AUDITED CODE.
 * DO NOT USE THIS CODE IN PRODUCTION.
 */
contract DestinationMinter is CCIPReceiver {
    MyNFT nft;

    event MintCallSuccessfull();

    constructor(address router, address nftAddress) CCIPReceiver(router) {
        nft = MyNFT(nftAddress);
    }

    function _ccipReceive(
        Client.Any2EVMMessage memory message
    ) internal override {
        (bool success, ) = address(nft).call(message.data);
        require(success);
        emit MintCallSuccessfull();
    }
}
Withdraw.sol
The Withdraw.sol contract includes functions for the contract owner to withdraw Ether and any ERC-20 tokens held by the contract.
Open Withdraw.sol in the contracts/utils folder and modify as below.
// SPDX-License-Identifier: MIT
pragma solidity 0.8.19;

import {OwnerIsCreator} from "@chainlink/contracts-ccip/src/v0.8/shared/access/OwnerIsCreator.sol";
import {IERC20} from "@chainlink/contracts-ccip/src/v0.8/vendor/openzeppelin-solidity/v4.8.0/token/ERC20/IERC20.sol";

/**
 * THIS IS AN EXAMPLE CONTRACT THAT USES HARDCODED VALUES FOR CLARITY.
 * THIS IS AN EXAMPLE CONTRACT THAT USES UN-AUDITED CODE.
 * DO NOT USE THIS CODE IN PRODUCTION.
 */
contract Withdraw is OwnerIsCreator {
    error FailedToWithdrawEth(address owner, address target, uint256 value);

    function withdraw(address beneficiary) public onlyOwner {
        uint256 amount = address(this).balance;
        (bool sent, ) = beneficiary.call{value: amount}("");
        if (!sent) revert FailedToWithdrawEth(msg.sender, beneficiary, amount);
    }

    function withdrawToken(
        address beneficiary,
        address token
    ) public onlyOwner {
        uint256 amount = IERC20(token).balanceOf(address(this));
        IERC20(token).transfer(beneficiary, amount);
    }
}
SourceMinter.sol
The SourceMinter.sol contract is designed for cross-chain NFT minting and interacts with Chainlink's Cross-Chain Interoperability Protocol (CCIP). The contract allows users to initiate the minting process on a destination chain by sending a CCIP message, and it handles the fees either in the native token or Chainlink's LINK token.
Open SourceMinter.sol, and modify it just like the one below.
// SPDX-License-Identifier: MIT
pragma solidity 0.8.19;

import {LinkTokenInterface} from "@chainlink/contracts/src/v0.8/interfaces/LinkTokenInterface.sol";
import {IRouterClient} from "@chainlink/contracts-ccip/src/v0.8/ccip/interfaces/IRouterClient.sol";
import {Client} from "@chainlink/contracts-ccip/src/v0.8/ccip/libraries/Client.sol";
import {Withdraw} from "./utils/Withdraw.sol";

/**
 * THIS IS AN EXAMPLE CONTRACT THAT USES HARDCODED VALUES FOR CLARITY.
 * THIS IS AN EXAMPLE CONTRACT THAT USES UN-AUDITED CODE.
 * DO NOT USE THIS CODE IN PRODUCTION.
 */
contract SourceMinter is Withdraw {
    enum PayFeesIn {
        Native,
        LINK
    }

    address immutable i_router;
    address immutable i_link;

    event MessageSent(bytes32 messageId);

    constructor(address router, address link) {
        i_router = router;
        i_link = link;
        LinkTokenInterface(i_link).approve(i_router, type(uint256).max);
    }

    receive() external payable {}

    function mint(
        uint64 destinationChainSelector,
        address receiver,
        PayFeesIn payFeesIn
    ) external {
        Client.EVM2AnyMessage memory message = Client.EVM2AnyMessage({
            receiver: abi.encode(receiver),
            data: abi.encodeWithSignature("mint(address)", msg.sender),
            tokenAmounts: new Client.EVMTokenAmount[](0),
            extraArgs: "",
            feeToken: payFeesIn == PayFeesIn.LINK ? i_link : address(0)
        });

        uint256 fee = IRouterClient(i_router).getFee(
            destinationChainSelector,
            message
        );

        bytes32 messageId;

        if (payFeesIn == PayFeesIn.LINK) {
            // LinkTokenInterface(i_link).approve(i_router, fee);
            messageId = IRouterClient(i_router).ccipSend(
                destinationChainSelector,
                message
            );
        } else {
            messageId = IRouterClient(i_router).ccipSend{value: fee}(
                destinationChainSelector,
                message
            );
        }

        emit MessageSent(messageId);
    }
}
Before moving to the other sections, run the following command to create Typechain typings for smart contracts.
Typechain is a development tool used to generate TypeScript typings for Ethereum smart contracts, making it easier for developers to work with these contracts by providing auto-generated TypeScript interfaces and type checking.
npx hardhat typechain
The output should be similar to the one below.
Compiled 26 Solidity files successfully
Utils
Now, we will create a Spinner, a simple text-based spinning animation in the console. It starts and stops the animation, giving visual feedback to the user during some asynchronous tasks. Although it does not affect the minting process, it is helpful for developer experience.
Create a utils folder and spinner.ts file in it by running the code.
mkdir utils
echo > utils/spinner.ts
spinner.ts
Open spinner.ts, and modify it just like the one below.
export class Spinner {
    private line = { interval: 130, frames: ['-', '\\', '|', '/'] }

    private spin: any;

    start() {
        const start = 0;
        const end = this.line.frames.length;
        let i = start;

        process.stdout.write('\x1B[?25l');

        this.spin = setInterval(() => {
            process.stdout.cursorTo(0);
            process.stdout.write(this.line.frames[i]);
            i == end - 1 ? i = start : i++;
        }, this.line.interval);
    }

    stop() {
        process.stdout.clearLine(0);
        process.stdout.cursorTo(0);
        clearInterval(this.spin);
        process.stdout.write('\x1B[?25h');
    }
}
Now, it is time to create Hardhat tasks, which are helpful for deploying smart contracts and minting NFT.
Tasks
A task is an async function with certain information attached to it. Hardhat uses this information to automate some tasks for you. Parsing arguments, validity, and help messages are all managed. Hardhat includes some tasks as predefined, such as compile, run, and test. You can run npx hardhat to see all available tasks.
We will create some additional tasks and helper files to make the cross-chain NFT minting process easier.
mkdir tasks

echo > tasks/constants.ts
echo > tasks/utils.ts
echo > tasks/helpers.ts
echo > tasks/balance-of.ts
echo > tasks/cross-chain-mint.ts
echo > tasks/deploy-destination-minter.ts
echo > tasks/deploy-source-minter.ts
echo > tasks/fill-sender.ts
echo > tasks/withdraw.ts
echo > tasks/index.ts
constants.ts
This code defines TypeScript types and constants related to blockchain addresses, token amounts, fee payment options, and supported networks. It also includes a configuration object (routerConfig) for various blockchain networks (such as Ethereum Sepolia, Arbitrum Testnet, Avalanche Fuji, and Polygon Amoy) with associated contract addresses and fee token information.
Always check the latest version of these contract addresses from Chainlink's documentation page.
Open constants.ts, and modify it just like the one below.
export type AddressMap = { [blockchain: string]: string };
export type TokenAmounts = { token: string; amount: string };

export enum PayFeesIn {
  Native,
  LINK,
}

export const supportedNetworks = [
  `ethereumSepolia`,
  `arbitrumTestnet`,
  `avalancheFuji`,
  `polygonAmoy`,
];

export const LINK_ADDRESSES: AddressMap = {
  [`ethereumSepolia`]: `0x779877A7B0D9E8603169DdbD7836e478b4624789`,
  [`polygonAmoy`]: `0x0Fd9e8d3aF1aaee056EB9e802c3A762a667b1904`,
  [`arbitrumTestnet`]: `0xd14838A68E8AFBAdE5efb411d5871ea0011AFd28`,
  [`avalancheFuji`]: `0x0b9d5D9136855f6FEc3c0993feE6E9CE8a297846`,
};

export const routerConfig = {
  ethereumSepolia: {
    address: `0xd0daae2231e9cb96b94c8512223533293c3693bf`,
    chainSelector: `16015286601757825753`,
    feeTokens: [
      LINK_ADDRESSES[`ethereumSepolia`],
      `0x097D90c9d3E0B50Ca60e1ae45F6A81010f9FB534`,
    ],
  },
  avalancheFuji: {
    address: `0xF694E193200268f9a4868e4Aa017A0118C9a8177`,
    chainSelector: `14767482510784806043`,
    feeTokens: [
      LINK_ADDRESSES[`avalancheFuji`],
      `0xd00ae08403B9bbb9124bB305C09058E32C39A48c`,
    ],
  },
  arbitrumTestnet: {
    address: `0x88e492127709447a5abefdab8788a15b4567589e`,
    chainSelector: `6101244977088475029`,
    feeTokens: [
      LINK_ADDRESSES[`arbitrumTestnet`],
      `0x32d5D5978905d9c6c2D4C417F0E06Fe768a4FB5a`,
    ],
  },
  polygonAmoy: {
    address: `0x9C32fCB86BF0f4a1A8921a9Fe46de3198bb884B2`,
    chainSelector: `16281711391670634445`,
    feeTokens: [
      LINK_ADDRESSES[`polygonAmoy`],
      `0x360ad4f9a9A8EFe9A8DCB5f461c4Cc1047E1Dcf9`,
    ],
  },
};
utils.ts
This code provides utility functions for retrieving various configuration parameters based on the network name and fee payment choice:
-
getProviderRpcUrl(network): Retrieves the RPC URL for a given network name, such as Avalanche Fuji or Polygon Amoy, based on environment variables.
-
getPrivateKey(): Retrieves the private key for interacting with the network from an environment variable.
-
getRouterConfig(network): Retrieves the router configuration for a given network name, such as Avalanche Fuji or Avalanche Fuji, from the constants defined in routerConfig.
-
getPayFeesIn(payFeesIn): Determines the fee payment choice (either native currency or LINK token) based on the provided string input, such as "Native" or "LINK."
Open utils.ts, and modify it just like the one below.
import { PayFeesIn, routerConfig } from "./constants";

export const getProviderRpcUrl = (network: string) => {
  let rpcUrl;

  switch (network) {
    case "ethereumSepolia":
      rpcUrl = process.env.ETHEREUM_SEPOLIA_RPC_URL;
      break;
    case "arbitrumTestnet":
      rpcUrl = process.env.ARBITRUM_TESTNET_RPC_URL;
      break;
    case "avalancheFuji":
      rpcUrl = process.env.AVALANCHE_FUJI_RPC_URL;
      break;
    case "polygonAmoy":
      rpcUrl = process.env.POLYGON_AMOY_RPC_URL;
      break;
    default:
      throw new Error("Unknown network: " + network);
  }

  if (!rpcUrl)
    throw new Error(
      `rpcUrl empty for network ${network} - check your environment variables`
    );

  return rpcUrl;
};

export const getPrivateKey = () => {
  const privateKey = process.env.PRIVATE_KEY;

  if (!privateKey)
    throw new Error(
      "private key not provided - check your environment variables"
    );

  return privateKey;
};

export const getRouterConfig = (network: string) => {
  switch (network) {
    case "ethereumSepolia":
      return routerConfig.ethereumSepolia;
    case "arbitrumTestnet":
      return routerConfig.arbitrumTestnet;
    case "avalancheFuji":
      return routerConfig.avalancheFuji;
    case "polygonAmoy":
      return routerConfig.polygonAmoy;
    default:
      throw new Error("Unknown network: " + network);
  }
};

export const getPayFeesIn = (payFeesIn: string) => {
  let fees;

  switch (payFeesIn) {
    case "Native":
      fees = PayFeesIn.Native;
      break;
    case "native":
      fees = PayFeesIn.Native;
      break;
    case "LINK":
      fees = PayFeesIn.LINK;
      break;
    case "link":
      fees = PayFeesIn.LINK;
      break;
    default:
      fees = PayFeesIn.Native;
      break;
  }

  return fees;
};
helpers.ts
This code defines a function getCcipMessageId that extracts the Cross-Chain Interoperability Protocol (CCIP) message ID from a transaction receipt by simulating a call to a router contract using the transaction's data and relevant information. The retrieved message ID is then logged for monitoring the status of the token transfer via CCIP Explorer.
Open helpers.ts, and modify it just like the one below.
import { ContractReceipt, ContractTransaction, providers } from "ethers";

export const getCcipMessageId = async (tx: ContractTransaction, receipt: ContractReceipt, provider: providers.JsonRpcProvider) => {
    // Simulate a call to the router to fetch the messageID
    const call = {
        from: tx.from,
        to: tx.to,
        data: tx.data,
        gasLimit: tx.gasLimit,
        gasPrice: tx.gasPrice,
        value: tx.value,
    };

    // Simulate a contract call with the transaction data at the block before the transaction
    const messageId = await provider.call(call, receipt.blockNumber - 1);

    console.log(`✅ You can now monitor the token transfer status via CCIP Explorer by searching for CCIP Message ID: ${messageId}`);
}
balance-of.ts
This script is a Hardhat task for checking the balance of MyNFTs associated with a specific address on a given blockchain. It utilizes the Hardhat framework, interacts with a JSON-RPC provider, and outputs the balance information after connecting to the MyNFT smart contract. We will use this task after the minting process to check the NFT smart contract's balance for our address.
Sample usage is like the following. We do not run this task yet.
npx hardhat balance-of --my-nft <MY_NFT_CONTRACT_ADDRESS> --blockchain polygonAmoy --owner <WALLET_ADDRESS>
Open balance-of.ts, and modify it just like the one below.
import { task } from "hardhat/config";
import { TaskArguments } from "hardhat/types";
import { getProviderRpcUrl } from "./utils";
import { providers } from "ethers";
import { MyNFT, MyNFT__factory } from "../typechain-types";
import { Spinner } from "../utils/spinner";

task('balance-of', 'Gets the balance of MyNFTs for provided address')
    .addParam(`myNft`, `The address of the MyNFT smart contract`)
    .addParam(`blockchain`, `The blockchain where the MyNFT smart contract was deployed`)
    .addParam(`owner`, `The address to check the balance of MyNFTs`)
    .setAction(async (taskArguments: TaskArguments) => {
        const rpcProviderUrl = getProviderRpcUrl(taskArguments.blockchain);
        const provider = new providers.JsonRpcProvider(rpcProviderUrl);

        const spinner: Spinner = new Spinner();

        const myNft: MyNFT = MyNFT__factory.connect(taskArguments.myNft, provider);

        console.log(`ℹ️  Attempting to check the balance of MyNFTs (${taskArguments.myNft}) for the ${taskArguments.owner} account`);
        spinner.start();

        const balanceOf = await myNft.balanceOf(taskArguments.owner);

        spinner.stop();
        console.log(`ℹ️  The balance of MyNFTs of the ${taskArguments.owner} account is ${balanceOf.toNumber()}`);
    })
cross-chain-mint.ts
This code defines a Hardhat task named cross-chain-mint, which is responsible for minting a new NFT by sending a cross-chain message. It takes various parameters, such as the source and destination blockchains, source and destination smart contract addresses, and the choice of paying fees in native tokens or LINK tokens. Inside the task action, it connects to the source blockchain, initiates the minting process using the provided parameters, and handles the task's execution, including logging information and completing the cross-chain minting operation.
Sample usage is like the following. We do not run this task yet.
npx hardhat cross-chain-mint --source-minter <SOURCE_MINTER_ADDRESS> --source-blockchain avalancheFuji --destination-blockchain polygonAmoy --destination-minter <DESTINATION_MINTER_ADDRESS> --pay-fees-in Native
import { task } from "hardhat/config";
import { TaskArguments } from "hardhat/types";
import { getPayFeesIn, getPrivateKey, getProviderRpcUrl, getRouterConfig } from "./utils";
import { Wallet, providers } from "ethers";
import { SourceMinter, SourceMinter__factory } from "../typechain-types";
import { Spinner } from "../utils/spinner";
import { getCcipMessageId } from "./helpers";

task(`cross-chain-mint`, `Mints the new NFT by sending the Cross-Chain Message`)
    .addParam(`sourceBlockchain`, `The name of the source blockchain (for example ethereumSepolia)`)
    .addParam(`sourceMinter`, `The address of the SourceMinter.sol smart contract on the source blockchain`)
    .addParam(`destinationBlockchain`, `The name of the destination blockchain (for example polygonAmoy)`)
    .addParam(`destinationMinter`, `The address of the DestinationMinter.sol smart contract on the destination blockchain`)
    .addParam(`payFeesIn`, `Choose between 'Native' and 'LINK'`)
    .setAction(async (taskArguments: TaskArguments) => {
        const { sourceBlockchain, sourceMinter, destinationBlockchain, destinationMinter, payFeesIn } = taskArguments;

        const privateKey = getPrivateKey();
        const sourceRpcProviderUrl = getProviderRpcUrl(sourceBlockchain);

        const sourceProvider = new providers.JsonRpcProvider(sourceRpcProviderUrl);
        const wallet = new Wallet(privateKey);
        const signer = wallet.connect(sourceProvider);

        const spinner: Spinner = new Spinner();

        const sourceMinterContract: SourceMinter = SourceMinter__factory.connect(sourceMinter, signer)

        const destinationChainSelector = getRouterConfig(destinationBlockchain).chainSelector;
        const fees = getPayFeesIn(payFeesIn);

        console.log(`ℹ️  Attempting to call the mint function of the SourceMinter.sol smart contract on the ${sourceBlockchain} from ${signer.address} account`);
        spinner.start();

        const tx = await sourceMinterContract.mint(
            destinationChainSelector,
            destinationMinter,
            fees,
        );

        const receipt = await tx.wait();

        spinner.stop();
        console.log(`✅ Mint request sent, transaction hash: ${tx.hash}`);

        await getCcipMessageId(tx, receipt, sourceProvider);

        console.log(`✅ Task cross-chain-mint finished with the execution`);
    })
deploy-destination-minter.ts
This code defines a Hardhat task named deploy-destination-minter, which is responsible for deploying two smart contracts, MyNFT.sol and DestinationMinter.sol, on a specified blockchain, which should be the destination blockchain.
It first connects to the blockchain using provided parameters or defaults, deploys the MyNFT contract, deploys the DestinationMinter contract with a router address and the deployed MyNFT contract as constructor arguments, and finally grants the minter role to the DestinationMinter contract, allowing it to mint MyNFTs. The task logs various information during the deployment process and provides feedback on the deployed contract addresses and transaction hashes.
Sample usage is like the following. We do not run this task yet.
npx hardhat deploy-destination-minter --network polygonAmoy
Open deploy-destination-minter.ts, and modify it just like one below.
import { task } from "hardhat/config";
import { HardhatRuntimeEnvironment, TaskArguments } from "hardhat/types";
import { getPrivateKey, getProviderRpcUrl, getRouterConfig } from "./utils";
import { Wallet, providers } from "ethers";
import { DestinationMinter, DestinationMinter__factory, MyNFT, MyNFT__factory } from "../typechain-types";
import { Spinner } from "../utils/spinner";

task(`deploy-destination-minter`, `Deploys MyNFT.sol and DestinationMinter.sol smart contracts`)
    .addOptionalParam(`router`, `The address of the Router contract on the destination blockchain`)
    .setAction(async (taskArguments: TaskArguments, hre: HardhatRuntimeEnvironment) => {
        const routerAddress = taskArguments.router ? taskArguments.router : getRouterConfig(hre.network.name).address;

        const privateKey = getPrivateKey();
        const rpcProviderUrl = getProviderRpcUrl(hre.network.name);

        const provider = new providers.JsonRpcProvider(rpcProviderUrl);
        const wallet = new Wallet(privateKey);
        const deployer = wallet.connect(provider);

        const spinner: Spinner = new Spinner();

        console.log(`ℹ️  Attempting to deploy MyNFT smart contract on the ${hre.network.name} blockchain using ${deployer.address} address`);
        spinner.start();

        const myNftFactory: MyNFT__factory = await hre.ethers.getContractFactory('MyNFT') as MyNFT__factory;
        const myNft: MyNFT = await myNftFactory.deploy();
        await myNft.deployed();

        spinner.stop();
        console.log(`✅ MyNFT contract deployed at address ${myNft.address} on the ${hre.network.name} blockchain`)

        console.log(`ℹ️  Attempting to deploy DestinationMinter smart contract on the ${hre.network.name} blockchain using ${deployer.address} address, with the Router address ${routerAddress} provided as constructor argument`);
        spinner.start();

        const destinationMinterFactory: DestinationMinter__factory = await hre.ethers.getContractFactory('DestinationMinter') as DestinationMinter__factory;
        const destinationMinter: DestinationMinter = await destinationMinterFactory.deploy(routerAddress, myNft.address);
        await destinationMinter.deployed();

        spinner.stop();
        console.log(`✅ DestinationMinter contract deployed at address ${destinationMinter.address} on the ${hre.network.name} blockchain`);

        console.log(`ℹ️  Attempting to grant the minter role to the DestinationMinter smart contract`);
        spinner.start();

        const tx = await myNft.transferOwnership(destinationMinter.address);
        await tx.wait();

        spinner.stop();
        console.log(`✅ DestinationMinter can now mint MyNFTs. Transaction hash: ${tx.hash}`);
    })
deploy-source-minter.ts
This code defines a Hardhat task named deploy-source-minter, which is responsible for deploying the SourceMinter.sol smart contract on a specified blockchain, which should be the source blockchain. It connects to the blockchain using provided parameters or defaults, deploys the SourceMinter contract with the router and LINK token addresses as constructor arguments, and logs the deployment status, including the contract address.
Sample usage is like the following. We do not run this task yet.
npx hardhat deploy-source-minter --network avalancheFuji
Open deploy-source-minter.ts, and modify it just like the one below.
import { task } from "hardhat/config";
import { HardhatRuntimeEnvironment, TaskArguments } from "hardhat/types";
import { getPrivateKey, getProviderRpcUrl, getRouterConfig } from "./utils";
import { Wallet, providers } from "ethers";
import { SourceMinter, SourceMinter__factory } from "../typechain-types";
import { Spinner } from "../utils/spinner";
import { LINK_ADDRESSES } from "./constants";


task(`deploy-source-minter`, `Deploys SourceMinter.sol smart contract`)
    .addOptionalParam(`router`, `The address of the Router contract on the source blockchain`)
    .setAction(async (taskArguments: TaskArguments, hre: HardhatRuntimeEnvironment) => {
        const routerAddress = taskArguments.router ? taskArguments.router : getRouterConfig(hre.network.name).address;
        const linkAddress = taskArguments.link ? taskArguments.link : LINK_ADDRESSES[hre.network.name]

        const privateKey = getPrivateKey();
        const rpcProviderUrl = getProviderRpcUrl(hre.network.name);

        const provider = new providers.JsonRpcProvider(rpcProviderUrl);
        const wallet = new Wallet(privateKey);
        const deployer = wallet.connect(provider);

        const spinner: Spinner = new Spinner();

        console.log(`ℹ️  Attempting to deploy SourceMinter smart contract on the ${hre.network.name} blockchain using ${deployer.address} address, with the Router address ${routerAddress} and LINK address ${linkAddress} provided as constructor arguments`);
        spinner.start();

        const sourceMinterFactory: SourceMinter__factory = await hre.ethers.getContractFactory('SourceMinter') as SourceMinter__factory;
        const sourceMinter: SourceMinter = await sourceMinterFactory.deploy(routerAddress, linkAddress);
        await sourceMinter.deployed();

        spinner.stop();
        console.log(`✅ SourceMinter contract deployed at address ${sourceMinter.address} on the ${hre.network.name} blockchain`);
    })
fill-sender.ts
This code defines a Hardhat task named fill-sender, which facilitates the transfer of either LINK tokens or native coins to a specified sender contract on a given blockchain. The task uses the provided parameters to connect to the blockchain, performs the transfer, and logs the transaction status along with its hash. The choice of paying fees in either native coins or LINK tokens is determined by the payFeesIn parameter.
This task can be used to fund SourceMinter contract that needs funds for CCIP fees. The funding process can be done either by sending tokens on MetaMask or using fill-sender task.
Sample usage is like the following. We do not run this task yet. Remember that the unit of amount is wei.
npx hardhat fill-sender --sender-address <SOURCE_MINTER_ADDRESS> --blockchain avalancheFuji --amount 10000000000000000 --pay-fees-in Native
Open fill-sender.ts, and modify it just like the one below.
import { task } from "hardhat/config";
import { TaskArguments } from "hardhat/types";
import { getPrivateKey, getProviderRpcUrl, getPayFeesIn } from "./utils";
import { Wallet, providers } from "ethers";
import { IERC20, IERC20__factory } from "../typechain-types";
import { LINK_ADDRESSES, PayFeesIn } from "./constants";
import { Spinner } from "../utils/spinner";


task(`fill-sender`, `Transfers the provided amount of LINK token or native coin to the sender contract to serve for paying CCIP fees`)
    .addParam(`senderAddress`, `The address of a sender contract on the source blockchain`)
    .addParam(`blockchain`, `The name of the blockchain (for example ethereumSepolia)`)
    .addParam(`amount`, `Amount to send`)
    .addParam(`payFeesIn`, `Choose between 'Native' and 'LINK'`)
    .setAction(async (taskArguments: TaskArguments) => {
        const { senderAddress, blockchain, amount, payFeesIn } = taskArguments;

        const privateKey = getPrivateKey();
        const rpcProviderUrl = getProviderRpcUrl(blockchain);

        const provider = new providers.JsonRpcProvider(rpcProviderUrl);
        const wallet = new Wallet(privateKey);
        const signer = wallet.connect(provider);

        const fees = getPayFeesIn(payFeesIn);

        const spinner: Spinner = new Spinner();

        if (fees === PayFeesIn.Native) {
            console.log(`ℹ️  Attempting to send ${amount} of ${blockchain} native coins from ${signer.address} to ${senderAddress}`);
            spinner.start();

            const tx = await signer.sendTransaction({ to: senderAddress, value: amount });
            await tx.wait();

            spinner.stop();
            console.log(`✅ Coins sent, transaction hash: ${tx.hash}`)
        } else {
            const link: IERC20 = IERC20__factory.connect(LINK_ADDRESSES[blockchain], signer);

            console.log(`ℹ️  Attempting to send ${amount} of ${link.address} tokens from ${signer.address} to ${senderAddress}`);
            spinner.start();

            const tx = await link.transfer(senderAddress, amount);
            await tx.wait();

            spinner.stop();
            console.log(`✅ LINKs sent, transaction hash: ${tx.hash}`)
        }
    })
withdraw.ts
This code defines a Hardhat task named withdraw that allows the owner to withdraw tokens or coins from a smart contract called Withdraw.sol on a specified blockchain. It uses the provided blockchain name, sender address ("from"), beneficiary address, and optionally a token address to execute the withdrawal.
It is useful to withdraw tokens for Chainlink CCIP fees from the SourceMinter.sol smart contract.
Sample usage is like the following. We do not run this task yet.
npx hardhat withdraw --beneficiary <BENEFICIARY_ADDRESS> --blockchain avalancheFuji --from <SOURCE_MINTER_ADDRESS>
Open withdraw.ts, and modify it just like the one below.
import { task } from "hardhat/config";
import { TaskArguments } from "hardhat/types";
import { getPrivateKey, getProviderRpcUrl } from "./utils";
import { Wallet, providers } from "ethers";
import { Spinner } from "../utils/spinner";
import { Withdraw, Withdraw__factory } from "../typechain-types";

task(`withdraw`, `Withdraws tokens and coins from Withdraw.sol. Must be called by an Owner, otherwise it will revert`)
    .addParam(`blockchain`, `The name of the blockchain (for example ethereumSepolia)`)
    .addParam(`from`, `The address of the Withdraw.sol smart contract from which funds should be withdrawn`)
    .addParam(`beneficiary`, `The address to withdraw to`)
    .addOptionalParam(`tokenAddress`, `The address of a token to withdraw`)
    .setAction(async (taskArguments: TaskArguments) => {
        const { blockchain, from, beneficiary, tokenAddress } = taskArguments;

        const privateKey = getPrivateKey();
        const rpcProviderUrl = getProviderRpcUrl(blockchain);

        const provider = new providers.JsonRpcProvider(rpcProviderUrl);
        const wallet = new Wallet(privateKey);
        const signer = wallet.connect(provider);

        const withdraw: Withdraw = Withdraw__factory.connect(from, signer);

        const spinner: Spinner = new Spinner();

        if (tokenAddress) {
            console.log(`ℹ️  Attempting to withdraw ${tokenAddress} tokens from ${from} to ${beneficiary}`);
            spinner.start();

            const withdrawalTx = await withdraw.withdrawToken(beneficiary, tokenAddress);
            await withdrawalTx.wait();

            spinner.stop();
            console.log(`✅ Withdrawal successful, transaction hash: ${withdrawalTx.hash}`);
        } else {
            console.log(`ℹ️  Attempting to withdraw coins from ${from} to ${beneficiary}`);
            spinner.start();

            const withdrawalTx = await withdraw.withdraw(beneficiary);
            await withdrawalTx.wait();

            spinner.stop();
            console.log(`✅ Withdrawal successful, transaction hash: ${withdrawalTx.hash}`);
        }
    })
index.ts
This code appears to import defined tasks.
Open index.ts, and modify it just like the one below.
import './balance-of'
import './cross-chain-mint'
import './deploy-destination-minter'
import './deploy-source-minter'
import './fill-sender'
import './withdraw'
Before moving to the next section, since all tasks are created, let's open hardhat.config.ts and uncomment the highlighted line below to be able to use these tasks.
import * as dotenvenc from '@chainlink/env-enc'
dotenvenc.config();

import { HardhatUserConfig } from "hardhat/config";
import "@nomicfoundation/hardhat-toolbox";
import './tasks'

const PRIVATE_KEY = process.env.PRIVATE_KEY;
const POLYGON_AMOY_RPC_URL = process.env.POLYGON_AMOY_RPC_URL;
const AVALANCHE_FUJI_RPC_URL = process.env.AVALANCHE_FUJI_RPC_URL;

const config: HardhatUserConfig = {
  solidity: "0.8.19",
  networks: {
    hardhat: {
      chainId: 31337,
    },

    polygonAmoy: {
      url: POLYGON_AMOY_RPC_URL !== undefined ? POLYGON_AMOY_RPC_URL : "",
      accounts: PRIVATE_KEY !== undefined ? [PRIVATE_KEY] : [],
      chainId: 80002,
    },
    avalancheFuji: {
      url: AVALANCHE_FUJI_RPC_URL !== undefined ? AVALANCHE_FUJI_RPC_URL : "",
      accounts: PRIVATE_KEY !== undefined ? [PRIVATE_KEY] : [],
      chainId: 43113,
      allowUnlimitedContractSize: true,
    },
  },
};

export default config;
Finally, the coding part is completed! Now, we can run our tasks to mint the NFT on Polygon Amoy by sending the transaction on Avalanche Fuji.
Deployment
Deployment on the Destination Blockchain
In this example, we will use Polygon Amoy as a destination blockchain. So, our NFT will be on this blockchain.
Run the command below to deploy the MyNFT.sol and DestinationMinter.sol smart contracts to the destination blockchain and then grant the NFT's minter role to the DestinationMinter smart contract.
npx hardhat deploy-destination-minter --network polygonAmoy
The output should be similar to the one below.
> npx hardhat deploy-destination-minter --network polygonAmoy
ℹ️  Attempting to deploy MyNFT smart contract on the polygonAmoy blockchain using 0x58D09ecd499A1d6F2a0269f361Ee6DbbaBa44eF8 address
✅ MyNFT contract deployed at address 0xd1EA5FE43EC7cefEA20a583fB74e24E45F55671b on the polygonAmoy blockchain
ℹ️  Attempting to deploy DestinationMinter smart contract on the polygonAmoy blockchain using 0x58D09ecd499A1d6F2a0269f361Ee6DbbaBa44eF8 address, with the Router address 0x9C32fCB86BF0f4a1A8921a9Fe46de3198bb884B2 provided as constructor argument
✅ DestinationMinter contract deployed at address 0x2d708EB589a39D66866B47A7B63bB6Ad549255E5 on the polygonAmoy blockchain
ℹ️  Attempting to grant the minter role to the DestinationMinter smart contract
✅ DestinationMinter can now mint MyNFTs. Transaction hash: 0x3724891fb7839947d4e0dc9c89120add2770be72093317a1d3c1de6d81b35ed1
Keep MyNFT and DestinationMinter contract addresses handy since we'll use them in the next steps.
Deployment on the Source Blockchain
In this example, Avalanche Fuji is the source blockchain, which is used to send minting transactions.
Run the command below to deploy the SourceMinter.sol smart contract to the source blockchain.
npx hardhat deploy-source-minter --network avalancheFuji
The output should be similar to the one below.
> npx hardhat deploy-source-minter --network avalancheFuji
ℹ️  Attempting to deploy SourceMinter smart contract on the avalancheFuji blockchain using 0x58D09ecd499A1d6F2a0269f361Ee6DbbaBa44eF8 address, with the Router address 0xF694E193200268f9a4868e4Aa017A0118C9a8177 and LINK address 0x0b9d5D9136855f6FEc3c0993feE6E9CE8a297846 provided as constructor arguments
✅ SourceMinter contract deployed at address 0xD0b243E9fabC20815e64c2A857D4FC176d35D742 on the avalancheFuji blockchain
Funding SourceMinter
For CCIP fees, SourceMinter contract should be funded with either native tokens or LINK tokens. As indicated before, the funding process can be done either by sending tokens on MetaMask or using a fill-sender task. In this guide, we will send tokens using a wallet.
- Open your wallet (e.g., MetaMask)
- Make sure you are connected to the source blockchain (Avalanche Fuji)
- Send 0.01 Fuji AVAX to your SourceMinter contract; it will be enough for the CCIP fee.
Minting NFT
Now, run the following code in order to mint the NFT on the destination blockchain by calling the SourceMinter contract, which is on the source blockchain.
npx hardhat cross-chain-mint --source-minter SOURCE_MINTER_ADDRESS --source-blockchain avalancheFuji --destination-minter DESTINATION_MINTER_ADDRESS --destination-blockchain polygonAmoy --pay-fees-in Native
Replace
SOURCE_MINTER_ADDRESSandDESTINATION_MINTER_ADDRESSwith the addresses of SourceMinter (on Avalanche Fuji) and DestinationMinter (on Polygon Amoy).
The output should be similar to the one below.
> npx hardhat cross-chain-mint --source-minter 0xD0b243E9fabC20815e64c2A857D4FC176d35D742 --source-blockchain avalancheFuji --destination-minter 0x2d708EB589a39D66866B47A7B63bB6Ad549255E5 --destination-blockchain polygonAmoy --pay-fees-in Native
ℹ️  Attempting to call the mint function of the SourceMinter.sol smart contract on the avalancheFuji from 0x58D09ecd499A1d6F2a0269f361Ee6DbbaBa44eF8 account
✅ Mint request sent, transaction hash: 0xe887a8c52b6baa7f92ee59c08eea58021c5bc63829448481c1e0da9948e9219a
✅ You can now monitor the token transfer status via CCIP Explorer by searching for CCIP Message ID: 0x
✅ Task cross-chain-mint finished with the execution
Now, let’s check the transaction hash on the CCIP Explorer.
- Go to the CCIP Explorer
- Search for your transaction hash
- The status will probably be Waiting for finality at the beginning. It means that the transaction is detected, but the finality is not completed yet.
- Wait for a while (it may take ~10 minutes)
- When the status is Success, it means that the NFT minting transaction is completed successfully

Checking the NFT
As you remember, we created the balance-of task to check the NFT smart contract's balance for a specific address.
Run the following command to get the result of the balanceOf function of MyNFT.sol contract with the argument of your wallet address.
Check the Destination Transaction Hash to learn the NFT address.
npx hardhat balance-of --my-nft MYNFT_ADDRESS --blockchain polygonAmoy --owner YOUR_WALLET_ADDRESS
Replace MYNFT_ADDRESS and YOUR_WALLET_ADDRESS with the MyNFT contract address and your wallet address.
The output should be like the one below. So, it means that the address has 1 MyNFT.
> npx hardhat balance-of --my-nft 0xd1EA5FE43EC7cefEA20a583fB74e24E45F55671b --blockchain polygonAmoy --owner 0x58D09ecd499A1d6F2a0269f361Ee6DbbaBa44eF8
ℹ️  Attempting to check the balance of MyNFTs (0xd1EA5FE43EC7cefEA20a583fB74e24E45F55671b) for the 0x58D09ecd499A1d6F2a0269f361Ee6DbbaBa44eF8 account
ℹ️  The balance of MyNFTs of the 0x58D09ecd499A1d6F2a0269f361Ee6DbbaBa44eF8 account is 1
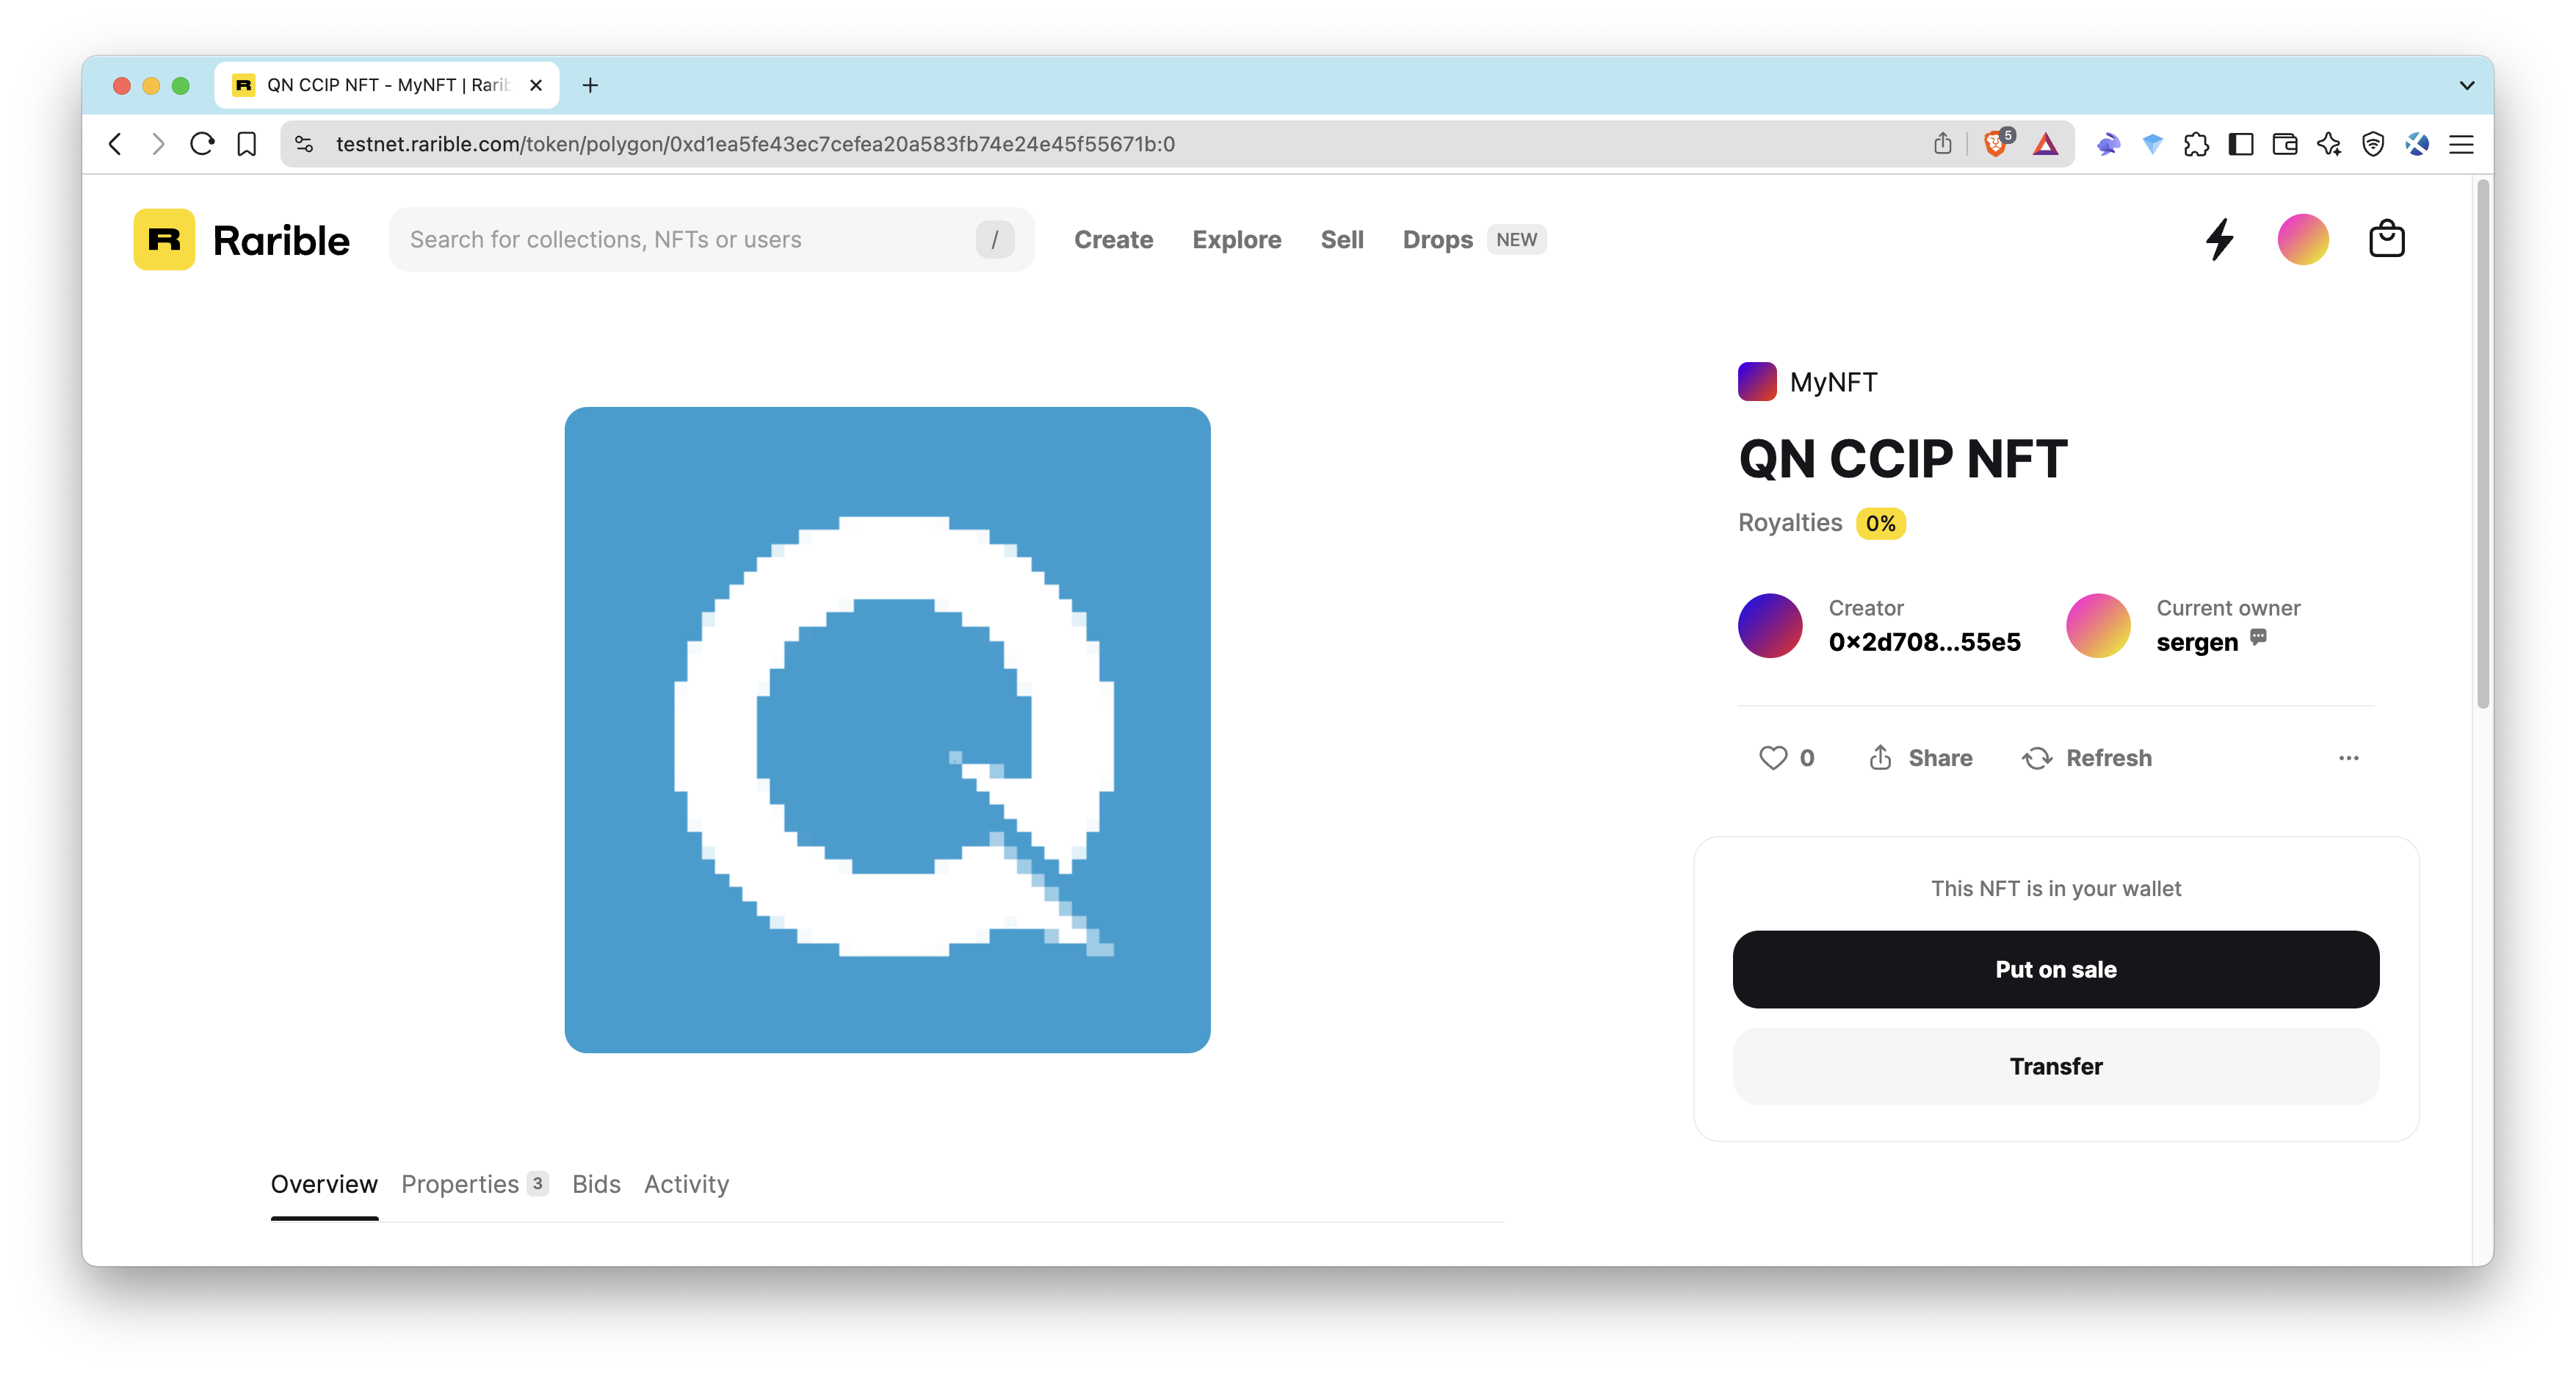
However, what if we want to check how the NFT looks like?
To check it, we can use NFT marketplaces that support testnets such as Rarible and OpenSea.
- Go to the Rarible's testnet website
- Connect your wallet
- Click the icon at the top right and click My NFTs
If you do not want to connect your wallet, you can modify the following URL by replacing MYNFT_ADDRESS with your MyNFT contract address.
https://testnet.rarible.com/token/polygon/MYNFT_ADDRESS:0
As you can see, the NFT is shown on Rarible, and it is on the Polygon Amoy testnet.
Frequently Asked Questions
What is Chainlink CCIP and why is it used for cross-chain NFT minting?
Chainlink CCIP (Cross-Chain Interoperability Protocol) is a protocol that enables secure communication and token transfers between different blockchains. It allows you to mint an NFT on one blockchain by sending a transaction from another blockchain, making it possible to use funds across different networks.
What smart contracts are required to mint a cross-chain NFT using Chainlink CCIP?
Four main contracts are needed: MyNFT.sol (the ERC-721 NFT contract on the destination chain), DestinationMinter.sol (receives CCIP messages and mints NFTs), SourceMinter.sol (initiates the minting process from the source chain), and Withdraw.sol (handles token withdrawals from SourceMinter).
How do I fund the SourceMinter contract for CCIP fees?
The SourceMinter contract must be funded with either native tokens (like AVAX on Fuji) or LINK tokens to cover CCIP fees. You can send tokens directly from your wallet or use the fill-sender Hardhat task.
How can I verify that my cross-chain NFT mint was successful?
After sending the mint transaction, you can monitor its status on the CCIP Explorer using the transaction hash. The status will change from "Waiting for finality" to "Success" when completed, which may take around 10 minutes.
Conclusion
🎉 Congratulations! In this journey, you've ventured into the world of decentralized cross-chain technology. You've learned about CCIP, created tasks, deployed smart contracts, and minted a cross-chain NFT across different blockchain networks.
Blockchain interoperability, facilitated by protocols like Chainlink CCIP, is a game-changer for the web3 ecosystem. It enables developers and entrepreneurs to harness the strengths of different blockchains and create innovative cross-chain applications. By mastering cross-chain NFT minting with CCIP, you'll be better equipped to explore new horizons in the world of decentralized applications and blockchain technology.
If you have any questions, feel free to use our dedicated channel on Discord or provide feedback using the form below. Stay up to date with the latest by following us on Twitter and our Telegram announcement channel.
We ❤️ Feedback!
Let us know if you have any feedback or requests for new topics. We'd love to hear from you.