
13 min read
NOTE: This guide shows you how to create and host a blog website on IPFS, however, this same process can be applied to any file type (e.g., images, videos, etc.)!
Overview
Prefer a video walkthrough? Follow along with Sahil and learn how to create and host a blog website with IPFS using Quicknode in under 7 minutes.
Are you interested in leveraging the power of web3 technologies for your website? If yes, this guide is for you!
In this guide, we will walk you through creating and hosting a blog on IPFS using Quicknode. Not only will you learn the practical aspects of using IPFS and web3 technologies, but you'll also gain an understanding of how these tools can help provide solutions in the decentralized world. By the end of this journey, you'll have a fully functioning blog hosted on IPFS, along with the knowledge to update and maintain it. If you're ready to step into the future of blogging, roll up your sleeves and let's get started!
What You Will Do
- Learn about the basics of IPFS
- Create a static blog using HTML, CSS, and JavaScript
- Set up IPFS infrastructure with Quicknode
- Host your blog on IPFS and preview it
What You Will Need
- Basic knowledge of programming concepts
- A code editor (e.g. Visual Studio Code)
- A Quicknode account (create one for free here!)
What is IPFS?
The InterPlanetary File System, better known as IPFS, is a protocol designed to create a decentralized, peer-to-peer method of storing and sharing media in a distributed file system. Essentially, IPFS seeks to make the web safer and more open by replacing the traditional model of the web, where each file and piece of content is served from individual servers (computers), with a system where content is served from multiple locations at once. In layman's terms, the data on IPFS isn't stored in a single location like a traditional centralized server. Instead, it's spread out across many different computers around the world that are part of the IPFS network.
How IPFS Works
When you add files to IPFS, which could be stored on your local node, a pinning service, or an IPFS-enabled application, the system breaks the files down into smaller parts. Each part is cryptographically hashed, receiving a unique content identifier (CID), which acts as an immutable record of your file at that point in time. When other nodes on the IPFS network want to access your file, they inquire from their peers about who is storing the content referenced by the file's CID. Upon viewing or downloading your file, these nodes cache a copy, temporarily becoming a provider of your content until their cache is cleared. Nodes can choose to "pin" content to retain and provide it indefinitely or discard used content to free up storage space. Consequently, each node only keeps the content it's interested in and some index data to determine which node stores what. If you upload a revised version of your file to IPFS, it gets a new CID due to its different cryptographic hash. This makes IPFS files resilient to tampering and censorship since changes to a file create a new version rather than overwrite the original. Moreover, the system is designed to reuse common chunks across files to optimize storage. But you don't need to memorize complex CIDs. IPFS can retrieve the latest version of your file using the IPNS, a decentralized naming system. Furthermore, the DNSLink protocol can associate CIDs with human-readable DNS names, simplifying navigation.
The IPFS protocol is based on a few key technologies and concepts:
IP Addresses
IP addresses in the context of IPFS are slightly different from traditional Internet Protocol (IP) addresses. While conventional IP addresses indicate the location of a device on a network, IPFS uses content-addressing rather than location-addressing.
In IPFS, each file and all of the blocks within it are given a unique fingerprint called a cryptographic hash. This is a content-based address, meaning it depends on the file's content and not on where it's stored. When you look up a file on IPFS, you're asking the network to find nodes that are storing the content behind that file's hash. This fundamental shift from location-based addressing (URLs in the traditional web) to content-based addressing makes IPFS resilient, secure, and efficient.
IPFS Gateways
In the world of IPFS, gateways serve a crucial role in interfacing between the IPFS and HTTP protocols. Traditional web browsers cannot natively access content on IPFS, as they operate using HTTP. IPFS gateways are the solution to this issue, acting as a bridge that translates requests from the HTTP protocol to the IPFS protocol and vice versa. When you access an IPFS hash through a gateway, it retrieves the corresponding content from the IPFS network and presents it to your web browser using HTTP. This allows your content to be accessible from any standard web browser without needing any special software or plugins. Although IPFS gateways enable accessibility, it's essential to note that using them somewhat dilutes the decentralization aspect of IPFS, as the gateway itself becomes a centralized point of failure. In the long term, the aim is for browsers to have built-in support for IPFS, reducing the need for gateways. However, for now, they remain a critical component for making IPFS content widely accessible.
What is IPFS Pinning?
Pinning in IPFS is the act of marking particular data to be stored permanently on one or more IPFS nodes. By pinning data, it is guaranteed to remain accessible indefinitely, as it will be exempt from deletion during the IPFS garbage collection process.
Pros & Cons of IPFS
Pros:
- Decentralization: IPFS removes the need for centralized client-server relationships. Each node in the IPFS network can act as a server, a client, or both.
- Censorship Resistance: Because content is distributed across multiple nodes, it is difficult to censor or remove content hosted on IPFS.
- Fault Tolerance: With multiple nodes storing content, the system is resilient against network failures. Even if some nodes go offline, the content remains accessible from other nodes.
- Efficient: Files are served from the closest nodes, reducing load times and bandwidth usage.
Cons:
- Data Persistence: There's no guarantee that data will be stored permanently unless it's pinned on a node, as nodes can remove unpinned content to save space.
- Complexity: Compared to traditional web technologies, IPFS has a steeper learning curve. Its decentralized nature requires a shift in thinking from traditional web development practices.
- Performance: IPFS can sometimes be slower than traditional web servers, especially when the network has a lower number of nodes hosting specific content.
- Mutability: By default, content in IPFS is immutable, meaning it can't be changed without changing its hash. While IPFS has mechanisms like IPNS for mutable content, these add another layer of complexity to the system.
If you want to learn more about IPFS concepts before starting this guide's technical section, check out the official IPFS website.
Creating Your Blog
For this guide, we will build a simple static blog website in one file containing HTML/CSS and JavaScript code. Open up your terminal and run the following commands to create a folder, navigate inside it, and create an index.html file.
mkdir blog-site-with-ipfs && cd blog-site-with-ipfs && echo > index.html
Then, open up the index.html file in your code editor of choice and input the following code:
<!DOCTYPE html>
<html>
<head>
    <title>My Blog</title>
    <style>
        body {
            font-family: Arial, sans-serif;
        }
        .post {
            border-bottom: 1px solid #ddd;
            padding: 20px 0;
        }
        .title {
            font-size: 24px;
            font-weight: bold;
            color: #007BFF;
        }
        .date, .author {
            font-size: 14px;
            color: #888;
        }
        .content {
            margin-top: 20px;
        }
    </style>
</head>
<body>
    <h1>My Blog</h1>
    <div id="blog">
        <!-- Posts will be inserted here -->
    </div>

    <script>
        // Example blog data
        const posts = [
            {
                title: 'First Blog Post',
                date: new Date(),
                author: 'Author Name',
                content: 'Lorem ipsum dolor sit amet, consectetur adipiscing elit. Morbi non neque felis. Vivamus auctor nisi nec sem faucibus, vitae lacinia lorem dapibus.'
            },
            {
                title: 'Second Blog Post',
                date: new Date(),
                author: 'Author Name',
                content: 'Curabitur porttitor, lorem non ornare pellentesque, nunc sem accumsan sem, vitae aliquam nunc neque quis purus.'
            }
        ];

        // Function to format a date string
        function formatDate(date) {
            const options = { year: 'numeric', month: 'long', day: 'numeric' };
            return new Intl.DateTimeFormat('en-US', options).format(date);
        }

        // Function to create a blog post element
        function createPostElement(post) {
            return `
                <div class="post">
                    <div class="title">${post.title}</div>
                    <div class="date">${formatDate(post.date)}</div>
                    <div class="author">${post.author}</div>
                    <div class="content">${post.content}</div>
                </div>
            `;
        }

        // Insert the blog posts into the page
        document.getElementById('blog').innerHTML = posts.map(createPostElement).join('\n');
    </script>
</body>
</html>
Remember to save the file!
Let's quickly recap the code.
This basic static blog is comprised of HTML, CSS, and JavaScript, all in a single file. The HTML structures the webpage with a blog section where posts will be dynamically inserted. The CSS styles the webpage, setting fonts and margins and distinguishing between different types of content such as title, date, author, and the body of the post.
The JavaScript code is used to create and insert blog posts dynamically. It contains an array of post objects, each with properties for title, date, author, and content. There is also a helper function to format the date in a readable way. The main function, createPostElement generates HTML for each blog post using template literals. These HTML strings are then inserted into the "blog" div of the webpage. The posts are hardcoded in this example, but you might load these from a file or an API in a more complex blog.
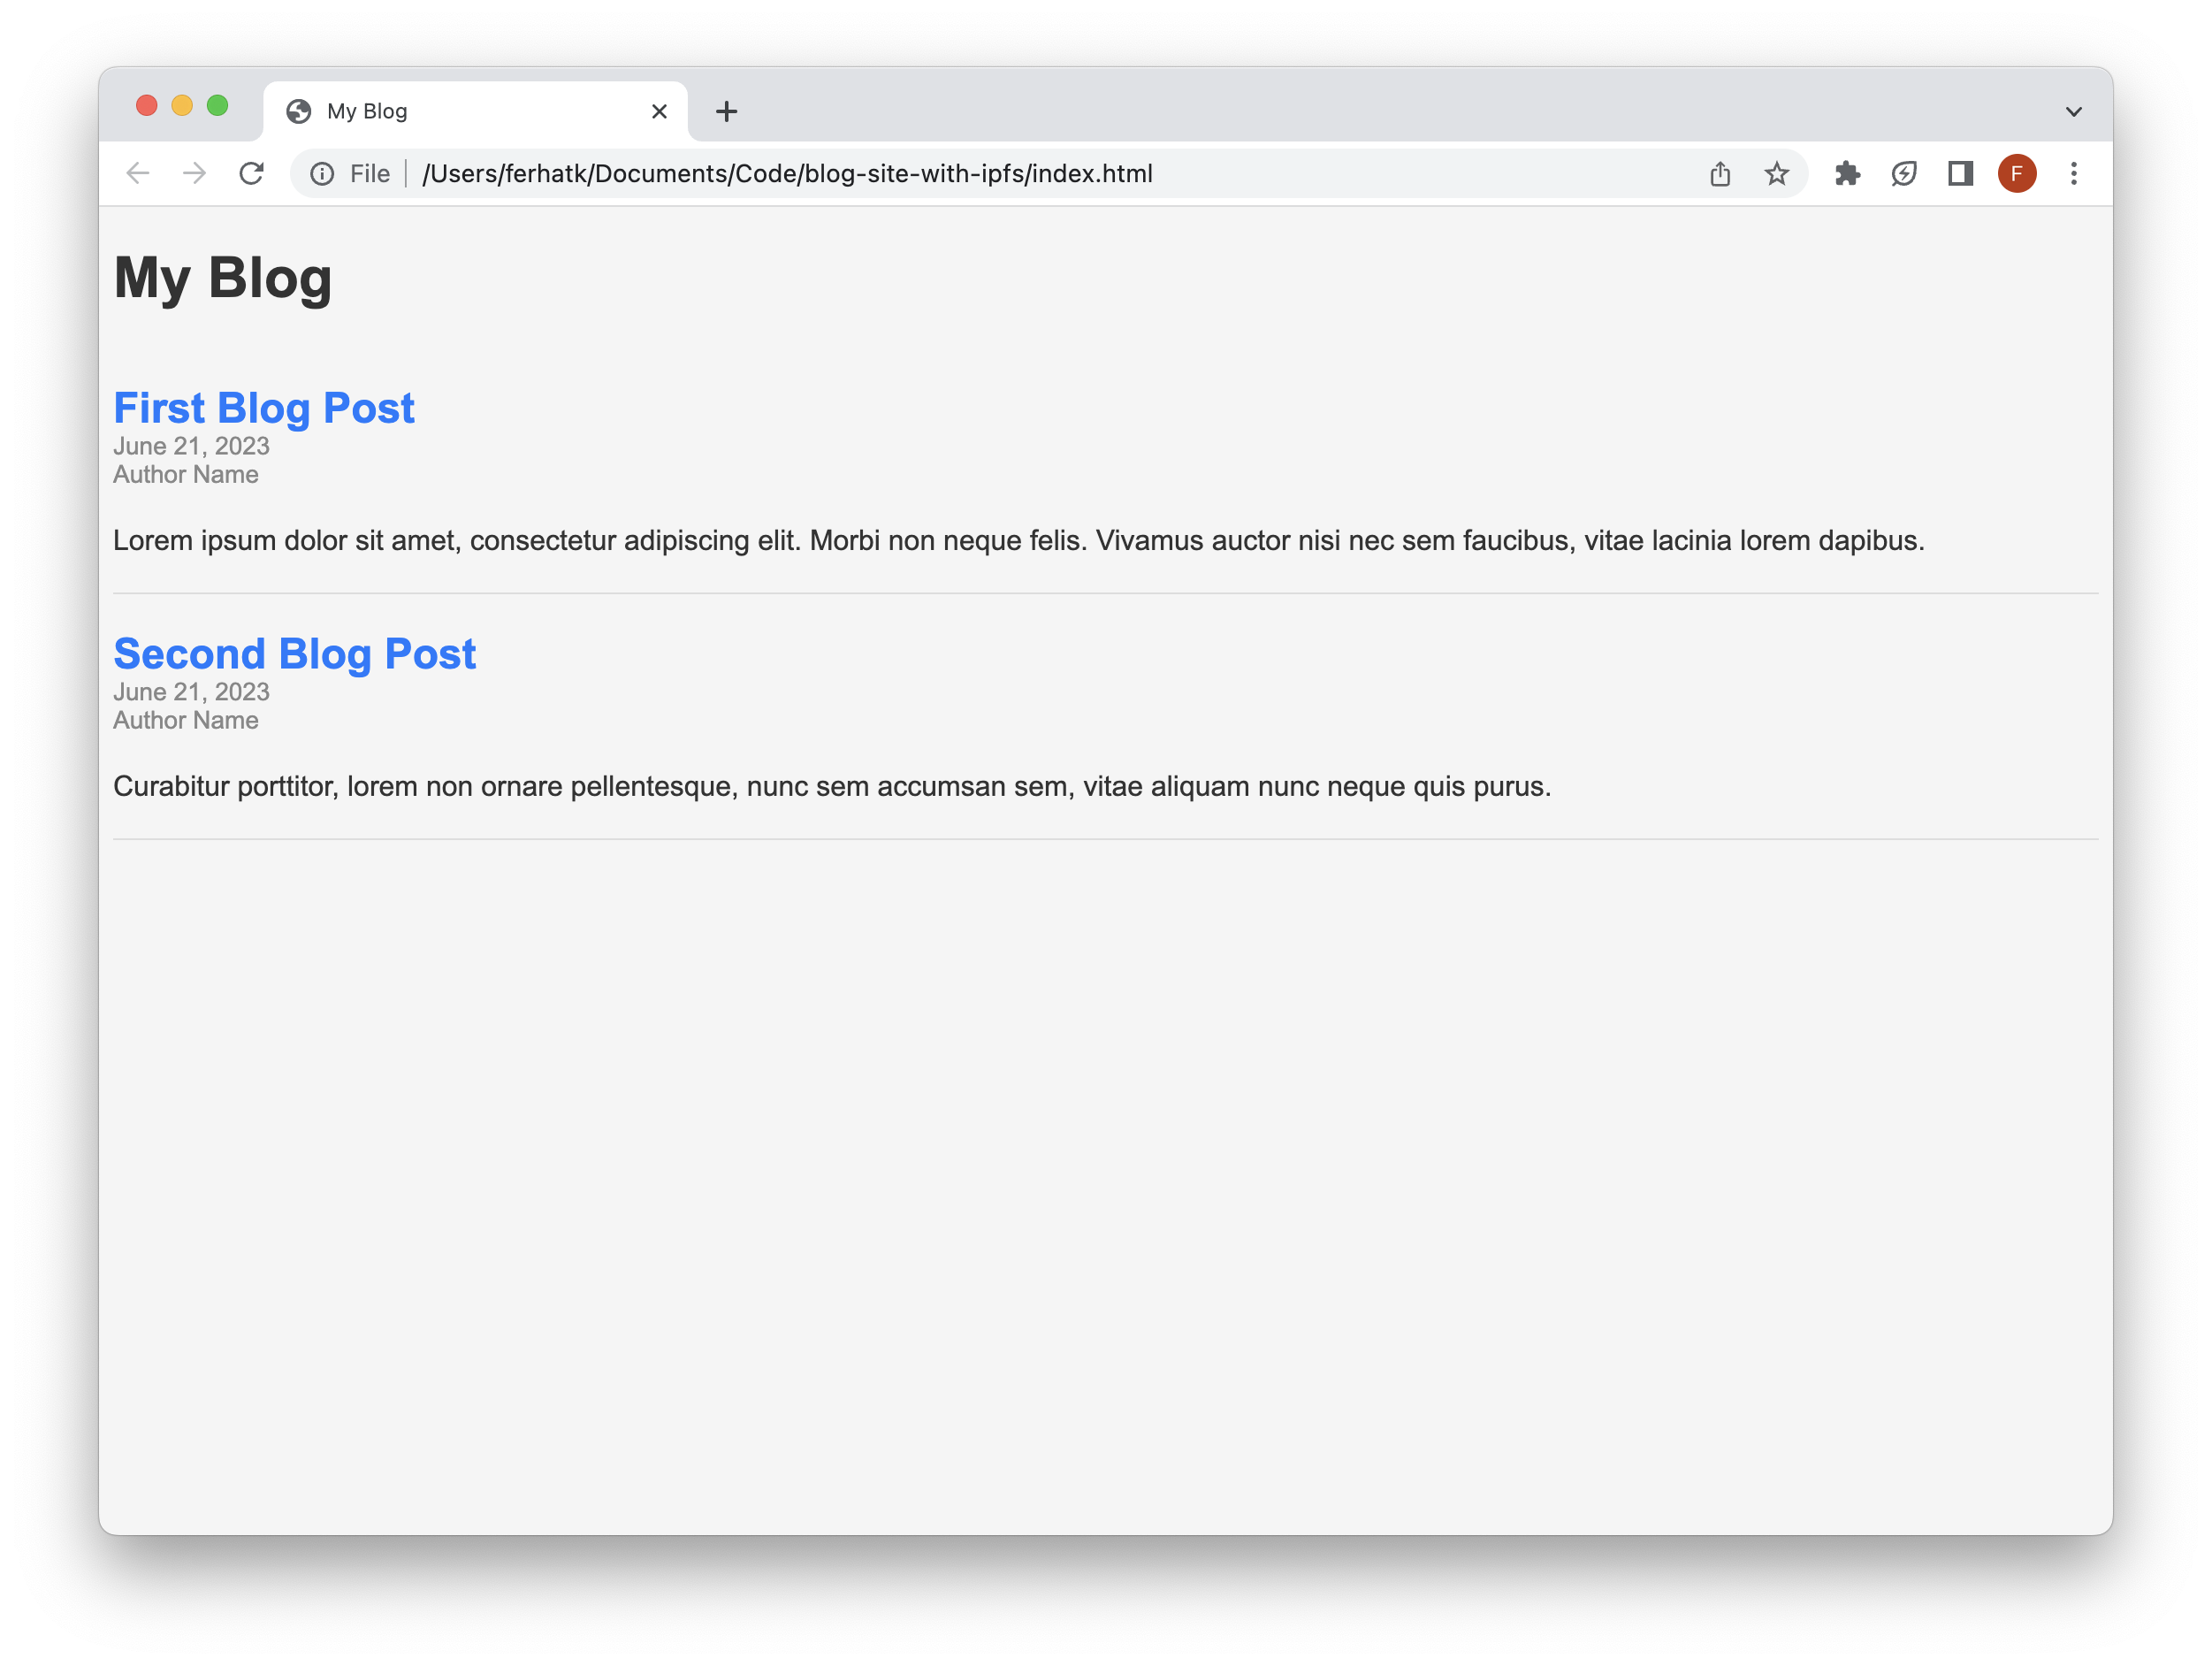
Preview the Blog
With the Blog code generated and saved in our directory, let's preview it and make sure all looks well. Double-click and open the index.html file, and you should see a new window open up that looks like this:
Great work! In the next section, we will add our blog website to IPFS.
Setting Up IPFS with Quicknode
To use IPFS on Quicknode, a Build plan or higher is required. View our feature breakdown by plan on our pricing page.
Before publishing our blog on IPFS, it's worth noting that there are various ways to interact with the IPFS protocol. While one option is to install and run IPFS locally, an alternative is to use Quicknode. Quicknode provides easy and quick access to IPFS, handling all the necessary infrastructure for you. This way, you can focus on your data without the need to maintain your own local IPFS node and keep it running to keep your data pinned. Just leave the heavy lifting to us!
You can get started with Quicknode with the following instructions:
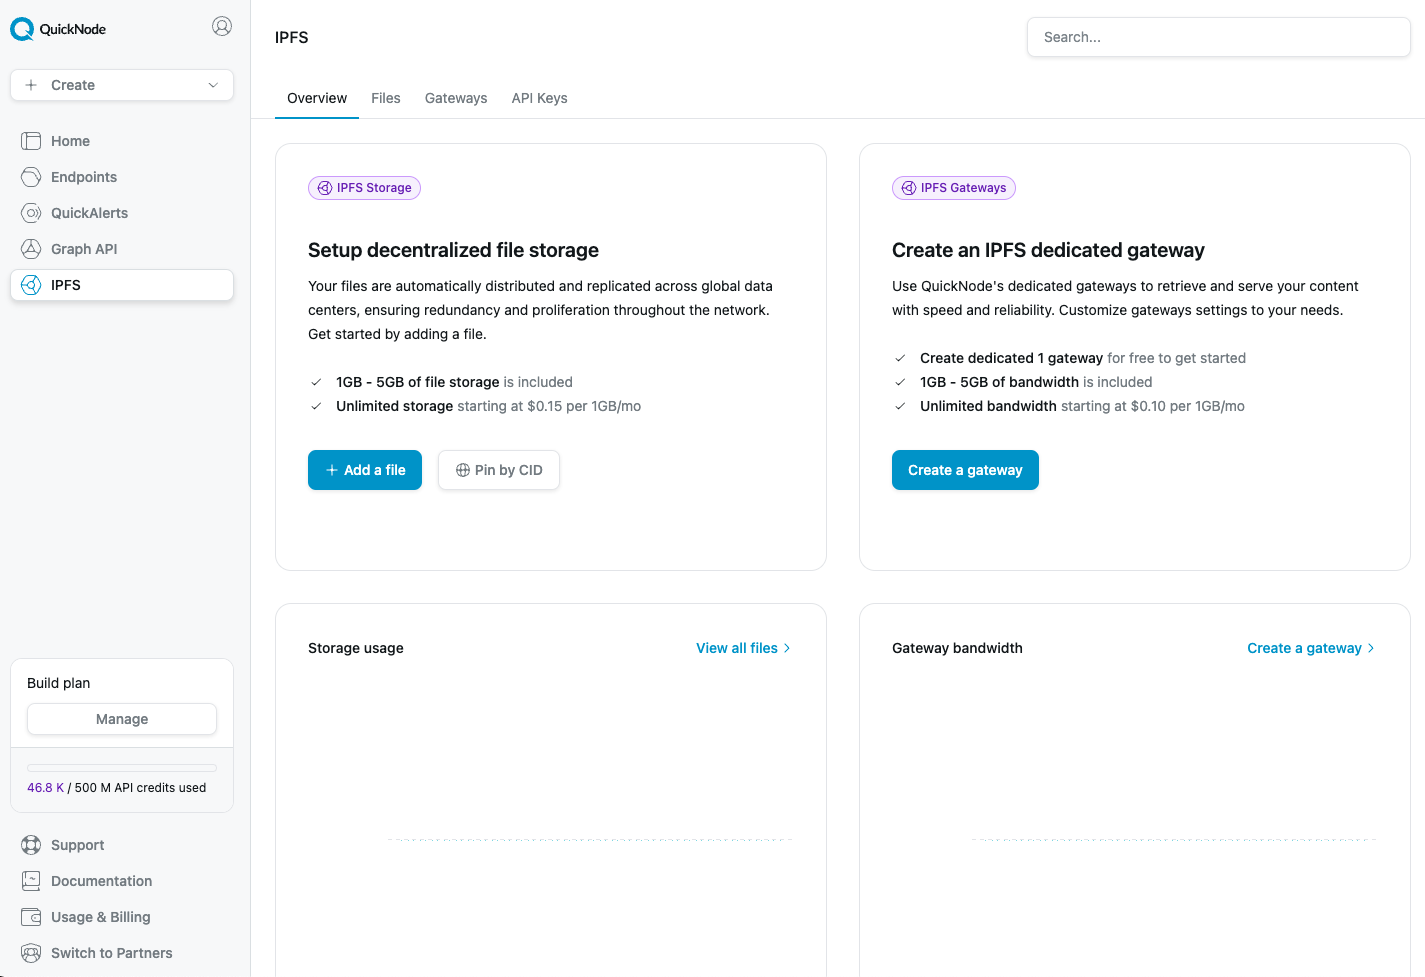
Login, and click on the IPFS tab on the left sidebar:
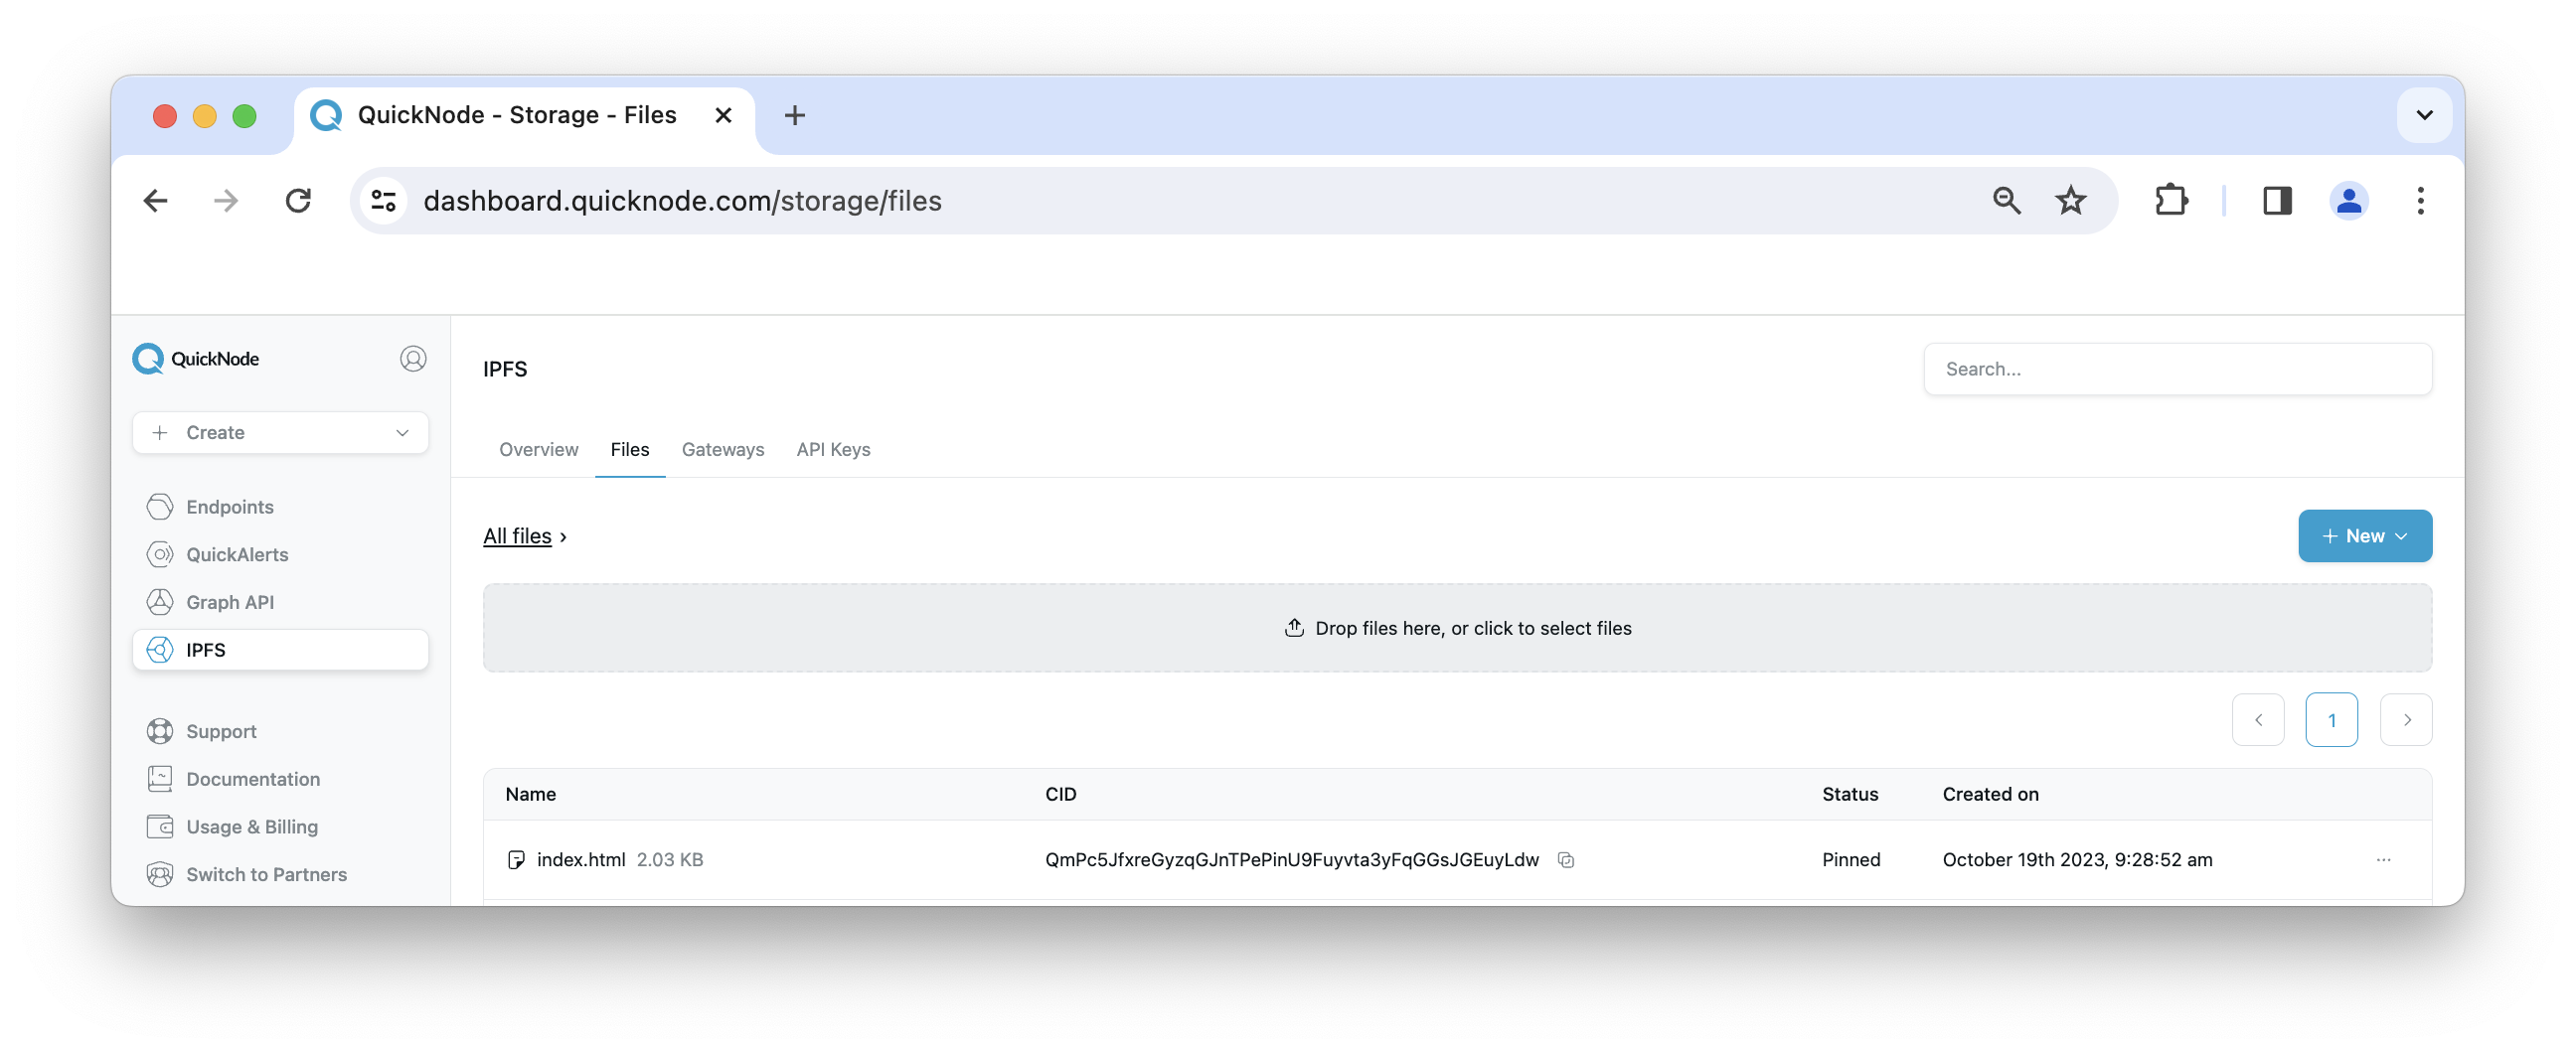
Then, click Add a file under the Setup decentralized file storage section. You'll need to navigate to the directory the index.html file lives in and add it. Once added, navigate to the files tab, and you should see the added file:
Note, if you want to use IPFS without Quicknode, you can install IPFS on your local machine by following the instructions here. If you are on a macOS machine, check out this list of instructions - https://docs.ipfs.tech/install/command-line/#install-kubo-mac. If you have IPFS installed locally, you can verify that it's properly set up by opening up a terminal window and running the following command: ipfs --version.
Accessing Your Blog on IPFS
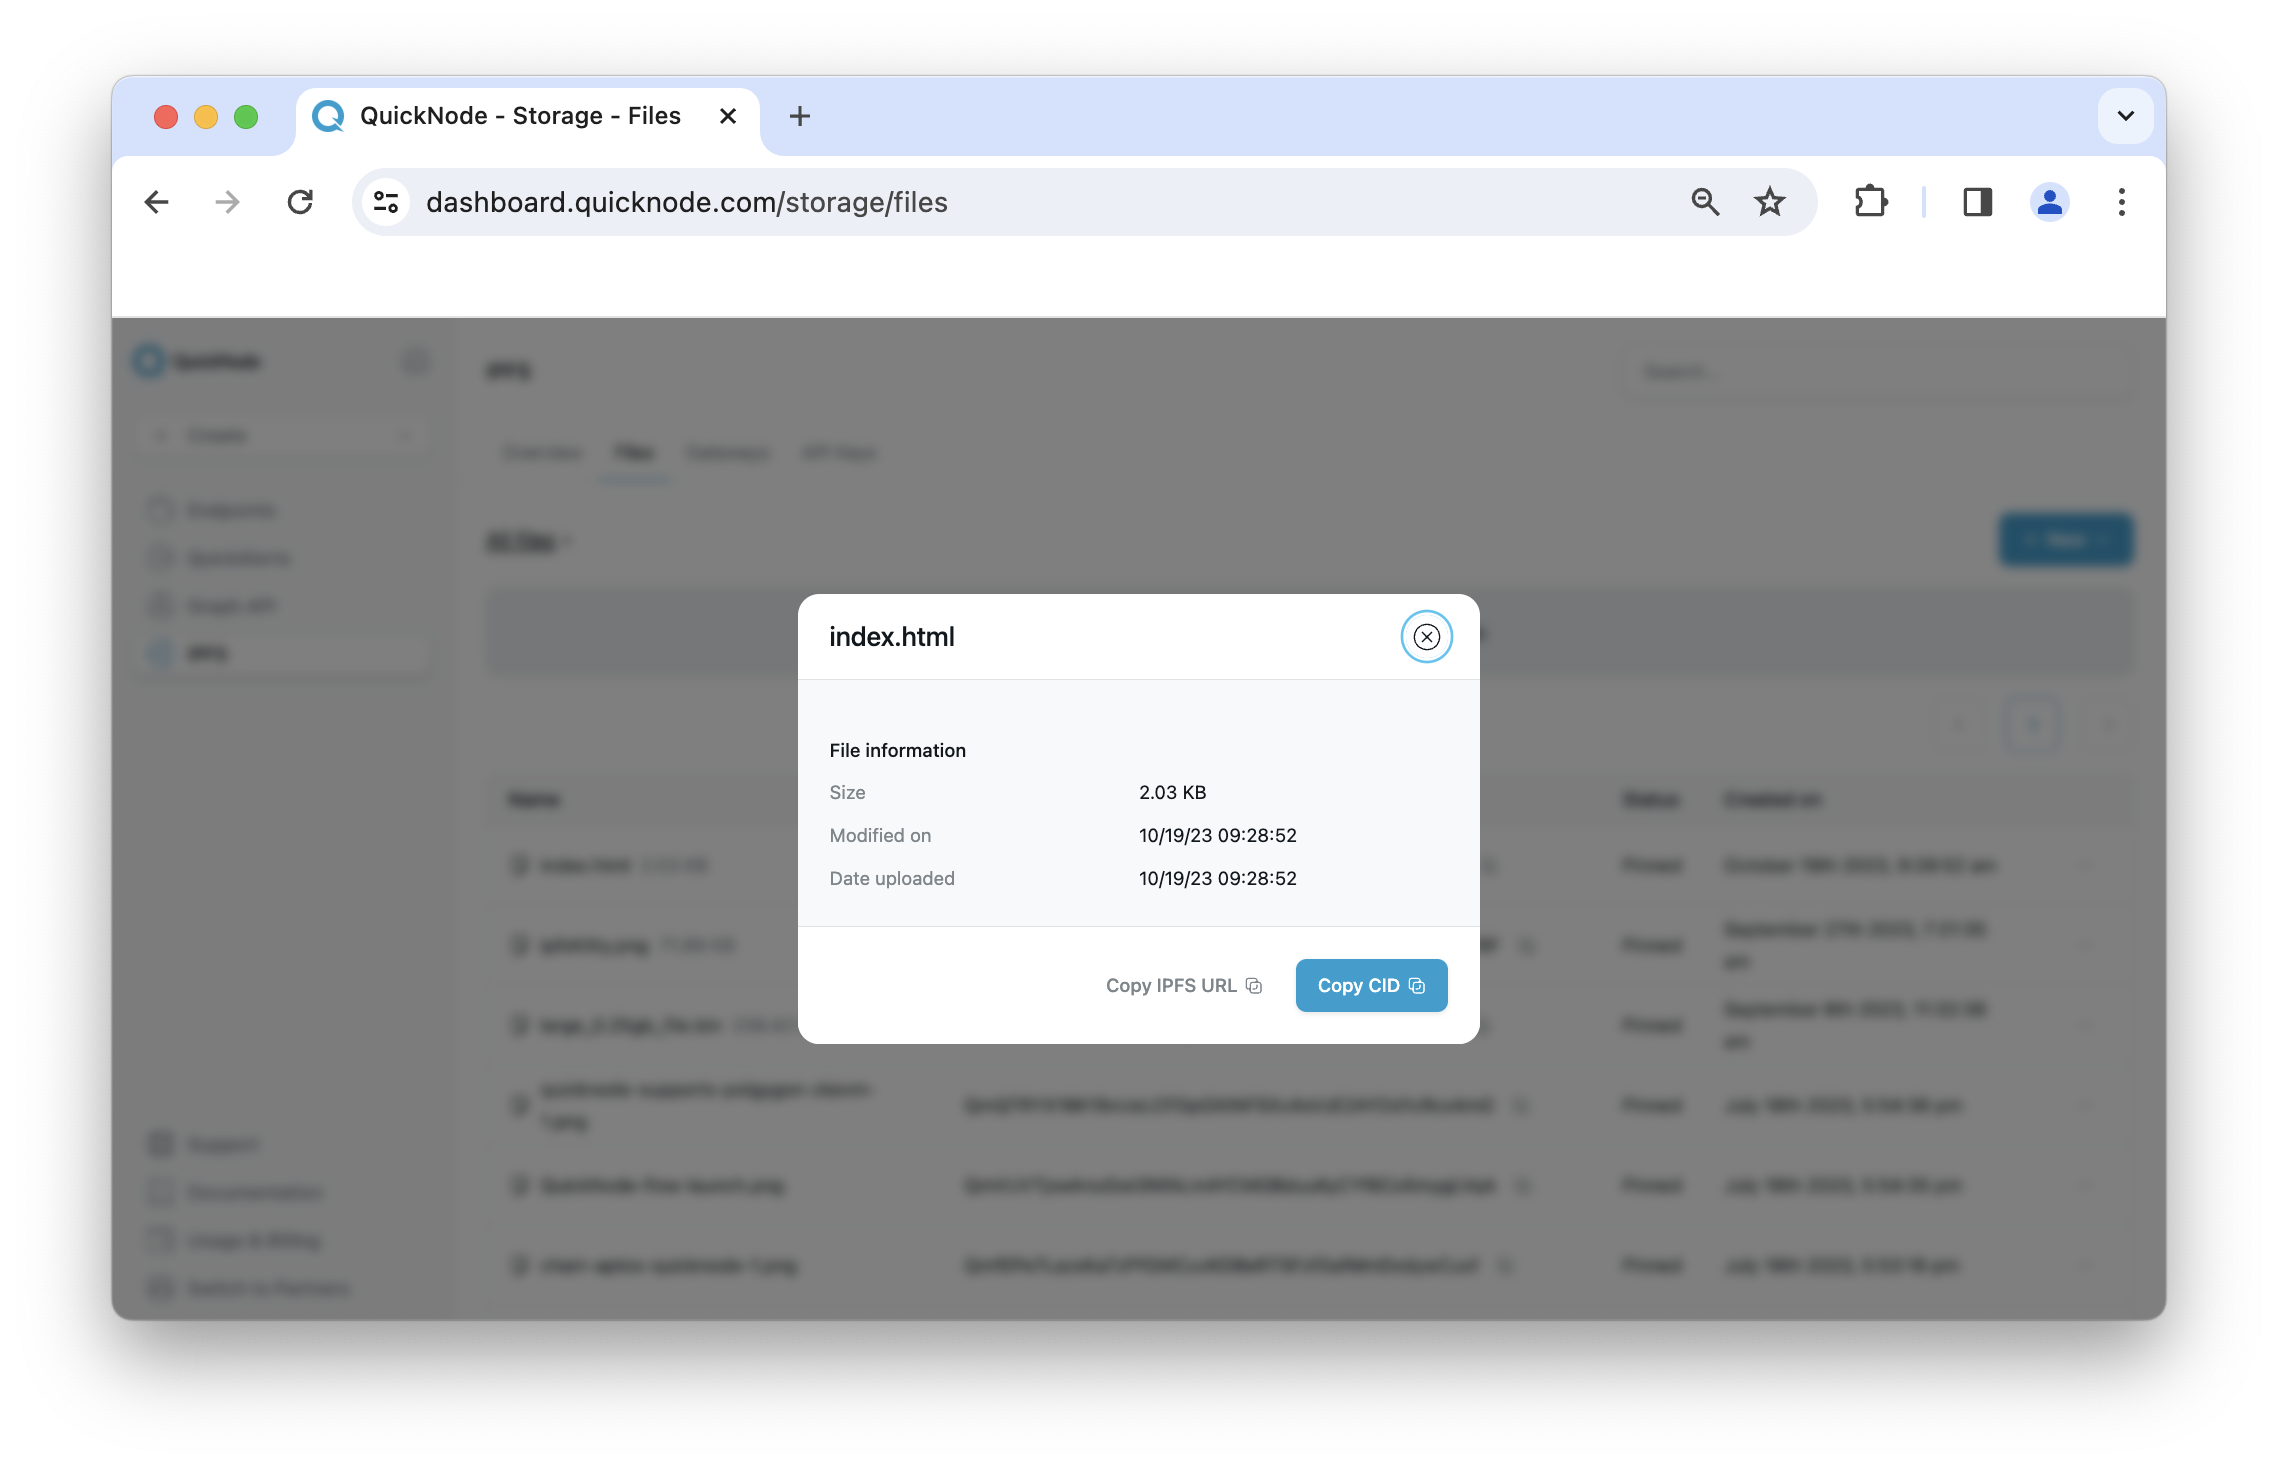
To preview the Blog on IPFS, click the ellipses on the right side of the IPFS hash created for your file on Quicknode and click Copy IPFS URL. You can navigate to the URL in your browser to preview it. Alternatively, you can click View file details, and you will see a preview as well as your files information. The URL (e.g., https://quicknode.myfilebase.com/ipfs/QmPc3....GyLdw) you see references a HTTP link pointing to your hosted file on filebase, which is a storage platform that allows you to store data in a secure, redundant, and performant manner.
Now you may be wondering, what if I want to add a new blog post? In this case, you will need to add the new updated file (e.g. index.html) to Quicknode and delete your outdated file. Note that this will result in a different URL (e.g. a different CID) so you will need to update your outdated URL with the new one wherever you have it posted (i.e. on your social media, website, etc.)
(Optional) Set up a Gateway on Quicknode
This section is optional; however, if you want a custom domain (e.g., thisismydecentralizedblog.com) and want to link it with your content on IPFS, follow the instructions below:
- Navigate to the Gateways tab on the IPFS page on Quicknode
- Click Create a Gateway and customize the gateway name (if you want), and choose if you'd like it Public or Private.
- Once the Gateway is created, you can navigate back to the Files tab and re-copy the new IPFS URL by clicking the ellipses.
You should see the custom domain you added along with filebase.com and IPFS CID appended to the end, for example: https://thisismydecentralizedblog.myfilebase.com/ipfs/QmPc5JfxreGyzqGJnTPePinU9Fuyvta3yFqGGsJGEuyLdw
Alternatively, if you want to create a private gateway, you can choose the Private option when creating your gateway. This will restrict the content to only be served by Quicknode.
That's it! You've created a blog and hosted it on IPFS using Quicknode! Check out the following resources and use cases below to further enhance your understanding.
Use Cases
IPFS can play an integral role in the emerging field of Web3 and crypto-related scenarios. Here are some unique use cases:
Decentralized Finance (DeFi) Platforms: DeFi platforms can leverage IPFS to store smart contract data or financial product information off-chain, ensuring secure, reliable, and tamper-resistant storage. It allows platforms to maintain transparency and trust among users.
Decentralized Autonomous Organizations (DAOs): DAOs, or organizations ruled by coded rules, can use IPFS to store their governance data and voting records. It helps ensure the immutability and transparency of the organization's decisions and actions.
Crypto Exchanges: Crypto exchanges can utilize IPFS to store trading data, user transactions, and other critical data in a decentralized way, mitigating single point of failure risks inherent in traditional, centralized storage.
Crypto Wallet Providers: Wallet providers can store wallet metadata, transaction data, or user preferences on IPFS, ensuring data permanence and providing a mechanism for wallet recovery.
Crypto Gaming and Virtual Realities: In the burgeoning field of crypto gaming and VR, IPFS can store game assets, metadata, and player histories. It facilitates improved game performance by decentralizing the load and ensuring asset permanence.
Marketplace for Digital Collectibles (NFTs): Digital collectible platforms, like NFT marketplaces, can use IPFS to store the metadata and ownership records of digital assets. It helps ensure the permanence of digital ownership and the integrity of asset history.
Additional Resources
- IPFS Documentation
- Quicknode Guide: How to integrate IPFS with Ethereum
- Quicknode Guide: How to Create and Deploy an NFT (ERC-721) and host metadata on IPFS
Final Thoughts
Congrats! You now have a fully functioning blog hosted on IPFS. You can continue exploring and expanding your knowledge of IPFS and web3 technologies. Consider exploring additional resources to deepen your understanding and further enhance your blog's features and functionalities. If you encounter any problems or have any questions, we'd love to help you! Find us on Discord or Twitter.
We ❤️ Feedback!
Let us know if you have any feedback or requests for new topics. We'd love to hear from you.