
5 min read
Overview
Quicknode Webhooks is a real-time blockchain event delivery service that sends filtered on-chain data directly to your HTTP endpoints. It makes it easy to get the data you care about like token transfers or contract events, without constantly polling or building complex infrastructure.
This guide walks you through creating and testing your first webhook.
What You Will Do
- Explore the Webhooks UI and its guided wizard
- Create a new webhook from scratch to get notified of new events you want to track
- Test delivery to your own URL and verify the payload
What You Will Need
- Access to your Quicknode account
- Basic understanding of blockchain data (e.g., logs, transactions)
- An HTTP endpoint capable of receiving POST requests (e.g., TypedWebhook, Webhook.site, ngrok, or your own server)
What is Webhooks?
Webhooks is a simple yet powerful product enabling you to receive real-time notifications of onchain events with advanced filtering, compression, and delivery guarantees. It consumes live blockchain data, applies a filter you define in the UI, then POSTs each matching event to the URL you provide.
Built on the same robust infrastructure powering enterprise applications, Webhooks simplifies the experience by exposing only essential configurations, making it perfect for developers who need real-time data without complex infrastructure requirements.
Common Use Cases
Webhooks is ideal for building:
- Trading Bots: Monitor DEX swaps and liquidity changes in real-time
- Analytics Dashboards: Track token movements, whale activity, and protocol metrics
- Notification Systems: Alert users about on-chain activity
- Wallet Tracking: Follow specific wallet activity such as token transfers
- Contract Event Tracking: Monitor specific events emitted by smart contracts, such as new mints, approvals, or function calls
- DeFi Monitoring: Watch lending positions, yield farming rewards, and liquidation events
- NFT Trackers: Follow mints, transfers, and marketplace activity for collections
Key Capabilities
- Real‑time delivery: Receive events just after they land on‑chain
- Guided wizard: Pick a chain, select a no-code template or request a new template based on your use case, set your URL, and that's it
- Templates: One‑click no-code forms support common patterns such as token transfers, contract events, and more
- Dynamic address filtering: Link a Key-Value Store list to your Webhook to track addresses dynamically. Add or remove addresses through the dashboard or REST API, and the Webhook picks up changes immediately with no restarts.
- Retry logic: Automatic retries for non‑200 responses
- Compression: Compress payloads with gzip to reduce payload size
- Reorg handling: Automatically handle blockchain reorganizations to ensure data consistency
- Upgrade to Streams: Do you need historical backfilling, batching, or different destinations? Check out Streams
Getting Started with Quicknode Webhooks
Setting up a webhook is a straightforward process. Here’s how you can get started:
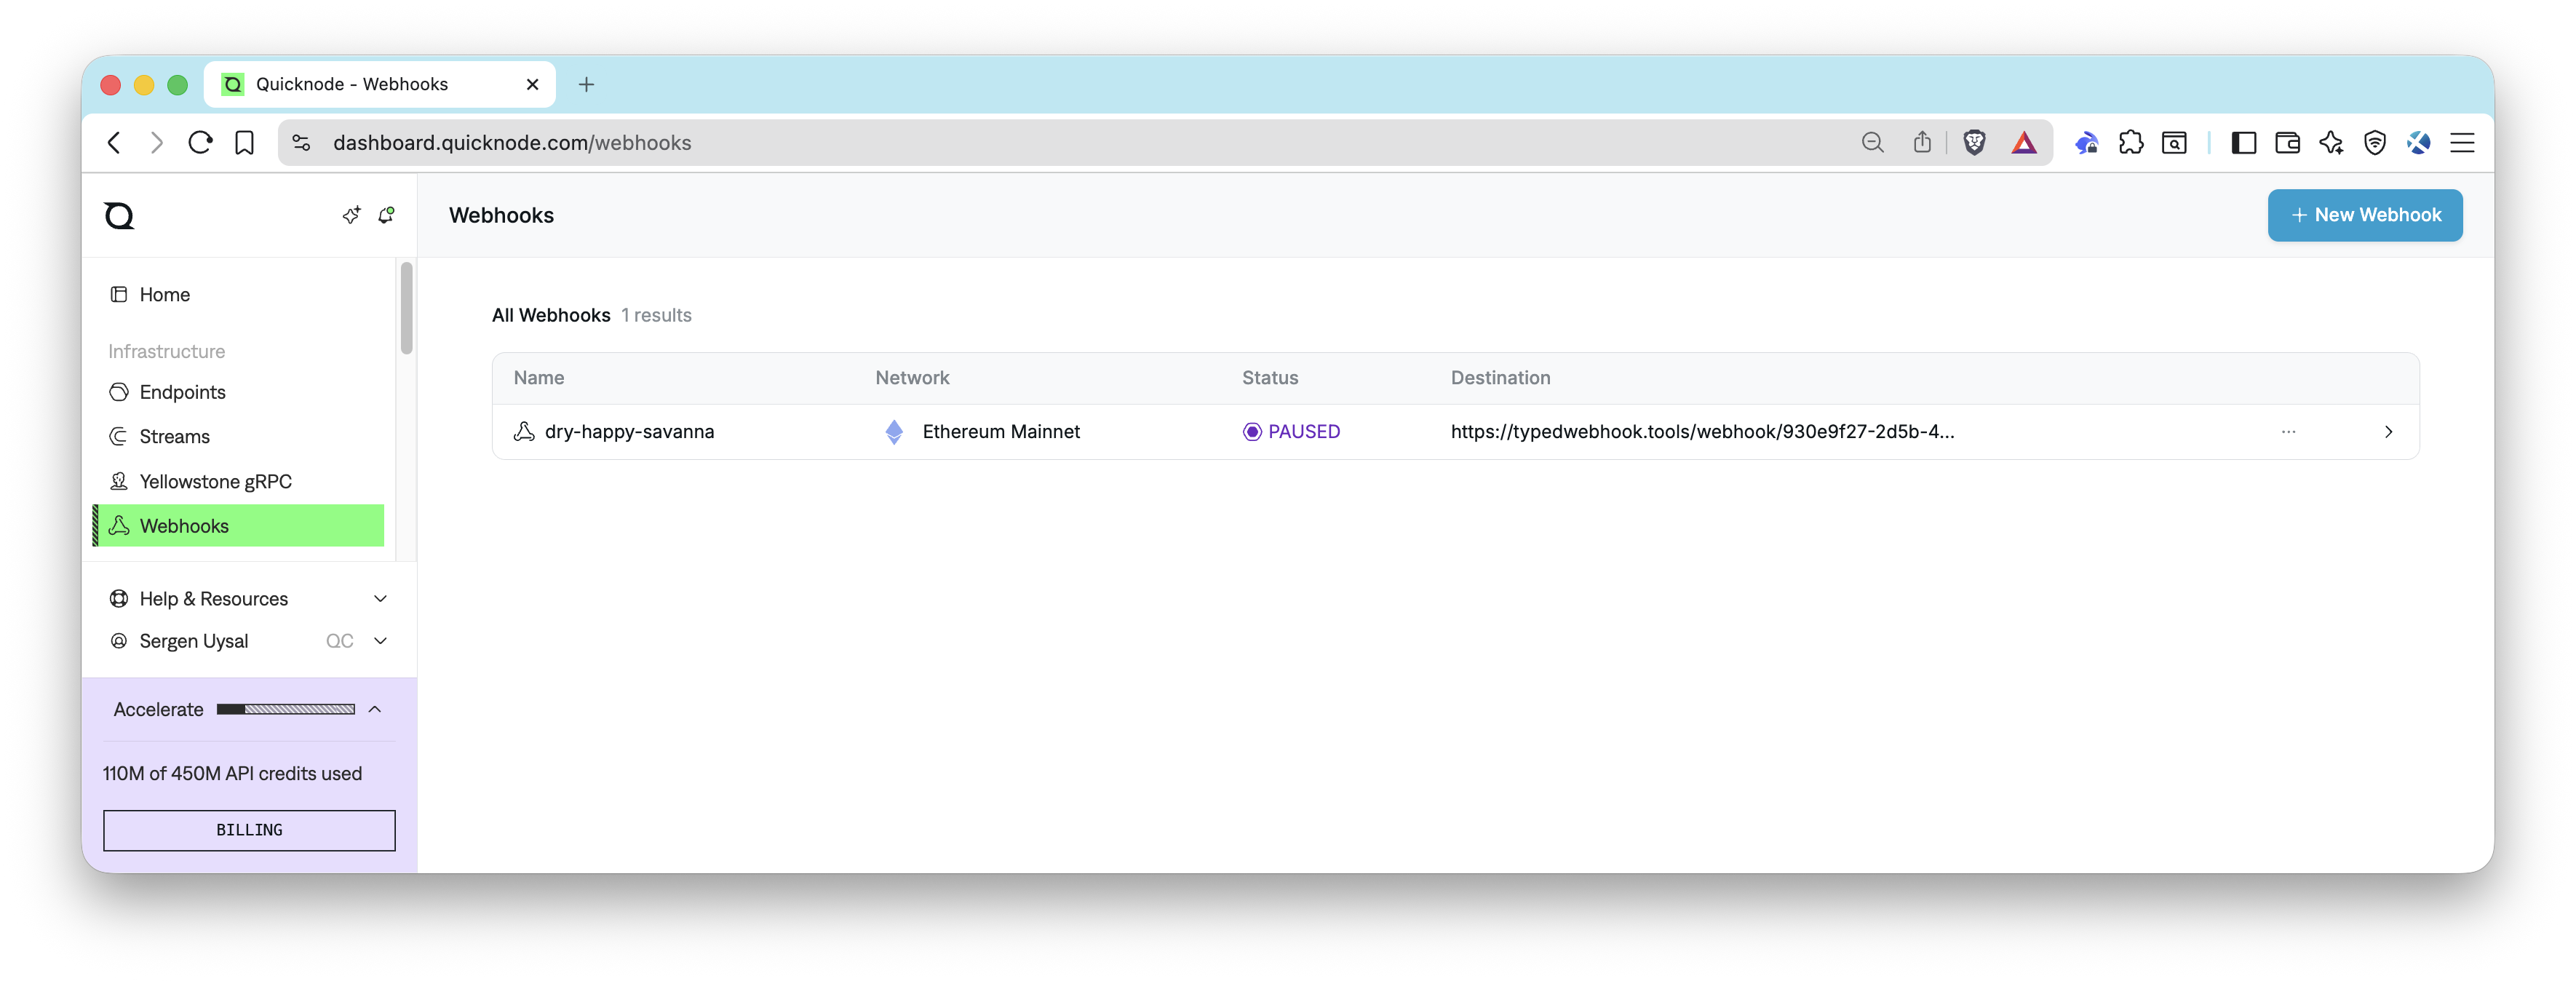
Step 1: Access the Webhooks Dashboard
Log in to your Quicknode account and navigate to the Webhooks section in your dashboard. If you don't have an account yet, you can sign up for one here.
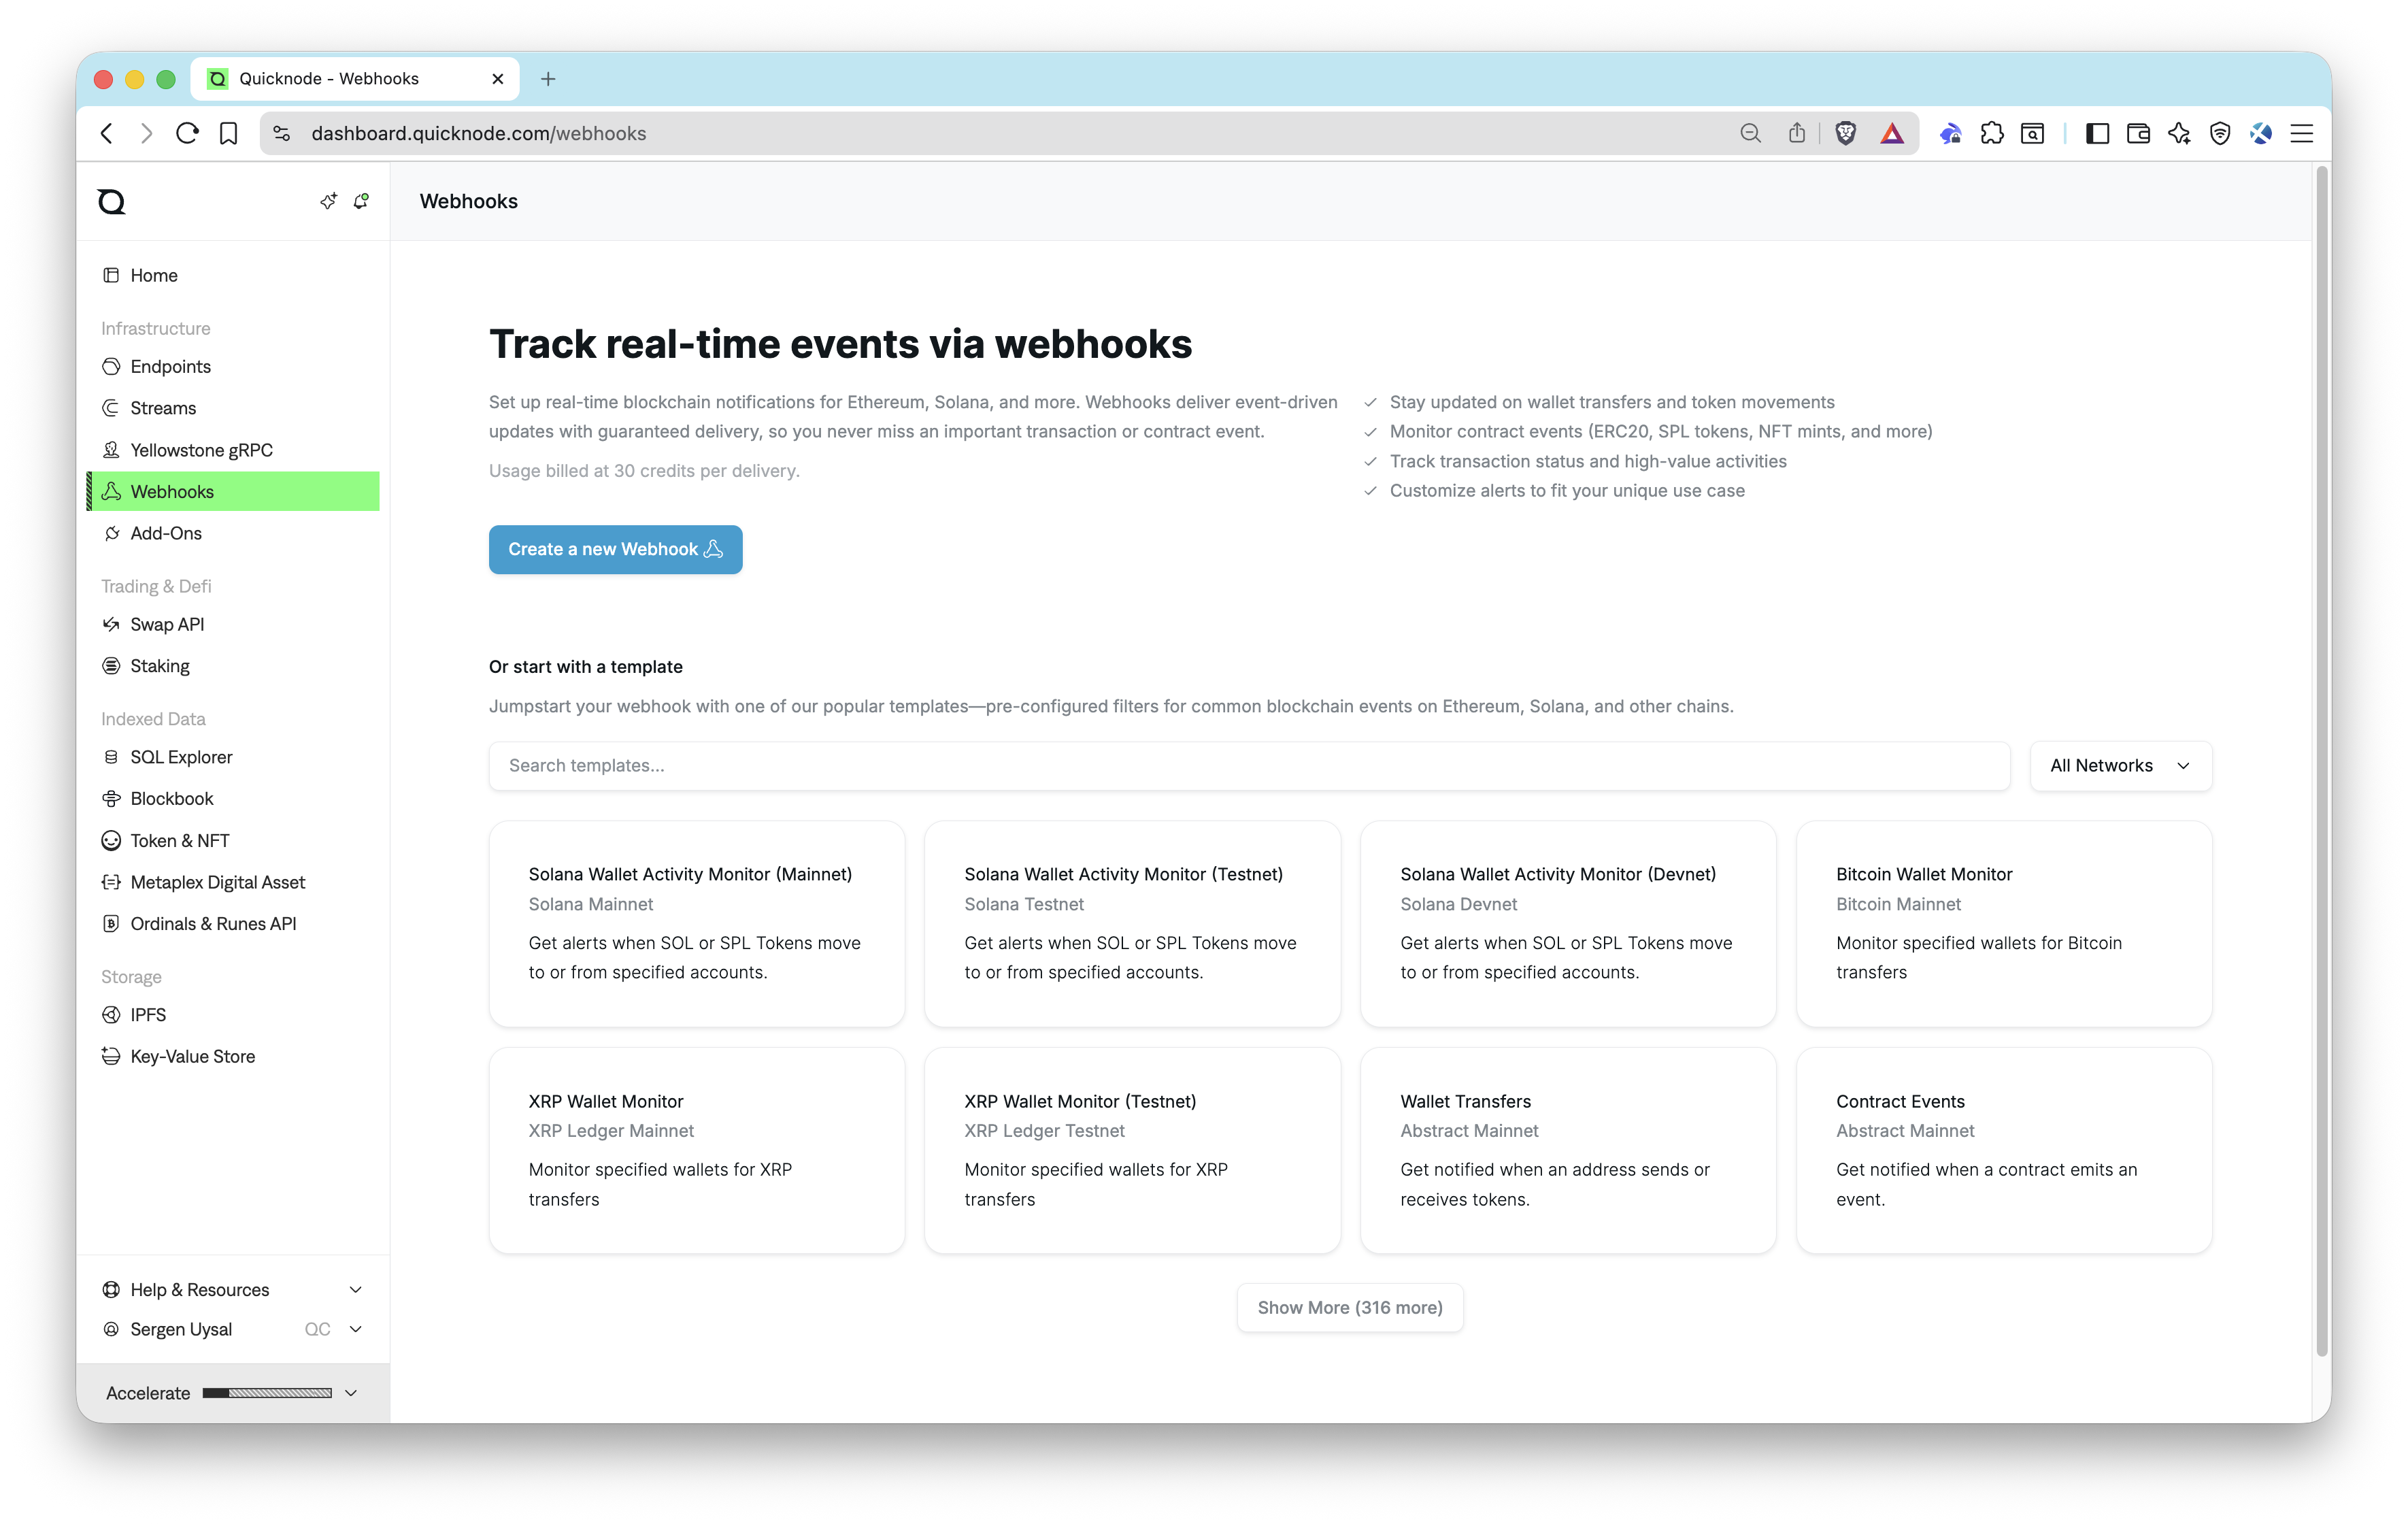
Step 2: Create Your First Webhook
Click Create Webhook to launch the guided wizard to get started right away. This wizard will guide you through the process of setting up your webhook, from selecting your network to defining your filters and target URL.
Step 3: Configure Your Webhook
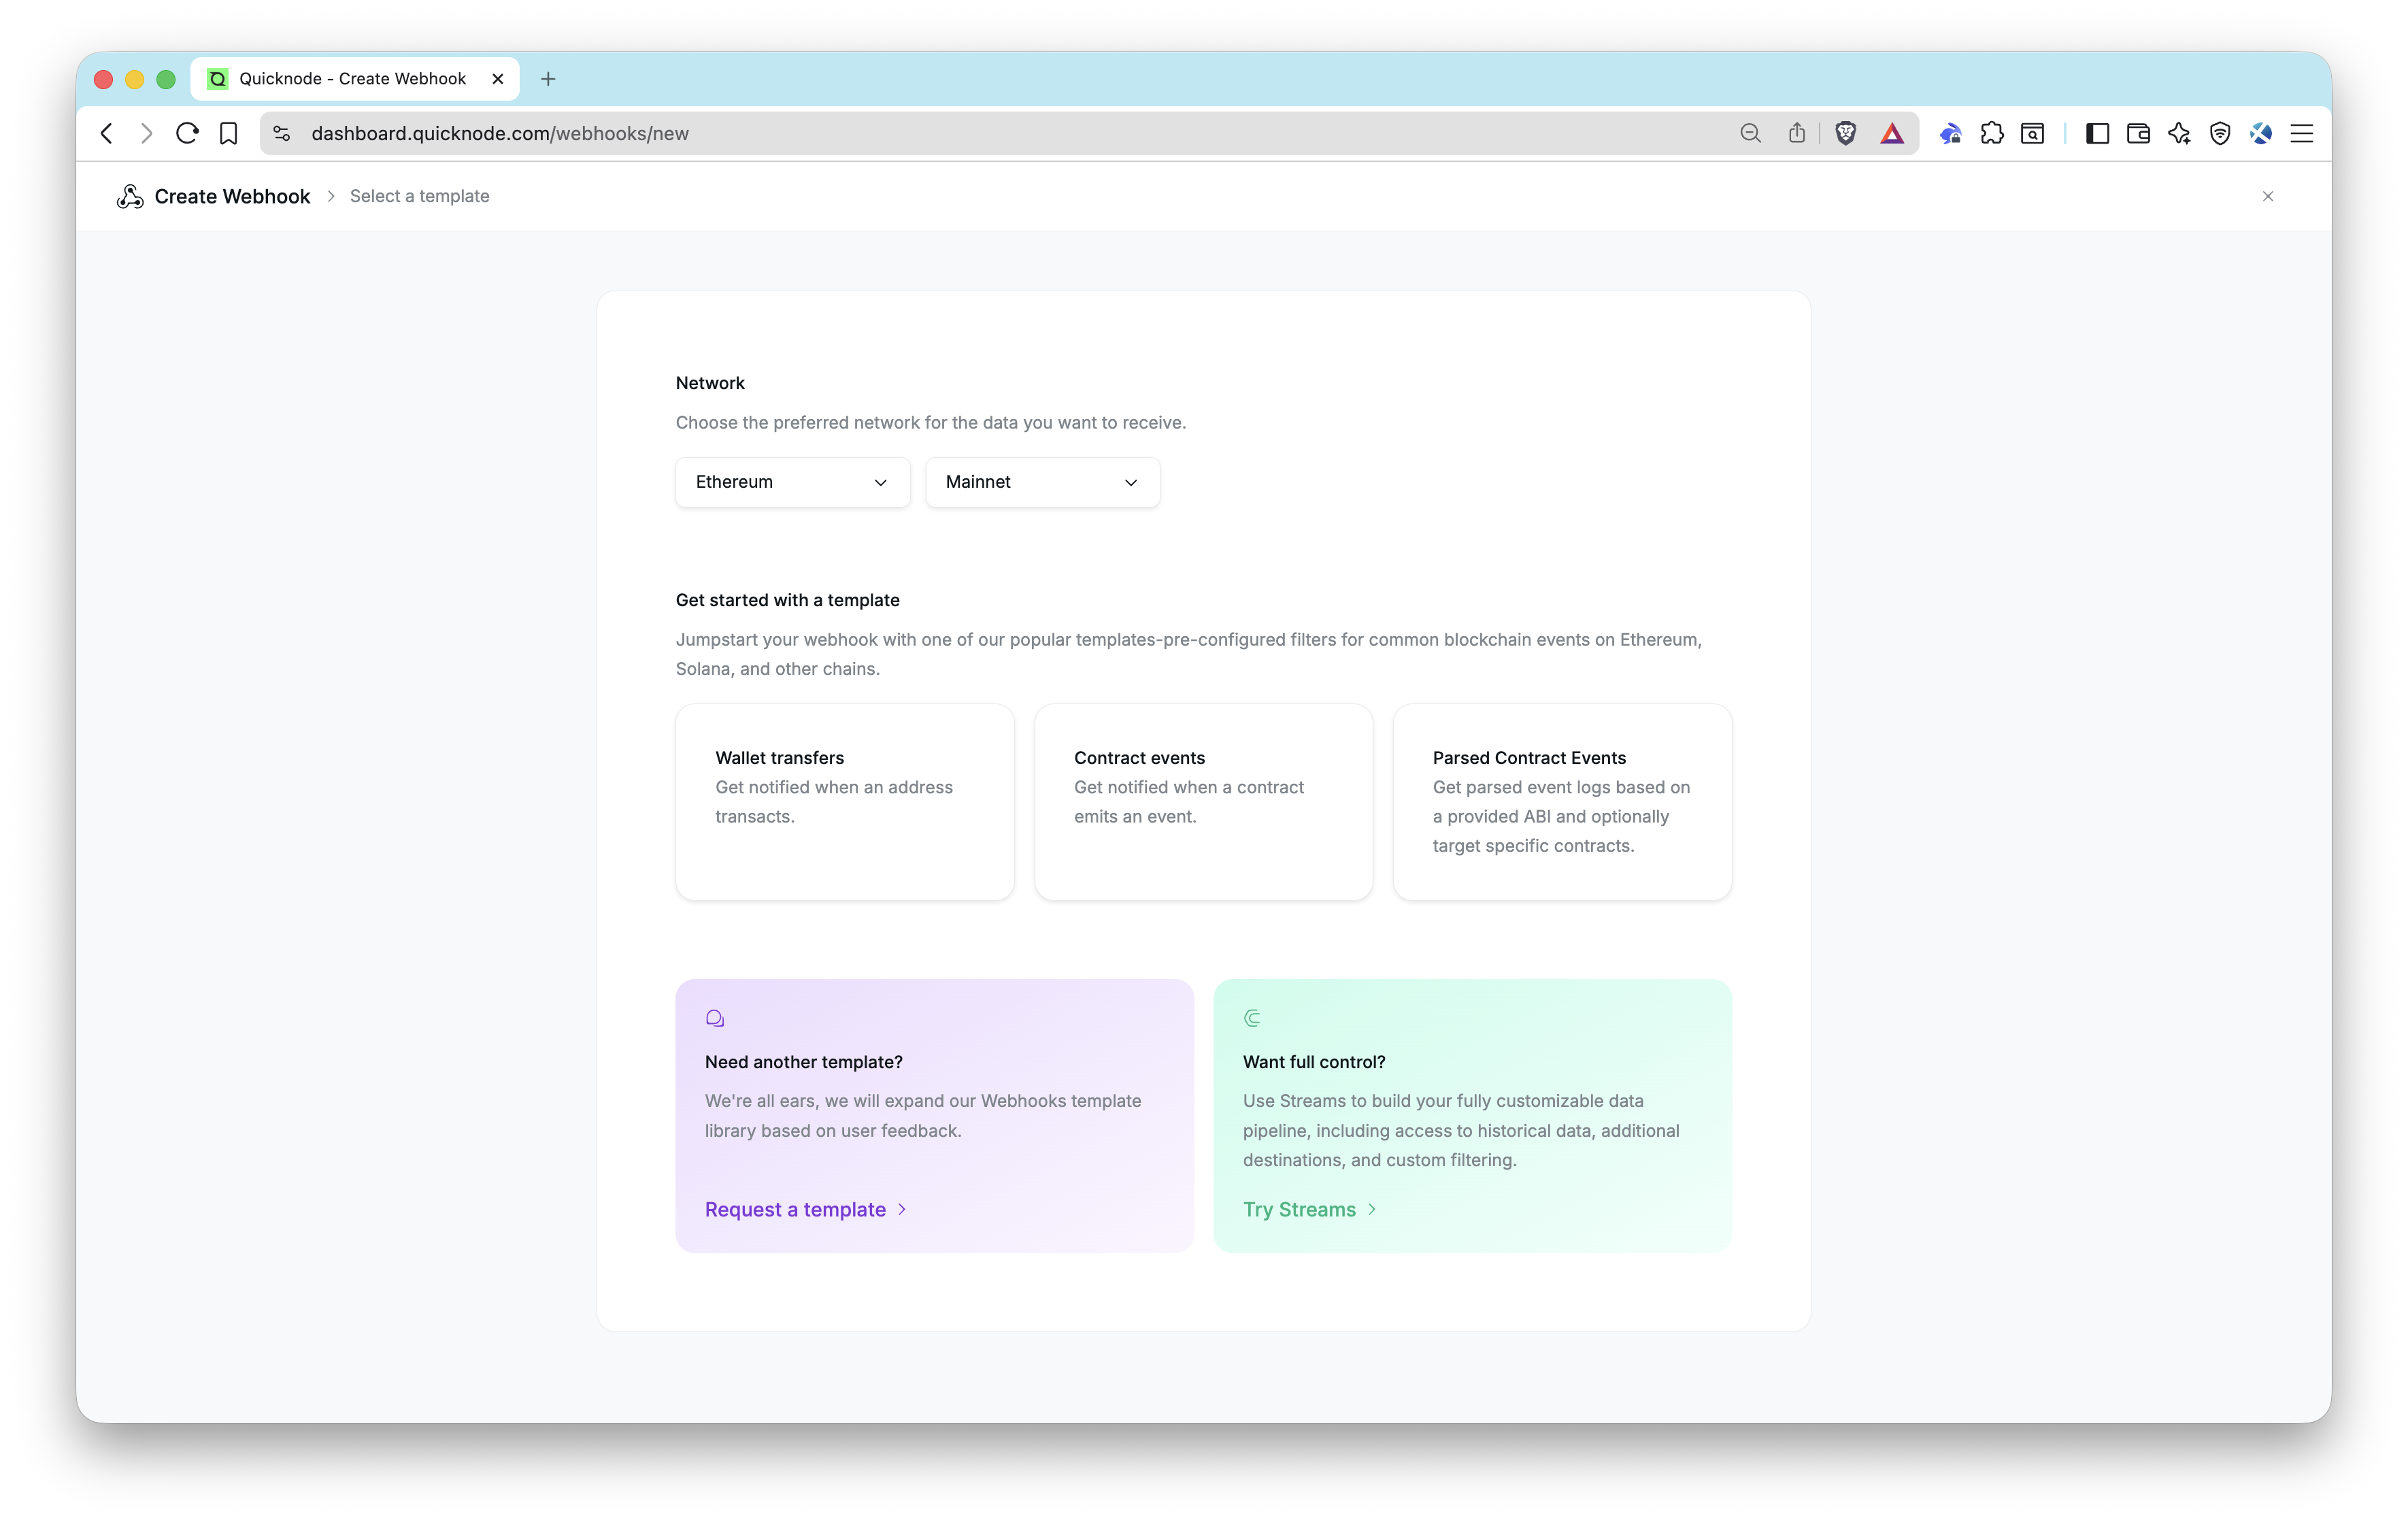
Chain Selection
Select the blockchain network you want to monitor. This is the first step in telling Webhooks where to listen for events.
Filter and List Selection
Next, you'll define what kind of events you want to receive.
Select a template: Webhooks provides one-click starters for common patterns like "Wallet transfers" or "Contract events." These templates pre-configure the necessary filters and just require you to specify the relevant parameters, such as wallet addresses or contract addresses.
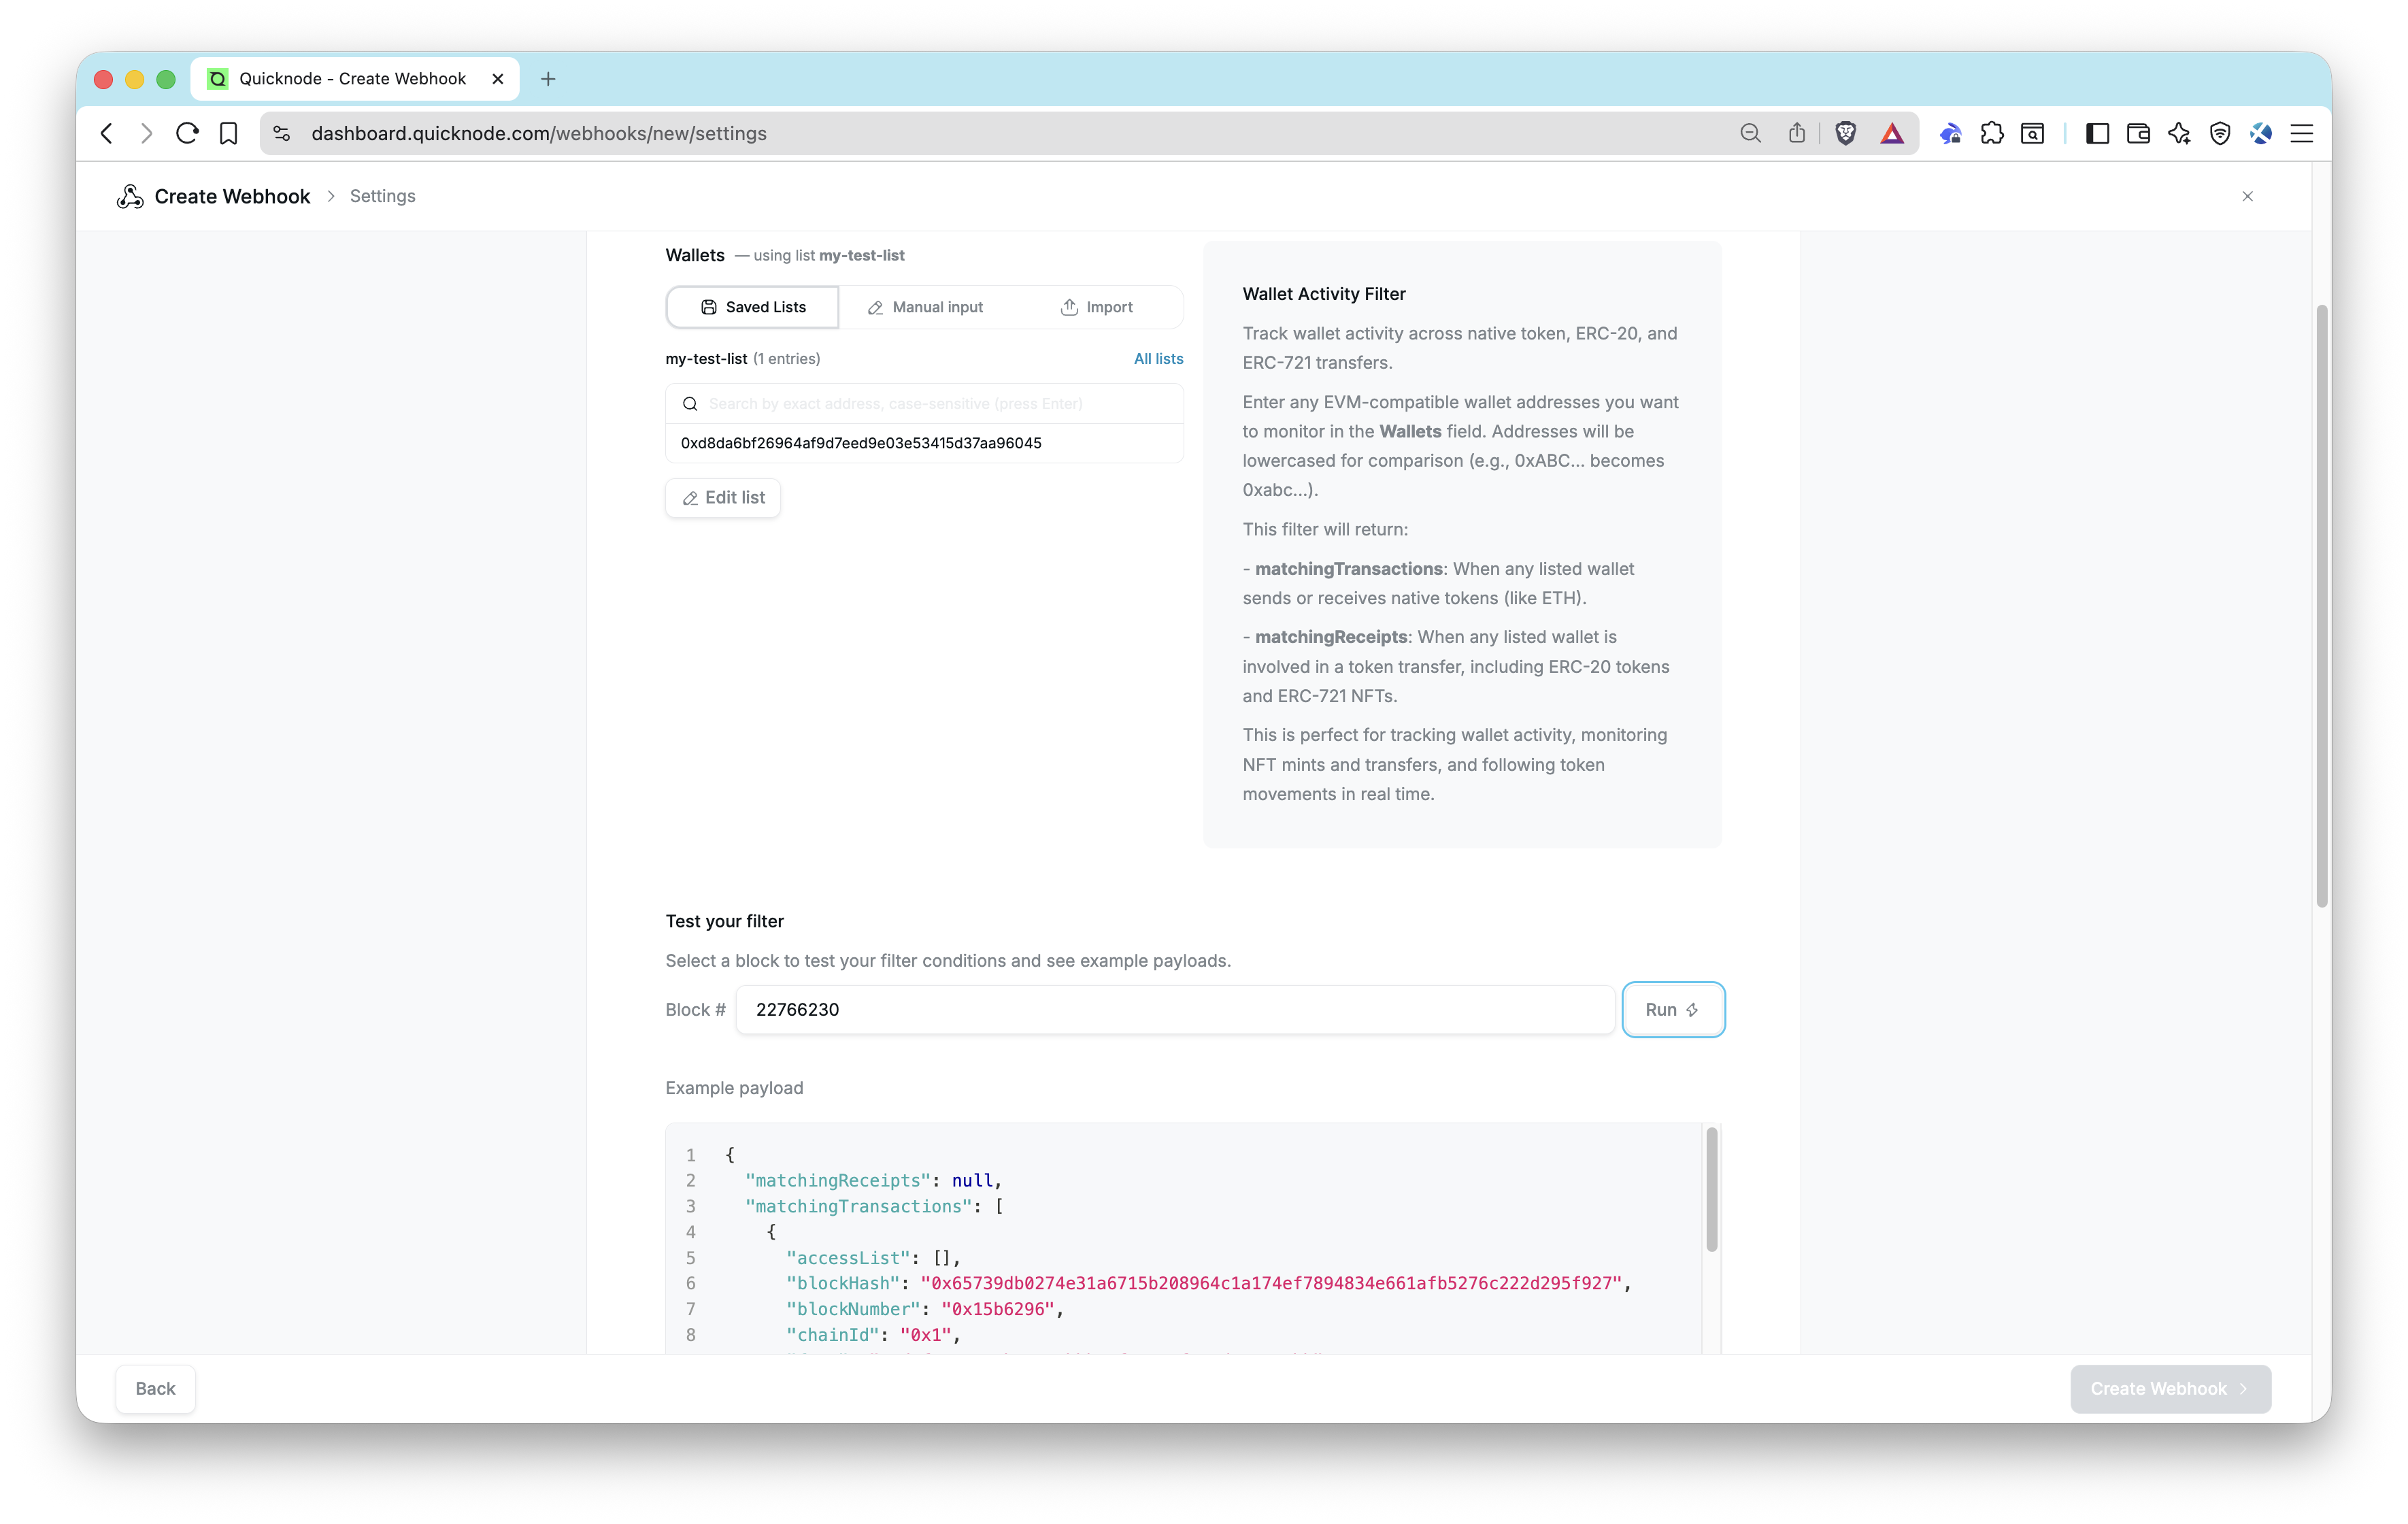
In this guide, we'll use the Wallet transfers template on Ethereum Mainnet as an example to get alerted when a new activity across ETH, ERC-20, and ERC-721 transfers occurs for a specific wallet address (e.g., 0xd8dA6BF26964aF9D7eEd9e03E53415D37aA96045 which is Vitalik Buterin's wallet).
Webhooks templates use Key-Value Store lists. When configuring the template, you can select an existing KV Store list, create a new one by adding addresses one by one, or import from a file. All three options create or reference a KV Store list, so you can add or remove addresses at any time through the dashboard or REST API with no Webhook changes needed. See the Build a Live Wallet Watchlist guide for a step-by-step walkthrough.
You can request a new template for your specific use case. Alternatively, if you need advanced filtering capabilities like custom JavaScript filters, check out Quicknode Streams which offers full flexibility for complex filtering scenarios.
Step 4: Test Your Filter
Before activating your webhook, it's crucial to test your filter to ensure it's working correctly and capturing the events you intend. To test your filter:
- Select a block number for testing
- Click Run next to the test block number input field
- Review example payload to test everything is working as expected
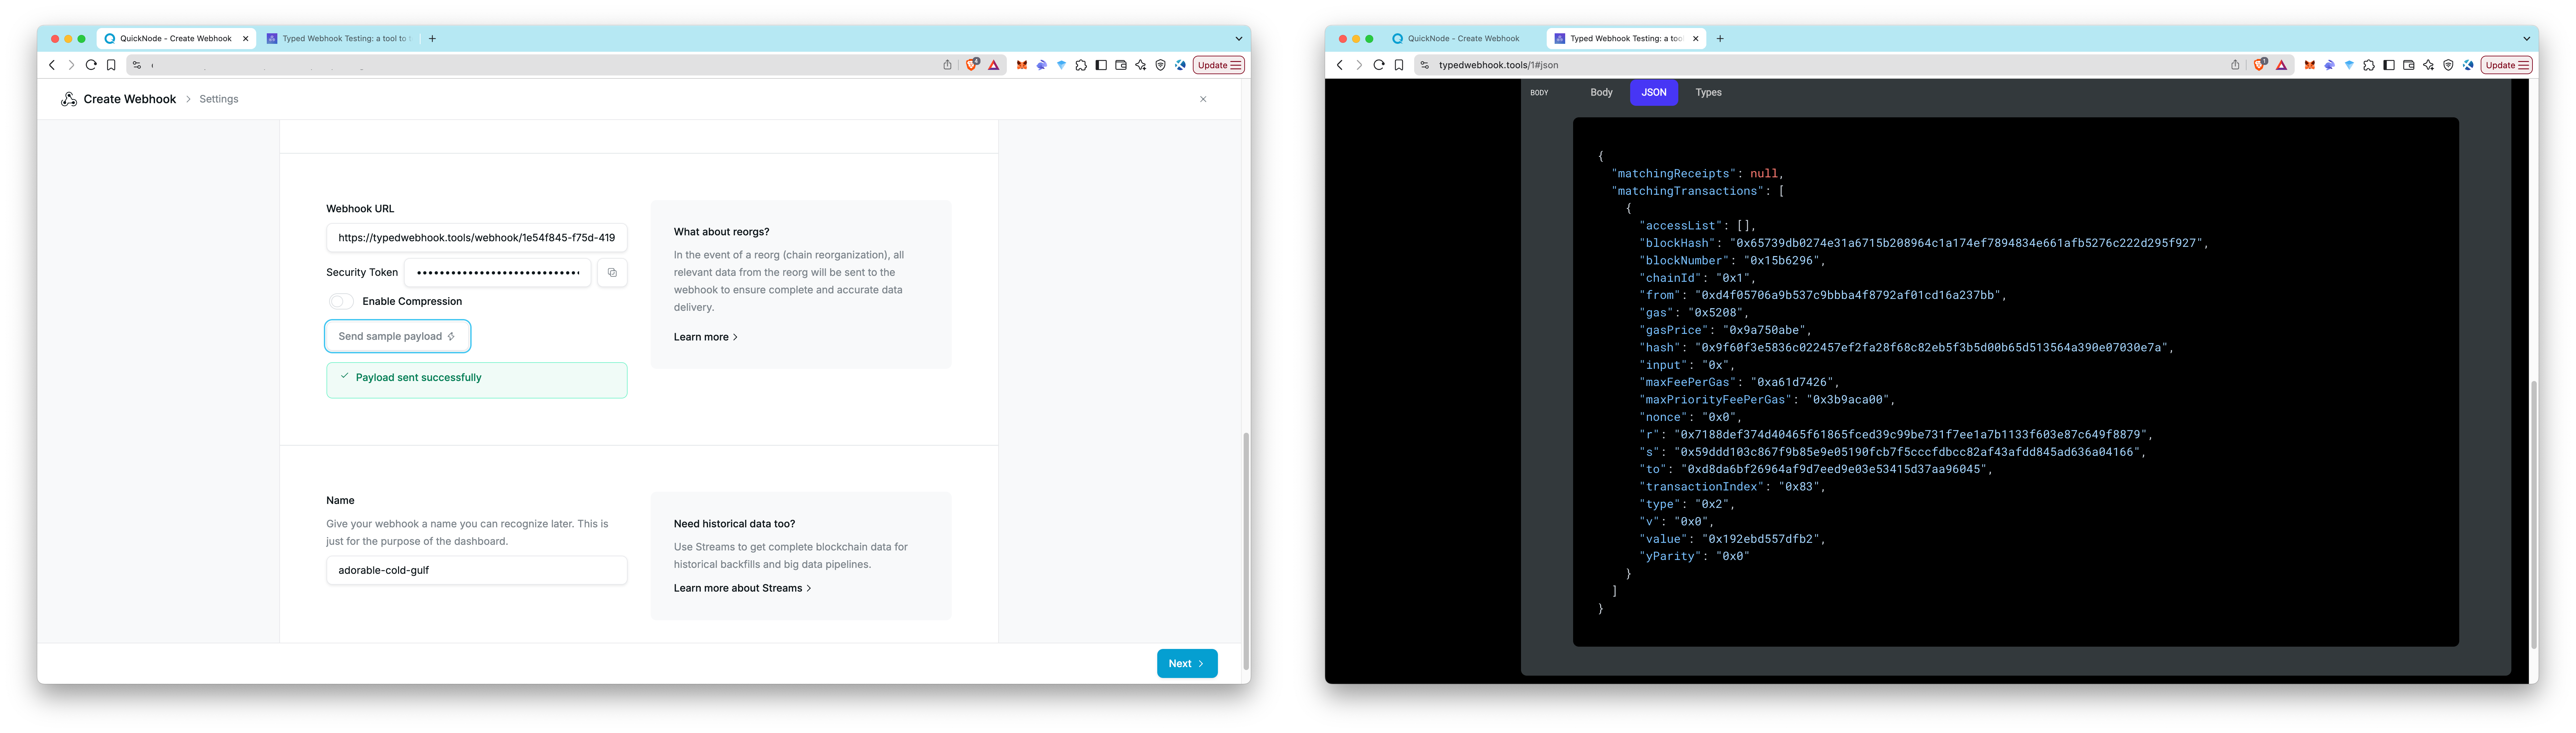
Step 5: Set Up Your Webhook URL
Enter the URL where you want to receive the payloads. Quicknode will send POST requests to this URL. The payload format will be the same as the one you see in the test payload, so you can easily parse it on your server.
In this guide, we'll use TypedWebhook to test our configuration easily. TypedWebhook is a free service that gives you a URL to send test payloads to. Follow these steps to set it up:
- Visit TypedWebhook
- Copy the URL and paste it in the Webhook URL field on the Webhooks dashboard
- Click Send Test Payload to send a test payload to your destination URL
If you need a sample code to build your own server, check out "Set Up A Backend Server with Express.js" section in our Visualizing Real-Time Blockchain Data With Streams and React guide.
After getting a successful response, you can create your webhook. However, before proceeding, let's explore some additional options you can configure.
Validation Token
Each webhook has a validation token that you can use to verify the authenticity of the webhook. This token is generated automatically and can be found in the Webhooks dashboard. By using the validation token, you can validate incoming webhook messages and ensure they originate from your webhook.
Check out How to Validate Incoming Streams Webhook Messages guide for more details.
Compression
Quicknode Webhooks provides a compression option to optimize your data delivery. You can choose to compress payloads with gzip to reduce their size.
While the cost for Webhooks is based on the number of alerts received, using compression can still offer benefits for your infrastructure. Smaller payload sizes lead to:
- Reduced Bandwidth Usage: This can lower your data transfer costs if you're charged based on the amount of data transferred.
- Faster Processing: Smaller payloads transmit quicker and may be processed more efficiently by your receiving server, reducing server load.
Step 6: Create Your Webhook
Finally, give your webhook a descriptive name to recognize it later, and click the button to create your webhook. Your webhook will now be live and streaming real-time data to your specified URL whenever your conditional filter is met.
Conclusion
Congratulations! You've successfully set up your first Quicknode Webhook, enabling you to receive real-time blockchain data with ease. Webhooks provides a powerful, yet simplified, way to integrate on-chain events directly into your applications.
If you have any questions, feel free to use our dedicated channel on Discord or provide feedback using the form below. Stay up to date with the latest by following us on X and our Telegram announcement channel.
Additional Resources
We ❤️ Feedback!
Let us know if you have any feedback or requests for new topics. We'd love to hear from you.