13 min read
Overview
Solana Pay is a fast, easy-to-use, secure payment solution built on the Solana blockchain. In this guide, you'll learn how to use Solana Pay to create a simple payment application, process payments, and verify transactions.
What You Will Do
Create a simple simulation using Solana Pay:
- Simulate a checkout experience and generate a payment URL.
- Process a payment.
- Verify the transaction.
Stay tuned for a bonus section at the end!
What You Will Need
- Nodejs (version 16.15 or higher) installed
- TypeScript experience and ts-node installed
- A Solana Paper wallet (.json) with Devnet SOL (Example script)
What is Solana Pay?
Solana Pay is a powerful and flexible JavaScript library that enables seamless commerce on the Solana blockchain. By utilizing a token transfer URL scheme, Solana Pay ensures interoperability across wallets and services, making it easy for businesses and developers to accept payments in SOL or any SPL token without intermediaries. Because Solana offers near-instant settlements and low transaction fees, Solana Pay is a great tool to reduce friction between buyers and sellers.
How Solana Pay Works
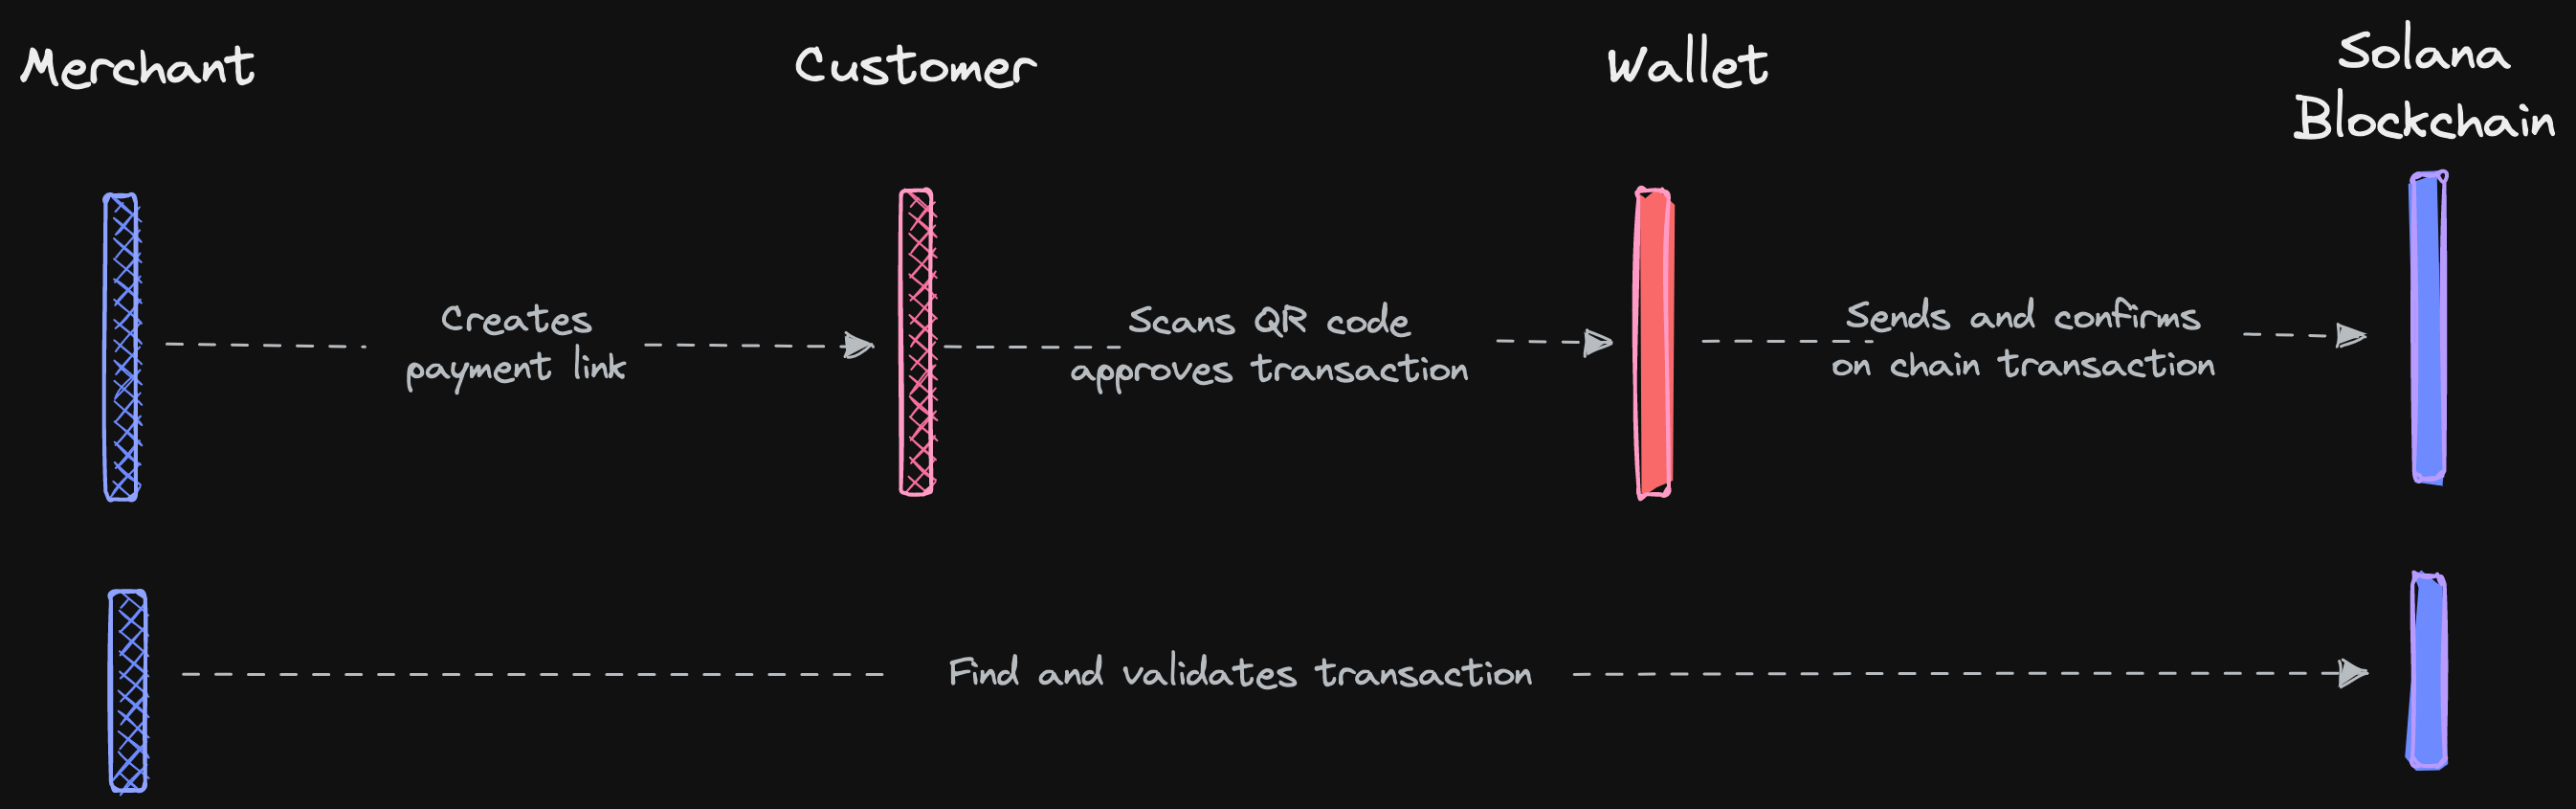 Source: docs.solanapay.com
The diagram above illustrates the process of a Solana Pay transaction between a client (user's wallet) and a server (merchant's website or application).
- User Creates an Order: The user visits the merchant's website or application and selects the product or service they wish to purchase.
- Merchant Creates a Payment Link: The website generates a Solana Pay transaction request URL, which may include payment links, "Pay Now" buttons, or QR codes.
- User Scans and Approves Transaction: The transaction request URL is parsed by the user's wallet using the Solana Pay JavaScript library, which extracts the necessary parameters from the URL. The wallet send's the Solana transaction to the cluster for processing.
- Server Finds and Validates the Transaction: The merchant's server verifies that the on-chain transaction details (such as amount, token, and recipient address) match the specified request. This process ensures that the payment is processed quickly, the transaction is secured by the Solana blockchain, and the merchant receives the correct payment amount.
Let's try it out!
Build a Solana Pay App
Set up Environment
Before you can start building your Solana Pay application, you need to set up your environment and install the required dependencies. Open your terminal and run the following commands:
# Create a new directory for your project
mkdir solana-pay-demo
cd solana-pay-demo

# Create a **tsconfig.json** with .json importing enabled:
tsc -init --resolveJsonModule true

# Initiate a new Node.js project and install the dependencies
npm init -y
npm install --save @solana/web3.js@1 @solana/pay bignumber.js
## or if you prefer yarn
yarn init -y
yarn add @solana/web3.js@1 @solana/pay bignumber.js
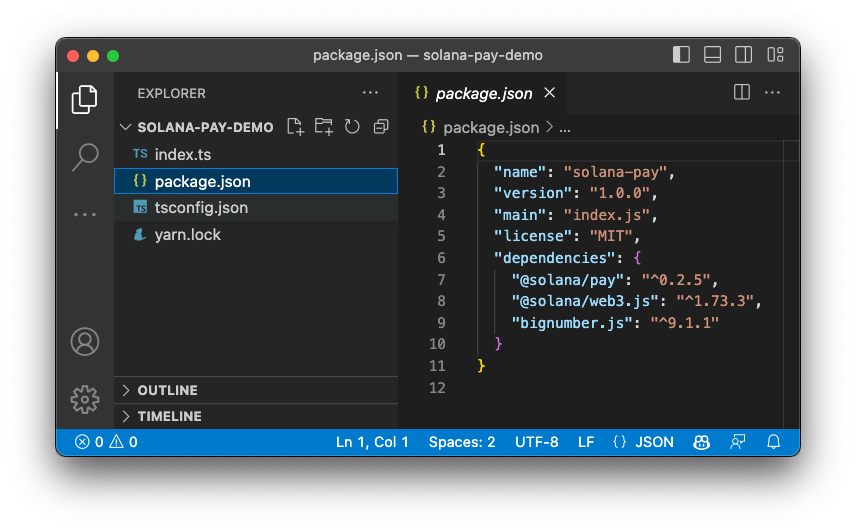
This will create a new directory for your project, initialize it with a package.json and tsconfig, and install the necessary dependencies.
Create a new file named index.ts in your project directory. In your terminal, enter:
echo > index.ts
When you are ready, your environment should look something like this:
Get a QuickNode Endpoint
Connect to a Solana Cluster with Your QuickNode Endpoint
To build on Solana, you'll need an API endpoint to connect with the network. You're welcome to use public nodes or deploy and manage your own infrastructure; however, if you'd like 8x faster response times, you can leave the heavy lifting to us.
See why over 50% of projects on Solana choose QuickNode and sign up for a free account here. We're going to use a Solana Devnet endpoint.
Copy the HTTP Provider link: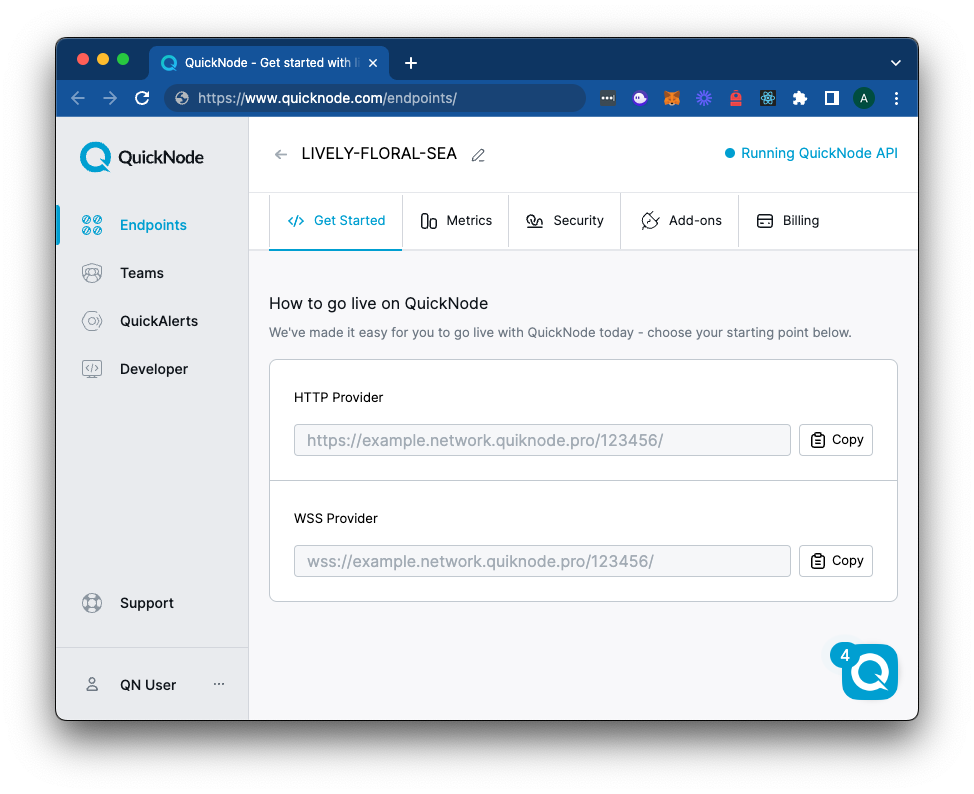
Install Dependencies
At the top of your index.ts file, import the required dependencies:
import { Connection, Keypair, LAMPORTS_PER_SOL, PublicKey, sendAndConfirmTransaction, SystemProgram, Transaction, TransactionInstruction } from '@solana/web3.js';
import { encodeURL, validateTransfer, parseURL, TransferRequestURL, findReference } from '@solana/pay';
import BigNumber from 'bignumber.js';
You can now access Logs for your RPC endpoints, helping you troubleshoot issues more effectively. If you encounter an issue with your RPC calls, simply check the logs in your QuickNode dashboard to identify and resolve problems quickly. Learn more about log history limits on our pricing page.
Define Key Constants
The first task we'll need to accomplish is creating an account with a wallet and funding it. We'll be using the handy tool below to automatically generate a new wallet and airdrop 1 SOL to it. (You can also achieve this with the Keypair.generate() and requestAirdrop() functions if you prefer a more manual approach).
Once you've successfully generated your keypair, you'll notice two new constants: secret and payer, a Keypair. The secret is a 32-byte array that is used to generate the public and private keys. The payer is a Keypair instance that is used to sign transactions (we've airdropped some devnet SOL to cover the gas fees). Make sure to add it to your code below your imports if you haven't yet:
const secret = [0,...,0]; // Replace with your secret key
const payer = Keypair.fromSecretKey(new Uint8Array(secret));
You'll also need to define some constants that we will use in the application. Add the following code below your payer constant:
// CONSTANTS
const myWallet = 'DemoKMZWkk483hX4mUrcJoo3zVvsKhm8XXs28TuwZw9H'; // Replace with your wallet address (this is the destination where the payment will be sent)
const recipient = new PublicKey(myWallet);
const quickNodeEndpoint = 'https://example.solana-devnet.quiknode.pro/123456/'; // Replace with your QuickNode endpoint
const connection = new Connection(quickNodeEndpoint, 'confirmed');
const amount = new BigNumber(0.1); // 0.1 SOL
const reference = new Keypair().publicKey;
const label = 'QuickNode Guide Store';
const message = `QuickNode Demo - Order ID #0${Math.floor(Math.random() * 999999) + 1}`;
const memo = 'QN Solana Pay Demo Public Memo';
Replace myWallet and quickNodeEndpoint with your wallet address and QuickNode endpoint from the previous step.
Here's a summary of what each constant does:
myWalletis the destination address for the payment.recipientis the destination public key where the payment will be sent.quickNodeEndpointis the QuickNode endpoint you created in the previous step.connectionis the connection to the Solana network.amountis the amount of SOL that will be sent (in SOL, not lamports).reference(optional) is a random key that will be used to verify the transaction on-chain (can be used as client IDs) - additional information about reference keys is available here.label(optional) describes the source of the transfer request (e.g., the store's name, brand, application) - this may be used by the wallet to display information to the buyer before approving the transaction.message(optional) is a message that describes the nature of the transfer request (e.g., name of an item, order ID, or a thank you note) - this may be used by the wallet to display information to the buyer before approving the transaction.memo(optional) is a public memo that will be included in the on-chain transaction.
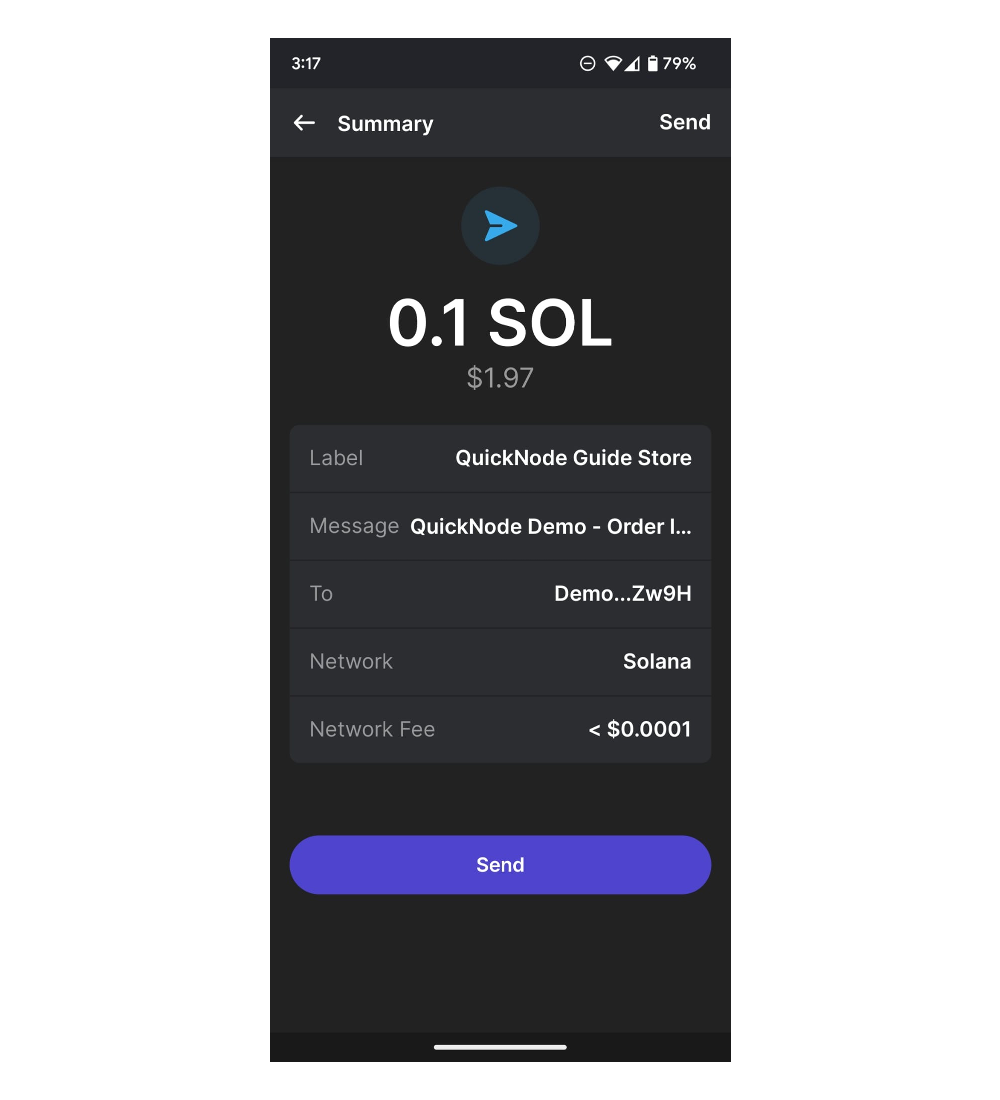
Here's an example of the message and label being displayed in a buyer's approval flow in their Phantom Wallet:
Now that you have set up your environment, you can build your application.
Simulate a Checkout Experience
In this step, you'll create a function, generateUrl that simulates a checkout experience by generating a payment request URL:
async function generateUrl(
    recipient: PublicKey,
    amount: BigNumber,
    reference: PublicKey,
    label: string,
    message: string,
    memo: string
) {
    console.log('1. Create a payment request link');
    const url: URL = encodeURL({ recipient, amount, reference, label, message, memo });
    console.log('Payment request link:', url);
    return url;
}
Typically you should generate the payment request URL on your backend server to ensure the security and integrity of the data. By handling sensitive data and transaction details on the server side, you can reduce the risk of exposing critical information to malicious users or third parties. This approach also allows you to better control and manage transaction data, making it easier to implement additional security measures, such as validating transactions or monitoring for fraudulent activities.
For the purposes of this guide, however, we will simplify this process by running the function on the client side.
At this stage, you should be able to generate a payment request URL. To test this, call your function:
(async () => {
    try {
        const url = await generateUrl(recipient, amount, reference, label, message, memo);
        console.log('Success');
    } catch (err) {
        console.error(err);
    }
})();
And in your terminal, enter:
ts-node index.ts
You should see a URL object in your terminal. Pay attention to the href property, which is the actual URL that you will use to send the payment. It should look something like this solana:DemoKMZWkk483hX4mUrcJoo3zVvsKhm8XXs28TuwZw9H?amount=0.1&reference=BurHXKwdNbcnShxWXL1khovANkYY6FWS4yTdN6FWCDsX&label=QuickNode+Guide+Store&message=QuickNode+Demo+-+Order+ID+%230405909&memo=QN+Solana+Pay+Demo+Public+Memo8.
You can remove or comment out your console.log('Payment request link:', url); line if you would like to clean up your terminal output.
Nice work. You have successfully generated a payment request URL. If you were building an actual application, you would likely now send this URL to the buyer (typically through a QR code), who would then use it to send the payment. We will cover building a front end and QR code in a future guide, but you can pass your URL's href into a QR code generator (e.g., qr-code-generator.com) to test it out.
Let's continue with processing the payment request URL.
Process Payment
Next, you'll create the processPayment function, which parses the payment request link to extract the payment details, creates a new Solana transaction, and sends it to the Solana blockchain. Typically this will be handled by a user's wallet app or a decentralized application (dApp) using a wallet adapter. The front-end component would parse the payment request link and initiate the transfer of funds through the user's wallet. Let's see how to do that.
In your index.ts file, add the following code:
async function processPayment(url: URL, payer: Keypair) {
    // Parse the payment request link
    console.log('2. Parse the payment request link');
    const { recipient, amount, reference, label, message, memo } = parseURL(url) as TransferRequestURL;
    if (!recipient || !amount || !reference) throw new Error('Invalid payment request link');

    console.log('3. Assemble the transaction');
    const tx = new Transaction();

    // Append the memo instruction if a memo is provided
    if (memo != null) {
        tx.add(
            new TransactionInstruction({
                programId: new PublicKey('MemoSq4gqABAXKb96qnH8TysNcWxMyWCqXgDLGmfcHr'),
                keys: [],
                data: Buffer.from(memo, 'utf8'),
            })
        );
    }
    // Create a transfer instruction
    const ix = SystemProgram.transfer({
        fromPubkey: payer.publicKey,
        toPubkey: recipient,
        lamports: amount.multipliedBy(LAMPORTS_PER_SOL).integerValue(BigNumber.ROUND_FLOOR).toNumber()
    });
    // Add the reference key to the instruction, if provided
    if (reference) {
        const ref = Array.isArray(reference) ? reference : [reference];
        for (const pubkey of ref) {
            ix.keys.push({ pubkey, isWritable: false, isSigner: false });
        }
    }
    // Add the transfer instruction to the transaction
    tx.add(ix);

    // Send the transaction to the Solana network and confirm it has been processed
    console.log('4. 🚀 Send and Confirm Transaction');
    const txId = await sendAndConfirmTransaction(connection, tx, [payer]);
    console.log(`      Tx: https://explorer.solana.com/tx/${txId}?cluster=devnet`);
}
Let's break down what's happening here:
- First, we parse the payment request link using the
parseURLfunction from the@solana/paylibrary. This function returns an object with the payment details, including the recipient, amount, reference, label, message, and memo, which we destructure for easy access. - Next, we create a new, empty Solana Transaction.
- If a memo is provided, we add a memo instruction to the transaction using the Solana Memo Program. If you are unfamiliar with the Solana Memo Program, you can read more about it in our Guide: here. In short, it will encode and store our
memoin the on-chain transaction data. - Next, we create and add a transfer instruction using the
SystemProgram.transferfunction. We also add the reference key to the instruction, if provided. - Note: As demonstrated here, the transfer instruction must come after the memo instruction. Solana Pay's validation function expects the transfer to be in the last position (see Solana Pay Specification).
So far, we have created a simulated environment where a seller can generate a payment request link, and a buyer can respond to that request and pay the vendor. Finally, we need a way to verify that the vendor has received the payment and that the payment details are correct.
Verify Payment
To verify that the payment has been received, you'll create the verifyPayment function, which will query the Solana blockchain to check that the payment has been received and that the payment details match the original request. In a typical environment, this type of function would be called by the seller's backend. For this simplified example, we will also process it from our client. In your index.ts file, add the following code:
async function verifyTx(
    recipient: PublicKey,
    amount: BigNumber,
    reference: PublicKey,
    memo: string
) {
    console.log(`5. Verifying the payment`);
    // Merchant app locates the transaction signature from the unique reference address it provided in the transfer link
    const found = await findReference(connection, reference);

    // Merchant app should always validate that the transaction transferred the expected amount to the recipient
    const response = await validateTransfer(
        connection,
        found.signature,
        {
            recipient,
            amount,
            splToken: undefined,
            reference,
            memo
        },
        { commitment: 'confirmed' }
    );
    return response;
}
Let's break down what's happening here:
- First, we use the
findReferencefunction from the@solana/paylibrary to locate the transaction signature from the cluster. The method runs agetSignaturesForAddressRPC call for the provided reference address. - Next, we use the
validateTransferfunction from the@solana/paylibrary to validate that the transaction transferred the expected amount to the recipient. The method runs agetTransactionRPC call for the provided transaction signature. It then checks that therecipientreceived the correctamountand that thememomatch the expected values.
Pay Day!
Finally, let's run the app. In your index.ts file, replace your async block from earlier with the following:
(async () => {
    try {
        console.log(`⚡️ Solana Pay Demo ⚡️`);
        console.log(`  Processing payment:`);
        console.log(`   - of ${amount} SOL`);
        console.log(`   - from ${payer.publicKey.toBase58()}`);
        console.log(`   - to ${recipient.toBase58()}`);
        const url = await generateUrl(recipient, amount, reference, label, message, memo);
        await processPayment(url, payer);
        const response = await verifyTx(recipient, amount, reference, memo);
        if (!response || response.meta?.err) throw new Error('Not verified');
        console.log('🎉 Payment Confirmed!');
    } catch (err) {
        console.error(err);
    }
})();
Now, run the app. In your terminal, enter:
ts-node index
You should see the following output in your terminal:
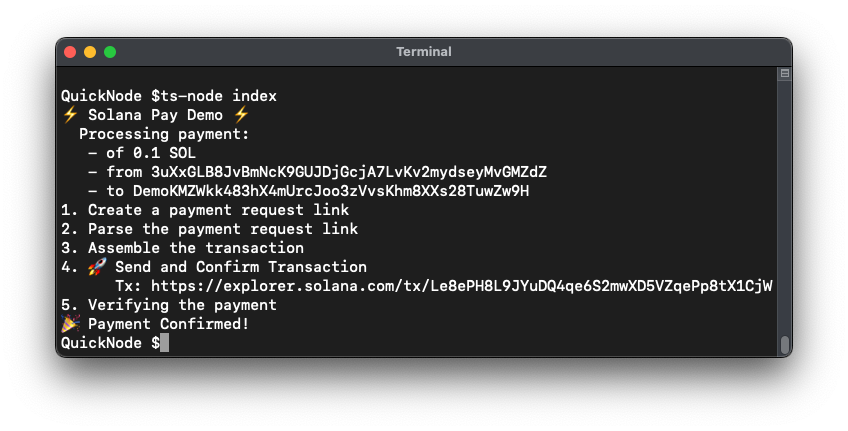
You should be able to follow the Explorer URL from your terminal to see the transaction on the Solana blockchain (and see both the memo and transfer instructions):

Great work!
This exercise has been helpful for creating and sending SOL payments, but what if you want to send SPL tokens (e.g., USDC)? Solana Pay makes it easy to send SPL tokens as well. For a bonus assignment, try to modify the generateUrl, processPayment, and verifyTx functions to send SPL tokens instead of SOL.
Hints:
- Add an
splTokenparameter to thegenerateUrlfunction. - Replace the
SystemProgram.transferinstruction with acreateTransferCheckedInstructioninstruction (you'll need togetOrCreateAssociatedTokenAccountfor both thepayerandrecipient). - You will need to add a
splTokenparameter to thevalidateTransferfunction.
Putting It All Together
In this guide, you learned the fundamentals of how to use Solana Pay to create a simple payment application, process payments, and verify transactions. By leveraging Solana Pay, you can easily build fast, secure, and user-friendly payment solutions on the Solana blockchain.
Keep in mind that this guide provided a simplified example, and in a real-world application, you would need to consider additional security measures, user experience, and error handling. It is crucial to separate sensitive data and transaction handling between the client and server sides to minimize the risk of exposing critical information.
If you need help or want to share what you are building with Solana Pay, let us know on Discord or Twitter.
We ❤️ Feedback!
If you have any feedback or questions on this guide, let us know. We'd love to hear from you!