EVM トークンファクトリー
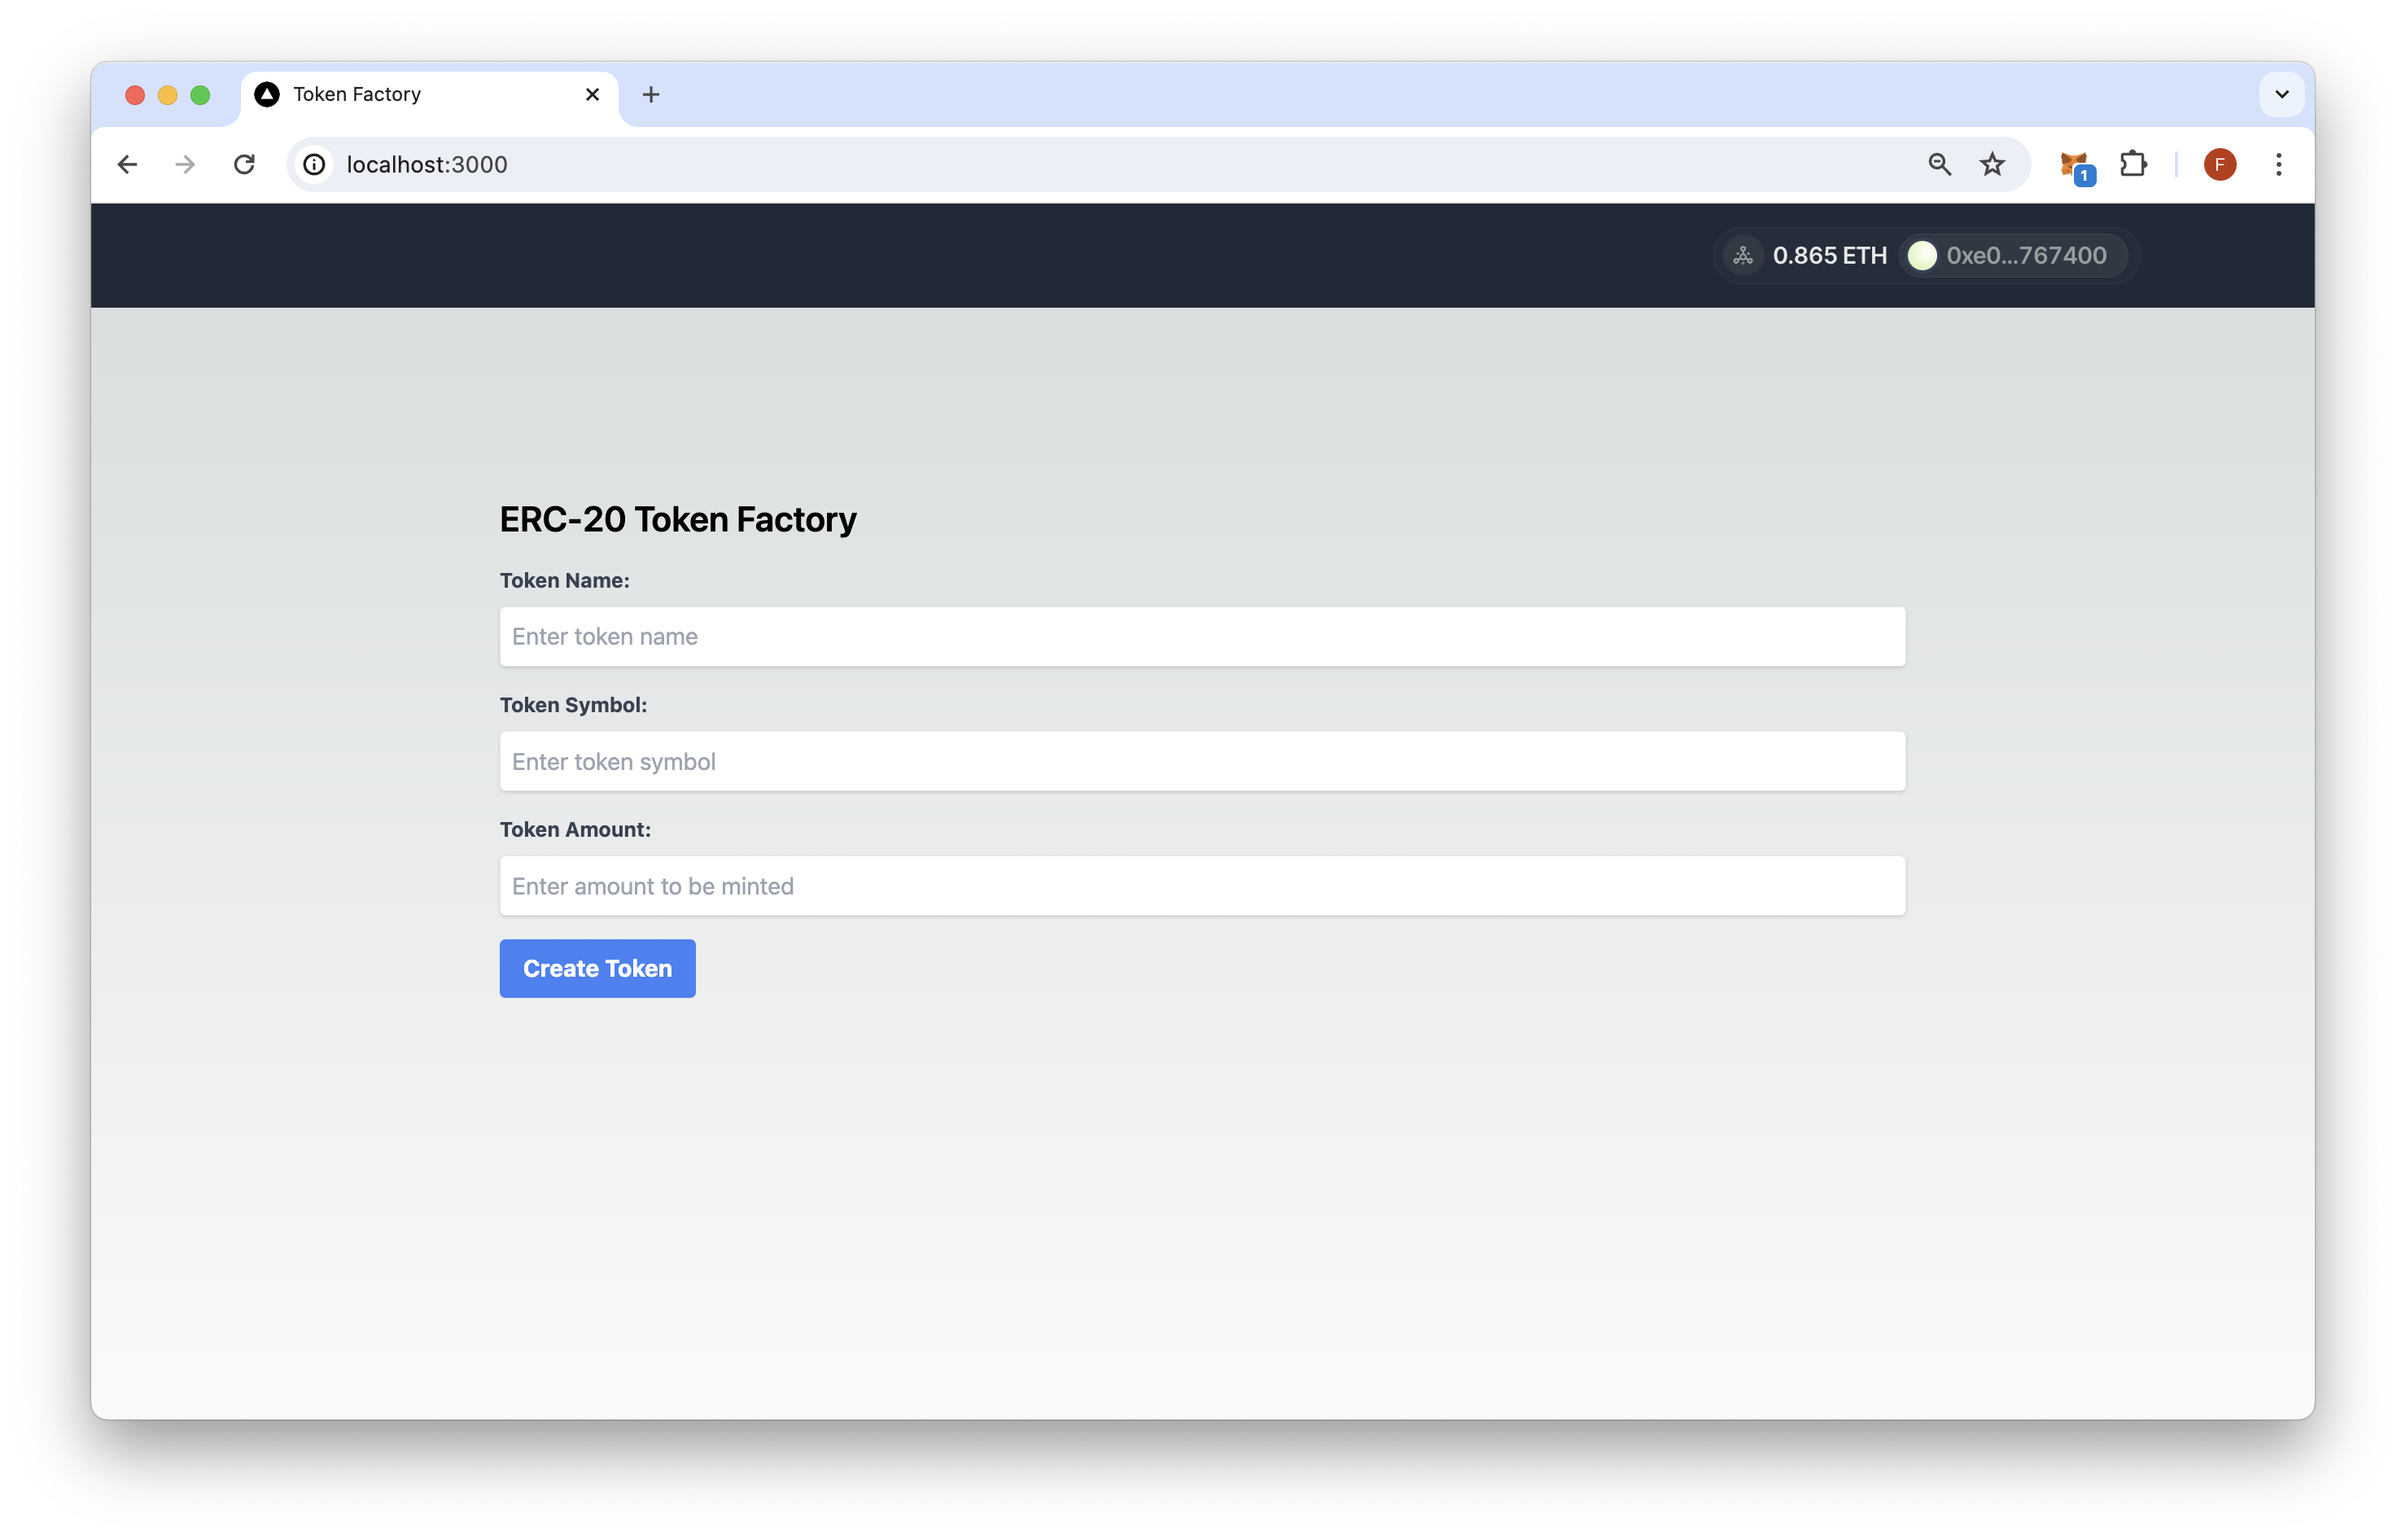
「EVM Token Factory」アプリを使えば、EVM互換のブロックチェーン上でERC-20トークンを作成できます。トークンの名称、シンボル、初期供給量を簡単にカスタマイズできます。



概要
「EVM Token Factory」アプリを使えば、EVM互換のブロックチェーン上でERC-20トークンを作成できます。トークンの名称、シンボル、初期供給量を簡単にカスタマイズできます。現在、この アプリはSepoliaとHoleskyに対応 していますが、必要に応じて他のネットワークを追加することも可能です。
Holeskytestnet は、現在アクティブなメンテナンスが行われていません。全体的な手順は、Hooditestnet などの他のチェーンにも適用できます。このアプリの更新版や、追加のチェーンへの対応をご希望の場合は、qn-guide-examplesリポジトリでイシューまたはプルリクエストを作成してください。
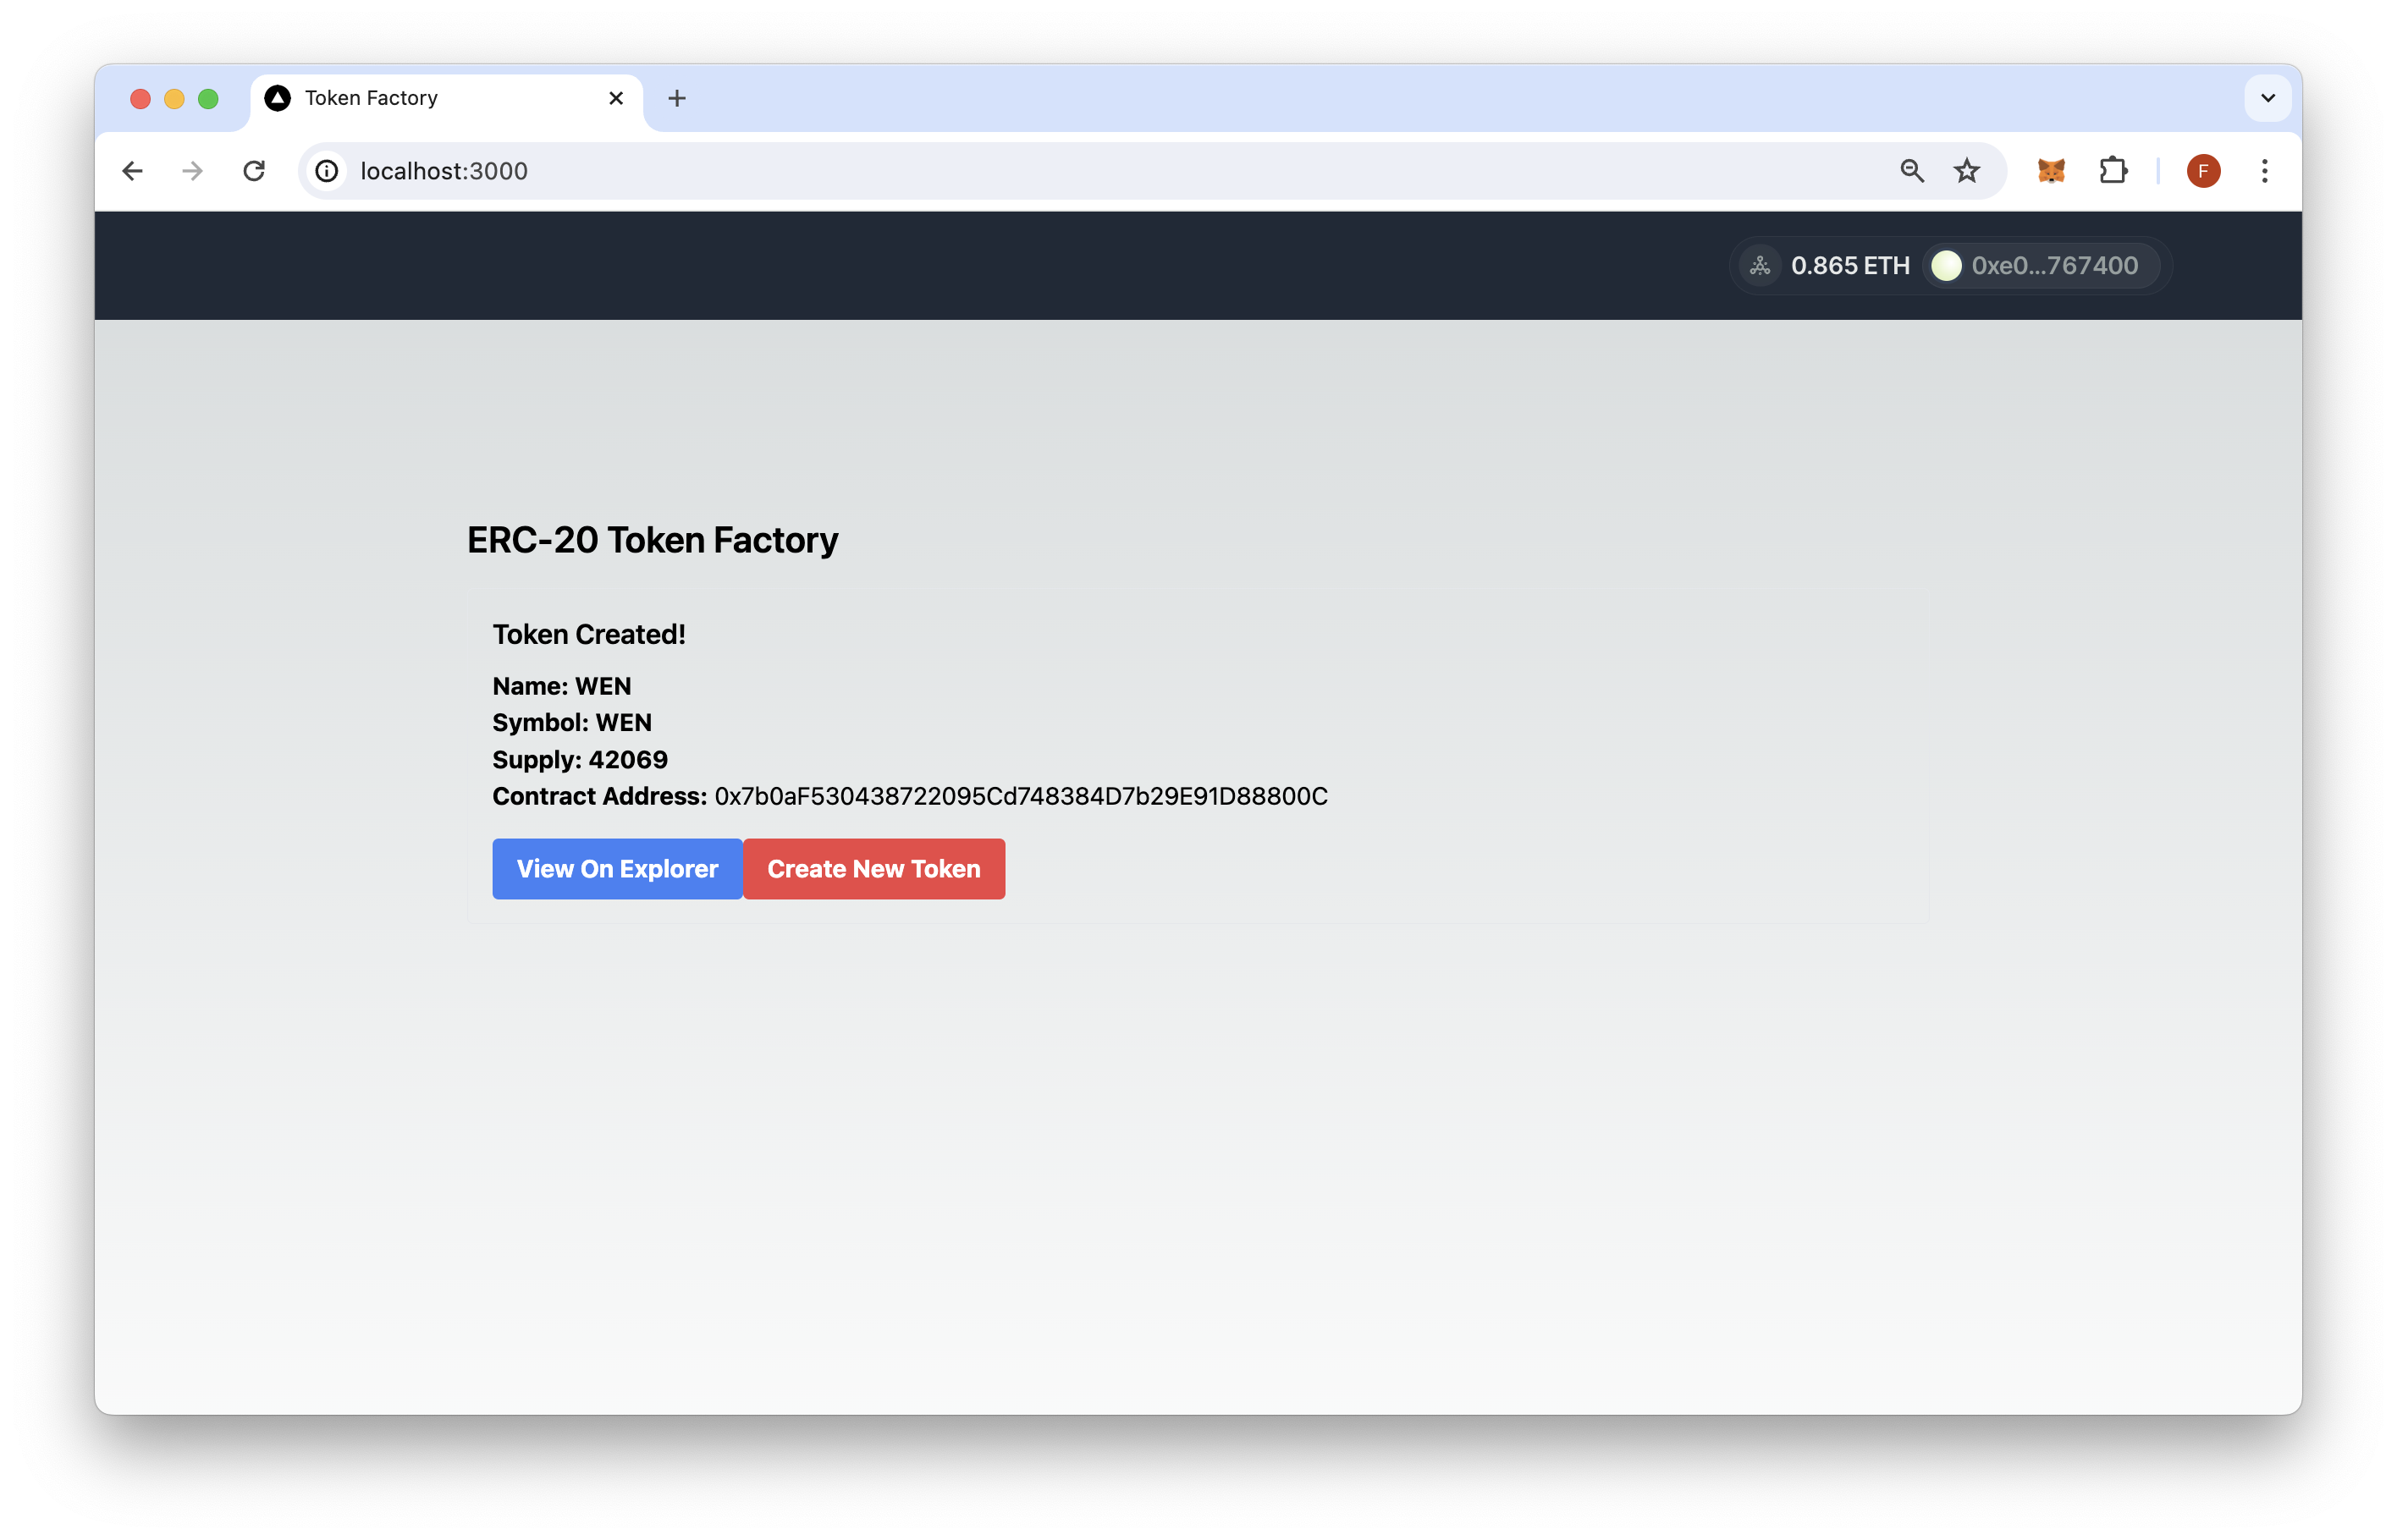
このアプリでは Next.js 14 以下のツールを使用して立ち上げられたプロジェクト create-next-app.
はじめに
プロジェクトディレクトリを開きます:
cd sample-dapps/evm-token-factory
環境変数の設定
- 名前を変更する
.env.example~へ.env.localそして、各ブロックチェーンのRPC URLを反映させて更新してください。また、あなたの WalletConnect. プロジェクト ID(任意。空欄にすることも可能ですが、一部の機能が利用できなくなります)。各チェーン用の RPC URL を作成するには、ローカルで独自のノードを実行するか、次のようなサービスを利用できます。 Quicknode ノードを素早く立ち上げるには、endpoint をご覧ください。
Configure Smart Contract Addresses
-
を更新する
工場の住所値はevm-token-factory/app/utils/ethereum.tsデプロイ済みのファクトリ契約のアドレスを指定してください。これは、 導入 セクション。 -
未使用のチェーン(例:mainnet )を
src/context/web3modal.tsxファイル。
RPC Configuration
このアプリでは、サポートしたい各ブロックチェーンについて、有効なRPC URLが必要です。アプリ全体でのRPCの設定方法の詳細については、以下をご覧ください。
- で参照されているRPC URLは、
.env.localファイルは、WalletConnectのモーダル用です。 - 取引を送信するために、このアプリは
ethers.BrowserProvider注入されたプロバイダー(MetaMask、Rabby、Coinbase Walletなど)をラップし、そのプロバイダーのRPC設定を使用するためのクラスです。したがって、アプリを利用するユーザーは、トークンを作成するネットワークをウォレットに追加し、そのRPCネットワークに切り替えておく必要があります。そうしないと、アプリに「このアプリは現在のネットワークに対応していません。続行するには、利用可能なオプションに切り替えてください。」というメッセージが表示されます。
ブロックチェーンをサポートしたくない場合は、そのチェーンへの参照を src/context/web3modal.tsx ファイル。
依存関係をインストールする
次に、依存関係をインストールします:
npm install
# または
yarn
# または
pnpm install
# または
bun install
その後、開発サーバーを起動します:
npm run dev
# または
yarn dev
# または
pnpm dev
# または
bun dev
アプリを表示するには、ブラウザでhttp://localhost:3000を開いてください。
Dappの利用方法
-
ウォレットを接続する
- トークン作成トランザクションの費用を賄えるだけの十分なETH(またはその他のネイティブEVMガストークン)がウォレットにあることを確認してください
- Testnet をご利用の場合は、「Quicknode 」のファウセットから無料でETHを受け取ることができます。
-
「トークンの作成」をクリックし、取引を確認して、ERC-20トークンを作成しましょう!
建築
├── app
│   ├── api
│   │   └── evm
│   │       └── createToken
│   │           └── route.ts # CreateToken 関数を呼び出すための API メソッド
│   ├── components
│   │   ├── Connect.tsx # Web3Modal コンポーネント
│   │   ├── Footer.tsx
│   │   └── Navbar.tsx
│   ├── favicon.ico
│   ├── globals.css
│   ├── layout.tsx # Web3Modal コンポーネント
│   ├── page.tsx # Token Factoryのメインページ
│   └── utils
│       ├── abi.json # ファクトリー ABI
│       └──ethereum.ts # チェーン設定とヘルパー
├── context
│   └── web3modal.tsx # ウォレットアダプターのコンテキストプロバイダー
├── contracts
│   ├── README.md
│   ├── foundry.toml # Forgeの設定
│   ├── lib # 依存関係
│   ├── remappings.txt # ライブラリのマッピング
│   ├── script
│   │   ├── Counter.s.sol
│   │   └── CreateToken.s.sol
│   ├── src
│   │   ├── Counter.sol
│   │   ├── Factory.sol
│   │   └── Token.sol
│   └── test
│       ├── Counter.t.sol
│       ├── Factory.t.sol
│       └── Token.t.sol
├── next-env.d.ts
├── next.config.mjs
├── package-lock.json
├── package.json
├── postcss.config.mjs
├── public
│   ├── next.svg
│   ├── preview.png
│   ├── preview2.png
│   └── vercel.svg
├── .env.example # RPC および WalletConnect プロジェクト ID の設定
├── tailwind.config.ts
└── tsconfig.json
スマートコントラクト
Solidityを用いたスマートコントラクトで構築されたERC-20トークンファクトリーのバックエンドは、EVM互換のブロックチェーンであればどこにでもデプロイ可能です。デモの目的で、当チームはトークンファクトリーをSepoliaおよびHolesky(testnet )にデプロイしました。ガス料金の制約により、現時点ではmainnet やL2チェーンにはデプロイされていませんが、ご自由にデプロイして、このリポジトリにPRを送信してください。
ERC-20 トークンファクトリーは、2つのスマートコントラクトで構成されています:
-
工場: 「The Factory」契約(
contracts/Factory.sol) は Token.sol スマートコントラクトを継承しており、新しい ERC-20 トークンを作成・追跡するためのファクトリーとして機能します。 -
トークン: これはERC-20スマートコントラクトです(
contracts/Token.sol) は OpenZeppelin 標準で定義されており、以下を含みます。ミントそして所有権の移転デプロイ時にコンストラクタ内で関数を呼び出す。
Supported Chains & Addresses
- セポリア:0x28D99a0A1B430B3669B8A2799dCDd7d332ceDb1C
- Holesky: 0x5fCCa8dCeD28B13f2924CB78B934Ab0AF445542A
Deploy the Factory to another EVM blockchain
Foundry を使用して新しいチェーンに Factory コントラクトをデプロイするには、以下の手順に従ってください:
- 確実に ファウンドリー がインストールされていることを確認し、その内部に移動して、
契約ディレクトリ。以下のコマンドを使用して、必要な依存関係をインストールしてください:
forge インストール foundry-rs/forge-std --no-commit
forge インストール OpenZeppelin/openzeppelin-contracts --no-commit
-
以下の方法を使用して、スマートコントラクトをビルド(コンパイル)します。
Forgeビルドコマンド。 -
以下の方法を使用してテストを実行します。
フォージテストコマンド。 -
デプロイするには、次のコマンドを実行してください。
forge create以下のコマンドを実行し、適切なRPCネットワークと秘密鍵の値を入力してください:
forge create --rpc-urlQUICKNODE_HTTP_URL \
--private-key YOUR_PRIVATE_KEY \
src/Factory.sol:TokenFactory
- を編集する
src/context/web3modal.tsxファイルを開き、そのチェーンIDを持つ新しいチェーンオブジェクトを追加します(リストを参照 こちら)、名前、ネイティブのガストークン通貨、エクスプローラーのURL、およびRPC URL(例:Quicknode ):
export const mainnet = {
  chainId: 1,
  name: 'Ethereum',
  currency: 'ETH',
  explorerUrl: 'https://etherscan.io',
  rpcUrl: process.env.NEXT_PUBLIC_MAINNET_RPC_URL
}
- 工場の住所とエクスプローラーのURLを
CHAINSオブジェクトがapp/utils/ethereum.ts. 例えば:
    1: { // Ethereum Mainnet
        factoryAddress: "FACTORY_ADDRESS",
        explorerUrl: "https://etherscan.io",
    },
スマートコントラクトの作成や展開についてさらに詳しく知りたい場合は、以下のリソースをご覧ください:
Next.js ドキュメント
Next.js についてさらに詳しく知りたい場合は、以下のリソースをご覧ください:
- Next.js ドキュメント- Next.js の機能と API について学びましょう。
- Next.js を学ぶ- インタラクティブな Next.js チュートリアル。
Next.jsのGitHubリポジトリをご覧ください。皆様からのフィードバックや貢献を歓迎します!
- リポジトリをフォークする
- フィーチャーブランチを作成する:git checkout -b feature/amazing-feature
- 変更をコミットします:git commit -m "素晴らしい機能を追加"
- ブランチをプッシュしてください:git push origin feature/amazing-feature
- プルリクエストを作成してください。