5 min read
Overview
Subgraphs make blockchain data queryable through GraphQL, significantly simplifying data access for decentralized applications. Using Ormi’s 0xgraph, you can access real-time, indexed blockchain data in 5 simple steps.
In this guide, you'll learn how to enable Ormi’s 0xgraph on your Quicknode endpoint, set up your subgraph using The Graph CLI, and deploy your subgraph quickly and easily.
If you’d like a deeper dive into how subgraphs work and how to create them from scratch, check out the How to Create a Custom Subgraph with The Graph guide.
What You Will Do
- Enable Ormi Labs' Subgraph add-on on Quicknode
- Set up your subgraph project using The Graph CLI
- Deploy your subgraph using the Subgraph add-on
What You Will Need
- A free Quicknode account
- A Quicknode endpoint with the Subgraph add-on enabled
- Basic understanding of The Graph
- Graph CLI installed
A video showing how to set up subgraphs with Ormi's 0xgraph, starting from the Quicknode Marketplace.
What is a Subgraph?
A subgraph indexes blockchain data, making it accessible through GraphQL queries. This simplifies fetching complex data for decentralized applications (dApps). For a more detailed introduction, refer to our guide: How to Create a Custom Subgraph with The Graph.
Why Ormi Labs?
Ormi Labs dramatically simplifies subgraph deployment. Instead of spending hundreds of engineering hours configuring hosting, ensuring uptime, and data freshness, Ormi provides a stable, production ready infrastructure out of the box. This lets you focus on building apps, while real-time analytics and dashboards make it easy to track and optimize performance.
Ormi Labs provides support across 40+ chains, letting you deploy subgraphs across popular networks. Before you begin, be sure to check the add-on's marketplace page to ensure compatibility with the networks you plan to use.
To summarize, here are the key features of Ormi Labs' Subgraph add-on:
- Petabyte-Scale Infrastructure: Fully compliant with The Graph Protocol, delivering petabyte-scale data access without the infrastructure burden..
- Seamless Graph Migration: Easily migrate from existing setups using familiar Graph CLI tools.
- Analytics & Metrics Dashboard: Real-time insights into query volumes, performance metrics, and uptime.
- Reliability & Performance: Guaranteed 99.9% uptime through robust SLAs and sub-second latency.
- Built-in Webhooks: Webhook support for notifications, messages, or other use cases.
Prerequisites
Enable Ormi Labs Add-on on Quicknode
To enable the Ormi Labs add-on on your Quicknode endpoint, follow these steps:
- Create a free Quicknode account if you haven't already.
- Log in to your Quicknode Dashboard.
- Create a new endpoint or select an existing one.
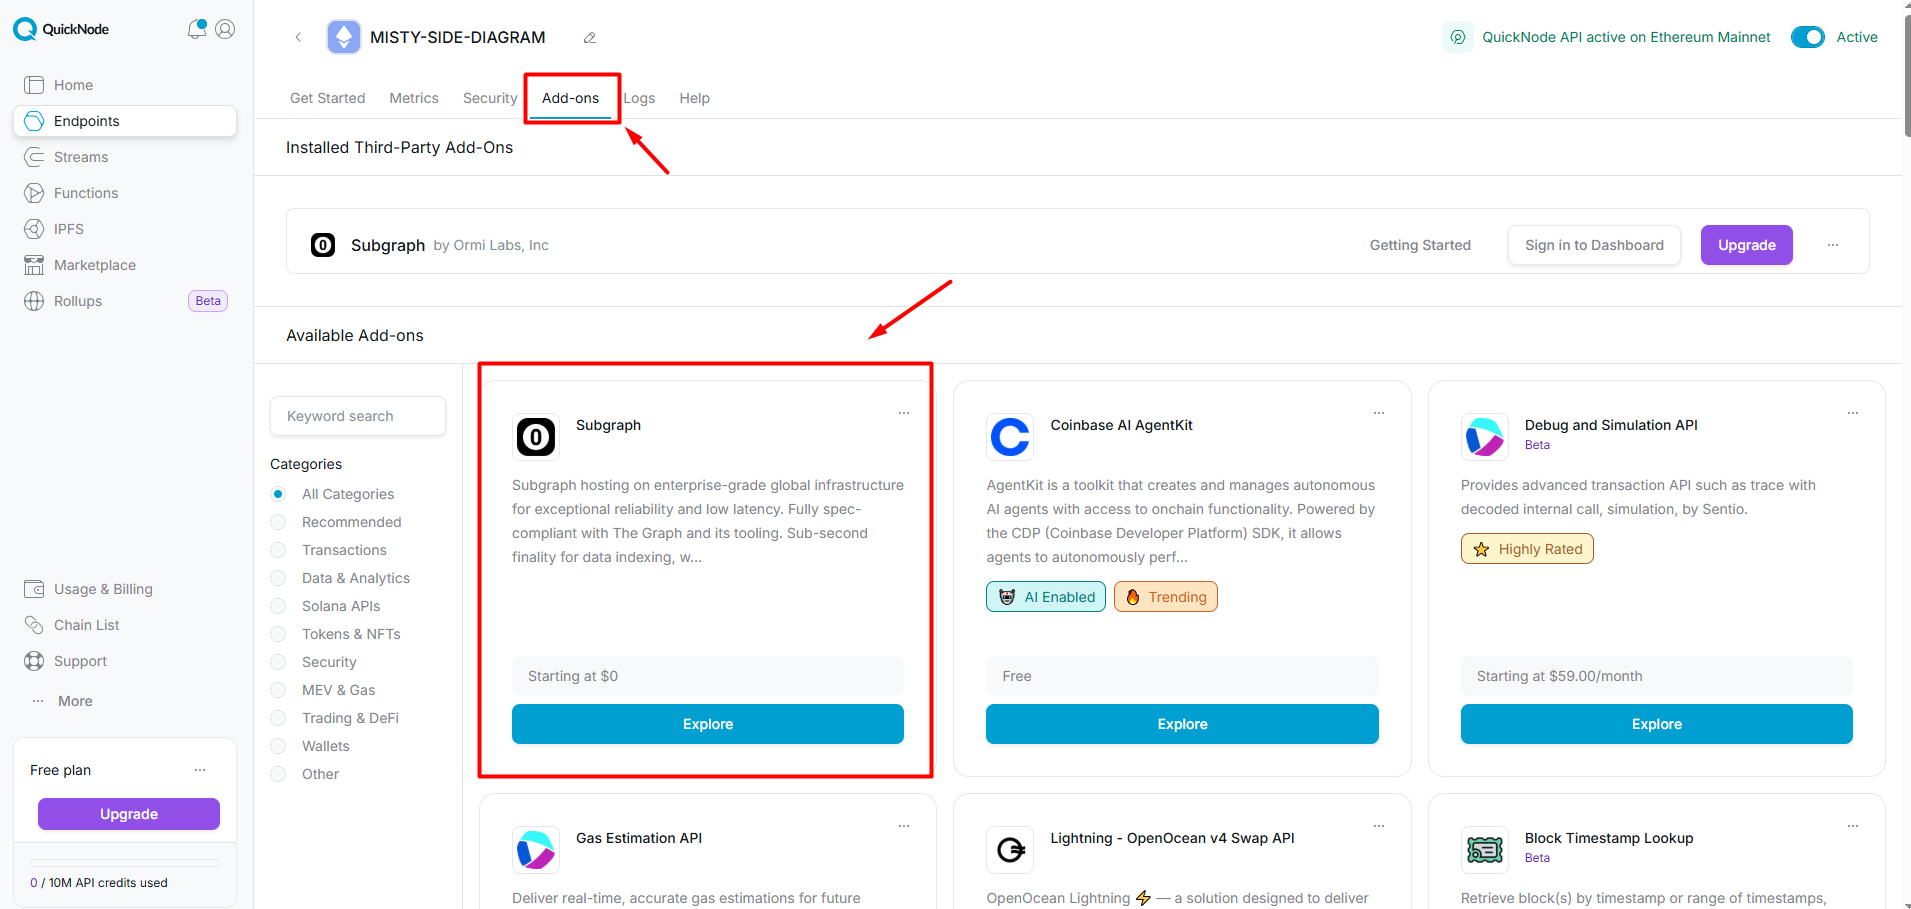
- Navigate to Add-ons, find and select Subgraph by Ormi Labs, Inc.
- Install the add-on.
Create an API Key
To create an API key, follow these steps:
- Log in to your Quicknode Dashboard.
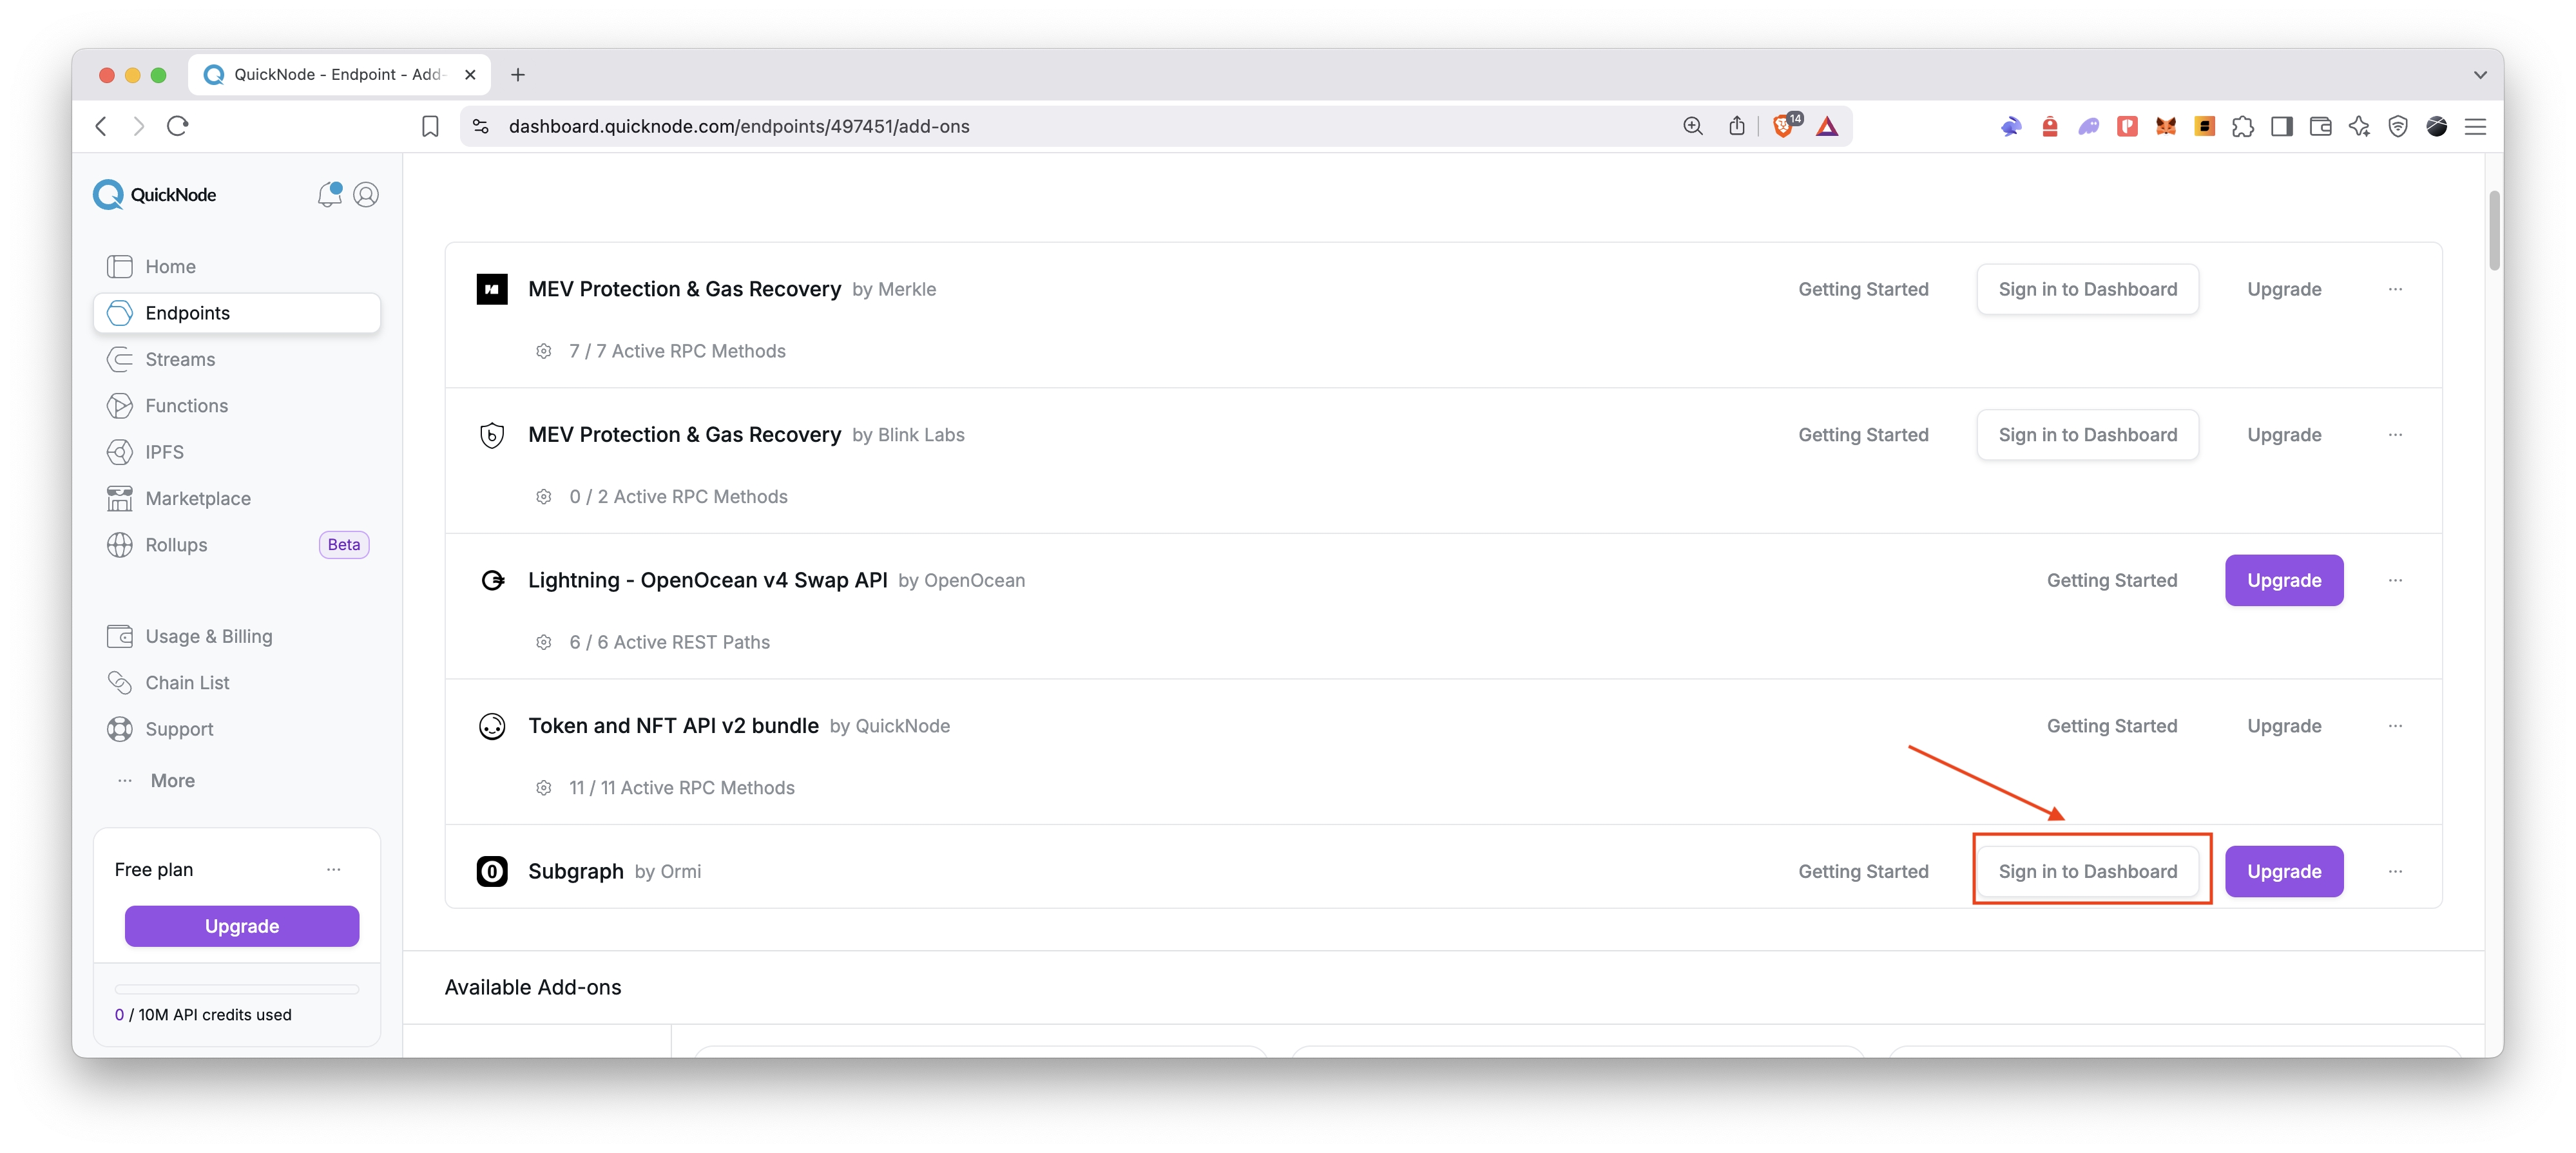
- On your endpoint page, navigate to the Add-ons tab.
- Click Sign in to Dashboard next to the add-on.
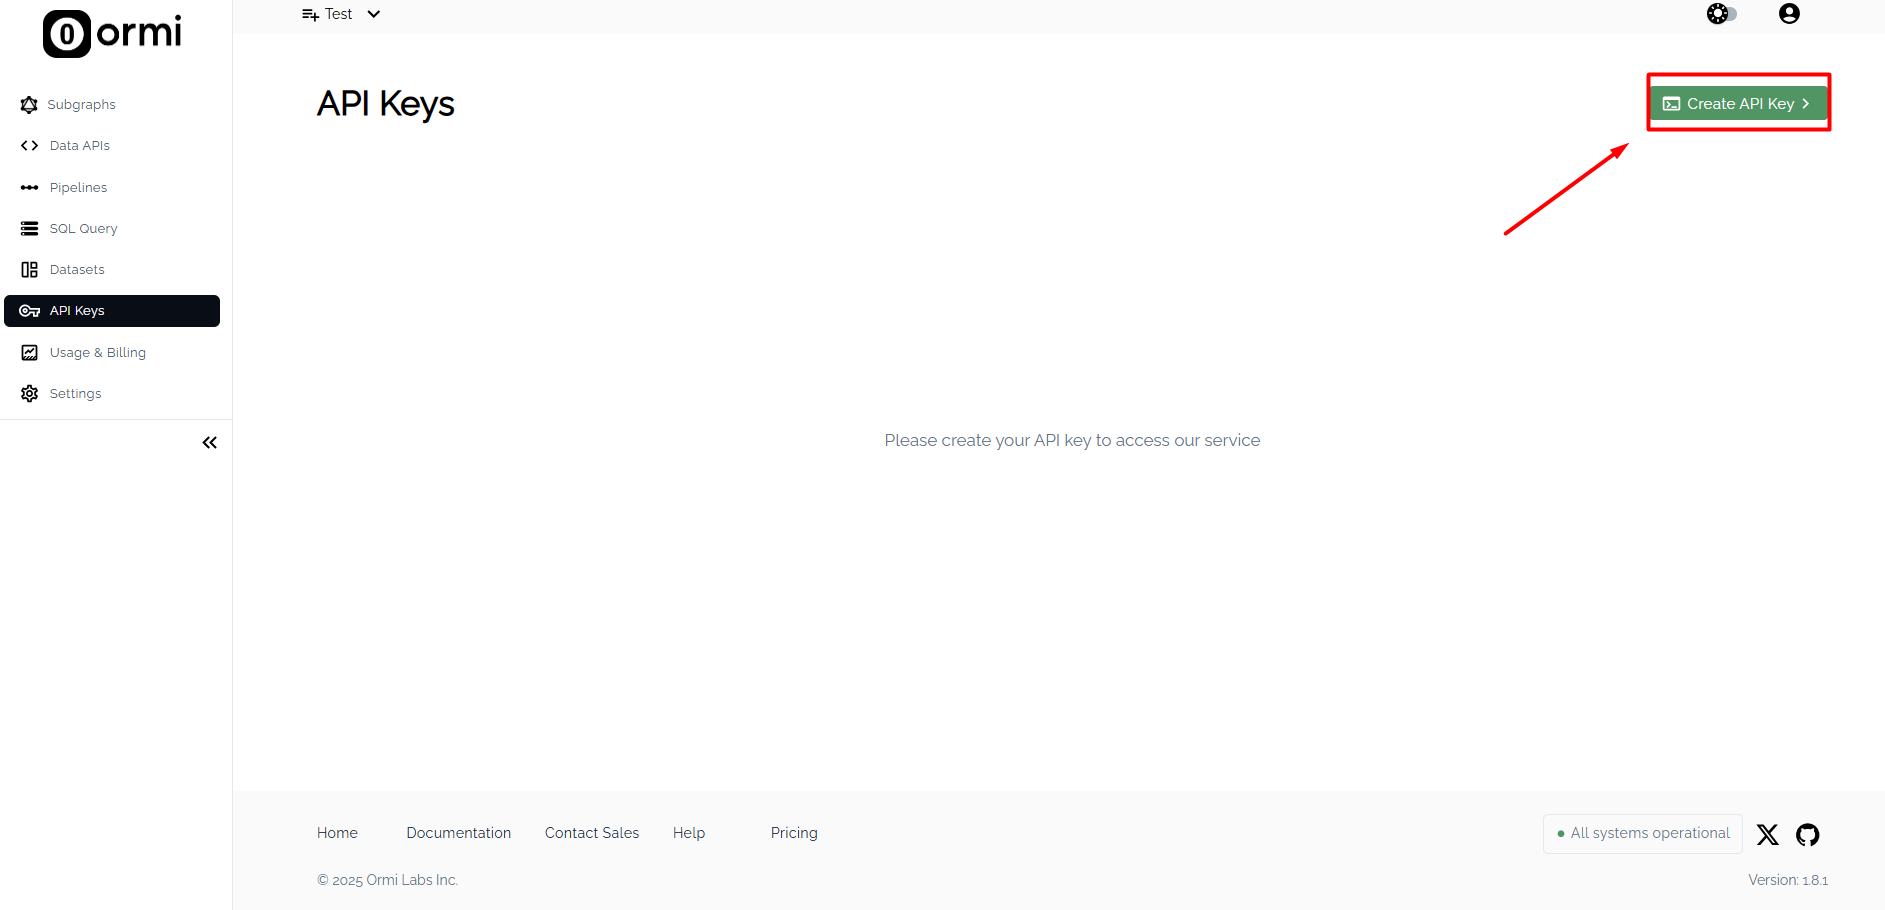
- In the Ormi Labs dashboard, follow the Launch with the Graph CLI instructions (or click the API Keys tab) to create an API key.
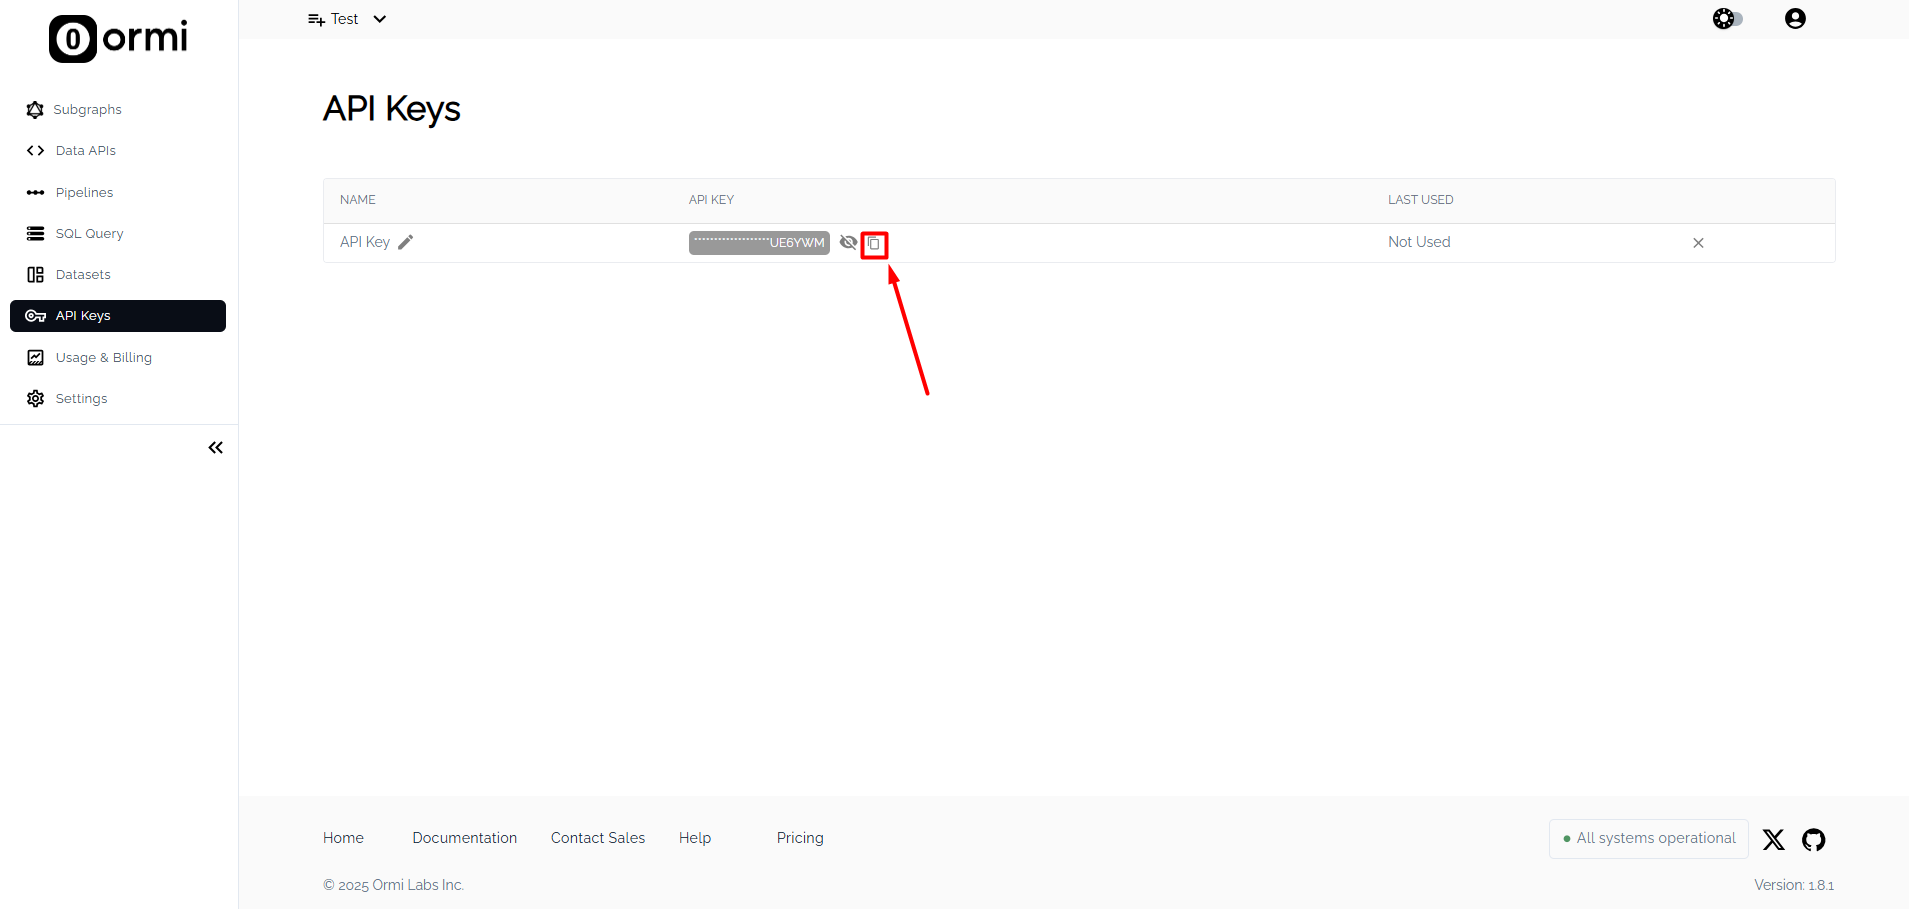
- Copy the generated API key for later use.
Deploy a Subgraph
In this section, we’ll first scaffold and configure your subgraph locally using The Graph CLI. Once your subgraph is ready, you’ll deploy it to Ormi Labs using your newly created API key.
We'll use the following example contract, which is an ERC721 contract for an NFT collection:
- Contract:
0xB6a37b5d14D502c3Ab0Ae6f3a0E058BC9517786e(Elemental NFT) - Network: Ethereum Mainnet
- Deployed on block:
17516233
Step 1: Set Up Your Subgraph Project
Create your subgraph using Graph CLI:
graph init my-graph
Replace my-graph with your desired project name.
When you run the Graph CLI init command, you’ll be asked a series of questions like the protocol, network, and contract address.
Once you enter the contract address, the CLI will attempt to fetch the ABI automatically. If it fails, you can manually provide the ABI file (a JSON file containing the contract's ABI) path.
Same for the contract deployment block number and contract name. If you don't know them, you can find it on Etherscan by checking the contract creation transaction.
If the contract is verified on Etherscan (or similar), go to the contract page, click on the Contract tab, scroll down to the Contract ABI section, and copy the ABI. Save it as a JSON file in your project directory.
See the screenshot below for the configuration options that we used for the Elemental NFT contract:
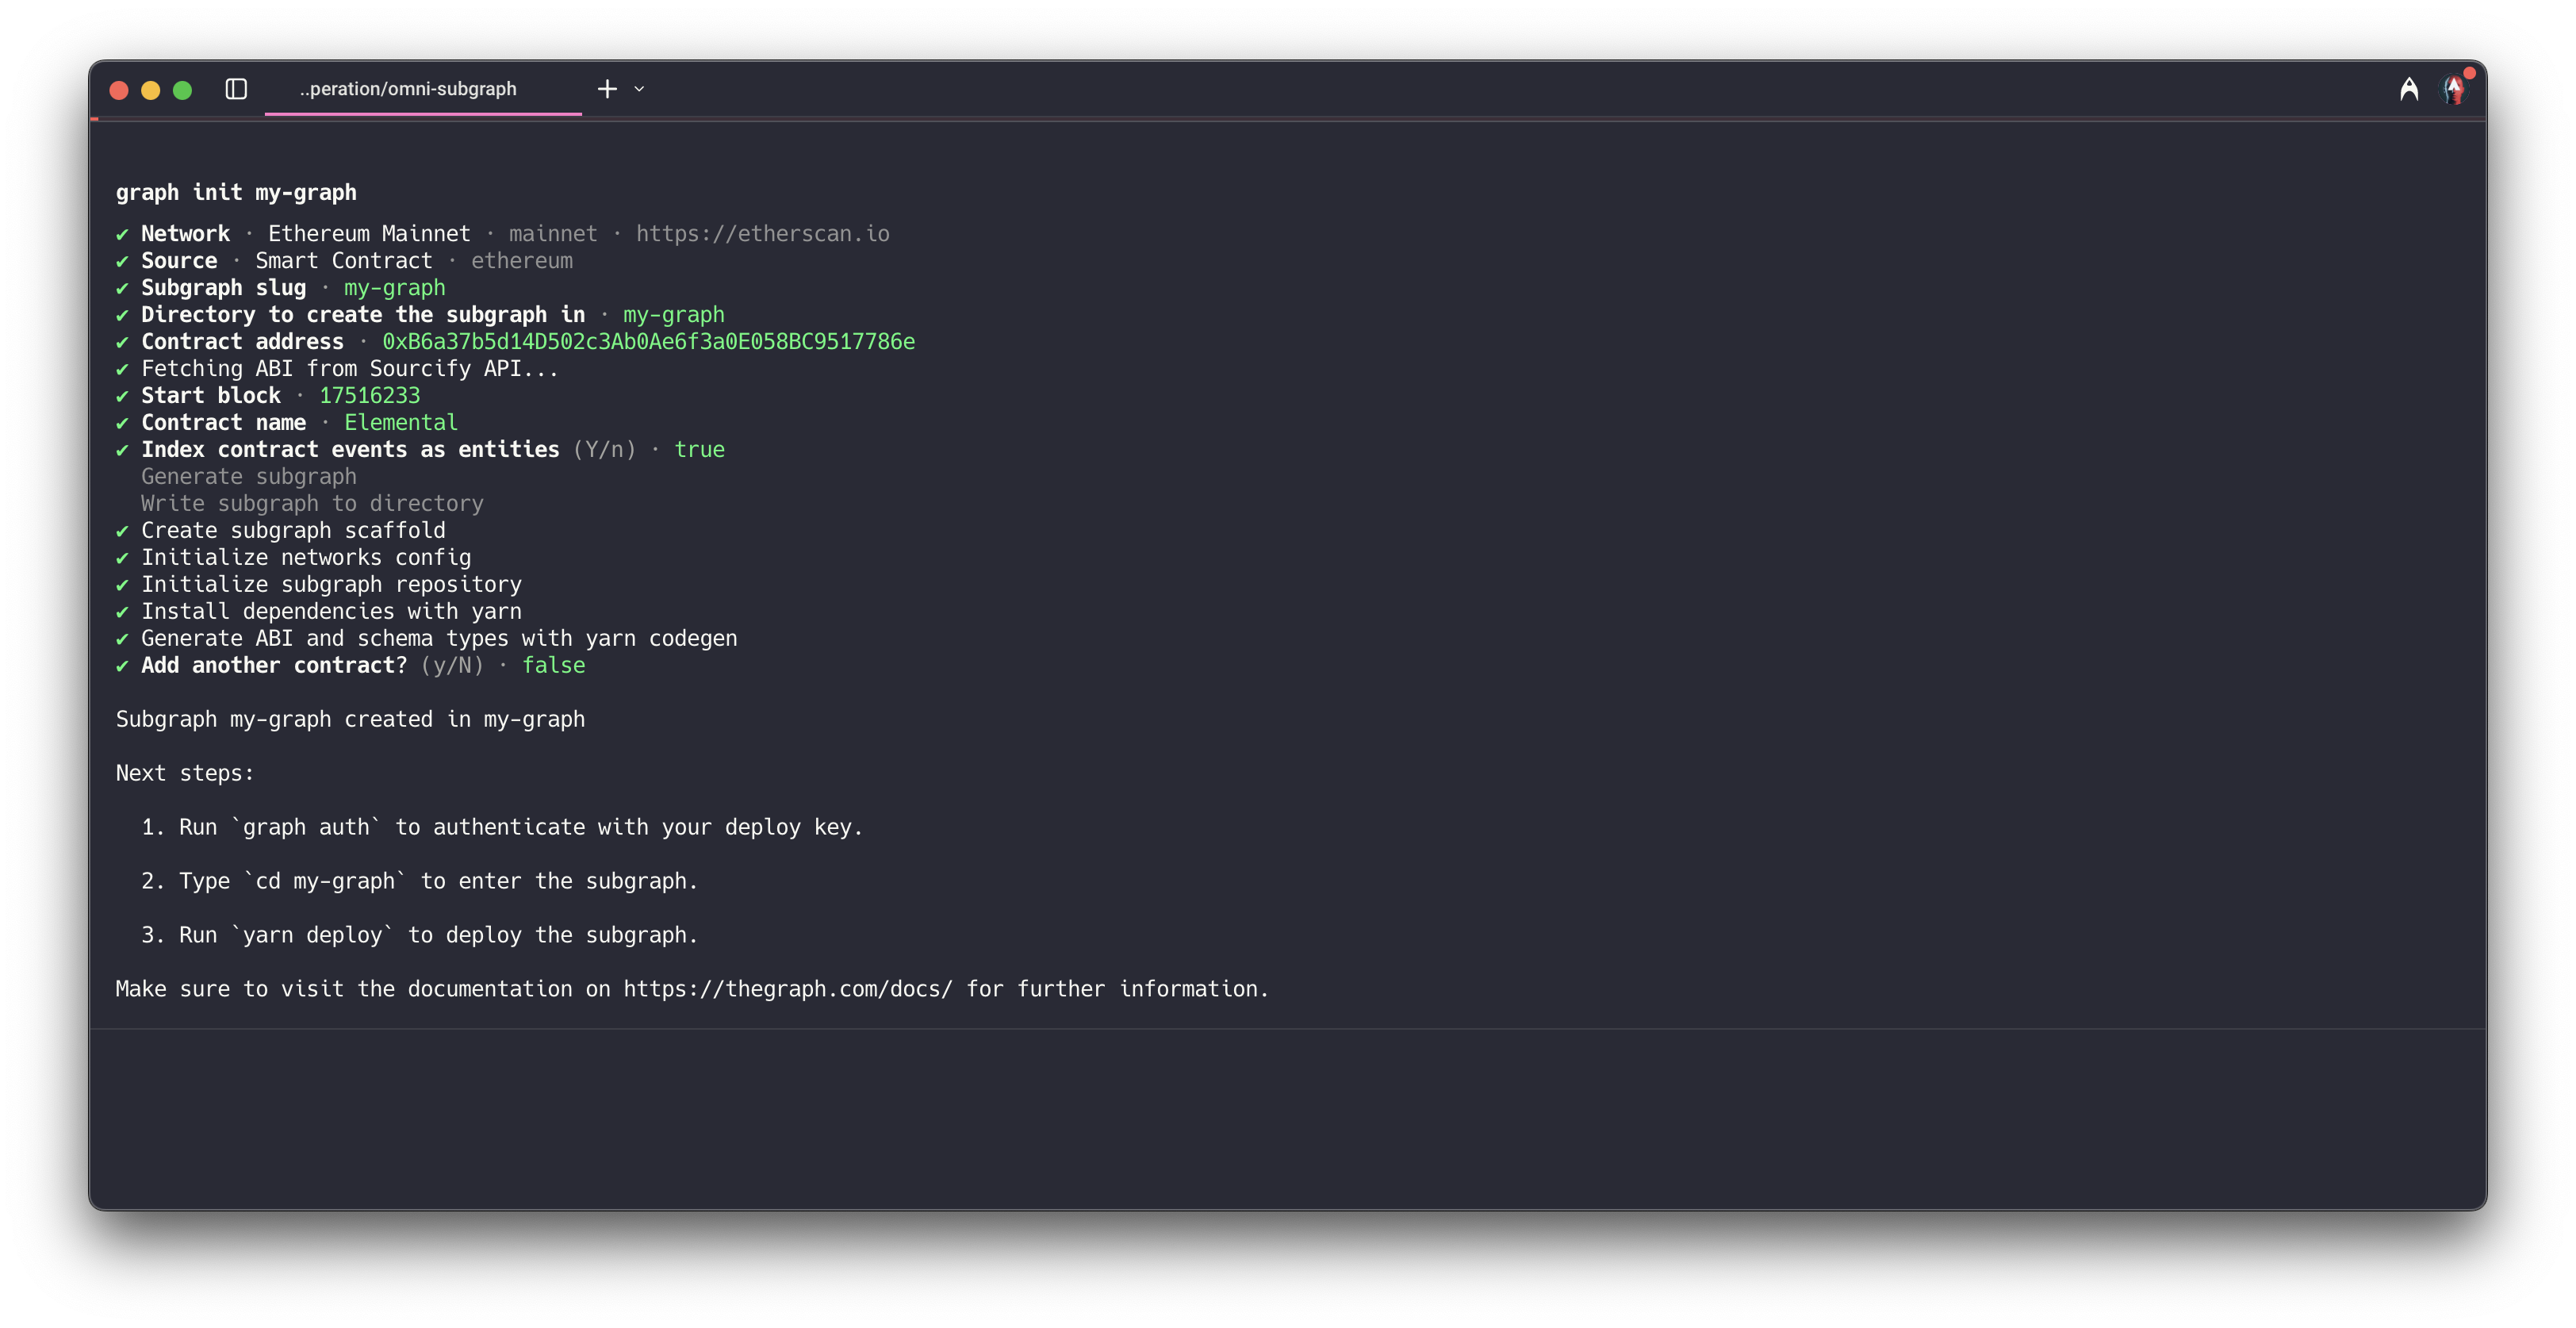
After this step, you should see a successful message in your terminal:
Subgraph my-graph created in my-graph

Next steps:
  1. Run `graph auth` to authenticate with your deploy key.
  2. Type `cd my-graph` to enter the subgraph.
  3. Run `yarn deploy` to deploy the subgraph.

Make sure to visit the documentation on https://thegraph.com/docs/ for further information.
Since you’re using Ormi Labs, you don’t need to run graph auth or yarn deploy commands. Instead, you’ll use the Graph CLI to generate types and mappings, compile your subgraph, and then deploy it using the Ormi Labs infrastructure.
Step 2: Generate Types and Mappings
Navigate to your project folder and generate types from your smart contract ABI:
cd my-graph
graph codegen
Step 3: Compile Your Subgraph
Compile the subgraph to ensure your mappings and schemas are correctly configured:
graph build
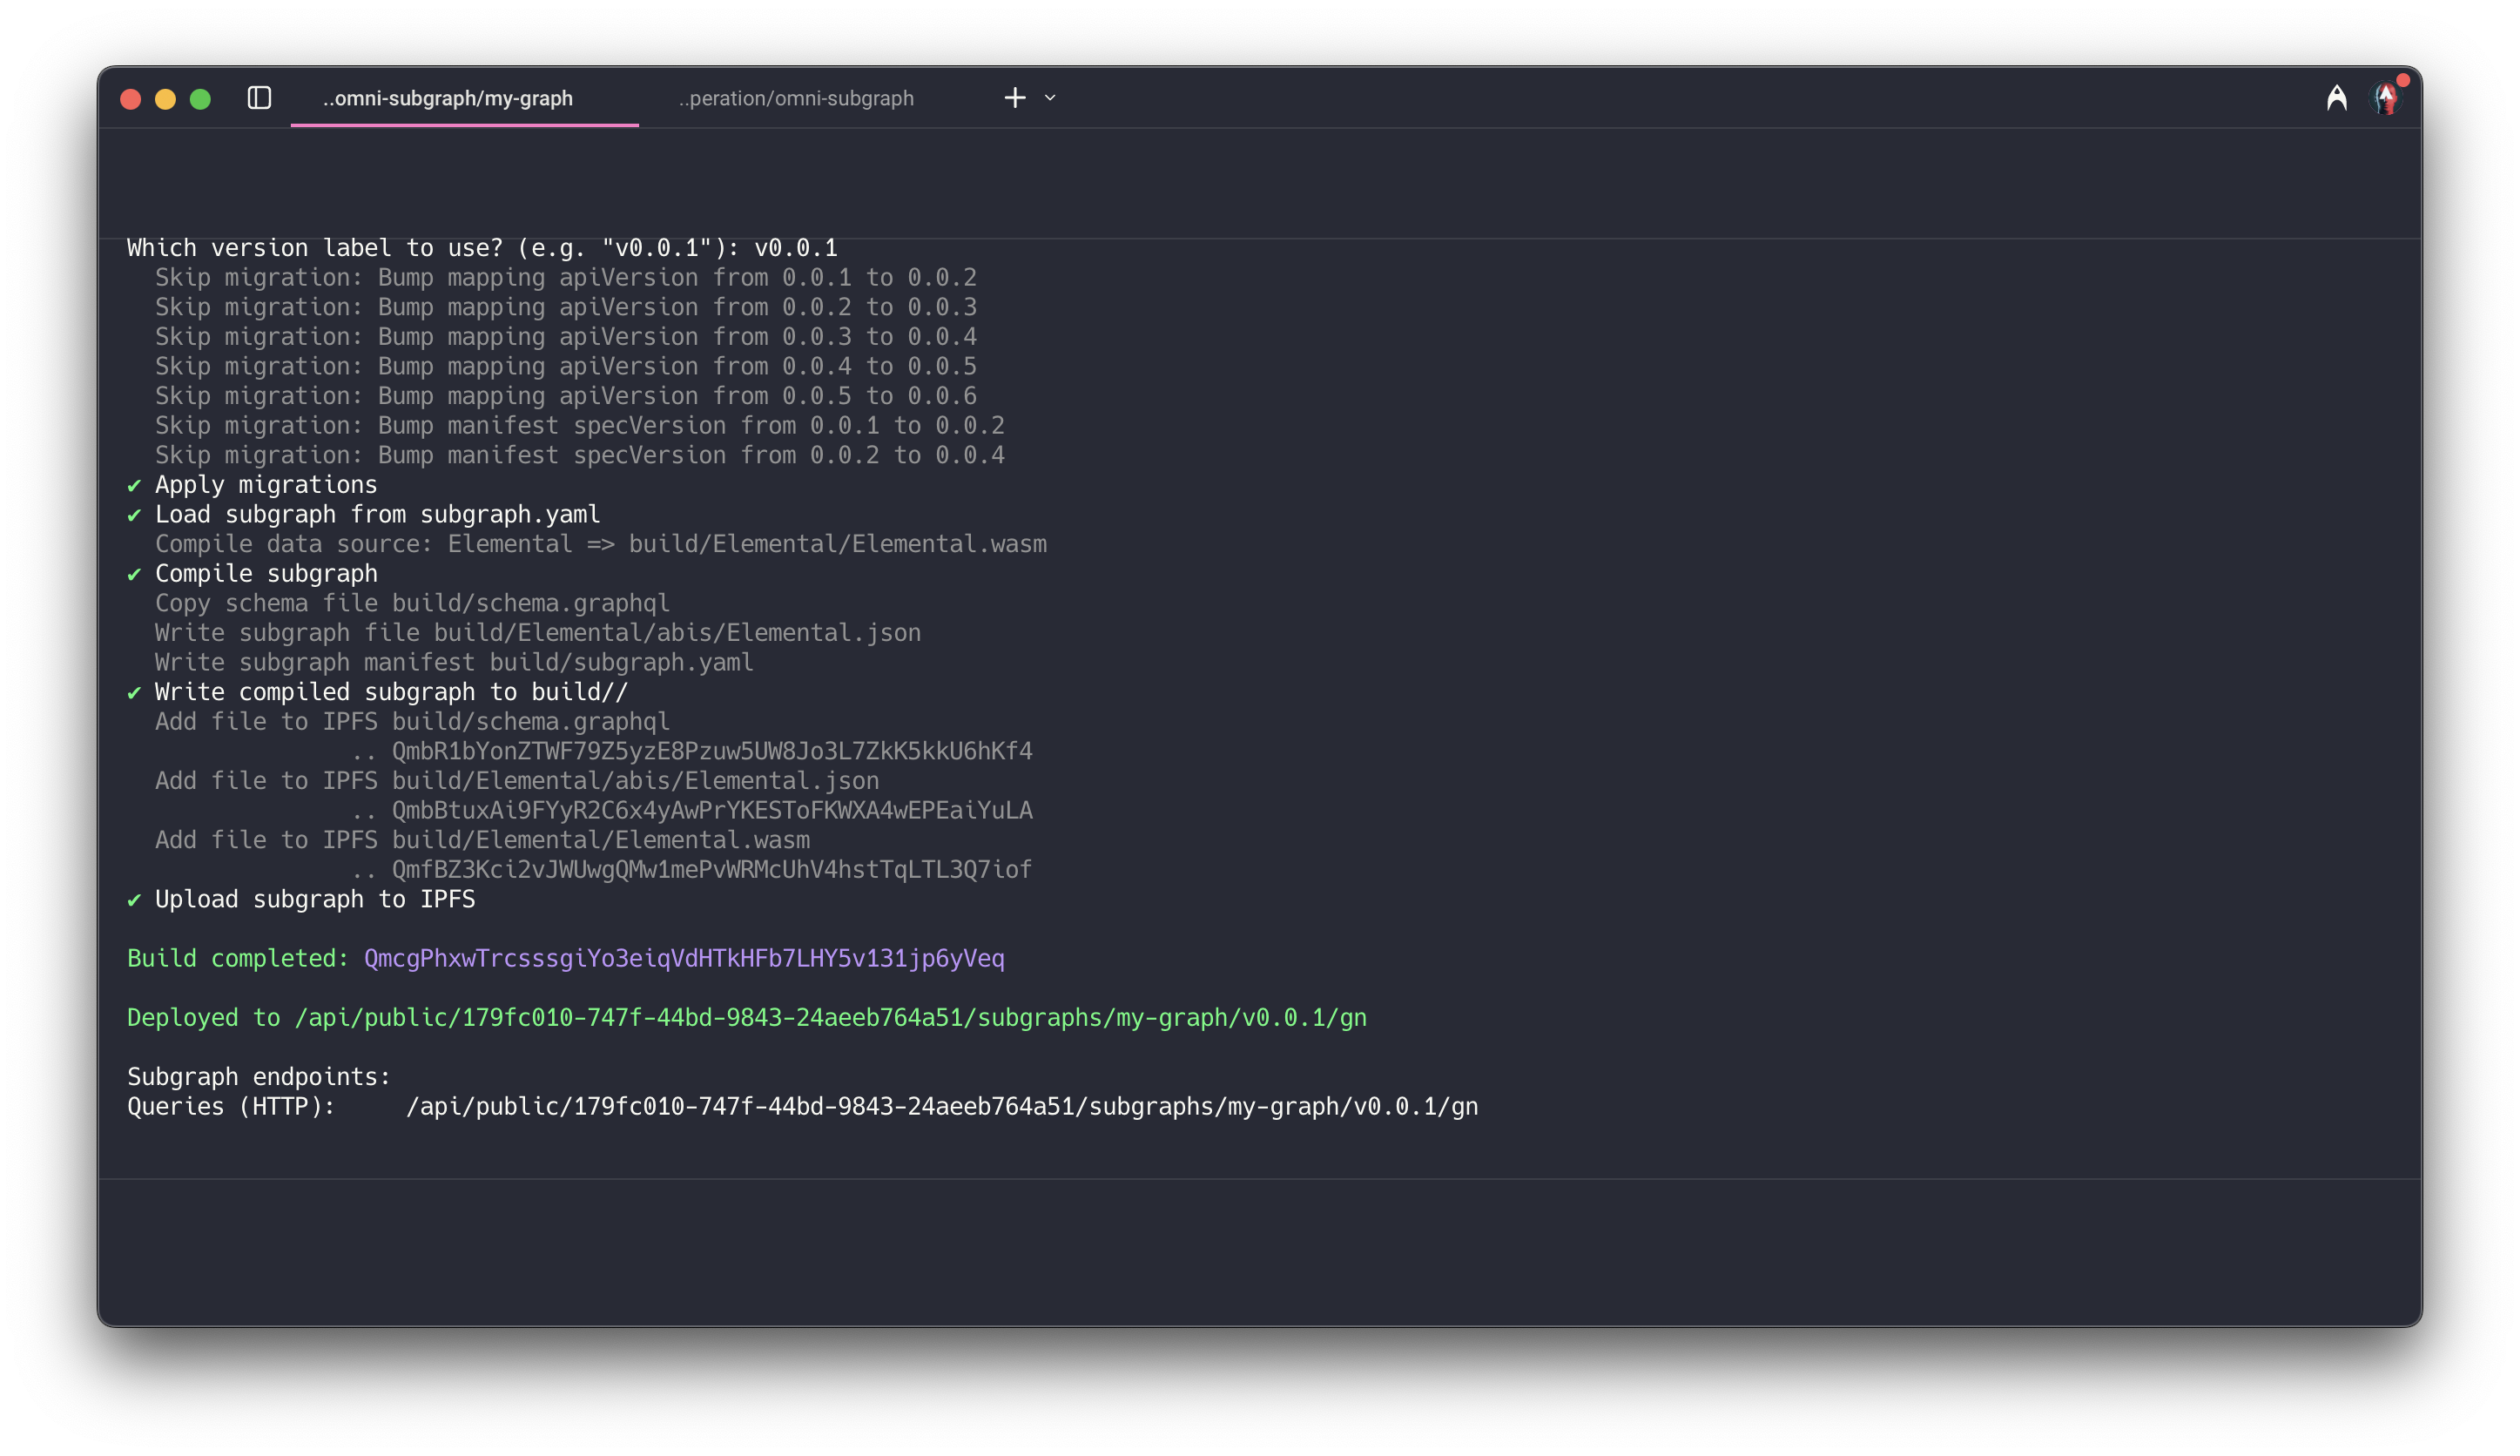
Step 4: Deploy Your Subgraph
Deploy your subgraph using Ormi Labs infrastructure:
graph deploy <your_subgraph> --node https://subgraph.api.ormilabs.com/deploy --ipfs https://subgraph.api.ormilabs.com/ipfs --deploy-key <api_key>
Replace <your_subgraph> with your subgraph identifier (e.g., my-graph) and <api_key> with your generated API key from Ormi Labs dashboard.
Step 5: Wait for Syncing
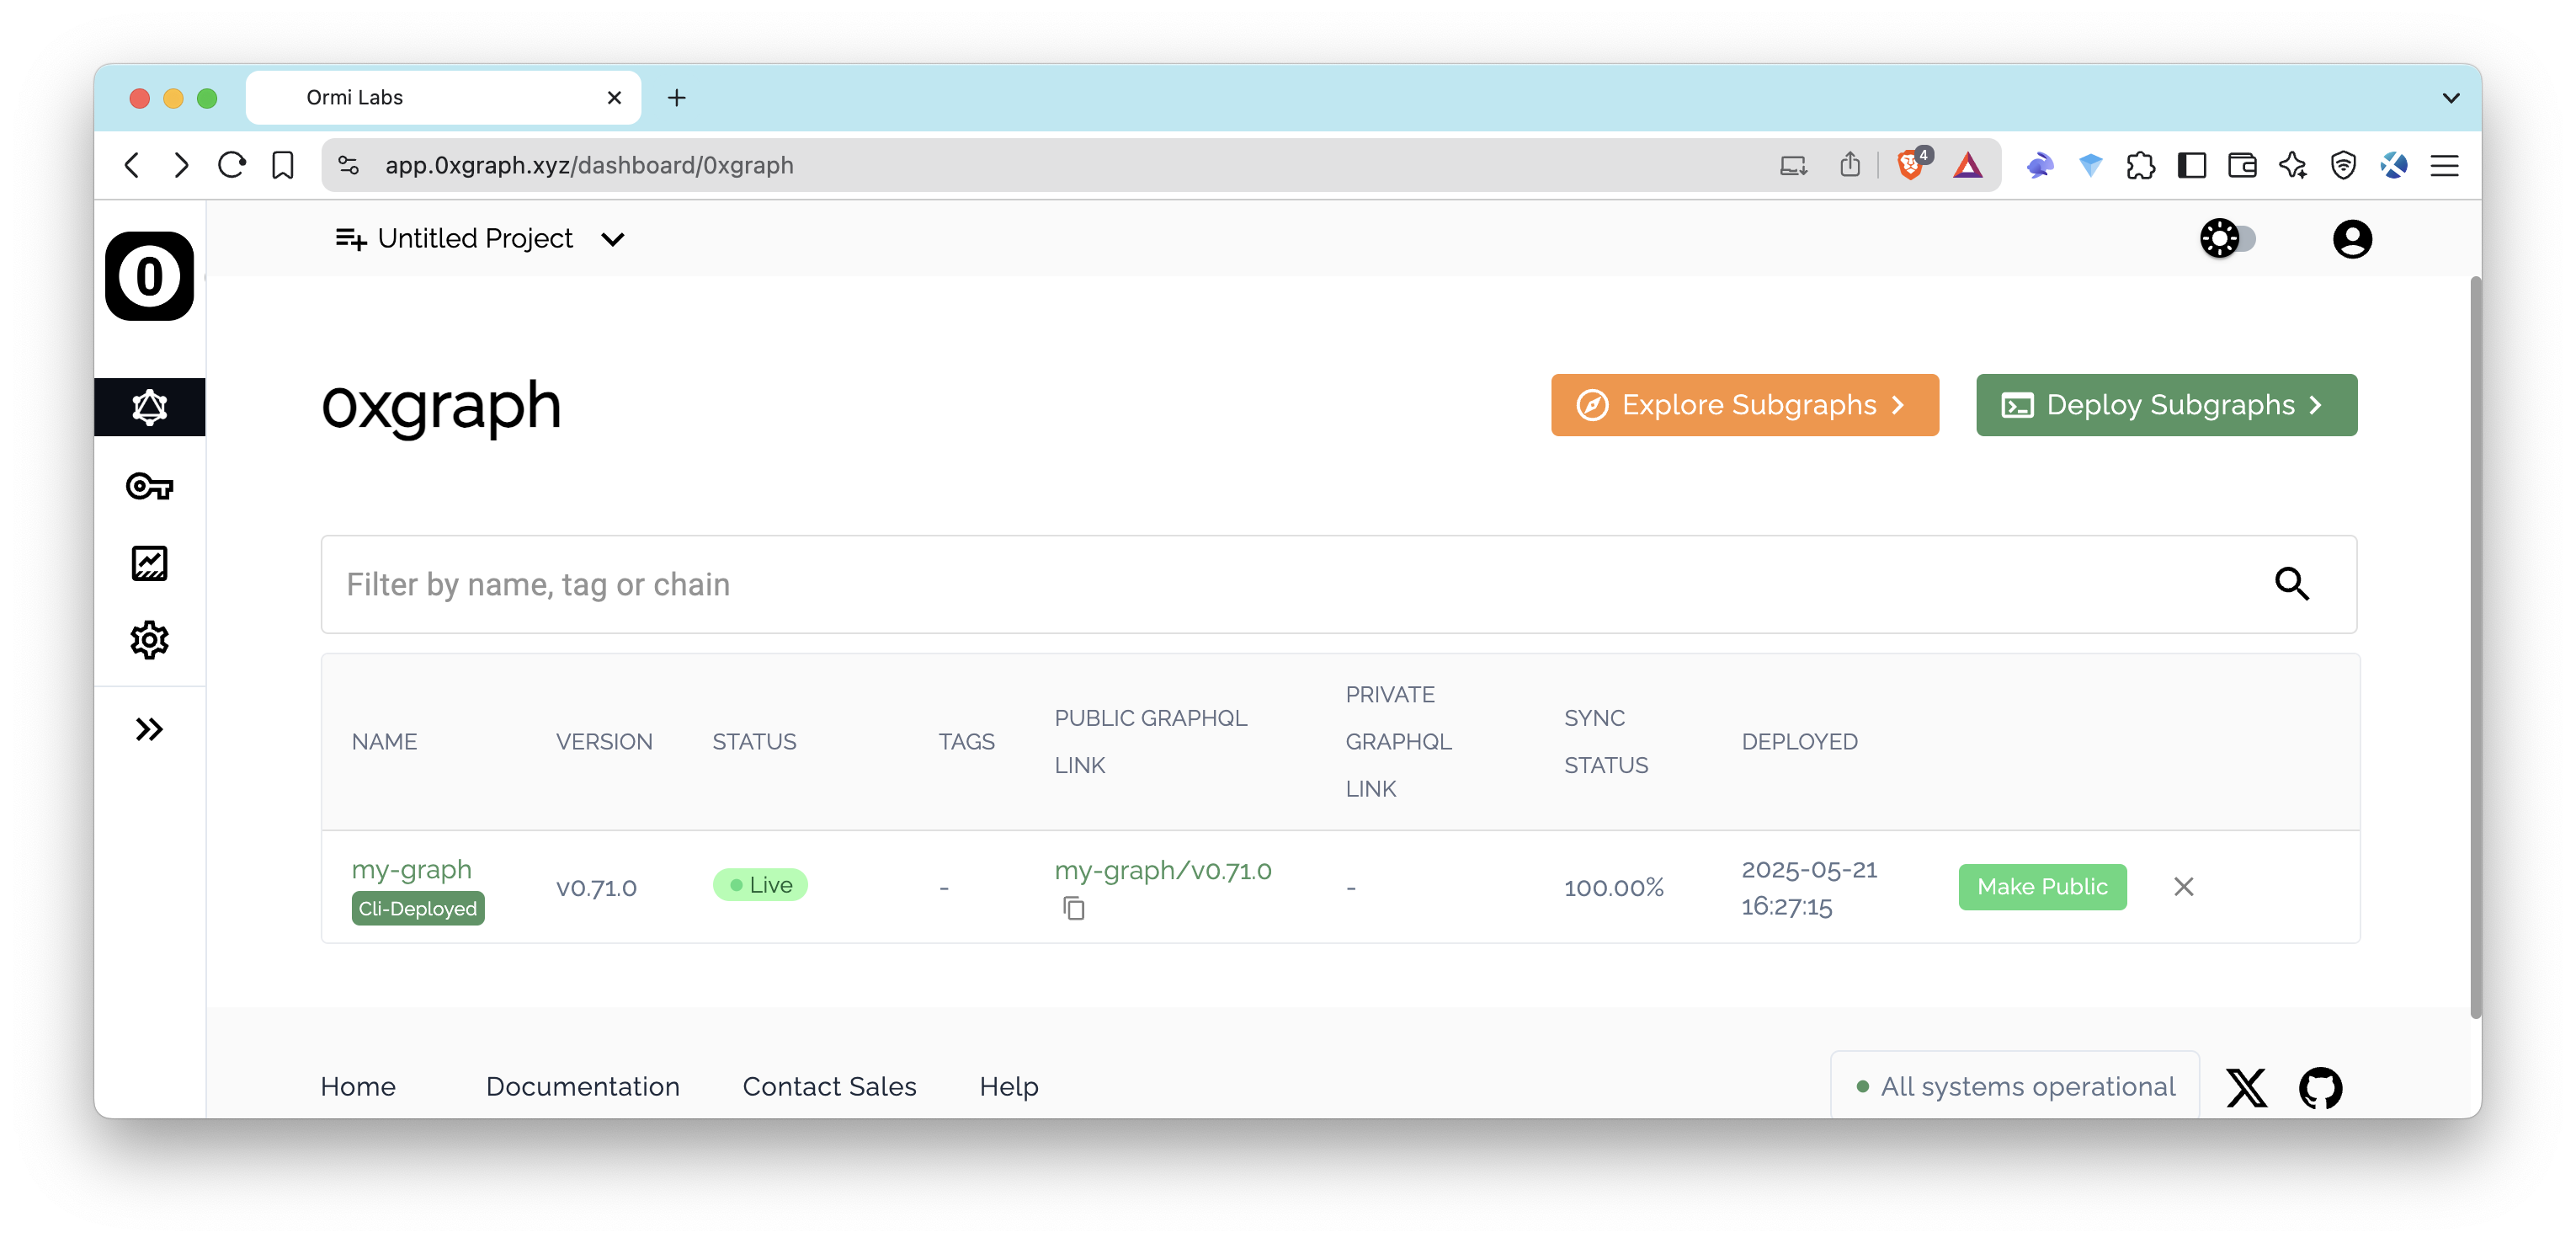
Wait for your subgraph to sync with the network. You can check the status of your subgraph in the Subgraphs tab of the dashboard or by using their Status API endpoint.
You can find the cURL command in the Ormi Labs dashboard under the Sync Status API Endpoint section. It will look something like this:
curl "https://api.subgraph.ormilabs.com/api/public/query_deployment?subgraph_id=<subgraph_id>"
The response will look like this. Note that the synced field will be true once the subgraph is synced:
{
	"id": "<your_id>",
	"name": "ormi-subgraph",
	"deployment": "<your_subgraph_id>",
	"deploy_version": "v0.0.1",
	"failed": false,
	"synced": false,
	"health": "healthy",
	"message": "",
	"latest_block": "19102326",
	"earliest_block": "19101826",
	"chain_name": "mainnet",
	"chain_id": "1",
	"chain_head_block": "22543608"
}
Once synced, you'll see a Live status next to your subgraph.
Query Your Subgraph
Once your subgraph is live, you can execute GraphQL queries via REST API (for example, https://api.subgraph.ormilabs.com/api/public/<your_id>/subgraphs/<your_subgraph>/<your_version>). Click the Public GraphQL Link in the dashboard to access the GraphiQL interface, where you can run queries and explore your subgraph.
Below is a sample query to fetch the latest transfers from the Elemental NFT contract. Be sure to adjust entity names and field names to match your schema (schema.graphql).
This query retrieves the 5 most recent Transfer events, ordered by the block timestamp in descending order. It returns the id, from, to, and blockTimestamp for each transfer.
query LatestTransfers {
	transfers(first: 5, orderBy: blockTimestamp, orderDirection: desc) {
		id
		from
		to
		blockTimestamp
	}
}
Conclusion
You've now successfully deployed your subgraph using Ormi Labs on Quicknode, gaining easy access to robust analytics and reliable infrastructure. Enjoy developing your data-driven decentralized applications!
Additional Resources
- Quicknode Marketplace – Ormi Labs Add-on
- How to Create a Custom Subgraph with The Graph
- How to Run a Hosted Subgraph with Traceye
- Ormi Labs Documentation
- The Graph Documentation
We would love to hear more about what you are building. Drop us a line in Discord, or give us a follow on X to stay up to date on all the latest information!
We ❤️ Feedback!
Let us know if you have any feedback or requests for new topics. We'd love to hear from you.