4 min read
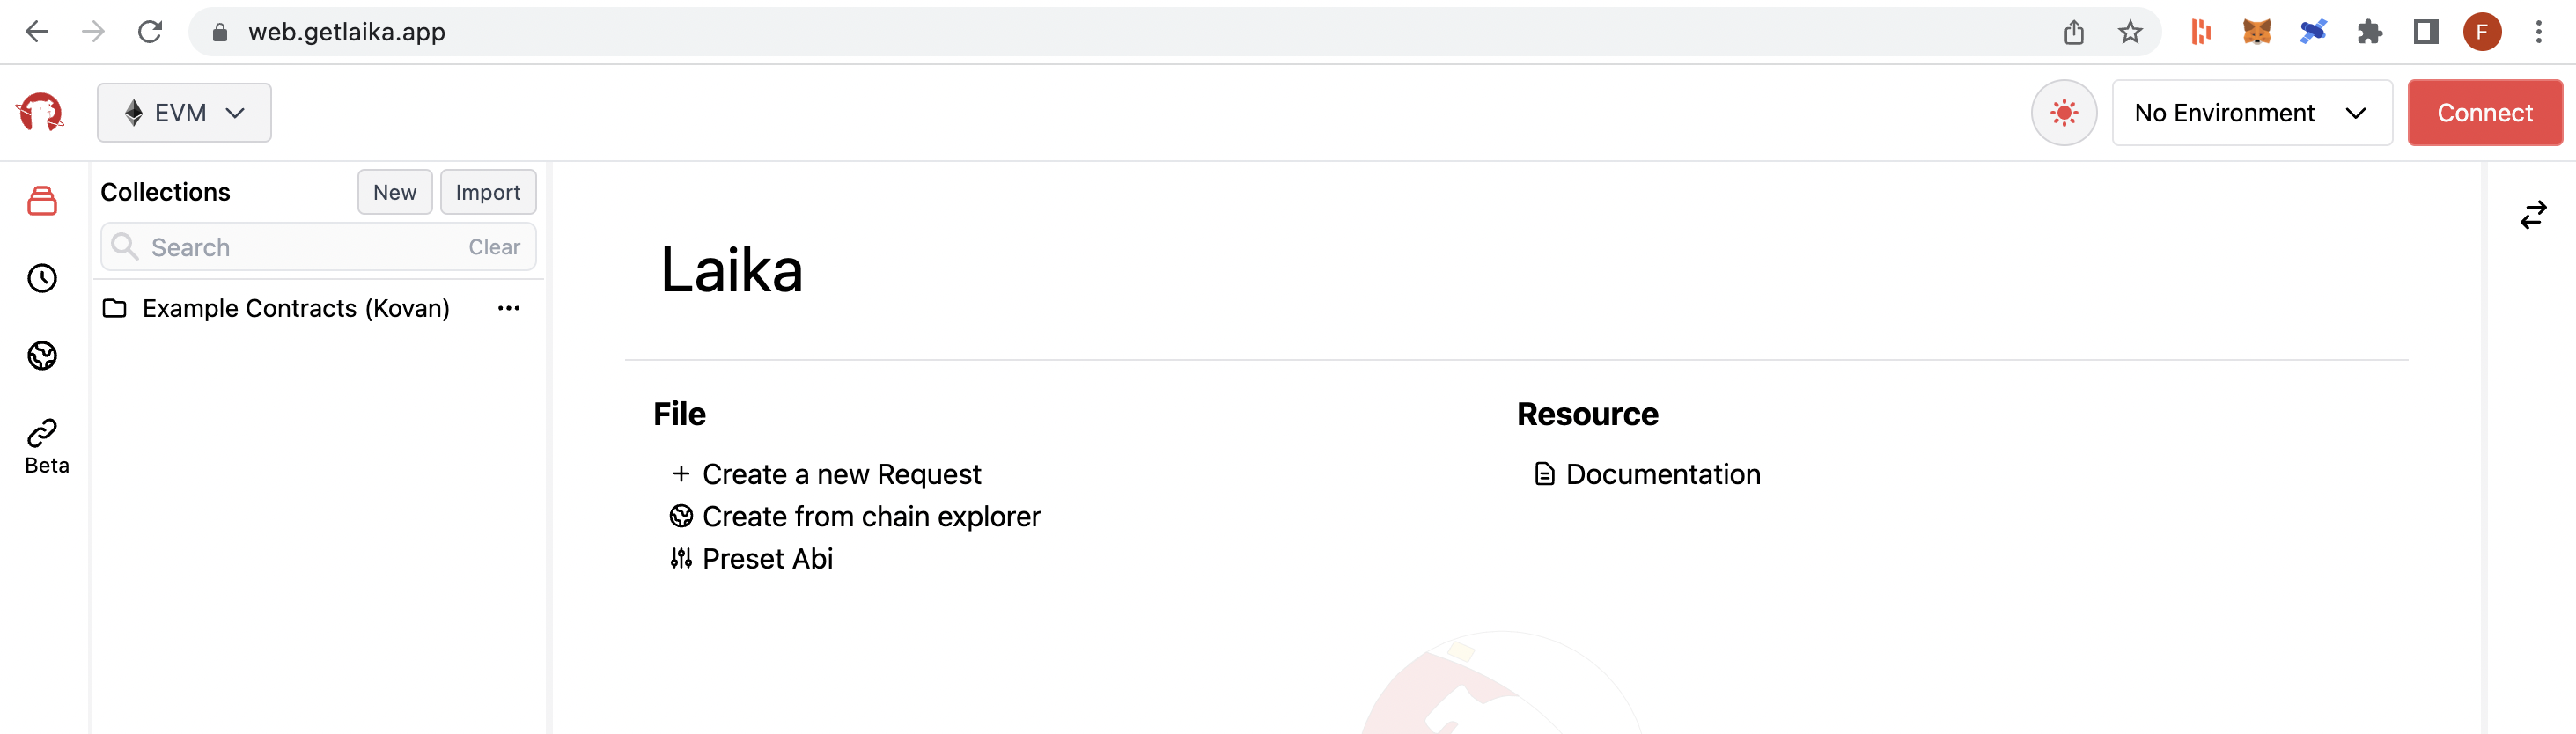
Overview
Developers spend most of their time writing code, testing, and fixing bugs. A lot of the time spent with these tasks can be simplified by using a tool like Laika. Laika is a Web3 development tool that aims to improve the developer experience when interacting with the blockchain. This guide will demonstrate how to interact with smart contracts in Laika using QuickNode.
**Prerequisites
**
- An Ethereum Node
- Basic understanding of smart contracts
Why Laika?
Laika is similar to Postman but is geared towards Web3. There are many reasons why a developer may find Laika handy. Let us go through a couple of their main features:
-
Query and interact with smart contracts
-
Easily manage requests using Collections
-
Create environments of choice to be reused in any request in collections you like
-
Generate code snippets for multiple programming languages (including Ethers.js and Web3.js)
-
Scenario requests (beta; which allows for making requests based on conditions)
If the features above got your attention, great! Let us move on to using Laika to query balances from a smart contract.
Setting Up Your QuickNode Ethereum Endpoint
While this goal could be accomplished by any node connection on the Kovan network, here at QuickNode, we make it quick and easy to set up a blockchain node. You can register for whatever plan best suits your needs and then make sure to launch a Kovan node. You can register for a free QuickNode account here, as well as see pricing here.
You will need the HTTP Provider URL for this tutorial, so keep this URL handy. It should look something like this:

Setting up Laika
Now that we have our blockchain infrastructure ready to go, we can move on to querying blockchain data using Laika.
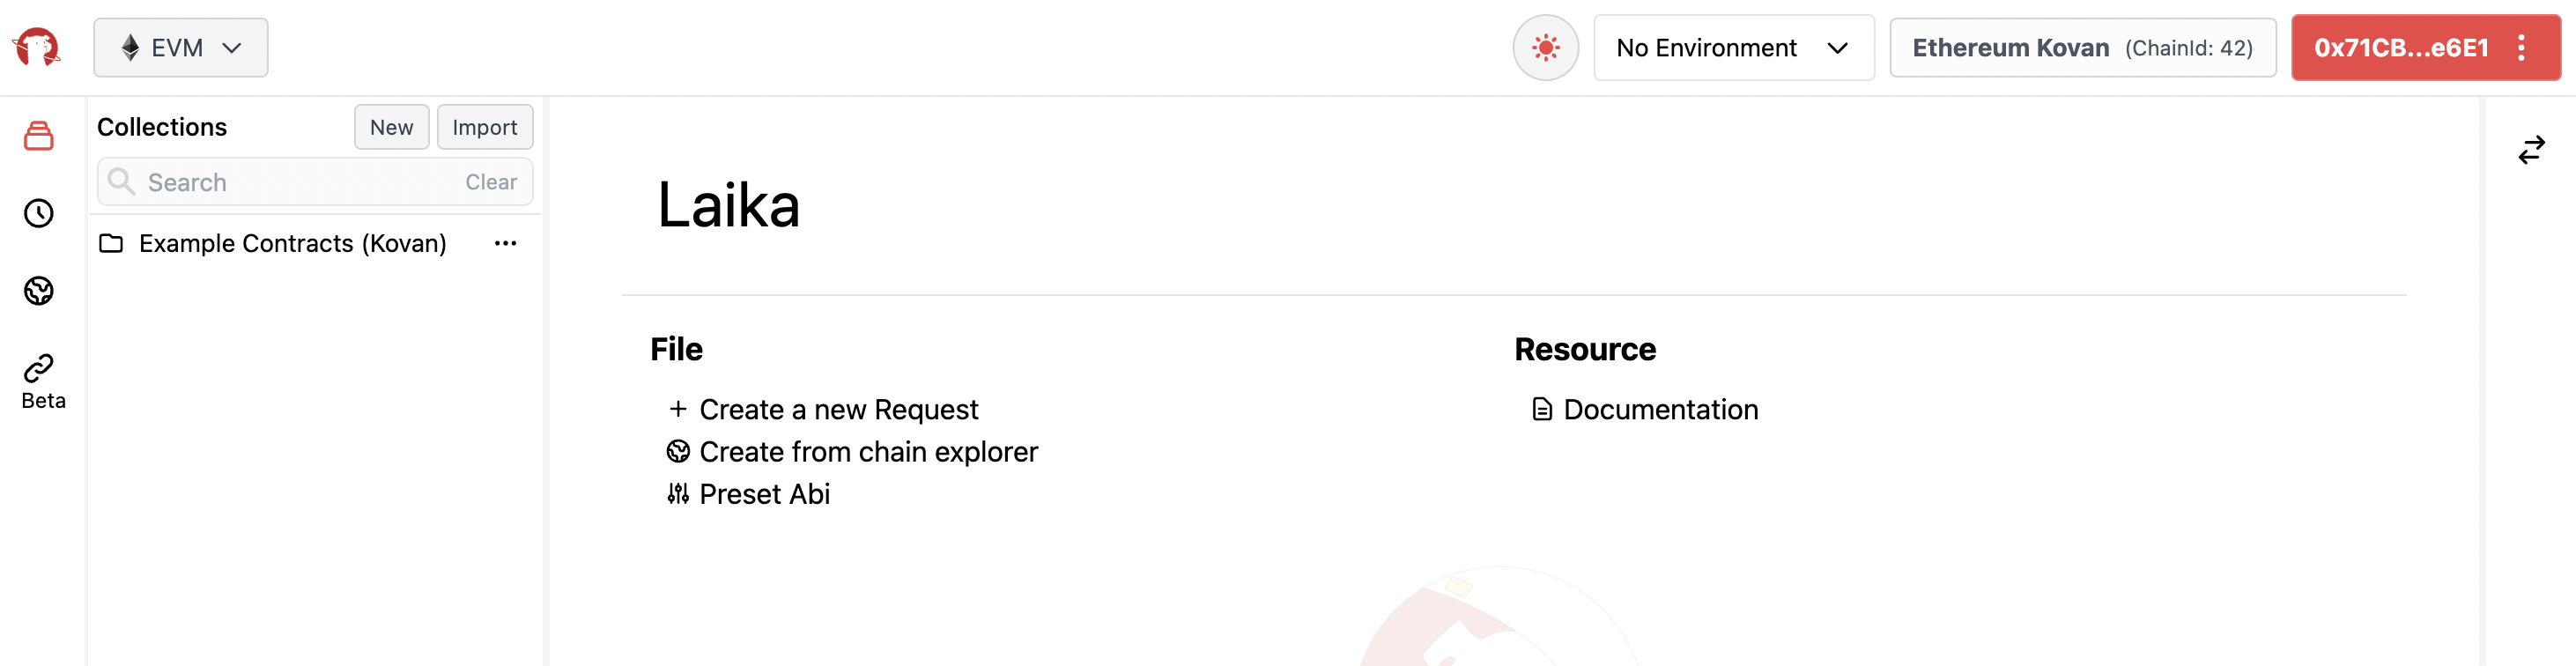
First, we will want to configure Laika with our QuickNode endpoint and mnemonic phrase. If you don't have a mnemonic handy, don't worry, Laika automatically generates a test wallet for you to use. Click the Connect button in the top right corner and then click Web3 Provider.
Input your QuickNode URL and click Connect:

Once our wallet and node are connected, click the New button in the top left corner of the page.
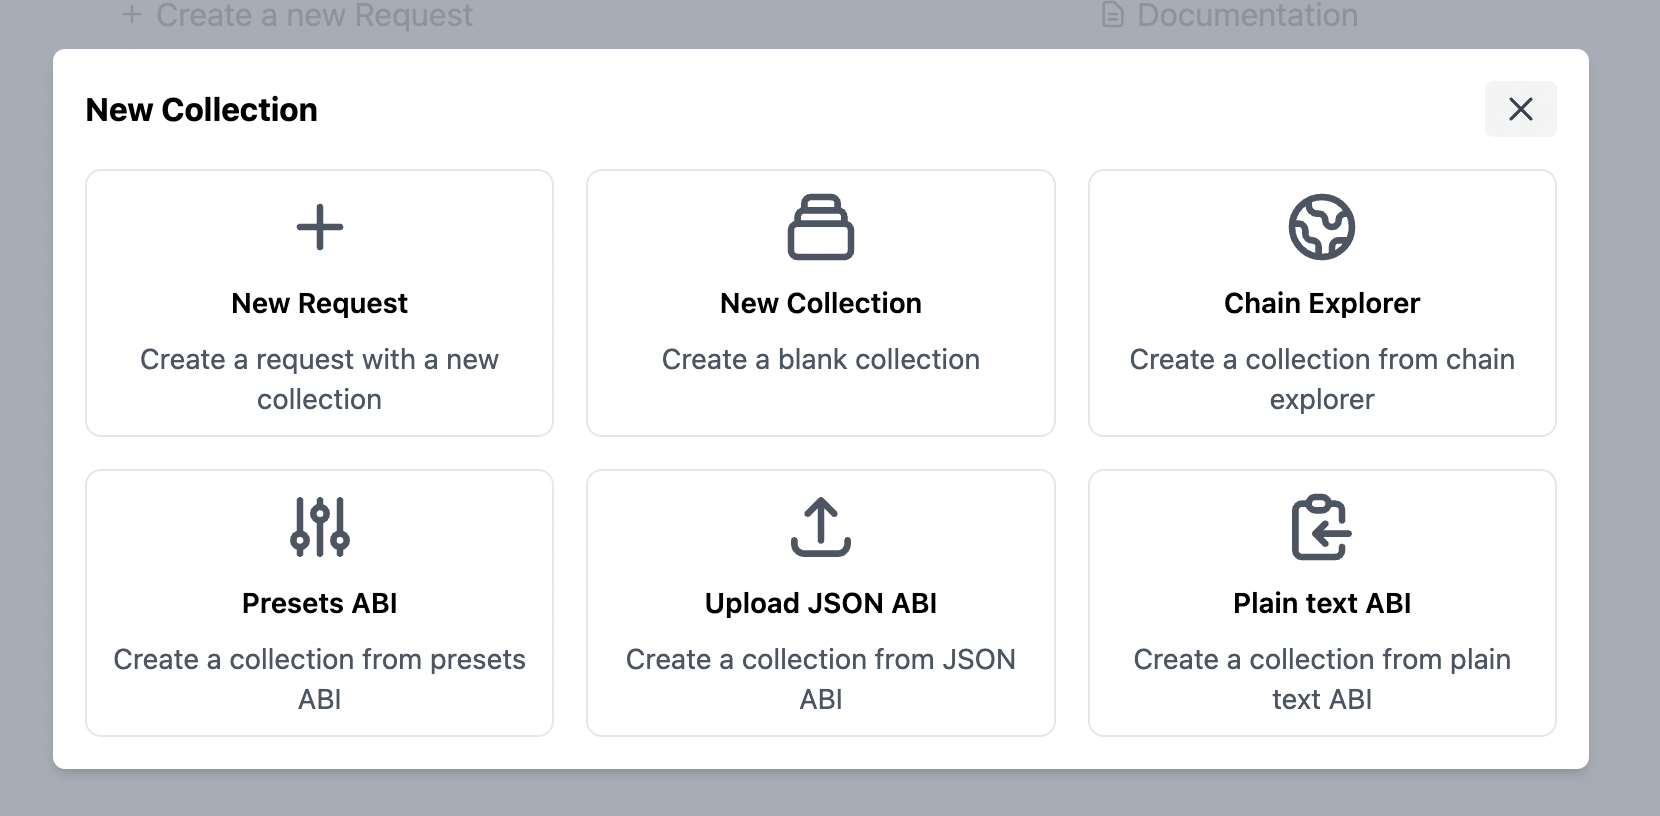
Then, depending on how you want to import your contract, you can click "Upload JSON ABI", or "Plain text ABI" to import a smart contract via ABI. Alternatively, if the smart contract is already verified on Etherscan, you can use the "Chain Explorer" option to input a smart contract address and Laika will automatically fetch the ABI for you.
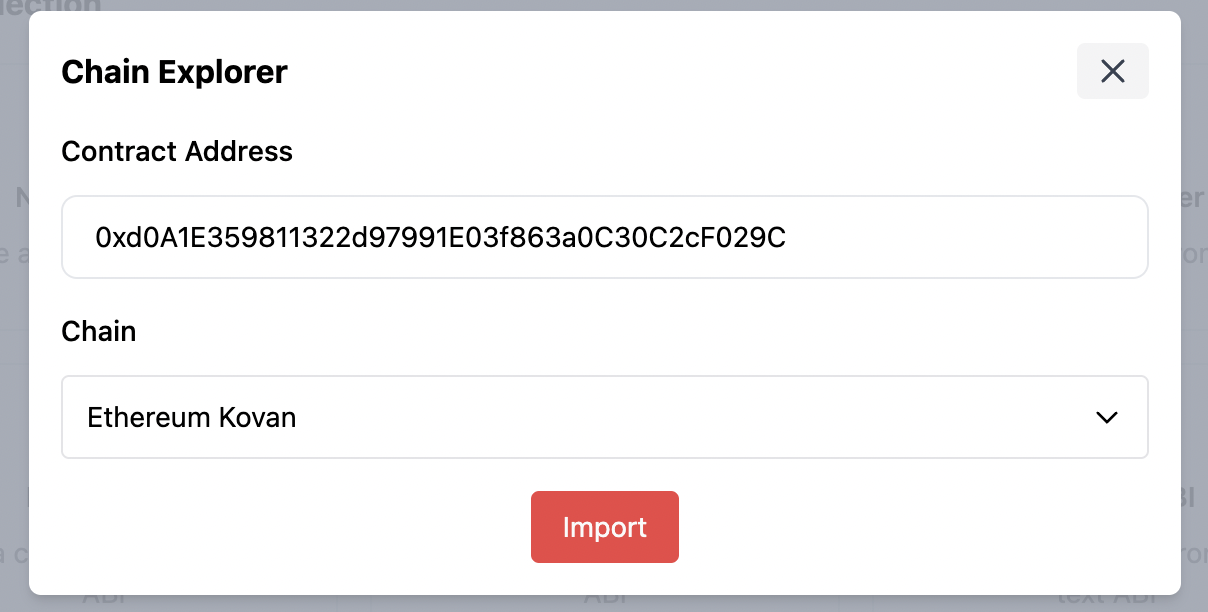
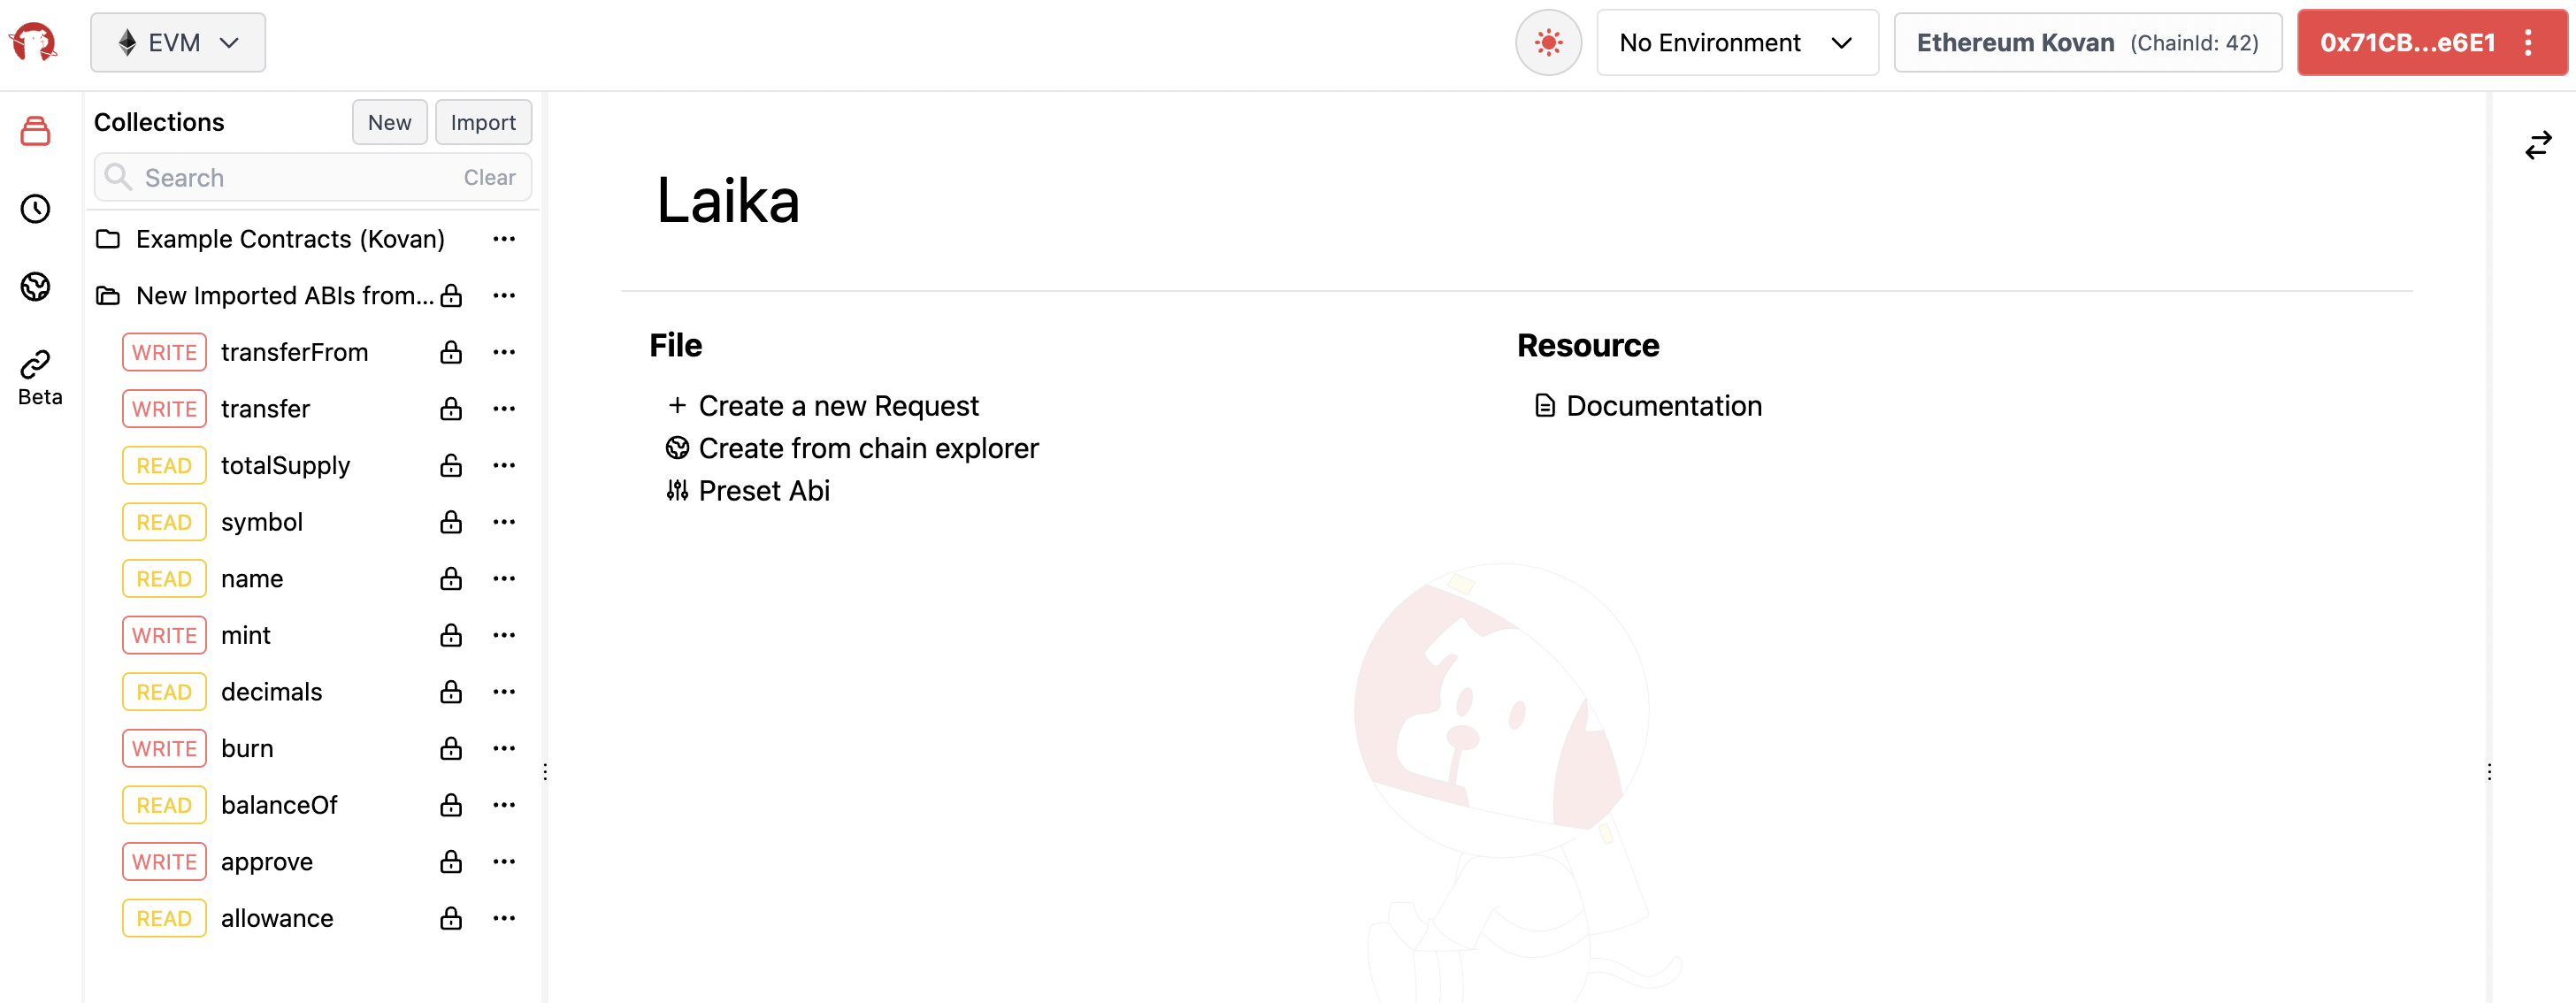
For this guide, we will use the "Chain Explorer" option and the following smart contract address: 0xd0A1E359811322d97991E03f863a0C30C2cF029C (WETH Address). Make sure to select "Ethereum Kovan" from the "Chain" dropdown. Then, click "import", and you should see the smart contract loaded on the collections panel under "New Imported ABIs from..".
Making Requests with Laika
We have our smart contract loaded. Now all that's left to do is start interacting with the blockchain!
Click the balanceOf function to see more details about the function such as the parameters required, response expected and etc. We see that this function has one required parameter which expects an address. Use the following address in the Value1 field: 0x2ED0fE9a8FbB3b7f0ffC45a18eff8f0c3A0ABE2C, then click Send.
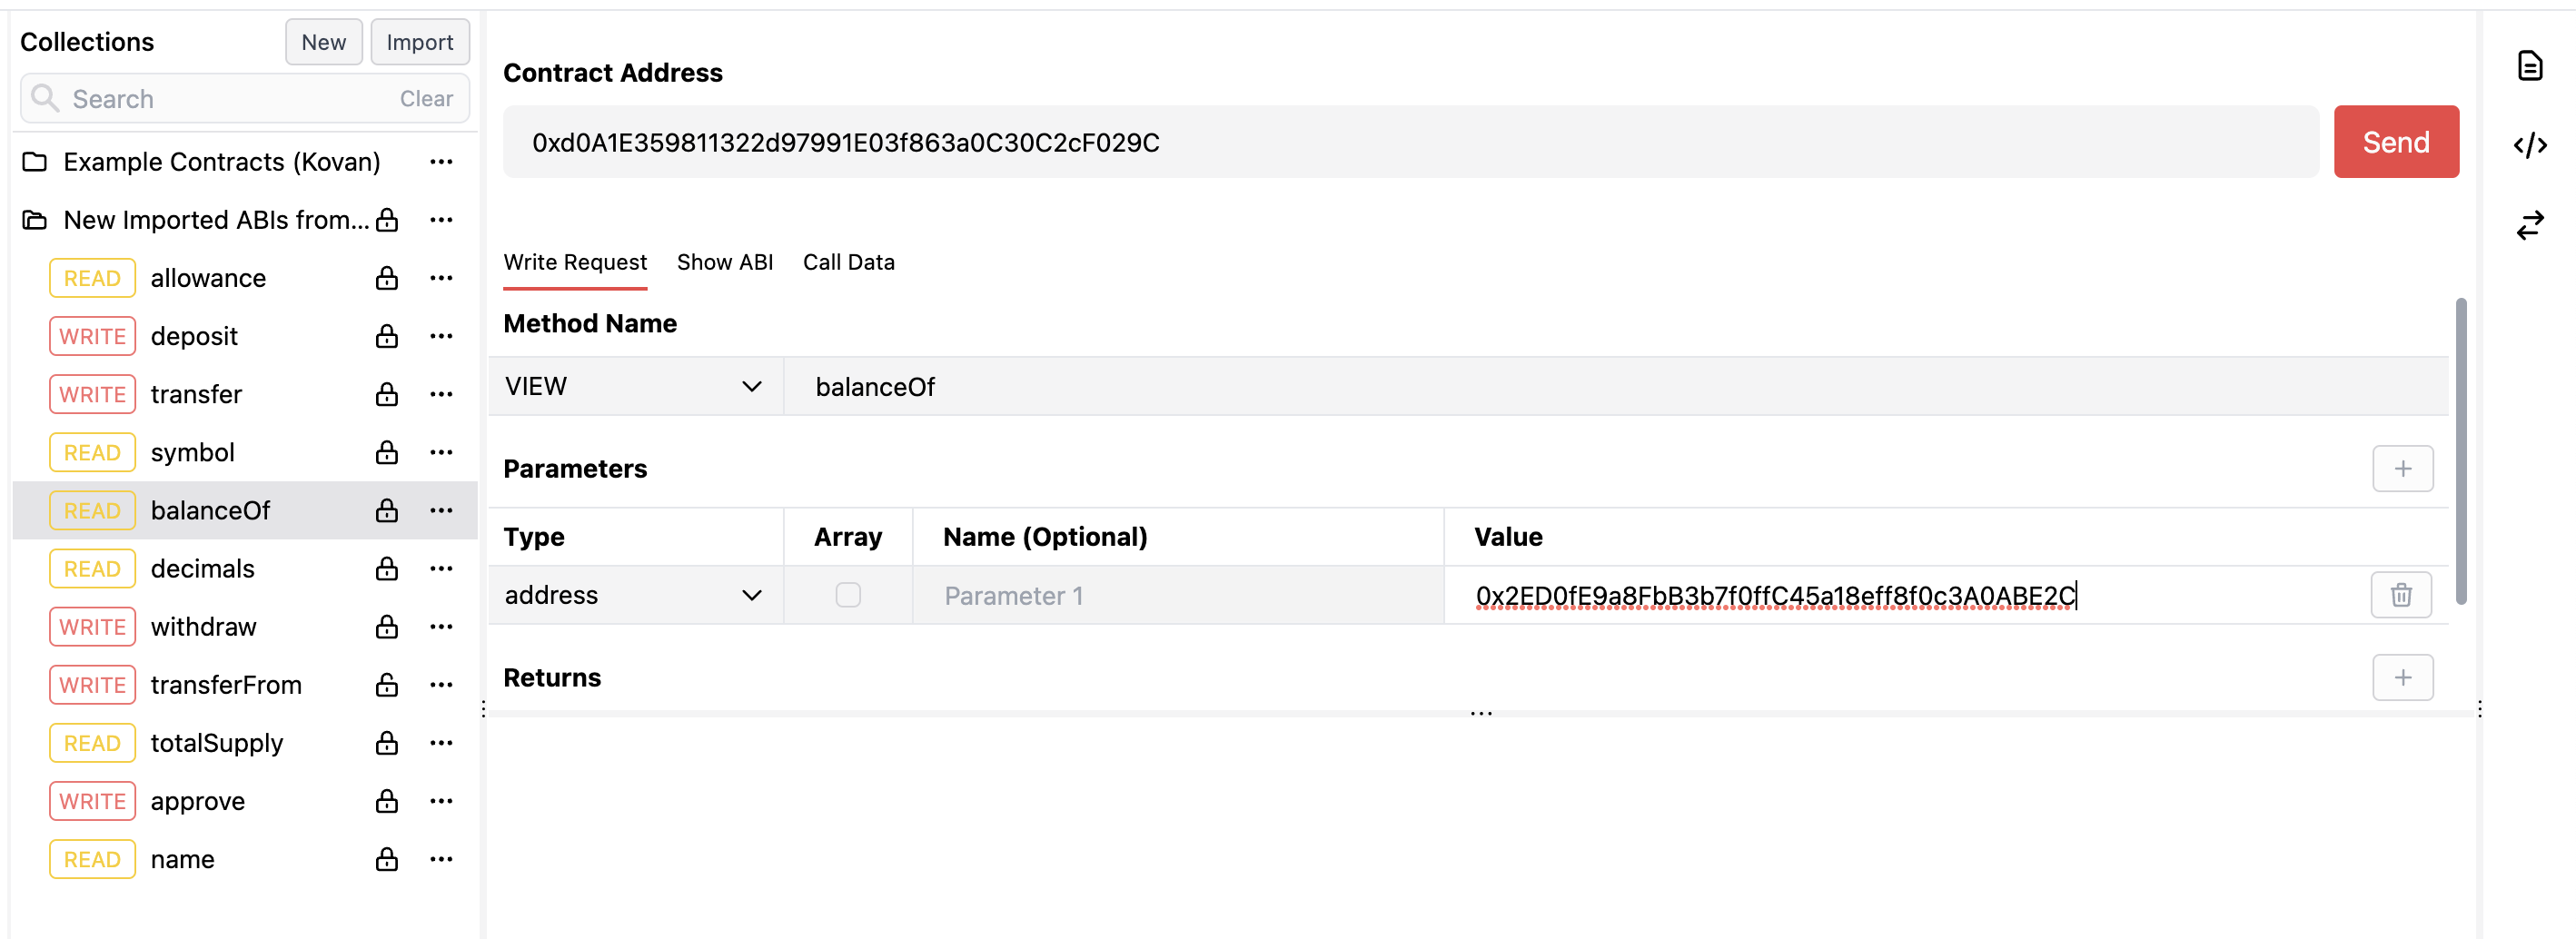
You'll get the following response:
[
  {
    "name": "",
    "type": "uint256",
    "value": "100000000000000000"
  }
]
You can now access Logs for your RPC endpoints, helping you troubleshoot issues more effectively. If you encounter an issue with your RPC calls, simply check the logs in your QuickNode dashboard to identify and resolve problems quickly. Learn more about log history limits on our pricing page.
There you have it! We just made a request using Laika and QuickNode! In the next section, we will go over some tips and features I hope you find helpful.
Tips & Features
Code Snippets
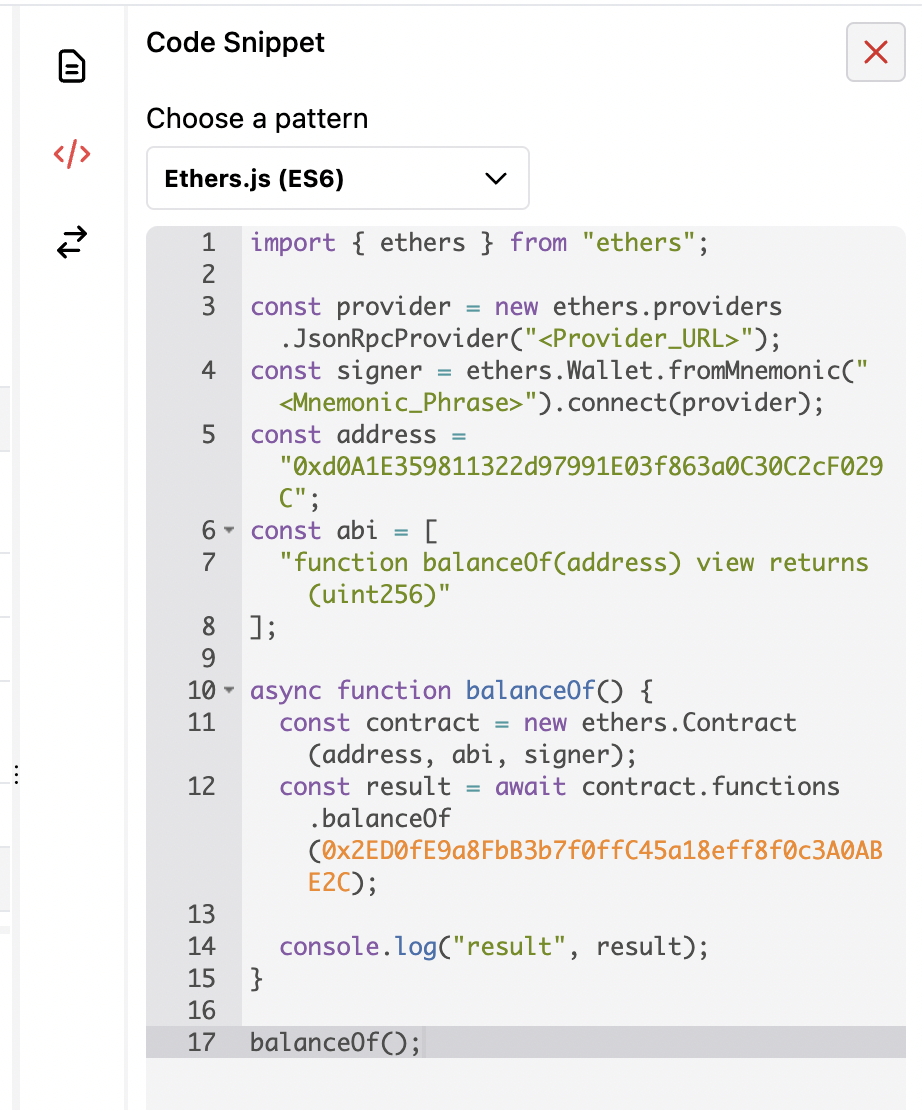
You can click the Code Snippet icon (</>) to generate code from multiple different libraries (i.e., Ethers.js, Web3.js) and formats. This will help us save time compared to writing code from scratch. For example, we can easily generate javascript code that uses Ethers.js to query the balanceOf function:
Scenario Requests
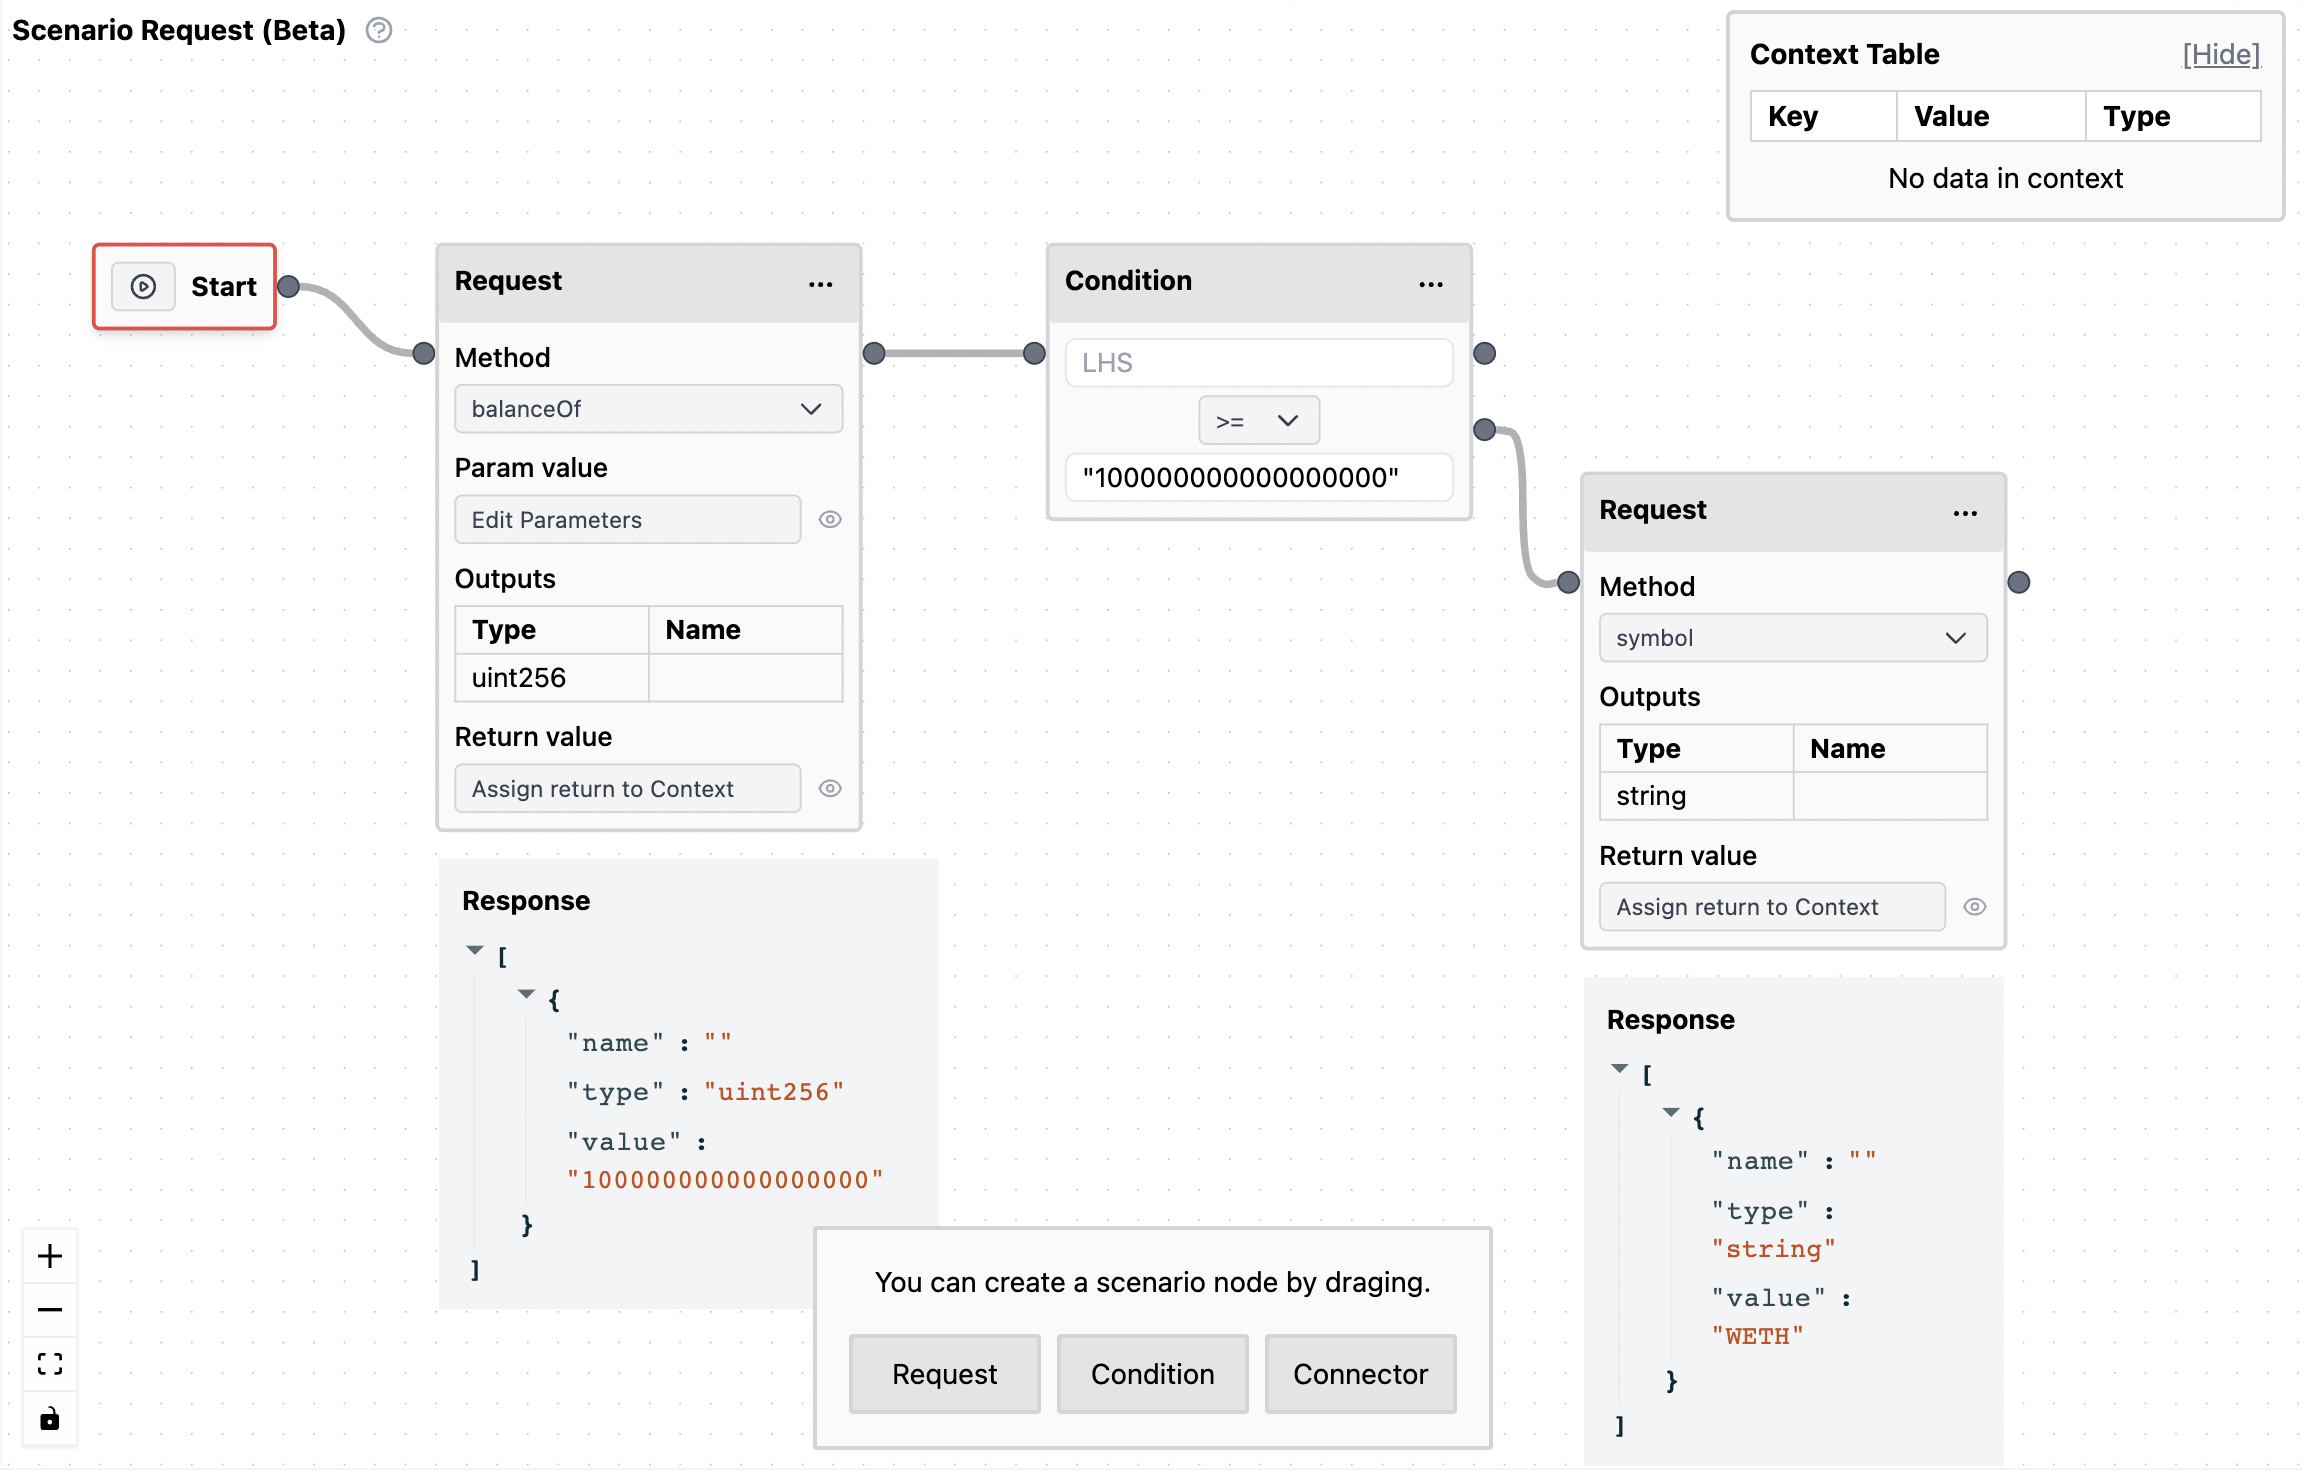
One interesting feature Laika has in development is the scenario requests tool. This allows you to set up a flow of requests based on conditional statements. For example, in the flow chart below, we make a balanceOf request and attach a conditional that states if the balance is greater than .1 ETH, run the next request (get symbol method):
Laika also has a Notes and Converter tab you can use to write notes or convert arbitrary data to a readable format.
Conclusion
Congratulations on interacting with the blockchain using Laika! You are on your way to becoming an efficient web3 developer! Subscribe to our newsletter for more articles and guides on Ethereum. If you have any feedback, feel free to reach out to us via Twitter. You can always chat with us on our Discord community server, featuring some of the coolest developers you will ever meet :)