2 min read
You can now access Logs for your RPC endpoints, helping you troubleshoot issues more effectively. If you encounter an issue with your RPC calls, simply check the logs in your QuickNode dashboard to identify and resolve problems quickly. Learn more about log history limits on our pricing page.
Overview
Using a non-custodial wallet is a necessity when interacting with web3 dApps. Backpack is one of the most widely used Solana non-custodial wallets. Note: at the time of this last update, Phantom and Solflare Wallet do not support custom RPCs.
Most non-custodial wallets (including Backpack) come with default RPC nodes set up. Using these wallets with default networks is acceptable for the majority of applications most of the time. However, suppose the operations you are performing require transactions to reach the chain faster or updating a balance where the latest information is crucial - in that case, a fast, reliable RPC node can come in handy. Sometimes the nodes behind these wallets may experience some downtime or lag as these wallets are public and a lot of people are accessing them at the same time. During such times, having a custom RPC node can come in handy.
What You Will Do
In this guide, we will see how to add a custom RPC to Backpack.
What You Will Need
- Backpack Wallet installed
- A QuickNode Solana Endpoint
Setting Up a QuickNode Solana Endpoint
The purpose of setting up a custom RPC in these wallets is to have a fast, reliable RPC node behind the wallet, which is why we will use QuickNode for this. So just grab a free QuickNode and head over to the next step.
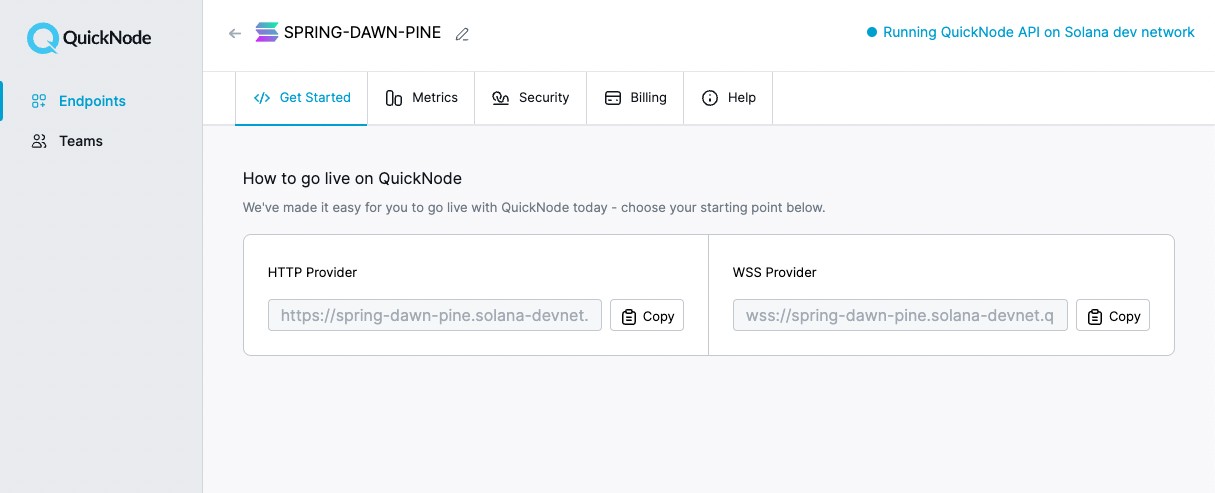
You'll need the HTTP Provider link later, so copy it and save it.
Adding Solana Node to Backpack Wallet
Now that we have a QuickNode Solana RPC, let us use it to power our wallet:
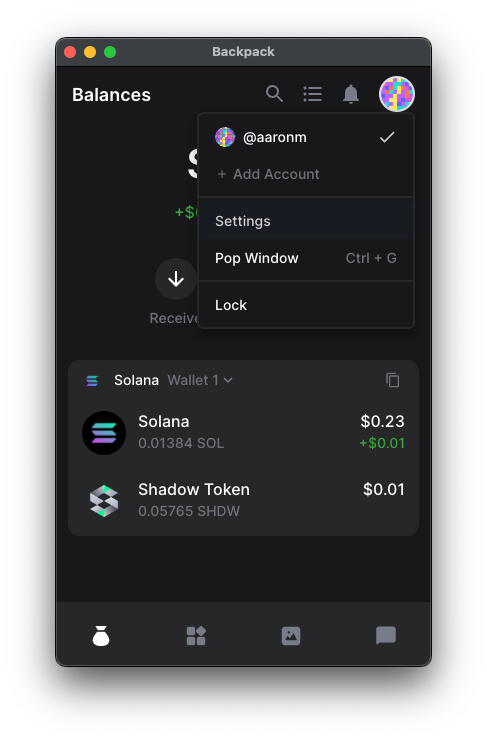
Step 1: Open your Backpack wallet and click open the Settings menu from the top right corner.
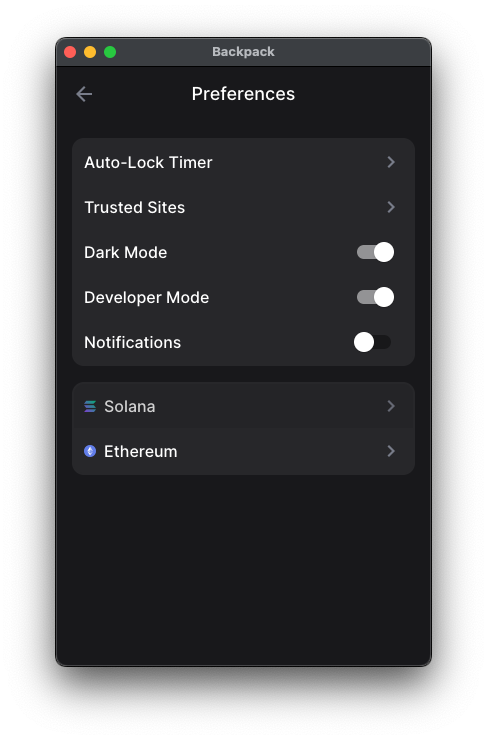
Step 2: Click Preferences > Solana
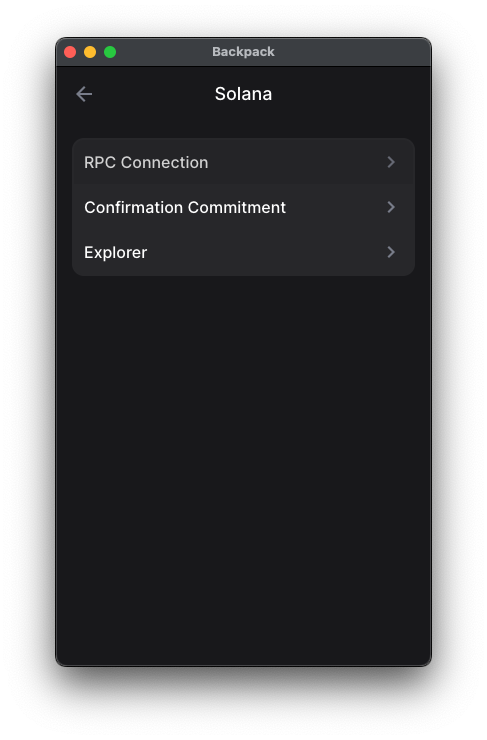
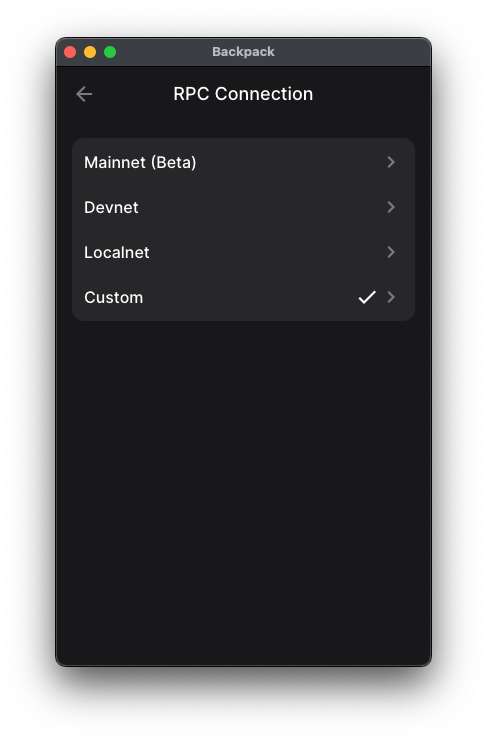
Step 3: Click RPC Connection > Custom
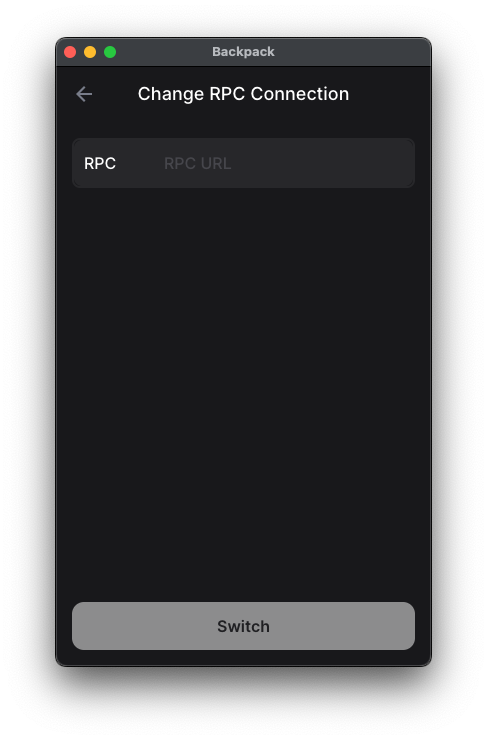
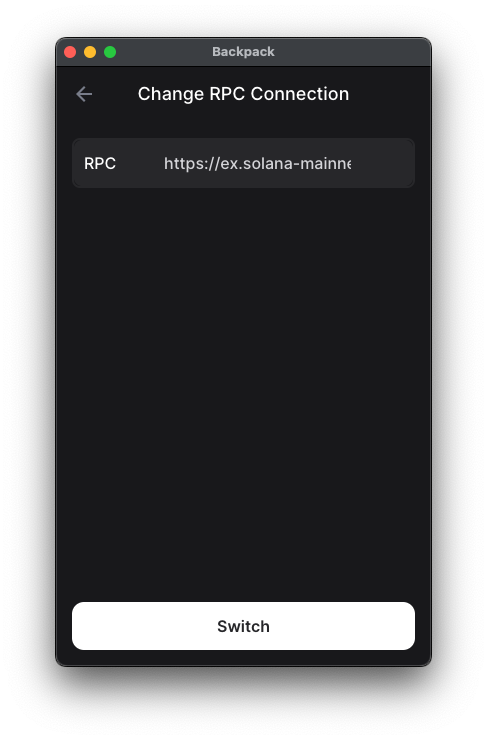
Step 4: Paste your QuickNode Solana Node's RPC URL in the RPC field. Click Switch. Your QuickNode RPC is set up in Backpack now. You should see a "✓" next to the Custom RPC field.
That's it! You have successfully set Backpack to use your QuickNode Solana RPC.
Conclusion
In this tutorial, we learned about setting up custom RPC in Backpack wallet. To learn more, check out some of our other Solana tutorials or subscribe to our newsletter.
Also, feel free to reach out to us via Twitter or our Discord community server. We’d love to hear from you!
We ❤️ Feedback!
Let us know if you have any feedback or requests for new topics. We'd love to hear from you.