6 min read
Introduction
Hello reader! Today is an exhilarating day because we are going on an expedition to the Solana Blockchain. Solana is an up-and-coming blockchain seeking to improve upon the current ecosystem's solutions to the complex problem of providing a secure, scalable, decentralized consensus protocol. Solana has a myriad of technologies that it is employing to garner some market share from its big brother Ethereum. In this guide, you will learn how to connect to Solana, obtain funds on its devnet, and send a transaction with this new and exciting technology.
Prefer a video walkthrough? Follow along with Sahil and learn how to send a transaction on Solana using JavaScript.
Prerequisites:
- Nodejs installed on your system.
- Familiarity with the command-line/terminal.
- A text editor to write code in.
Setting Up the Project
You need to set up your project before you start slinging Solana transactions like a penny stock day trader! To start, create a directory. We will be naming it SolanaTransaction in this guide, but feel free to name it whatever you like. After we make the new project folder, we will need a file where we write our code. Again, you can call it anything so long as it ends with the .js suffix, but we will call ours sendSol.js. Enter the following commands in your console to proceed.
mkdir SolanaTransaction
cd SolanaTransaction
touch sendSol.js
With that out of the way, crack open the sendSol.js file with your favorite text editor.
Getting a Solana Node
Connect to a Solana Cluster with Your Quicknode Endpoint
To build on Solana, you'll need an API endpoint to connect with the network. You're welcome to use public nodes or deploy and manage your own infrastructure; however, if you'd like 8x faster response times, you can leave the heavy lifting to us.
See why over 50% of projects on Solana choose Quicknode and start your free trial here. We're going to use a Solana Devnet endpoint.
Copy the HTTP Provider link: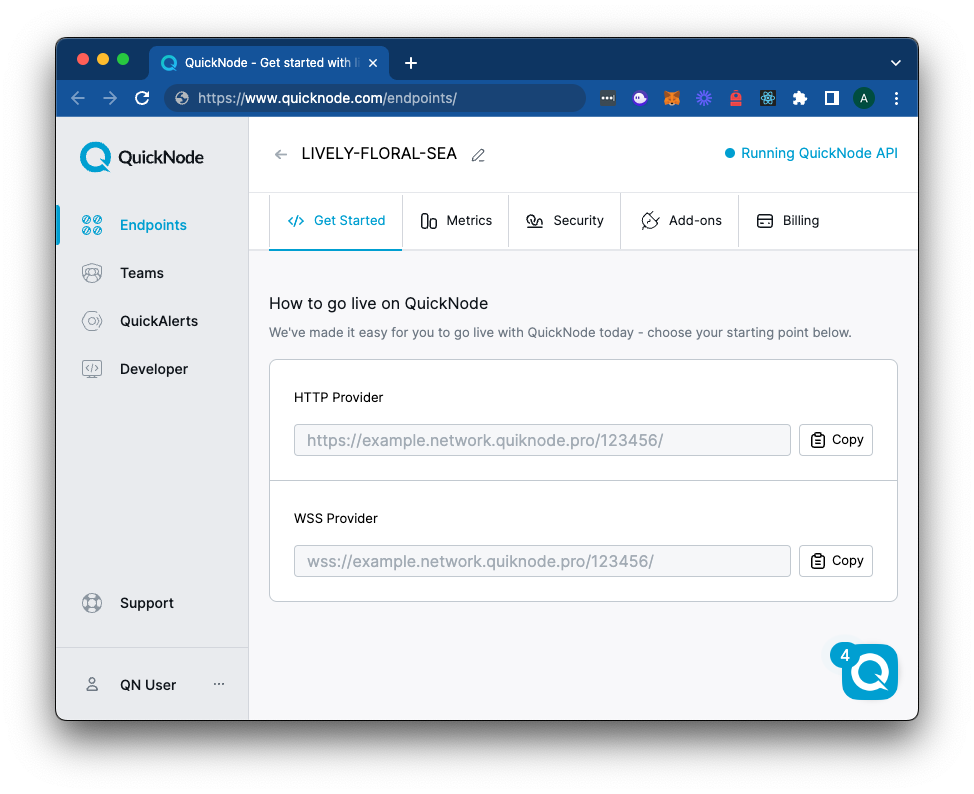
Connecting to Solana
To connect to the devnet that Solana offers we will need to install the @solana/web3.js library. To do so run the following command.
npm i @solana/web3.js@1
With the Solana's JavaScript library installed, we can now conenct to the network.
//sendSol.js
const web3 = require("@solana/web3.js");
// Connect to cluster
const connection = new web3.Connection(
  "<YOUR_QUICKNODE_URL_HERE>",
  'confirmed',
);
A quick breakdown of the code:
- Line 2: importing the solana/web3.js library.
- Line 4-6: Making a new connection object. The constructor for connection takes a string representation of an endpoint URL (which we generated in our previous step), and a commitment level.
With the connection constant configured, you will now be able to make calls to the Solana Network. If you'd like to test out if your connection is working, you can console.log(connection) to log the connection object.
Generating the Addresses and Funds
With a connection to the network, we will need to get the tools to generate the addresses and get funds for the network. First we will need to generate a new keypair and airdrop some SOL. We've created a simple tool to generate a new keypair for you:
Note: Sending airdrop requests too frequently may trigger a 429 (Too Many Requests) error.
Paste your secret and from wallet address into your code below your web3 declaration.
Finally, add a destination address--we will just generate a random one to send our SOL to using const to = web3.Keypair.generate(); Your code should look like this:
//sendSol.js
const web3 = require("@solana/web3.js");
const connection = new web3.Connection(
    "<YOUR_QUICKNODE_URL_HERE>",
    'confirmed',
  );

const secret=[00, ... 00]; // Replace with your secret key
const from = web3.Keypair.fromSecretKey(new Uint8Array(secret));

// Generate a random address to send to
const to = web3.Keypair.generate();
Walking through this bit of code:
secret: This is the secret key that we generated in the previous step. It is used to sign transactions--we have already deposited some devnet SOL into this account.from: Creating a new keypair derived from the unit8array of the secret key.to: Creating a new keypair that we will send funds to.
Having done all of those previous steps, you should now have:
- A connection to the Solana Network.
- An account with funds to send SOL from.
- An account address to send SOL to.
As it turns out, with all of those components you are now able to complete a transaction!
Sending the Transaction
On to the fun bit! We can now send a transaction on the network. There are two parts to this process. First, we need to create a new transaction object. Second, we have to send that transaction to another user and add our signature to it. The following async block of code will show us exactly how to do that:
(async () => {
    const transaction = new web3.Transaction().add(
        web3.SystemProgram.transfer({
          fromPubkey: from.publicKey,
          toPubkey: to.publicKey,
          lamports: web3.LAMPORTS_PER_SOL / 100,
        }),
      );

      // Sign transaction, broadcast, and confirm
      const signature = await web3.sendAndConfirmTransaction(
        connection,
        transaction,
        [from],
      );
      console.log('SIGNATURE', signature);
})()
Creating the Transaction
Here you can see each of the previous steps has its own function. We can start with the first function web3.Transaction().add(web3.SystemProgram.transfer()). That is quite verbose, and needs to be broken down into smaller parts to be fully understood.
- web3.Transaction() - creates the empty Transaction object.
- add() - Provides a method where we can add instructions to the Transaction object.
- web3.SystemProgram.transfer() - This is the method responsible for sending the funds from one account to another. It takes several arguments. This represents lines 2-6 of our first function that we store in the transaction constant.
Parameters:
- fromPubkey - The public key of the account that we are sending funds from.
- toPubkey - The public key of the account that is receiving funds from the transaction.
- lamports: - The amount of lamports to send. You can think of lamports are to Sol, what gwei are to Ether.
Signing the Transaction
With the transaction object ready to go, we now need to authorize the transaction by signing it with our secret key. The 2nd function in the code block above is responsible for this step in the process. We can break that down to get a better understanding of what is going on.
- Line 10: Declaring the signature constant, which will store the result from sendAndConfirmTransaction()
- Line 11-13: providing the arguments to the previously mentioned function. In order, the arguments are the connection object, the transaction to send, and the sender's private/public keypair represented by an array.
- Line 15: Logging the successful signature, which is represented by a transaction hash.
With all of that done, you are now ready to run your code. Save the Quicknode endpoint URL and secret key in an environment variable as following:
QUICKNODE_URL=<YOUR_QUICKNODE_URL_HERE>
SECRET_KEY=<SECRET_KEY_HERE>
Replace <YOUR_QUICKNODE_URL_HERE> and <SECRET_KEY_HERE> with actual values.
The final code snippet in the end should look like this
//sendSol.js
require('dotenv').config();
const web3 = require("@solana/web3.js");

const connection = new web3.Connection(
    process.env.QUICKNODE_URL,
    'confirmed',
);

const secret = JSON.parse(process.env.SECRET_KEY);
const from = web3.Keypair.fromSecretKey(new Uint8Array(secret));

// Generate a random address to send to
const to = web3.Keypair.generate();

(async () => {
    const transaction = new web3.Transaction().add(
        web3.SystemProgram.transfer({
          fromPubkey: from.publicKey,
          toPubkey: to.publicKey,
          lamports: web3.LAMPORTS_PER_SOL / 100, //0.01 SOL
        }),
    );

    // Sign transaction, broadcast, and confirm
    const signature = await web3.sendAndConfirmTransaction(
        connection,
        transaction,
        [from],
    );
    console.log('SIGNATURE', signature);
})()
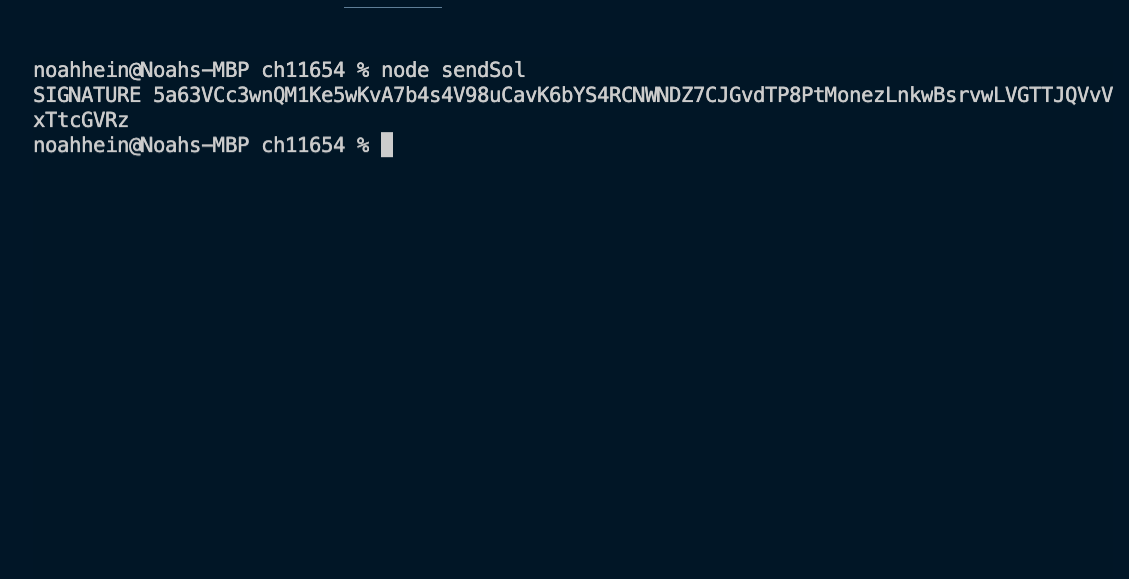
You can now run the sendSol.js file in your terminal and get an output similar to this!
Conclusion
Congratulations! If you made it to this part you have now successfully sent a transaction on the Solana Network. Solana is a very interesting blockchain, that seemingly makes improvments upon the Ethereum Network in terms of UX. The transactions happen faster, and fees are lower. Solana has not been battle tested quite like Ethereum has, but it is certainly worth keeping an eye out on. And more importantly, you are already ahead of the curve! There aren't many that can say that they have sent a transaction on Solana using JavaScript, but you can!
Subscribe to our newsletter for more articles and guides on Ethereum. If you have any feedback, feel free to reach out to us via Twitter. You can always chat with us on our Discord community server, featuring some of the coolest developers you’ll ever meet :)
We ❤️ Feedback!
Let us know if you have any feedback or requests for new topics. We'd love to hear from you.