6 min read
Overview
Tools like Solana Explorer are handy for querying transactions, but sometimes your use case may benefit from including additional information about the transaction. Say, for example, you want to include a note about the transaction or an associated invoice ID.
Solana's Memo Program makes doing this easy. If you have used getSignaturesForAddress, you may have noticed the resulting objects contain a memo key that is often null. Let's change that!
What You Will Do
In this guide, you will learn how to add a note (or notes) to your transaction using the Solana Memo program. You will create a simple app using Typescript that will send a transaction with a memo to the Solana network and fetch it from the chain.
What You Will Need
Set Up Your Project
Create a new project directory in your terminal with:
mkdir solana-memo
cd solana-memo
Create a file for your app, app.ts:
echo > app.ts
Initialize your project with the "yes" flag to use default values for your new package:
yarn init --yes
#or
npm init --yes
Create a tsconfig.json with .json importing enabled:
tsc -init --resolveJsonModule true
Install Solana Web3 Dependency
We will need to add the Solana Web3 library for this exercise. In your terminal type:
yarn add @solana/web3.js@1
#or
npm install @solana/web3.js@1
Let's get started.
Set Up Your App
Import Necessary Dependencies
Open app.ts, and paste the following imports on line 1:
import { Connection, Keypair, PublicKey, sendAndConfirmTransaction, SystemProgram, Transaction, TransactionInstruction } from "@solana/web3.js";
We are importing a few essential methods and classes from the Solana Web3 library.
Create a Wallet and Airdrop SOL
We need to to create a wallet and fund it. We are using the handy tool below to automatically generate a new wallet and airdrop 1 SOL to it. (You can also achieve this with the Keypair.generate() and requestAirdrop() functions if you prefer a more manual approach).
Note: Sending airdrop requests too frequently may trigger a 429 (Too Many Requests) error.
Once you've successfully generated your keypair, you'll notice two new constants: secret and fromKeypair, a Keypair. The secret is a 32-byte array that is used to generate the public and private keys. The fromKeypair is a Keypair instance that is used to sign transactions (we've airdropped some devnet SOL to cover the gas fees). Make sure to add it to your code below your other constants if you haven't yet.
Paste the output below your imports:
const secret = [0,..,0]; // Replace with your secret
const fromKeypair = Keypair.fromSecretKey(new Uint8Array(secret));
Set Up Your Quicknode Endpoint
To build on Solana, you'll need an API endpoint to connect with the network. You're welcome to use public nodes or deploy and manage your own infrastructure; however, if you'd like 8x faster response times, you can leave the heavy lifting to us.
See why over 50% of projects on Solana choose Quicknode and sign up for an account here. We're going to use a Solana Devnet node.
Copy the HTTP Provider link:
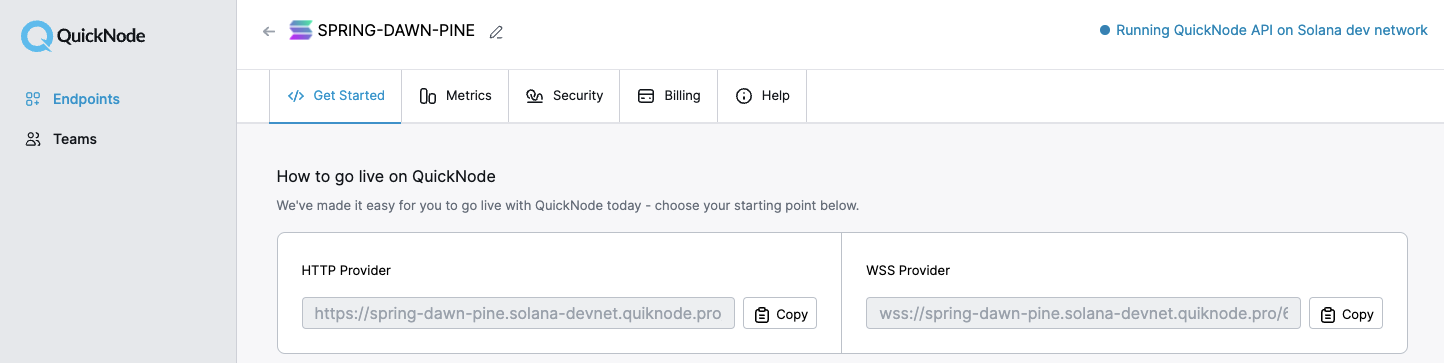
Inside app.ts under your import statements, declare your RPC and establish your Connection to Solana:
const QUICKNODE_RPC = 'https://example.solana-devnet.quiknode.pro/0123456/';
const SOLANA_CONNECTION = new Connection(QUICKNODE_RPC);
Create two new async functions, logMemo and fetchMemo, that we will use to send a memo transaction to Solana and fetch a memo, respectively:
async function logMemo (message: string) {

}

async function fetchMemo() {

}
Create Log Memo Function
To send a memo transaction, we will need to do a few things:
- Create a Solana Transaction
- Add a memo instruction to the Transaction
- Send and Confirm the Transaction
- Log Transaction URL
Add the following code to your logMemo function:
async function logMemo (message: string) {
    // 1. Create Solana Transaction
    let tx = new Transaction();

    // 2. Add Memo Instruction
    await tx.add(
        new TransactionInstruction({
          keys: [{ pubkey: fromKeypair.publicKey, isSigner: true, isWritable: true }],
          data: Buffer.from(message, "utf-8"),
          programId: new PublicKey("MemoSq4gqABAXKb96qnH8TysNcWxMyWCqXgDLGmfcHr"),
        })
      )
    // 3. Send Transaction
    let result = await sendAndConfirmTransaction(SOLANA_CONNECTION, tx, [fromKeypair]);
    // 4. Log Tx URL
    console.log("complete: ", `https://explorer.solana.com/tx/${result}?cluster=devnet`);
    return result;
}
Believe it or not, that's all you need to write a memo to Solana. Let's dive deeper into Step 3 before we test it out. First, we use the .add method on our transaction to add a new TransactionInstruction. Transaction instructions require three components: keys, data, and programId. Because our transaction instruction will only interact with the payer wallet, that's the only key we will need for this instruction--that key will be a signer and will need to be writable to allow for the transfer of SOL for the payment. For the Memo Program, we need to generate a Buffer from our message (a string) encoded as utf-8. Finally, the Program ID of the Memo Program is MemoSq4gqABAXKb96qnH8TysNcWxMyWCqXgDLGmfcHr. Make sure to call it as a PublicKey.
Go ahead and call logMemo() with a String as the message argument. Add this code to the bottom of app.ts:
logMemo("Quicknode Memo Guide Test");
And run it. In your terminal, type:
ts-node app.ts
You should get a link to your transaction on Solana Explorer. Open it. You should see your memo down at the bottom of the page inside the Memo Instruction and in the Program logs:
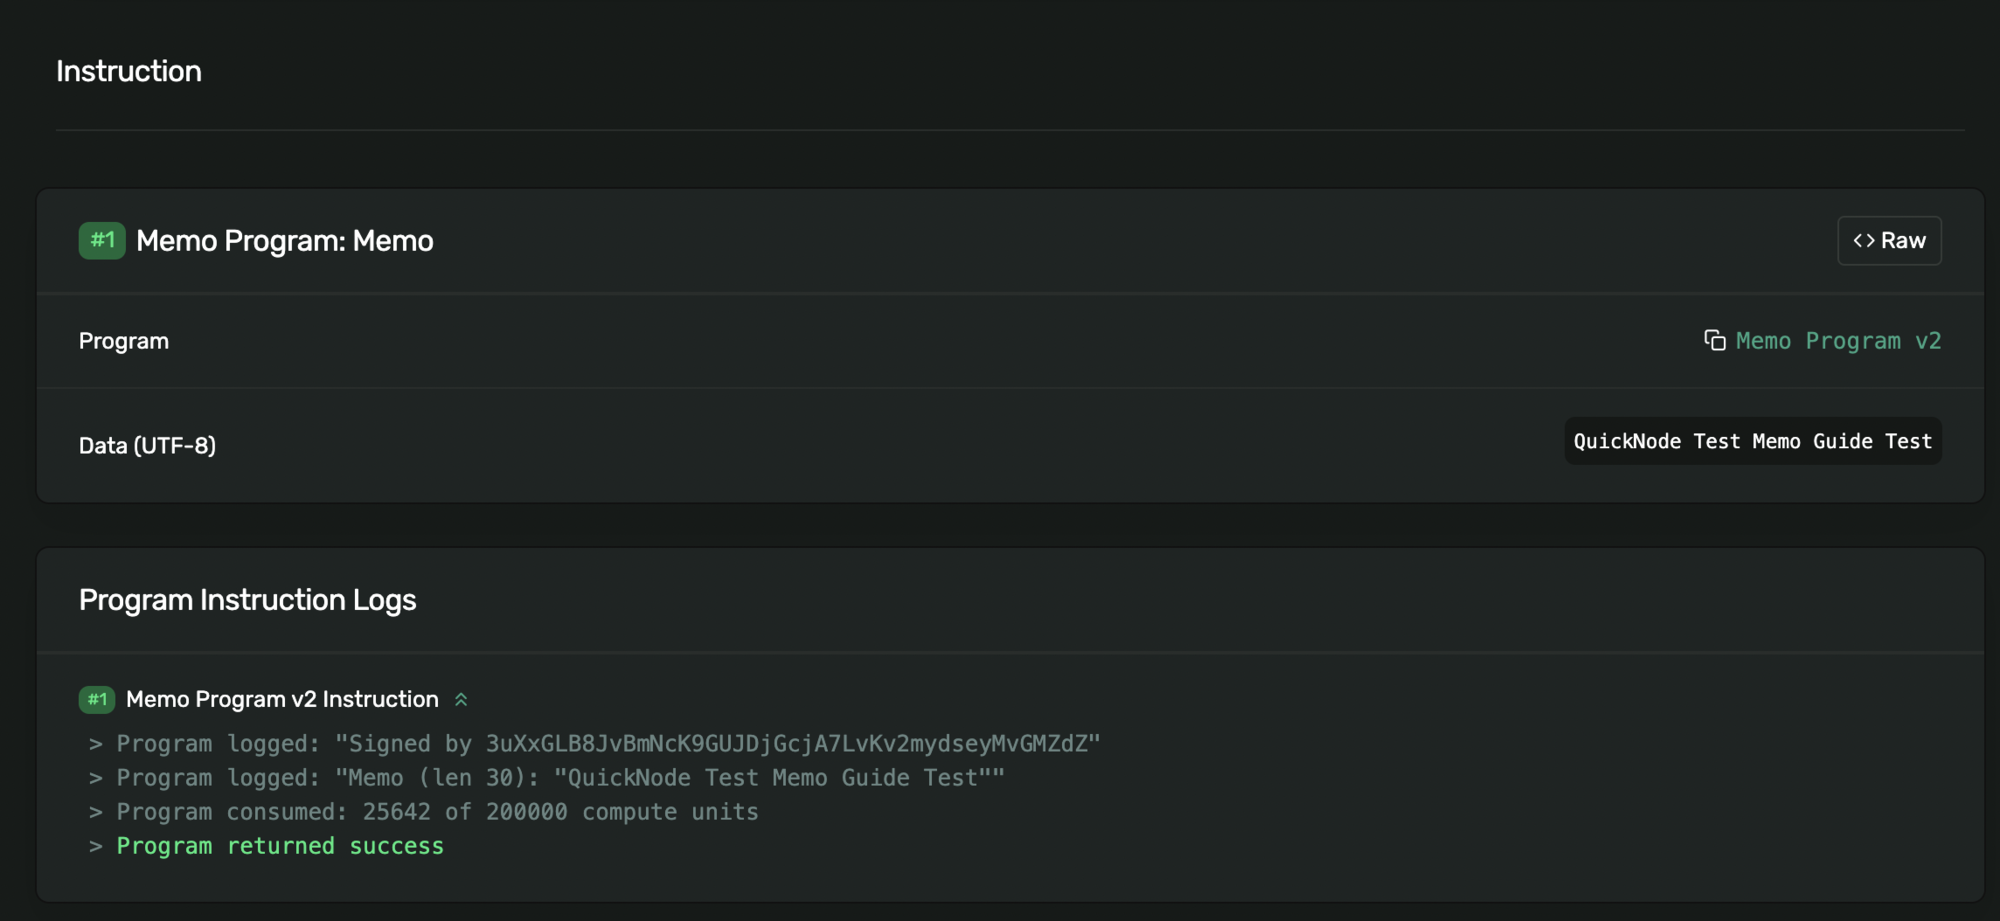
Memo received. Nice job!
Create Fetch Memo Function
Now, how can we fetch that memo ourselves? Just a single call to Solana! Inside of your fetchMemo function, add:
async function fetchMemo() {
    const wallet = fromKeypair.publicKey;
    let signatureDetail = await SOLANA_CONNECTION.getSignaturesForAddress(wallet);
    console.log('Fetched Memo: ', signatureDetail[0].memo);
}
What we're doing here is grabbing the PublicKey from the same wallet that initiated our transaction, fetching the signature details for that address using getSignaturesForAddress, and logging the detail of the first signature in the resulting array (the most recent transaction).
Now you can replace your logMemo() call with fetchMemo():
// logMemo("Quicknode Test Memo Guide Test");
fetchMemo()
Finally, rerun your code. In your terminal, type:
ts-node app.ts
You should see the memo from your last transaction in your terminal, preceded by an array with a value in it (the length of your memo):

Great job!
Leave Us a Message!
You may have noticed in creating the logMemo function that the memo we made was just one instruction in our transaction. You can add other transaction instructions to your script to log a memo to your typical transactions (e.g., transferring SOL, interacting with a custom Program, etc.).
Try modifying the logMemo function to add a SOL transfer to your transaction using SystemProgram.transfer. Try sending us some Devnet SOL to HHWnihfANXc78ESGG7RbVeC1xyKtvr6FEoKY3aHqDLfS and leave us a message in your memo!
Wrap Up
Transaction memos can be a handy tool for adding additional context or information to your transaction logs. You now have the tools you need to add your own memos! Want to try adding memos to practice some more? Try performing our Bulk Transaction Guide with a unique memo message for each transaction.
Got questions or having trouble? Reach out on Discord or Twitter!
We ❤️ Feedback!
If you have any feedback or questions on this guide, let us know. We’d love to hear from you!