5 min read
Some sections of this guide might reference older technologies. Our goal is to ensure you have access to the most current and relevant information. If you’d like to see an updated version of this guide, please let us know!
Overview
To run an Ethereum node without any problems, it is essential to choose a good node client. Nethermind is one of the oldest and most trusted Ethereum node clients. In this guide, let’s see how we can launch a Nethermind node.
What is Nethermind?
Nethermind is an open-source .NET core implementation of a full ethereum node. Nethermind is claimed to be the fastest Ethereum client; it takes comparatively less time to sync when compared to other clients. It has features like monitoring, stability, reliability, security.
Nethermind supports a lot of networks along with Ethereum Mainnet, like
Hardware requirements
Generally, it is suggested that the faster the IO, the faster the node. If you are hosting your node on the cloud, it is recommended to choose DigitalOcean.
If you are planning to run your node locally, a powerful SSD is recommended. An HDD will take a lot more time for the node to sync and may not even keep up with the network after the sync. After the node is started, it will display the estimated maximum required space, but it is always safe to account for more space than displayed, as some block syncs may go above the values.
Following are hardware recommended hardware configs:
For Fast sync nodes 16GB RAM with 8x CPUs and 300GB of disk space.
Note: Though the 300GB won't last long as the fast sync mode does not have Pruning enabled by default and the disk usage will increase daily by a few GBs. Nethermind has configs for pruning named like mainnet_pruned.cfg, goerli_pruned.cfg etc, with pruning enabled the DB will be constantly pruned and the disk space will not increase dramatically. Nethermind core devs are working on a new Pruning method, as the current one has some known bugs.
For Archive nodes 64GB RAM (128GB for best performance) with 64/128 CPUs, and as Ethereum chain data has grown a lot, the current Mainnet Archive Database takes ~8TB Disk space. So it is recommended to have 12TB of disk space to have the node running for a year at least.
Firewall Configuration
It is recommended to use a firewall along with your node so that the JSON RPC port and the private keys are protected. While setting up the firewall, take the following precautions.
- Port 8545 (or 8000-9000) should be kept close for everyone except for trusted sources as this is the JSON RPC port that gives admin access to the node.
- TCP port 30303 (or 30300-30400) should be kept open, allowing other nodes to connect with your node.
- UDP port 30303 (or 30300-30400) should be kept open so that other nodes can find your node.
Running Nethermind node
Before getting to the process of running a Nethermind node, let’s understand about three sync modes that Nethermind offers.
Fast sync
Fast sync is the default and most popular sync mode for Nethermind; after the fast sync is completed, you’ll be able to query your node for basic calls like getBalance. Fast sync will download the latest state of blockchain, headers, and optionally bodies and receipts.
Beam sync
Beam sync is just like fast sync, but with beam sync, you can start querying the blockchain within a few minutes of the client’s start. However, this mode is not suggested without having full knowledge about it. You can learn more about Beam sync here.
Note: Though this is not recommended as a lot of devs had not had a good success rate.
Archive sync
Archive sync is the slowest and most load-consuming sync, but this sync will get the blockchain’s historical data and state right from the genesis block. It may take several weeks for Archive sync to complete for Mainnet, depending on IO’s speed.
Now let’s see the operating system based Nethermind installation process.
Linux
You can either download the package from Nethermind’s download page, GitHub release page or download it using wget
$ wget https://github.com/NethermindEth/nethermind/releases/download/1.10.72/nethermind-linux-amd64-1.10.72-e63bcb9-20210524.zip
Then download the dependencies.
$ sudo apt-get update && sudo apt-get install libsnappy-dev libc6-dev libc6 unzip -y
Now unpack the package in the new folder nethermind.
$ unzip nethermind-linux-amd64-1.10.72-e63bcb9-20210524.zip -d nethermind
Note: The name of the package and GitHub link may differ based on the package version.
Now go to the nethermind folder.
$ cd nethermind
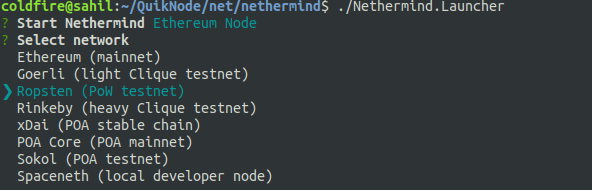
Run ./Nethermind.Launcher and select the Ethereum node from the options.
$ ./Nethermind.Launcher

Now select the network you want your node to run on (Ropsten in this example).
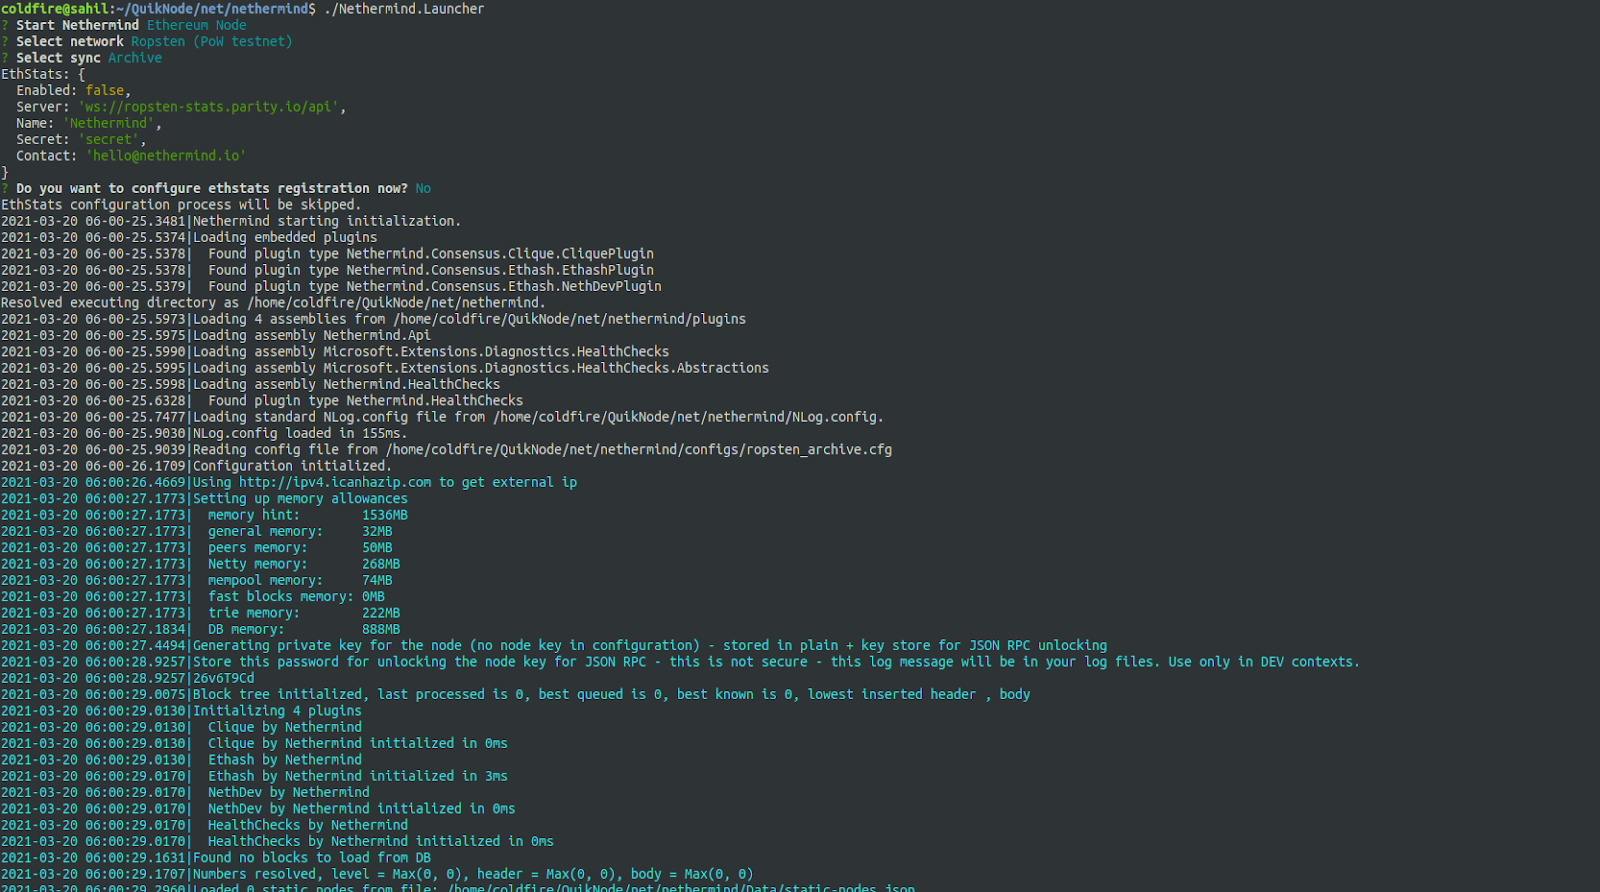
Select the type of sync (Archive in this example).

Now it will prompt if you want JSON RPC supported or not type Y if you want to.

After selecting yes, you can also set custom JSON RPC IP

It will now ask for Ethstats registration, you can skip this, or if you want to register for this, you can enter the necessary information.
Now the node will start syncing, and it should look something like this.
macOS
Download the Darwin package from Nethermind’s download page or GitHub releases.
Now install dependencies for mac using Homebrew.
$ brew install gmp snappy lz4 zstd
Unzip the downloaded package and run `Nethermind.Launcher`. Then, you can follow the same configuration steps as we saw for Linux.
Windows
For Windows, download the Windows package from Nethermind’s download page or GitHub releases.
Unzip the package and run `Nethermind.Launcher.exe`; further configuration steps are the same as we saw in Linux.
You can learn more about supported JSON RPC modules here.
Now, let’s see how we can run our node with a custom configuration. For that, run the node with ./Nethermind.Runner for Linux/macOS and Nethermind.Runner for Windows.
- To get a list of all configuration options
$ ./Nethermind.Runner --help
- To store all the data node processes in a custom directory.
$ ./Nethermind.Runner --datadir <path>
- To configure the path of Nethermind’s database folder.
$ ./Nethermind.Runner --baseDbPath <path>
- To change the log level, available option: DEBUG, TRACE, INFO, WARN, ERROR.
$ ./Nethermind.Runner --log <option>
- To change the source directory of config files.
$ ./Nethermind.Runner --configsDirectory <path>
- To determine which configuration file to use.
$ ./Nethermind.Runner --config <filename>
Conclusion
So here we saw how to launch your own Nethermind node. You can learn more about it from their official documentation website. Also, check out how to launch your own OpenEthereum (parity) and Geth nodes.
Subscribe to our newsletter for more articles and guides on Ethereum. If you have any feedback, feel free to reach out to us via Twitter. You can always chat with us on our Discord community server, featuring some of the coolest developers you'll ever meet :)